Gardens · perennial border spacing
Space a New Perennial Border for Mature Spread and Maintenance Access
Turn nursery-label spreads into a scaled border plan that lets plants meet at maturity while preserving routes for weeding, division, staking, and watering.
Published Last updated
In this guide
- Measure the border as usable ground
- Build a reliable plant schedule
- Convert mature spread into center points
- Draw access before filling the gaps
- Arrange functional layers without double-counting space
- Group for clarity and practical care
- Plan the first two years without stealing future room
- Set plants out before digging
- Audit the border at mature-season peak
- Let maintenance evidence refine the plan
- Calculate seven plants in a twelve-by-eight-foot border
- Design ideas
Measure the border as usable ground
Measure the length and depth of the actual planting area, then subtract what plants cannot occupy: edging, drains, utility access, root flares, stepping points, wall clearances, and the reach needed to open gates or windows. A border described as deep on paper may have a much narrower usable center once circulation and fixed features are respected. Plot those exclusions before selecting quantities, because extra plants cannot create space that the site does not contain.
Record light, moisture, soil, wind, and viewing direction across the same plan. A perennial's mature spread is useful only where the site supports normal growth. Shade can produce a looser reaching outline, rich soil can enlarge some plants, and a dry edge can keep another undersized. Use local references and exact cultivar labels, then treat the published spread as a planning envelope rather than a promise that every individual will form a perfect circle.
Decide whether the border is viewed from one side, several sides, or above from a window. A one-sided border can place taller plants toward the back, while an island needs access and balanced height from multiple directions. Mark primary sight lines and the points where people enter, turn, or sit. Spacing is partly biological and partly spatial: plants need resources, and people need a border whose intended layers remain visible and maintainable.
Build a reliable plant schedule
Create one row for every exact species or cultivar. Record mature foliage height and width, flowering height, growth habit, light, moisture, likely longevity, spread mechanism, seasonal presence, and expected maintenance. The University of Georgia emphasizes habit and final size because young perennials can become much larger in width and height. Do not merge all coneflowers, salvias, or grasses into one dimension when named selections have materially different forms.
Resolve contradictory dimensions by scope. Prefer a regional institutional source and the current nursery label for the exact cultivar, then note the range rather than averaging unlike reports. A plant measured in a long-season climate may exceed its outline in a colder region; a selection may be compact only under adequate sun. When the reason for discrepancy is unclear, plan with the larger credible spread or place the plant where later editing is easy.
Add a confidence note. High confidence means the exact taxon has consistent local information; medium means published ranges vary but the behavior is known; low means the identity, provenance, or habit is uncertain. Do not put low-confidence plants beside paving, drains, or rare slow-growing neighbors. Test them in an accessible pocket. This small distinction prevents a guessed dimension from becoming the structural center of the whole border.
Convert mature spread into center points
Turn each mature width into a radius by dividing it in half. For two neighboring plants that should meet without overlapping, place their centers approximately the sum of those two radii apart. This works when plants have different sizes and prevents the common error of using one center-to-center interval for an entire mixed border. Mark center points, not pot edges, because the pot disappears while the crown and mature foliage expand around its center.
Use the geometry as a starting condition, then adjust for habit. An upright plant may keep most foliage inside its listed width, while an arching plant can lean beyond the crown. A colony former may not retain one center at all. Draw the actual outline—oval, fountain, fan, or moving patch—when that behavior affects a path or neighbor. Do not tighten spacing simply because young containers look lonely; the plan should represent the established border rather than opening day.
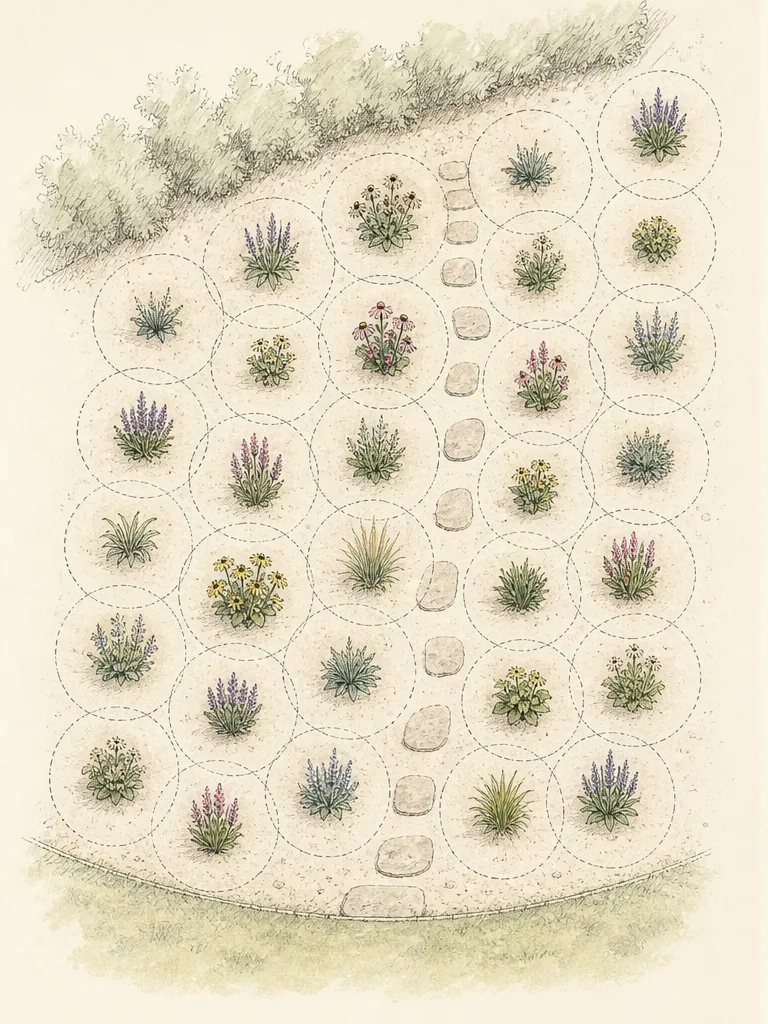
Make overlap intentional and visible on the drawing. Compatible groundcover plants may knit before their maximum outlines, and naturalistic groups can interlock, but heavy overlap increases competition and can hide crowns. Where two mature circles overlap, write why: weed-suppressing matrix, seasonal succession, or a soft group edge. If no reason exists, restore the full spacing. An unexplained overlap is usually future division work disguised as immediate fullness.
Draw access before filling the gaps
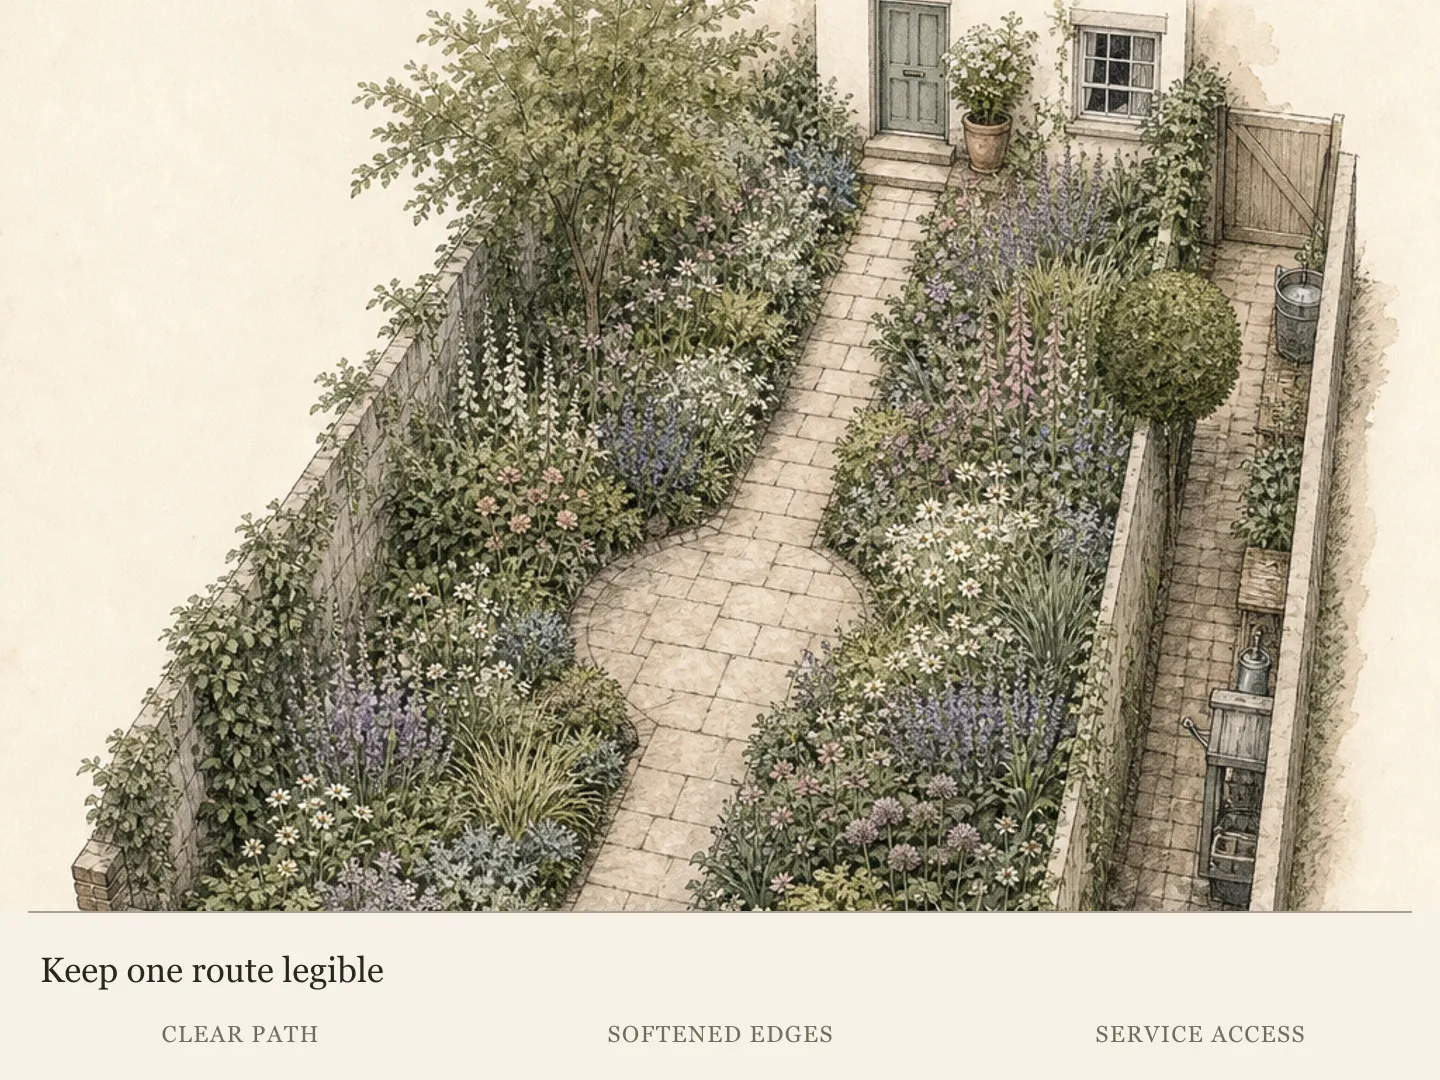
Mark how a gardener will reach every part of the bed after plants mature. A shallow border may be serviced from the path, but a deep border needs discreet stepping points or an internal route. Place access where it connects useful tasks: a hose fitting, staking group, division-prone clump, drain, wall, or back edge. The route can disappear visually beneath low foliage, but its stable surfaces and center line must remain clear of crowns.
Create working pockets around plants that demand repeated attention. Tall perennials may need support, spreading plants need edge inspection, and large clumps eventually need a spade and space for lifting. A narrow gap that admits a hand today may not admit shoulders, a watering can, or bundled stems later. Test reach from the intended footing and reserve enough room to work without kneeling on neighboring crowns or compacting their root zones.
Protect circulation edges from mature foliage. Set arching leaves and leaning flower stems back from paths, gates, steps, and drive sight lines. The exact margin depends on plant habit and site use, so draw the whole flowering outline rather than applying one generic setback. A path should remain its designed width in August, not only when plants are dormant. If regular clipping is required to preserve passage, the plant is probably too close or the wrong shape.
Arrange functional layers without double-counting space
A layered border can include structural plants, seasonal display plants, and a low groundcover matrix, as described by Illinois Extension. Layers share views and sometimes share ground, but they do not erase one another's root and crown needs. Plot the structural layer first because it persists visually and is hardest to move. Add seasonal groups into true openings, then use compatible low plants to cover remaining ground without burying or crowding established centers.
Distinguish vertical overlap from ground-level overlap. A spring bulb can emerge through a later perennial canopy because their peak seasons differ and their crowns occupy different forms. Two broad perennial crowns cannot occupy the same point merely because one is taller. Show bulb drifts and ephemeral foliage on a separate tracing so their positions remain known during later division. Seasonal succession works when root disturbance and light competition are understood, not when a plan hides multiple plants under one symbol.
Keep the matrix editable. Dense low planting can shade soil and unify the border, but it must not conceal the bases of plants that need division, reveal disease slowly, or run through stepping points. Select a behavior suited to the site and leave defined openings around vulnerable crowns. A groundcover layer is a living maintenance strategy, not filler poured into every uncolored patch on the plan.
Group for clarity and practical care
Repeat plants in groups large enough to read from the main viewpoint, using fewer selections where the border is seen at a distance. University of Georgia recommends masses of fewer selections to increase visual impact and simplify maintenance. Repetition also helps gardeners distinguish intentional plants from weeds during emergence. Calculate each group from mature centers, then vary the outer contour rather than compressing the internal spacing to create an instant block.
Place plants with similar maintenance rhythms near compatible access. A cluster that is cut back together can be reached from one stepping point, while a spreading species is easier to monitor along an exposed edge than behind delicate crowns. Do not group solely by flower color. Two plants can bloom together yet require conflicting moisture, division, or support. The most durable repetitions share enough culture and care to be managed without repeatedly crossing or disturbing neighbors.
Use single specimens only when their mature form can hold the role. A large architectural perennial or grass can anchor a group, but a small short-lived plant usually looks stranded alone and is easy to lose. Draw the specimen's full seasonal gap as well as its peak outline. If it disappears in winter, nearby structure should maintain the composition without planting permanent crowns inside the space it needs to return.
Plan the first two years without stealing future room
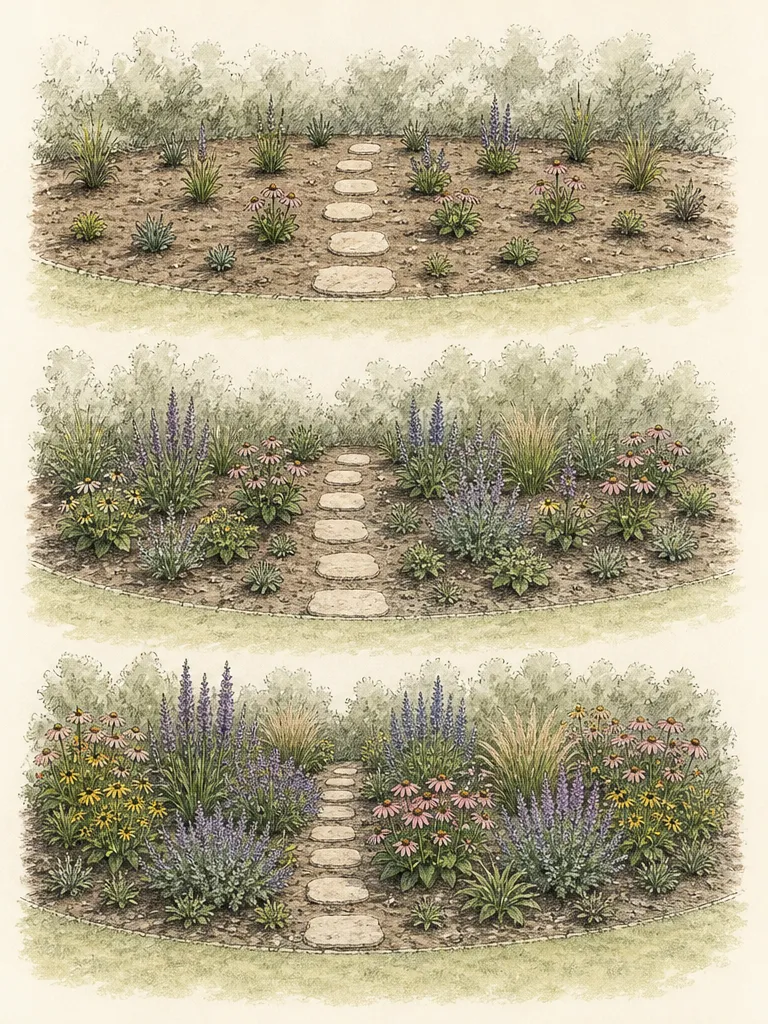
A correctly spaced new border will show open soil while roots establish. Treat that openness as a temporary phase, not proof of failure. Cover soil with an appropriate surface mulch kept away from crowns, or use removable annuals and short-lived fillers that can leave before perennials reach mature spread. Do not insert extra permanent plants unless the plan shows where they will be moved and when that work can occur safely.
Label center points and photograph them from fixed views. Young plants can be hidden by mulch, go dormant, or emerge late, making the original geometry difficult to recover. Durable records prevent a new purchase from being placed on top of a sleeping crown. They also reveal whether a plant is growing outside its expected envelope because of site conditions, misidentification, self-seeding, or a spread behavior missed during selection.
Weed open ground early and gently. Young perennials do not yet provide the shade and competition of a mature layer, so gaps require active attention. Pull weeds before they root through crowns and replenish surface cover only where measured. The answer to first-year weed pressure is not automatically closer permanent spacing. Establishment care should protect the future design rather than converting every temporary gap into long-term crowding.
Set plants out before digging
Transfer the scaled center points to the bed with flags, canes, or labeled pots. Start with fixed structural plants and access, then place repeated seasonal groups and matrix plants. Check dimensions from a tape rather than adjusting by eye alone. View the layout from all important positions and walk every route. An arrangement can be mathematically correct yet visually awkward if repeated groups align like rows or hide a focal point.
Use triangulated or staggered positions for groups when they suit the design, while preserving center distances. Straight rows make sense for a formal edge; naturalistic masses benefit from irregular contours and repeated intervals. Keep group centers away from drain covers, edging joints, and stepping surfaces. When a pot must move to protect access, update the plan instead of leaving the record and ground in disagreement.
Plant at the depth held in the container or required by the plant type, water thoroughly, and maintain a visible crown. Do not sink a tall pot to reduce its height or mound a small plant to improve visibility. Finished soil grade should be established before layout. After backfilling and watering, recheck center markers because loose soil and foot traffic can shift small plants from the intended geometry.
Audit the border at mature-season peak
Review spacing when each major group reaches its largest seasonal outline, not only in spring. Note path encroachment, hidden access, crowns touching, airless pockets, exposed soil, and weeds. Compare the result with the scaled plan. A plant that remains smaller may be young, stressed, or naturally compact in the site; a larger plant may reflect rich conditions or an inaccurate label. Diagnose the cause before moving center points across the whole design.
Use photographs to decide whether an overlap is productive. Interlocking foliage can make a cohesive border, but stems leaning through a neighbor, inaccessible weeds, repeated mildew, and buried crowns indicate crowding. Correct the plant that violates the plan rather than shearing every group into artificial shapes. Move, divide, or remove it during the appropriate season, maintaining access while the bed is open.
Check the hidden infrastructure at the same time. Stepping stones should remain stable and uncovered enough to find; irrigation outlets and drains should be reachable; wall and fence lines should not trap unmanageable debris. A border can look full from the path while becoming impossible to service. Mature-season access is one of the design's visual achievements because healthy, well-edited plants keep their forms more clearly.
Let maintenance evidence refine the plan
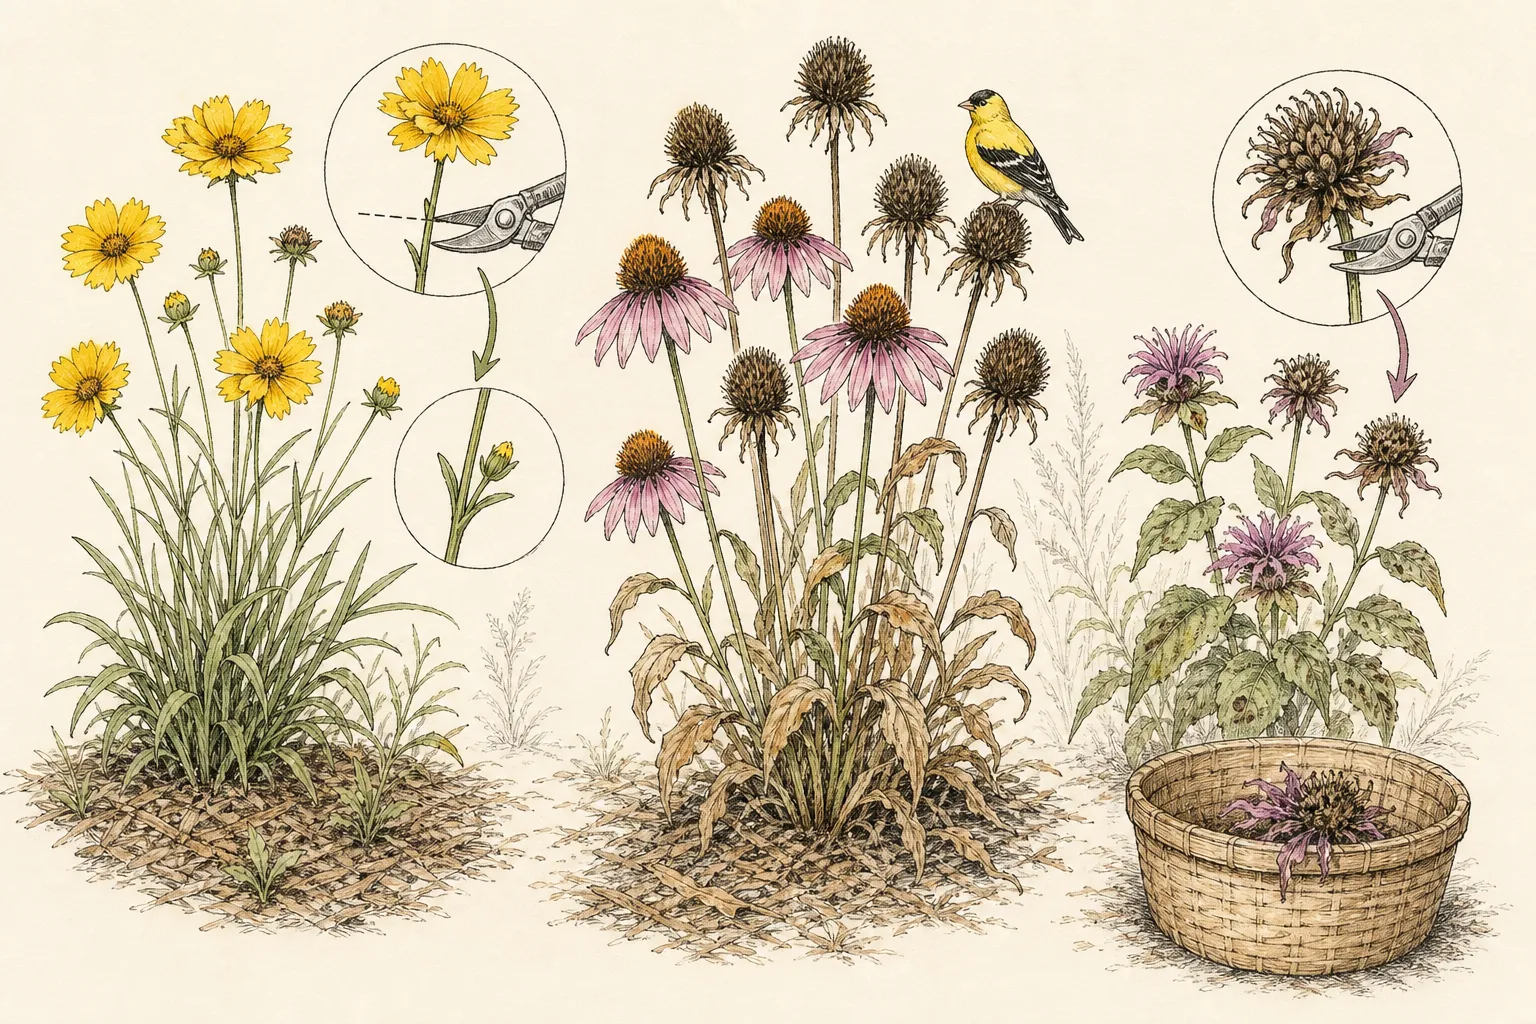
Record the work each group actually requires: watering reach, staking, deadheading, division, seedling removal, disease cleanup, and access time. If one plant repeatedly forces entry through delicate neighbors, move it closer to a route or replace it with a lower-care form. Maintenance capacity is a site condition just like light and soil. A design that demands unavailable labor will lose its spacing logic as edits are postponed.
Revise one zone at a time. Widespread crowding may come from using pot-size spacing, while a local failure may be one vigorous cultivar or colony former. Preserve successful groups and access routes rather than renovating the whole border for a single mismatch. When divisions are made, replant only the number that fits the mature geometry; surplus divisions belong in another planned space, not squeezed back between the same neighbors.
The finished border should feel generous without being sealed. Plants meet, overlap deliberately, and repeat across the view, while paths remain open and every important crown can be reached. Some visible surface and access pockets are signs of foresight, not missing plants. Spacing by mature spread makes the composition possible; reserving maintenance access keeps that composition visible through the years.
Calculate seven plants in a twelve-by-eight-foot border
Work with a sunny, well-drained 12-by-8-foot Zone 6 Pennsylvania border that can be serviced from both long edges. For this example, use three Phlox paniculata with 3-foot planning diameters and four Echinacea purpurea with 2-foot diameters. These species-based allowances must be increased if a selected cultivar's documented spread is larger. The moderate-moisture bed suits both; it is not a dry gravel or saturated-soil recipe.
Using feet from the front-left corner, set phlox centers at (2, 5.5), (6, 5.5), and (10, 5.5). Set coneflowers at (1.5, 1.5), (4.5, 1.5), (7.5, 1.5), and (10.5, 1.5). Phlox centers are 4 feet apart, leaving 1 foot between 3-foot circles. Coneflower centers are 3 feet apart, also leaving 1 foot between circles. An open interval separates the two rows even at their allocated mature widths.
The order is seven plants, not bed area divided by nursery-pot area. Keep the middle interval open for observation and approach each row from its service edge. If only front access is available, reduce the bed depth or redesign the route before planting. The calculation demonstrates spacing decisions under declared assumptions; it is not a measured performance result.
Design ideas
- Style
- Layered perennial border with repeated groups, deliberate overlap, and concealed but usable access
- Space
- A new residential border viewed from one or more paths, windows, or seating areas
- Climate
- Temperate ornamental garden with exact species and cultivar dimensions adjusted for local light, moisture, soil, hardiness, and growth behavior
- 1Use radius cards
Write each plant's mature width and half-width on a reusable card. When two different plants meet, add their half-widths to set the starting center distance. Note arching or colony-forming behavior on the same card so a simple circle is not mistaken for the full mature outline.
- 2Reserve a hidden stepping chain
Place stable stepping points through the deep border before plants, linking the path to the back edge, drain, and high-maintenance groups. Space them for safe movement and keep centers outside mature crowns. Low editable foliage can soften their edges without making the route impossible to find.
- 3Trace three functional layers
Use separate tracing sheets for structural plants, seasonal groups, and the groundcover matrix. Compare them over the access plan to reveal accidental crown conflicts. Keep bulbs and ephemerals on another seasonal overlay so dormant positions remain protected during division and new planting.
- 4Create one trial pocket
Place an uncertain species or cultivar beside easy access with its larger credible spread reserved. Observe its width, lean, flowering height, and spread behavior for a full cycle before repeating it. A trial pocket contains uncertainty without letting one guessed dimension govern the whole border.
- 5Fill early gaps with removable color
Use a small number of annuals or clearly temporary fillers inside open first-year areas, keeping them away from perennial crowns and removing them before competition develops. Mark every permanent center so seasonal planting never occupies the return space of a dormant or late-emerging perennial.
- 6Give dividers an edge position
Place perennials that need frequent division near a path, stepping point, or open pocket where a spade and lifted clump can be handled. Keep slow, permanent plants deeper in the group. Maintenance rhythm then supports the visual layers instead of repeatedly dismantling them.
- 7Photograph the peak outline
Take the same overall and access-route photographs when each main group reaches full seasonal size. Annotate encroachment, productive overlap, bare soil, and unreachable weeds on the plan. Use that evidence for one-zone edits instead of compressing or expanding the entire border from memory.
- 8Mark a path-edge leaf arc
For every arching plant beside circulation, draw the farthest mature leaf and flowering stem as an arc beyond the crown circle. Keep that arc outside the path's required clear width. If the outline crosses circulation on paper, move the center rather than planning to clip the plant into an unnatural shape.
- 9Schedule one removable first-year layer
Choose a limited annual or short-lived filler palette and assign it only to spaces outside permanent crown markers. Put a removal month on the plan, tied to the expected expansion of neighboring perennials. The temporary layer should cover soil and add rhythm without seeding heavily or becoming another permanent spacing problem.
- 10Reserve one replacement pocket
Keep a reachable, uncommitted pocket near the border edge for testing replacements when a plant fails or a cultivar proves larger than expected. The pocket prevents an emergency purchase from being squeezed into mature groups. Once a replacement is proven, revise the scaled plan before repeating it elsewhere.
Plants in this guide
Related reading
Sources
- Landscape Basics: Success with Herbaceous Perennials. University of Georgia Cooperative Extension. Source record · Accessed 2026-08-19.
- Perennials: Planting. Royal Horticultural Society. Source record · Accessed 2026-08-19.
- Planning a New Perennial Garden for the Whole Garden Ecosystem. University of Illinois Extension. Source record · Accessed 2026-08-19.
- Phlox paniculata. NC State Extension. Source record · Accessed 2026-09-09.
- Echinacea purpurea. North Carolina Extension Gardener Plant Toolbox. Source record · Accessed 2026-09-09.