Gardens · foundation border access bloom sequence
Design a Long-Blooming Foundation Border with Clear Windows and Access
Plan a long-blooming foundation border from building clearance, window views, mature plant size, service routes, drainage, and a restrained sequence of flowers.
Published Last updated
In this guide
- Survey the building before the flowers
- Map the wall-side microclimate
- Draw clearances as spaces, not thin lines
- Make the bed deep enough for real layers
- Choose a restrained structural framework
- Build long bloom as a relay
- Keep a continuous service route
- Manage water without wetting the building
- Install structure and access before seasonal fill
- Audit the border from the house and the service strip
- Measure a spring-to-summer segment beside the service strip
- Design ideas
Survey the building before the flowers
A foundation border occupies working space beside a building. Before drawing plants, record the wall material, foundation, windows and their opening direction, doors, steps, handrails, vents, meters, hose connections, heat-pump or air-conditioning equipment, downspouts, cleanouts, exterior lighting, and roof overhang. Confirm required clearances with current codes, manufacturers, utilities, insurers, and wildfire guidance applicable to the property.
Measure from fixed points and photograph the facade straight on and from both approaches. Add sill heights, door swing, service-panel working space, downspout discharge, and the path a contractor would use while carrying equipment. A plant is not properly placed if ordinary access depends on tying it back, standing in another crown, or cutting it hard immediately before service.
Look from inside every affected window. Record the seated and standing view, useful daylight, desired privacy, and any emergency egress requirement. UF/IFAS guidance recommends mature-size plants that keep windows clear and preserves room between plants and the house for cleaning and shutter work. Local emergency and security requirements take priority over ornamental screening.
Define the border's job: frame the entry, soften a long wall, connect corner masses, provide a long flower season, and remain serviceable without hiding the architecture. University of Illinois Extension notes that foundation planting should soften and connect a house rather than camouflage it. Empty wall and visible foundation can be intentional parts of the composition.
Map the wall-side microclimate
A single facade can contain several exposures. Eaves create a rain shadow; downspouts create concentrated wet points; masonry reflects heat; corners accelerate wind; and a projecting bay can cast shade. Observe direct sun by season and time of day instead of assigning one label to the whole wall. Winter sun and summer shade may reverse beneath deciduous trees.
Watch meaningful rain. Note where roof water lands, whether finished grade carries water away from the structure, and where irrigation or runoff reaches the wall. Do not alter foundation drainage or grade to improve a flower bed without qualified advice. Keep inspection points and drainage components visible and accessible.
Check soil in more than one location. Construction debris, compaction, backfill, imported topsoil, and repeated mulch can vary along a short run. Test soil when pH or nutrients will change plant choice, and assess drainage separately. A broad bed amendment should follow actual need; a rich isolated pocket beside compacted soil can hold water around roots.
Mark heat, shade, moisture, and wind zones on the base plan. A long-bloom palette may need different taxa in visually related roles as conditions change. Repeating color, leaf shape, or habit can connect those substitutions without pretending the root environment is uniform from corner to corner.
Draw clearances as spaces, not thin lines
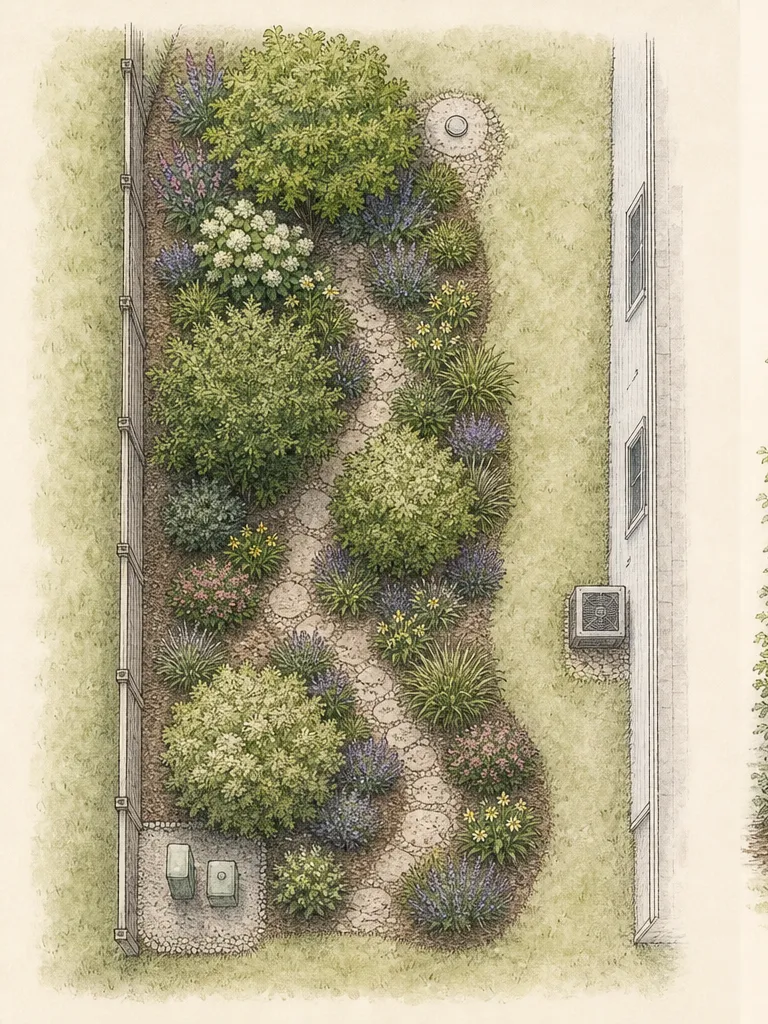
Turn every requirement into a visible area on the plan. Draw the window view and opening zone, utility working area, downspout route, equipment airflow, door and gate swing, main path, and a continuous wall-side service strip. These shapes are unavailable for permanent mature plant mass even when the bed looks empty during installation.
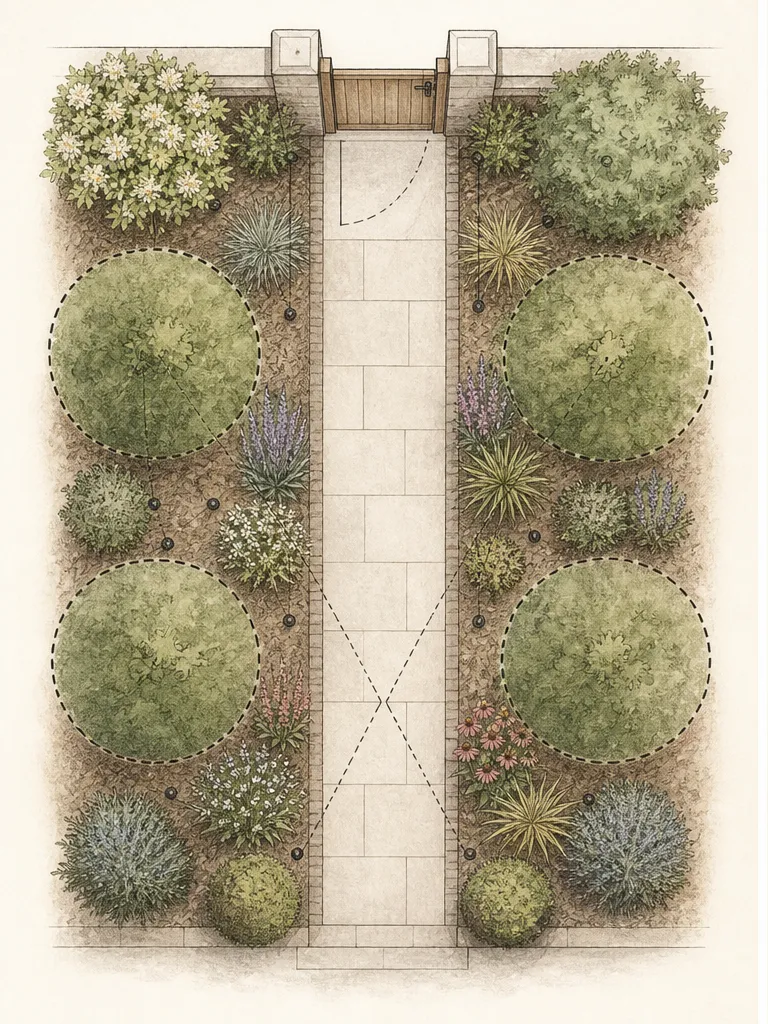
For each candidate, draw a center point and a credible cultivar-specific mature outline. NC State Extension advises considering both mature height and width near structures and selecting plants that fit without constant pruning. Keep the natural outline outside the building and service spaces, then add any clearance required by the wall assembly, equipment, local code, or maintenance method.
Do not measure only to the trunk or crown. Arching stems, flowers heavy with rain, snow-laden branches, and suckers can extend beyond the nominal base. A plant under a sill must remain below and clear of the operable window in ordinary mature posture, not merely after spring shearing. Preserve views from indoors as well as the facade seen from outside.
Reject the plant that fits only by promise. Terms such as dwarf, compact, or patio need actual dimensions for the named cultivar and regional evidence. When sources disagree, reserve the larger plausible outline or choose a better-documented plant. Repeated size control is a maintenance burden and can remove flowers from shrubs that bloom on older wood.
Make the bed deep enough for real layers
A very narrow strip against the wall encourages a single row of shrubs, root competition, and branches pressed toward siding. Pull the front edge into the yard where circulation, drainage, and existing roots allow. The resulting depth should hold a service strip, mature structural plants, and a lower front layer without stacking them into one another.
Relate the new edge to the entrance, corners, and main views rather than tracing the foundation mechanically. A broader lobe can hold a corner shrub or seasonal focal group; a shallower interval can expose attractive masonry or protect a utility zone. University of Illinois guidance explicitly notes that plants need not fill the entire foundation line.
Keep the entry legible. Use the bed line and repeated foliage to lead toward the door, leaving steps, lights, numbers, and handrails visually open. A large flowering mass centered on the approach can compete with arrival or conceal a change in level. Move the strongest color just beyond the pinch point so it rewards movement without obstructing it.
Test maintenance reach from the front edge and service strip. Deep beds may need stable stepping points linked to the wall-side route. Place them before plants and outside mature crowns. Do not plan to step on mulch over root zones or to lean ladders through shrubs for window and gutter work.
Choose a restrained structural framework
Long bloom needs a calm base. Select a small number of shrubs, compact ornamental grasses, or durable foliage perennials to hold the facade when few flowers are open. Their forms should respond to the house's scale without creating a continuous heavy hedge. NC State guidance observes that modern foundations need not be hidden by dense planting.
Place taller structural plants beside rather than directly in front of windows, unless a deliberately low cultivar fits beneath the sill with margin. UF/IFAS recommends framing windows to preserve the view and selecting plants whose mature height and spread suit the space. Keep branches flexible and open only where a locally compliant privacy screen is actually intended.
Use asymmetrical balance around doors and corners. One broader shrub group can balance several lower repeated plants on the opposite side. Echo foliage color or shape across the facade rather than forcing identical species into different sun and moisture conditions. The entrance remains the visual center even when the planting is not mirrored.
Draw the framework in winter or its least leafy season. Deciduous branch form, evergreen weight, dormant gaps, and retained grasses should still compose the wall. Avoid filling every interval with evergreen shrubs merely to claim year-round interest; excessive dark mass can obscure windows and make a small house appear lower.
Build long bloom as a relay
Long bloom does not mean one plant flowering continuously. Build a relay of groups whose emphasis changes while the structural framework and foliage remain. Choose a spring group, an early-summer group, a late-summer group, and an autumn group suited to each microclimate. Overlap their relative local seasons so weather does not leave isolated single-day events.
Repeat each important plant or visual role in more than one compatible pocket. A spring bulb group can echo beneath two shrubs; a summer perennial can appear as one main drift and a smaller repeat; autumn seed heads can carry the same upright line near the corner. Repetition connects the long facade and reduces the impression of a plant catalogue.
Use foliage to manage the handoffs. Broad leaves can cover the visual gap after bulbs finish while still allowing bulb foliage to remain until it naturally declines. Fine grasses can bridge from summer flowers into autumn. A low evergreen or persistent mound can mark the edge through winter. Ensure companions share root-zone and moisture conditions rather than pairing solely by bloom calendar.

Record local timing by cultivar. Catalog months shift with latitude, elevation, exposure, and weather, and a species may have cultivars with different duration or habit. Use regional Extension, public-garden, and nursery evidence to assemble the relay, then update the schedule from the actual garden instead of buying more plants after one unusual spring.
A worked relay needs one persistent structural role and distinct flower seasons, not four versions of the same mound. The regional example uses a compact evergreen at blank wall intervals, a spring mat at the front, an arching midseason group, and an autumn clump in the slightly more moisture-retentive part of otherwise well-drained soil. This sequence keeps foliage and form present while the flower emphasis moves along the facade.
Treat published dimensions as planning envelopes, then apply the building survey. The evergreen's pointed foliage excludes it from egress and brushing routes; the spreading spring mat still occupies horizontal clearance despite its low height; the arching catmint needs front access for cutting back; and the autumn aster cannot be placed where winter-wet soil collects. Delete a repeat whenever its full outline conflicts with a sill, door, utility, path, or service strip.
The example is bounded to a full-sun St. Louis-area lower-Midwest facade, but its plant profiles come from Oregon State, NC State, and the RHS. Those records support identity, habit, dimensions, and cultivation limits; they do not prove local performance or legality. The executable quantities and footprints appear in the worked composition, and every purchase still requires current local hardiness, invasive-status, cultivar-identity, and availability checks.
Keep a continuous service route
Reserve a wall-side strip wide and stable enough for the tasks the building requires: inspecting the base, reaching windows, reading meters, operating taps, cleaning vents, and placing a ladder where authorized. Its dimension is project-specific. Wall construction, equipment, fire rules, accessibility, and maintenance tools determine more than a generic garden number.
Connect the strip to the entry or another clear access point without crossing plant crowns. Use a stable surface appropriate to drainage and local weather. It can be visually quiet gravel, pavers, or maintained open mulch where those materials are safe and permitted, but it must remain a route rather than becoming hidden storage or a row of temporary pots.
Bridge the route only with elements designed for access, such as a removable hose crossing or a stepping point. Do not train thorny, stiff, poisonous, or strongly arching plants into the service space. The Florida window guidance specifically cautions against hazardous plants near emergency access; apply the same practical standard to the whole working corridor.
Label utilities on the planting plan and brief anyone who maintains the border. A beautiful shrub is not a screen for meters or equipment when technicians must cut it to work. If screening is desired, place it outside the required service and airflow zone and design the view from normal approaches, not from directly in front of the equipment.
Manage water without wetting the building
Keep existing drainage away from the foundation functioning. Do not raise soil or mulch against siding, vents, weep openings, or the visible foundation to make the bed look level. Preserve the root flare of woody plants and keep downspout discharge inspectable. Seek qualified advice for damp walls, settlement, or drainage that cannot be corrected within ordinary garden work.
Place irrigation in the planted root zones, not in the service strip or against the wall. Separate plants with meaningfully different water needs where the system allows. Observe a full cycle for leaks, overspray, runoff, and emitters blocked by expanding shrubs. Adjust by soil moisture and weather rather than watering the facade line on a fixed lawn schedule.
Account for the eave shadow. The UF/IFAS page notes that plants outside the eave line can receive rainfall, while those close to the house may remain dry. Do not interpret a dry surface alone as a watering command; check the root ball and surrounding soil. A plant that requires constant rescue under an overhang may belong farther forward or in another site.
Use mulch suited to the plants and keep it below vulnerable building details. Maintain a visible gap around stems, crowns, drain outlets, and inspection points. Replenish from measured need, not habit. Deep annual accumulation can conceal grade, hold moisture at the wall, and erase the service route the plan was designed to protect.
Install structure and access before seasonal fill
Mark every clearance, service route, stepping point, and mature plant center on the ground. Walk the route with the tools or ladder the task requires and open each window and door. View the layout from indoors. Correct conflicts before digging, when changing a center costs nothing and no roots have been disturbed.
Install drainage protection and approved access surfaces first, then place structural shrubs at mature spacing. Set out repeated perennial groups and bulbs only after the framework is confirmed. Keep dormant positions on an as-built plan. Do not fill first-year openings with permanent extra shrubs simply because the border appears sparse.
Prepare soil according to tests and actual compaction or drainage, avoiding isolated over-amended holes. Plant at correct crown or root-flare level and water the original root ball through establishment. Keep construction and planting activity away from existing tree roots and utilities. Follow local planting windows rather than a universal calendar.
Use limited removable annuals only where their water needs and roots do not compromise the permanent relay. Mark a removal date and preserve service access. Apply suitable mulch without piling it on crowns or the building. Photograph the finished centers and routes before foliage expands; this record will guide later edits and safe digging.
Audit the border from the house and the service strip
Review after rain, at seasonal peak, during a bloom gap, and in dormancy. Open windows and doors, walk the service strip, read every meter, and approach each utility. Mark foliage touching the building, blocking a view, hiding a step, restricting airflow, or requiring technicians to enter the bed.
Compare actual plant outlines with the mature plan. Move or replace a shrub that repeatedly exceeds its space; do not normalize constant shearing. Divide or reduce a perennial group when its crown enters access, and preserve intentional negative space. Update cultivar dimensions from the site without treating one specimen as a universal measurement.
Evaluate the flower relay by fixed-view photographs. Identify true seasonal gaps, but distinguish them from a week shortened by unusual weather. Strengthen an existing compatible group before adding another species. If foliage after bloom looks untidy, adjust companions or move the group rather than cutting leaves before they finish their horticultural role.
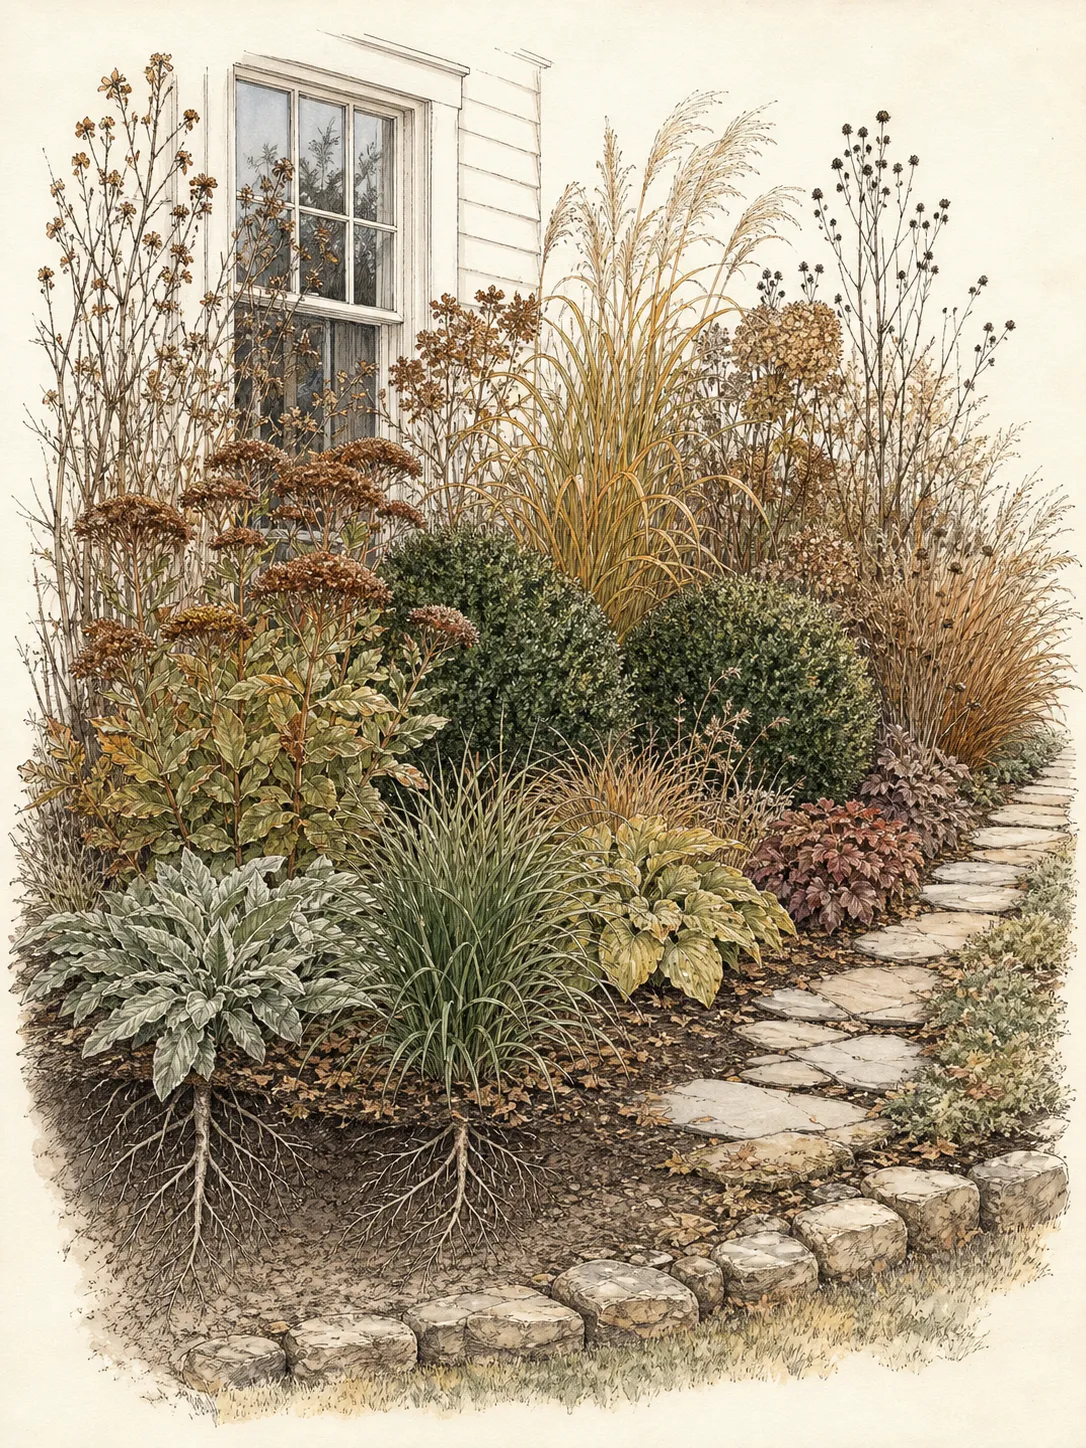
Inspect grade, drainage, irrigation, mulch depth, and wall clearance at least with each major seasonal cleanup. A successful foundation border keeps the house readable and maintainable while flowers change in front of it. The measure is not the number of blooming taxa; it is a coherent sequence that never spends windows, building clearance, or service access to create fullness.
Measure a spring-to-summer segment beside the service strip
Take one sunny 14-by-10-foot segment of a Zone 6 Pennsylvania foundation border where drainage and required building access have already been resolved. Assume the rear 2 feet must stay unplanted for service; this is a site assumption, not a code clearance. Three Phlox subulata can carry spring color in front of three Phlox paniculata for summer. For this drawing, allocate 3-foot mature circles to all six, and verify the exact selections against that envelope.
Place front centers at (3, 2), (7, 2) and (11, 2) feet from the front-left corner, and rear centers at (3, 6), (7, 6) and (11, 6). The rear foliage ends at 7.5 feet, leaving space before the service strip begins at 8 feet. Keep the six-plant segment out of door, vent, meter and window working areas. Its spring-to-summer relay is one part of the border; it does not by itself provide autumn flowers or evergreen screening.
Design ideas
- Style
- Layered foundation border with compact structural shrubs, repeated perennial drifts, a quiet service strip, and a restrained seasonal flower relay
- Space
- Residential planting along a house facade with windows, entry circulation, utilities, drainage components, and exterior maintenance needs
- Climate
- Final plants and materials must match local hardiness, heat, exposure, soil, drainage, roof rain shadow, snow or storm load, wildfire rules, building construction, equipment clearances, and cultivar dimensions; long-bloom timing is regional and should be corrected from observation. Check the facade after heavy rain, at seasonal sun extremes, and while every window and service route is in use before treating any planting pocket as horticulturally or operationally uniform. The worked palette is specifically bounded to a full-sun St. Louis-area lower-Midwest facade with dry-to-medium, well-drained soil. It is not a prescription for wet eave pockets, deep shade, or the deep South, and every exact taxon or cultivar still requires a current local hardiness, invasive-status, availability, and site-exposure check.
- 1Frame, do not fill, each window
Place one compact structural group beside a window and a lower repeated foliage group beneath only where mature height leaves the sill, opening, view, and required egress clear. Let visible wall become negative space on the other side. Echo color or leaf shape at the next window instead of repeating the exact species into a different exposure.
- 2Set one St. Louis dry-sun palette
For a full-sun St. Louis-area lower-Midwest facade with well-drained soil, place two Juniperus squamata 'Blue Star' anchors at blank wall intervals, three front-edge Phlox subulata drifts, two Nepeta x faassenii 'Walker's Low' midseason drifts, and two Symphyotrichum oblongifolium 'October Skies' autumn clumps in the moisture-retentive pockets. Reserve maximum planning footprints of 4 feet, 3 feet, 3 feet, and 0.5 metre respectively. Delete any repeat whose full outline enters a window, door, utility area, service route, or wall-side strip. This regional composition still requires current local hardiness, invasive-status, cultivar-identity, and availability checks.
- 3Hold blank intervals with 'Blue Star'
Use Juniperus squamata 'Blue Star' as sparse non-flowering evergreen structure. Oregon State describes a rounded dwarf conifer about 3 feet high by 4 feet wide, with densely arranged awl-shaped steel-blue leaves, a sunny exposure, tolerance of dry soil, and hardiness to USDA Zone 4. Reserve the full 4-foot spread at a blank corner or beside a window, while keeping the 3-foot height and pointed foliage out of low-sill, egress, door, and service zones. Reach it from the bed front and reject any position that depends on repeated size control. Confirm local climate fit and current restrictions before purchase.
- 4Open the relay with moss phlox
Repeat Phlox subulata as the April-to-May spring drift. NC State describes a mat 4 to 6 inches high and 2 to 3 feet wide, so reserve the full 3-foot footprint below a window and outside egress, stepping points, the service strip, and the front path. Give it full sun and moist, well-drained soil, with dappled sun considered in hot, humid summers. Keep the mat reachable from the front for cutting after flowering. Its Zone 3 to 9 listing and broad eastern and central North American range are not local approval; verify the exact taxon or cultivar and current regional status.
- 5Carry midseason with 'Walker's Low'
Use Nepeta x faassenii 'Walker's Low' for the long midseason blue-purple group. NC State gives it a 2-to-2.5-foot height, a 2.5-to-3-foot spread, full sun with possible afternoon shade in southern heat, and dry to well-drained soil; cutting back spent bloom supports flowering from spring into fall. Put it below a window only when the measured sill and every opening or egress clearance exceed the credible height. Otherwise move the 3-foot drift between windows or forward, leave front access for cutting back, and keep arching stems outside the service route. Confirm true cultivar identity and current local guidance.
- 6Close autumn with 'October Skies'
Repeat Symphyotrichum oblongifolium 'October Skies' as the autumn close. The RHS describes a compact clump up to 0.5 metre high and wide, flowering through autumn in sun or partial shade and moist but well-drained soil; it does not tolerate winter waterlogging. Draw the full 0.5-metre circle and keep it below a window only when sill, opening, and egress measurements leave adequate clearance. Otherwise use it forward or between windows, with front access for division and seasonal cleanup. Verify the named cultivar, local winter behavior, and current regional status before planting.
- 7Expose one handsome wall interval
Leave a clean section of masonry or siding visible between two planting masses where no screening is required. Continue the edge treatment and mulch through the opening and keep the service route behind it. The pause can reveal building materials, reduce crowding, and make adjacent flowers stronger while preserving a natural access point for inspection.
- 8Widen the border at one corner
Pull the bed into a generous lobe beyond a blank corner, where a larger shrub or small ornamental tree can mature without covering a window or pressing on the wall. Taper the bed toward service-heavy areas. Check canopy, roots, utility lines, and building clearance, then balance the corner mass with lower repeats near the entrance.
- 9Turn the service strip into a reveal
Use one restrained stable material behind the planting and allow short glimpses of it between groups. The repeated reveal makes required access look intentional and shows where a gardener may step. Keep it free of pots, hoses, spreading groundcover, and mulch spill so the visual rhythm and practical route survive after plants mature.
- 10Repeat a leaf across changing light
Choose different locally suitable plants with a related leaf shape or color for sunny, eave-dry, and shaded pockets. Repeat that visual note while allowing species and water needs to change responsibly. Record each cultivar and mature outline; resemblance does not make their horticultural requirements interchangeable or justify putting the whole facade on one irrigation schedule.
- 11Keep one movable color accent
Use a single coordinated container or small seasonal group near the door where access, drainage, and water can be managed independently. Let it carry a short color gap without expanding the permanent plant list. Preserve door swing and walking space, and remove or relocate it during building work rather than allowing temporary ornament to become a fixed obstruction.
Plants in this guide
Related reading
Sources
- Planting Around Windows. University of Florida IFAS Gardening Solutions. Source record · Accessed 2026-08-30.
- Update Your Home with New Foundation Plants. University of Illinois Extension. Source record · Accessed 2026-08-30.
- 19. Landscape Design. NC State Extension Publications. Source record · Accessed 2026-08-30.
- Juniperus squamata 'Blue Star'. Oregon State University Landscape Plants. Source record · Accessed 2026-08-30.
- Moss-pink - Phlox subulata. NC State Extension. Source record · Accessed 2026-08-30.
- Catmint - Nepeta x faassenii 'Walker's Low'. NC State Extension. Source record · Accessed 2026-08-30.
- Symphyotrichum oblongifolium 'October Skies'. Royal Horticultural Society. Source record · Accessed 2026-08-30.
- Phlox subulata. North Carolina State Extension. Source record · Accessed 2026-09-09.
- Phlox paniculata. NC State Extension. Source record · Accessed 2026-09-09.