Grow · semi ripe ornamental shrub cuttings
Take Semi-Ripe Cuttings from Selected Ornamental Shrubs in Late Summer
Learn to recognize a semi-ripe shoot, prepare a clean nodal cutting, balance air with moisture, and carry rooted ornamental shrubs into their next stage.
Published Last updated
In this guide
- Choose a shoot by maturity, not the date
- Use shoot maturity and roots as separate gates
- Confirm the plant belongs to the semi-ripe method
- Collect in the cool part of the day
- Prepare one clean nodal cutting
- Build an airy, evenly moist rooting zone
- Hold humidity without sealing in rot
- Read rooting before potting on
- Keep a record and propagate only what you may
- Steps
Choose a shoot by maturity, not the date
The right semi-ripe cutting comes from this season's growth after its first softness has begun to firm. Look for mature, full-sized leaves, a lower stem that feels reasonably firm, and a tip that still bends instead of behaving like a dry twig. In a temperate garden that stage often arrives from late summer into early autumn. The Royal Horticultural Society places the usual window from July through September, while NC State Extension describes mid-July to early fall. Both sources make the plant's growth stage more important than a calendar square.
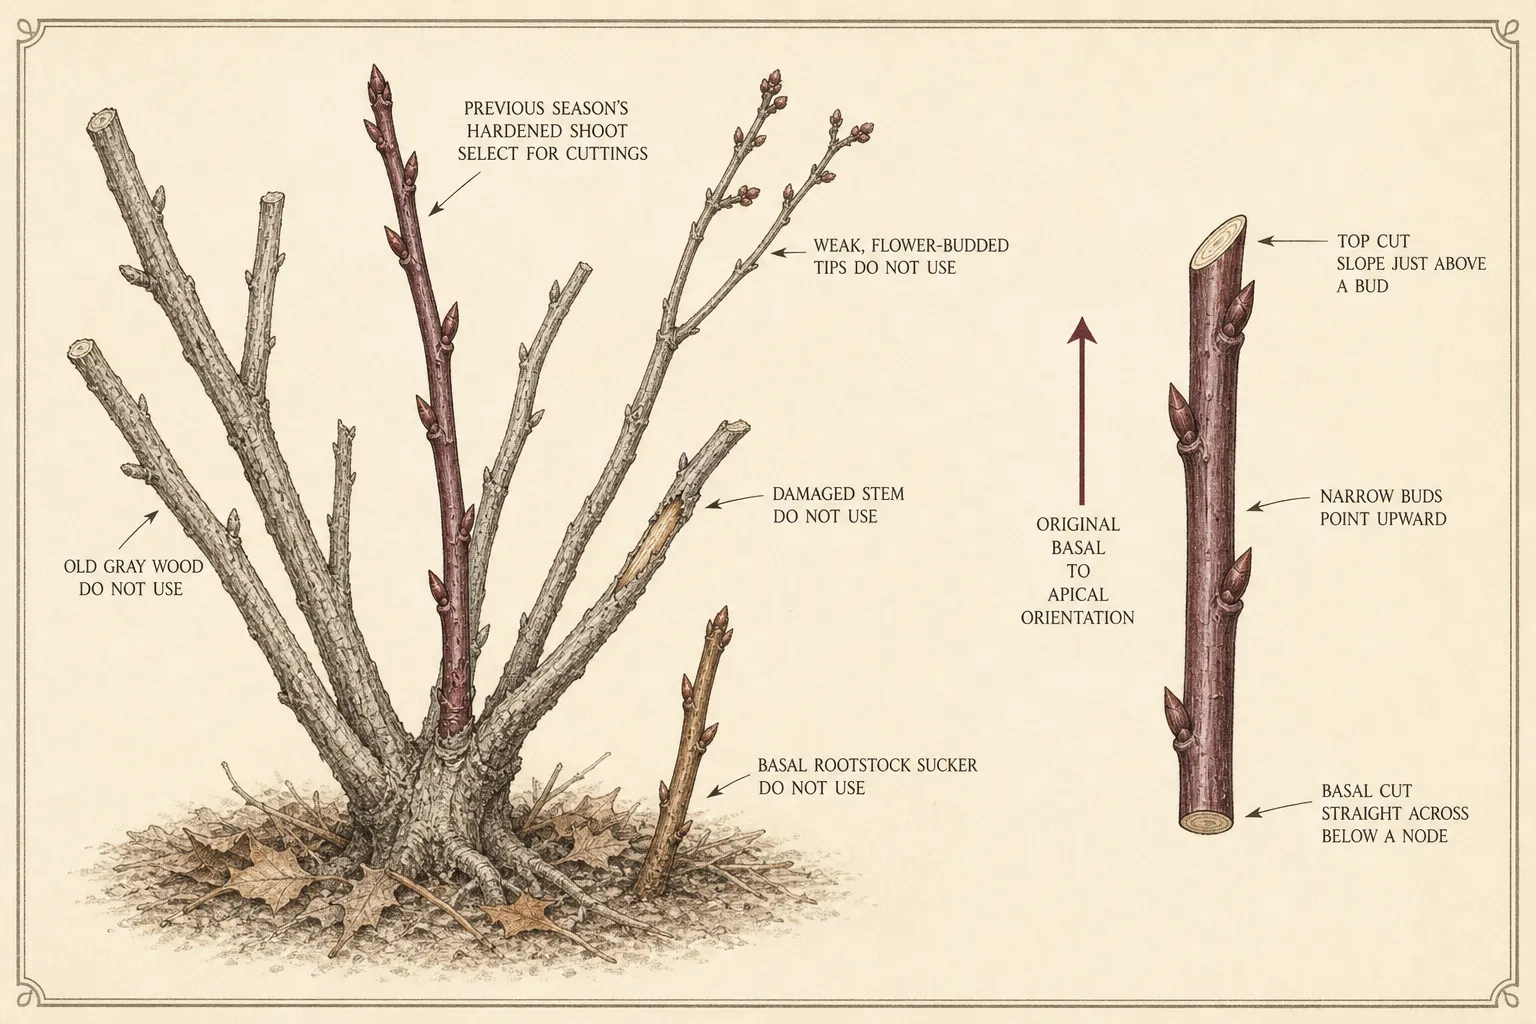
Read several shoots on the same shrub before cutting. Very soft growth is pale, easily bruised, and prone to collapsing after removal. Fully hardened growth is rigid and woody from base to tip. The useful section lies between those states. The RHS favors healthy current-season shoots with short internodes and advises against damaged, atypical, or excessively vigorous growth. A moderately growing side shoot often gives a clearer run of mature nodes than a rank vertical water shoot.
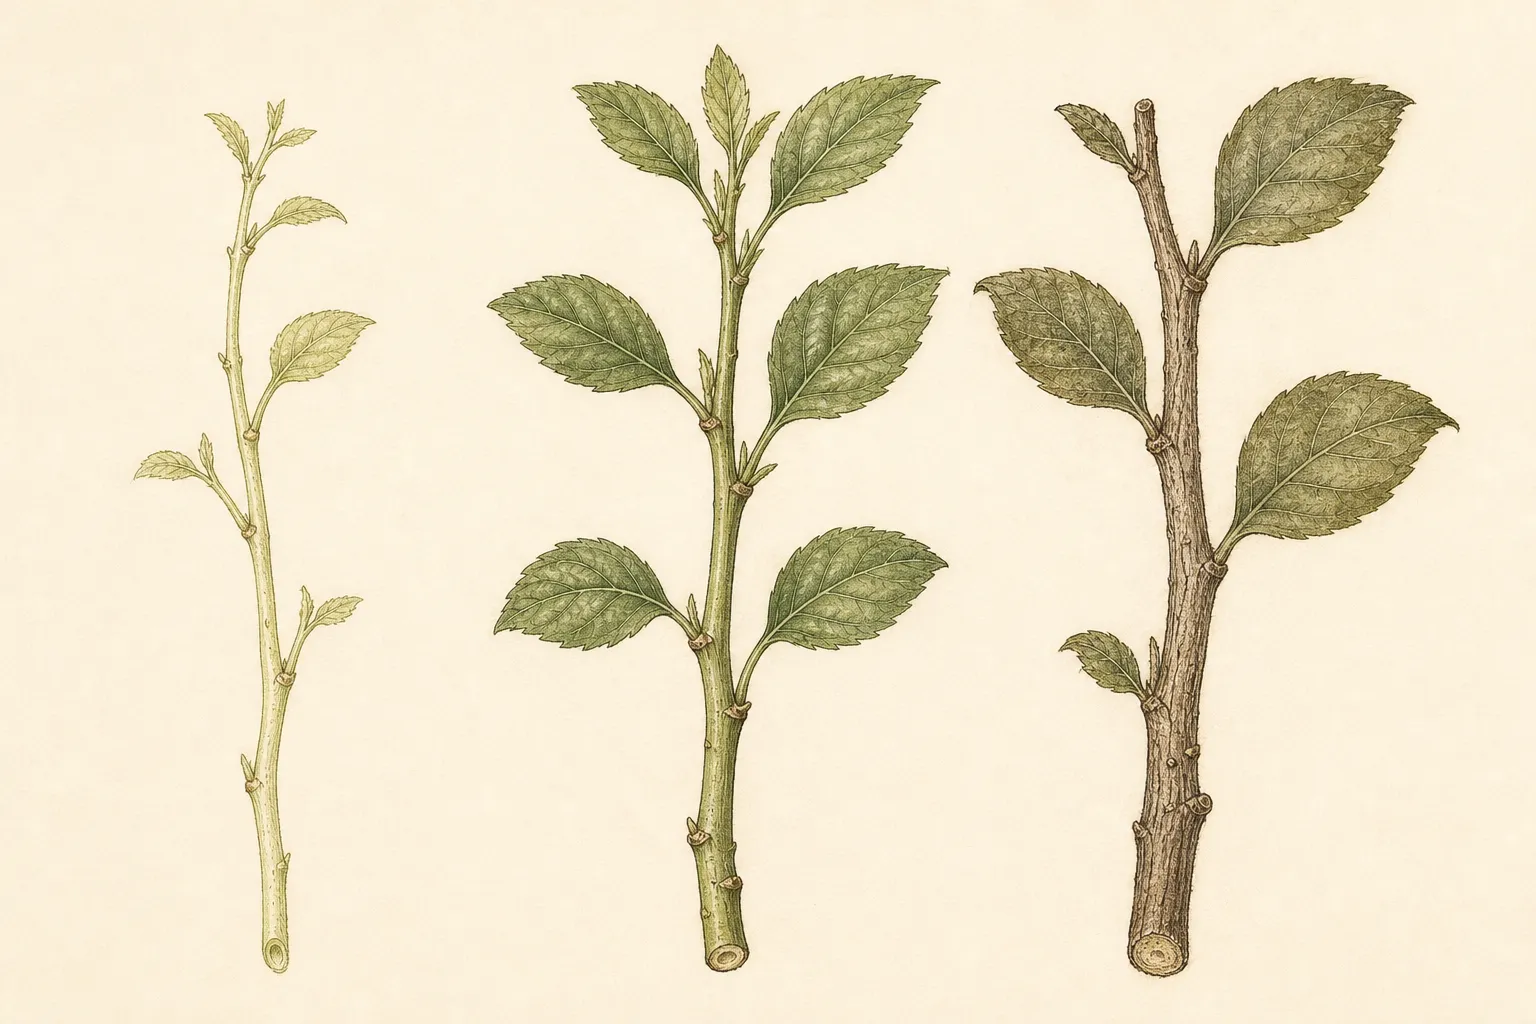
Weather and pruning history shift the window. A shrub that made a late flush after rain may carry soft tips beside older semi-ripe stems; a drought-stressed plant may have little suitable material at all. Do not force every shoot into the same category. If the base is still succulent, wait. If the whole length has become hard, consult species-specific hardwood guidance or wait for that method's season. One plant can contain several stages on the same morning.
Use shoot maturity and roots as separate gates
Start only when the identified plant's protocol matches the shoot: firm lower growth with a flexible tip is the semi-ripe checkpoint. Later, move the cutting on only when a real root system supports that transition. Calendar estimates help schedule inspections, but neither the collection month nor an upright cutting proves that the next stage is ready.
Confirm the plant belongs to the semi-ripe method
Semi-ripe is a stem condition, not a promise that every woody ornamental will root from it. The RHS includes many evergreen shrubs and hedging plants, among them camellia, ceanothus, choisya, holly, viburnum, and mahonia. NC State Extension likewise identifies many broadleaf evergreens and some conifers as semi-hardwood subjects. Use those lists to recognize the method's territory, then find directions for the exact genus, species, and cultivar before choosing cutting length, wounding, hormone, or winter treatment.
The University of Georgia's species table shows why the second check matters. Its holly examples use firm semi-hardwood material after a growth flush, while its hydrangea entries generally specify earlier softwood material. A generic claim that every flowering shrub should be cut in September would therefore send some gardeners to the wrong tissue. Start with the plant label, confirm the botanical name, and compare at least one reliable species-specific protocol with the general method on this page.
Propagate only a healthy parent with the form worth repeating. Skip stems with unexplained dieback, distorted leaves, cankers, active spotting, or heavy sap-feeding damage. A cutting reproduces the parent's genotype, but it can also carry pests and pathogens into a protected propagation space. If the shrub is failing and its cause is uncertain, diagnose it before taking material. Propagation is a poor rescue plan when the selected stem is already compromised.
Collect in the cool part of the day
Prepare the container before approaching the shrub. Fill it with moistened propagation medium, set out labels, clean and sharpen the cutting tool, and make a shaded place for collected shoots. Detached leaves begin losing water while the future root system is still absent. The RHS recommends collecting in the morning to reduce wilting and placing cut material in a plastic bag immediately. The shorter the interval between parent plant and prepared pot, the less recovery is demanded of the cutting.
Take a little more stem than the finished cutting needs and handle it by the stem rather than crushing leaf blades. Keep each cultivar separate from the first cut; a label added later cannot reconstruct identity from similar green twigs. Place the bag in shade and close it loosely enough to retain moisture without heating the contents in sun. The RHS advises aiming to prepare collected material within twelve hours. Treat that as an outer working limit, not a reason to store a morning's cuttings until evening.
Return unused stems to compost only if they are healthy and locally suitable for it. Clean the blade before moving between shrubs when disease is suspected, and do not carry wet leaf debris into the propagation area. A few carefully chosen shoots are more informative than a bag of mixed material. Record the parent plant, date, shoot position, and any treatment at collection; those details will explain different rooting results later.
Prepare one clean nodal cutting
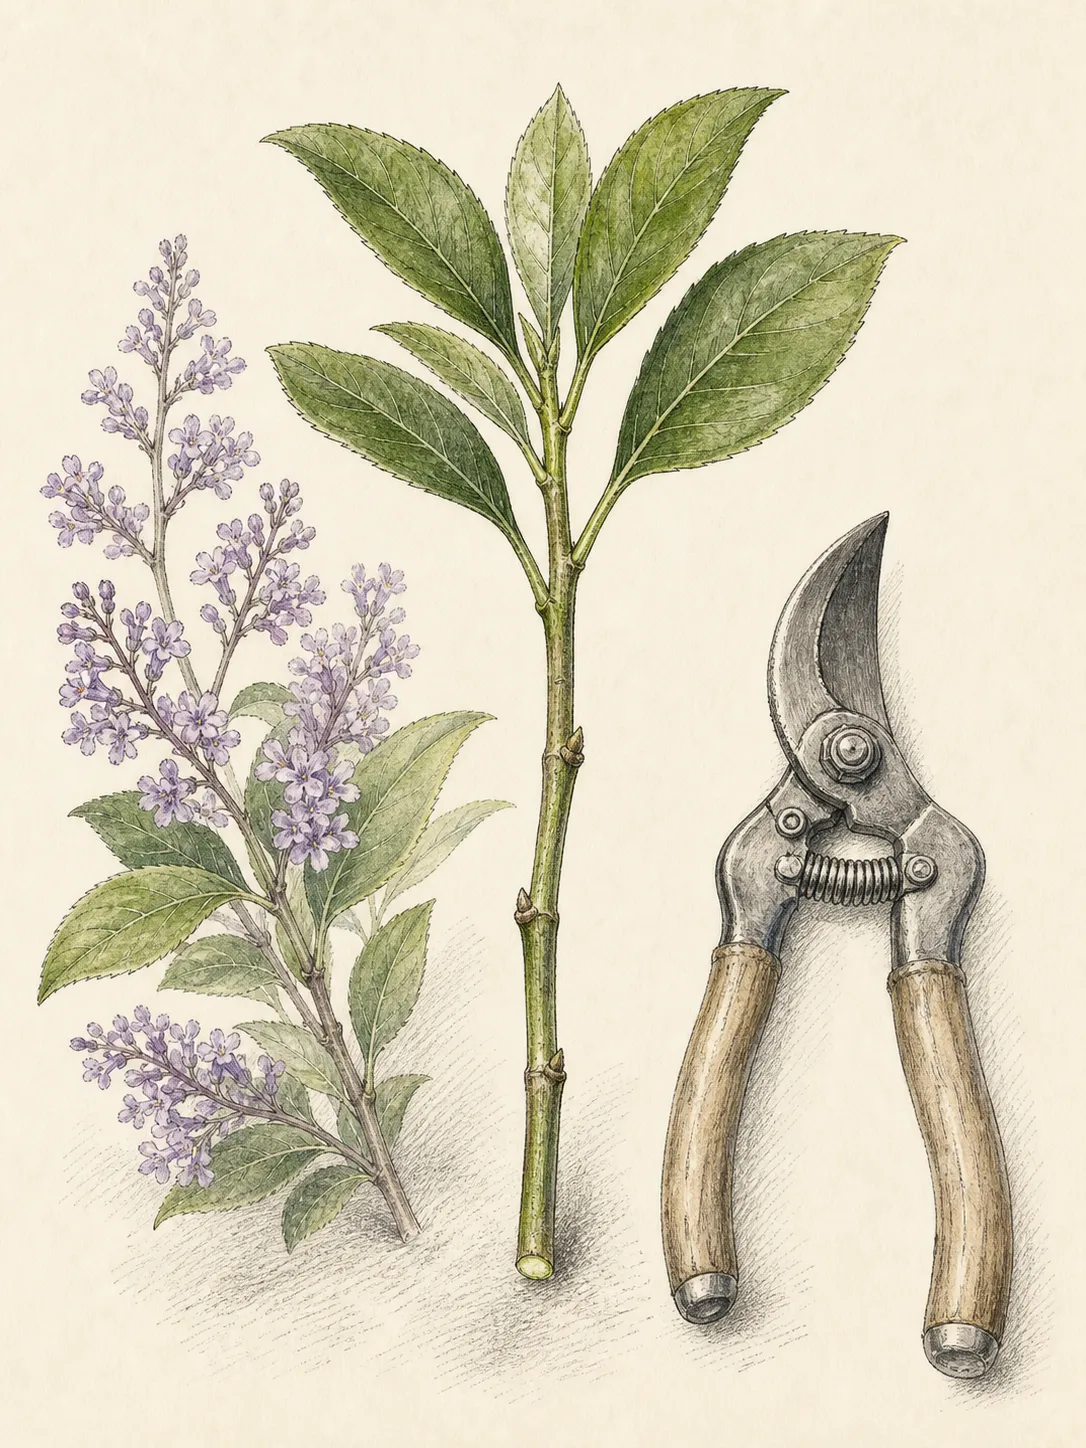
For the RHS basic method, trim a prepared cutting to about 10–15 cm (4–6 in), making the basal cut just below a leaf node. Remove the lowest leaves and the excessively soft tip, commonly leaving about four leaves. That is a general starting form, not a universal specification. A species protocol may call for a shorter terminal piece, a heel of older wood, or a different leaf count. Preserve the node and stem tissue the selected method depends on.
Work on one cutting at a time. Make a decisive basal cut with a sharp blade instead of sawing or crushing the stem. Strip lower leaves without tearing a ribbon of bark, and keep every retained leaf above the medium. Large leaves may be reduced when species guidance recommends it; the RHS suggests halving them to limit water loss. Leave naturally small leaves intact. Removing most of the canopy can reduce transpiration, but it also removes the tissue that supports new root formation.
Rooting hormone is plant- and product-specific. UGA's table uses hormone for several woody examples, while the concentration ranges elsewhere in the same publication vary by cutting type. If a reliable protocol calls for it, use a product labeled for the plant and cutting stage and follow that label exactly. Make a dibber hole so powder is not scraped off as the stem enters. Hormone cannot correct immature tissue, stale cuttings, saturated medium, or a diseased parent.
Build an airy, evenly moist rooting zone
A cutting needs water around the stem and oxygen in the same pore space. UGA recommends a clean, fine-textured, fertilizer-free propagation medium with both moisture retention and drainage. A packaged propagation mix is the simplest consistent choice. The RHS offers a home mixture of equal parts free-draining peat-free potting compost and sharp horticultural sand. Garden soil and rich potting compost are poor substitutes: they can compact, drain unpredictably, and supply more fertility than an unrooted stem can use.
Water the prepared medium and let it drain before inserting the cutting. Open a hole with a dibber, lower the bare stem without burying any retained leaf, and firm gently enough to close large air gaps without compressing the whole pot. The stem should stand upright because the medium supports it, not because it has been driven against the pot bottom. Label immediately with plant name, cultivar, date, and treatment.
Several cuttings can share a container only when their leaves have room and their identities remain unambiguous. Crowded foliage holds droplets, blocks inspection, and lets one rotting cutting touch its neighbors. A small batch also makes water management easier: use a container proportionate to the number of stems, verify the drainage opening is clear, and empty any saucer after watering. The target is damp throughout, never a permanently wet reservoir beneath the pot.
Hold humidity without sealing in rot
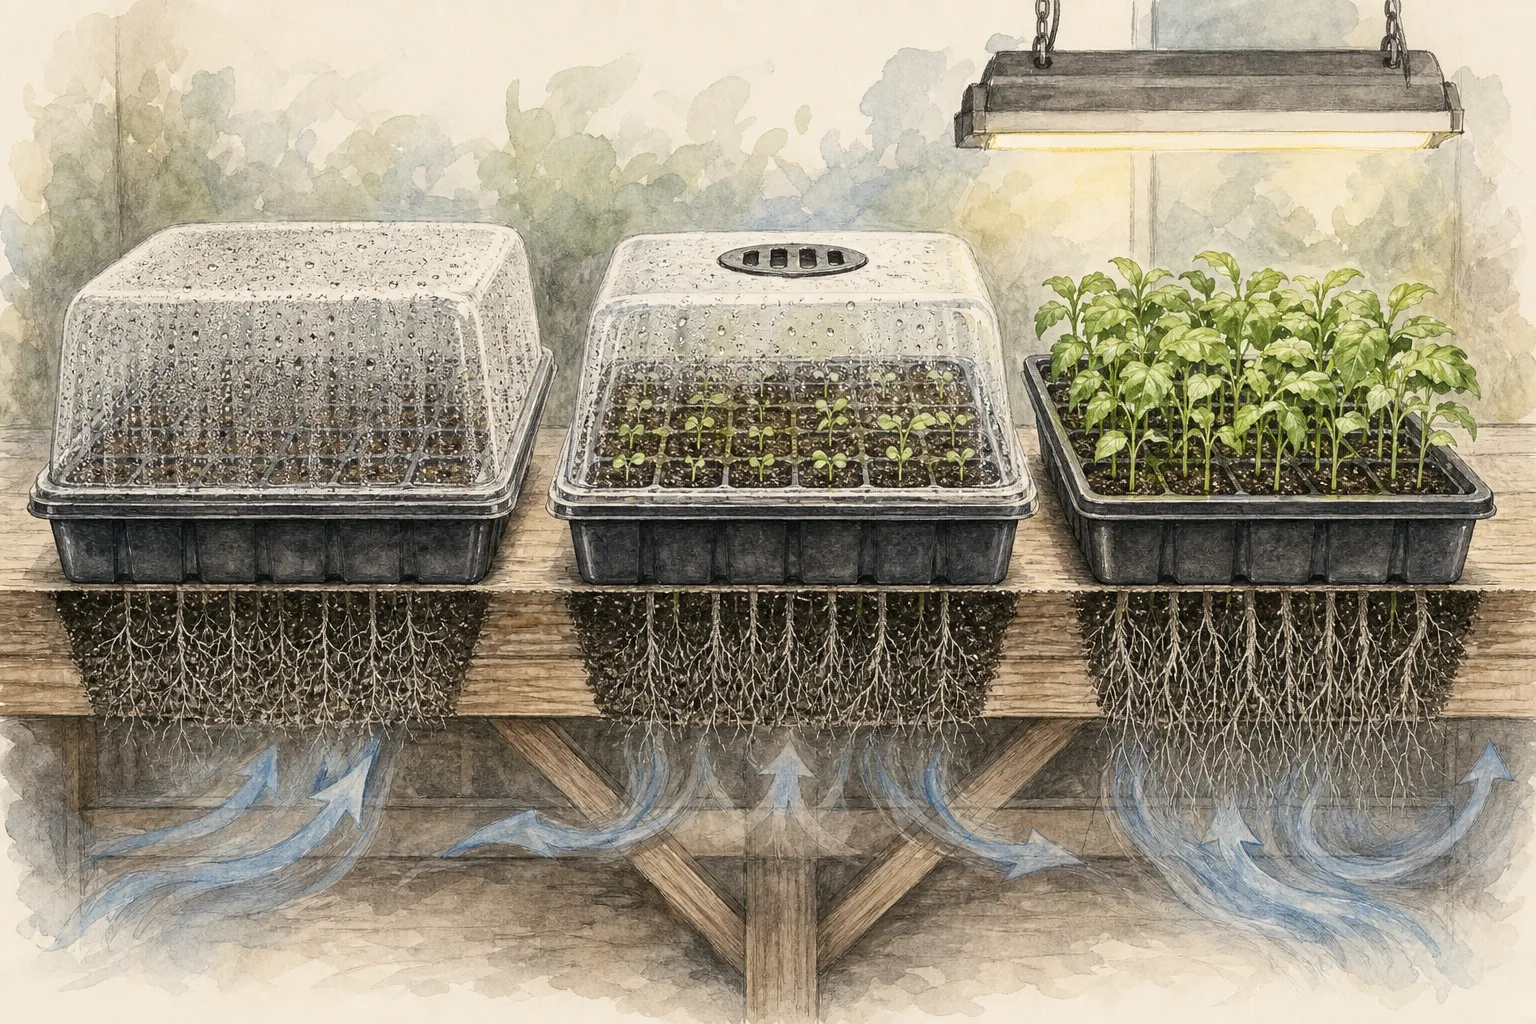
Covering the pot with a clear bag or placing it in a propagator slows water loss from leaves before roots form. Put the enclosure in bright, indirect light rather than direct sun, which can overheat a small closed volume. Keep the cover above the foliage with clean supports if necessary. A leaf pressed against wet plastic remains persistently damp and is harder to inspect than a leaf held in open humid air.
Humidity does not replace moisture in the medium, and moisture does not require saturation. Check the pot by weight and by the medium below the surface instead of adding water on a fixed schedule. The RHS says to keep the compost damp while removing excess moisture, and warns that moulds and rots become serious when stale humidity is not relieved. Vent the enclosure briefly when condensation remains heavy, remove fallen leaves promptly, and discard a cutting that becomes soft or diseased before it contacts the rest.
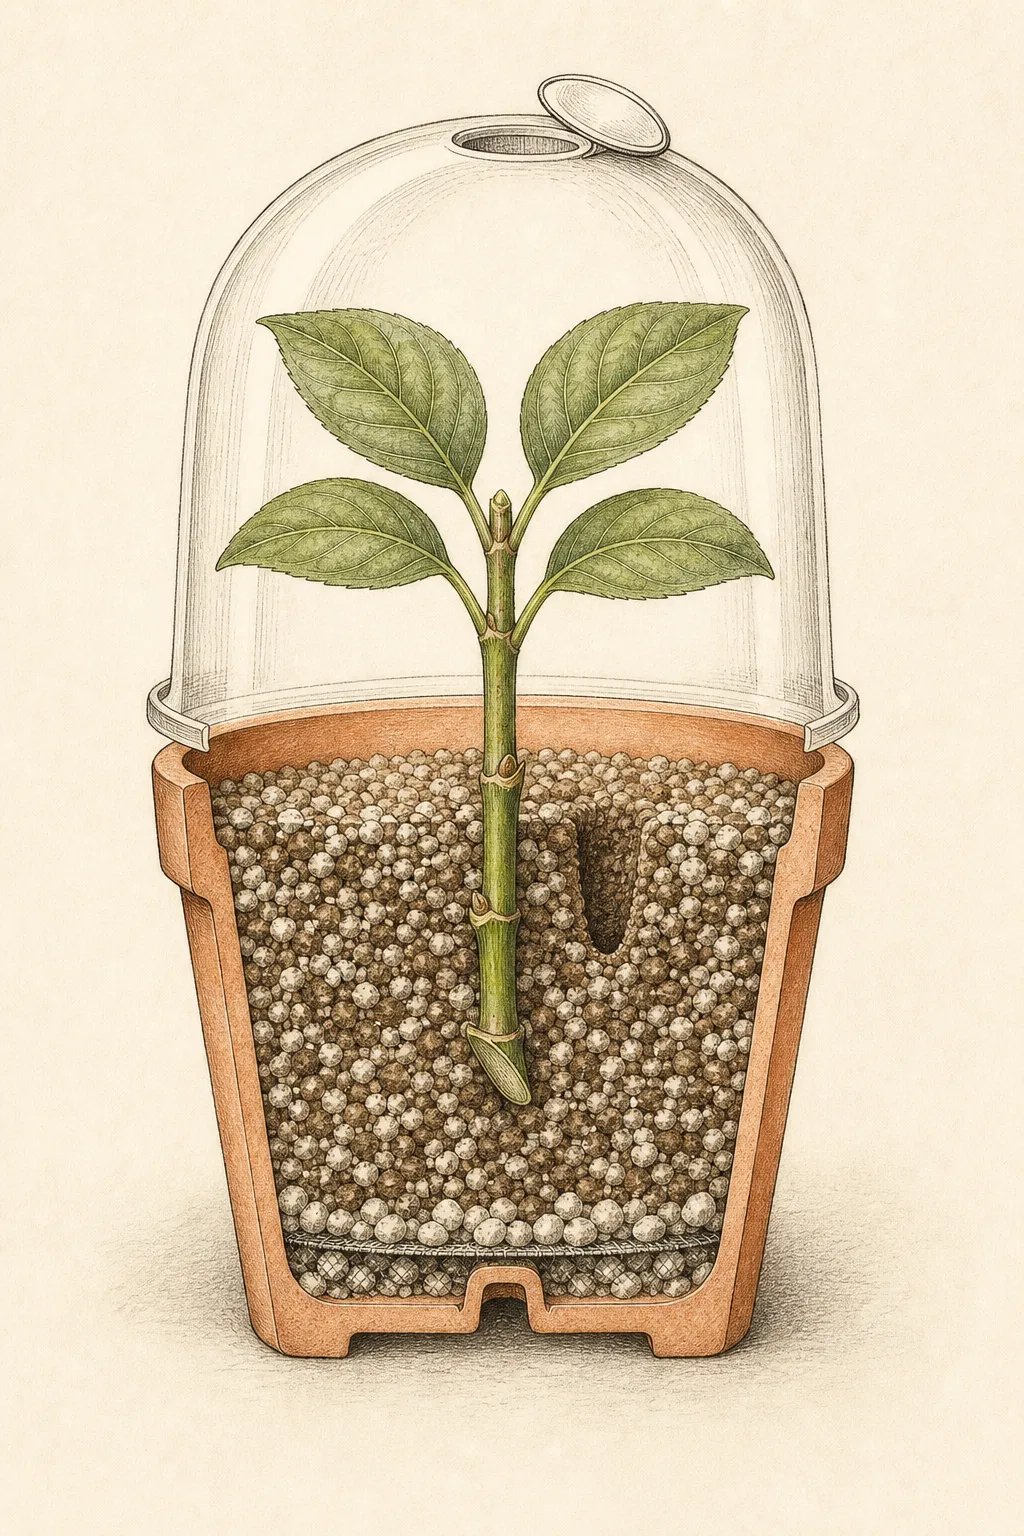
Temperature needs are species- and season-dependent. The RHS notes that summer semi-ripe cuttings often root without bottom heat, while later autumn material may respond faster in a heated propagator. That is not permission to improvise a hot windowsill. Follow the exact plant protocol, protect the unit from cold nights, and keep light and moisture stable. If temperature control is unavailable, a shaded cold frame may suit hardy material, but some cuttings there may not finish rooting until the following spring.
Read rooting before potting on
Rooting time varies too widely for one deadline. UGA gives about 10–12 weeks for its semi-hardwood holly examples, while easier plants and different cutting stages can move faster. Use the species protocol as the first estimate, then read the plant. A cutting that remains green is only alive; it is not necessarily rooted. Fresh extension can draw on stored reserves. Repeated tugging breaks the first fine roots, so inspect sparingly and compare more than one sign.
Look for roots at a drainage opening, a stem that holds gently against a very light resistance check, or a sacrificial sample whose medium can be eased away without stripping the whole batch. Once roots hold the plug together, begin reducing enclosure humidity in stages. RHS guidance calls for gradual hardening of propagator- or greenhouse-rooted cuttings before they move into less protected conditions. Sudden exposure to dry air, wind, or strong sun can undo a successful rooting period in an afternoon.
Pot rooted cuttings individually into an appropriate growing mix without burying the original stem deeper. Keep them sheltered while roots occupy the new container, then acclimate them to the light and temperature required by that plant. Late-rooted material may need frost protection through its first winter. Planting into the garden is a separate decision based on root development, hardiness, local freeze timing, and site preparation—not a reward delivered automatically when one white root appears.
Keep a record and propagate only what you may
Record the number taken, the number rooted, the stem stage, medium, enclosure, and first root check. Note failure patterns rather than reporting only a final percentage. Cuttings that collapse in the first days point toward soft material, collection wilt, or heat; firm stems that slowly blacken at the base point toward sanitation, stagnant moisture, or an unsuitable protocol. A labeled record turns one batch into a better decision for the next growth flush.
Named cultivars may also carry propagation restrictions. In the United States, the USPTO explains that an active plant patent gives its owner the right to exclude others from asexually reproducing the protected plant; rooting a cutting is an asexual method. Check the plant label and current patent record before propagating a named selection, especially for distribution or sale. Rules and rights differ by country, and a trade name by itself does not establish the plant's patent status.
The finished result should preserve identity as carefully as it preserves roots. Keep the parent label, propagation date, and any patent or provenance note with the young plant. Do not pass an unknown clone under a guessed cultivar name. When the batch is legally permissible, healthy, and correctly labeled, move only the rooted plants that have been hardened and can be placed in suitable garden conditions. The goal is not the largest tray of cuttings; it is a small set of true, vigorous ornamental plants with a traceable beginning.
Steps
- Level
- moderate
- Time
- About 45 minutes to prepare a small batch, followed by several weeks of aftercare
- Tools
- sharp hand pruners, clean propagation knife or snips, dibber or pencil, watering can with a fine rose, plant labels
- Materials
- clean fertilizer-free propagation medium, small pot or propagation tray with drainage, clear ventilated cover or propagator, rooting hormone only when the species protocol and product label call for it
- 1Verify the plant and its rights
Confirm the botanical identity, find a species-specific cutting protocol, select a healthy parent, and check any active propagation restriction attached to a named cultivar before removing material. Before collecting, assign prepared pots and labels to this batch and confirm where it will root and later grow. Keep incompatible species protocols in separate batches. If the required environment or propagation route remains unresolved, leave the shoot on the parent until those conditions are ready.
- 2Read the current-season shoot
Choose growth with mature leaves, a firm lower stem, and a tip that remains flexible. Leave very soft, rank shoots and fully rigid woody stems for a more suitable stage or method.
- 3Collect cool and prepare promptly
Take shoots in the morning with a clean sharp tool, label each cultivar at once, enclose the material against wilting, keep it shaded, and move directly to the prepared work area.
- 4Make the basic nodal cutting
Follow the plant-specific length; for the RHS basic method, trim to 10–15 cm, cut just below a node, remove lower leaves and the soft tip, and retain a modest working canopy.
- 5Insert into airy damp medium
Use a dibber hole in clean fertilizer-free propagation medium, place the bare lower stem without burying leaves, firm lightly, drain excess water, and write the full label.
- 6Balance humidity with ventilation
Cover the pot in bright indirect light, keep foliage clear of the cover, maintain damp rather than saturated medium, vent persistent condensation, and remove any rotting material promptly.
- 7Confirm roots before moving on
Use the species rooting range and several signs instead of a calendar alone, reduce humidity gradually once roots hold the medium, pot individually, and protect late-rooted plants through acclimation and winter as needed.
Plants in this guide
Related reading
Sources
- Cuttings: semi-ripe. Royal Horticultural Society. Source record · Accessed 2026-08-21.
- 13. Propagation. NC State Extension. Source record · Accessed 2026-08-21.
- Starting Plants From Cuttings for the Home Gardener. University of Georgia Cooperative Extension. Source record · Accessed 2026-08-21.
- General Information About 35 U.S.C. 161 Plant Patents. United States Patent and Trademark Office. Source record · Accessed 2026-08-21.