Grow · ornamental shrub softwood cuttings
Propagate Suitable Ornamental Shrubs From Softwood Cuttings
Identify the brief softwood stage, prepare clean nodal cuttings of suitable ornamental shrubs, hold leaf humidity without saturating the medium, and wean rooted plants gradually.
Published Last updated
In this guide
- Confirm that softwood is the right method
- Use the named softwood suitability table
- Recognize the short softwood window
- Prepare clean, airy rooting conditions first
- Run the Spiraea 5–10 cm worked example
- Collect hydrated shoots and keep their identity
- Prepare a nodal cutting with enough leaf to work
- Insert and settle the cuttings without crowding
- Manage humidity without waterlogging the base
- Wean rooted plants before potting them on
- Carry the clone through its first garden year
- Steps
Confirm that softwood is the right method
Softwood is a growth stage, not a synonym for every green branch. The RHS uses soft, flexible shoot tips from current growth for many deciduous shrubs, climbers and some trees; NC State classifies softwood separately from semi-hardwood and hardwood. Confirm the plant's botanical name and look up the recommended cutting type before taking material. A technique that suits hydrangea or spirea may be wrong for a broadleaf evergreen that roots better from firmer summer growth.
Choose a healthy, established stock plant that is making normal new growth. NC State and UGA both emphasize healthy source material. Do not expect a cutting to correct severe drought stress, nutrient disorder, stem dieback or an unresolved decline. Propagating from a failing shrub can carry the weakness into the tray and removes tissue the original plant still needs. Diagnose and stabilize valuable shrubs before treating cuttings as rescue insurance.
Before taking stock in the United States, complete an eligibility gate as well as an identity check. UGA tells gardeners to confirm permission, and current USPTO guidance says a plant patent can exclude others from asexually reproducing the protected plant and explicitly includes rooting cuttings as asexual reproduction. Read the complete label, search the current USPTO record by cultivar denomination and patent notice, and do not propagate a patented cultivar or a plant sold as PPAF without the rights holder's permission. A trademarked selling name alone is not proof of a plant patent; trace it to the cultivar and record. Use an unprotected species or public-domain cultivar for the worked Spiraea batch. Outside the United States, check local plant-variety rights and permitted acts before cutting.
Limit the project to a manageable batch. Softwood loses water rapidly and must be prepared promptly. A dozen shoots collected while the first is already wilting is worse than four handled well. Set up medium, labels, cover and work area before cutting. If the species needs mist, bottom heat, a particular hormone or professional timing you cannot provide, use layering, another season's cutting type or a reputable nursery instead of improvising.
Use the named softwood suitability table
PROCEED — Spiraea (UGA, Georgia context): softwood taken while the plant is in leaf, from May to early September; rooting hormone applied; well-drained medium; expected rooting period 2–4 weeks. The UGA row does not specify mist, so the worked home batch below pairs those species conditions with the RHS UK small-batch humidity method and states that combination openly rather than attributing a bag to UGA.
PROCEED ONLY WITH THE LISTED FACILITY — smooth hydrangea (Hydrangea arborescens) and roses (Rosa) in the UGA table: smooth hydrangea uses hormone-treated softwood in June–July under mist in peat:perlite, with 3–4 weeks expected; roses use wounded, hormone-treated softwood in spring and summer under mist in peat:perlite, also 3–4 weeks. A closed home bag is not a silent substitute for rows that explicitly require mist. Defer these examples unless that facility and the exact preparation are available.
PROCEED AFTER A SPECIES RECIPE IS FOUND — beautyberry, crape myrtle and butterfly bush: UGA names all three as woody plants that can use softwood, and the RHS UK guide separately lists Buddleja among deciduous shrubs suited to the method. Those lists do not provide a complete timing, hormone, medium, facility and rooting-window row for every named plant. Treat them as candidates, not as permission to copy the Spiraea recipe; retain a plant-specific source before cutting.
DEFER FROM THIS SOFTWOOD METHOD — Rhododendron, Photinia, Ilex, Magnolia and Camellia: UGA assigns these broadleaf evergreens to semi-hardwood after the flush, generally June–September in its context. Its detailed holly row uses 4 in terminal semi-hardwood cuttings of Chinese holly, Japanese holly or inkberry, rooting hormone, June, August or September timing, shade or mist in soil or another suitable setting, and 10–12 weeks. That is a different tissue class and schedule, not a tougher version of the Spiraea batch.
Recognize the short softwood window
Look for current-season growth that is still green and flexible but has begun to acquire substance. NC State describes suitable shoots as snapping easily when bent and retaining a gradation from mature lower leaves to smaller new leaves; UGA warns that the very youngest succulent tissue may be too tender for some species. Test sacrificial tips on the source plant rather than repeatedly bending the exact shoot you intend to root.
Use calendar only as a prompt to inspect. The RHS gives spring to early summer in its climate, and NC State notes that May through July is common for many woody plants in its region. UGA tables show that even familiar shrubs have species-specific windows. Growth flush, latitude, elevation, spring temperature and pruning history can shift the stage. The right day is when the named plant presents suitable tissue and your propagation environment is ready.
Choose non-flowering shoots. Flowers and flower buds divert resources and complicate humidity management, while the retained sources consistently remove them from prepared cuttings. Avoid the weakest shaded interior growth and excessively lush water shoots. A moderate lateral or terminal shoot from a healthy, normally nourished plant is easier to handle. If every available tip carries buds, use another shoot, wait for a later growth flush or check another recommended method.
Separate softwood from semi-hardwood in the notebook. Firmer stems after a flush may still root, but they belong to a different cutting class and may need different treatment. Do not mix them in one pot and call the results one trial. Label any uncertain material as a separate batch. The maturity comparison is more valuable than pretending the date made every shoot equivalent.
Prepare clean, airy rooting conditions first
Use containers with unobstructed drainage and a fresh propagation medium that holds moisture while preserving air around the cut base. NC State calls for sterile, low-fertility, well-drained and moisture-retentive media; UGA likewise favors clean propagation media rather than heavy garden soil. A general potting mix rich in fertilizer may not provide that balance. Choose a labeled propagation product or a source-supported mix appropriate to the plant and your watering method.
Moisten the medium fully, then let excess drain before inserting cuttings. Dry particles can pull moisture from tender stems, but saturated material excludes air and favors decay. Fill containers evenly without compressing them. Make one pot per cultivar or maturity class where possible. Crowding unrelated cuttings together makes roots hard to separate and allows one collapsing stem to remain hidden among healthy leaves.
Clean the bench, containers and cutting tools using methods appropriate to the materials and the disinfectant label. Remove soil and plant debris before disinfection; do not mix cleaning products. Keep the blade sharp enough to make a smooth cut without crushing the stem. Set out labels, a dibber, a small clean vessel for any rooting product, and a bag or lidded box for collected shoots. Organization shortens the time between stock plant and medium.
Build the humidity chamber before collection. A clear bag, dome or lidded transparent box can reduce water loss for a small home batch, as NC State and UGA describe. It must admit light, stay physically off the leaves and sit in bright indirect light rather than direct sun. Confirm that pots can drain inside it and that water cannot pool around their bases. High air humidity does not require submerged rooting medium.
Run the Spiraea 5–10 cm worked example
Start with a healthy, correctly identified, unprotected Spiraea species or public-domain cultivar that has passed the eligibility gate. In UGA's Georgia context, use softwood while the shrub is in leaf from May to early September, apply a labeled rooting hormone, use well-drained propagation medium and expect a 2–4 week rooting period. Those dates describe the source region, not a national appointment: proceed only when the actual shoot is softwood and postpone if the plant is dormant, flowering heavily or already semi-hardwood.
Use the RHS UK nodal dimensions for the small home batch. Collect a non-flowering shoot in the cool part of the day, then trim each finished cutting to 5–10 cm (2–4 in), making the basal cut just below a node. Remove lower leaves and pinch out the very soft tip as the RHS method directs, while preserving healthy upper leaf area. Keep top and base obvious, and discard any piece that cannot hold at least the prepared lower node and a sound upper node within that length.
Apply the rooting hormone exactly as its label permits for Spiraea and softwood, make a dibber hole and insert the prepared lower node into fresh well-drained, low-fertility propagation medium. UGA's Spiraea row does not call for mist; for this small home example, use the RHS closed propagator or clear-bag method in good indirect light, with the cover held off leaves and ventilation at least twice weekly under that UK guidance. Do not extend that bag method to the UGA hydrangea or rose rows, which explicitly specify mist.
Label day zero and treat 2–4 weeks as UGA's expected Spiraea rooting window, not a guarantee. Keep the medium moist and aerated, protect the chamber from direct sun and do not tug. Look for sustained turgor and visible roots; if no evidence appears by the end of week four, inspect one sacrificial cutting and record whether the base is unchanged, callused, rooted or decayed. Wean only rooted cuttings by gradually increasing ventilation, then pot and harden them as the later sections describe.
Collect hydrated shoots and keep their identity
Collect early in the cool part of the day when shoots are fully hydrated, following RHS and NC State guidance. Water the stock plant appropriately beforehand if its root zone is dry, but do not create saturated soil or wet foliage solely for collection. Carry clean snips, labeled bags and a cool shaded container to the shrub so every shoot is protected immediately rather than laid on a warm bench.
Take a modest shoot length above a node on the parent, leaving a clean cut and useful growth behind. The final cutting will be trimmed again below a node at the bench. Do not tear a heel unless the plant-specific method asks for one, and do not strip bark from the stock stem. Avoid wood with a flower bud, visible injury or abnormal leaf pattern. One sound shoot may yield more than one cutting only if the species and node arrangement support it.
Put each shoot directly into its correctly labeled bag with enough retained humidity to prevent wilting but no standing water. Keep the bag cool and out of sun. The RHS allows short refrigerated holding if preparation cannot be immediate, but prompt work is better for a home batch. Do not freeze material, leave it in a hot vehicle or store several unidentified cultivars together with the intention of sorting them by leaves later.
Return to the work area as soon as the planned count is reached. Recheck each shoot for tissue stage and discard anything limp, crushed or accidentally flowering. Record the parent code, collection time and maturity class before preparation. Those notes help distinguish a method failure from a collection failure and prevent a vigorous rooted plant from losing its identity months later.
Prepare a nodal cutting with enough leaf to work
For the RHS UK nodal method, trim the base just below a node with a sharp clean blade and make the finished cutting 5–10 cm (2–4 in) long. That range is the worked Spiraea dimension here, not a universal measurement for every shrub in the suitability table. The finished piece needs the prepared lower rooting node and a healthy upper node or tip. Maintain polarity from the moment it is cut; an upside-down stem is not corrected by deeper insertion.
Remove leaves from the lower portion that will enter the medium. No leaf or petiole should be buried and decaying beside the stem. Retain healthy upper leaves because they support the cutting, but reduce exceptionally large blades when the plant-specific method recommends it and space is tight. Cutting every leaf to a token fragment can remove too much working area; leaving a broad hydrangea leaf pressed against plastic can cause persistent wet contact. Balance both risks.
Remove flower buds and the excessively soft tip if the selected method calls for pinching it out. Do not wound the stem automatically. NC State and UGA describe wounding for particular woody material, while many species do not require it. Use only the degree supported for the named shrub. Unnecessary scraping creates a larger injury and another route for decay.
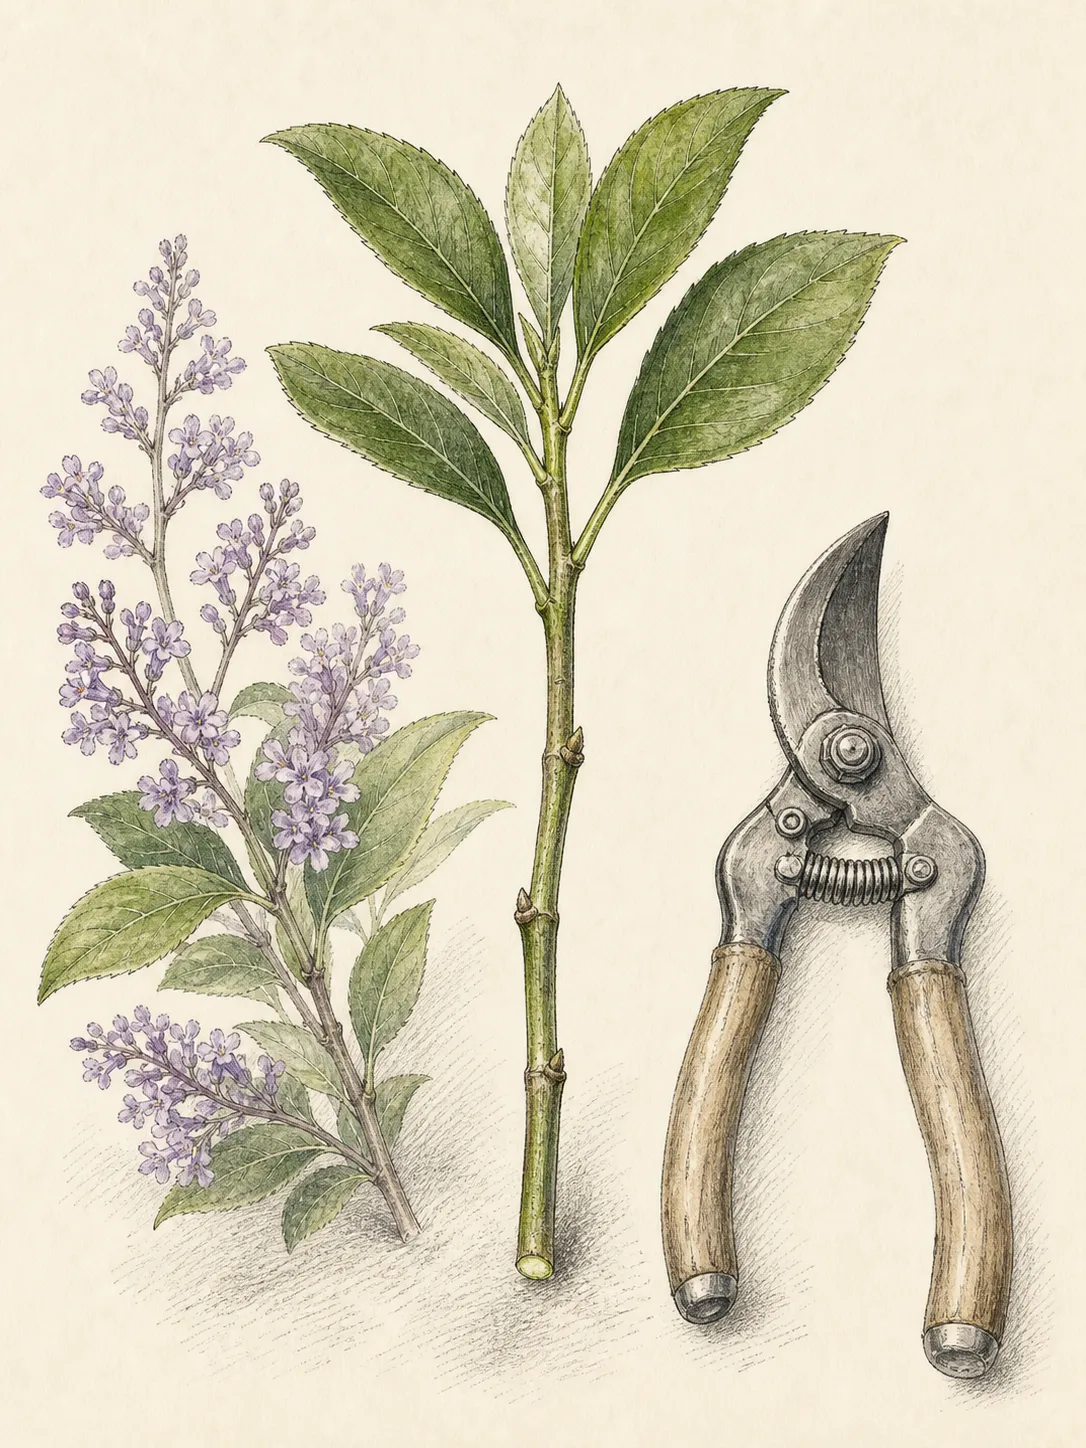
Treat rooting hormone as species-specific assistance, not compulsory seasoning. Select a product labeled for the plant and softwood stage, follow its directions and use personal protective equipment named on the label. Pour a small amount into a separate clean vessel, dip only as instructed and discard the remainder; never return it to the stock container. Make a dibber hole so insertion does not wipe the product off or crush the fresh base.
Insert and settle the cuttings without crowding
Insert each cutting to the depth supported for its length and species, with at least the prepared lower node positioned as intended and all remaining leaves above the medium. Firm gently around the base so it stands without compacting the entire pot. Space leaves so they receive indirect light and do not overlap heavily. A tray that looks full is not a better tray if air cannot move between wet leaf surfaces.
Water once to settle the medium if needed, then allow free drainage. Confirm that no cutting has floated upward, fallen sideways or been planted upside down. Replace labels before the cover goes on. Photograph the tray from above so initial leaf color, spacing and pot positions are documented. This baseline helps reveal progressive wilt or rot that may be subtle when viewed every day.
Place the container inside the prepared clear chamber in bright indirect light. Keep leaves from touching the cover with clean hoops or enough chamber height. Direct sun can rapidly overheat a closed container, as the RHS and NC State warn. Avoid placing the chamber over a radiator, on a hot paving slab or in a dark corner. A cutting needs light for leaf function without the heat and water loss of exposed sun.
Record the insertion date, medium, hormone product if used and environmental position. Do not add fertilizer at this stage unless a plant-specific protocol explicitly requires it; the retained Extension guidance favors low-fertility propagation media. The immediate job is maintaining living leaves and an aerated moist base while roots initiate, not driving top growth before the cutting can support it.
Manage humidity without waterlogging the base
Check the cuttings briefly and consistently. High humidity should keep leaves from losing water faster than the unrooted stem can replace it, but the medium still needs air. Feel or observe the medium rather than watering because the dome lacks condensation. Add water only when the rooting zone is beginning to lose useful moisture, then drain excess. A perpetually saturated pot is not insurance against wilt.
Read leaves and stems separately from the cover. Slight temporary loss of firmness after preparation may recover; progressive limpness, blackening at the base or translucent decaying tissue is a failure cue. Remove a collapsed cutting promptly with minimal disturbance and review whether it was too tender, overheated, crowded or waterlogged. Do not spray fertilizer or apply an unsourced treatment to every remaining cutting in response.
Vent when persistent heavy condensation, leaf contact or decay shows that the closed chamber is too wet, while avoiding an abrupt drop that wilts all cuttings. Wipe the chamber only with a clean method that does not drip contaminated water into pots. Increase separation if leaves remain pressed together. Humidity is managed by cover, temperature, leaf area, spacing and medium moisture together; no single visual cue gives a universal percentage target.
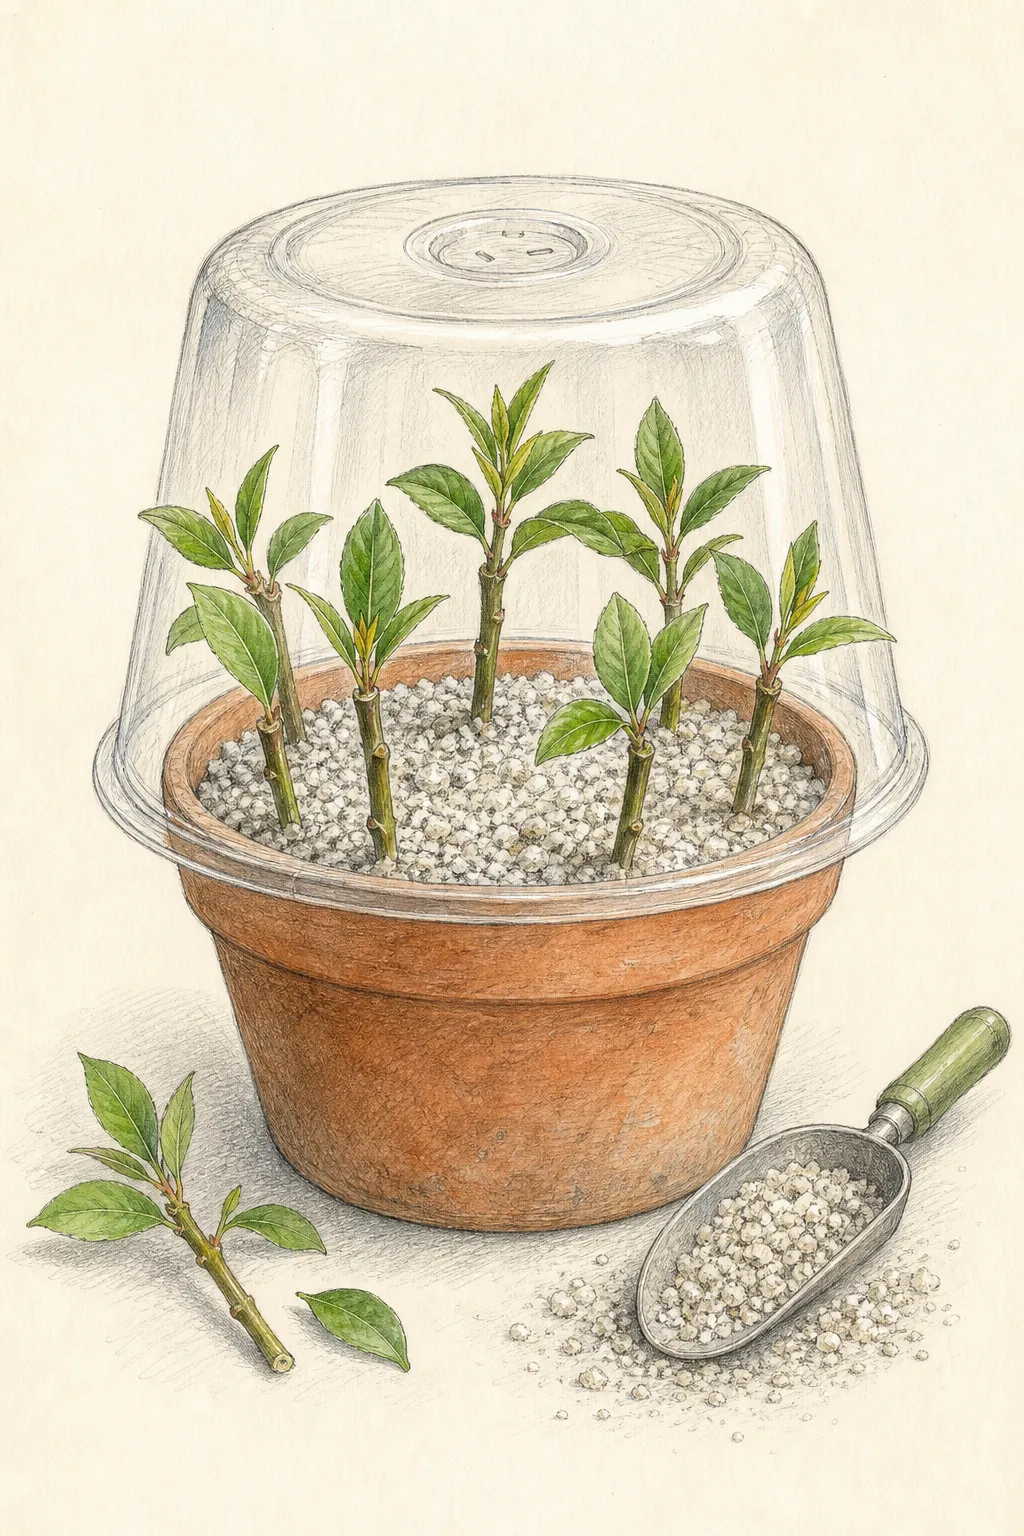
Do not tug cuttings to test for roots. Resistance may come from compacted medium, and pulling breaks the first fragile roots. Watch for sustained turgor, new growth that remains normal and roots visible at a transparent pot edge or drainage opening. If a plant-specific expected period passes without progress, inspect one sacrificial cutting carefully rather than disturbing the whole batch. Record callus, roots, rot or unchanged stem condition.
Wean rooted plants before potting them on
Begin weaning only after roots can support the cutting, not at the first hint of a new leaf. UGA describes gradually opening the chamber, and NC State identifies the move from high humidity to ordinary conditions as a critical transition. Increase ventilation in small stages while watching midday leaf firmness. If the whole batch wilts, restore some cover and slow the next change rather than alternating between sealed and fully open each day.
Separate rooted cuttings when each has enough roots to hold a small plug together without a dense circling mass. Lift by the root ball or leaves, never by pinching the tender stem. Pot into a clean container with an appropriate growing mix, keeping the original stem depth and spreading roots only as they tolerate. Label immediately. Water to settle, drain and return the young plant to sheltered bright conditions.
Introduce nutrition only after establishment in the new mix and according to the product and species. Pale growth immediately after potting may reflect root disturbance, water imbalance or abrupt light, not automatically fertilizer shortage. Keep the mix evenly but not constantly wet and compare container weight or moisture at a consistent depth. Remove any flower buds that appear before the plant has built a useful root system.
Harden plants toward outdoor conditions gradually. Increase air movement and light in stages while reducing protection, as UGA advises, but use the actual destination and season. A rooted hydrangea intended for filtered light should not be hardened by exposure to harsh midday sun. Protect tender new roots from frost, heat and drought, and delay planting out when the local establishment window has closed.
Carry the clone through its first garden year
Choose between growing on in a pot and planting into a prepared nursery position. The decision depends on rooting date, species hardiness, root volume and local winter. A late or lightly rooted cutting often needs protected container care rather than immediate placement in a permanent border. Use local Extension guidance for overwintering the named shrub and keep pots from alternating between saturation and complete dryness.
When planting out, match the stock plant's species needs but do not copy a mature shrub's water independence onto a small clone. Harden fully, prepare the site, set the young plant at its pot depth and water the root ball and surrounding soil as separate zones until roots expand. Keep mulch away from the stem and retain a visible label. Protect the plant from accidental hoeing or trampling without enclosing it in a humidity cover outdoors.
Judge success after a full growth cycle, not merely at first rooting. Record survival after potting, overwintering and garden establishment, plus whether the plant retained the expected leaf or flower character. A variegated shoot that reverts or a mislabeled clone may not serve the original purpose even if it roots vigorously. Remove weak duplicates before they consume permanent border space.
Review the batch as a process. Compare tissue stage, parent position, preparation, medium, humidity response, rooting and weaning. Change one variable in the next attempt. If softwood repeatedly collapses on a shrub that authoritative guidance assigns to semi-hardwood, believe the plant and the source. Good propagation is not maximizing the number of cut stems; it is carrying a correctly identified ornamental clone from healthy stock to an independent, acclimated plant.
Steps
- Level
- moderate
- Time
- One hour to prepare and take a small batch, followed by brief daily checks and gradual aftercare
- Tools
- Sharp clean snips or propagation knife, Dibber or pencil, Small watering can or mister, Weatherproof labels and pencil, Clean hoops or supports for a clear cover, Gloves and any protective equipment required by product labels
- Materials
- Clean pots with drainage, Fresh low-fertility propagation medium, Clear propagation dome, bag or lidded box, Labeled bags for collected shoots, Rooting hormone only where species guidance supports it, Clean potting mix for rooted cuttings
- 1Verify method, identity and propagation eligibility
Record botanical and cultivar identity, confirm that softwood is the named method and check the complete label. In the United States, search the current USPTO plant-patent record by cultivar denomination and patent notice; do not root a patented or PPAF plant without rights-holder permission, and do not infer patent status from a trademarked selling name alone. Outside the United States, check local plant-variety rights. Use unprotected species or public-domain stock for this batch.
- 2Select a row from the suitability table
Proceed with the Georgia-context Spiraea row only when softwood is present while the plant is in leaf from May to early September, with labeled rooting hormone, well-drained medium and a 2–4 week expected window. Defer broadleaf evergreens named by UGA to semi-hardwood. If a row specifies mist, as the hydrangea and rose examples do, do not replace that facility silently with a home bag.
- 3Set up the rooting environment
Clean tools and containers by label-directed methods, fill draining pots with fresh low-fertility propagation medium, moisten it and let excess drain. Prepare labels, dibber and a clear cover that stays off leaves. Place the future chamber in bright indirect light away from direct sun and heat, with a way for pots to drain without standing in water.
- 4Choose the correct tissue stage
Inspect flexible current growth that is beginning to mature, with larger lower leaves and smaller upper leaves. Avoid flower buds, extremely succulent tips, weak shaded growth and firm later-stage stems unless separately labeled. Use calendar as an inspection cue only; the named shrub's growth flush, climate and authoritative propagation guidance control the usable window.
- 5Collect cool, hydrated shoots
Work in the cool part of the day, cut modest healthy shoots above a parent-plant node and place each immediately in its labeled humid bag out of sun. Stop when the planned count is reached and return to the bench. Discard limp, crushed or accidentally flowering material; do not leave cut shoots on a warm surface while gathering a larger batch.
- 6Prepare 5–10 cm Spiraea nodal cuttings
For the worked batch, trim each finished cutting to the RHS 5–10 cm (2–4 in) range with its base just below a node. Retain orientation, remove lower leaves and the very soft tip, and keep sound upper leaf area. Apply a rooting hormone labeled for Spiraea softwood, decanting a small amount and discarding the remainder, then insert the prepared lower node into well-drained propagation medium.
- 7Insert, drain and cover
Make a hole, place the prepared lower node at the intended depth and firm medium gently around the stem. Separate leaves, water only enough to settle, let the pot drain and replace labels. Put the tray under the clear cover in bright indirect light with plastic held off foliage. Record medium, preparation, hormone if used and insertion date.
- 8Balance leaf humidity and root-zone air
Check turgor, stem bases and medium moisture without tugging. For Spiraea, mark UGA's 2–4 week expected window and use the RHS closed-propagator or bag ventilation method without waterlogging the base. Remove collapsed cuttings and review tissue stage, heat, crowding and water. Confirm roots through sustained growth, visible roots or one sacrificial inspection after the window; restore some cover if gradual weaning causes wilt.
- 9Wean, pot and harden gradually
Open the cover in stages after roots can support the leaves. Pot each rooted cutting by its root ball into clean growing mix, preserve stem depth and water to settle. Introduce nutrition only after establishment and by label. Harden toward the actual outdoor destination in gradual light and air steps, then overwinter or plant out according to root volume, species and local season.
Related reading
Sources
- Cuttings: Softwood. Royal Horticultural Society. Source record · Accessed 2026-08-19.
- Extension Gardener Handbook: Propagation. NC State Extension. Source record · Accessed 2026-08-19.
- Starting Plants From Cuttings for the Home Gardener. University of Georgia Cooperative Extension. Source record · Accessed 2026-08-19.
- General Information About 35 U.S.C. 161 Plant Patents. United States Patent and Trademark Office. Source record · Accessed 2026-08-19.