Grow · staged root pruning established deciduous shrub move
Move an Established Deciduous Shrub with a Staged Root-Pruning Plan
Choose a source-bounded root-ball framework, root-prune months ahead, prepare the receiving hole first, and move a dormant shrub without lifting by its stems.
Published Last updated
In this guide
- Decide whether the shrub should move at all
- Require recovery between root pruning and the move
- Build a two-date operation around dormancy
- Choose one root-ball framework before cutting
- Root-prune while the shrub can rebuild inside the circle
- Prepare the receiving site before the final cut
- Shape, wrap, and lift the dormant root ball
- Reset the shrub at its original grade
- Judge recovery across a full growing season
- Steps
Decide whether the shrub should move at all
An established shrub is not a large nursery plant waiting to be relocated. Its absorbing roots extend beyond the soil volume a gardener can carry, its stems may conceal decay or weak unions, and its new site must support the same plant at mature size. Begin with identity, health, sentimental or design value, expected lifespan, and the reason for moving. A declining shrub in an unsuitable new site does not become a sound investment because its history matters.
Inspect the root zone for buried utilities, walls, paving, major tree roots, drainage lines, and soil that will not hold together as a ball. Inspect the crown for cankers, basal injury, dead framework, and stems that cannot be tied inward without cracking. Clemson Extension emphasizes preparation because the move destroys much of the absorbing root area. If the job would require a ball too large to control, mechanical extraction around utilities, or leverage against brittle stems, plan qualified help or propagate a replacement from the plant instead.
Confirm the receiving site's light, drainage, soil reaction, mature space, and access for water. Penn State's sentimental-shrub guidance places this site match before the move. Mark the projected crown and service path at the new location. A move that transfers the shrub from one future conflict to another only delays removal, while a well-chosen receiving site justifies the months of preparation and establishment care that an older plant needs.
Require recovery between root pruning and the move
Treat root pruning and relocation as two separate operations with a recovery decision between them. Keep the planned dormant move conditional on plant health, workable soil, a controllable root ball and a prepared destination. Poor recovery or an unsafe moving route can cancel the move. A date reserved earlier does not establish that the shrub is ready.
Build a two-date operation around dormancy
This method is deliberately different from an unprepared same-day shrub transplant. The first date creates a confined, fibrous root system by cutting roots at the future ball boundary; the second date lifts and moves the shrub after new roots have developed within that boundary. Penn State advises root pruning several months to a year before digging, with larger plants prepared a year or more ahead. Clemson provides a southern schedule: root prune in March for an October or November move, or after leaf fall in October for a March move.
Those calendars cannot be copied into every region. Clemson's months describe its Extension context, while Iowa State calls early spring before growth and fall after leaf drop the best dormant windows for deciduous shrubs. Use the source appropriate to the garden's climate, species, and soil, then preserve the sequence: root pruning occurs while the plant can recover before the move; lifting occurs after natural leaf drop or before budbreak; frozen, saturated, or powder-dry soil postpones either operation.
Write both intended dates on the garden record before the first cut. Add an irrigation plan for the prepared interval and a fallback if drought, early freeze, construction delay, or poor shrub response closes the move window. The shrub remains a rooted plant after root pruning, not a stored object. Wilting, premature color, dieback, soil cracking along the trench, or poor bud development means the schedule needs reassessment rather than an automatic second operation.
Choose one root-ball framework before cutting
Root-ball dimensions determine feasibility, preparation, final weight, receiving-hole size, and how much root system remains. The retained sources use different practical frameworks. Iowa State sizes the radius for deciduous shrubs at about half the distance from the center to the drip line, trenches twelve to fifteen inches deep, and tells home gardeners to limit themselves to shrubs five feet tall or less because balls greater than two feet across become extremely heavy. Clemson provides a height-based table developed from nursery standards.
Under Clemson's table, a three-foot deciduous shrub receives a minimum fourteen-inch-diameter ball about eleven inches deep; a five-foot shrub receives an eighteen-inch-diameter ball about fourteen inches deep; and a seven-foot shrub receives a twenty-two-inch-diameter ball about fifteen inches deep. Those values are not combined with Iowa State's drip-line radius. Compare the two frameworks for the identified shrub and region, select the one supported by the local project, and enlarge or professionalize the job when root habit, sandy soil, plant difficulty, or handling risk demands it.
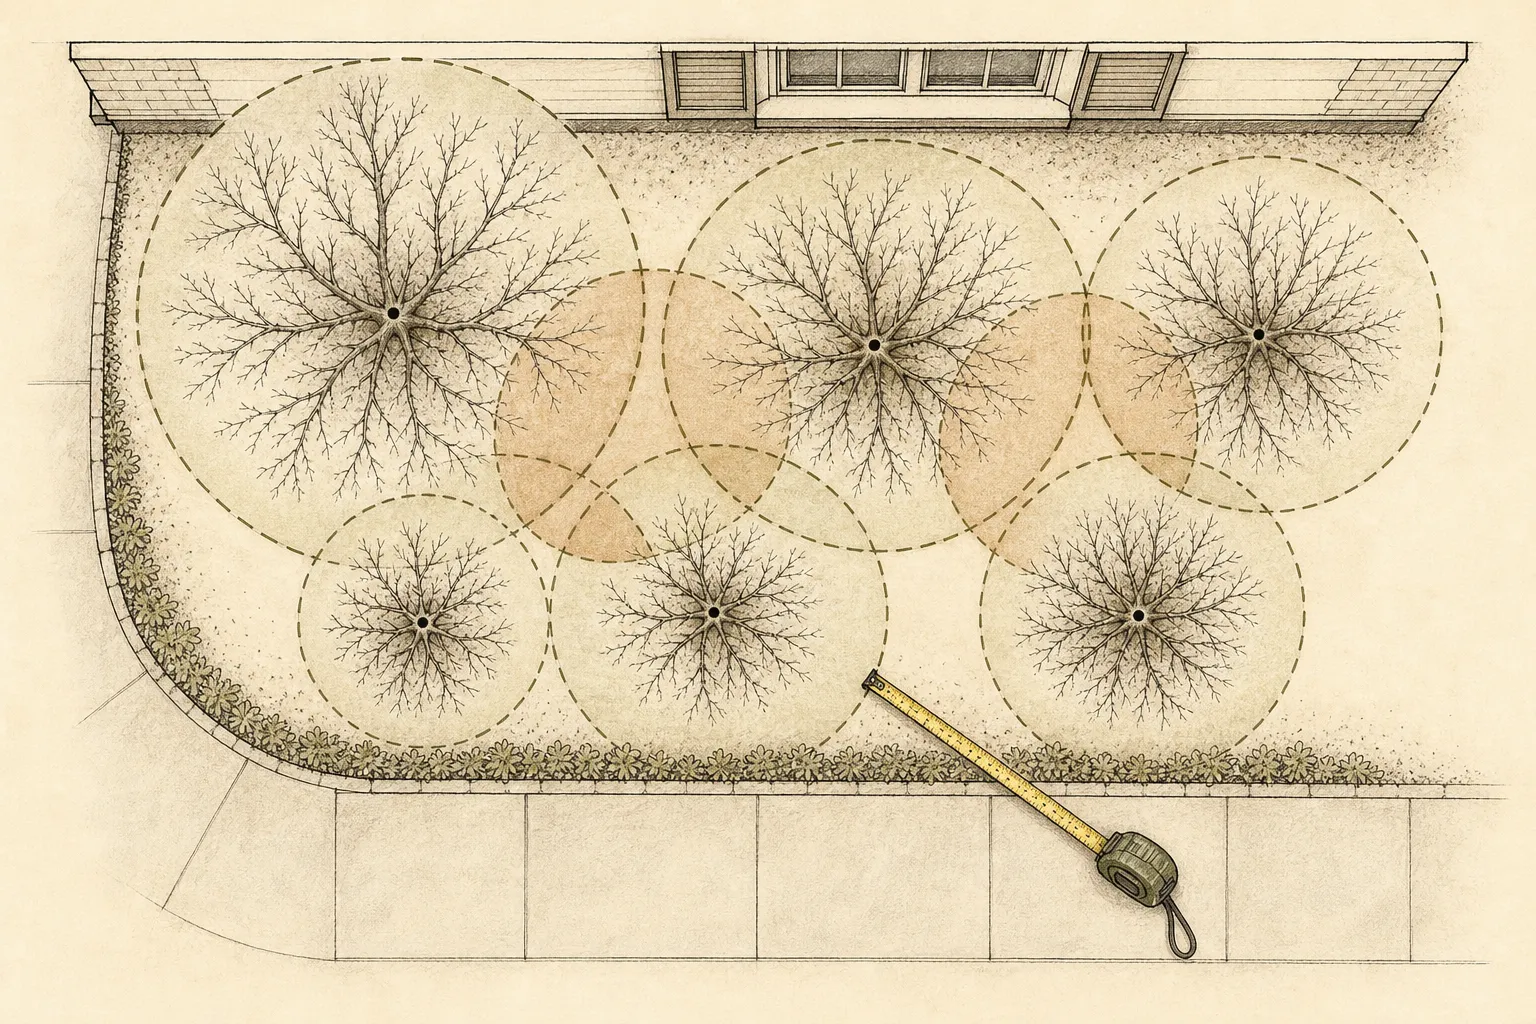
Mark the chosen finished-ball circle around the actual stem cluster, not an assumed single trunk. Then mark a second outer working circle for the trench. Clemson begins digging about twelve inches beyond the anticipated finished ball before shaping inward; Iowa State's simpler homeowner method trenches at the ball boundary. Record which method governs, the intended diameter and depth, the crown height, and the estimated route width. A vague circle made with a spade cannot support a controlled later lift.
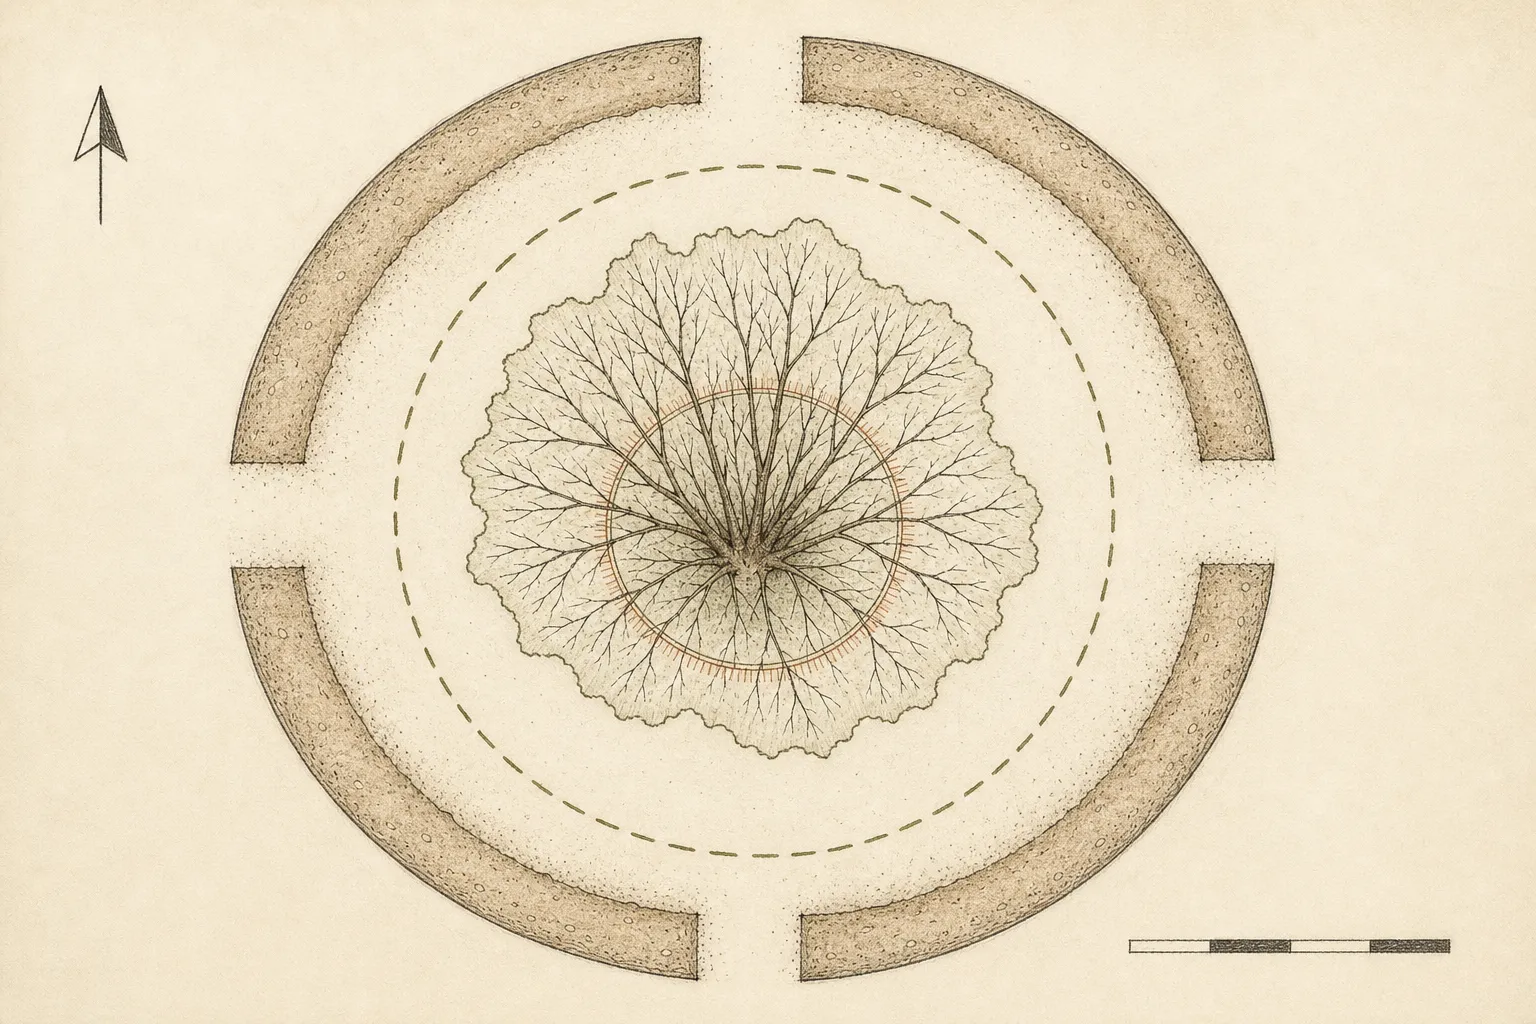
Test the logistics with inert weight before touching roots. Soil weighs more after rain, a wrapped ball needs hand clearance, and steps or gates can turn a lift into an uncontrolled drop. Stage a rigid low cart, rated dolly, board ramp, or mechanical aid that can carry the estimated ball. If helpers cannot keep the load low, level, and supported without grasping stems, the homeowner-sized move has already exceeded its safe limit.
Root-prune while the shrub can rebuild inside the circle
Water dry soil in advance so it is moist enough to cut cleanly but not saturated. Gently tie flexible branches upward with broad soft material, starting low and working around the crown without forcing rigid stems across one another. Mark north on one stem and mark the original soil line on several stems or durable stakes. Remove the ties after root pruning so the shrub can function normally during the preparation interval.
With a sharp spade, cut vertically just outside the selected ball circle to the adopted depth. Use loppers or a pruning saw for roots too large to sever cleanly with a spade; tearing them by rocking the tool can loosen the future ball and leave ragged wounds. Clemson directs separation of topsoil and subsoil during trenching, followed by replacement in their original order. Work in manageable sections so the plant remains stable and open trenches do not become trip or water hazards.
Backfill the trench promptly, settle the returned soil with water, and restore the surface without burying the stem base. Do not fill the ring with a rich compost band or fertilizer. The goal is a controlled root boundary in continuous site soil. Label the line with low markers that will survive mowing, leaf cover, and winter, then photograph the circle from a fixed point. The later digging trench must be outside this prepared boundary so the new roots inside it remain with the ball.
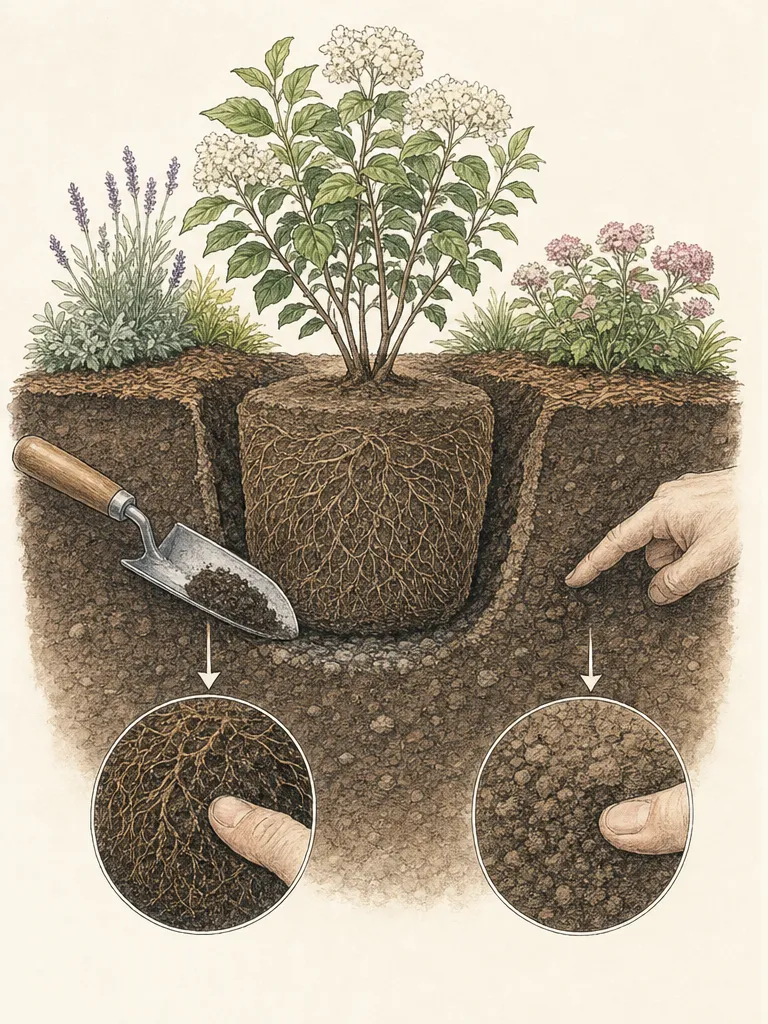
Maintain even moisture through the recovery period according to weather and drainage. Penn State calls for deep irrigation during dry spells after root pruning. Sample soil on both sides of the cut rather than watering by calendar. New growth, leaf color, shoot extension, and bud condition offer supporting evidence, while saturated soil, chronic wilt, or progressive dieback calls for diagnosis. Delay or cancel the move when the shrub does not recover from preparation.
Prepare the receiving site before the final cut
On move day, the receiving hole, route, wrapping, tools, water, and lifting equipment must be ready before the root ball is freed. Iowa State recommends a hole about twice the root-ball width and equal to the ball height. Penn State describes a wide shallow hole two to three times the ball diameter. Choose the regional installation protocol in advance, keep the center firm, and check drainage rather than leaving the shrub exposed while the new site is excavated.
Set the target grade from the shrub's original soil-line marks and visible root-crown relationship. A receiving hole dug too deep should be corrected with firmly packed suitable soil before the load arrives. Keep usable topsoil separate from sod and rubble. Do not create a highly amended pocket or add fertilizer directly against cut roots. The new hole needs room for outward root growth and watering access, not a soft bowl that settles the shrub below grade.
Clear the movement route at root-ball width plus hand and equipment clearance. Protect paving where the cart turns, bridge steps with a rated ramp only when it can be secured, and keep bystanders away. Plan where the ball will rest if work pauses, how it will remain shaded and moist, and which side enters the hole first. A rehearsed route protects both the prepared roots and the people carrying them.
Shape, wrap, and lift the dormant root ball
Retie the dormant crown gently, renew the north and grade marks, and remove loose surface soil until the original crown reference is clear. Dig the working trench outside the root-pruned line so regenerated roots remain inside the ball. Keep the back of the spade toward the plant when shaping, as Clemson directs, and cut every encountered root cleanly. Large roots are cut with controlled hand tools instead of being torn by levering the whole shrub.
Shape a coherent ball with rounded upper shoulders and a base that tapers inward. Clemson describes undercutting at about a forty-five-degree angle; Iowa State likewise rounds the soil mass after a twelve-to-fifteen-inch trench. Work around the ball in sequence and keep enough bearing soil beneath it until wrapping is ready. If the soil slumps, roots tear, or the shrub rocks within the ball, stop. A disintegrating ball is not repaired by tighter twine around damaged stems.
Tip a manageable ball only enough to feed rolled burlap beneath one side, then reverse the controlled tilt and draw the material under the remainder. Pull the burlap snug around soil, not around the crown, and secure it so the ball moves as one unit. Natural or synthetic wrapping used for transport is removed or opened under the receiving-site planting protocol; its temporary job is to preserve root-soil contact during the short move.
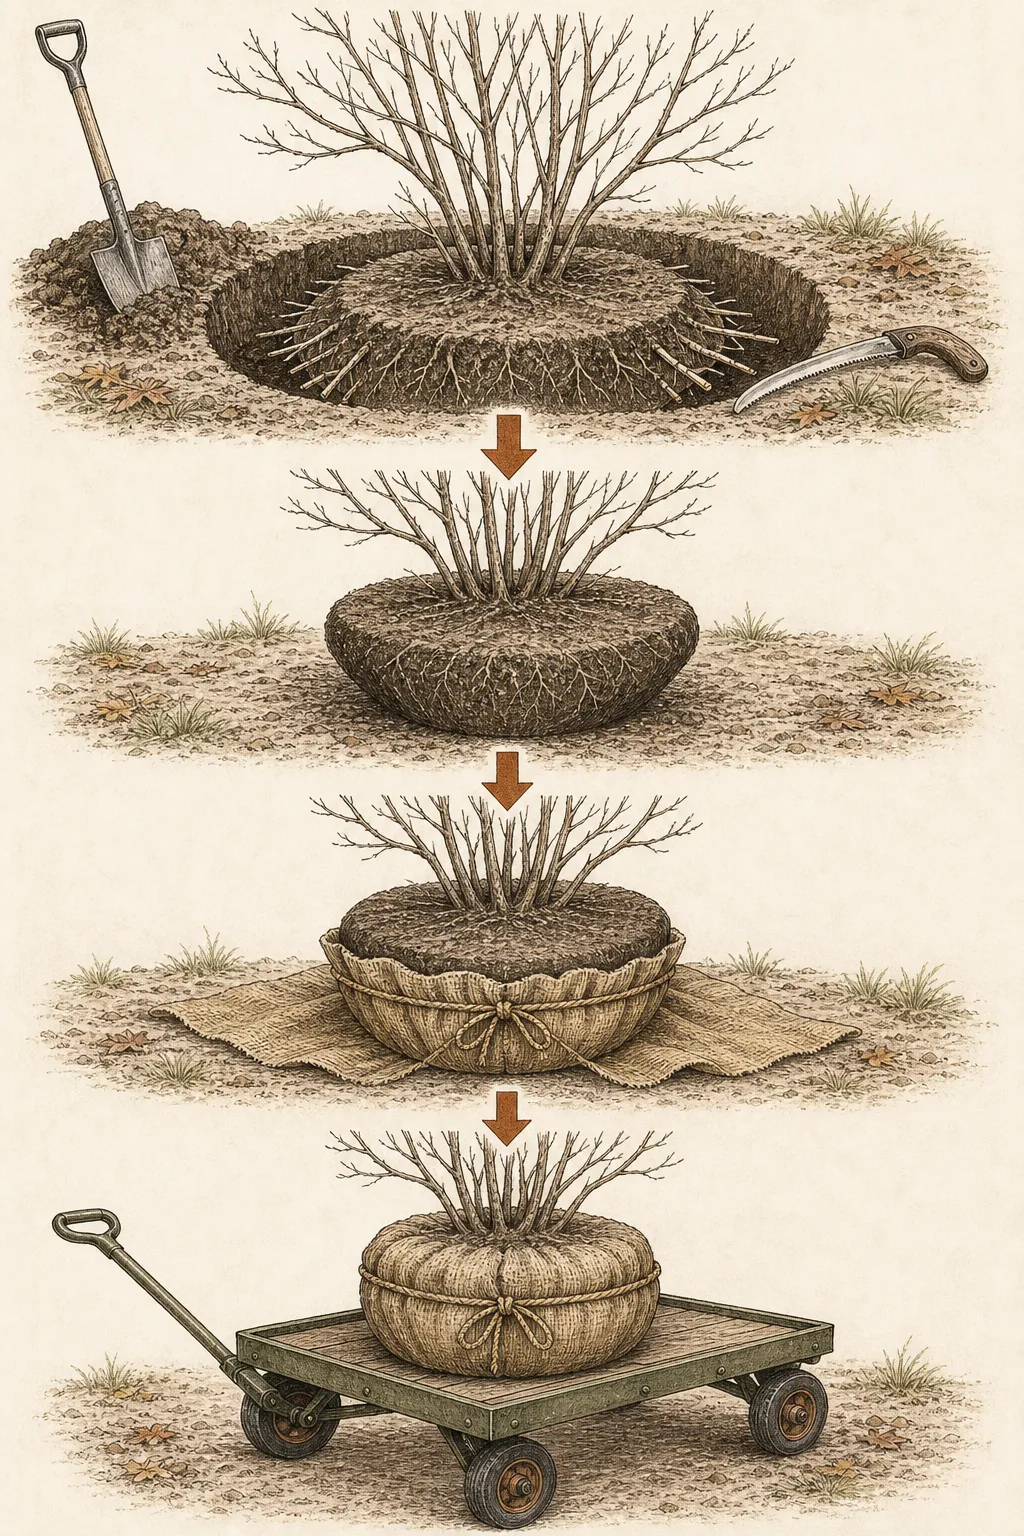
Lift from beneath the wrapped ball. Iowa State explicitly warns against carrying a shrub by its stems, and the distinction matters most when the crown is bundled and tempting to grasp. Slide the load onto the staged cart or board, keep it low, and move directly to the receiving hole. A ball greater than the crew or equipment can control belongs to a professional operation, even if most of the digging is already complete.
Reset the shrub at its original grade
Lower the ball onto firm soil and compare the stem and grade marks with a board across surrounding ground. Correct a low or tilted setting by lifting the ball, not by pulling stems or pushing loose soil beneath a loaded edge. Use the north mark as an orientation reference when practical, but let the new site's light, circulation, access, and structural view determine the final rotation if a change is needed.
Stabilize the lower ball with a small amount of backfill, then release ties from stems and open or remove the accessible upper wrapping without breaking the soil mass. Iowa State removes the exposed upper burlap when the hole is about two-thirds full. Keep fabric, rope, and fasteners away from stems and the surface. If project guidance requires more wrapping removal, complete it while the ball is supported and before the material disappears below grade.
Return usable site soil around the ball, settling major voids gently and keeping the original crown level visible. Water thoroughly so both the old ball and new backfill become moist. Persistent ponding is a drainage problem, not a call for repeated soaking. Apply two to three inches of mulch where Clemson's regional guidance fits, pulling it away from stems; elsewhere follow the applicable regional depth while preserving the same clear crown and broad protected root zone.
Judge recovery across a full growing season
Check moisture within the original ball and in surrounding soil because the textures can dry at different rates. Clemson warns that both too little and too much water kill newly moved plants and recommends maintaining moisture without saturation. Penn State calls for deep regular watering through at least a full growing season for established transplants. Turn those principles into site checks rather than an automatic weekly volume.
Inspect after heavy rain, wind, freeze-thaw cycles, budbreak, and the first hot spell. Look for settlement, a buried crown, ball rotation, bark injury from former ties, standing water, dry cracks, and branch dieback. A smaller spring leaf flush may reflect the reduced root system; progressive wilt in moist soil, darkening bark, or continuing crown decline needs diagnosis. Fertilizer does not repair severed or oxygen-starved roots.
Retain healthy canopy and prune only dead, broken, diseased, or hazardous wood until the shrub shows recovery. Broad top reduction can remove flower buds and stored resources without restoring roots. Keep turf and digging away from the establishment zone. Record the root-pruning date, move date, ball dimensions, weather, water checks, and photographs so later changes can be interpreted against the actual operation.
The staged plan succeeds when the shrub remains stable at its old grade, produces sound extension growth over time, and begins to draw moisture beyond the original ball. It also succeeds when preparation reveals that the move should be canceled. A rooted cutting or replacement planted in the correct site can preserve the garden role when an old shrub's mass, health, or recovery evidence makes relocation unreasonable.
Steps
- Level
- advanced
- Time
- Two major work sessions separated by several months to a year, plus a full season of aftercare
- Tools
- Measuring tape, stakes, and weatherproof labels, Sharp spade and digging shovel, Bypass loppers or pruning saw for large roots, Soft branch ties, Burlap and ball-securing twine, Straight board for grade checks, Rated low cart, dolly, ramp, or mechanical lifting equipment, Hose or slow watering equipment, Work gloves and eye protection
- Materials
- Healthy established deciduous shrub suited to the new site, Usable excavated soil, Water, Organic mulch, Durable preparation and aftercare record
- 1Assess plant, site, and limits
Identify the shrub, inspect crown and root-zone health, confirm mature fit and culture at the new site, mark utilities, and reject a move that needs an uncontrollable ball or hazardous equipment access. Propagation or replacement is a valid outcome when the established plant is too large, structurally weak, or poorly matched.
- 2Set two regionally suitable dates
Plan root pruning several months to a year before the dormant move. Clemson's southern example root-prunes in March for an October or November move, or after leaf fall in October for a March move; Penn State allows longer preparation for large shrubs. Adapt the sequence to regional dormancy, workable soil, and species.
- 3Select and record the ball framework
Choose either an applicable drip-line-based or height-table method instead of averaging them. Iowa State uses a radius about half the center-to-drip-line distance and limits homeowner work to shrubs five feet or less; Clemson's table assigns a five-foot shrub an eighteen-inch-diameter, fourteen-inch-deep minimum ball in its context.
- 4Root-prune at the future boundary
Tie flexible branches temporarily, mark north and original grade, and cut a clean circle to the selected depth with a sharp spade, loppers, or saw. Separate soil horizons when trenching, return them in order, water to settle the trench, remove crown ties, mark the line, and maintain moisture through recovery.
- 5Require recovery before the move
Monitor moisture, leaf color, shoot extension, buds, dieback, and soil cracking during the prepared interval. Delay or cancel the second operation if the shrub shows progressive decline, chronic saturation, or poor recovery. Keep the future ball free of new digging and preserve access for the later outer trench.
- 6Prepare the destination and route
Dig a wide shallow receiving hole on a firm center before freeing the shrub, using the adopted regional protocol. Set target grade from original marks, clear a root-ball-width route plus working space, stage water and wrapping, and test the rated cart, ramp, or lift with inert weight.
- 7Dig outside the prepared roots
Retie the dormant crown, renew the north and grade marks, and trench outside the root-pruned circle. Shape the ball with clean cuts, preserve bearing soil until wrapping is ready, and undercut in controlled sections. Stop when soil collapse, stem movement, or load size prevents a coherent safe ball.
- 8Wrap and move from beneath
Feed burlap beneath a manageable ball with controlled tilts, secure the soil mass, and slide it onto the staged equipment. Keep the load low and supported, never lifting or carrying by stems. Move directly to the prepared hole and protect the roots from sun, wind, freezing, and drying during any pause.
- 9Set, unwrap, backfill, and water
Place the ball on firm soil at its original crown grade, correct tilt by lifting, stabilize the lower edge, and clear stem ties and accessible upper wrapping. Backfill with usable site soil, water both ball and surrounding soil, keep the crown exposed, and mulch broadly without touching stems.
- 10Monitor for a full season
Sample moisture in two soil zones, inspect settlement and stability after storms, and watch budbreak, first heat, shoot growth, and progressive dieback. Preserve healthy canopy, withhold unneeded fertilizer, record aftercare, and extend checks until evidence shows roots are using surrounding soil and watering intervals can safely lengthen.
Plants in this guide
Related reading
Sources
- Saving Sentimental Shrubs. Penn State Extension. Source record · Accessed 2026-08-20.
- Transplanting Established Trees and Shrubs. Clemson Cooperative Extension. Source record · Accessed 2026-08-20.
- How to Transplant Deciduous Shrubs. Iowa State University Extension and Outreach. Source record · Accessed 2026-08-20.