Gardens · fern garden light moisture
Build a Fern Garden From Measured Moisture and Light Gradients
Map shade through the day and soil moisture after rain, then arrange locally hardy ferns by mature habit, spread behavior, seasonal presence, and access.
Published Last updated
In this guide
- Treat shade as a changing site condition
- Measure moisture beyond the surface
- Overlay light and moisture maps
- Build the composition from fern habits
- Choose species by regional fit
- Shape soil without erasing the gradient
- Place colonies where movement is useful
- Layer companions without losing the ferns
- Establish crowns in their measured zones
- Use frond response to refine the map
- Separate six ferns into two measured moisture bands
- Design ideas
Treat shade as a changing site condition
A fern garden begins with more than the word shade. Buildings, deciduous canopies, evergreens, walls, slopes, and overhangs produce different light through the day and year. A bed may receive cool morning sun, filtered midday light, a brief hot western beam, or very low light beneath dense foliage. Map those patterns before choosing ferns. The graceful fronds that suggest woodland calm still need enough compatible light to grow with their characteristic density and posture.
Observe at several times on clear days and repeat after the canopy is fully leafed. Mark direct sun, bright filtered light, open shade, and the darkest pockets. Note reflected heat from walls and paving, plus wind that can dry or tear fronds. University of Georgia Extension describes filtered shade as broadly suitable for many ferns and warns that dense shade can be less favorable than an open woodland edge. Species requirements, however, remain the final guide.
Separate summer and spring maps where deciduous trees dominate. Early light can support bulbs and woodland flowers before fern fronds expand, while the fern framework must tolerate the summer condition. Do not place a shade fern from a spring observation alone. Likewise, pruning or losing a tree can expose established fronds abruptly. Keep the site record so later decline can be compared with a real change in canopy rather than treated as an unexplained plant failure.
Measure moisture beyond the surface
Check soil after ordinary rain, after a longer wet spell, and during a dry interval. Probe below the leaf litter in several positions and note whether the profile is dry, evenly moist, temporarily wet, or persistently saturated. Shade often slows evaporation, but overhangs and tree roots can create severe dry shade. A cool-looking bed is not necessarily moist. Mark drainage paths, downspout influence, low pockets, and the places where roots fill the soil.
Record how quickly each point changes rather than assigning one permanent label. A swale may be wet for a short period and then drain, while compacted clay stays airless. Most garden ferns prefer moisture with drainage; a species from a swamp, rocky slope, or dry woodland has a different tolerance. Use local profiles to match the pattern. Do not add water broadly to make an unsuitable low point support the same fern as a well-drained shoulder.
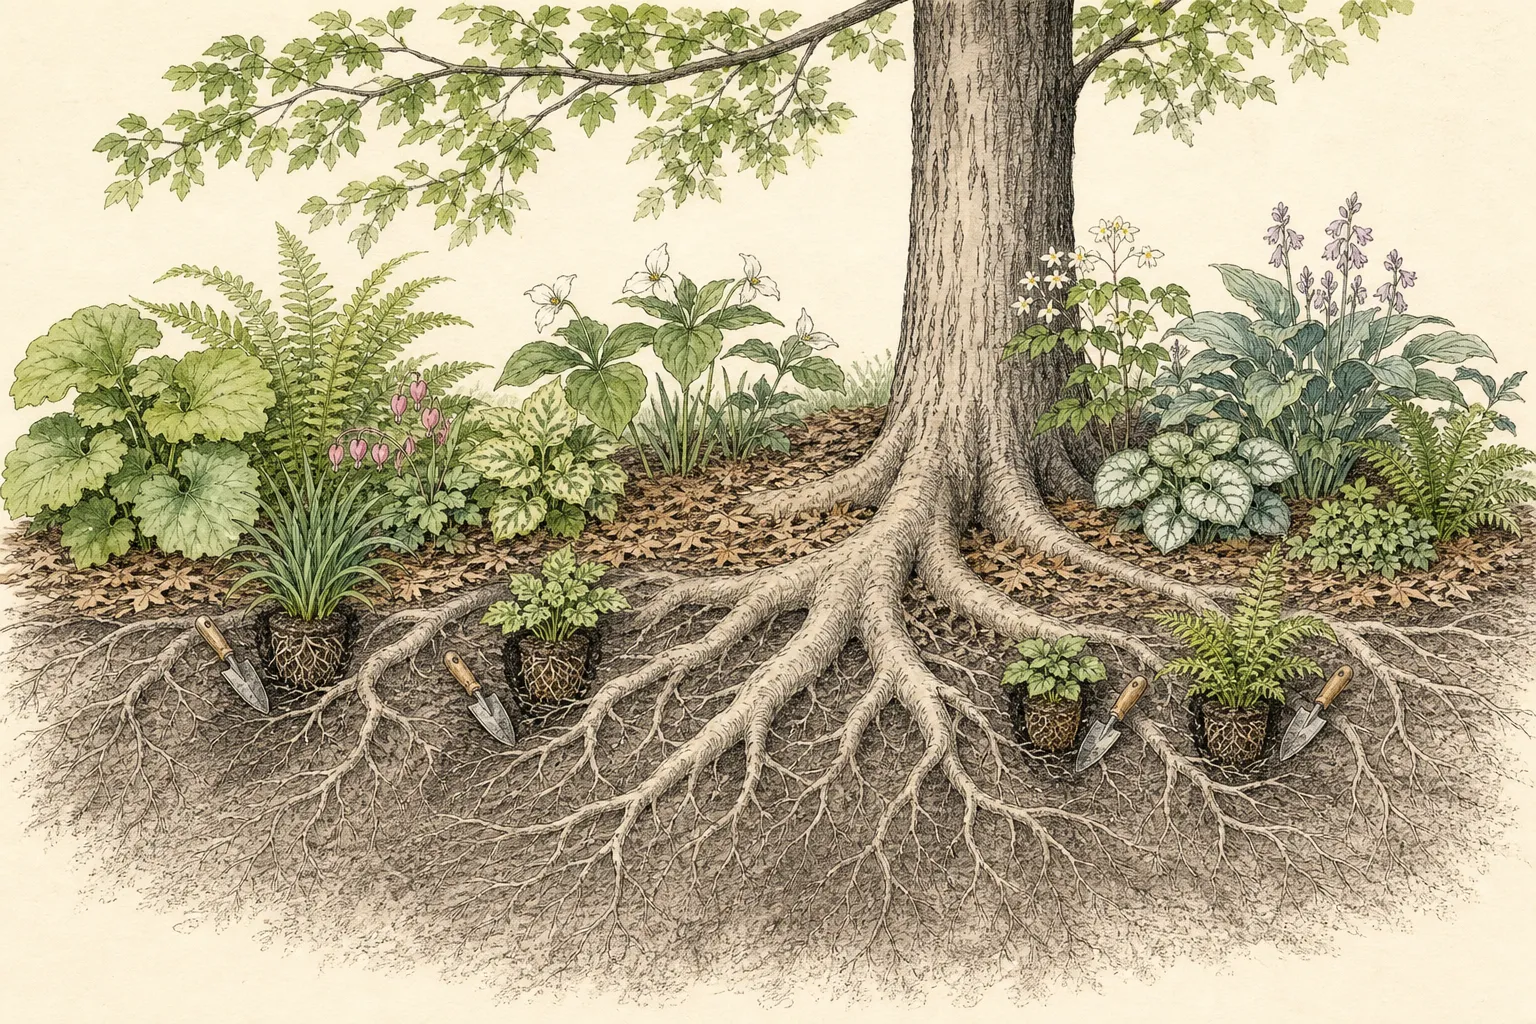
Distinguish root competition from low rainfall. Beneath mature trees, fine roots can draw moisture rapidly even after storms, and broad excavation to improve the fern bed can damage the tree. Preserve root flares, grade, and major roots. Test small planting pockets and plan surface irrigation for establishment where appropriate. If the tree root system leaves little workable soil, an open leaf-litter area may be more responsible than forcing a continuous carpet of ferns.
Overlay light and moisture maps
Place the timed light map over the moisture map and outline the intersections. A bright, evenly moist edge; a dark, root-dry pocket; a filtered, well-drained center; and a temporarily wet low area are different planting zones even when they share one bed. Add winter exposure, wind, and access. These combined zones provide a more useful design framework than arranging ferns by color or height before the site has been understood.
Give each zone a short evidence-based description. Include when light arrives, how the soil feels below the surface, what happens after rain, and which existing roots or structures shape it. Avoid false precision: boundaries can move with season and weather. Draw them as soft bands and identify uncertain margins for testing. A fern documented across a broad moisture or light range can bridge bands; a specialist belongs only where the matching condition is reliable.
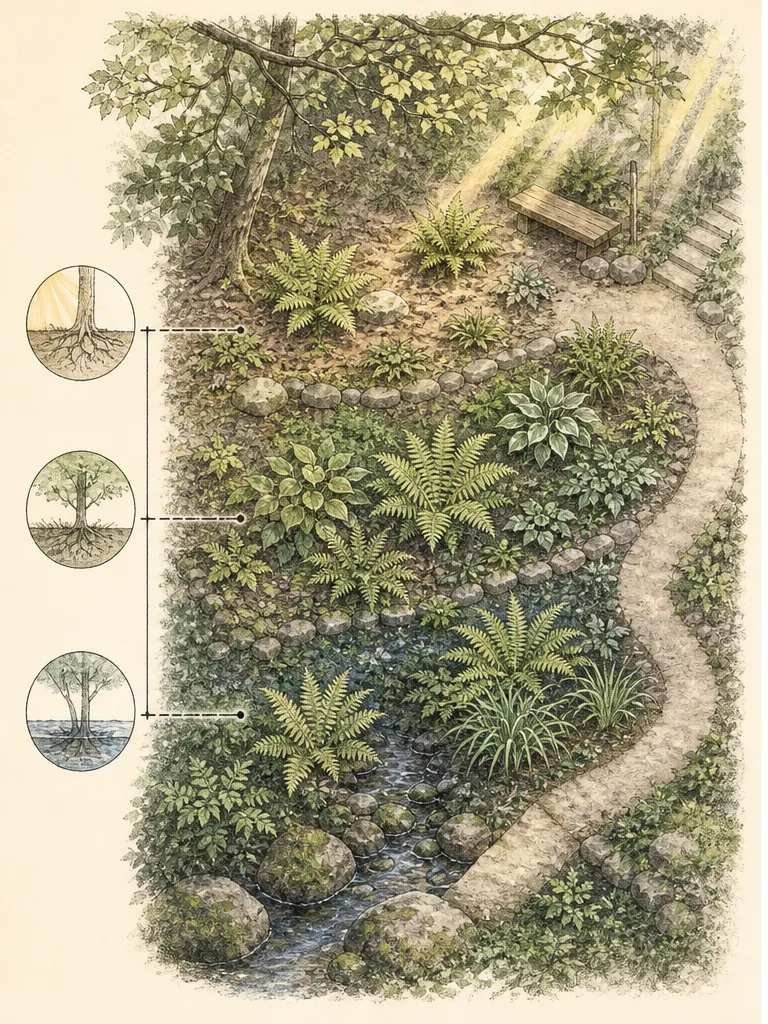
Reject zones that cannot be maintained safely. Persistent standing water without a wetland-adapted plan, concentrated roof discharge, unstable slope, deep tree-root excavation, or a narrow space with no access should be corrected or left unplanted. A fern garden can include deliberate leaf litter, mossy stone where locally appropriate, and open paths. Empty ground is preferable to a plant whose needs require constant rescue or damaging changes to the primary site.
Build the composition from fern habits
Choose whole-plant forms before collecting frond patterns. Vase-shaped crowns lift outward from a central point, arching clumps make broad mounds, upright crowns carry vertical emphasis, and creeping rhizomes can create colonies. Draw each at mature height and width. A beautiful close-up of a pinna does not show whether the plant will block a path, disappear behind a shrub, or travel through a small companion. Habit is the structural vocabulary of the fern garden.
Include seasonal presence. Some ferns are deciduous and leave a winter gap; others are evergreen or semi-evergreen only in climates that support that behavior. North Carolina Extension describes Dryopteris intermedia as evergreen to semi-evergreen in mild winters and nonspreading, but those traits belong to that species and climate context. Do not label an entire genus evergreen or assume a retained frond will remain upright after local snow, ice, heat, or drought.
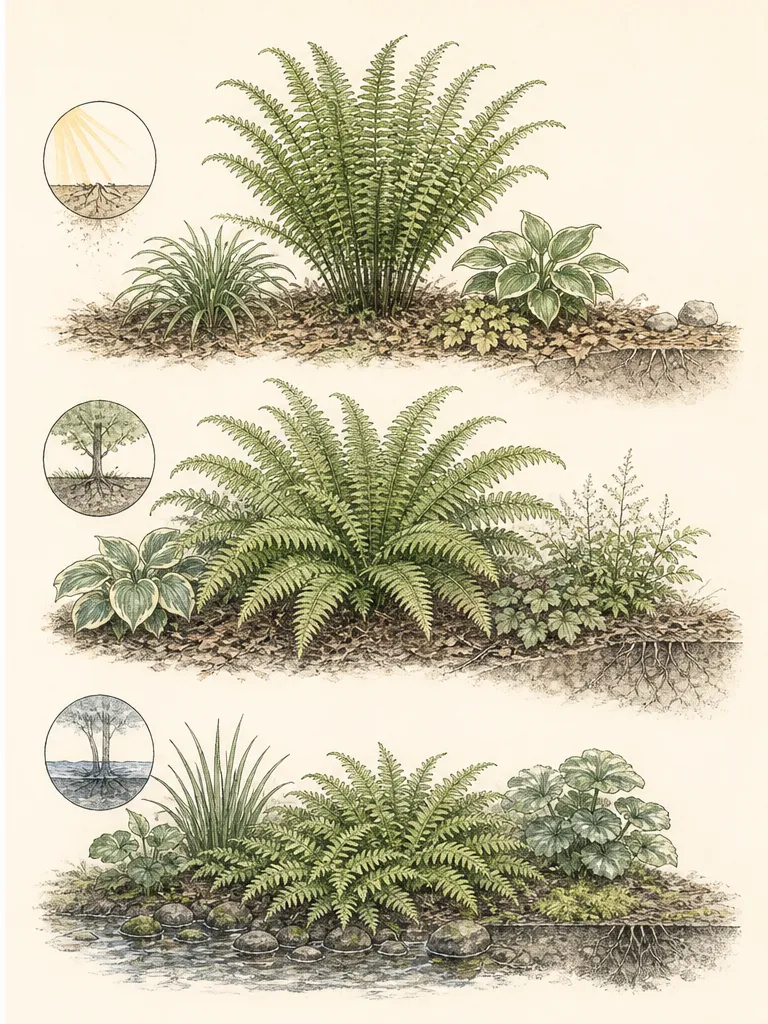
Assign roles: one tall framework fern, one repeated medium clump, one low edge, and, only where space allows, one colony former. Repeat a limited set through compatible zones so the garden reads as a composition rather than a catalogue. Let frond geometry create contrast—broad versus fine division, horizontal versus upright, matte versus reflective—while mature behavior controls placement. The strongest design still works when no sori or new croziers are being admired at close range.
Choose species by regional fit
Make a shortlist from a regional Extension service, botanical garden, or native plant authority. Record exact botanical name, local hardiness, native or noninvasive status, light, moisture, drainage, soil reaction, height, width, spread behavior, and seasonal presence. University of Georgia notes that even a fern native to the state may not be native to every part of that state. Regional identity is specific; a national native label does not guarantee local ecological or horticultural fit.
Use species profiles to reveal meaningful differences. Some ferns prefer rich, moist, well-drained woodland soil; others occupy wet bottomlands, rocky slopes, calcareous sites, or drier woods. Soil pH preferences also vary. Test soil where a specialist is being considered and do not lime or acidify an entire established garden for one attractive plant. Choose a fern suited to the existing range or create a small, defensible amendment zone only when local guidance supports it.
Check how the plant is sold. A cultivar may change frond color, size, sterility, or vigor, and a common name can refer to more than one taxon. Preserve the full label. Avoid wild collection; buy responsibly propagated plants from reputable sources. Before using a vigorous species, verify current regional invasive status and its practical containment. The garden should not trade one difficult bare area for a colony that requires repeated deep removal among tree roots.
Shape soil without erasing the gradient
Ferns commonly benefit from soil rich in organic matter that holds moisture while remaining aerated, but existing conditions and species needs vary. Test texture and drainage before amending. Apply finished organic matter broadly at the surface where possible rather than making isolated rich pockets. In a planted or root-filled bed, deep tilling can destroy soil structure, roots, bulbs, and the very woodland relationships the design is meant to support.
Correct compacted access separately from planting soil. A stepping route needs stable footing, while fern crowns need uncompacted root zones. Do not improve drainage by mounding every plant above its documented moisture band or improve moisture by placing every crown in a depression. Preserve the measured gradient and match plants to it. If a zone requires wholesale reconstruction, reassess whether a fern garden is the right use for that portion of the site.
Retain a modest leaf-litter or organic surface where it does not mat over crowns. Keep fern centers and emerging croziers visible, preserve tree flares, and avoid piling material against woody stems. Natural-looking does not mean unmanaged depth. Fallen leaves can move with wind and water, so redistribute thick mats and leave small markers at dormant crowns. The surface should conserve and condition without concealing plant anatomy or drainage evidence.
Place colonies where movement is useful
A rhizomatous fern can cover a slope or broad moist area, but its success depends on having a boundary that can be inspected. Place colony formers away from small clumping ferns, delicate spring plants, drains, and property edges unless local experience shows compatible behavior. Draw the intended colony and a larger monitoring line. A mature patch is not a set of evenly spaced crowns, so plan it as an area rather than a repeated dot pattern.
Use nonspreading clumps beside paths, specimen stones, and access pockets. Their stable centers make spacing and maintenance more predictable. Slowly expanding clumps can be repeated to create rhythm without requiring a continuous carpet. Allow their mature fronds to arch without brushing circulation. Where a clump must be divided, reserve a route for tools and lifted soil; a fern wedged among roots and hard edging may be impossible to manage cleanly.
Control spread early from visible shoots at the edge, following species-specific advice. Do not wait until rhizomes are interwoven with valuable neighbors. If movement exceeds maintenance capacity, remove or relocate the colony while boundaries are still legible. A large sweep can be beautiful, but its design value disappears when every season begins with deep excavation or when the fern escapes into a local natural area.
Layer companions without losing the ferns
Use companions that share the measured zone and provide structure when deciduous ferns are low. Spring bulbs and ephemerals can flower before fronds expand; shade-tolerant sedges, low perennials, shrubs, stones, and woody stems can maintain winter form. Plot their crowns separately so later division does not injure dormant plants. Avoid companions whose dense roots or aggressive spread occupy the same layer as a slow fern.
Let foliage carry the design. Pair a broad undivided leaf with finely cut fronds, a rounded mound with an upright vase, or a matte green fern with a restrained silver cultivar. Repeat combinations across only the zones that support both plants. Flower color should remain an accent rather than the sole organizer, because fern gardens spend much of the year expressing texture, line, light, and the depth of green.
Keep air and access between mature masses. A humid-looking garden does not require stagnant air or foliage packed over crowns. Draw the final widths and retain openings for inspection, weeding, and watering. A narrow stepping line can disappear beneath adjacent fronds while remaining physically open. If the composition needs constant leaf clipping to reveal a route, revise the plant centers before installation.
Establish crowns in their measured zones
Set labeled pots on the ground at mature spacing and compare them with the gradient map. Place framework clumps and access first, then repeated medium ferns, low edges, colonies, and companions. Move any plant whose root ball sits on a zone boundary it cannot tolerate. The installed arrangement can look sparse; temporary leaf litter and patience are safer than crowding permanent crowns to imitate a mature photograph.
Plant at the depth held in the container or specified for the plant, keeping the crown visible and roots in firm contact with surrounding soil. Water thoroughly after planting even in a moist zone. A nursery root ball can dry independently of the site, and newly planted ferns need consistent moisture while roots establish. Use temporary surface irrigation that can be adjusted by zone and removed or simplified as plants become rooted.
Protect fronds from immediate wind and hot sun without creating a permanent artificial environment. Temporary shade may help a transplant during an unusual exposure, but the long-term site must match the species. Mark every crown, especially deciduous ferns that vanish in winter. Record source, exact name, zone, and planting date. This map becomes essential when the garden's surface fills with leaves and spring maintenance begins.
Use frond response to refine the map
Watch new growth, frond color, tip condition, posture, and crown density through wet and dry periods. Crisp margins or collapsing fronds can reflect drought, heat, wind, root disturbance, or another issue; pale sparse growth may reflect inadequate light or site mismatch. Compare the same species across zones before diagnosing. One struggling plant should not trigger more water or fertilizer across the entire garden.
Recheck soil below the surface where symptoms appear. A dry-looking top can cover moisture, while a shaded hollow can remain saturated. Adjust irrigation by zone and correct runoff or compaction where it is the cause. Move a fern during an appropriate season only when the new location solves a measured mismatch. Replacing it in the same unsuitable pocket repeats the error and obscures the useful information provided by the first plant.
Review the map after canopy pruning, drought, construction, or a change in drainage. The gradients can shift even when the bed outline remains. Edit colony boundaries, clear crowns, preserve access, and update seasonal photographs. A mature fern garden succeeds when its frond layers look abundant while each plant still occupies a defensible combination of light, moisture, soil, region, and manageable behavior.
Separate six ferns into two measured moisture bands
A partly shaded 10-by-8-foot Zone 6 Pennsylvania bed can illustrate a moisture gradient if its front band is dry-to-moderate and its rear band remains consistently moist. Put three Polystichum acrostichoides in the drier band and three Osmunda spectabilis in the wetter one. Maryland's Christmas fern guidance and the NC State royal fern profile support that moisture distinction; a damp day alone does not establish the rear band as reliably wet.
Measure centers from the front-left corner. Set Christmas ferns at (2, 2), (5, 2), and (8, 2) feet with 2-foot planning circles. Set royal ferns at (2, 6), (5, 6), and (8, 6) with 3-foot circles. The royal-fern circles touch along their row at the upper allowance, so use wider centers or fewer plants if distinct frond outlines are required. The gap between rows keeps the two root-zone checks accessible from the ends.
Order six only after the moisture map supports both bands. If the rear repeatedly dries, omit royal fern instead of irrigating the entire bed as one wet zone. If all of the site remains saturated, reconsider the Christmas-fern band. This is a proposed arrangement with explicit moisture assumptions, not a claim that either species will correct the site's drainage.
Design ideas
- Style
- Layered woodland foliage with repeated fern habits, restrained companions, and visible seasonal structure
- Space
- A residential shade border, woodland edge, north-facing garden, or sheltered slope
- Climate
- Temperate garden with timed shade observations, measured soil moisture, locally verified fern hardiness and provenance, and species-specific drainage and soil reaction
- 1Make a two-layer site map
Trace morning, midday, and afternoon light on one sheet and moisture after rain and during a dry interval on another. Overlay them to find the real planting zones. Keep uncertain boundaries dashed and use those margins for locally appropriate, adaptable trial plants rather than specialists.
- 2Repeat one stable vase form
Choose a locally suitable, nonspreading vase-shaped fern as the recurring framework. Place it at mature spread in several compatible zones, then vary lower companions around it. The repeated crown gives order without relying on one moisture-loving colony to occupy the whole bed.
- 3Give a colony a drawn boundary
Outline both the desired mature patch and a wider monitoring line for a rhizomatous fern. Keep small clumps, path edges, tree flares, and drains outside that line. Inspect new shoots at the boundary while they remain easy to identify and remove according to species guidance.
- 4Pair winter and summer structure
Place a deciduous fern with a locally persistent evergreen or semi-evergreen form, stone, sedge, or woody stem that shares its conditions. Draw both winter and summer views. The companion should hold the gap without occupying the crown space needed when fronds return.
- 5Keep one open leaf-litter court
Leave an intentional unplanted pocket around a tree flare, dense roots, or an access junction. Shape it with repeated fronds and maintain a conservative leaf-litter surface. The opening protects roots, reveals grade, and gives the abundant foliage a quiet visual center.
- 6Use a frond-contrast pair
Combine one broad, simple or coarsely divided frond with one finely divided form in the same measured zone. Repeat the pair rather than adding many unrelated cultivars. Confirm mature height, spread, and seasonal presence so the contrast remains visible and neither crown overwhelms the other.
- 7Route water by zone
Lay temporary surface irrigation to reach new crowns in dry or root-competitive pockets without saturating naturally moist areas. Mark outlets and check below the surface before watering. Simplify or remove lines as establishment evidence appears, keeping hardware away from crowns and tree trunks.
- 8Place a dry-edge trial trio
At the driest mapped edge, test three small plants of one locally recommended fern before repeating it through the border. Space them at mature width and monitor after heat, wind, and rain interception. Expand the group only when the crowns remain sound without an irrigation schedule that conflicts with adjacent zones.
- 9Protect one canopy-change refuge
Reserve a sheltered pocket where a valued fern can be moved if pruning or storm loss suddenly increases sun elsewhere. The refuge must already match the plant's soil and moisture needs and remain accessible for lifting and watering. It is contingency space, not a reason to ignore a permanently unsuitable original zone.
- 10Compare a storm week with a dry week
Photograph the same crowns and probe the same marked soil points after a rainy period and again during a dry one. Note which zones change quickly and which remain wet or root-dry. Use that paired evidence before relocating ferns or extending irrigation across the entire garden.
Plants in this guide
Related reading
Sources
- Native Plants for Georgia Part II: Ferns. University of Georgia Cooperative Extension. Source record · Accessed 2026-08-19.
- Gardening in the Shade. University of Minnesota Extension. Source record · Accessed 2026-08-19.
- Dryopteris intermedia. North Carolina Extension Gardener Plant Toolbox. Source record · Accessed 2026-08-19.
- Christmas fern garden profile. University of Maryland Extension. Source record · Accessed 2026-09-09.
- Osmunda spectabilis plant profile. NC State Extension. Source record · Accessed 2026-09-09.