Grow · ornamental cut flower border harvest design
Plan an Ornamental Cut-Flower Border That Still Looks Like a Garden
Set a cutting quota, mature plant matrix, access route, bloom sequence, and harvest rules so flowers can enter the house without leaving a stripped production row.
Published Last updated
In this guide
- Define the border’s public view and private yield
- Build a seasonal flower and foliage brief
- Draw the permanent matrix before the harvest layer
- Place harvest plants where cuts disappear
- Sequence bloom without promising constant abundance
- Design access, water, and support as one system
- Harvest to preserve both the plant and composition
- Audit the border after the vase leaves the room
- Steps
Define the border’s public view and private yield
The border serves two audiences: the person viewing it in the garden and the person arranging stems indoors. Begin by marking the primary garden view, approach, and time of use. Then estimate realistic vase demand: one small weekly arrangement, occasional gifts, or several rooms. Without a quota, the plan either overproduces a temporary crop or promises more cutting than a display border can lose gracefully.
Photograph the site from the path, window, and seating area. Record full dimensions, utilities, access, tree roots, slope, water, wind, and summer sun. Cut flowers need reachable stems and adequate light, but a visible bed is still bound by mature scale and circulation. Preserve doors, gates, sight lines, and a dry route for carrying a bucket without brushing every front plant.
Choose whether the garden’s priority is a continuous exterior composition or maximum stem yield. A production row can be planted densely for efficient harvest; an ornamental border relies on layered form, repetition, and long-lived structure. This article addresses the latter. If household demand is high, reserve a separate cutting patch rather than hollowing the most visible border every week.
Set a harvest rule before selecting cultivars. For example, no more than one-third of open or near-ready stems from a visible clump at one visit, with several stems always left to carry the garden view and support pollinators where appropriate. The exact limit changes with species and purpose, but a written rule prevents a promising border from becoming bare after one enthusiastic bouquet.
Build a seasonal flower and foliage brief
List the months when stems are wanted and the rooms or vessels they will serve. Separate focal flowers, line flowers, airy fillers, foliage, seedheads, and branches. A bouquet of only large focal blooms demands more plants and appears visually heavy in the border. Foliage shrubs, ornamental grasses, and fine branching material can provide structure in both places when harvest is selective and plant-specific.
Record vase suitability from reliable species guidance and personal trials. Not every beautiful garden flower holds after cutting, and some wilt unless harvested at the correct stage or conditioned. Toxic sap, thorns, skin irritation, strong fragrance, pollen, pets, and food-table use affect placement and handling. Keep unknown plants out of arrangements around children and animals until identity and safety are established.
Favor taxa that earn garden space beyond the cut: durable foliage, repeat bloom, architectural seedheads, winter stems, or a clear seasonal handoff. Include a few high-yield annuals only where their removal or frost decline will not expose an empty hole. Perennials and shrubs should be chosen for mature habit and site fit first; vase value is an additional role, not permission to crowd them.
Create a color and form family broad enough to survive partial harvest. Repeat two or three colors across different plants and times. If every blue spike comes from one clump, cutting it erases that line from the garden. Repetition allows one group to enter the house while another carries the color outdoors. Keep one quieter foliage rhythm that remains when flowers pause.
Draw the permanent matrix before the harvest layer
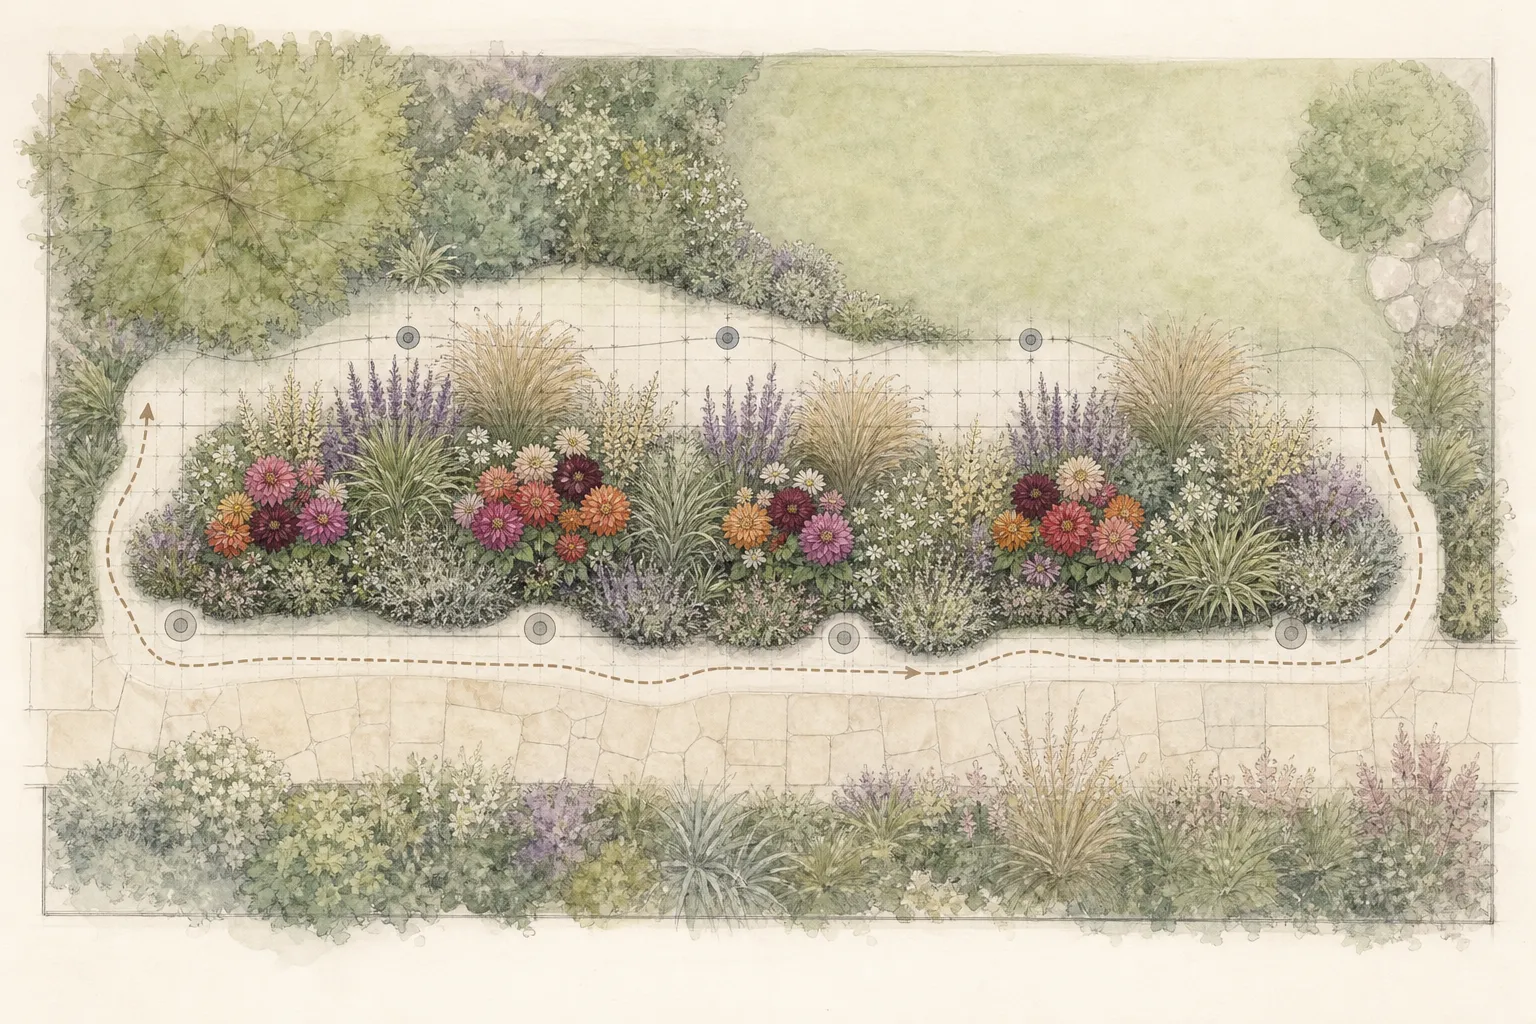
On a measured plan, draw existing and proposed woody plants, evergreen forms, grasses, long-lived perennials, path edge, and ground plane at mature size. This is the matrix that remains after a bucket is filled. It should provide height, mass, foliage contrast, and winter or off-season interest without relying on every flowering stem. Keep roots, crown access, and maintenance spaces legible.
Place the strongest permanent form near the primary view, not in the middle of a future harvest route. A small flowering shrub can anchor the back, a grass or upright perennial can repeat vertical line, and a low edge can preserve the foreground. Confirm local suitability, invasiveness, toxicity, and dimensions. Do not use a large shrub as disposable florist foliage if repeated cutting will destroy its natural habit.
Reserve several deep planting pockets among the matrix for annual and herbaceous cut flowers. Deep pockets let stems be removed behind a foreground layer while maintaining enough light and air. Draw the pockets as groups, not isolated dots. Repetition creates harvest volume and visual coherence. Leave enough soil and access that annual roots can be removed without cutting through established perennial crowns.
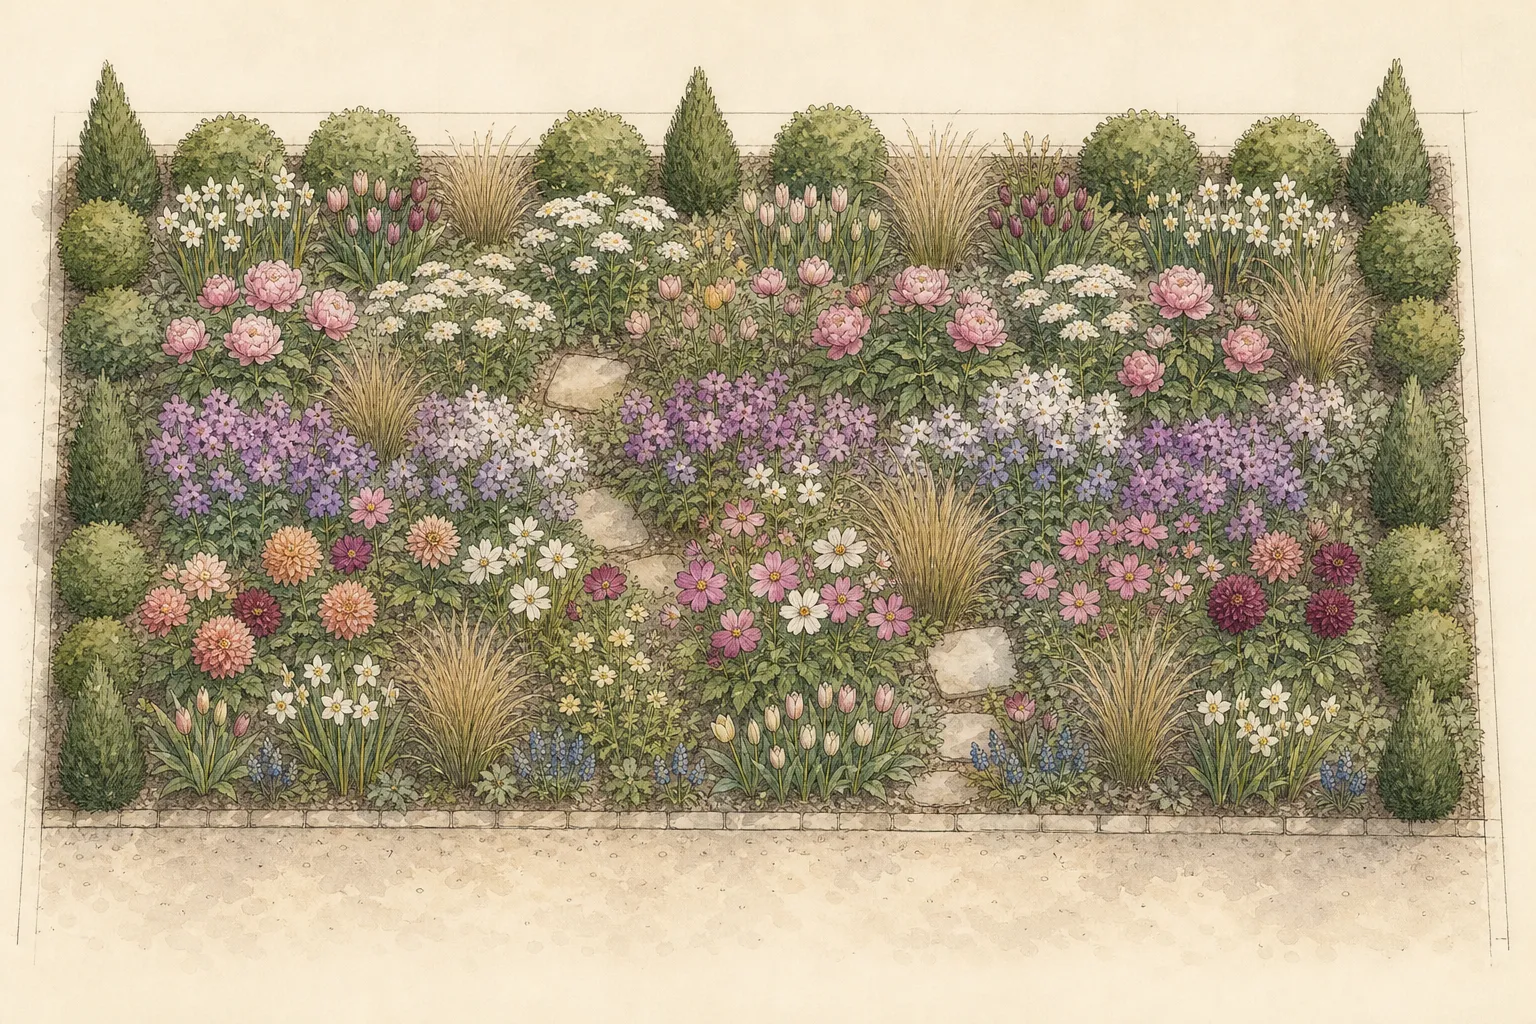
Keep negative space. A narrow access opening, visible mulch interval, or low groundcover plane can separate groups and provide a place to stand. Do not fill the gap when the first spring plant sale arrives. Harvest needs a bucket position, hand reach, and a route for removed foliage. If every square foot is planted, stems will be cut from the path side and the border face will collapse.
Place harvest plants where cuts disappear
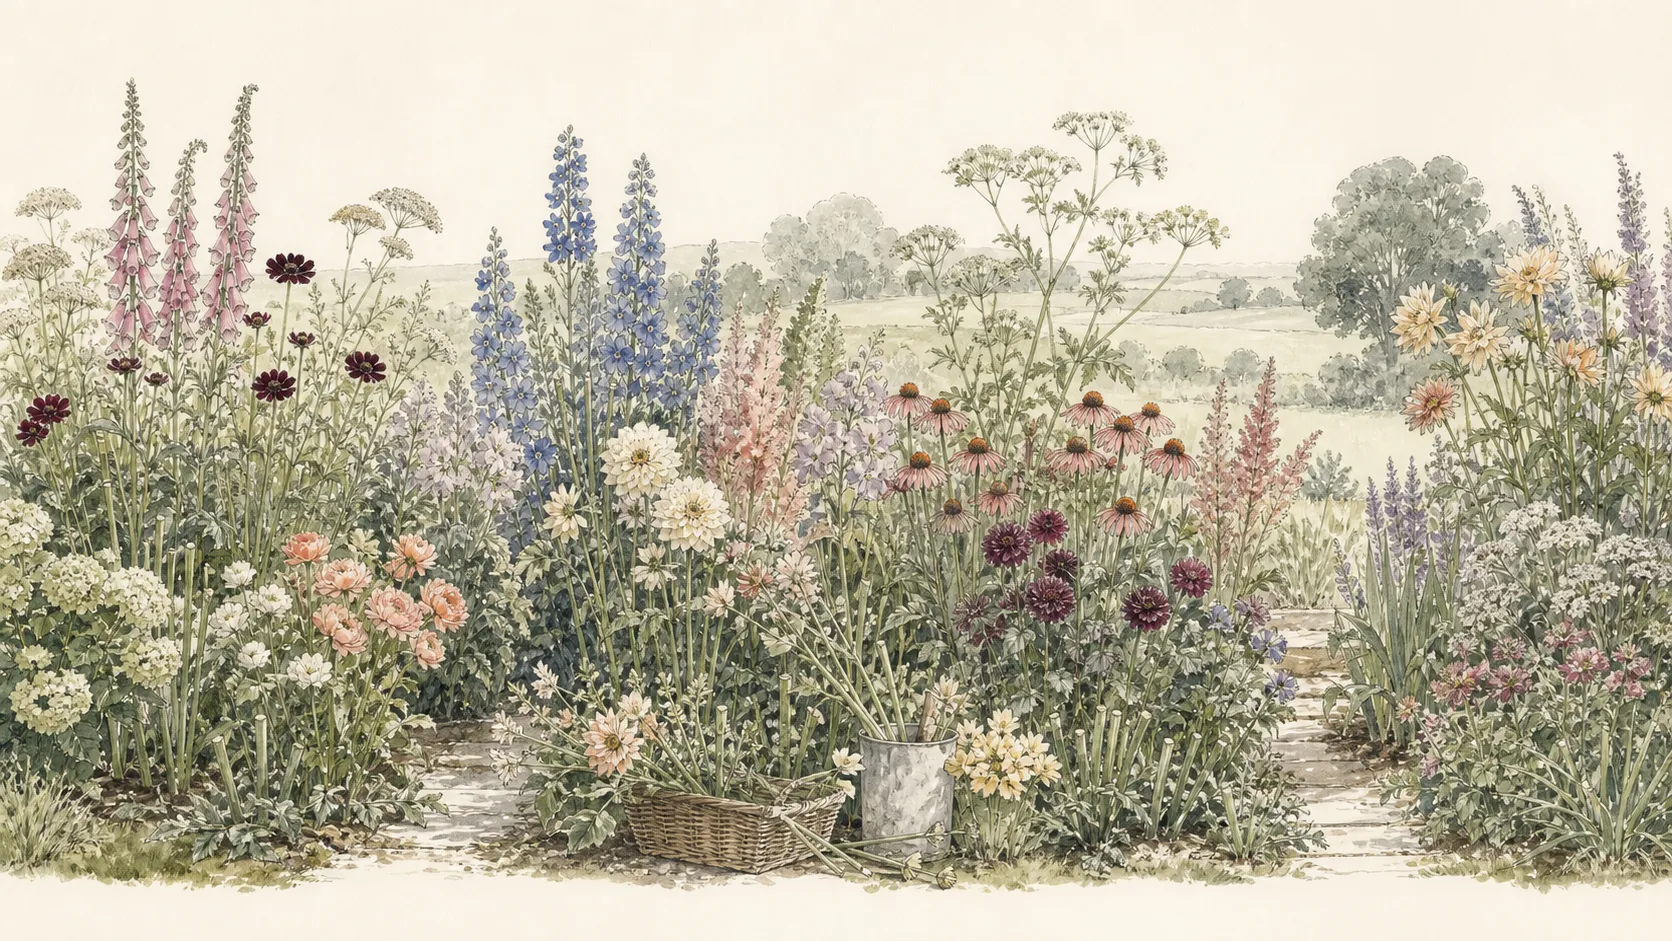
Put tall annuals and repeat-bloom perennials in the middle depth, behind a lower durable edge and in front of or between structural forms. Their stems remain visible before harvest, but cut bases are screened afterward. Avoid planting every tall species at the back against a fence; unreachable stems become overripe and harvesting compacts the entire bed.
Use repeated blocks or ribbons large enough to lose several stems. One zinnia, one cosmos, and one snapdragon create a specimen collection with no cutting resilience. A group of each, repeated by color or form, can supply a few stems while retaining mass. Adjust plant names to local climate and disease pressure, and use spacing supported for the cultivar rather than packing for an instant photograph.
Place fragile stems away from prevailing wind or provide discreet support before they lodge. Netting can be effective in a production patch but visually intrusive in a public border. Use twiggy supports, stakes, rings, or a low grid selected before growth, with safe edges and access. The support must remain hidden enough for the garden role without entangling hands during harvest.
Keep poisonous, irritating, thorny, or strongly scented material out of tight paths and child-access edges. Some cut flowers are safe to handle but not edible; never place them on food as garnish without authoritative confirmation. Label the border and indoor buckets by botanical identity. A mixed armful should not erase the information needed for pets, allergies, or later propagation.
Sequence bloom without promising constant abundance
Build overlapping waves rather than one uninterrupted inventory. Spring bulbs and flowering branches can begin the season, followed by early perennials, summer annuals, late perennials, grasses, and seedheads. Each wave should contain at least one focal or line element and one supporting foliage source. A quiet week can be filled from another garden role or the florist; it need not force another plant into the border.
Use succession sowing only for annuals whose regional guidance and frost window support it. Mark each sowing pocket and final transplant footprint. Later batches need nursery space, water, and a clear destination after earlier plants are removed. Do not interplant seedlings beneath a mature canopy where light and root competition make the succession theoretical. Keep a separate staging area when timing is uncertain.
Record first usable stem, peak, decline, and final removal for each group. Catalog bloom months are broad. Local heat, day length, cultivar, pinching, deadheading, and harvest change timing. After one season, shift a sowing or add a complementary plant only where the record shows a persistent gap. Avoid reacting to an unusually early spring by rebuilding the whole calendar. Plan the post-harvest handoff. Some annuals can be cut back and regrow; others decline after the main flush. Perennials need enough foliage to replenish crowns. Bulb foliage must remain until it yellows. Know the plant before removing “messy” leaves for an arrangement. A border designed for cutting preserves the source plant as carefully as it conditions the stem.
Design access, water, and support as one system
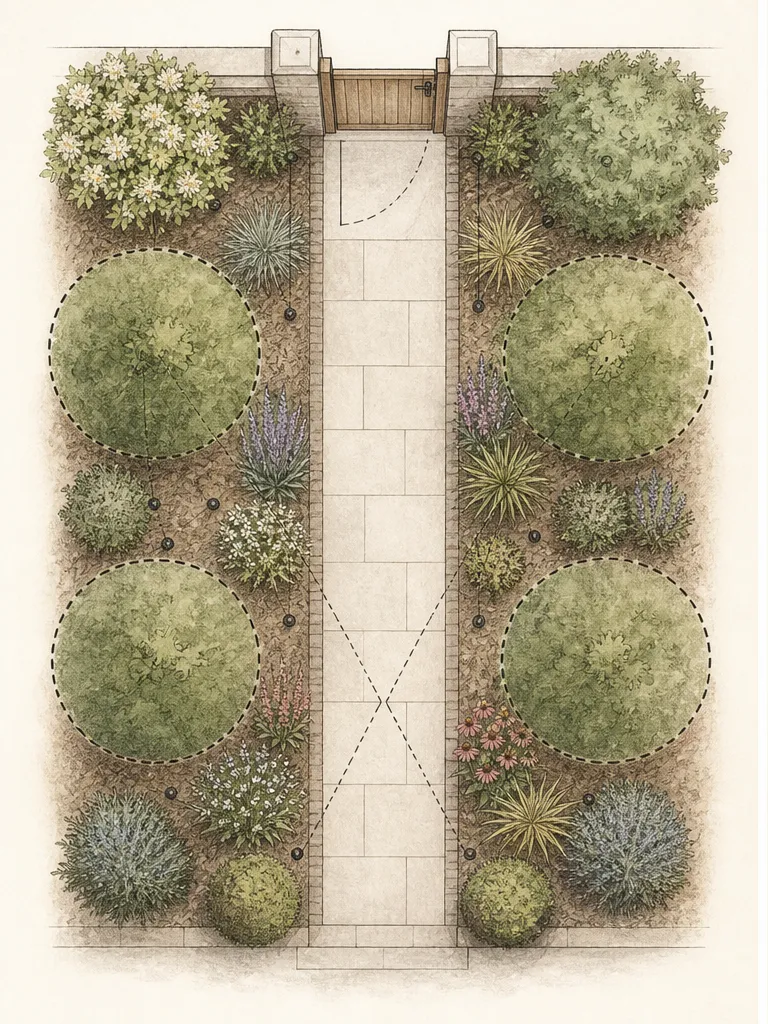
A discreet stepping route every few feet can prevent daily compaction. Use stable, level surfaces sized for a boot and bucket, with no hidden irrigation line or sharp stake. Keep the primary path clear at wet mature spread. The access route should reach both sides of deep groups or allow stems to be harvested from an opening rather than leaning across low front plants.
Group plants by soil moisture and irrigation need. An annual harvest pocket may require more consistent water than an established drought-tolerant shrub. Do not place them on one undifferentiated schedule and drown the matrix. Drip or careful hand watering can serve groups when emitters are visible for inspection and kept outside cutting paths. Test coverage before the canopy hides tubing.
Install support while plants are short. Mark the mature outline, drive stakes without striking roots or utilities, and keep ties broad and visible. Supports should let individual stems be cut without collapsing neighbors. Remove or lower them after the crop and store safely. Empty stakes left through winter turn the border into an unexplained framework and can create injury at eye or hand height.
Reserve a small work point for a clean bucket, labels, and removed foliage. Harvest tools should not rest on soil or disappear under plants. Keep water containers outside the path and empty standing water. A good route makes selective cutting slower and more deliberate, which protects the border. Efficiency comes from access and records, not from sweeping every open stem into one armful.
Harvest to preserve both the plant and composition
Harvest during a cool part of the day when plants are well hydrated, using clean sharp tools and a clean water container. The correct flower stage varies: some spikes are cut with lower florets open, some composite flowers after opening, and some buds before full display. Use crop-specific guidance. A universal “cut in bud” rule can produce flowers that never open or stems already past their best.
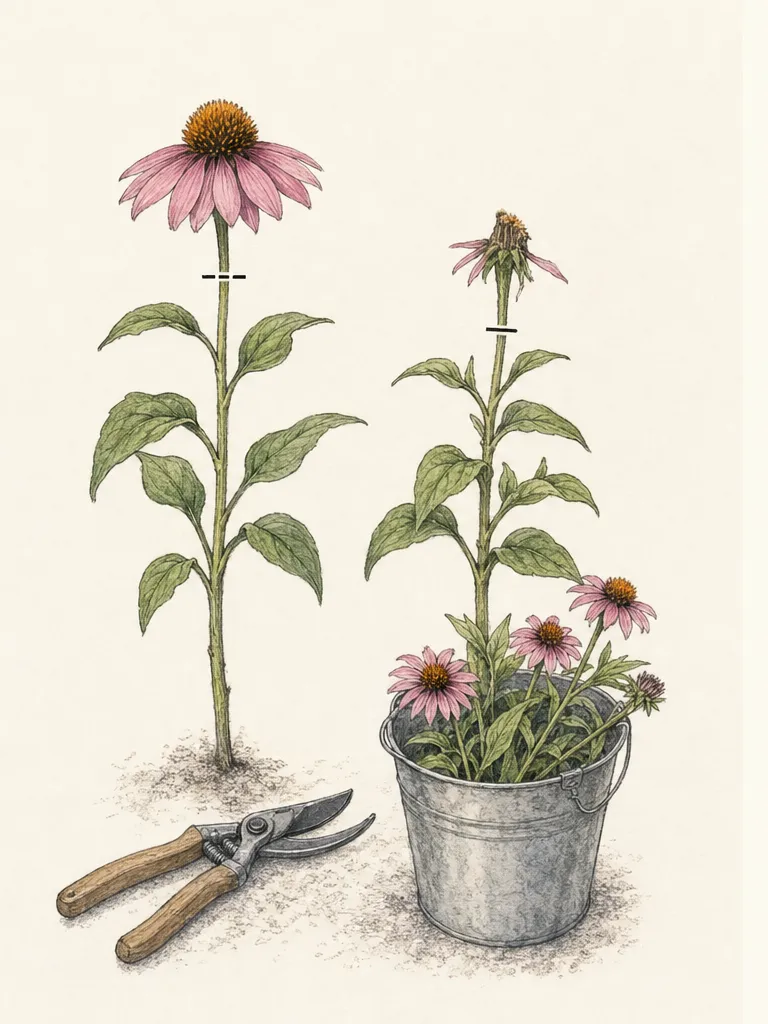
Trace the stem to a cut that leaves useful foliage, buds, and plant structure. Do not reach blindly into the clump. Cut above a suitable node or at an origin according to the species and intended regrowth. Remove no more than the prewritten quota from a visible group. Step back after each few stems and view from the path before deciding the garden can spare more.
Place stems immediately in clean water or the conditioning method supported for the plant. Strip only foliage that would sit below water and avoid leaving piles in the border. Label unfamiliar or potentially toxic material. Clean tools between plants when disease is suspected. Conditioning recipes involving household chemicals should not be improvised; follow reliable floriculture guidance for the crop.
After harvest, water the root zone if measured conditions require it, reset supports, and remove damaged material. Do not fertilize automatically to replace cut stems. Repeated harvest changes plant energy and form; observe regrowth. If a perennial weakens, reduce the quota or move production to an annual patch. The garden is the living source, not a disposable stockroom.
Audit the border after the vase leaves the room
Photograph the border before and after each main harvest from the marked view. Note visible holes, exposed stakes, flattened access, and groups that still carry the color or line. Photograph the arrangement too. The pair shows which plants contribute well to both settings and which require too much garden loss for one useful stem.
At season end, count approximate stems by group and compare with household use. A surplus that was composted or given away reluctantly indicates overplanting; constant shortage may justify a larger separate patch rather than denser display planting. Record disease, lodging, vase life, labor, and water. Yield alone should not select next year’s ornamental border.
Retain the strongest structural and garden-performing plants even when another cultivar produced more stems. Remove or relocate a plant that repeatedly leaves an ugly gap, needs intrusive support, or conflicts with the site. Replace its role—height, color, bloom window, foliage—not merely its flower shape. The matrix should become more dependable as harvest data accumulates.
Close the annual plan with next year’s seed and division quantities, support repairs, sowing dates, and maximum harvest by group. Preserve labels through flowering and do not save hybrid seed with promises of identical offspring. A cut-flower border remains beautiful when the design anticipates absence: every bouquet is a temporary edit the outdoor composition is prepared to absorb.
Steps
- Level
- moderate
- Time
- Two to four hours for planning, then seasonal sowing, support, and harvest
- Tools
- Measured site plan, Bloom and harvest calendar, Clean bypass snips or pruners, Clean harvest bucket, Labels and weatherproof record
- Materials
- Site-suited ornamental seed and plants, Discreet plant supports, Stable stepping points where needed, Inspectable irrigation components
- 1Set view and vase demand
Mark the primary garden view and access, then estimate realistic arrangements and stems by season. Decide whether the site is a display border with selective cutting or needs a separate production patch.
- 2Write a harvest quota
Define how many stems or what fraction can leave each visible group while preserving flowers, foliage, plant energy, and wildlife value. Record species-specific exceptions.
- 3Draw a permanent matrix
Place woody plants, grasses, durable perennials, edge, and ground plane at mature size. The matrix must remain coherent after the cuttable layer loses stems.
- 4Repeat deep harvest pockets
Group compatible annuals and perennials in middle-depth pockets behind a stable foreground, with enough plants to lose several stems and enough air and light to remain healthy.
- 5Build hidden access and support
Provide stable bucket positions, safe stepping routes, inspected irrigation, and early supports that do not dominate the view or entangle harvest hands.
- 6Sequence realistic waves
Overlap source-supported bloom periods and succession sowings without demanding constant abundance. Include foliage and line material, and plan what visually replaces each harvested or declining group.
- 7Cut by crop and composition
Harvest at the plant-specific stage in cool conditions, leave the right node, foliage, or crown, condition promptly, and step back from the primary view after a few stems.
- 8Compare border loss with vase value
Photograph before, after, and arrangement; record stem count, vase life, lodging, disease, labor, and recovery. Adjust one group or quota instead of crowding the whole border.
- 9Assign every plant a second garden role
For each harvest group, record what remains after stems leave: durable foliage, repeat bloom, seedhead, line, screening, or a planned seasonal replacement. Remove a candidate whose only contribution disappears with the bouquet unless a neighboring matrix clearly absorbs the opening.
- 10Protect dormant and permanent roots
Map bulbs, shrub roots, perennial crowns, irrigation, and support anchors before installing annual pockets or stepping points. Keep yearly cultivation shallow and bounded. A cut-flower succession is not successful when removing one crop repeatedly damages the long-lived framework beneath it.
- 11Reconcile production with actual use
At season end, compare stems cut, arrangements used, material discarded, labor, water, disease, and the border’s photographed gaps. Reduce an overproductive group, expand only a proven shortage, and move high-volume demand to a separate patch rather than making the display denser.
Plants in this guide
Related reading
Sources
- Start to Finish: Growing a Cut Flower Garden. University of Illinois Extension. Source record · Accessed 2026-08-19.
- Landscape Design. NC State Extension Publications. Source record · Accessed 2026-08-19.
- Growing Cut Flowers for Joy. Penn State Extension. Source record · Accessed 2026-08-19.