Grow · spring flowering bulb fall planting
Plant Spring-Flowering Bulbs After the Soil Cools
Hold sound bulbs briefly while warm soil cools, then plant at species-appropriate depth in a draining bed so roots can establish before winter.
Published Last updated
In this guide
- Wait for the soil to cool, not for the parcel to arrive
- Inspect the order before storing anything
- Reject a wet site before choosing a planting depth
- Set depth from the bulb itself
- Orient the base and build the group once
- Water to settle soil, then read the weather
- Let roots, winter and spring do separate jobs
- Know where this fall rule stops
- Steps
Wait for the soil to cool, not for the parcel to arrive
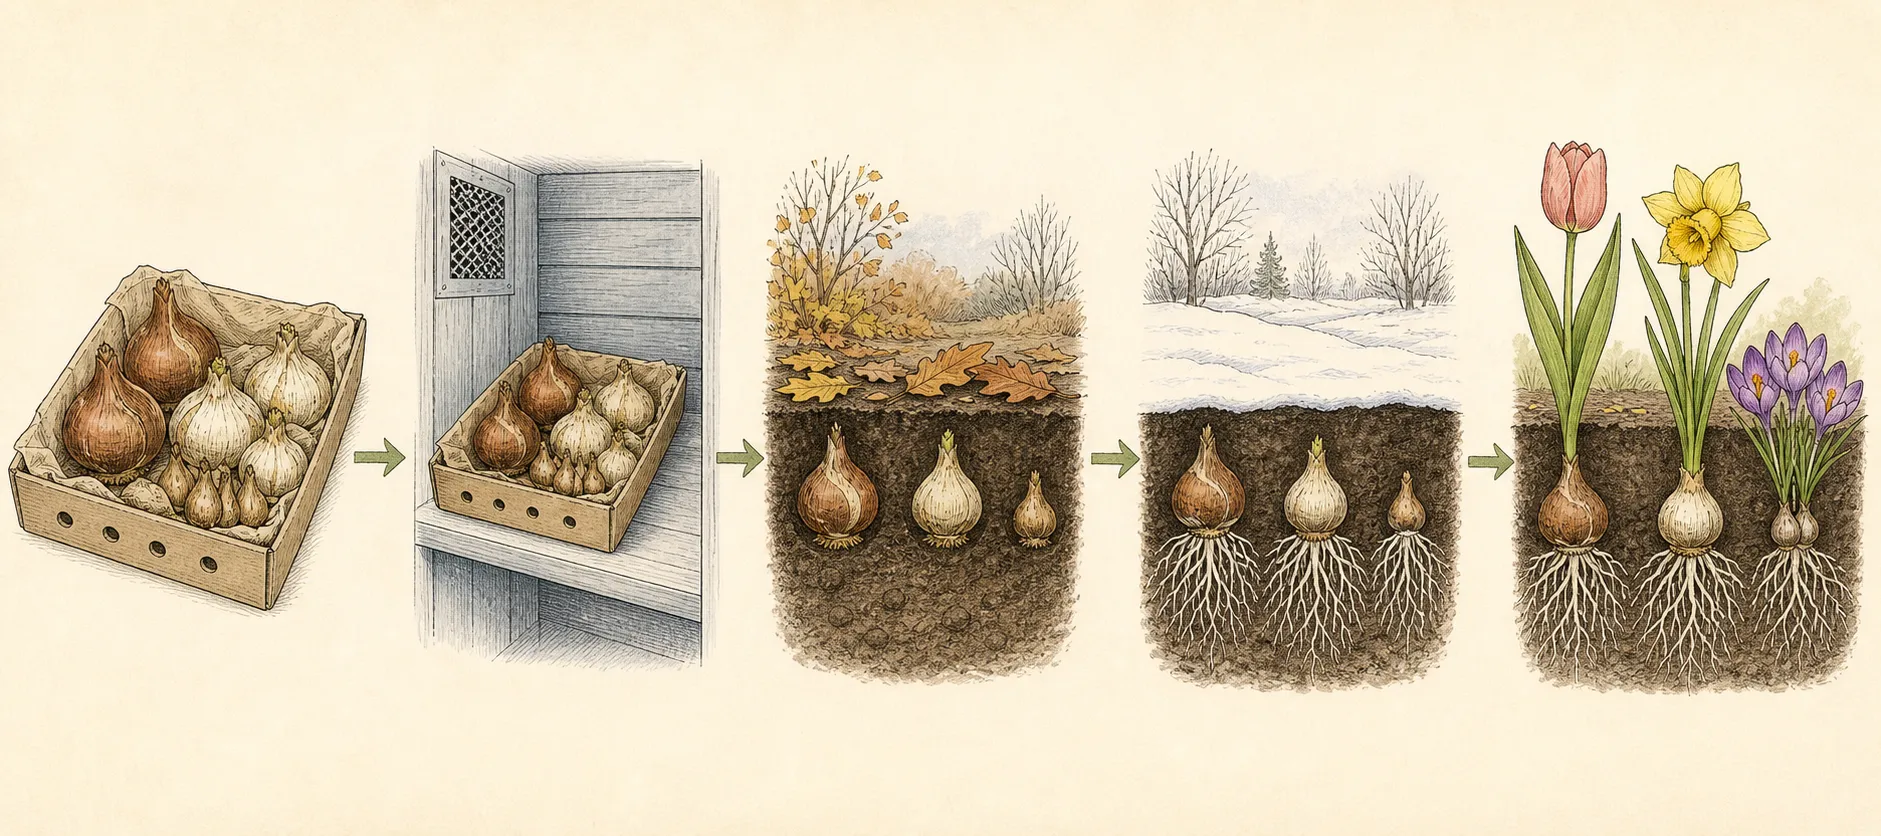
In a cold-winter garden, a box of tulips, daffodils or crocus arriving in late August is not a command to plant into warm soil. Inspect the bulbs when they arrive, keep sound ones cool and dry for a short hold, and plant after autumn cooling begins while the ground is still workable. That interval lets roots establish without encouraging a flush of foliage that will meet winter above ground.
The calendar belongs to the region. University of New Hampshire Extension describes October and sometimes November as the practical window in New Hampshire, after soil temperatures have cooled; University of Illinois guidance uses late September through October for Illinois. Those examples are local cues, not national dates. Follow current Extension guidance for the garden's climate, and move earlier where the soil freezes early or later where autumn stays warm.
Inspect the order before storing anything
Open shipping cartons promptly. Keep bulbs that feel firm and full for their type, with intact basal plates and no spreading mold, wet breakdown or soft collapsed areas. A papery outer tunic may be loose without making a bulb unusable; the deciding tissue is the firm body beneath it. Separate a suspect bulb so decay cannot remain pressed against the rest of the order, and consult the seller when damage is substantial.
If the bed is still warm, leave the sound bulbs in breathable packaging in a cool, dry, ventilated place. Illinois Extension's spring-bulb sheet also keeps stored bulbs away from ripening apples, bananas, melons, pears and peaches because their ethylene can interfere with flower development. A sealed plastic bag, sunny shed or damp refrigerator drawer turns a useful pause into a rot risk. Check the bulbs weekly and plant as soon as the local cooling window opens.
Reject a wet site before choosing a planting depth
A correct date cannot rescue bulbs set in a winter puddle. Watch the proposed bed after a soaking rain and move the planting if water lingers in the root zone. Illinois, Iowa State and New Hampshire Extension all put freely draining soil at the center of bulb success. Improving the whole bed structure can help a marginal site, but a small pocket of amended soil inside dense clay may still act like a basin.
Choose spring light as well as winter drainage. Early bulbs can work beneath deciduous trees because they receive light before the canopy fills, while later tulips and ornamental alliums need enough sun during leaf growth to replenish the underground storage organ. Avoid cutting major tree roots to make a formal trench. In a root-filled site, use smaller planting pockets between roots or choose a different bed.
Set depth from the bulb itself
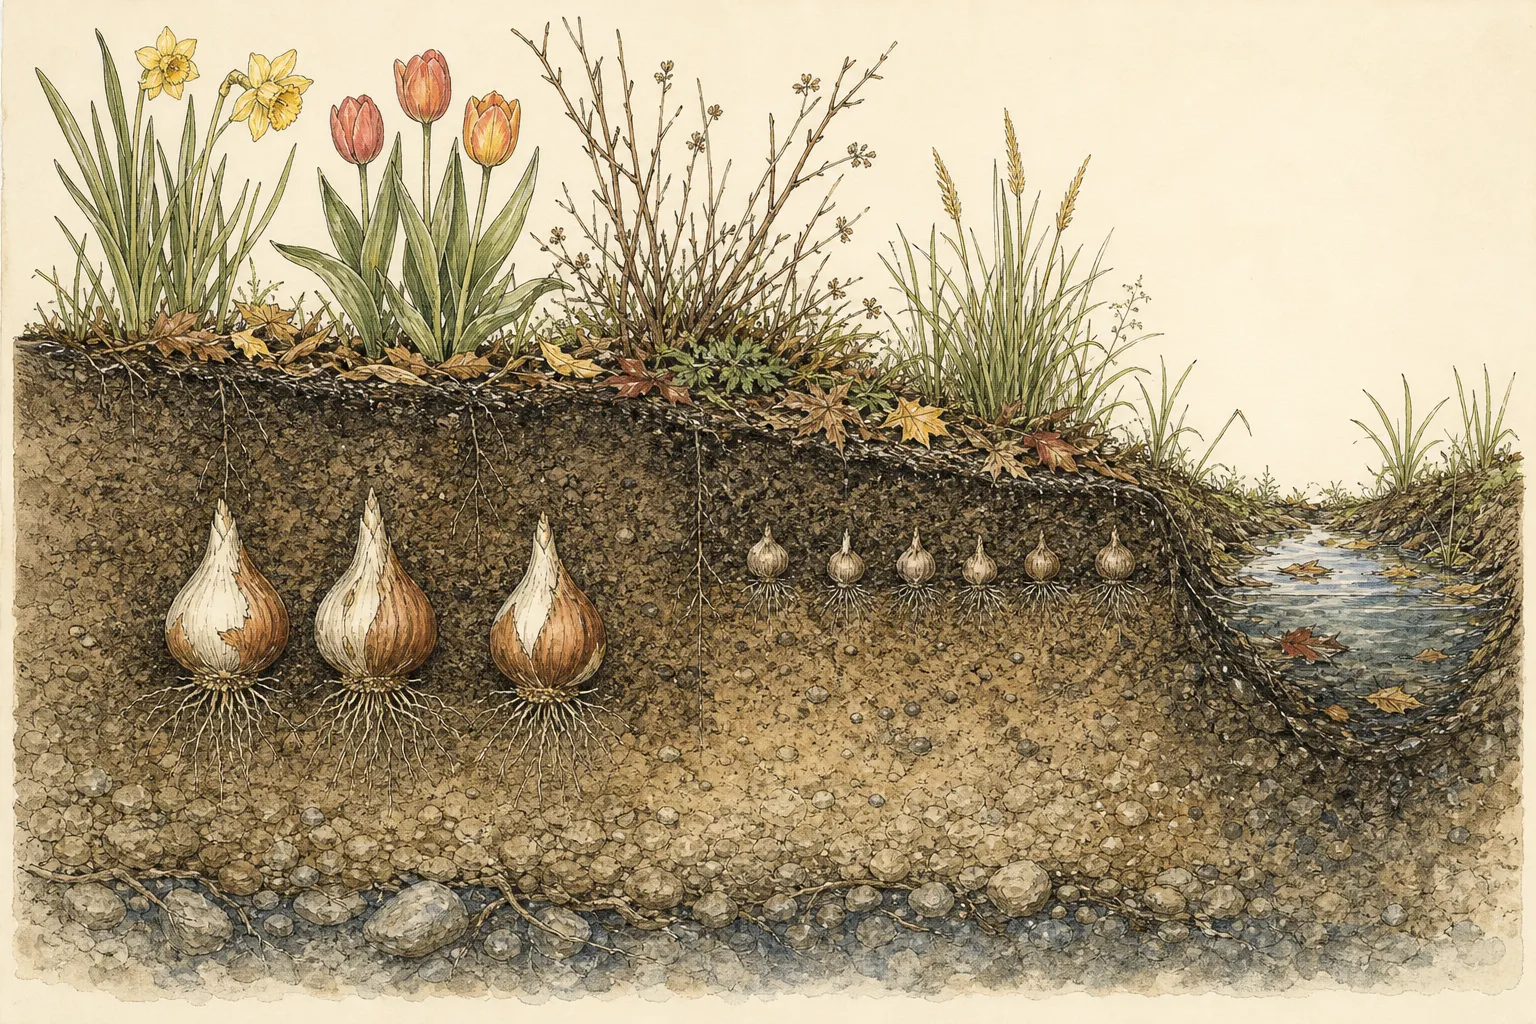
Use the grower's direction for the named species and cultivar first. Where no specific depth is supplied, Iowa State and Illinois describe a general depth of about two to three times the bulb's own dimension, measured from the bulb base to the finished soil surface. Their common examples place large tulip, daffodil and hyacinth bulbs roughly six to eight inches deep and small crocus, snowdrop and squill bulbs about three to four inches deep.
These are useful checks, not permission to make every planting hole identical. Bulb size varies by grade, and some plants sold in bulb catalogs are corms, tubers or rhizomes with different requirements. Mark the finished soil line on the trowel, measure from the basal plate, and account for loose soil settling. A thick mulch layer placed later is not a substitute for the required soil cover.
Orient the base and build the group once
Place a true bulb with its pointed nose upward and its flatter basal plate down. When the top of a small or irregular bulb is genuinely unclear, Iowa State notes that planting it on its side is acceptable; the shoot will turn upward. Never force a bulb into compacted subsoil merely to hold it upright. Loosen the receiving surface, set the bulb gently and return friable soil around it without leaving large air pockets.
For a drift, excavate the whole group to its correct depth, arrange bulbs at the spacing on the supplier's label, then backfill once. This preserves a coherent shape and avoids a field of narrow holes with compacted walls. Keep cultivars in identifiable groups and record the layout before the soil closes. The map will protect dormant bulbs when perennials are divided or annuals are added next year.
Water to settle soil, then read the weather
Water the completed planting thoroughly once so soil settles around the bulbs and moisture reaches the future root zone. Iowa State specifically recommends this when soil is dry and warns against overwatering because most bulbs tolerate wet conditions poorly. After that first watering, use rainfall and an actual soil check rather than a fixed schedule. The bed should be moist enough for roots, never continuously saturated.
A light mulch can moderate moisture and temperature swings after planting. Illinois guidance uses roughly two to three inches for an established bulb bed, while its spring-bulb sheet gives a lighter two-inch example. Match material and depth to the species and region, leave drainage paths open, and avoid burying tiny early bulbs under a dense mat. Mulch belongs over a correctly planted bed; it cannot correct a low wet site.
Let roots, winter and spring do separate jobs
Fall planting starts roots; it is not meant to produce a leafy autumn display. New Hampshire Extension explains that many familiar spring bulbs need a prolonged cold period and gives about ten to fourteen weeks near 40°F or below for its discussion. The same source warns that planting while soil remains warm can draw foliage above ground, spending energy and exposing that growth to winter damage. Cooling soil, root formation and winter chill are linked stages, not interchangeable reasons to rush.
Leave markers in place through winter and resist digging for bulbs on a mild day. If shoots appear early, protect the bed from traffic and let normal weather take over rather than adding fertilizer or repeated water. In spring, compare emergence with the species' expected season and the bed's exposure. South- and west-facing sites warm earlier than north-facing ground, so two groups planted on the same date need not emerge together.
Know where this fall rule stops
This method is for hardy spring-flowering bulbs in climates that provide a dependable winter chilling period. It does not cover tender summer bulbs, indoor forcing or every warm-winter garden. Where winter is too mild for tulips, hyacinths or certain daffodils to receive their required chill, use locally recommended prechilled bulbs and planting dates; cold-climate timing cannot be copied southward simply by changing the month.
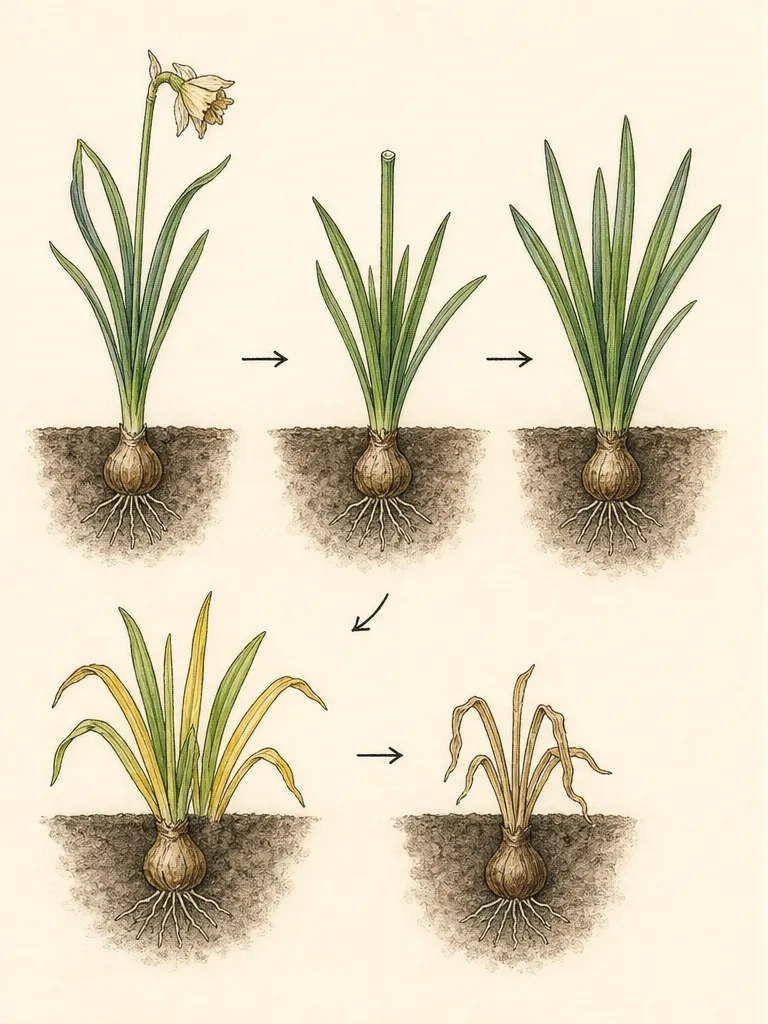
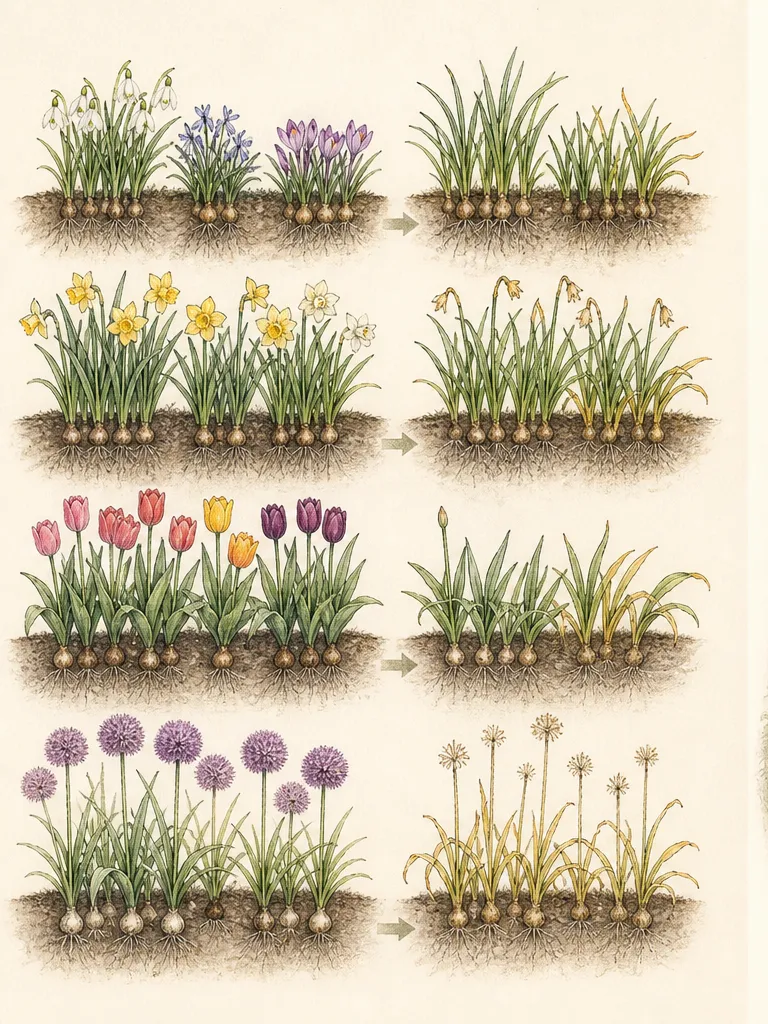
Species also differ in persistence. A daffodil suited to the site may settle into a long-lived colony, while many hybrid tulips are grown for a strong first spring and replaced when their display declines. Preserve every label, note planting depth and date, and evaluate the result after foliage has matured next year. Those records separate a timing mistake from a drainage problem, an unsuitable cultivar or an unrealistic expectation of perennial return.
Steps
- Level
- easy
- Time
- One to two hours for one prepared bulb bed, plus brief weekly checks if planting is delayed
- Tools
- Trowel or spade, Ruler or marked planting tool, Watering can or hose, Weatherproof labels
- Materials
- Firm spring-flowering bulbs suited to the region, Breathable tray or paper packaging for a short hold, Mulch appropriate to the bulb and climate
- 1Open and inspect the order
Unpack bulbs promptly, retain firm specimens with sound basal plates, and isolate anything soft, wet, moldy or collapsed before storage or planting.
- 2Wait for regional cooling
Use current local Extension timing and soil conditions. Hold sound bulbs briefly in a cool, dry, ventilated place when late-summer soil remains warm.
- 3Approve drainage and spring light
Reject a site where water lingers after rain, then match the chosen species to the light available while its foliage is actively growing.
- 4Read the species depth
Follow the supplier's direction; use the two-to-three-times bulb-size rule only as a general check, measuring from the base to finished grade.
- 5Set the bulb and group
Place the basal plate down and pointed nose up, or lay an ambiguous small bulb on its side. Arrange the full drift before backfilling.
- 6Settle the bed with water
Water once to close soil around the bulbs and reach planting depth, then let rainfall and soil moisture determine whether any further fall watering is needed.
- 7Mulch and mark
Apply a locally suitable light mulch without blocking drainage, label each group, and record the planting map before winter hides the bed.
- 8Observe spring emergence
Leave the soil undisturbed through winter, then judge emergence by species and exposure rather than expecting every bulb to appear on one date.
Plants in this guide
Related reading
Sources
- Fall Gardening for Rewards Next Year: Bulbs, Garlic and Lawns [audio]. University of New Hampshire Extension. Source record · Accessed 2026-08-26.
- How do I plant spring-blooming bulbs?. Iowa State University Extension and Outreach. Source record · Accessed 2026-08-26.
- Planting Bulbs. University of Illinois Extension. Source record · Accessed 2026-08-26.
- Selecting & Planting Spring Bulbs. University of Illinois Extension. Source record · Accessed 2026-08-26.