Gardens · autumn bulb display sequence
Plan an Autumn Bulb Display by Bloom Sequence, Foliage Duration, and Repeatable Groups
Design a spring bulb display in autumn by mapping local bloom windows, the longer life of post-flowering foliage, and a small set of repeatable planting groups.
Published Last updated
In this guide
- Start with the display after the flowers
- Count one three-part group before repeating it
- Build a local sequence, not a catalog calendar
- Limit the palette before multiplying bulbs
- Repeat groups that survive the foliage phase
- Use foliage duration to assign companions
- Match the planting pocket to drainage and light
- Set out the sequence at full visual scale
- Make labels part of the maintenance design
- Let spring observations revise the autumn plan
- Keep the display repeatable, not frozen
- Design ideas
Start with the display after the flowers
The most useful autumn bulb plan begins with a spring question: what will the bed look like after each flower fades? Spring-flowering bulbs need their leaves for the next cycle, so the design must accommodate foliage that remains while nearby plants advance. Treat that green phase as part of the display rather than an untidy interval to conceal at any cost. A successful scheme gives the leaves light, room, and a visually calm setting in which to finish.
Photograph the intended bed from its principal views during the current growing season. Mark permanent crowns, emerging perennials, deciduous shade, path edges, irrigation, and places where digging would disturb established roots. Note which neighboring plants begin growth early enough to share attention without lying directly over bulb foliage. The aim is companionship, not camouflage: leaves bent, tied, or buried under a rapidly expanding neighbor cannot perform normally.
Draw three layers on the plan: flowers at their expected display height, leaves at their likely width after flowering, and the surrounding planting as it develops. Exact dimensions and timing vary by species, cultivar, climate, and season, so verify them with regional sources and local observation. This three-layer drawing exposes collisions that a flower-only photograph hides, especially beside narrow paths or low edging where relaxed bulb leaves may occupy more visual space than the blooms did.
Count one three-part group before repeating it
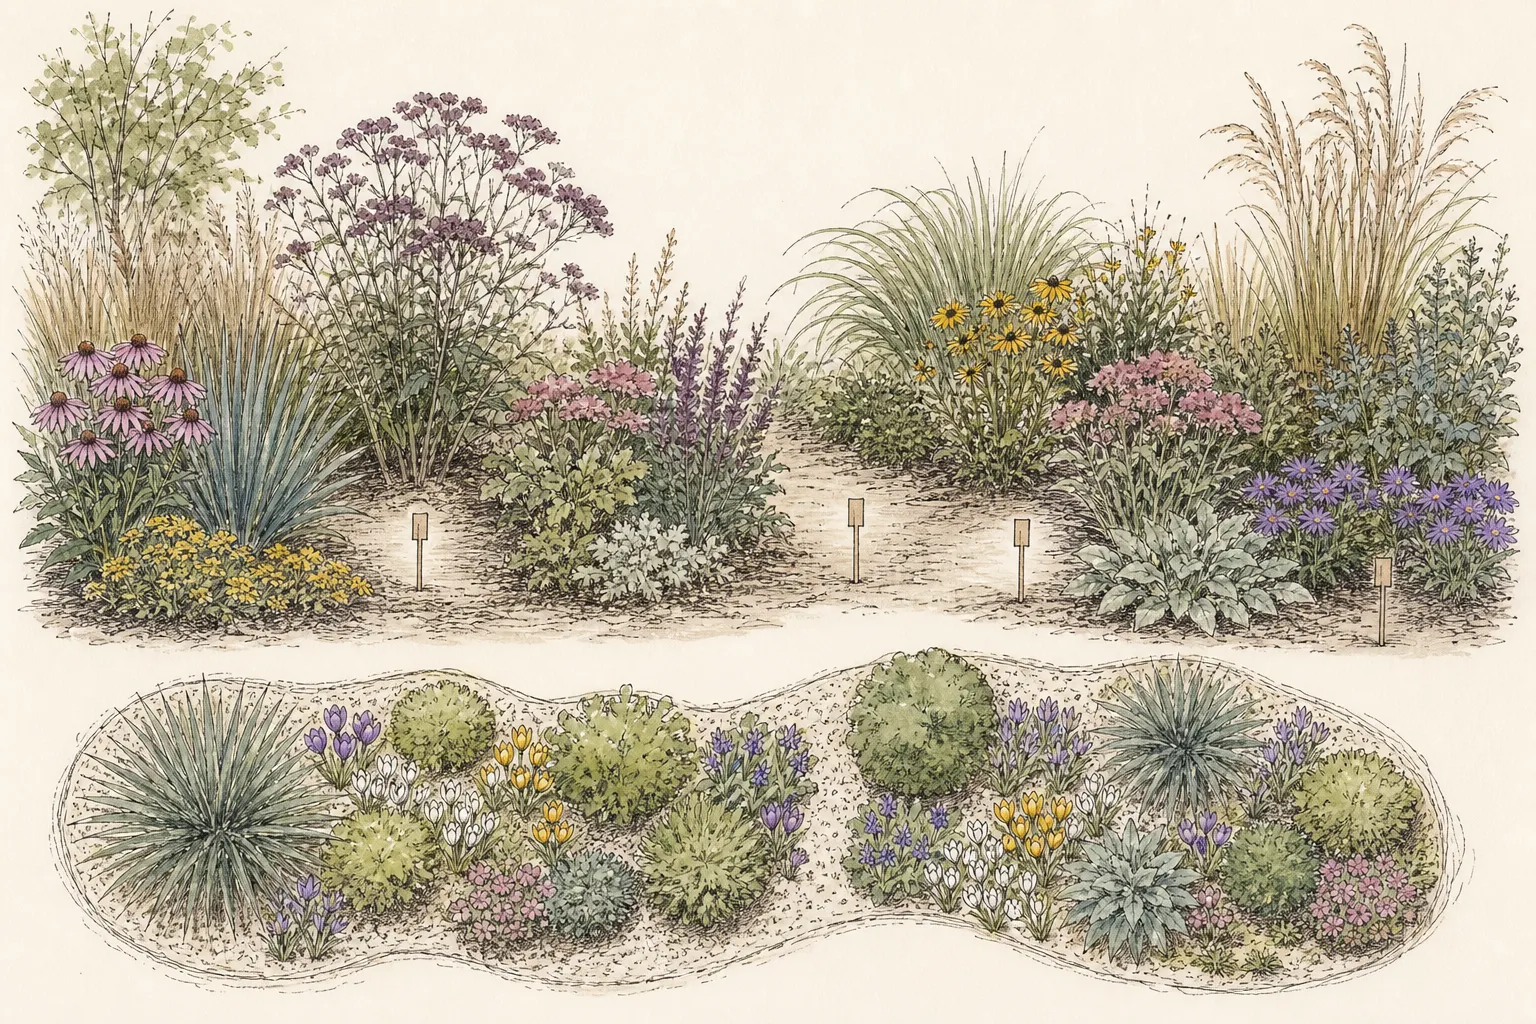
For a Zone 5 Upper Midwest example, assume a 12-by-6-foot bed with useful spring sun, full summer sun, moderately moist soil that drains, and access along both long sides. Divide its length into three 4-foot panels. Each panel receives nine Galanthus nivalis bulbs, three Narcissus pseudonarcissus bulbs and one Echinacea purpurea. Snowdrops open the sequence, daffodils carry a later spring layer, and the coneflower supplies a separate summer role. The order is 27 snowdrops, nine daffodils and three coneflowers; this is an illustrative design, not a field trial or a fixed bloom calendar.
Within each panel, measure x from its left edge and y from the front of the bed. Set the coneflower at (2, 5) feet with a 2-foot mature circle. Set daffodils at (0.75, 3), (2, 3) and (3.25, 3), allowing a 1-foot eventual clump circle at each point. Place snowdrops in a three-by-three group using x=1.5, 2 and 2.5 feet and y=0.5, 1 and 1.5 feet, with half-foot clump allowances. Repeat the panel at x offsets of 4 and 8 feet. These are horizontal planning allowances based on the species profiles; planting depth still follows the bulb-specific guidance.
The coneflower circle stays behind the daffodil foliage zone, with space between their allotted edges. Keep green bulb leaves exposed until their natural decline and watch the actual handoff as perennial foliage expands. Mark every group from the service edge so summer dormancy does not invite digging. If a selected cultivar is larger, a panel receives different moisture, or the summer canopy closes too early, reduce or change that panel before repeating the full order. The existing diagrams remain schematic, with the dimensions here defining this particular example.
Build a local sequence, not a catalog calendar
Sort candidates into relative windows such as first, early-middle, late-middle, and last rather than promising fixed dates. Weather, elevation, aspect, cultivar, and local chilling conditions can shift flowering. Use regional Extension or botanic-garden records as a starting point, then annotate them with dates from gardens near the site. The sequence should remain intelligible if two neighboring windows overlap or one season compresses the whole display.
Give every candidate two bars on a simple strip: one for flower presence and one for green foliage presence. The second bar will often extend farther and should influence placement just as strongly as flower color. Iowa State's aftercare guidance advises leaving spring-bulb foliage until it has naturally yellowed and died back rather than removing it while green. Because the duration is not identical among bulbs or regions, record observed condition instead of assigning one universal number of weeks.
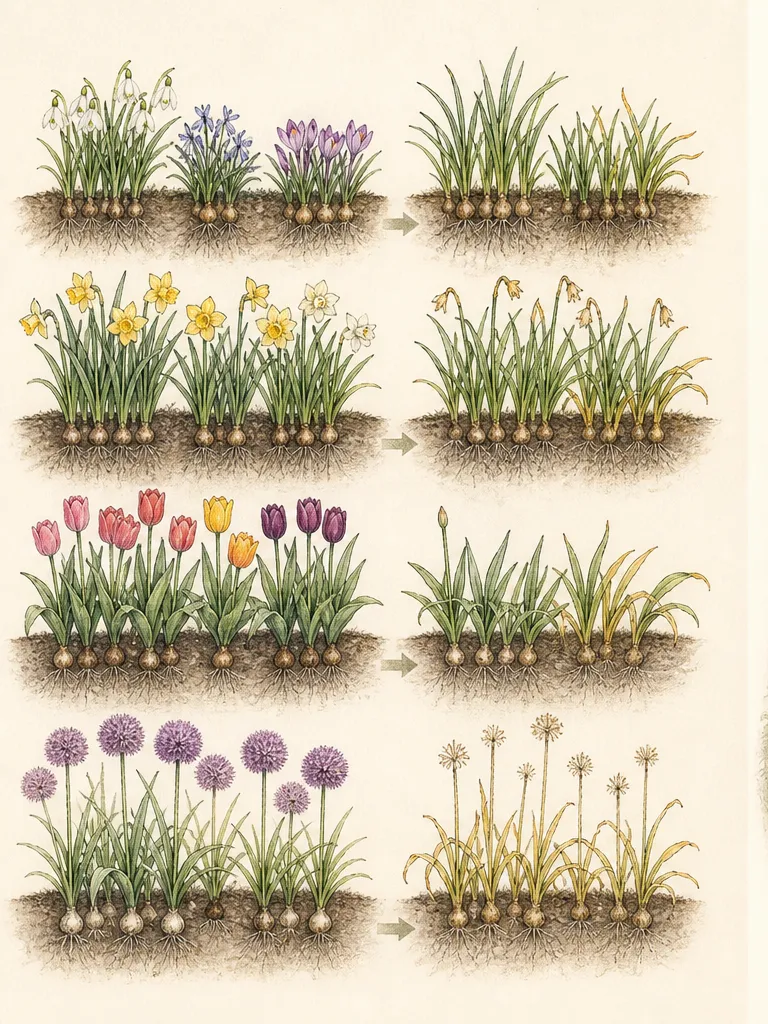
Place an early bulb beside a later-emerging perennial only after comparing both growth curves. The perennial should eventually share the scene without smothering the bulb leaves during their active period. Where spring stays cool and foliage persists, allow more visible room; where local heat accelerates senescence, the overlap may be shorter. The plan is a sequence of living states, not a static recipe copied from another climate.
Limit the palette before multiplying bulbs
Choose a small set of roles before choosing quantities: an opening note, a principal middle-season group, a late bridge, and perhaps one restrained accent. One candidate can occupy more than one role if its local performance spans a useful interval. Limiting the palette makes repeated groups readable and simplifies later care, because the gardener can recognize what is emerging, what has finished flowering, and which foliage still needs protection.
Test color in relation to the whole border. Pale flowers may be clear against dark evergreen foliage but disappear against a bright wall; saturated colors may need repetition to avoid isolated dots. Include bud, stem, leaf, fading flower, and seed head in the color study. Bulbs are not visible only at peak. A combination that looks calm through these transitions will be easier to retain than one designed around a single catalog image.
Confirm that each bulb is suitable for the site's winter conditions, summer moisture pattern, drainage, and light while in active growth. Some bulbs persist and multiply only under particular regional conditions; others are best treated as a shorter-lived display. Check local invasive-plant guidance and toxicity information where children or pets use the space. Do not infer hardiness, naturalizing behavior, or safety from a broad common name, because species and cultivars can differ.
Repeat groups that survive the foliage phase
Design one repeatable group as a complete unit: a limited bulb mixture, its visible post-flowering foliage footprint, one or two companion perennials, and an access edge. Repeat that unit in separated positions rather than scattering every bulb individually. The group should still look intentional when only one component is flowering and when all flowers have gone. Repetition carries the eye while the foliage changes texture and posture.
Vary the group's size only within a clear family. A larger version can mark a path turn and a smaller version can echo it farther away, but keep the same dominant bulb and companion relationship. Draw each perennial at mature crown size and leave the bulb foliage zone visible between crowns. This prevents a young, open planting from being filled so tightly that the established perennials later cover leaves or make bulb renewal impossible.
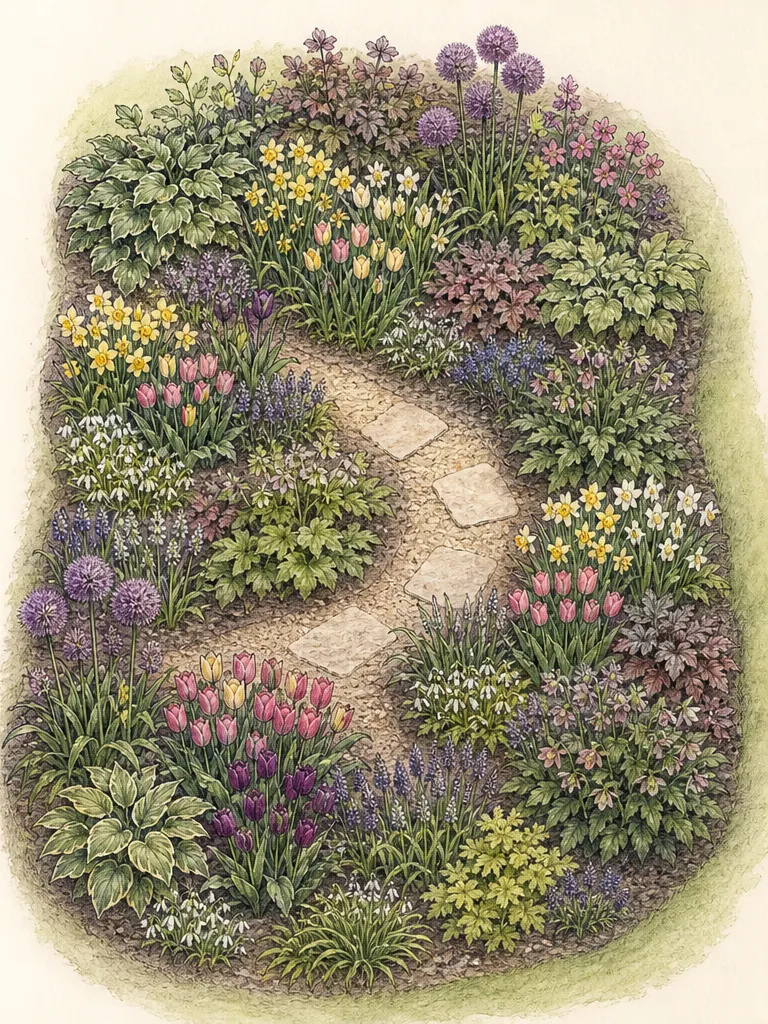
Place repeats where their care can be repeated too. If one group sits in free-draining sun and another in a damp, shaded pocket, they are visually similar but horticulturally different. Adjust the palette or omit the repeat rather than expecting identical performance across different root zones. A repeatable group is a tested site-and-plant relationship, not merely the same shopping list placed at regular intervals.
Use foliage duration to assign companions
Companions need their own jobs. An early clumping perennial can provide a low frame while bulb leaves are upright; a later, broader perennial can take visual emphasis as the leaves yellow; persistent ground-level foliage can hold the border edge without spreading into the bulb cluster. Select behavior and timing locally. A plant that emerges at the right moment in one climate may be too early, too late, or too vigorous in another.
Keep companion crowns beside rather than directly over the bulb group. The bulbs need a route to the surface and leaves need light. Mark a crown-clear zone around long-lived perennials and avoid inserting bulbs so close that future division, staking, or pruning will repeatedly disturb them. At the same time, avoid an isolated bulb island surrounded by bare soil; connect it visually with repeated foliage shapes, surface texture, or a second group.
Do not tie, braid, or fold green bulb leaves to make them disappear. Leave them in their natural position until they yellow and decline. If the foliage consistently obstructs a path or overwhelms a tiny foreground, change the planting location or select a more suitably scaled bulb next autumn. The design should solve the awkward phase spatially, rather than asking plant care to correct a layout problem.
Match the planting pocket to drainage and light
Map where winter water stands, where roof runoff concentrates, and where summer irrigation continues after bulbs become dormant. RHS and university guidance emphasize well-drained conditions for many commonly grown bulbs, but requirements differ, so match the exact plant to the pocket. Correct a broad drainage problem before planting; do not assume a handful of amended soil in a wet bed will create a permanently separate root environment.
Assess light while deciduous plants are leafless and again when they have a canopy. Spring sun under a deciduous tree can support some bulbs even though the same position is shaded later, while an evergreen canopy may intercept light throughout the active season. Root competition and dry shade also matter. Use regionally appropriate woodland bulbs only where their moisture cycle and root competition tolerances fit, not simply because the site looks woodland-like.
Mark utilities, tree roots, and irrigation lines before setting out groups. Preserve a route for the planting tool and for later lifting or division where the selected bulb requires it. If the safest pocket is too small for the intended group, reduce the palette rather than squeezing bulbs among vulnerable roots. The display starts with a suitable underground volume even though the visible design is drawn above ground.
Set out the sequence at full visual scale
Before planting, place labeled markers or empty pots at the center of every group and view them from the house, path, and seating area. Check whether the repeats are visible as a rhythm or collapse into one mass from the main angle. Move the centers, not individual bulbs, until the sequence leads the eye. Then mark the group's outer foliage footprint and the no-dig areas around perennial crowns.
Within each group, use a natural but legible arrangement rather than a rigid row or random broadcast. The planting depth and spacing must follow current guidance for the exact bulb; package directions and regional institutional sources are useful because bulb sizes and local conditions vary. Keep records of what was actually planted, including botanical name, cultivar where relevant, source, location, and autumn date.
Plant at an appropriate local time when the soil and bulb type are suitable, not merely on the first cool weekend. The University of Minnesota and RHS guides provide regional and general frameworks, but gardeners outside those conditions should use their own Extension or botanical institution. Inspect bulbs before planting and discard material showing serious decay. Preserve the orientation and depth appropriate to the plant without forcing a generic rule across bulbs, tubers, corms, and rhizomes.
Make labels part of the maintenance design
A durable map is more useful than a forest of prominent labels. Number the groups on a base plan and place one discreet marker at a reliable edge, not in the middle where it can damage a bulb or vanish under foliage. Record the group recipe and its companions. This prevents accidental digging during summer and makes it possible to compare repeated units without guessing which cultivar was used.
Add an autumn edit date and a spring observation space to the record. Note first visible shoot, flowering order, overlap, leaf decline, gaps, animal damage, and whether the companion emerged at the intended time. These observations belong to this site and will become more reliable than a generalized calendar. Keep weather anomalies in the notes so one unusually early or late season does not cause a complete redesign.
Mark bulbs that require special handling, are short-lived locally, or are toxic if disturbed or ingested. Keep packaging and institutional identification notes where household members can find them. If pets dig in the bed or children handle plants, select and site bulbs with specific safety guidance in mind. Decorative appeal does not replace a species-level toxicity check, and the plan should never imply that all ornamental bulbs share the same risk.
Let spring observations revise the autumn plan
Photograph each repeat from the same viewpoints at emergence, peak flower, fading flower, green foliage, yellowing foliage, and dormancy. The goal is not a perfect diary but evidence of the whole sequence. Compare groups in different pockets. A weak repeat may reveal a site mismatch rather than a poor design idea, while a vigorous group may need more room than the original drawing allowed.
Delay foliage removal until it has yellowed and died back according to the plant's normal cycle. Remove spent flowers when appropriate for the species and design intent, but do not assume every bulb receives identical aftercare. Keep watering decisions tied to the active plant, current soil moisture, and regional guidance. A mixed border can contain bulbs with different summer-moisture needs, which is a reason to group compatible plants rather than distributing them everywhere.
When a group declines, diagnose before replacing it. Consider drainage, shade, animal pressure, planting depth, bulb condition, competition, and regional persistence. Do not automatically add more bulbs to the same pocket. The best revision may be a different species, a moved group, fewer companions, or an acceptance that a particular display will be renewed rather than naturalized. State that intention in the record.
Keep the display repeatable, not frozen
After two or more observed cycles, identify which part of the recipe is dependable: the dominant bulb, the color relationship, the sequence, or the companion. Preserve that core and edit the less successful components. Repetition should provide recognition, not prevent adaptation. If one group receives different light or moisture, let its plant list change while retaining a shared shape or color note.
Protect the gaps that make the sequence readable. Self-sown plants, expanding crowns, and opportunistic autumn additions can erase the spaces between groups. At the seasonal edit, restore the no-dig crown zones, the path edge, and the visual intervals. Lift or divide only according to species-specific timing and regional advice; do not disturb a stable bulb group merely to make the plan look newly planted.
An autumn bulb display is complete when it anticipates more than flowers. Its locally tested bloom order provides movement, its post-flowering foliage has an honest place, and its repeated groups stay recognizable through change. Planning those three elements together turns a short peak into a coherent spring chapter and gives the gardener a practical record for the next autumn.
Design ideas
- Style
- Naturalistic repeated bulb groups integrated with clumping perennial structure
- Space
- Temperate ornamental border, courtyard bed, or deciduous-edge planting viewed through spring
- Climate
- Final bulb and companion choices must match local winter chilling, hardiness, spring light, soil drainage, summer moisture, animal pressure, toxicity concerns, and regional invasive status
- 1Draw flowers and leaves as separate bars
Give each bulb one locally informed bar for bloom and a second for green foliage after flowering. Arrange candidates so the display moves forward while no group is expected to vanish immediately after bloom. Update the bars from spring photographs rather than treating catalog dates as fixed. This simple double timeline makes the least glamorous but most important phase visible before planting.
- 2Repeat one tested three-part group
Combine one dominant bulb, one smaller supporting bulb, and one later-emerging clumping perennial in a clearly bounded group. Repeat it in two or three genuinely similar planting pockets. Keep mature crowns and bulb foliage zones separate on the plan. If a pocket differs in drainage or light, retain the group's visual relationship but substitute locally suitable plants instead of forcing an identical list.
- 3Use an opening, middle, and closing note
Assign one candidate to open the season, a repeated group to carry its middle, and a later bulb to close it. Choose by relative local order, not promised calendar dates. Echo one color or leaf shape across the three moments so they read as a sequence. Keep enough overlap that a weather-shortened season does not divide the display into isolated episodes.
- 4Frame relaxed leaves with a durable edge
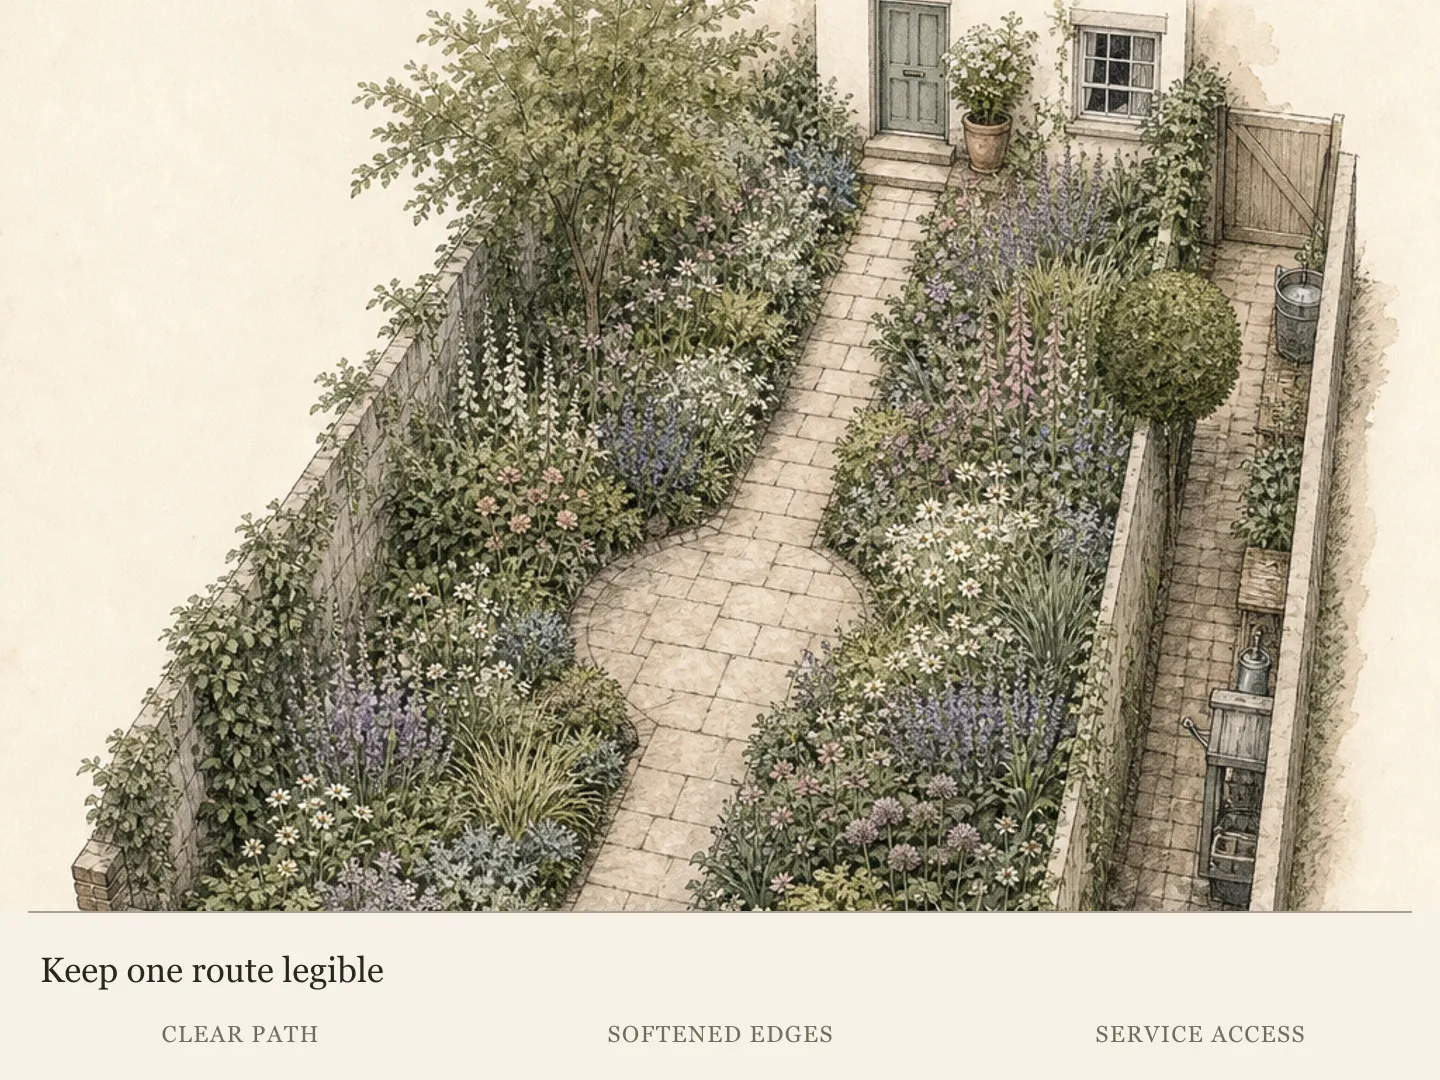
Place a restrained clumping foliage plant or a clear hard edge where declining bulb leaves might otherwise spill into circulation. Leave the bulb leaves untied and exposed to light until they yellow naturally. The edge should organize the view without covering the leaves or occupying their root zone. If the leaves still obstruct access, relocate the bulb group rather than cutting it early.
- 5Mark every group from one safe edge
Put one discreet marker beyond the bulb footprint and connect its number to a paper or digital plan. Record botanical name, cultivar, source, date, and companion. The edge marker helps prevent summer digging without creating visual clutter among flowers. Place it where routine perennial work will not move it and where it remains findable after all bulb foliage has disappeared.
- 6Reserve one trial pocket
Test an unfamiliar bulb and its proposed companion in one representative pocket before repeating it across the border. Observe flowering order, foliage duration, summer conditions, animal pressure, and persistence. A full cycle may reveal that the combination is attractive but incompatible in care. Keeping the trial bounded makes adaptation inexpensive and protects established perennial crowns from repeated autumn disturbance.
- 7Repeat color without repeating conditions
Where the border shifts from sun to open shade, carry one color note across both areas with different locally suitable bulbs. Keep group shape and spacing rhythm related, but respect each plant's drainage, light, and climate needs. The eye reads continuity while the plant list changes responsibly. Verify identification and regional behavior rather than assuming visually similar bulbs require the same treatment.
- 8Photograph the unglamorous weeks
Take the same view after petals fall and again while foliage yellows. Note whether companion growth supports, crowds, or hides the leaves and whether the path remains clear. These photographs are the most useful evidence for the next autumn plan. Preserve successful gaps, move mismatched groups, and resist buying additional bulbs until the full sequence—not only peak bloom—has been reviewed.
Related reading
Sources
- Care of Spring-Flowering Bulbs After Bloom. Iowa State University Extension and Outreach. Source record · Accessed 2026-08-19.
- Planting Bulbs, Tubers and Rhizomes. University of Minnesota Extension. Source record · Accessed 2026-08-19.
- Bulbs: Growing Guide. Royal Horticultural Society. Source record · Accessed 2026-08-19.
- Galanthus nivalis. NC State Extension. Source record · Accessed 2026-09-09.
- Narcissus pseudonarcissus. NC State Extension. Source record · Accessed 2026-09-09.
- Echinacea purpurea. NC State Extension. Source record · Accessed 2026-09-09.