Grow · late summer flower gap map
Map Late-Summer Flower Gaps Before Ordering Fall Bulbs
Photograph the border at its quietest, distinguish seasonal gaps from structural failures, and plan bulbs and later perennials without crowding crowns or losing access.
Published Last updated
In this guide
- Record the quiet week from fixed viewpoints
- Separate a flowering gap from occupied dormant space
- Trace crowns, roots, and access on a scale sketch
- Separate flower gaps from foliage and structure gaps
- Assign each gap one seasonal job
- Plan bulb drifts around living crowns
- Choose later perennials by mature behavior
- Test the sequence before placing an order
- Install in phases and preserve the map
- Audit the border at the same quiet week next year
- Price maintenance space before adding flower volume
- Use orders as a revision checkpoint
- Steps
Record the quiet week from fixed viewpoints
Photograph the border from the entrance, main window, path, and one close maintenance view during the week that feels empty. Keep camera position and framing repeatable. A single close-up exaggerates a gap and ignores the border’s foliage rhythm. Include paths, supports, and neighboring plants so the map records composition and access, not only missing flower color.
Write the date, recent weather, and which plants have just finished or have not yet begun. Extreme heat or drought can pause bloom temporarily. A late-starting perennial may still be developing. Compare earlier photographs before declaring the week a design failure. The goal is to identify a repeatable seasonal gap, not fill every response to unusual weather.
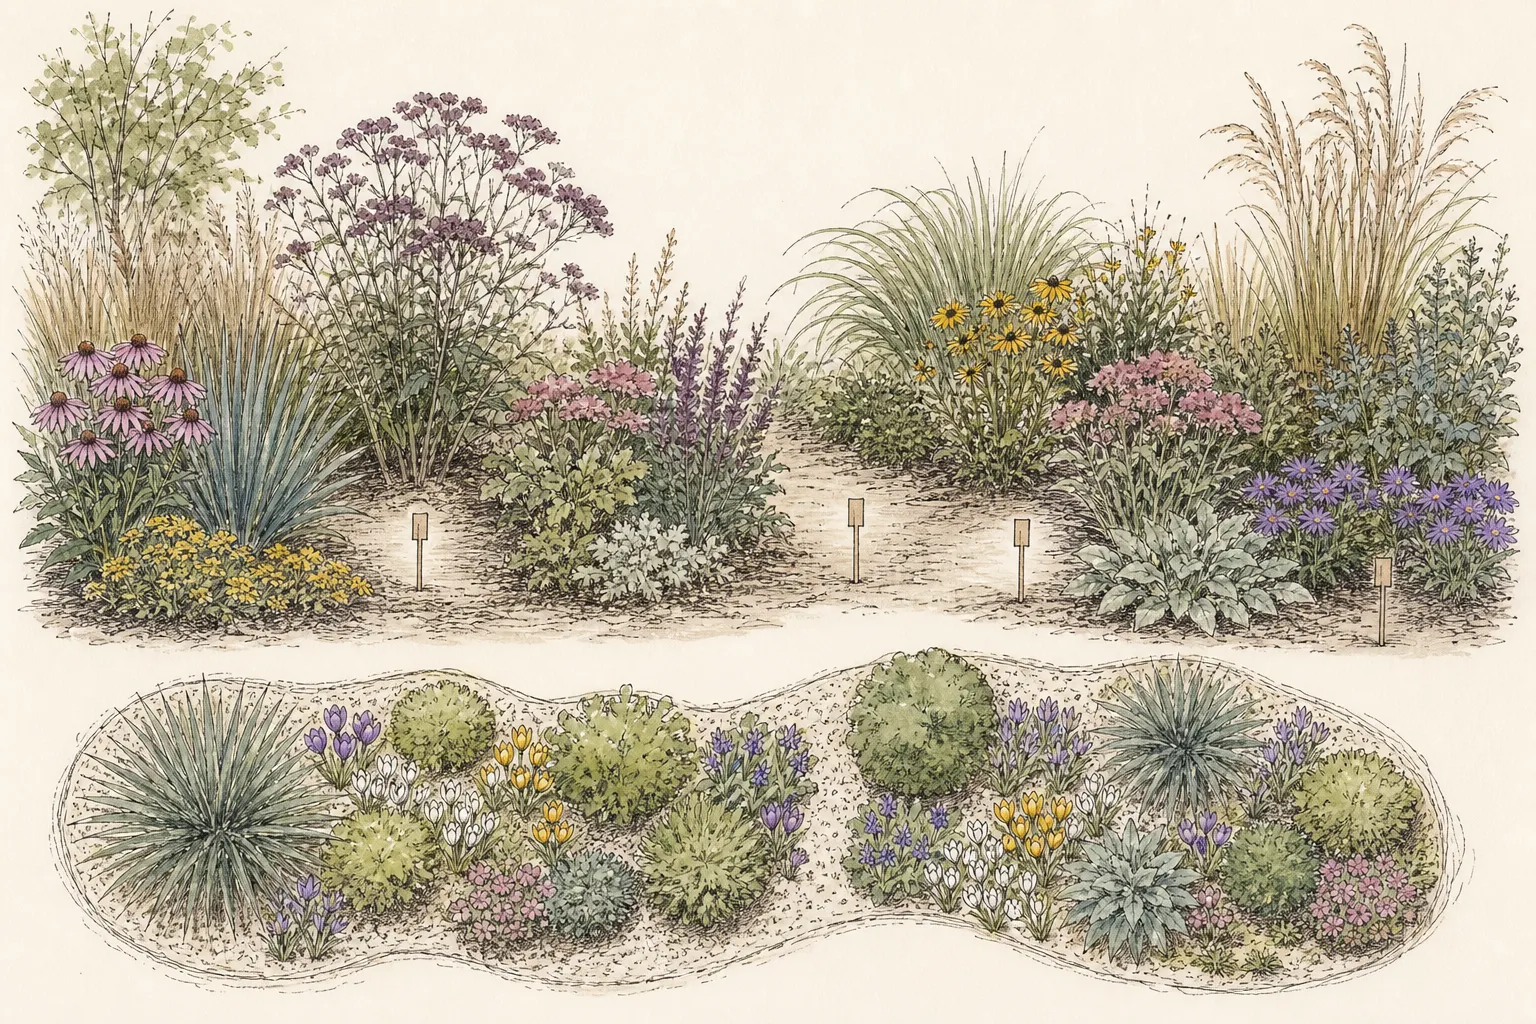
Mark what still works: strong foliage, seed heads, bark, grasses, a hedge, or repeated shapes. A border can be quiet and coherent. If structure remains visible, the missing element may be one modest color or vertical accent. If the route and repeated forms disappear, bulbs alone will not repair the underlying composition.
Separate a flowering gap from occupied dormant space
Map mature crowns and no-dig zones before placing another plant in a quiet view. Check whether foliage, future growth or a later season already uses the opening. For a real flower gap, fit the proposed addition at adult size and include its maintenance route. Keep an unfilled comparison where the seasonal role remains uncertain.
Trace crowns, roots, and access on a scale sketch
Measure bed length and depth and draw mature crown footprints, not just plant labels. Mark woody roots, irrigation, buried bulbs, supports, and stepping points. Use photographs to locate foliage that has spread beyond the original tag. The open surface between leaves may already contain roots or dormant crowns and should not be treated as unoccupied soil.
Give every maintenance task a route. Preserve access to deadheading, division, taps, and the back of deep borders. A bulb drift under a step or a new perennial in the only handhold creates future damage. Mark no-dig areas around trees and established shrubs. The finished plan should show where a trowel can enter without severing important roots.
Note light and moisture for the exact gap in spring and late summer. Deciduous shade, neighboring growth, and irrigation can change through the season. A bulb that completes growth before canopy closure may fit a spring pocket that is too dry or dark for a summer perennial. A late flower needs the conditions present while it is actively growing, not the April light in a catalog photograph.
Separate flower gaps from foliage and structure gaps
A flower gap occurs when the border remains proportioned and readable but lacks a desired bloom role. A foliage gap exposes soil after an early plant disappears. A structure gap leaves no repeated mass, edge, or vertical line. Label each differently. Spring bulbs solve early color, later perennials solve an extended living layer, and persistent foliage or a small shrub may solve structure.
Do not ask one plant to solve all three unless its mature habit truly does. A tall late perennial added for August color can cast spring shade, crowd neighbors, and leave a winter hole. A bulb drift provides spring bloom but disappears. Use layered assignments: a persistent ground layer, a modest bulb group, and a late accent only where the footprint and maintenance support all three.
Preserve intentional negative space. Open mulch around a specimen, a path widening, or a view through the border can make dense planting legible. If the gap repeats the composition’s breathing room, label it keep open. A shopping list should not erase the spaces that allow mature plants to be seen and reached.
Assign each gap one seasonal job
Choose one primary role for each real gap: early bulb color, late-summer flower, persistent foliage, seed-head structure, or access. Rank the view where it matters and the maintenance the area can support. A front-edge gap may need low clean foliage; a rear gap seen from a window can carry taller transparent stems. Keep the role specific enough to reject attractive plants that do not solve it.
Repeat roles already present before introducing a new form. If rounded foliage groups carry the border, use another site-suitable rounded mass in the gap. If a few vertical accents mark turns, repeat that language. Repetition makes a seasonal addition belong. A unique shape in every gap fragments the border and creates a maintenance list with no shared rhythm.
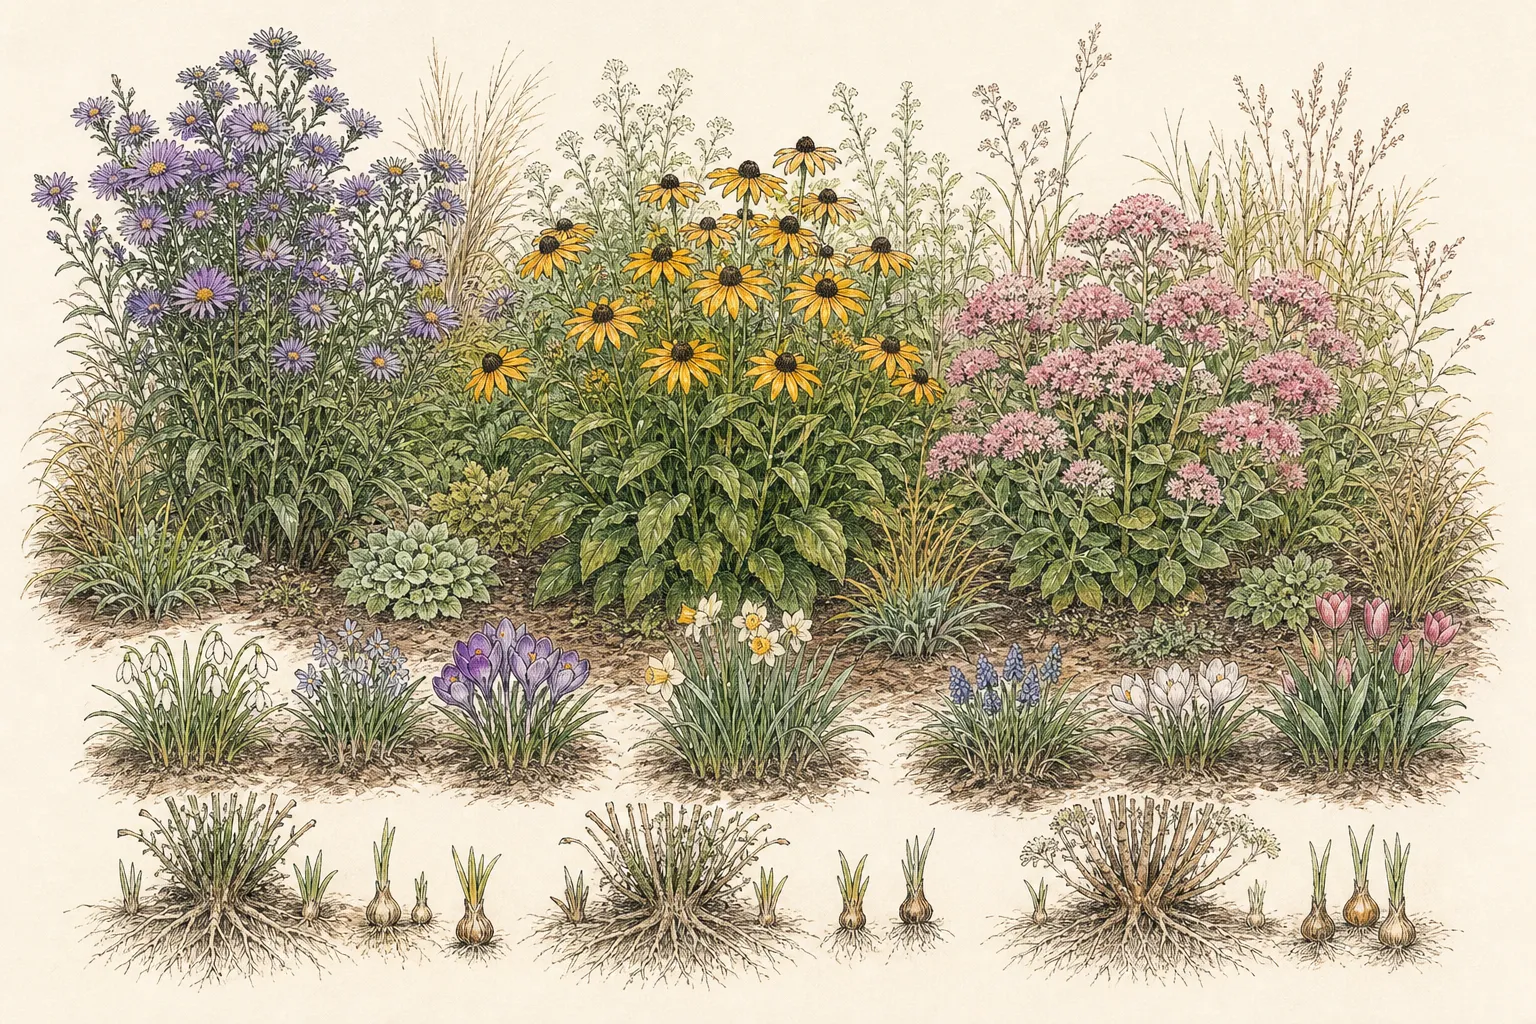
Set a maximum mature footprint and height. Include neighboring spread and the view through the gap. The plant must fit without annual severe pruning or frequent division. For bulbs, estimate clump multiplication and leaf duration. The green leaves need light after flowering; they cannot be hidden by cutting them early for tidiness.
Plan bulb drifts around living crowns
Choose bulbs for local hardiness, chill, soil drainage, wildlife pressure, and bloom sequence. Order from reputable sources and follow species-specific planting depth and timing. Do not assume every bulb naturalizes or tolerates the same moisture. Check toxicity where pets or children may encounter bulbs, and wear gloves with irritating species.
Place bulbs in small repeated drifts between crowns rather than one continuous trench. Use the scale sketch and surface markers. Dig individual or modest group holes with a trowel, moving when roots are encountered. Avoid slicing a ring around perennials or trees. The drift can curve around roots and still read as one group from the path.
Plan for post-bloom foliage. Place bulbs where emerging perennial leaves can screen yellowing foliage without smothering it before energy returns to the bulb. Do not braid or tie leaves. Mark the group so later division and summer planting do not excavate it accidentally. A bulb plan includes the weeks after flowers as much as the bloom moment.
Choose later perennials by mature behavior
For late-season bloom, confirm mature height, spread, support needs, moisture, and whether the plant spreads by seed or rhizome. Match the actual pocket. A plant advertised for shade may need consistent moisture that dry tree roots cannot provide. A sun lover placed in the gap because August light looks bright may have spent spring under a closed canopy.
Prefer a small number of repeated plants or divisions over many singles. Three related pockets can extend the border rhythm and provide a clearer pollinator resource than isolated novelties. Check regional invasive lists and garden escape risk. A late flower that requires constant containment is not a low-maintenance solution to a temporary quiet week.
Include foliage quality and winter behavior. Some late bloomers emerge late and leave spring gaps, so pair them with bulbs or earlier foliage. Others form a substantial mound that can crowd the very bulbs meant to precede them. Draw both seasons and leave enough root and maintenance space.
Test the sequence before placing an order
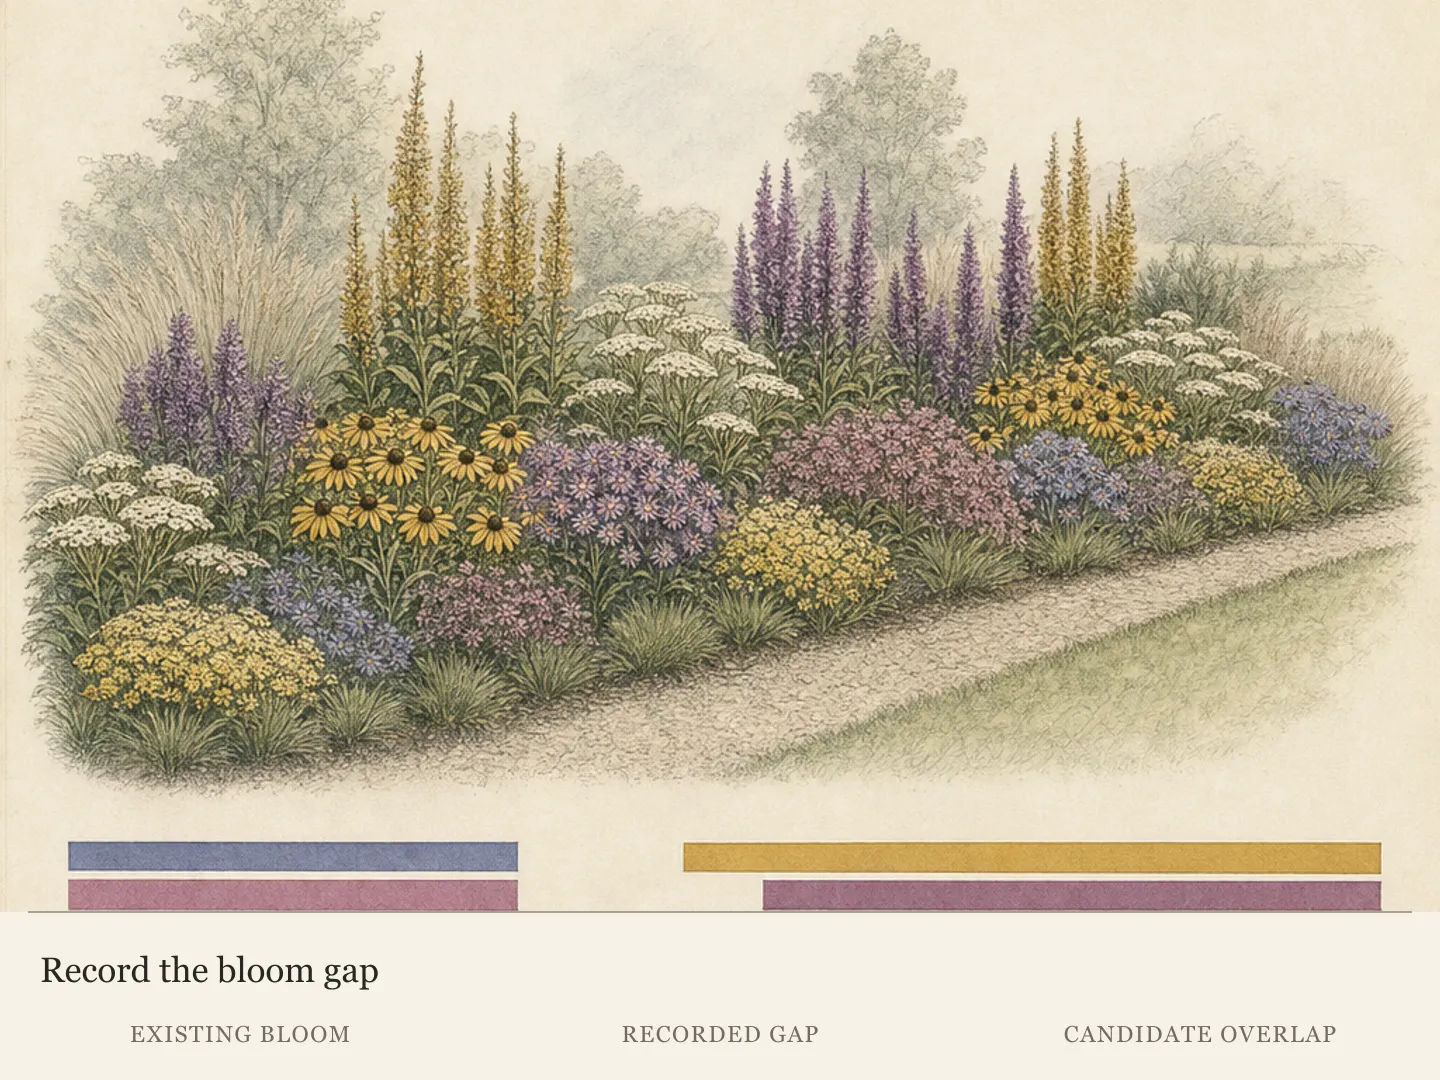
Make a twelve-month strip for each chosen gap and shade the weeks of foliage, flower, seed, and dormancy. Add neighboring plants. Look for overlap, not uninterrupted bloom at any cost. A brief quiet interval can reveal foliage and reduce maintenance. The test should show that each new plant contributes a distinct season without erasing another.
Check quantities against mature spread and budget. Order enough bulbs to read as a drift, but keep perennial quantities within the measured footprint. Reserve some budget for labels, mesh protection where locally appropriate, and replacement after a trial. Do not buy the entire border’s final count before a new species proves itself in the site.
Review maintenance dates. Bulb planting, perennial division, staking, deadheading, and seed control should fit the gardener’s calendar and access. If all new roles demand work in the same difficult week, simplify. A seasonal plan succeeds only when the tasks that sustain it can be reached and completed.
Install in phases and preserve the map
Mark every pocket while existing foliage is visible, then photograph the markers from the fixed views. Plant perennials in a suitable seasonal window and bulbs at the locally recommended fall time. Keep labels at the bed edge and on the drawing. Do not rely on memory after foliage dies back and mulch levels change.
Use small hand tools around crowns and roots, setting plants at proper grade and bulbs at their documented depth. Water new perennials through establishment and keep bulb soil drained. Restore mulch conservatively without burying crowns or creating a thick layer over small bulb shoots.
Leave one gap unfilled as a control if the design is uncertain. Compare the edited and open areas through the next season. This prevents a full commitment to a weak hypothesis and preserves room for natural plant spread. Phased installation is a design tool, not unfinished work.
Audit the border at the same quiet week next year
Return to the fixed viewpoints on the same dates. Compare flower, foliage, access, and plant health. New bulbs may solve spring while leaving the late gap unchanged; a later perennial may still be establishing. Judge each assigned role separately and allow realistic maturity time.
Edit multiplication and crowding early. Thin volunteer seedlings, divide only when appropriate, and remove bulbs or perennials that repeatedly fail in the measured conditions. Do not add another layer automatically. A failed plant may reveal dry soil, deep shade, or root competition that should remain open rather than receiving a third candidate.
Update the map with actual spread and bloom dates. The document becomes a living record of the garden’s seasonal sequence. Future orders can answer a real gap with known dimensions instead of repeating the cycle of seeing bare soil, buying plants, and discovering that the space was already occupied by another season.
Price maintenance space before adding flower volume
Estimate the yearly work attached to each candidate: staking, division, deadheading, seed control, bulb foliage management, and irrigation. Put that work beside the access route on the plan. Late bloom placed at the unreachable center can become a source of collapsed stems and weeds even when its color solves the photograph.
Give high-frequency tasks to path edges and low-frequency durable groups to deeper pockets. Keep bulbs away from zones divided annually and place self-sowers where seedlings can be edited. The schedule should show that one addition does not force repeated disturbance through another plant’s roots.
Set a maintenance ceiling for the gap. When every candidate exceeds it, preserve foliage or negative space instead. A seasonal quiet period that remains healthy and reachable is better than a densely flowering interval followed by years of work the gardener will not sustain.
Use orders as a revision checkpoint
Before payment, compare the cart with the scale map and remove any plant without a labeled pocket. Check final quantities, substitutions, toxicity, invasive status, mature size, and source reputation. A sale bundle should not decide the border’s repetition or force a new color into every gap.
Reject substitutions that change height, spread, moisture, or bloom role even when flower color is similar. Ask for the botanical name and cultivar. If the intended plant is unavailable, leave the pocket marked and revisit the design. Empty planned space remains more useful than an incompatible impulse replacement.
Store the final order with the seasonal strip and installation photograph. When plants arrive, verify identity and condition before setting them out. The purchase record becomes part of the next quiet-week audit and helps explain whether a failed role came from design, site, stock, or establishment.
Steps
- Level
- easy
- Time
- Two to three hours for mapping and selection, plus later planting
- Tools
- Camera, Measuring tape, Graph paper, Trowel
- Materials
- Plant markers, Catalog or local plant references
- 1Photograph the quiet week
Use fixed entrance, window, path, and maintenance viewpoints. Record date, weather, plants just finished, and plants still developing. Mark successful foliage and structure before calling the absence of flowers a failure.
- 2Draw mature crowns and no-dig zones
Measure the border and trace plant spread, roots, buried bulbs, irrigation, supports, and stepping access. Add seasonal light and moisture. Treat open leaf space as potentially occupied soil until the map shows a safe planting pocket.
- 3Classify each real gap
Label flower, foliage, structure, seed-head, and access gaps separately. Preserve intentional negative space. Give each gap one primary seasonal job and repeat an existing shape or rhythm instead of introducing a new form everywhere.
- 4Layer bulbs around crowns
Choose locally suitable bulbs, plan small repeated drifts, and mark post-bloom foliage space. Use individual or group holes around roots instead of trenches. Keep labels and allow leaves to mature naturally after flowering.
- 5Fit late plants at mature size
Check height, spread, moisture, light, support, seeding, and winter behavior. Repeat a few site-suitable plants and reject aggressive or high-maintenance candidates that cannot be contained from existing access.
- 6Test the twelve-month sequence
Plot foliage, flower, seed, and dormancy for new and neighboring plants. Check quantities, budget, and maintenance dates. Keep a trial count and preserve one open control area where the design remains uncertain.
- 7Install, label, and revisit
Mark pockets while foliage is visible, plant in appropriate seasonal windows, and protect grade and roots. Photograph the installation. Return at the same quiet week next year, update actual spread and bloom dates, and edit before ordering another layer.
- 8Assign maintenance to reachable zones
List staking, division, deadheading, seed control, foliage ripening, and irrigation for every candidate. Place frequent work near paths, keep bulbs out of annual division zones, and reject additions whose maintenance cannot be performed from the preserved access.
- 9Set a workload ceiling
Decide how much recurring work the gap can justify. Preserve strong foliage or intentional open ground when every flowering solution exceeds that limit. Do not trade one quiet week for a permanent high-maintenance conflict.
- 10Audit the cart against the map
Require one labeled pocket for every ordered plant, verify botanical identity and mature behavior, and reject substitutions that change the assigned role. Store the final order with the seasonal plan and confirm delivered stock before installation.
- 11Preserve one unfilled comparison
Leave one mapped quiet pocket open through the next seasonal cycle and photograph it beside the edited pockets. The comparison shows whether added plants improved sequence and structure or simply increased crowding, irrigation, and maintenance around already successful crowns.
- 12Update actual bloom dates
Replace catalog ranges with the observed first, peak, and finish dates from this garden. Include weather anomalies and establishment year. Use the revised strip before ordering again so the next addition answers a measured local interval.
- 13Keep scale
Retain mature plant measurements on every revision.
Related reading
Sources
- Plant Bulbs in the Fall for a Spring Celebration. Penn State Extension. Source record · Accessed 2026-08-19.
- Perennials: Selection, Planting, and Care. University of Maryland Extension. Source record · Accessed 2026-08-19.
- Growing Astilbe in Iowa. Iowa State University Extension and Outreach. Source record · Accessed 2026-08-19.