Grow · bearded iris division
Divide Bearded Iris Without Burying the Rhizomes
Divide a crowded bearded iris clump after flowering, keep firm young rhizomes, reject borer or soft-rot damage, and replant with the rhizome tops at the soil surface.
Published Last updated
In this guide
- Make sure this is a bearded iris job
- Accept a division by rhizome condition and identity
- Prepare the destination before the clump leaves the ground
- Lift the rhizome network intact
- Keep only firm, growing pieces
- Replant shallowly, with roots anchored
- Guide establishment without covering the rhizomes
- Read the first season correctly
- Steps
Make sure this is a bearded iris job
Divide a bearded iris when the clump has become a pavement of overlapping rhizomes, the center is thinning, or flowering has fallen away despite adequate sun. The familiar three-to-five-year interval is a useful inspection reminder, not a command to disturb a vigorous, open clump. A plant that still flowers well and has room for its newest rhizomes can remain in place.
This procedure is specifically for bearded iris: the spring-flowering irises with sword-shaped leaves, thick horizontal rhizomes near the surface, and a fuzzy beard on each lower petal. Siberian and Japanese irises form different clumps, prefer different moisture conditions, and are divided into larger multi-fan sections. Dutch and other bulbous irises are bulbs, not rhizomes. Identify the plant before copying a cut or planting depth from this guide.
In much of the Upper Midwest, July and August provide the customary window. The useful biological cue is that flowering has ended and the new outer rhizomes have had time to develop, while enough frost-free weather remains for replanted roots to establish. Farther south, the same stage may arrive on a different calendar. Use local Extension timing if summer heat or the first hard freeze makes a July date unsuitable where you garden.
Do not confuse post-bloom tidying with division. Removing a spent flower stalk leaves the underground network intact; division lifts and edits the whole clump. Make the larger intervention only when crowding, a dead center, declining bloom, a site problem, or the need to move the cultivar supplies a reason. That condition-led choice prevents a healthy plant from losing a flowering season merely because an anniversary arrived.
Accept a division by rhizome condition and identity
Keep this shallow-rhizome method for confirmed bearded iris. Select sound growing sections during the appropriate post-bloom window, rejecting damaged material before it reaches the receiving bed. Reset the roots below the surface while preserving the rhizome's specified surface position. Rooted fans and new leaves are the early checkpoint; a full flower display may take longer.
Prepare the destination before the clump leaves the ground
Choose the receiving ground first. Bearded iris flowers best in full sun—Extension guidance commonly uses at least six hours of direct light—and its fleshy rhizomes require drainage. If the old clump sits where water lingers after rain, division alone will not solve the site. Move the keepers to freer-draining ground or use a locally appropriate raised bed rather than returning cleaned pieces to the same wet pocket.
Lay out enough space for the divisions you intend to keep. Twelve to eighteen inches between standard bearded iris divisions is a common home-garden range, with wider spacing reasonable for large cultivars and narrower spacing likely to bring the next division sooner. A group of three can make a full-looking unit without forming an immediate knot: arrange the rhizomes loosely and point the leaf fans outward so each growing end advances into open soil.
Have the holes, labels, and disposal plan ready before lifting. A digging fork or spade, a clean sharp knife or pruners, a hose or bucket for exposing the rhizomes, and a hand trowel cover the work. If several cultivars meet in one bed, mark their positions while some distinguishing record still exists; once the flowers are gone and the clumps are apart, green fans offer little help in rebuilding the original map.
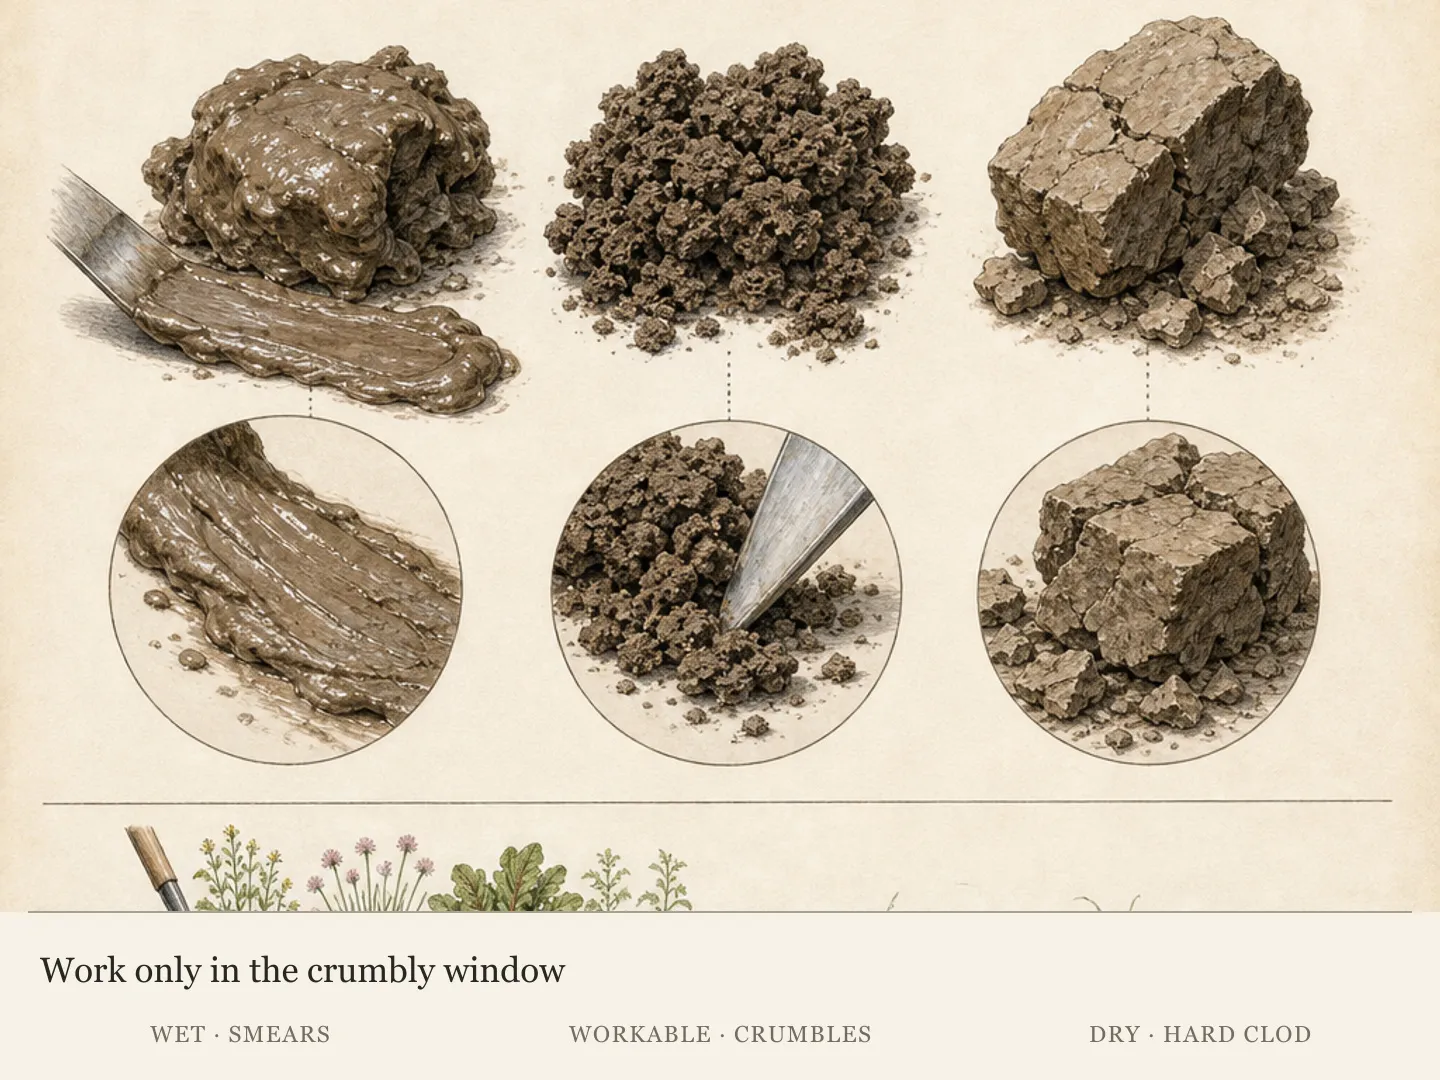
If the soil is very dry, water the bed a day before the work so the fork can enter without shattering hard ground. The aim is workable soil, not saturation. Clear mulch and loose debris from the rhizome surfaces, find the outer edge of the network, and mark any irrigation line or buried edging. These minutes of preparation protect more roots than trying to improvise a destination while divisions lie exposed.
Lift the rhizome network intact
Start outside the visible rhizomes and work around the clump. Bearded iris roots are shallow, but the newest rhizomes may extend beyond the leaf mass. Push a fork or spade down beyond that perimeter, loosen several sides, and lever upward in small increments. The objective is to raise the branching network as one piece, not to drive a blade through every growing tip and sort out the damage later.
Once the clump is free, shake away loose soil and set it where every branch can be seen. Rinse only as much as needed to expose joints, roots, soft spots, and tunnels; in loose soil, shaking may be enough. The revealed network tells the history of the clump: older central segments sit behind younger outer growth, and each active end carries a fan that points in the direction the plant was expanding.
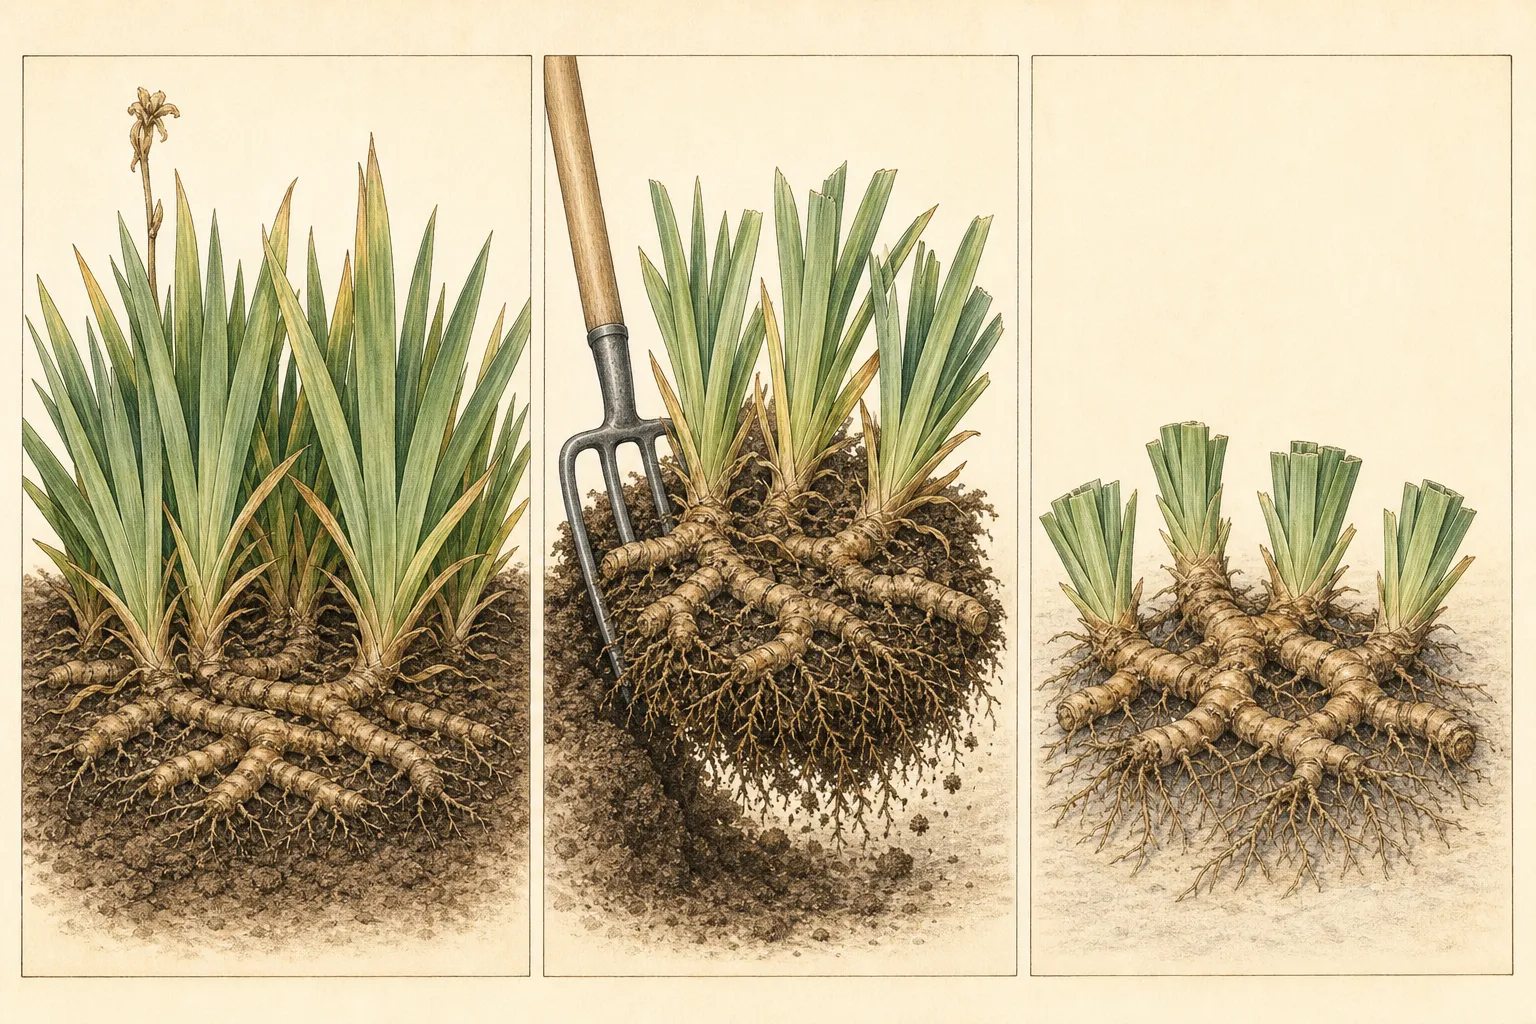
Shorten the leaves to about one-third of their original height; on tall bearded types this often leaves a fan roughly four to six inches high. The shorter fan makes the division easier to handle and reduces leaf area while new roots establish. A neat V-shaped cut is traditional but not necessary. Preserve sound green leaf bases, and remove only leaves that are dead or damaged beyond useful tissue.
Do not begin by chopping the whole mass into equal blocks. First trace natural forks and identify the young outer pieces that have their own roots and fan. Equal size is less important than complete anatomy. A compact division with a firm rhizome, healthy roots, and one sound leaf fan has a coherent growing point; a larger piece assembled from old, rootless center tissue does not.
Keep only firm, growing pieces
A useful division feels firm and is usually light tan inside, carries several healthy roots, and ends in a living leaf fan. Illinois and Wisconsin Extension use a piece about three inches long and roughly thumb-thick as a practical benchmark for common tall bearded iris. Treat that as a screen for substance, not a reason to pare a naturally smaller cultivar to a number. The required parts—firm storage stem, roots, and a growing fan—matter most.
Work outward from the old center. Young rhizomes attached at natural joints are the usual keepers; old leafless or spongy central segments have finished their useful work and can be removed. Pull sound joints apart where they separate cleanly. Where a cut is needed, use a clean sharp blade at a natural fork, protect your supporting hand, and leave the retained piece with an undamaged fan and root system.
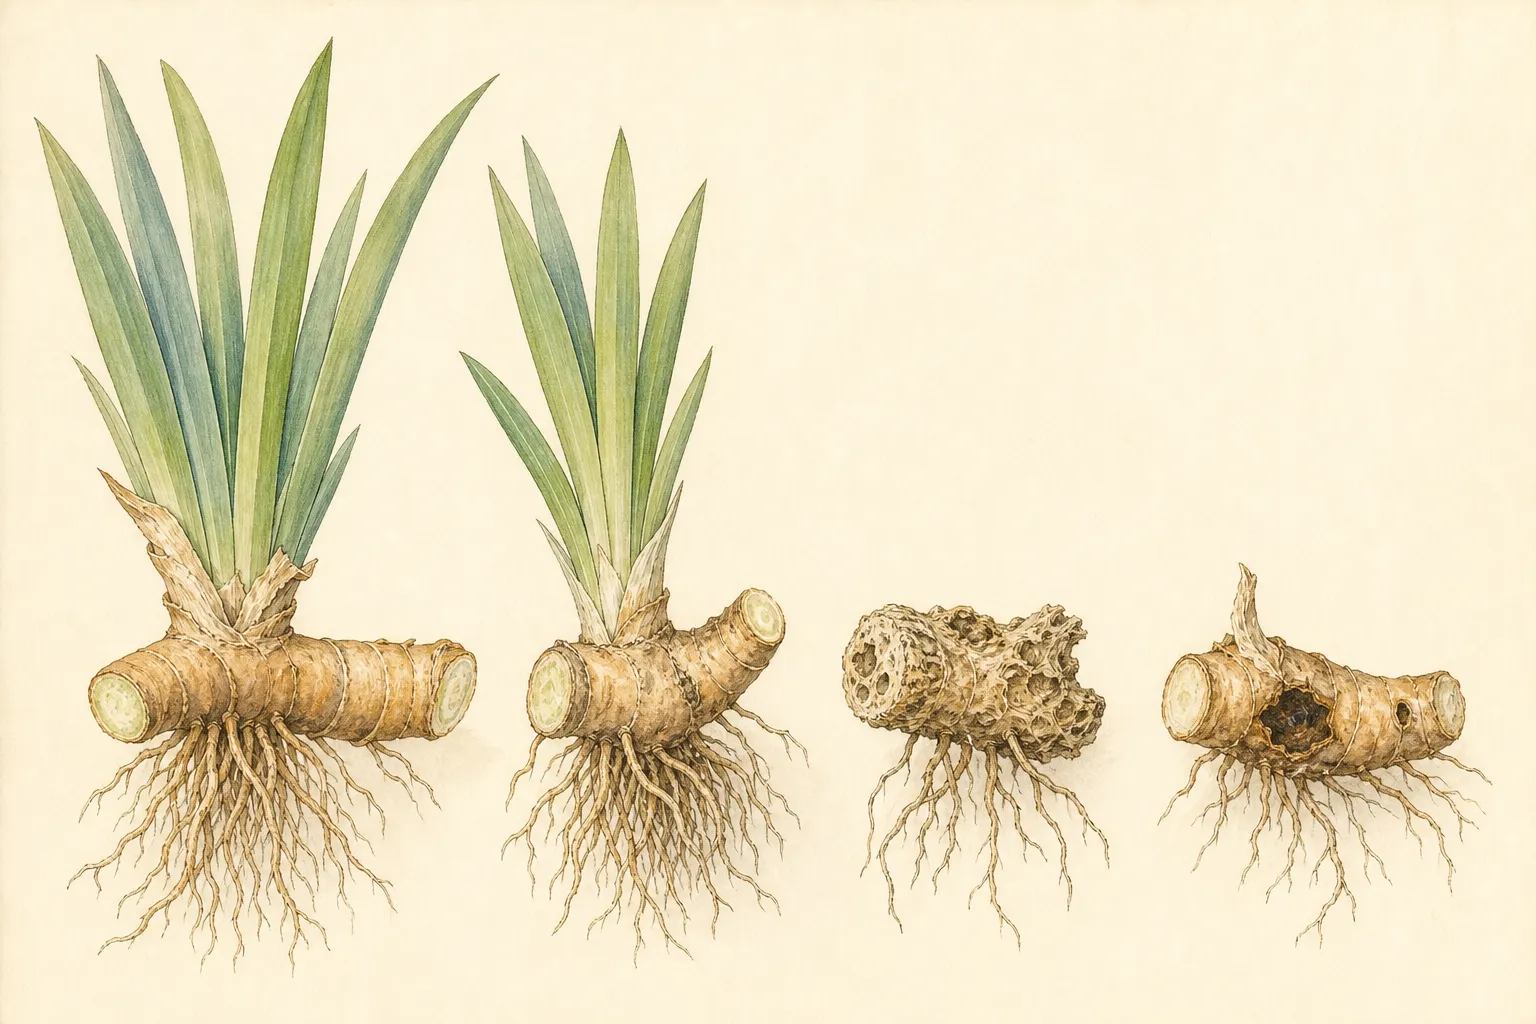
Inspect before any piece returns to soil. Iris borer damage may appear as streaking or ragged tissue at the leaf base, frass, tunnels, or a caterpillar inside the rhizome. Bacterial soft rot produces soft, mushy tissue and a conspicuous unpleasant odor. Reject a piece that is broadly soft, dark, hollowed, or doubtful. Do not return diseased or insect-infested tissue to the bed; discard or destroy it by the method recommended locally.
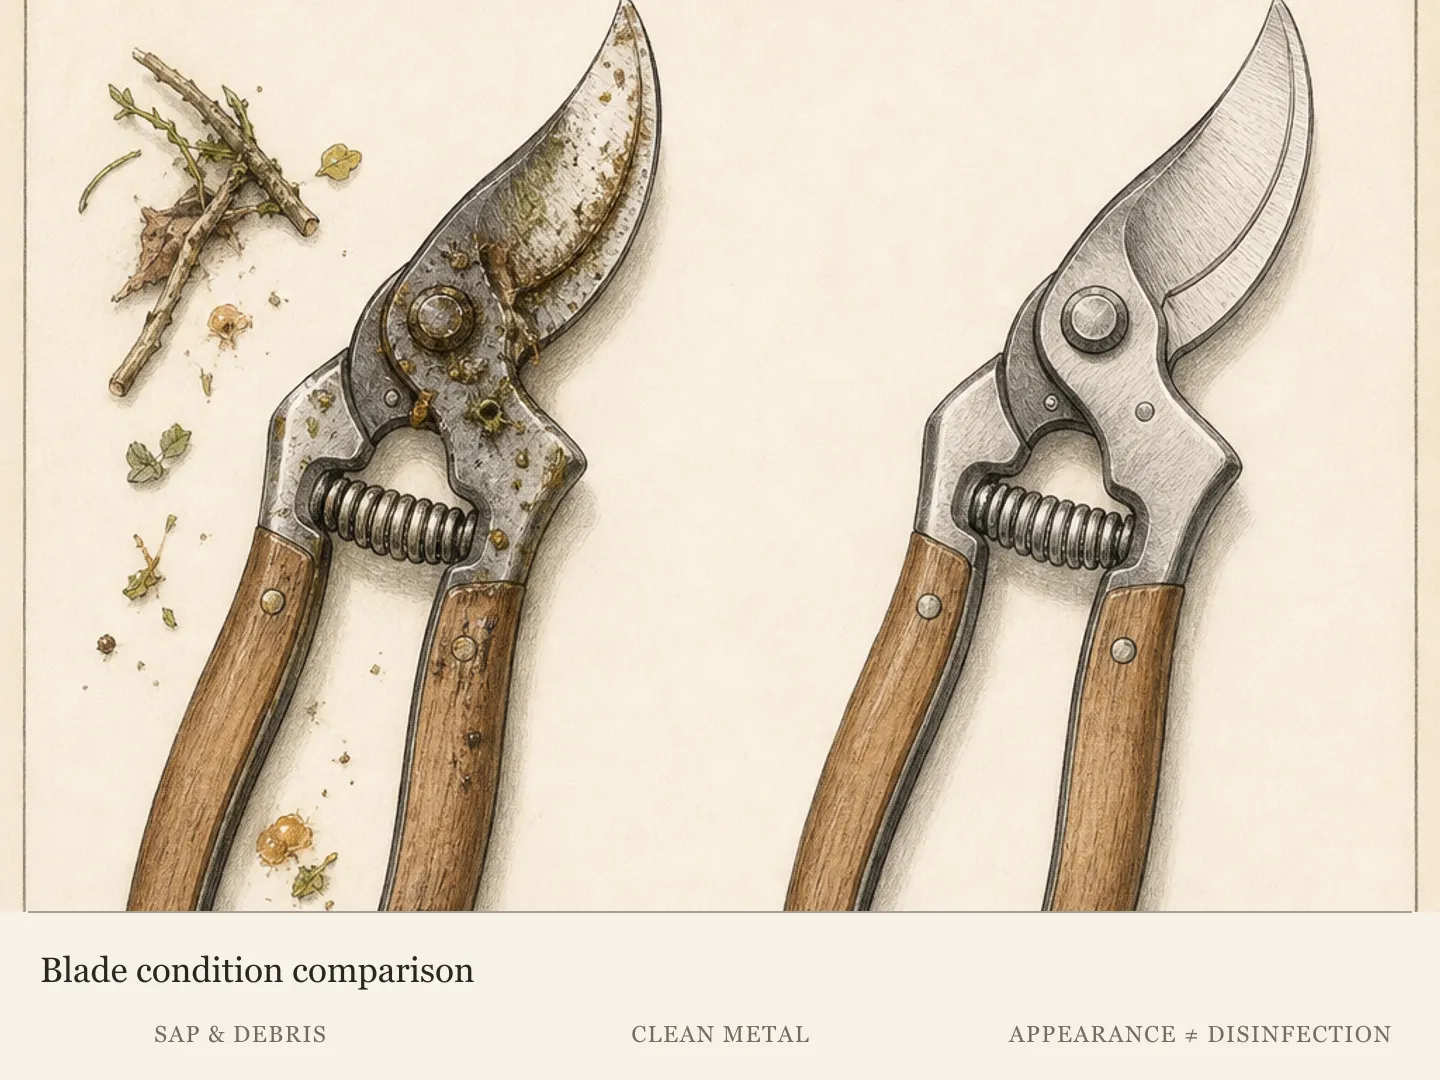
Disinfect the cutting tool between cuts when disease is present so the sorting operation does not carry contaminated sap to a clean rhizome. Follow the disinfectant label rather than improvising a stronger mixture, and keep healthy trimmings separate from suspect waste. A generous pile of divisions is not a reason to save a marginal piece; the point of division is to reset the bed with sound material.
Replant shallowly, with roots anchored
Make a shallow hole with a low mound through its center. Set the rhizome horizontally on the crest and spread the fibrous roots down both sides into the surrounding soil. This geometry gives the roots firm contact without using the rhizome as an underground peg. Point the leaf fan toward the open space where the next rhizomes can grow, especially when three divisions share one planting group.
Return soil around the roots and firm it gently, but leave the upper surface of the rhizome visible or under only a very thin skin of soil. At finished grade, the roots are buried and anchored while the fleshy horizontal stem remains at the light and air boundary. Do not measure depth from the bottom of the hole; a deep hole is harmless only if its central mound still holds the rhizome at the surface.
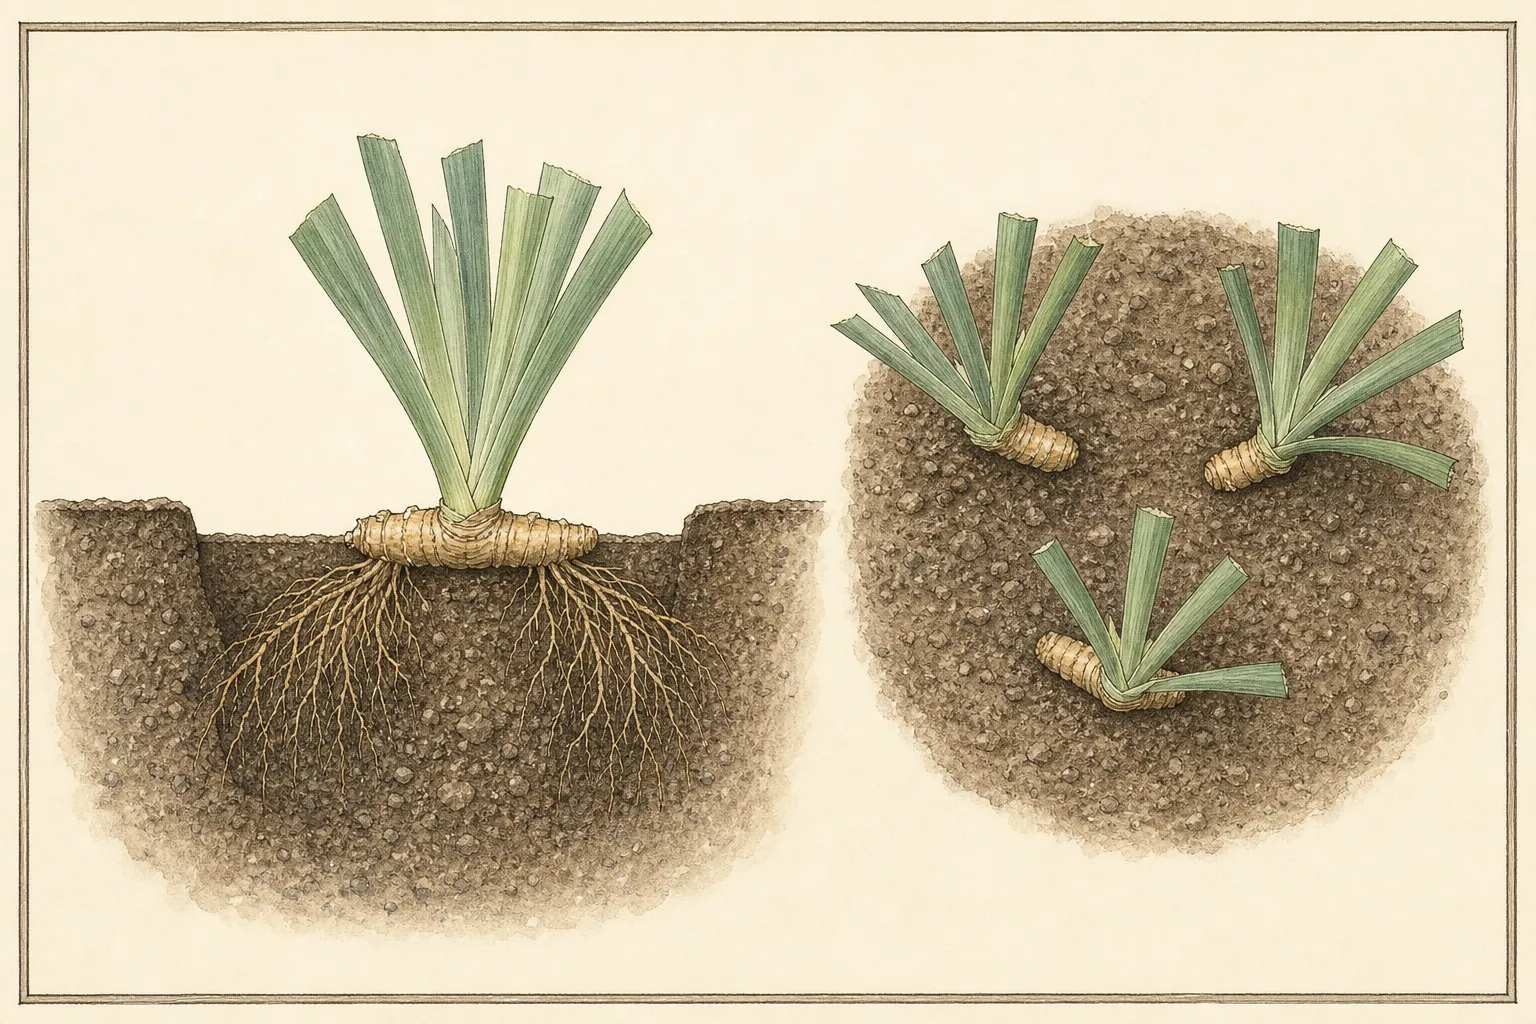
This shallow position is not cosmetic. Deeply buried bearded iris may flower poorly and are more vulnerable where wet soil remains around the rhizome. In heavy or slow-draining ground, follow local guidance for a raised bed or a different site; no shallow planting position can compensate for persistent saturation. Where local guidance places the rhizome top just below grade rather than visibly exposed, keep that shallow adjustment distinct from burying the rhizome several inches down.
Space the divisions according to their mature scale and the time you are willing to wait before dividing again. Twelve to eighteen inches works for many standard plantings; Iowa guidance extends the range to twenty-four inches where a broader display is intended. Finish one group at a time, verify that no label has moved, and water thoroughly to settle soil around the roots. If the rhizome sinks below grade after watering, lift and reset it rather than scraping soil from its top while leaving the roots loose.
Guide establishment without covering the rhizomes
After the first thorough watering, keep the root zone evenly moist but not wet while new roots and leaves develop. Check the soil rather than following a fixed daily schedule. Clean new leaf growth is a useful sign that the division is taking hold; standing water, a loosening fan, or softening tissue calls for inspection, not another automatic drink. Established bearded iris tolerates drier conditions better than a newly lifted division, but neither benefits from saturated ground.
Keep ordinary growing-season mulch off the exposed rhizome. A blanket of bark or compost can hold moisture against the fleshy stem and erase the planting depth you just set. Hand-pull weeds close to the fan so a hoe does not slice shallow roots. Fallen leaves and old iris debris should not accumulate over the crown line, particularly in a bed with a history of borer or soft rot.
Cold-winter advice needs a seasonal distinction. Wisconsin Extension allows a temporary protective mulch after the ground freezes where alternate freezing and thawing and unreliable snow threaten new divisions, then calls for its removal in early spring. That is different from mulching warm soil over the rhizomes in summer. Use the winter treatment only where local guidance recommends it, and uncover promptly before spring growth traps moisture.
Do not add fertilizer simply because the clump was divided. If growth, soil history, or a planned amendment raises a fertility question, use a soil test and local recommendation. Excess input cannot compensate for shade, poor drainage, or a buried rhizome. During establishment, the decisive work is already visible: correct grade, firm root contact, open surface, measured moisture, and enough undisturbed time before hard freeze.
Read the first season correctly
A divided bearded iris often flowers sparsely in the first spring after replanting. Iowa State notes that a fuller display commonly returns in the second year. That pause does not by itself mean the planting failed: the division first rebuilds roots and extends a new rhizome from the fan. Judge establishment by firm tissue, anchored roots, and clean new leaf growth before judging it by flower count.
Investigate rather than wait if a fan pulls loose, yellows rapidly from the base, develops water-soaked streaks, or sits above soft, foul-smelling tissue. Those signs do not describe ordinary transplant delay. Remove affected material, check drainage and planting depth, and use a local diagnostic service when the cause is uncertain. A nearby healthy fan does not make a mushy rhizome safe to leave in the group.
At the end of the first growing season, the bed should still show discrete fans and visible rhizome surfaces rather than a newly buried mat. Replace displaced labels, remove leaf debris, and note which groups held their spacing. The next division date should remain open. Return to the clump when its center thins, rhizomes crowd, or bloom declines—not merely when a calendar count reaches three.
Steps
- Level
- moderate
- Time
- One half-day after flowering, plus establishment checks
- Tools
- Digging fork or spade, Clean sharp knife or pruners, Hose or bucket for exposing rhizomes, Hand trowel
- Materials
- Plant labels, Irrigation water, Tool disinfectant used according to its label
- 1Confirm the plant and the reason to divide
Proceed only with a bearded iris whose shallow horizontal rhizomes are crowded, whose center has thinned, whose bloom has declined, or which must be moved. Do not apply this method to Siberian or Japanese iris clumps or to bulbous Dutch iris; their divisions and moisture requirements are different.
- 2Choose the post-bloom window
Work after flowering and after the newest outer rhizomes have developed, while enough mild weather remains for roots to establish before hard freeze. July or August suits many northern gardens, but local bloom and frost timing outrank the month printed on a national calendar.
- 3Prepare the receiving bed and layout
Choose full sun and well-drained soil, prepare shallow planting positions, and set labels before lifting. Allow roughly 12 to 18 inches for many standard bearded irises, adjusting for cultivar scale and local guidance. If the old site remains wet after rain, correct the site or move the divisions rather than returning them to the same pocket.
- 4Lift beyond the outer rhizomes
Probe around the perimeter at several positions with a fork or spade, then rock the loosened mass upward from alternating sides. Carry the connected clump to the sorting area. Brush or rinse it only until junctions, root attachments, and defects are visible.
- 5Shorten the fan and trace natural joints
Cut leaves to about one-third of their original height, often four to six inches on tall forms. Follow the rhizomes from the old center toward the active outer fans. Identify pieces that already contain a firm storage stem, a healthy root system, and one living leaf fan before making cuts.
- 6Select sound divisions and reject damage
Keep firm, light-colored rooted pieces of useful substance; about three inches and thumb-thick is a practical benchmark for many tall bearded irises, not a universal cultivar rule. Discard old leafless or spongy centers and any broadly soft, foul-smelling, tunneled, or insect-damaged piece. Disinfect the blade between suspect cuts and dispose of damaged material as local guidance directs.
- 7Set roots below and the rhizome at the surface
Place each rhizome horizontally on a low soil mound and spread its roots down both sides. Return and firm soil around the roots while leaving the rhizome top visible or only barely covered. Aim leaf fans toward open growing space; in a three-plant group, point them outward rather than into one another.
- 8Water in and keep the surface open
Water thoroughly once to settle the roots, then use soil moisture and new growth to guide later irrigation. Keep the root zone moist but not saturated and do not cover the rhizomes with growing-season mulch. Expect bloom to be light the first spring; firm anchored fans and healthy new leaves are the earlier measures of successful establishment.
Related reading
Sources
- How to divide and plant bearded iris. University of Illinois Extension. Source record · Accessed 2026-08-18.
- Transplanting and Dividing Iris. Iowa State University Extension and Outreach. Source record · Accessed 2026-08-18.
- Dividing Bearded Iris. University of Wisconsin–Madison Division of Extension. Source record · Accessed 2026-08-18.
- Iris borers. University of Minnesota Extension. Source record · Accessed 2026-08-18.