Gardens · winter container cut evergreen structure
Design a Winter Container with Cut Evergreen Structure
Build an outdoor winter container from a stable vessel, a clear branch framework, locally suitable cut greens, and enough negative space to survive wind, snow, and close viewing.
Published Last updated
In this guide
- Begin with the place, not the materials
- Choose a vessel that can remain outdoors
- Compose the silhouette before choosing detail
- Select cut material by behavior as well as appearance
- Anchor stems without defeating drainage
- Design for water, wind, snow, and thaw
- Edit the display as it weathers
- Dismantle cleanly and return the pot to garden use
- Audit the arrangement through the season
- Count a small cut-bough arrangement before installing it
- Design ideas
Begin with the place, not the materials
A winter container is part of the garden’s architecture after summer foliage has receded. Stand where it will be seen most often and record viewing distance, approach, door swing, stair edge, handrail, night lighting, roof runoff, snow storage, and prevailing wind. A pot beside an entry must remain clear of coats, delivery paths, and icy steps. One viewed from a window can carry a broader outline, but it still needs a secure base and a deliberate relationship to the frame of the view.
Photograph the setting in grayscale. The image reveals whether the container needs dark mass, pale line, or a clearer outline rather than more color. Brick, dark siding, and evergreen hedges can swallow dense conifer boughs; pale stone can make white stems disappear. Select one contrast problem to solve. An arrangement that attempts red fruit, silver foliage, yellow twigs, cones, ribbons, lights, and three evergreen textures often loses its form before any material has weathered.
Measure the available envelope at full width and height, including the amount of branch movement acceptable in wind. Mark the center of gravity over the pot rather than assuming a tall bundle is stable because it fits through the doorway. Decide whether the display should read from one direction or all around. A one-sided composition can be effective against a wall, while a pot in an open court needs a coherent back and enough interior space that stems do not become a solid hedge from every viewpoint.
Choose a vessel that can remain outdoors
Use a container whose material, construction, and drainage are rated for local winter exposure. Penn State Extension notes that plastic or metal vessels with ample drainage can remain outdoors more reliably than vulnerable pottery or terracotta. Freeze damage occurs when water occupies pores, seams, or blocked cavities and expands. A beautiful unverified pot is not made winter-safe by adding evergreen branches. Move susceptible ceramics under cover and use a proven frost-resistant vessel for the outdoor arrangement.
Inspect the base before adding anything. Every drainage opening must be clear, the pot must sit level, and runoff must leave without crossing a walking surface where it can refreeze. Pot feet may improve clearance when they are stable and compatible with the surface, but they should not create a rocking platform. Do not seal a drainage hole to retain water for cut stems. Outdoor winter arrangements need moisture in their medium, not a hidden reservoir that can freeze solid around the pot wall.
Match visual weight to actual weight. A tall narrow urn beside an exposed corner may need a wider substitution, relocation, or discreet structural restraint. Adding stones above drainage can make a pot heavy without making the upper framework less wind-catching, and loose ballast can obstruct outlets. If stability depends on concealed anchoring, design that connection before assembly and ensure it does not damage paving, utilities, the vessel, or public access. Never rely on ice forming in the medium as the fastening method.
Compose the silhouette before choosing detail
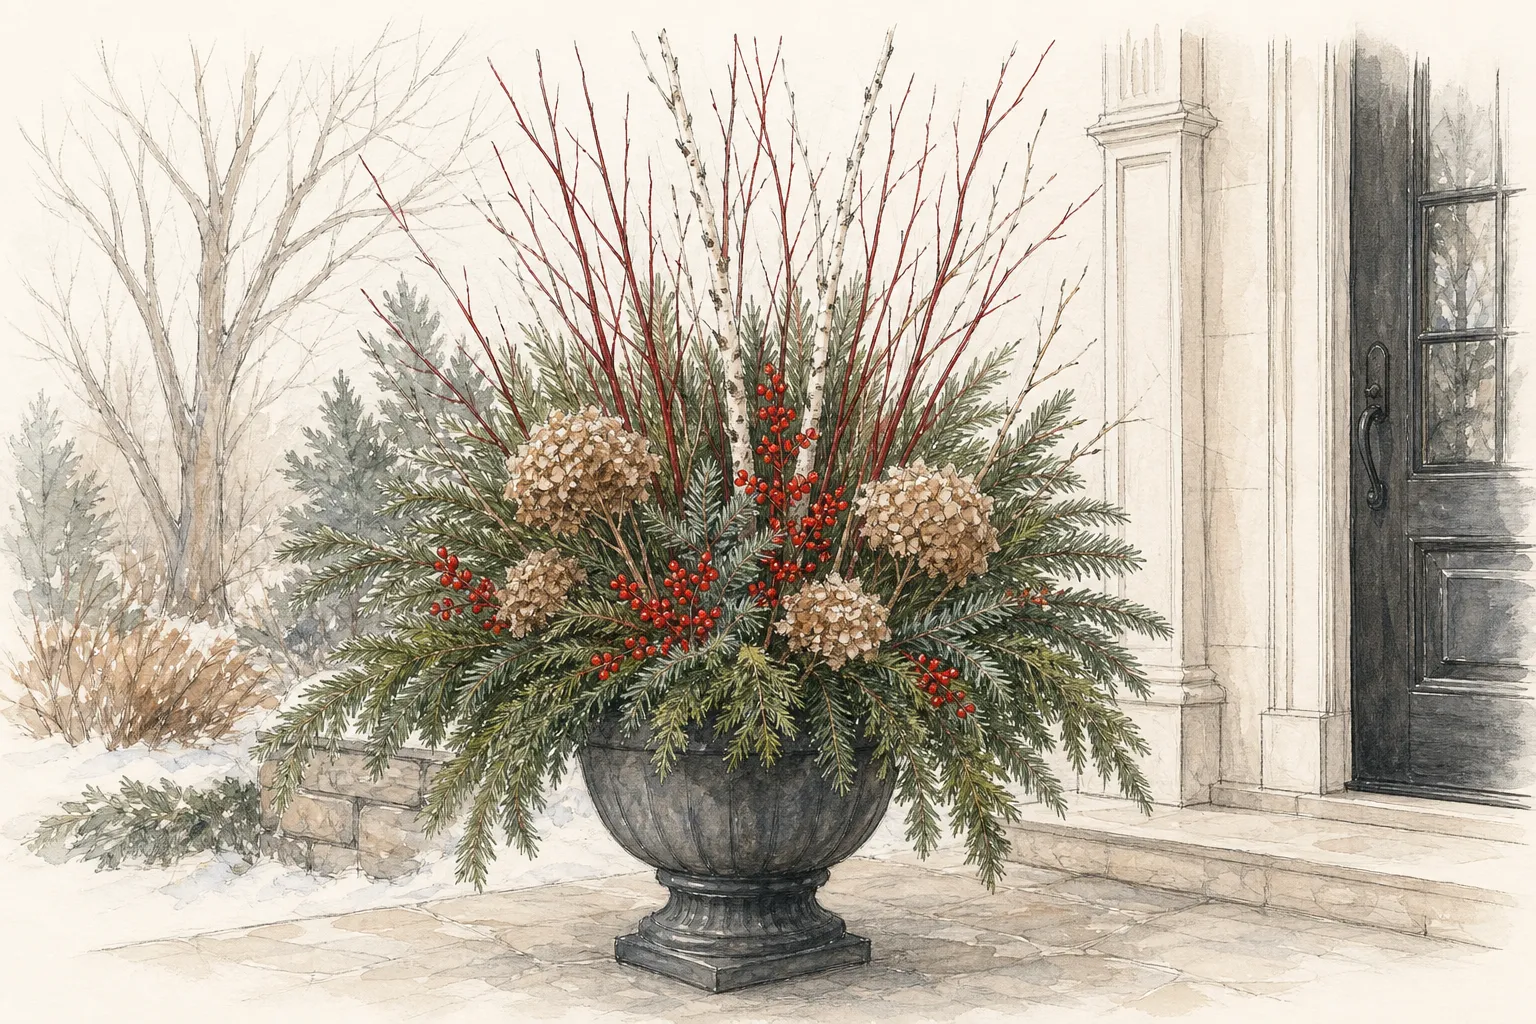
Draw the arrangement as three masses: a low spreading base, a middle transition, and an upper line. The base usually comes from broad evergreen boughs that visually connect the pot to the ground. The middle may contain denser foliage or a restrained dried form. The upper line can be a few branched twigs rather than a vertical bundle. Test the outline with ordinary branches first. If the drawing is weak without berries and ornaments, small accents will only decorate an unresolved structure.
Give each line room to be seen. Pale birch or red dogwood stems register against dark foliage only when light and background remain between them. Insert twigs at different depths and angles, preserving branching character rather than creating a broom. Repeat one angle from nearby architecture—a roof pitch, rail, or tree branch—without turning the container into a literal model. An asymmetric framework can feel balanced when the lower evergreen mass extends slightly toward the shorter side.
Set a single emphasis at a point the eye can reach. A concentrated group of winterberry, dried hydrangea heads, cones, or one contrasting foliage texture is usually stronger than evenly distributing every accent around the rim. Keep the focal material inside the stable silhouette and away from faces and sleeves. Step back after every major insertion. The arrangement should still have a front, a quiet interval, and a path for the eye when all bright material is temporarily covered with a cloth.
Select cut material by behavior as well as appearance
Choose legally and responsibly obtained branches from pruning, a reputable grower, or a vendor who can identify the plant. Do not cut from parks, roadsides, wild populations, or a neighbor’s property. Confirm local transport restrictions for evergreen material because pests and pathogens can move with foliage. Inspect every branch for discoloration, scale-like residue, galls, webbing, decay, or excessive needle loss. Decorative use is not a reason to carry questionable plant material into a garden.
Combine a small number of behaviors. Fir and some other conifers may hold needles differently from pine, spruce, cedar, or broadleaf evergreen cuttings; local climate and harvest condition matter. Flexible boughs form the low skirt, twiggy material creates line, and firm branched pieces can bridge the transition. Avoid assuming a species will remain fresh for a fixed number of weeks. Wind, sun, repeated thaw, road salt, and reflected heat can dry one side long before the shaded side changes.
Treat berries, cones, seedheads, and dried flowers as limited resources. Winterberry fruit is toxic if eaten by people or pets, and loose fruit can fall where children or animals investigate. Dried flower heads become heavy and collapse under wet snow. Cones and pods need secure attachment if they are used above a path. Artificial accents should be outdoor-rated, tightly fastened, and removable for reuse; glitter, loose plastic fragments, and fine wire near wildlife or public circulation do not belong in the arrangement.
Anchor stems without defeating drainage
A container left from summer may retain established perennial roots or compacted mix. Decide whether those plants are intended to overwinter in place before inserting stakes and stems through the root ball. Container-grown perennial roots are more exposed to cold than roots in the ground, so a decorative treatment is not itself winter protection. If valuable living plants remain, map crowns and roots, choose noninjurious insertion points, and follow regionally appropriate overwintering guidance for the whole pot.
For an empty vessel, use a clean, stable, free-draining medium that will grip stems without becoming a waterlogged plug. Insert the strongest structural branches first, aiming stems toward the center and down far enough to resist twisting. Build opposing angles so one branch helps brace another. Test with firm hand pressure at several heights before adding soft greens. Floral foam not designed for outdoor weather can crumble, hold water unpredictably, and create waste; do not use it as an automatic substitute for sound mechanical support.
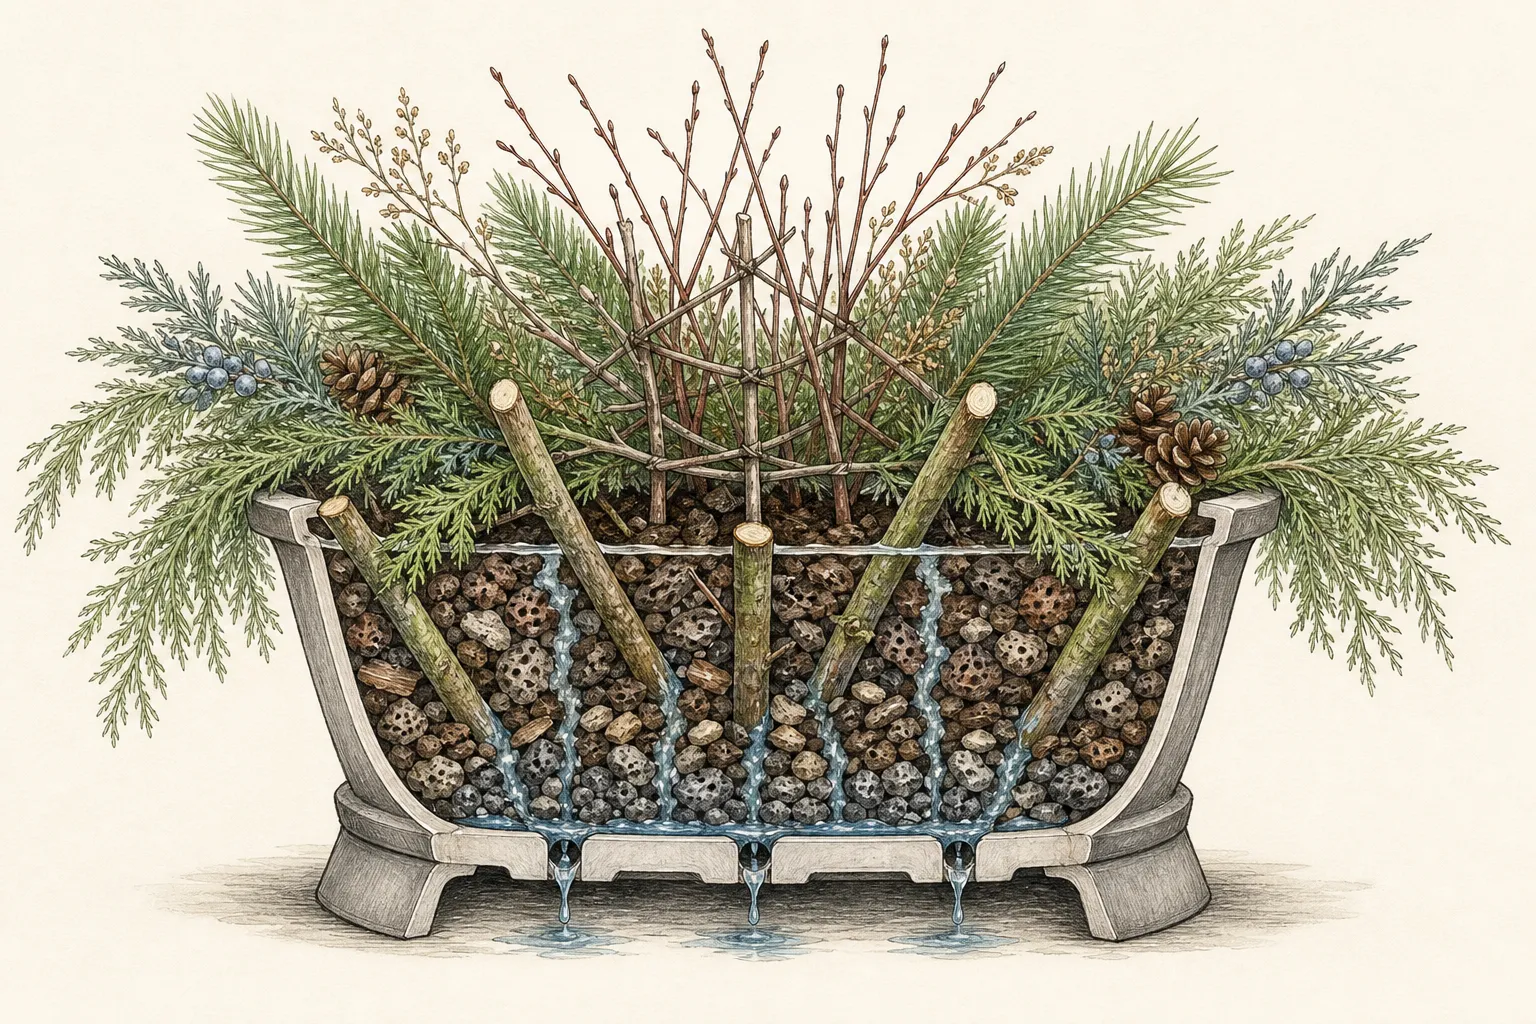
Add evergreen boughs from the lowest layer upward, alternating direction and depth so cut ends remain concealed but air can move through the foliage. Recut dry stem bases where appropriate and insert them promptly. Do not wire everything into one rigid mass before testing the form; a failed central bundle can pull the entire arrangement out. When wire or ties are necessary, use weather-resistant material, twist ends inward, avoid sharp projections, and attach to structural branches rather than crushing foliage.
Design for water, wind, snow, and thaw
Water the medium after assembly only enough to settle it and supply cut stems, then verify that water exits freely. In prolonged dry, above-freezing weather, check the medium below the surface rather than watering by calendar. A frozen pot cannot absorb water normally, and adding warm water to force a thaw can create stress, refreezing, and runoff. Keep the display away from deicing splash where possible; salt can discolor foliage, damage living plants, and contaminate the root zone.
Watch the first windy day from indoors and outside. Movement at twig tips is expected; rotation at the base means the framework is not secure. Shorten or remove the branch causing leverage instead of adding hidden weight indefinitely. Place lighting cords, if any, according to the listed outdoor instructions with protected connections, drip loops, and no trip path. The arrangement must be safe when wet and dark, not only attractive during daytime assembly.
After snow or freezing rain, assess before shaking. Brittle frozen foliage and twigs can snap under sudden movement. Support a loaded branch from below and remove loose snow gently when access is safe; leave adhered ice to thaw if moving it would tear material. Recheck the vessel, feet, paving, and drainage after every thaw. A pot that has shifted, cracked, or begun releasing water across a step should be emptied or relocated, even if the plant material still looks fresh.
Edit the display as it weathers
Inspect weekly from the main view and at arm’s length. Remove moldy dried flowers, broken twigs, dropped fruit, browned foliage that disrupts the intended mass, and any fastening that has loosened. Do not spray paint, polish, or household preservatives onto foliage in the garden without understanding exposure and disposal. Natural fading can be part of the design. If the container needs constant cosmetic treatment to remain coherent, the original palette carried too many fragile details.
Rotate replaceable material only when the pot is designed for all-around viewing and the move does not expose an unfinished back. In a wall-facing arrangement, refresh the weather side selectively while preserving the branch framework. Use the replacement to restore a missing role—base mass, transition, or emphasis—not to introduce a new color each week. A calm winter display can become more spare over time and still remain intentional.
Record the materials that actually lasted in the site. Note harvest or purchase date, sun hours, strongest wind, snow loading, watering, first browning, and any fruit loss. These observations are more useful next winter than a generic longevity claim. Photograph the silhouette before dismantling so the next arrangement can begin from measured proportion rather than memory. Keep notes with the vessel, including its frost rating and any crack or drainage repair.
Dismantle cleanly and return the pot to garden use
Remove the arrangement before spring growth, nesting activity, or repeated warm spells turn it into a brittle tangle. Work from accents to soft greens to structural branches so wire and ties are visible before handling. Wear gloves and eye protection around rigid twigs, and keep cut ends away from the face. Separate plant material from metal, plastic, lights, and reusable ornaments. Follow local green-waste rules rather than assuming all branches can enter a home compost pile.
Do not compost material that showed suspicious pests, disease signs, invasive seed, synthetic flocking, paint, preservatives, or attached wire. Bag or dispose of it according to local guidance. Clean reusable hardware and allow it to dry before storage. If branches came from a regulated host or were transported across a quarantine boundary, follow the relevant authority’s disposal directions. Responsible sourcing includes the end of the material’s life, not just the moment it enters the design.
Empty or renovate the medium according to the container’s next use. Preserve roots and crowns of living perennials, replacing displaced mix without burying stems. In an empty seasonal pot, clear drainage, inspect interior and exterior walls, and delay planting if freeze conditions or damaged material make the vessel unsafe. The strongest winter container leaves behind a sound pot, a clean site, reusable hardware, and a record that makes next year’s design simpler rather than a hidden maintenance debt.
Audit the arrangement through the season
Photograph the container immediately after construction, after the first heavy rain or freeze, and again near the intended removal date. Compare the outline, anchor points, water movement, and visibility from the main approach. A stem that repeatedly twists, a vessel that shifts, or a base that stays saturated identifies a construction problem even when the foliage still looks fresh.
After severe weather, work from the outside inward. Clear ice or fallen debris around the route, check that the container remains stable, and then inspect bindings and stem insertion without pulling frozen material sharply. Replace only the failed component with a matching prepared stem. Rebuilding the complete arrangement during a cold event creates more damage and leaves the container unsecured for longer.
Close the display deliberately. Remove wire, ties, foam, branches, and decorative material before spring growth hides them; separate reusable hardware from locally acceptable green waste. Wash and dry the vessel, photograph the empty location, and record which species retained color, shed needles, stained the surface, or caught wind. That evidence is more useful next winter than adding another layer to compensate for an unmeasured failure.
Count a small cut-bough arrangement before installing it
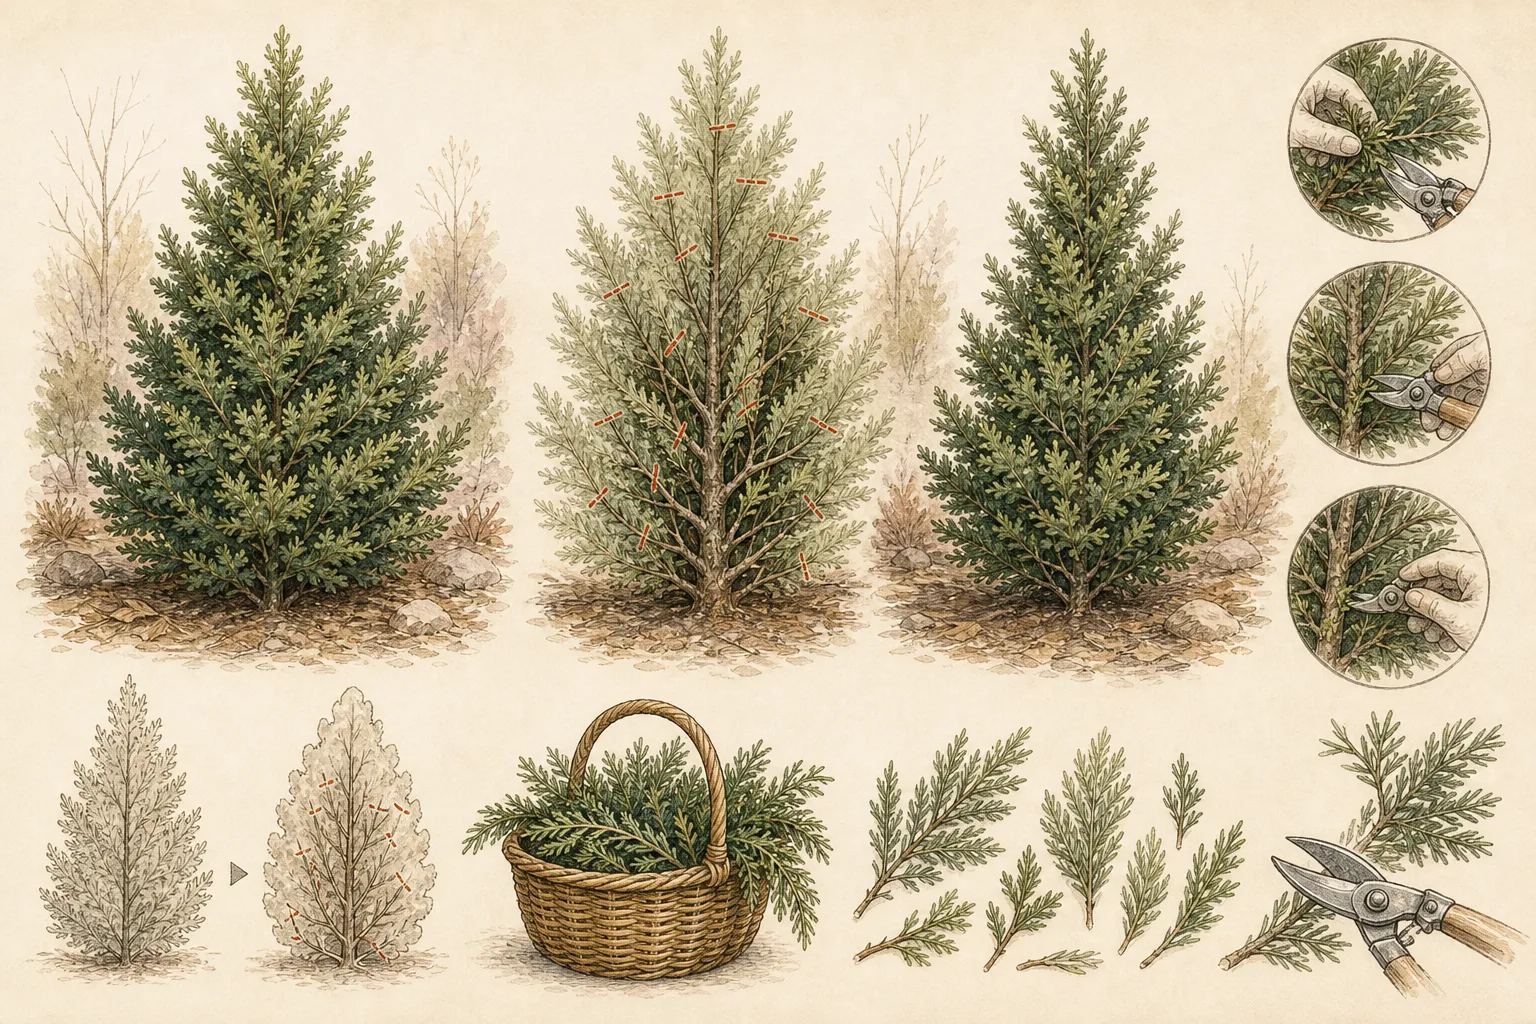
For a sheltered Illinois winter entry, make a temporary indoor mock-up using one stable container with an 18-inch opening, five purchased cut Pinus strobus boughs and three bare branching twigs. Aim initially for a 24-inch-wide outline and a top line 18 inches above the rim. These are composition assumptions for cut material, not growth dimensions, anchoring specifications or wind ratings. No living pine is being planted in that container.
Arrange the five boughs as a low uneven base and use the three twigs to test the upper silhouette. Leave decorations out until the shape works. Move the mock-up outdoors only after the container, support, drainage and actual exposure have passed the earlier installation checks; lower or abandon the arrangement if it moves toward the doorway or cannot be secured appropriately. Record the eight-piece starting count so a later adjustment responds to the outline instead of adding material without a plan.
Design ideas
- Style
- Architectural cut-evergreen winter container
- Space
- Entry, terrace, courtyard, or window-view container
- Climate
- The method assumes sustained outdoor winter exposure. Vessel material, plant sourcing, wind anchoring, moisture, snow handling, and the suitability of any living perennial must be adjusted to local freeze, thaw, precipitation, and regulation.
- 1Dark base, pale line
Build the lowest third from one dark evergreen, then place three to five pale birch or willow branches through the center with background visible between their forks. Concentrate cones or fruit below the branch intersection so the eye reads one emphasis. Check the silhouette from the window and entry before watering it in. Remove a pale stem if it crosses another, touches a face-height route, or begins rotating at the base after wind.
- 2Red stems without a red cloud
Choose a few naturally forked red dogwood stems for the upper framework and turn each fork toward open space. Repeat red once near the rim with a small berry cluster or reusable outdoor accent, leaving dark foliage between the two notes. After the first freeze, compare the windward and sheltered sides. Shorten the stem that levers the whole framework, and collect dropped fruit before it reaches a path or an area used by children or pets.
- 3One-sided wall composition
Flatten the rear plane of a wall-facing pot and set the tallest branch just behind center, with evergreen boughs extending toward the viewer. Preserve a hand-width inspection gap from siding and a larger clearance where vents, fixtures, or hot exhaust require it. Finish both approach-side edges because the back can remain plain. Recheck after rain: foliage rubbing the wall, trapped runoff, or heat-dried needles signal that the pot or rear branches need to move forward.
- 4Low wind-exposed arrangement
Use an oval evergreen mound with short lateral branches where a tall twig crown would catch persistent wind. Keep the foliage inside the stable footprint of the vessel and place the focal material close to its center of gravity. Watch the complete pot during the first gusty period. Tip movement, base rotation, or a lifting outer bough is the threshold for shortening the lever arm, lowering the accent, or relocating the display before added ballast blocks drainage.
- 5Dried flower restraint
Place three to five intact dried flower heads in the middle transition, sheltered by structural branches and reachable while the base stays assembled. Their pale texture should bridge the evergreen mass and upper twigs, leaving gaps around each head. Inspect after wet snow or thaw. A collapsed, moldy, shedding, or waterlogged head comes out immediately; the remaining evergreen-and-stem composition should still read clearly on its own.
- 6A reusable light framework
When building rules and the site allow lights, attach an outdoor-rated set to the main structural branches before adding soft foliage. Trace two or three principal lines and leave the quiet intervals dark. Keep every connection and cord in its approved weather configuration, outside walking and drainage routes, and preserve access to the fasteners. After precipitation, disconnect by the maker's procedure before correcting a loose wire, failed lamp section, wet connection, or branch that has shifted against the cable.
Plants in this guide
Related reading
Sources
- Overwintering Unplanted Trees, Shrubs and Perennials. Iowa State University Extension and Outreach. Source record · Accessed 2026-08-30.
- 19. Landscape Design. NC State Extension Publications. Source record · Accessed 2026-08-30.
- Creating Eye-Catching Winter Evergreen Containers. University of Illinois Extension. Source record · Accessed 2026-08-30.
- Pinus strobus. NC State Extension. Source record · Accessed 2026-09-09.