Grow · make evergreen door wreath wire frame
Make a Fresh Evergreen Door Wreath on a Wire Frame
Fit a fresh evergreen wreath to an outdoor door, build even fans of cut conifer sprigs and close the last bundle neatly on a reusable wire frame.
Published Last updated
In this guide
- Fit the wreath to the door before cutting the greens
- Choose a frame and estimate the foliage footprint
- Sort fresh trimmings into usable sprigs
- Make one reference fan and keep it on the table
- Bind the stems and advance in one direction
- Correct the outline while the last binding is accessible
- Close the join beneath the first fan
- Hang, inspect and take the wreath apart
- Steps
Fit the wreath to the door before cutting the greens
Hold the bare wire ring against the door and lay a handful of fresh evergreen tips across its upper edge. The greenery will reach beyond the metal on both sides. Check the outside edge against the door surround and look through the middle: the door should still show through the opening. Then turn the bundle sideways. On an entry with a storm door, the thickness of that handful may decide whether the wreath can hang there at all.
Build the wreath face up, with the leafy tips of each bundle covering the wired stems of the preceding one. A single length of florist wire follows the work around the ring. The final stems slip under the foliage where you began, so there is no exposed start or finish. This makes a one-sided wreath: the front carries the greenery, while the back stays accessible for fastening, hanging and eventual dismantling.
Late November is a useful time to make one for a cool outdoor entry in a temperate climate. Choose the position before committing your best cuttings. On a narrow door a modest wreath with an open centre can show the character of individual sprays. A deep, densely packed wreath may look handsome on a broad stationary panel yet rub the glazing every time a second door closes. Test that movement with the sample bundle still on the frame.
Choose a frame and estimate the foliage footprint
A box-style wire frame has several connected rings and crosspieces. The crosspieces give the starting wire somewhere to hold, and the width of the frame supports a fan of foliage. Iowa State suggests a 16-inch frame for general use. Missouri Botanical Garden demonstrates with a 14-inch frame. These are bare-frame sizes. Measure the space you have for the finished greenery before treating either example as the size to buy.
For a quick estimate, lay samples at opposite edges of a ring. If the tips extend two inches beyond each side of a 14-inch frame, the finished width at those positions is about 18 inches. A twig angled farther outward changes that measurement even if its cut length stays exactly the same. Look at the inner edge at the same time. Tilting every bundle towards the centre can fill the hole long before the outside edge looks full.
Set the frame on heavy paper or cardboard. Have hand pruners for plant material, wire cutters for metal and florist wire on a paddle or roll within reach. Iowa State specifies 22- or 24-gauge florist wire; the Missouri demonstration uses 22-gauge. A continuous roll lets you tension each wrap while the previously attached bundles stay in place. Save separate short lengths for accents and the hanger, which have different jobs from the main winding.
Sort fresh trimmings into usable sprigs
Flex a few needles and handle the branch before cutting it into pieces. Fresh material should feel pliable; brittle needles that come off readily point to a poor starting branch. Fragrance varies among conifers, so a faint scent on a still-flexible fir is less informative than needles showering off as the branch is moved. Check purchased greens and garden trimmings alike. Elaborate wiring cannot restore foliage that is already falling apart.
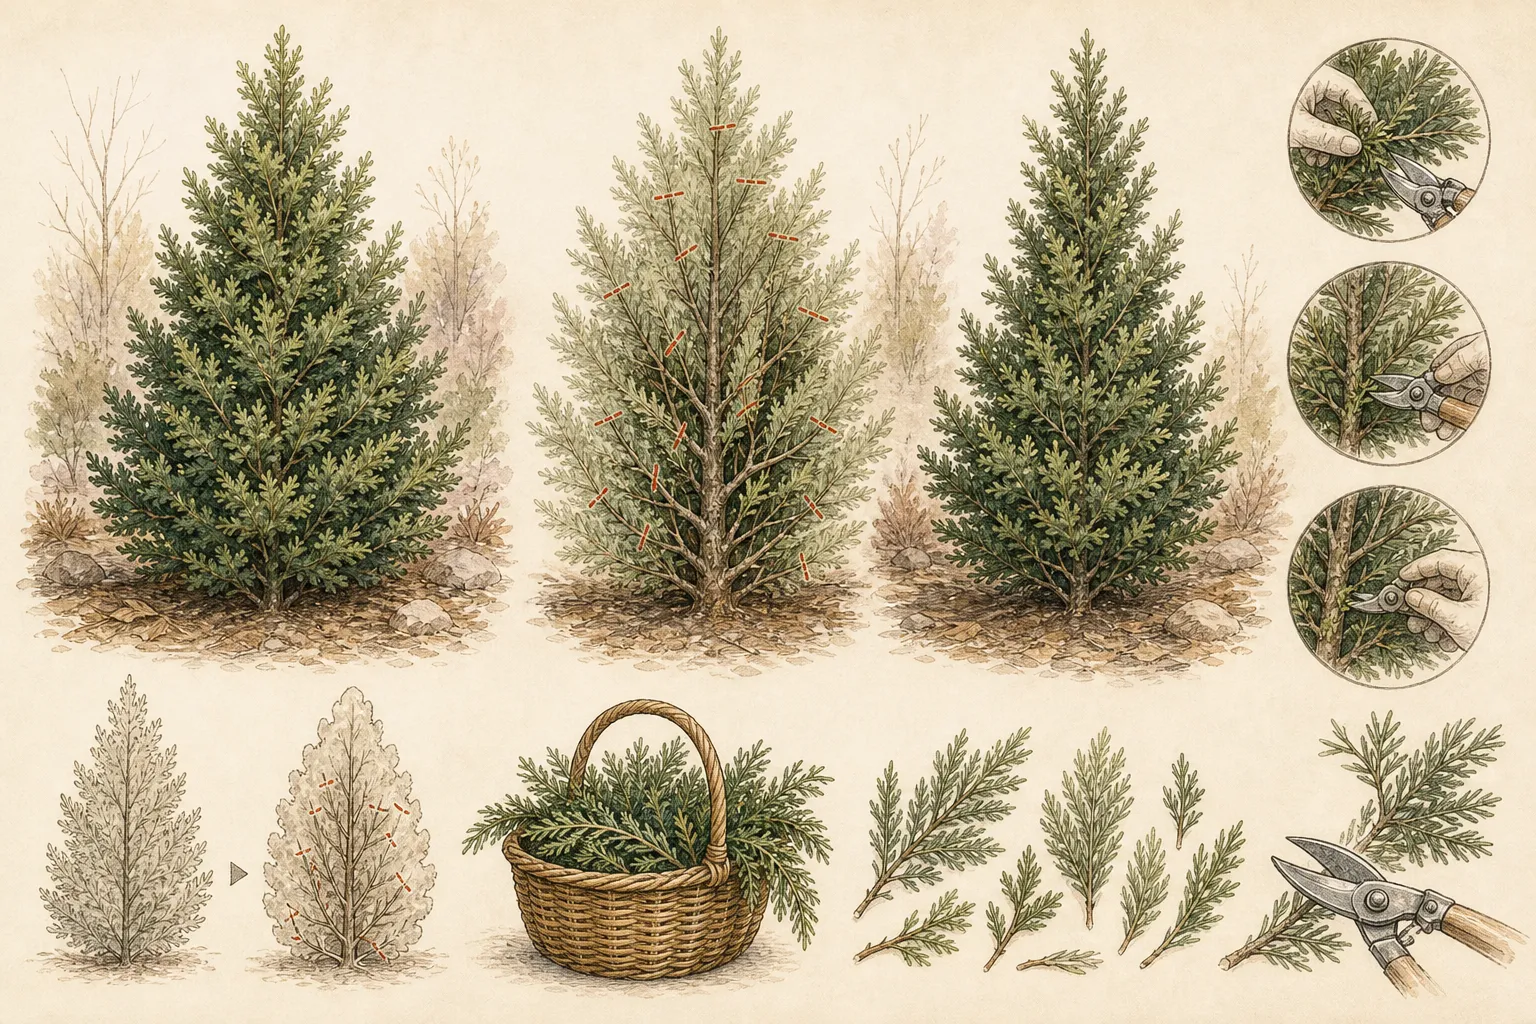
Use branches already available from appropriate garden pruning or lower limbs removed when fitting a cut Christmas tree. A tree lot or florist is another source when the garden has little to spare. For a first wreath, choose one abundant material for the repeated base. Fir gives a defined outline, and white pine supplies a softer accent. A short spray of a second texture can sit on top where it remains visible instead of disappearing inside the bunch.
Follow side shoots down to their junctions before cutting. A long branched piece may yield a tip and several useful laterals; the bulky stick left in your hand need not go into the wreath. Missouri Botanical Garden suggests keeping the working stems no thicker than a pencil in its demonstration. Test an awkward stem against the curve of the ring. If its bare wood lifts the fan away from the metal, harvest the smaller shoots and set the heavy part aside.
Cut a trial handful first. Iowa State uses sections roughly 4 to 8 inches long; Cornell's workshop example uses pieces about 5 to 8 inches long. Missouri uses longer pieces, about 7 to 10 inches, for its fuller demonstration. Choose lengths that make your particular ring fit the door. A short dense fir tip can cover more wire than a longer, sparsely branched shoot. Keep cutting until you have several comparable handfuls, then test their coverage before reducing the entire pile to one length.
Make one reference fan and keep it on the table
Lay the longest pieces on the bench first, then set shorter sprays over them. Bring the cut ends together in a narrow grip and open the leafy ends into a fan. The back layer gives the bunch its reach; the shorter front pieces disguise bare wood. If a shoot curves naturally to one side, try it at that edge of the fan. Its bend can fill the shoulder of the wreath more neatly there than in the middle.
Iowa State's starting bundle has three or four pieces. Missouri's example uses five to seven. The count matters less than whether the fan covers the frame at the desired thickness. Hold it against the door as you did with the first handful. A flatter door wreath needs enough foliage to cover the metal from the front, but it gains little from a second thick layer on the back. Leave the cut bases accessible for the wire.
Set the best trial fan to one side as a reference. Compare each working handful with it at the cut end as well as the tips. Two bundles can look equally green face up while one has twice as much woody stem underneath. That difference becomes a lump when the wire pulls the stems together. Keep the reference until the last gap; otherwise the bundles can gradually increase in size as you reach for apparently bare places on the ring.
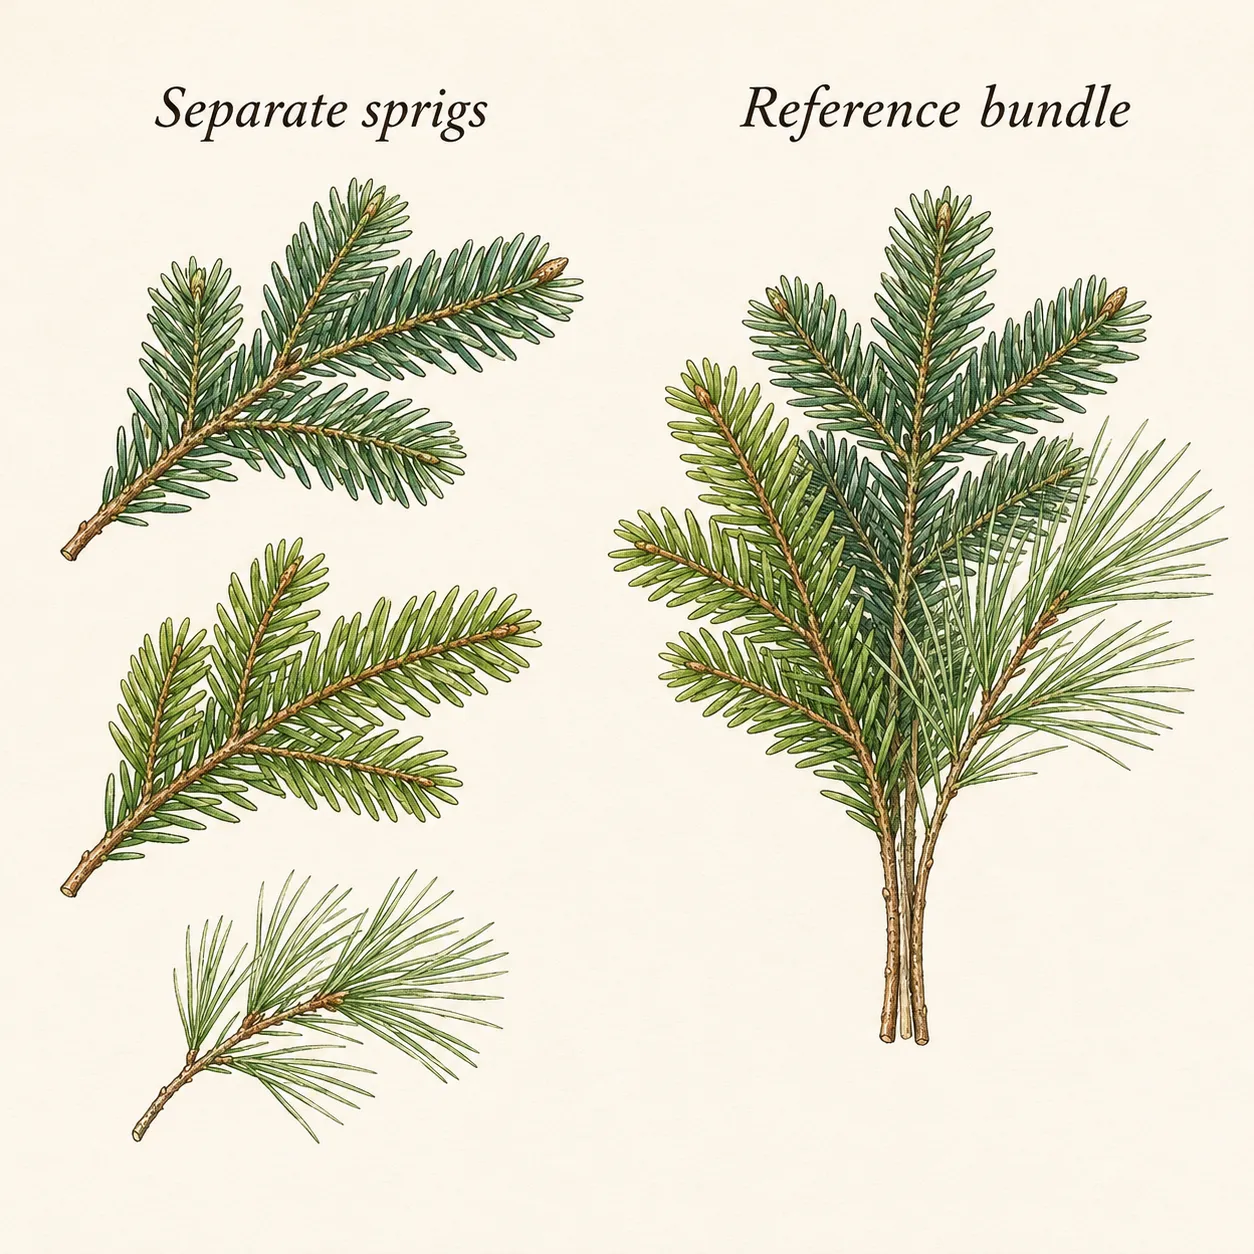
Cornell gives approximately 120 to 150 individual pieces for its 14-inch wreath example. That figure describes one workshop design, not the quantity every 14-inch ring consumes. Estimate yours from a short trial arc. If three equally spaced bundles cover a quarter of your ring with the overlap you want, think in terms of about twelve similar bundles for the whole circle, plus some choice of sprigs for the join. Repeat the trial if a change in foliage changes the coverage.
Bind the stems and advance in one direction
Twist the free end of the paddle wire securely around a frame crosspiece. Put the first fan over that starting point, with its length running along the circle and its tips angled slightly outward. Hold the narrow stem end against the frame. Pass the paddle around the stems and frame together; the strand must run behind the metal before returning to the front. A turn around the greenery alone only ties a bunch that can slide off the ring.
Iowa State and Cornell use two or three snug turns for a bundle. Pull each turn into place as you make it. Try moving the fan gently by its base: the stems should stay put and the wire frame should keep its shape. If a twig turns freely, reseat it within the binding while you can still see the stems. Increasing tension until the metal bends is a poor correction for a thick fork resting across the neighbouring twigs.
Lay the next fan with its tips pointing the same way as the first. Those tips overlap the previous binding; its own cut ends lie on the next bare stretch of frame. Wire that new base, leaving the paddle attached. A right-handed and a left-handed maker may prefer opposite directions around the table. What matters is that the sequence remains consistent: fresh tips over the preceding stems, then new binding ahead of them.
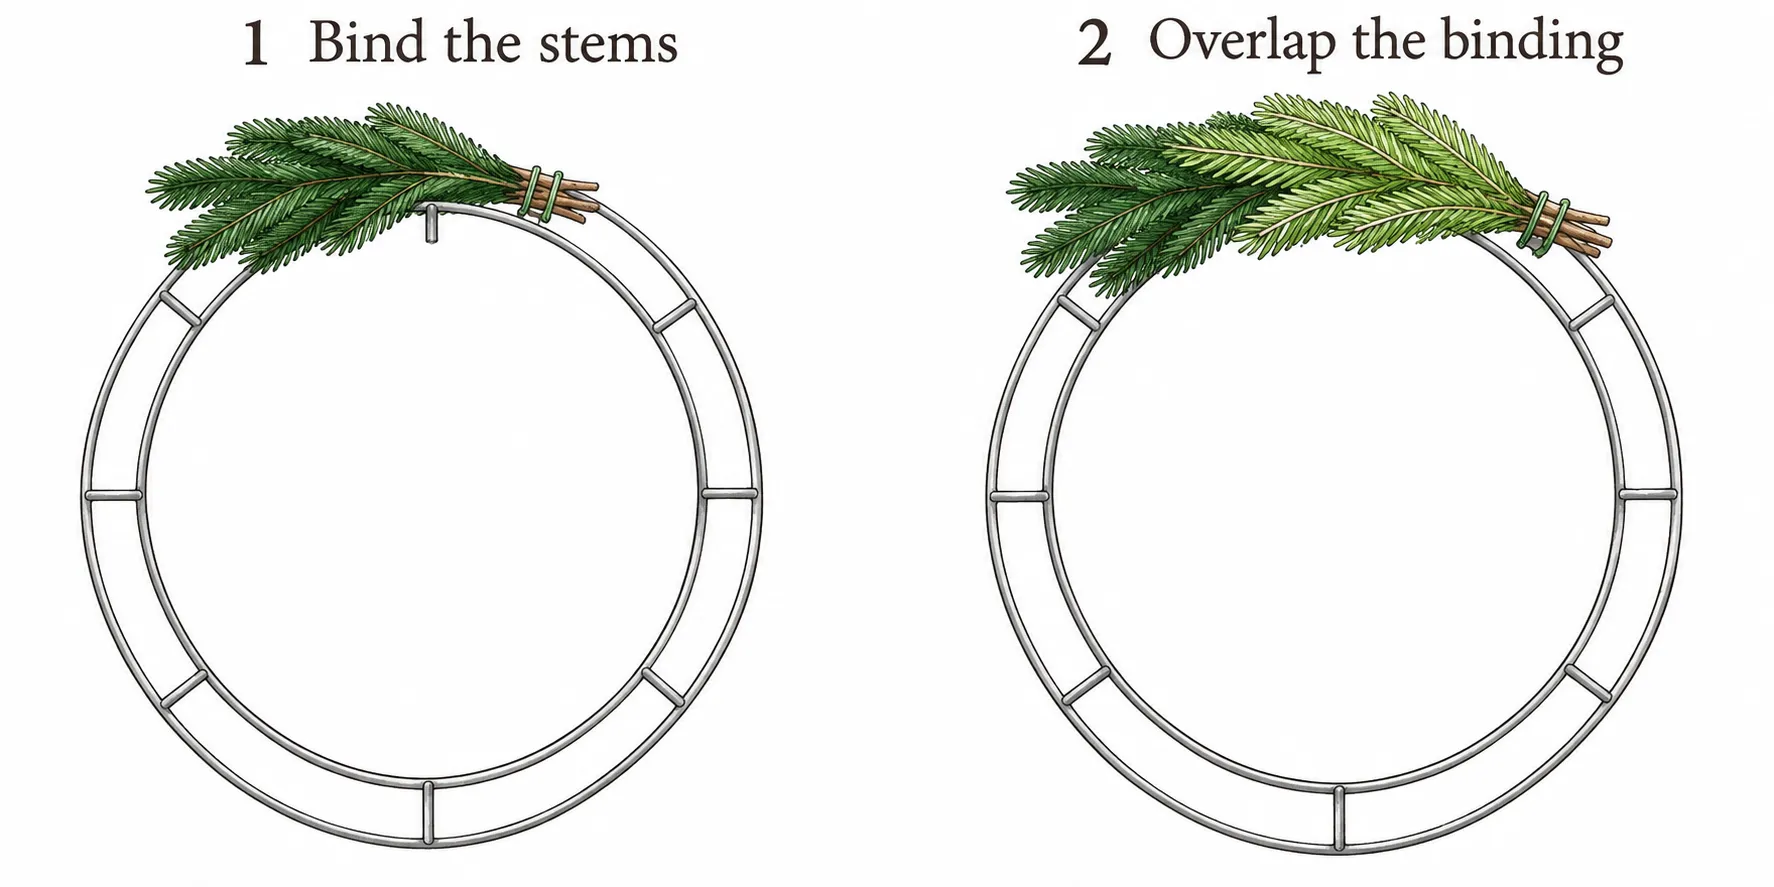
After a few bundles, lift the ring and look at both faces. From the front, the binding should disappear under the next fan. From the back, you should be able to trace the wraps gripping the metal. Rotate the ring on the table to bring the next bare section towards your working hand. If the wire breaks, fasten its loose end to the frame and anchor the roll afresh before continuing. A broken end left unsecured can release work already concealed beneath the greenery.
Correct the outline while the last binding is accessible
Stand the partly covered ring upright and check it from the distance at which someone approaches the door. Look along the inner rim first. A stray long shoot can make a round opening look pinched on one side even when the outer edge is even. Reposition that bundle at its stems while the binding is still exposed. Trimming every shoot around the inside can leave blunt cut ends in the most visible part of the wreath.
A bare patch between fans usually means the leafy tip of the new bundle falls short of the last binding. Bring the bundles closer together or use a better-branched piece at the front of the new fan. A bulge calls for a different adjustment: compare that bundle's stem thickness and angle with the reference. Adding foliage everywhere else to match one oversized bunch increases weight and depth and may cost the clearance you measured at the door.
Check the back as you turn the wreath. Keep thick stem ends on the frame where their binding holds them, and free any branch tips trapped between the ring and the bench. Reserve a few slender sprigs for the final space, especially if the ring already looks very full. It is easier to close a measured gap with one appropriately sized fan than to compress the last quarter into a dense knot.
Close the join beneath the first fan
As you approach the beginning, stop with enough bare frame to receive the last stem bases. Lift the leafy tips of the first fan slightly, leaving its original binding intact. Slip the cut ends of the final fan underneath those tips. Its greenery covers the previous binding in the usual direction, while the lifted foliage will cover the last one. A helper can hold the first tips clear while you make the wraps.
Secure the last bundle to the frame, release the first tips and check the face before cutting the wire. If a strip of metal is showing, lift the tips again and adjust the seating. Turn the wreath over and secure the working wire to the frame. Missouri's example leaves about three inches of tail for finishing. Wrap and twist it securely, then turn the end into the foliage so it cannot scratch the door. Cut metal with wire cutters and keep pruning blades for stems.
Lay the wreath face up and try any accents in position before fastening them. A pine cone can hide a change of texture, but the greenery beneath it still needs a sound join. Wire the cone or bow separately through to the frame so its weight stays off the flexible tips. Hold the wreath upright again to decide which point is the top, then attach the hanger to the metal at that position.
Hang, inspect and take the wreath apart
Hang the frame on a fitting suited to the door finish and the finished weight. Iowa State suggests securing the hanger to the hook on a moving door so it stays engaged as the door swings. Open and close the door slowly, looking for contact with the handle, surround or storm door. If the wreath is too deep for the space, move it to a suitable stationary surface or reduce the bulky layer where it was bound.
A cool outdoor position suits cut greens. Missouri particularly recommends outdoor or cool porch display for spruce because it can shed in a warm room. Iowa State describes wreaths sometimes lasting from late November into early January in Iowa's outdoor holiday conditions. The actual life of an individual wreath depends on its starting material and exposure. Judge the needles in your hand: when the foliage becomes brittle or begins shedding heavily, take it down even if the planned display date is still ahead.
To reclaim the frame, lay the wreath face down and remove the hanger and separately wired decorations first. Snip the wrapping wire along the accessible back, controlling the loose ends and working a section at a time. Separate the greenery completely from wire and ribbon. Follow local disposal guidance for the plant material; set the clean frame and reusable accents aside. Keep a note of the frame size and which sprig length cleared your door. Those two measurements are more useful next season than the number of branches you happened to start with.
Steps
- Level
- easy
- Time
- Allow an afternoon for sorting, fitting and binding the greens
- Tools
- Hand pruners, Wire cutters, Ruler or tape measure, Garden gloves
- Materials
- Box-style wire wreath frame, Fresh conifer trimmings, 22- or 24-gauge florist wire on a roll, Door hanger suited to the finished wreath, Optional pine cones and ribbon
- 1Mark the door clearance
Set the empty frame against the proposed hanger and hold sprigs at opposite edges. Measure across their outer tips, then look at the space remaining in the middle. Check the depth with the second door closed if there is one. Choose a smaller ring or a flatter bundle now if the sample catches on the glazing or surround.
- 2Cut and compare the fans
Cover the bench, sort out brittle material and take usable side shoots from fresh branches. Lay longer sprays behind shorter pieces and pinch their cut ends together. Compare the fan with the available space on the frame. Set one good example aside; use it to check both foliage width and stem bulk as you make the next handfuls.
- 3Anchor the roll and wire the first arc
Twist the end of the florist wire onto a crosspiece, place the first fan over the anchor and wrap its stems to the metal. Check the base for movement. Place the leafy end of the second fan over that binding. Continue with the roll attached, rotating the frame on the table so each exposed stem base is easy to reach.
- 4Correct gaps and close the join
Hold the work upright before the frame is full. Reseat a thick or inward-facing bundle and cover any exposed binding with the next fan. At the last gap, lift the first leafy tips and slip the final cut ends beneath them. Bind that base to the ring, release the foliage, fasten the wire at the back and tuck away the sharp end.
- 5Hang the frame and test the swing
Attach any accents directly to the frame with separate wires. Select the top while holding the wreath upright, fit its hanger and secure it on the door. Test the complete opening and closing movement. Check the greens during display and remove them when brittle. Clip the wire from the back at dismantling time and separate out the reusable frame and ornaments.
Related reading
Sources
- How to Create A Holiday Wreath. Iowa State University Extension and Outreach. Source record · Accessed 2026-11-14.
- Creating an Evergreen Holiday Wreath. Missouri Botanical Garden. Source record · Accessed 2026-11-14.
- The Pros at the Botanic Gardens Teach You Wreath-Making. Cornell University. Source record · Accessed 2026-11-14.