Gardens · moist woodland edge root safe design
Design a Moist Woodland Edge From Measured Light and Moisture
Map changing light and root-zone moisture, protect established tree roots, and compose a layered woodland edge whose plants fit the evidence rather than a generic shade label.
Published Last updated
In this guide
- Make the established tree the first design constraint
- Use root-free pockets to set the final quantities
- Measure light on a canopy calendar
- Measure moisture below the woodland surface
- Overlay the light and moisture evidence
- Build the composition from woodland-edge roles
- Fit the garden between roots, not over them
- Place moisture lovers only where drainage is proven
- Install in small phases and keep the evidence readable
- Edit the woodland edge through changing seasons
- Design ideas
Make the established tree the first design constraint
A woodland-edge garden is not an empty border that happens to be shaded. Its canopy, trunk flare, structural roots, fine feeder roots, leaf fall, and changing rain interception already form a living system. Begin by identifying the tree and assessing its health before choosing an understory. A declining, recently damaged, or construction-stressed tree needs qualified arboricultural attention; a decorative planting should not conceal the evidence or add another disturbance while the cause is unresolved.
Draw the trunk, visible flare, exposed roots, canopy outline, paths, buildings, downspouts, and existing plants on a base plan. Add places where mower traffic, stored materials, or compacted shortcuts already cross the root zone. The tree remains the dominant long-lived structure, so the new garden must improve access and surface protection without raising grade, covering the flare, cutting major roots, or making future tree inspection impossible.
Decide where no planting is the right answer. A calm apron of leaf litter or conservative mulch around the trunk can be visually intentional, especially where roots are dense at the surface. Empty ground also gives the tree room to change. The goal is not to fill every square foot; it is to create a legible edge in which understory plants occupy defensible pockets and the tree's anatomy remains visible throughout the year.
Use root-free pockets to set the final quantities
Treat the Upper Midwest panel dimensions as a boundary for planning, not permission to excavate across tree roots. Fit the named sedge and woodland groups into suitable pockets while preserving the maintenance route and flare. If roots or moisture reduce the available area, reduce the count. Keep the foliage roles coherent without forcing every planned position into occupied ground.
Measure light on a canopy calendar
Record light in morning, midday, afternoon, and late day rather than assigning one permanent shade label. Mark direct beams, bright filtered light, open sky beyond the canopy, and the darkest interior. Repeat the observation when deciduous leaves are fully expanded and compare it with the brighter spring condition. A woodland edge often receives more usable light at its outer band and before leaf-out than the quiet green summer scene suggests.
Note the quality of exposure as well as duration. Gentle morning sun, a short hot western beam, glare reflected from pale paving, and light filtered through moving foliage can affect the same plant differently. Add prevailing wind and the sheltered rain shadow behind trunks, walls, and dense evergreen branches. These observations explain why two positions only a few feet apart can produce different leaf density, flower performance, and moisture demand.
Keep the map descriptive instead of pretending to laboratory precision. Canopies grow, branches are pruned, storms open gaps, and neighboring buildings cast longer shadows in different seasons. Use broad bands with uncertain margins. Reserve those margins for adaptable plants or small trials, and place a light-sensitive or moisture-dependent specimen only where the matching condition has been observed more than once.
Measure moisture below the woodland surface
A moist-looking edge can contain both damp pockets and severe root-dry ground. Check below leaves or mulch after ordinary rain, after a longer wet period, and again during a representative dry interval. Use a narrow hand tool in places where roots are not visible, stopping whenever resistance suggests woody tissue. Describe each point as evenly moist, quickly drying, temporarily wet, or persistently saturated rather than relying on the appearance of the surface.
Trace how water arrives and leaves. Canopy leaves can shed rain outward, trunks can concentrate stemflow, overhangs can exclude rain, and slopes can move water through the bed before it infiltrates. A low spot that stays wet is not interchangeable with a well-drained pocket that remains evenly moist. Mark downspout discharge, compacted paths, and any water moving toward a building before plants are used to disguise a drainage problem.
Separate moisture supply from root competition. Established tree roots occupy the same upper soil that new perennials need, so a pocket can dry rapidly even in shade. Do not promise that an added layer of rich soil will solve the competition; raising grade can harm the tree and roots can enter the new layer. Select plants for the moisture pattern that can be maintained without burying roots or watering an entire site to satisfy one misplaced species.
Overlay the light and moisture evidence
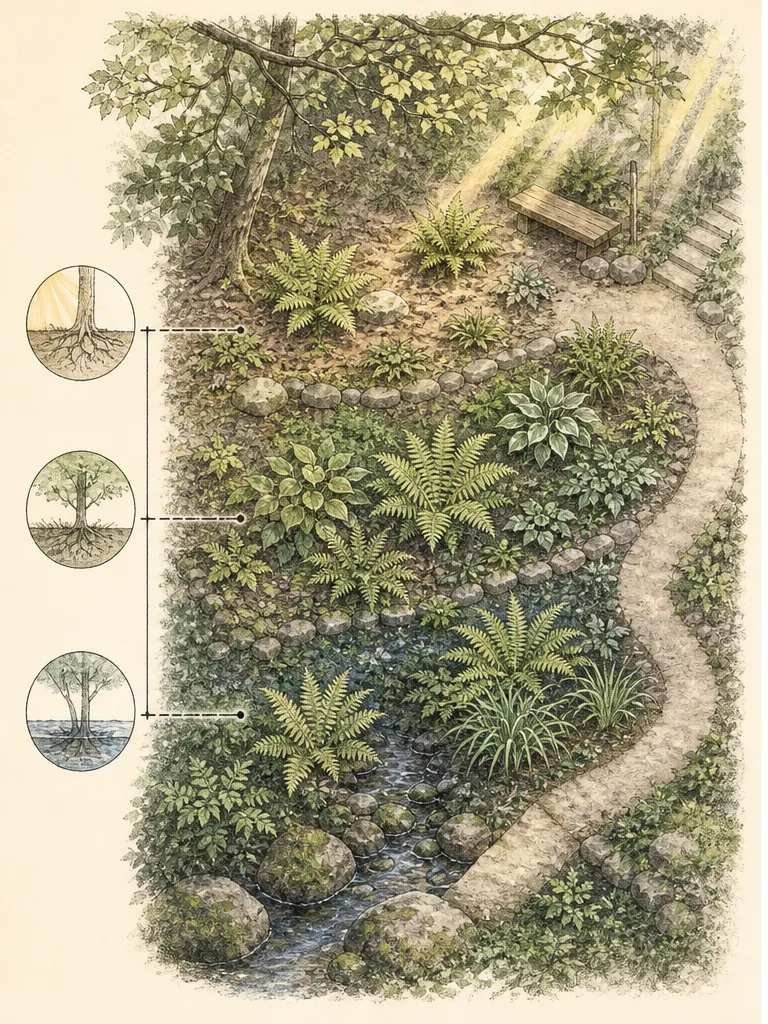
Place the light map over the moisture map and outline the intersections. A bright outer edge that stays evenly moist, a filtered center that dries between rain, a spring-bright pocket that becomes dark in summer, and a low area that remains wet are separate design zones. Add root density and access as a third layer. Only the spaces that satisfy all three tests are genuine planting opportunities.
Give every zone a short working description: when light arrives, how moisture changes, which roots or structures limit digging, and how the position can be reached. This is more useful than a list headed plants for shade. It lets a locally appropriate sedge, fern, broad-leaved perennial, spring ephemeral, or small shrub be evaluated against the same evidence, and it reveals where a container or unplanted surface is safer than excavation.
Reject a zone when ordinary care would conflict with the tree. A design that requires cutting roots for a broad planting hole, trenching irrigation through dense roots, adding a raised bed, or keeping the root crown constantly wet is not a woodland solution. Move the feature outward, reduce its scale, use smaller planting material, or leave the area open. The strongest plan accepts the site's limits before arranging ornamental detail.
Convert the overlay into a testable planting schedule. For each workable pocket, write the expected spring light, summer light, ordinary moisture, post-rain drainage, root interference, and route for hand watering. Then walk the site with the list and remove any pocket whose description depends on adding soil, severing roots, or supplying water across an area that should remain dry. Mark one comparison point outside every moisture-dependent group so later observations can distinguish a genuinely dry interval from a localized irrigation failure. This schedule also disciplines substitutions: a nursery plant can replace the intended one only when its documented light, drainage, mature spread, and regional behavior fit the same pocket. If evidence remains mixed, use one small, locally appropriate trial plant and leave enough open ground to lift it without disturbing the tree. Photograph the pocket before planting and from the same viewpoint through the first full canopy cycle. The result is a design decision that can be reviewed and reversed, rather than a permanent intervention justified by a single damp afternoon.
Build the composition from woodland-edge roles
Start with plant roles, not a shopping list. Choose a limited framework of locally hardy forms: perhaps one restrained shrub at the open edge, repeated medium foliage mounds, a fine-textured ground layer, and spring plants that complete their display before the canopy closes. Assign each role to a measured zone. Repetition across compatible pockets makes the scattered openings between roots read as one garden without forcing a continuous carpet.
Use foliage to carry the long season. Pair broad leaves with fine fronds or narrow blades, matte surfaces with restrained gloss, and rounded mounds with arching or upright lines. Flower color can move through the scheme in a few repeated notes, but it should not be the only connection. A woodland edge is most convincing when its structure remains coherent after a brief bloom has finished and when dormant gaps were anticipated on the plan.
Draw mature spread and seasonal absence. A plant that disappears after spring needs a later neighbor that can occupy the view without invading its crown; a colony former needs a boundary that can be inspected without digging among tree roots. Avoid aggressive spreaders whose control would require repeated excavation. Confirm current regional status and exact cultivar behavior, because a familiar common name does not guarantee locally appropriate movement or size.
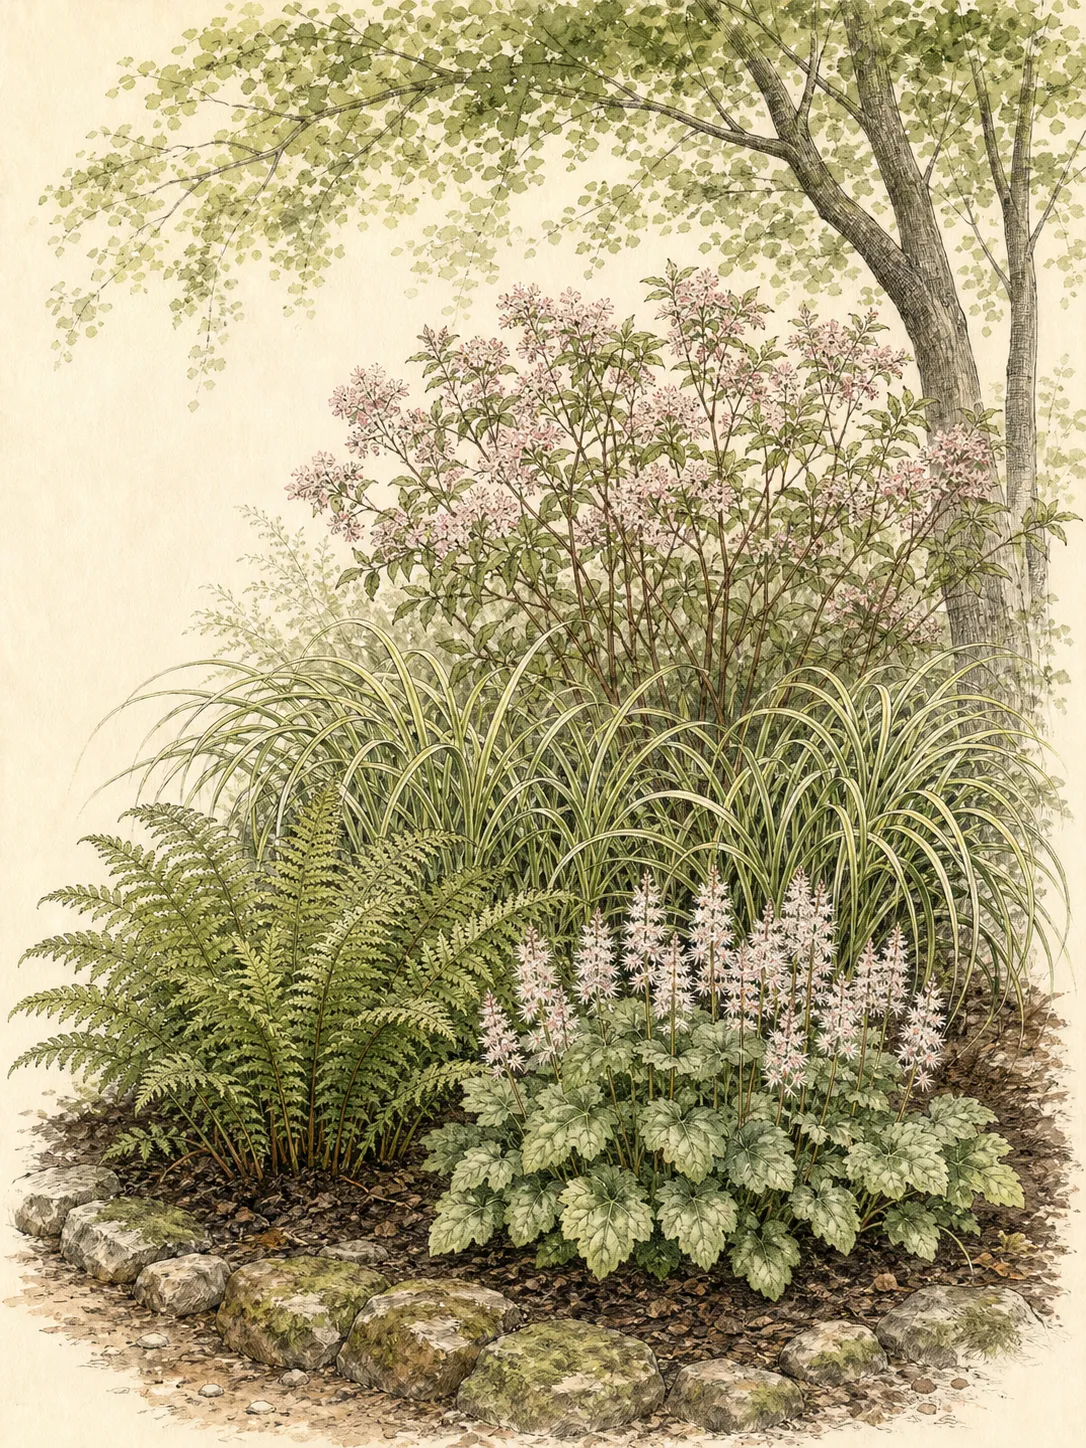
Here is one declared-region composition rather than a universal recipe: a 12-by-8-foot outer woodland-edge panel in an Upper Midwest Zone 4 or 5 garden, observed to receive spring light and part-to-full summer shade, with average-to-moist soil that drains after rain. Preserve every visible structural root, retain a 30-inch maintenance route along the open side, and treat the dimensions as the panel boundary, not permission to excavate the entire rectangle.
Within root-free pockets, set three Gray's sedges, Carex grayi, on roughly 36-inch centers as the taller moist-ground rhythm; five seersucker sedges, Carex plantaginea, on 12-inch centers as broad-textured mounds; seven spreading sedges, Carex laxiculmis, on 12-inch centers as the lower bridge; and nine wild ginger divisions, Asarum canadense, on 8-inch centers near the readable front edge. Those centers derive from the mature dimensions in University of Minnesota Extension's shade table. Shift an entire group around a root while keeping its internal spacing; never cut a woody root to preserve the drawing.
The Gray's sedges make the upright summer accents, the two lower sedges carry the foliage matrix, and wild ginger closes small foreground pockets without concealing the flare. Where the measured pocket stays rich, moist, and draining, one northern maidenhair fern can add a fine two-foot frond layer; University of Wisconsin-Madison Extension describes it as a slowly spreading Zone 3–8 fern but gives no fixed mature width, so begin with one plant in a roughly 24-inch observation pocket and expand only after local growth is clear. This specification is limited to the declared light, moisture, drainage, and hardiness conditions. Recheck local status and nursery provenance, and substitute only from regional institutional guidance when the site or region differs.
Fit the garden between roots, not over them
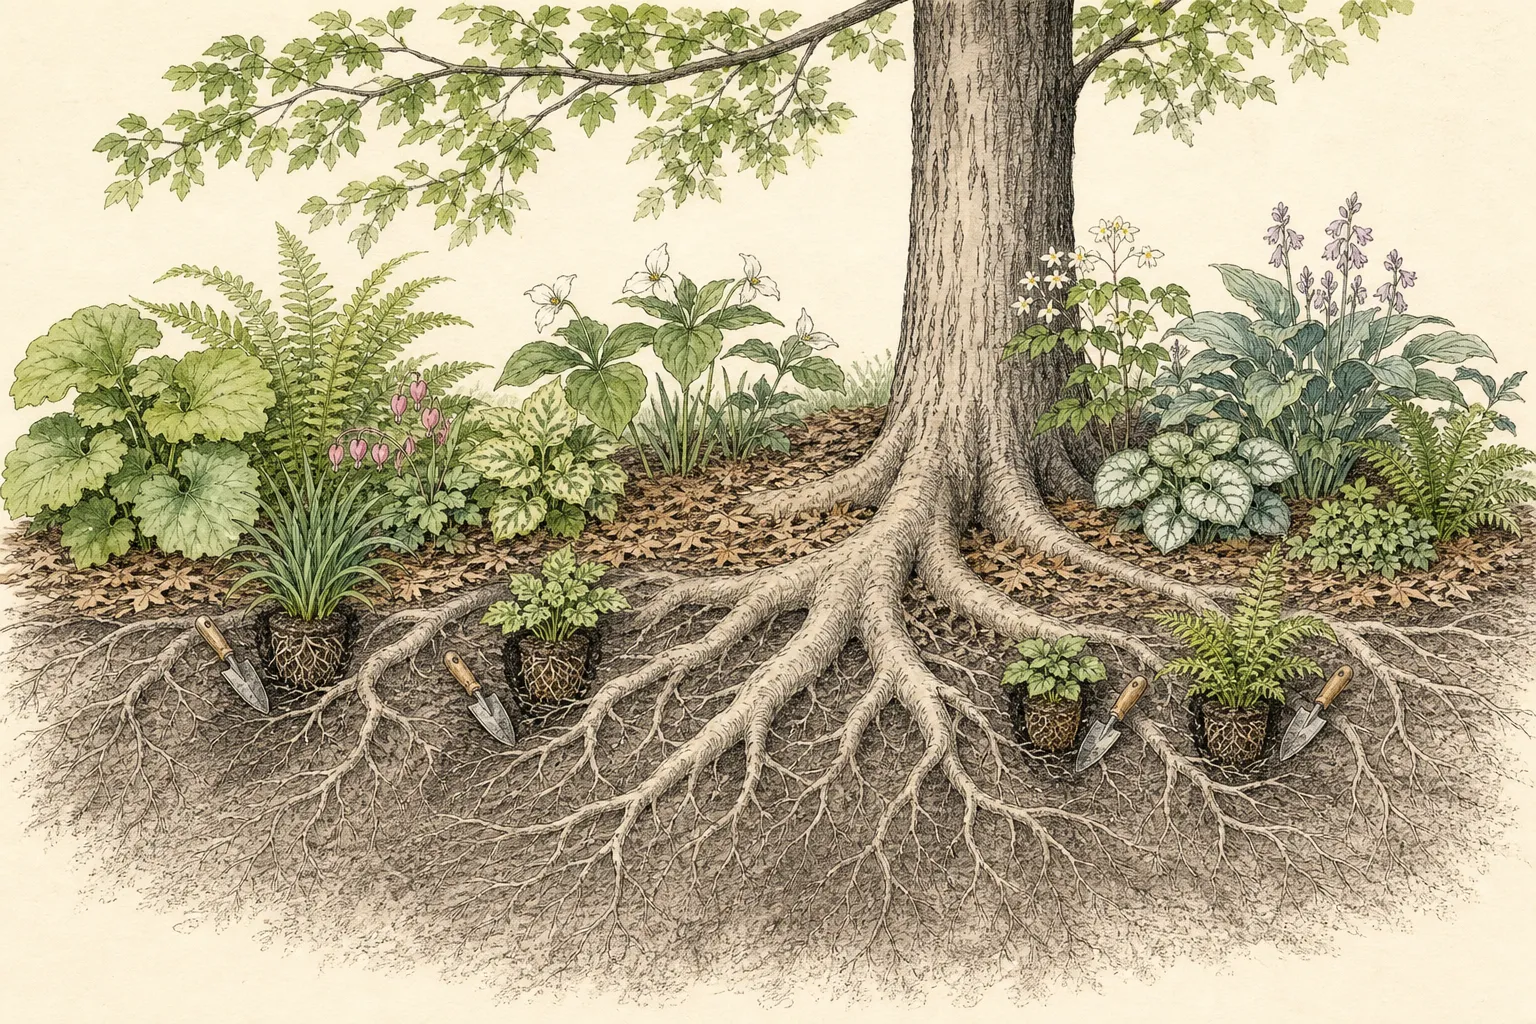
Probe gently for workable pockets and place starter-sized plants where their root balls fit without cutting woody roots. Use a hand trowel, not a tiller or broad trench. If a root blocks the hole, move the plant and redraw the composition; do not shave the root to preserve a decorative spacing rule. Small plugs and divisions may take longer to fill, but they allow the garden to adapt to the existing underground structure.
Keep the root flare, exposed roots, and trunk base uncovered. Do not build a raised island or spread a deep new soil blanket to create an easier planting medium. Retain the existing grade and use only a conservative surface layer suited to the tree and local conditions. Leaves can form part of that surface where they do not mat over small crowns, block drainage, or hide the flare from inspection.
Route maintenance before planting. A narrow path or a sequence of stable stepping points should reach the outer and middle zones without compacting the same root area at every visit. Keep hoses, edging tools, and wheelbarrows from scraping the trunk or exposed roots. A path can disappear visually beneath arching foliage while remaining physically open; if access depends on cutting leaves or stepping through crowns, the planting centers are too close.
Place moisture lovers only where drainage is proven
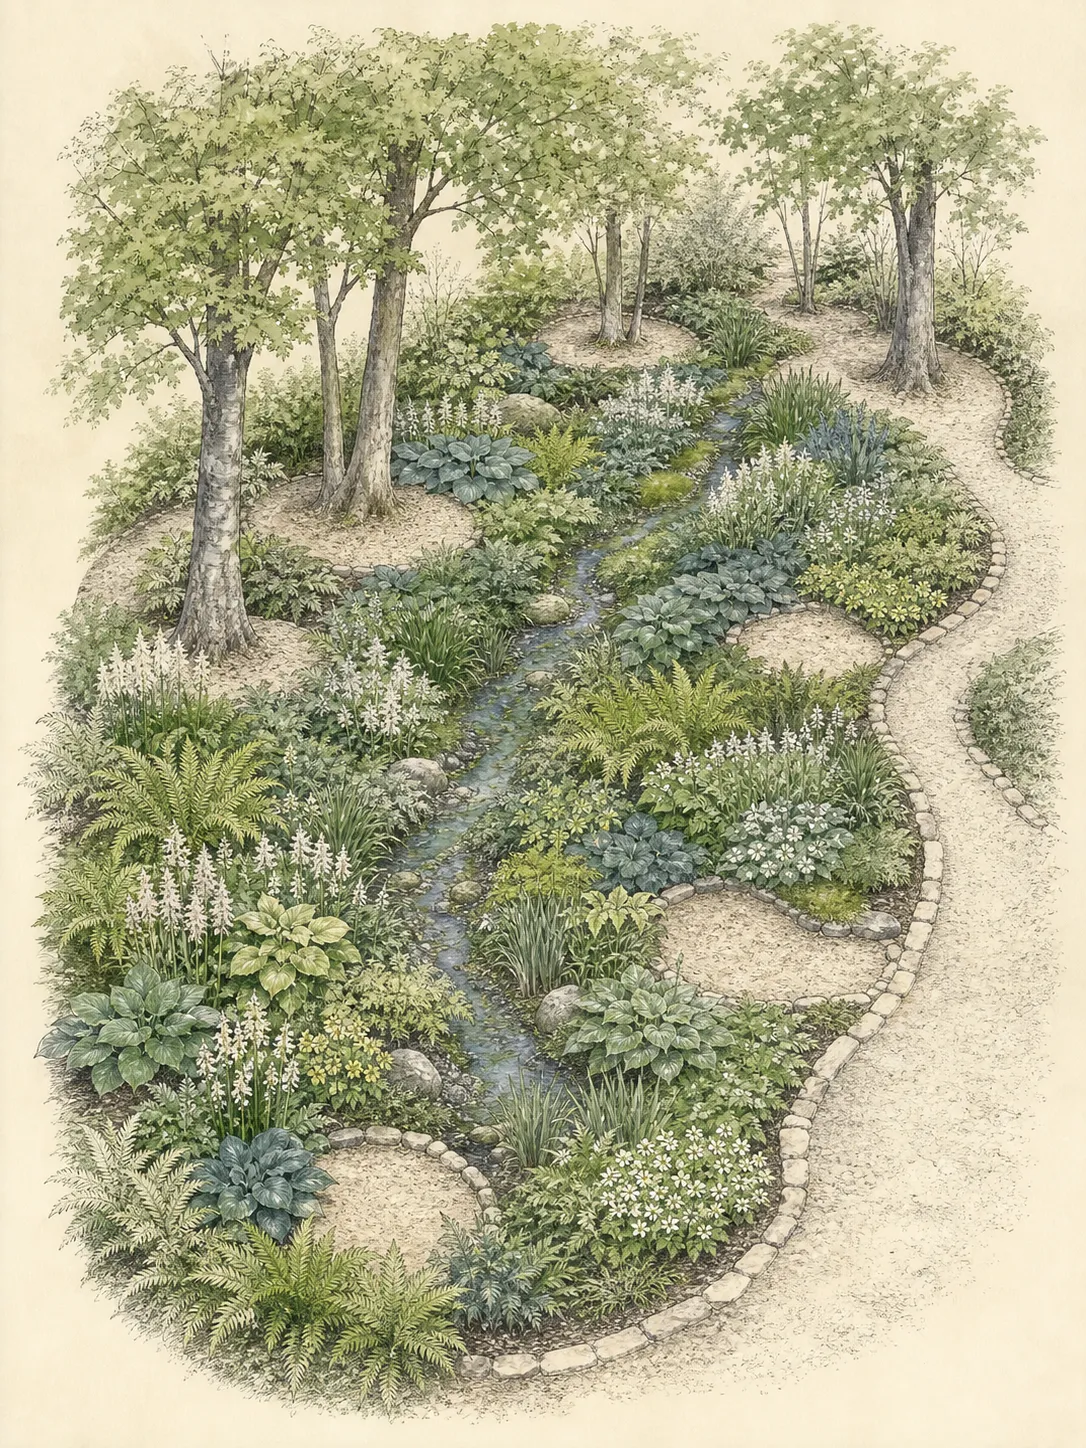
Moist woodland plants generally need oxygen as well as water. Before assigning a species to a damp hollow, observe whether the soil drains after rain or remains saturated. Choose from regional references that describe the exact plant's moisture and drainage range. A species from a stream margin, a mesic slope, and a seasonally wet flat may all be called woodland plants while requiring very different root conditions.
Use the transition between moist and drying ground as a design feature. Repeat an adaptable plant across the soft boundary, then place specialists farther inside their reliable bands. This creates visual continuity without pretending the soil is uniform. Do not mound every moisture-loving plant or sink every drought-tolerant one; those corrections erase the evidence and can direct water toward tree roots in ways the original site did not.
Keep irrigation reversible and visible during establishment. Surface-laid lines or careful hand watering can target new root balls without trenching through roots. Check the planted root ball and nearby soil before each adjustment, because a nursery medium can dry differently from the woodland soil. Reduce or relocate delivery as plants establish, but continue to watch the tree and the understory during unusual heat, wind, or prolonged rain.
Install in small phases and keep the evidence readable
Set labeled plants on the surface at mature spacing and walk the plan from every approach. Install the root-safe path and a few framework plants first, then repeat the ground layer through pockets that prove workable. A phased installation lets the first season reveal dry bands, runoff, and root density before the whole budget is committed. Temporary leaf litter is better than crowding plants to imitate immediate maturity.
Plant at the depth appropriate to each nursery root ball or division, keeping crowns and woody bases visible. Backfill with the excavated soil unless a regional recommendation based on a soil test calls for a broader correction. Water each plant thoroughly and observe infiltration. Do not compact wet soil around roots or fertilize simply to force rapid filling; establishment is measured by stable growth and expanding root contact, not by an oversized first flush.
Label dormant crowns and keep a simple plan with source, exact botanical name, cultivar, planted zone, and date. This record prevents spring cleanup from damaging invisible plants and makes substitutions deliberate. If a nursery changes a cultivar, compare mature size, spread, light response, and moisture needs before accepting it. A similar flower photograph is not evidence that the replacement belongs in the same root pocket.
Edit the woodland edge through changing seasons
Review the garden in spring before leaf-out, in full summer shade, after a substantial rain, and during a dry period. Photograph the same views and recheck the same moisture points. Look for crowns that remain dense, foliage leaning toward light, scorched outer leaves, repeated wilt, standing water, path obstruction, and new shoots crossing a planned colony boundary. Compare patterns before changing water or moving plants.
Update the map after tree pruning, storm damage, construction, or a new drainage pattern. A plant that performed well for years can become exposed when canopy conditions change. Move it only when a new site resolves the measured mismatch, and protect the tree during the work. Do not replace a struggling plant in the same pocket repeatedly or turn one local symptom into a fertilizer or irrigation treatment for the entire edge.
The finished woodland edge should look layered without hiding how it works. The tree flare and major roots remain readable, paths remain reachable, moisture-loving plants occupy draining moist bands, and dry or uncertain ground is allowed to stay open. The garden can become fuller over time, but every addition still has to fit the measured light, changing moisture, mature spread, regional suitability, and the root system that made the place possible.
Design ideas
- Style
- Layered woodland-edge planting with quiet foliage contrast, repeated seasonal forms, and visible tree structure
- Space
- Residential border at the open edge of mature deciduous or mixed tree canopy
- Climate
- Declared worked example: an Upper Midwest USDA Zone 4 or 5 woodland edge with spring light, part-to-full summer shade, average-to-moist soil that drains after rain, and established tree roots that must remain protected; other regions require locally sourced substitutions
- 1Draw a three-layer evidence map
Trace seasonal light, moisture behavior, and root or access constraints on separate sheets, then overlay them. Plant only where the layers agree. Keep uncertain margins dashed and reserve them for a small trial, a movable container, or deliberate leaf-litter space rather than a moisture specialist. Date every observation and note recent rain, because an undated patch of color cannot support a planting decision when canopy and weather change.
- 2Repeat the Upper Midwest sedge bridge
In the declared Zone 4–5, part-to-full-shade panel, repeat seven Carex laxiculmis on roughly 12-inch centers through separate average-to-moist, draining pockets. University of Minnesota Extension lists the species at 6–10 inches tall and 6–12 inches wide. Move the sequence around roots rather than trenching a continuous line, and use a different locally documented plant outside this regional and site scope.
- 3Make the root flare a focal opening
Frame the visible tree base with low, repeated foliage set well outside dense structural roots. Maintain a clean surface of leaf litter or conservative mulch at the center. The unplanted opening protects the tree, reveals grade, and gives the surrounding woodland layers visual calm. Check the opening after leaf fall and after mulch renewal so gradual grade change or trunk contact cannot disappear beneath an otherwise attractive composition.
- 4Pair spring light with summer foliage
Use locally appropriate spring bulbs or ephemerals in small root-safe pockets that receive light before leaf-out, then place a later-emerging foliage plant nearby without overlapping crowns. Draw both seasonal states so the spring display is not erased by summer growth or maintenance. Mark each dormant crown on the plan and keep cleanup tools outside it; the seasonal pairing works only when both plants retain their own root and shoot space.
- 5Build a moist-edge transect
Arrange three compatible forms from the reliably moist outer band toward the drying interior: a moisture-dependent accent, an adaptable middle plant, and a dry-shade foliage anchor. Repeat the sequence only where the moisture map confirms the same transition and drainage remains sound.
- 6Use containers where roots close the ground
Where digging would damage roots, place a stable, draining container on an appropriate existing hard surface or root-free position rather than on the flare. Select plants for the container's separate light and watering conditions, and keep its weight and runoff away from sensitive roots.
- 7Hide a service path with arching edges
Keep a real route through the garden, then place arching plants outside its clear width so foliage softens the view without occupying the footing. Test access with a watering wand and hand tools before planting. The route should remain usable without stepping on crowns or roots.
- 8Reserve a canopy-change refuge
Leave one accessible pocket whose light, moisture, and drainage could receive a valued plant if storm loss or pruning changes exposure elsewhere. The refuge must already fit the plant; it is contingency space, not permission to install a shade-dependent specimen in an unstable boundary.
Plants in this guide
Related reading
Sources
- Planting Under Trees. University of Vermont Extension. Source record · Accessed 2026-08-19.
- Gardening in the Shade. University of Minnesota Extension. Source record · Accessed 2026-08-19.
- Planting Under Trees. Nebraska Extension in Lancaster County. Source record · Accessed 2026-08-19.
- Northern Maidenhair Fern, Adiantum pedatum. University of Wisconsin-Madison Extension. Source record · Accessed 2026-08-19.