Grow · leaf mold surface conditioning
Use Finished Leaf Mold in a Shade Border Without Burying Crowns
Identify fully finished leaf mold, clear every crown and stem base, then apply a measured surface layer that conditions shaded soil without changing planting depth.
Published Last updated
In this guide
- Confirm that the leaf mold is finished
- Decide what the surface treatment must do
- Read the shade border as several microclimates
- Clear plant bases before spreading
- Measure what is already on the soil
- Spread a thin, even surface layer
- Preserve paths, drainage, and tree roots
- Settle the layer and reopen every collar
- Let future additions answer a measured loss
- Steps
Confirm that the leaf mold is finished
Use material that has completed the leafy stage and become dark, loose, and crumbly. Finished leaf mold should break apart readily in the hand and no longer form a stack of intact leaf blades. A few fine veins or small fragments are not a problem, but broad leathery pieces and coherent wet mats belong back in the leaf pile. The distinction matters in a shade border, where an unfinished layer can remain cold and compressed against slowly emerging crowns.
Smell and structure are practical checks. Sound finished material smells earthy and woodland-like, not sharply sour or stagnant. Squeeze a handful: it may be moist, but it should separate again rather than remain a slick block. Remove sticks, litter, thick evergreen leaves, and any material of uncertain origin. Leaf mold made from plants affected by a serious local sanitation issue should be handled according to local Extension guidance rather than spread through an ornamental collection.
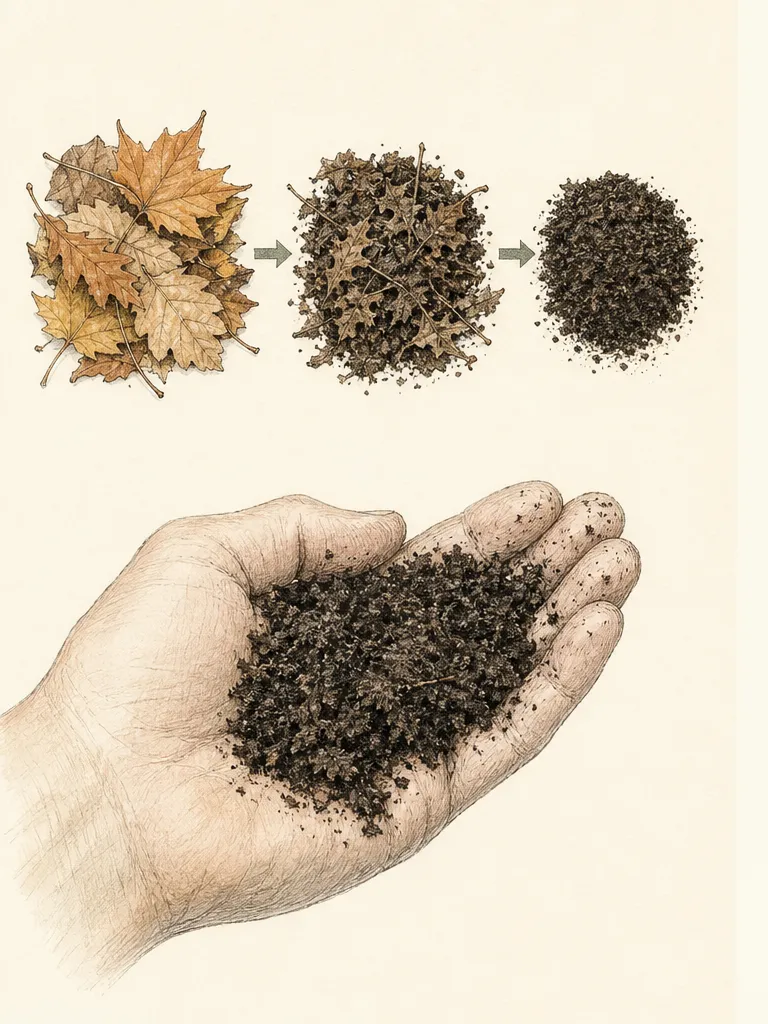
Do not judge readiness by a calendar alone. Leaf species, shredding, moisture, pile size, and climate change the rate of decomposition. The Royal Horticultural Society distinguishes younger, partly decomposed leaf mold useful as mulch from older, finer material useful as a soil conditioner. For this surface-conditioning job, select the finer finished fraction. Return coarse material to decompose, and keep finished material covered until application so wind and drying do not separate it.
Decide what the surface treatment must do
In an established shade border, finished leaf mold can cover open soil, contribute organic matter as it continues to break down, moderate surface moisture, and soften the visual gap between foliage groups. It is not a concentrated fertilizer and should not be used to chase rapid growth. The job is gradual surface conditioning. If plants show nutrient deficiency, poor drainage, or an unsuitable pH, diagnose those issues separately with a soil test and species-specific guidance.
Keep the operation on top of the soil. Digging leaf mold through an occupied border can cut shallow feeder roots, disturb bulbs and rhizomes, and erase the original depth of perennial crowns. Surface organisms and ordinary weather will integrate fine organic material over time. Where the bed is empty and being rebuilt, soil preparation is a different project; this guide addresses a planted shade border whose root system and grade should remain intact.
Choose the application area by need, not by a desire for uniform color. Bare mineral soil, crusted spaces between clumps, and spots where an older organic layer has decomposed may benefit. An area already covered by sound leaf litter or adequate mulch may need only light redistribution. A wet hollow, buried crown, or compacted path is not improved by adding more material. Mark those exceptions before bringing leaf mold into the bed.
Read the shade border as several microclimates
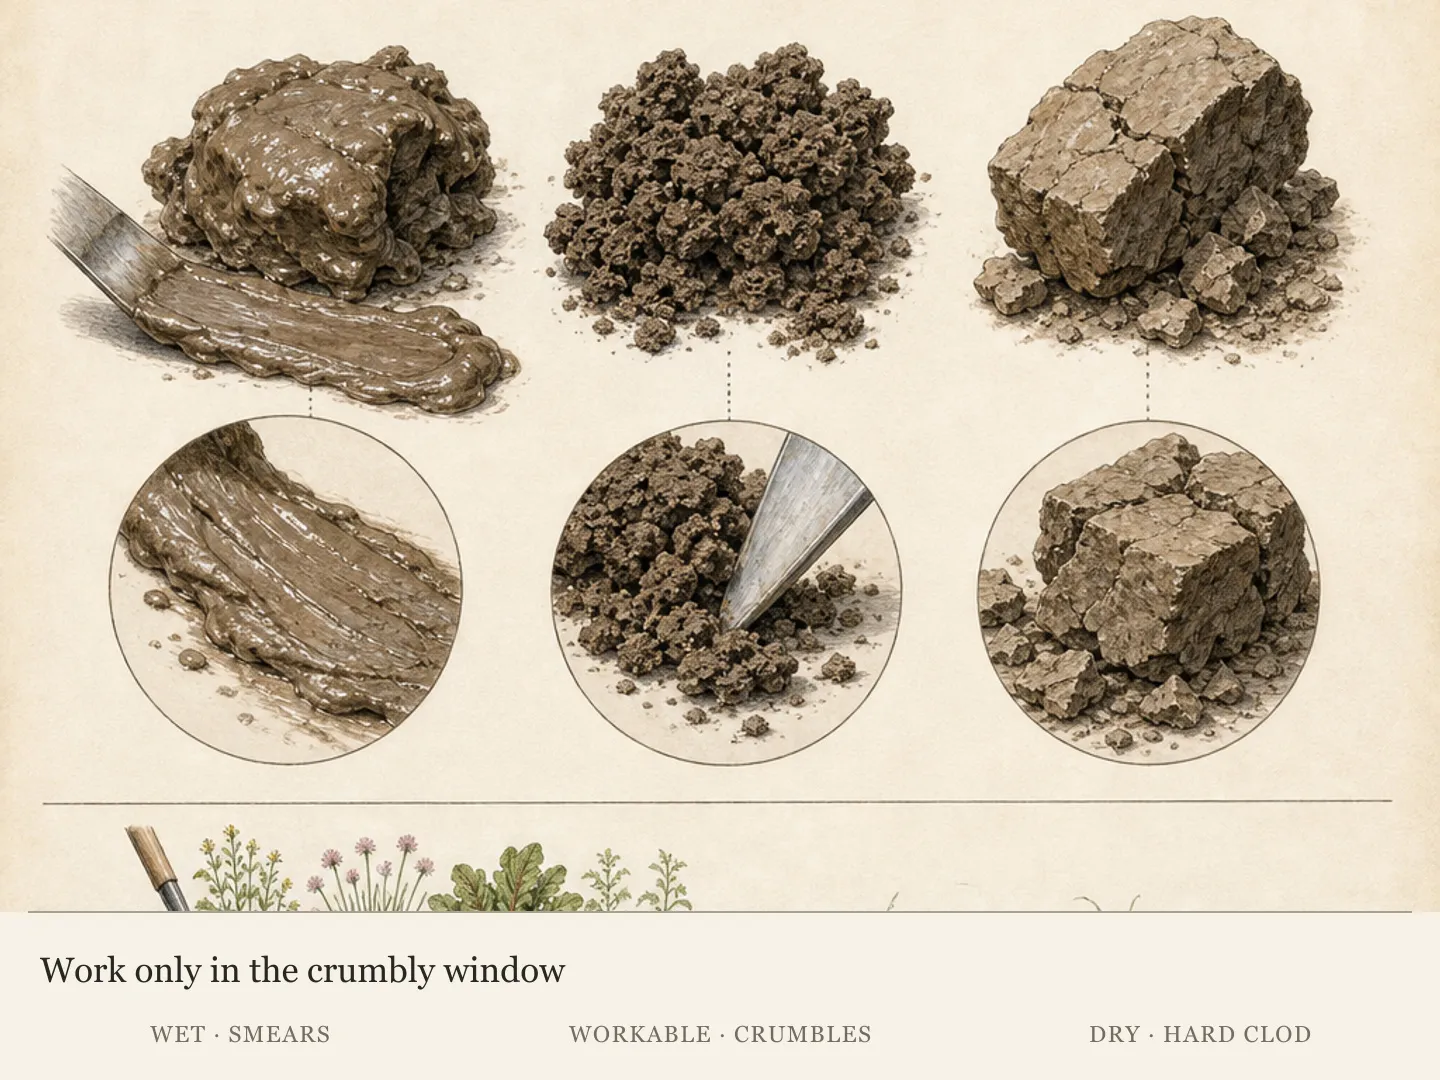
Walk the border after rain and during a dry interval. Shade from a building may keep soil cool yet block rainfall, while a canopy edge may receive both drip and afternoon light. Dense roots can leave one section dry even when another remains moist. Press a trowel into representative spaces and note moisture, surface crusting, existing organic cover, slope, and runoff. A single shade label cannot determine one application thickness for the whole bed.
Identify plants that demand special handling. Fern crowns collect loose material, hosta shoots may be invisible before emergence, iris rhizomes need exposure appropriate to their type, and spring bulbs can disappear completely by summer. Woody shrubs have stem bases and root flares rather than herbaceous crowns. Mark dormant positions from a planting map or last season's photographs. If you cannot identify a plant base confidently, leave that patch untreated until its growth returns.
Check whether the surface can accept a fine organic layer. Soil that stays saturated, smells anaerobic, or receives concentrated runoff needs a drainage diagnosis. Leaf mold can improve the surface over time, but it cannot create an outlet through compacted subsoil or repair a leaking downspout. Likewise, do not cover active crown rot, heaving, or deep planting. Expose movable material, document the symptom, and seek plant-specific advice before changing grade.
Clear plant bases before spreading
Trace every living stem to the soil and find the crown or stem base. With fingers or a narrow hand tool, pull loose leaves and old mulch outward until the original soil line is visible. Do not scrape into mineral soil to manufacture a circular collar. The opening can be irregular; its purpose is to keep decomposing material from resting against shoots and to preserve the transition between roots and stems at the depth where the plant is already growing.
Treat plant forms individually. Leave the center of a fern crown and emerging croziers open. Keep fine leaf mold off exposed iris rhizomes and away from peony eyes or other shallow buds according to their planting requirements. Clear woody stems to the soil line without exposing roots, and never mound material against bark. For a groundcover whose stems root across the surface, place material only in genuine gaps rather than pouring it through the living mat.
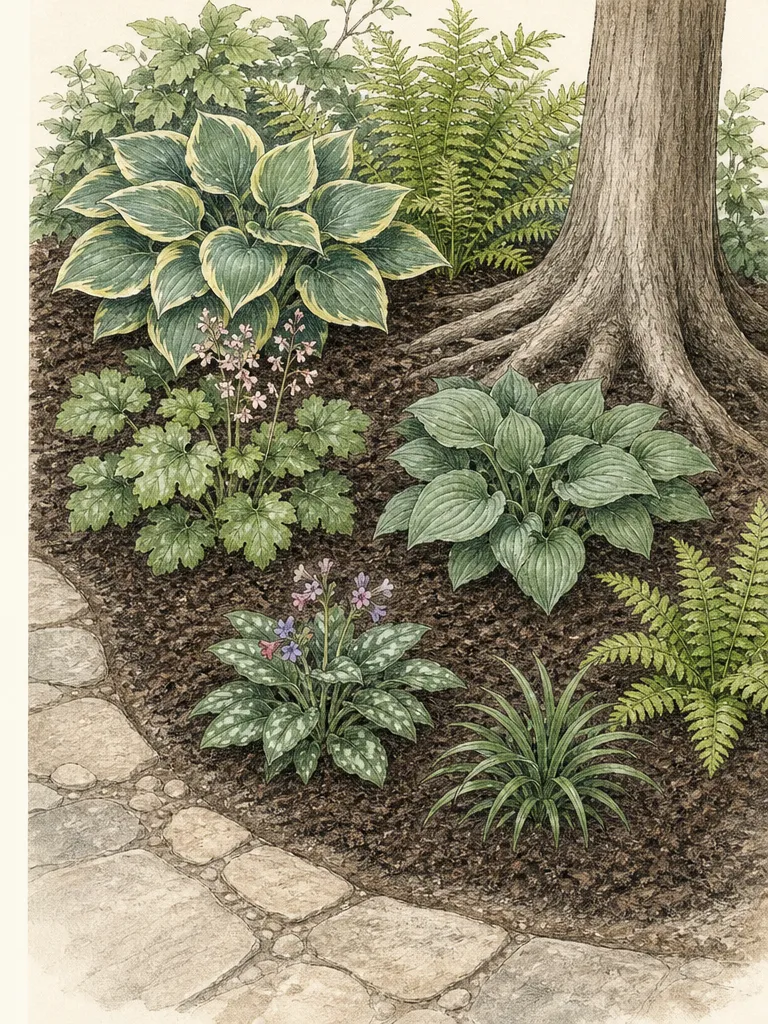
Set a temporary marker beside each cleared base, including dormant plants. Work from the back of the border toward the path so finished areas are not stepped on. If a crown can be found only by digging, stop. The plant may be set too deeply or obscured by soil rather than loose organic matter. Surface conditioning can remove movable cover, but it should not become an improvised excavation around established roots.
Measure what is already on the soil
Before adding leaf mold, inventory the existing surface layer. Lift a small section in several parts of the border and distinguish mineral soil from decomposed organic material. Note deep pockets beside edging, thin patches beneath dense foliage, and drifts gathered by runoff. Existing sound material counts. Adding the same new layer everywhere can bury crowns in one zone while barely changing another, especially where years of autumn leaves have already accumulated.
Loosen a matted but healthy surface lightly with fingers, keeping tools above roots and bulbs. Redistribute excess from plant bases and deep pockets toward bare soil. This may complete the task in much of the bed. Remove only material that is diseased under local guidance, contaminated, full of persistent weeds, or otherwise unsuitable. Faded color does not make an organic layer useless; condition and total coverage matter more than a fresh, uniform appearance.
Choose a modest finished total suited to the plants, soil, climate, and existing layer. Institutional guidance gives different mulch depths for different contexts, so do not select the largest published number as a universal target. Fine leaf mold settles more closely than coarse bark. Apply less where drainage is slow or crowns are dense, and leave adequate existing cover untouched. Record the local decision so next year's maintenance does not automatically repeat a full addition.
Spread a thin, even surface layer
Carry finished leaf mold in a small container and place handfuls on open soil rather than tipping a full barrow into the bed. Spread from the cleared plant collars outward, feathering the material into the existing surface. Keep the original grade visible at crowns and woody bases. The fine layer should rest on the soil, not be folded into planting holes or pushed under foliage where the plant's center cannot be checked.
Work in short sections and look back from the path. A safe application follows the irregular spaces between plants instead of producing a flat blanket over everything. Use a soft hand rake only in broad open ground; around ferns, ephemerals, and shallow-rooted perennials, use gloved fingers. Keep irrigation emitters and labels visible. If the material immediately slides into a low point, correct the distribution and investigate runoff rather than topping up the exposed slope.
Reserve some finished material until the first settling check. It is easier to fill a verified thin patch later than to remove leaf mold from dozens of hidden crowns. Store the remainder where it will stay slightly moist and clean. Do not create a disposal mound at the border edge, against a fence, or over tree roots. Surplus is useful only when it can be applied deliberately to another suitable surface or returned to managed storage.
Preserve paths, drainage, and tree roots
Keep stepping stones and maintenance routes free of loose leaf mold. Fine material on a hard path can become slippery and will wash into low areas. Preserve a narrow working line into deep borders so future weeding and inspection do not require stepping on conditioned soil. At edging, taper the layer rather than building a ridge that traps water or gives turf and spreading groundcovers a concealed route into the bed.
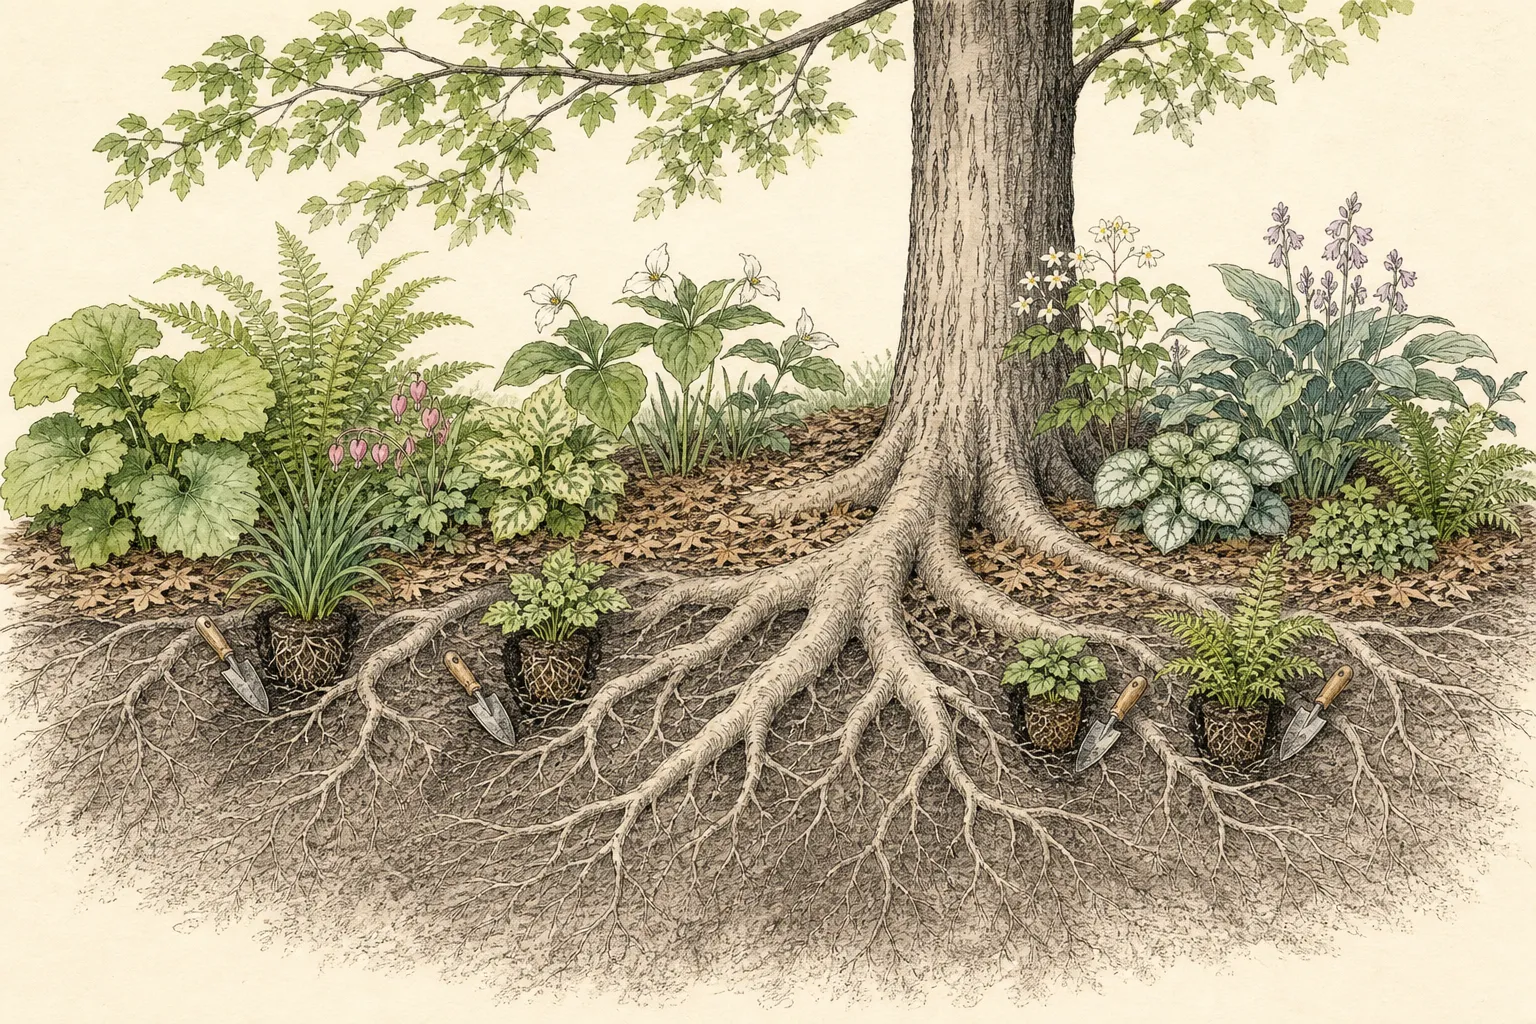
Where the shade border lies beneath a mature tree, the tree remains the primary constraint. Do not add soil, raise the grade, bury the trunk flare, or pile leaf mold over visible structural roots. A conservative surface layer between roots may be appropriate, but keep the flare and inspection area open. Avoid cultivation intended to mix the material in. If surface roots occupy nearly all available ground, retained natural leaf litter may be the better treatment.
Leave downspout paths, drain grates, and low outlets unobstructed. Fine organic matter can move in concentrated water and collect where it is not wanted. After spreading, simulate only normal irrigation if needed; do not flood the bed as a test. The first natural rain will show whether the layer stays in place. Repeated movement calls for correcting flow, slope, or application area, not repeatedly replacing the same displaced material.
Settle the layer and reopen every collar
Water newly planted or dry plants according to their needs, or wait for ordinary rain, then inspect the surface after it settles. Fine leaf mold may slump toward crowns, fern centers, edging, and depressions. Use the markers to reopen every plant collar and lift material away from shoots. Redistribute gathered material toward a verified bare spot. Do not interpret settling as an automatic need for a second full application.
Check beneath the surface with a finger before changing irrigation. Leaf mold can reduce evaporation, so a schedule established for bare soil may now be excessive in a cool shaded pocket. Conversely, dry shade beneath an overhang or competitive tree roots may still need deliberate watering. Adjust by measured moisture and plant response. The conditioner supports more stable soil conditions; it does not make all zones share the same water requirement.
Look for warning signs during the following weeks: material crusting into a sheet, sour odor, runoff channels, buried shoots, persistently wet crowns, or new animal disturbance. Break a harmless light crust at the surface without cultivating roots, and remove excess that cannot be redistributed safely. If a plant collapses or discolors, expose its base and diagnose the plant rather than assuming that more leaf mold will correct it.
Let future additions answer a measured loss
At the next seasonal review, begin again with crowns and existing material. Finished leaf mold continues to decompose, but the rate varies across a shade border. A dry upper edge may lose cover faster than a protected hollow, while natural leaf fall may replenish another area. Measure and redistribute before opening stored material. The aim is a stable, breathable surface, not a yearly ceremony of adding the same volume.
Update the plant map as the border changes. Mark spreading groundcovers, enlarged fern crowns, new divisions, and gaps left by dormant ephemerals. A space that accepted leaf mold last year may be occupied this year. Divide or move plants in their appropriate season as a separate task; do not use surface material to hide overcrowding. Good maintenance keeps both the organic layer and the living architecture legible.
Success appears gradually: open crowns, fewer bare crusted patches, a friable surface, and moisture that changes less abruptly without staying stagnant. Leaf mold should recede visually beneath the plants, not become the subject of the border. Keep making small corrections from observation. When the conditioned surface is adequate, leave it alone and direct effort toward watering, editing, and plant health where the border actually asks for care.
Steps
- Level
- easy
- Time
- About 45–90 minutes for a small established shade border
- Tools
- Gloves, Small container, Narrow hand tool, Temporary plant markers, Ruler or marked probe
- Materials
- Finished leaf mold, Plant map or seasonal photographs
- 1Sort the finished fraction
Take only dark, earthy, crumbly leaf mold that separates in the hand. Return intact leathery leaves and coherent mats to further decomposition. Remove sticks, litter, and questionable debris. If the material smells sharply sour, came from an unknown waste stream, or includes plants subject to local sanitation advice, isolate it rather than spreading it through the border.
- 2Map plants and wet spots
Mark every visible crown, fern center, rhizome, bulb location, and woody stem base. Note saturated hollows, downspout paths, mature tree roots, existing mulch pockets, and the maintenance route. Use last season's photographs for dormant plants. Leave any uncertain patch untreated until the plant emerges or its position can be confirmed without digging.
- 3Open every plant collar
Pull loose organic material away from crowns and stems until the original soil line is visible, without scraping into mineral soil. Keep fern centers, shallow buds, exposed rhizomes, and tree flares clear according to their anatomy. Place a marker beside each opening so it remains visible while you work from the back of the border toward the path.
- 4Measure and redistribute first
Check the existing organic layer in representative dry, moist, deep, and bare areas. Loosen sound mats gently above the root zone and move excess from plant bases into true gaps. Count retained material toward the finished surface. Remove only unsuitable debris or surplus that has no safe location; a faded but functional layer does not need replacement for appearance.
- 5Apply leaf mold to open soil
Place small handfuls on bare or verified thin soil and feather them into the retained layer. Keep the treatment on the surface and stop before every marker, crown, stem, fern center, rhizome, inlet, and path. Use fingers near plants and a soft rake only in broad open spaces. Reserve part of the material until the layer settles.
- 6Inspect after settling
After normal watering or rain, revisit every marker. Reopen collars where fine material slumped, redistribute drifts, and check for crusting, sour odor, runoff channels, or blocked drainage. Probe moisture below the surface before adjusting irrigation. Add a small amount only where the settled layer still shows a genuine deficit and plant bases remain fully visible.
- 7Record the new baseline
Note the date, finished material used, approximate surface condition, moisture zones, and places where movement occurred. Photograph the cleared crowns and overall border. At the next review, repeat the crown check and existing-layer inventory before adding more. Future applications should answer observed decomposition or displacement rather than an annual schedule.
Plants in this guide
Related reading

Sources
- Leafmould. Royal Horticultural Society. Source record · Accessed 2026-08-19.
- Mulching for Soil and Garden Health. University of Minnesota Extension. Source record · Accessed 2026-08-19.
- Planting and Care. University of Illinois Extension. Source record · Accessed 2026-08-19.