Tools · bottom heat ornamental seed germination
Choose Bottom Heat for Flower-Seed Germination
Decide when a seedling heat mat helps ornamental seed germination, how to control root-zone temperature, and when to remove heat before it weakens emerging plants.
Published Last updated
In this guide
- Decide whether the seed actually needs added heat
- Choose mat size by the real tray footprint
- Use a thermostat when the margin is narrow
- Build a measured and electrically safe setup
- Balance warmth with moisture and oxygen
- Read the tray as a temperature map
- Remove heat at the biological transition
- Buy only the control the crop requires
- Compare heated and unheated batches on one sheet
- Tool notes
Decide whether the seed actually needs added heat
Bottom heat is a method for raising the temperature of seed-starting medium above a cool room or bench, not a universal requirement for germination. Flower species differ: tender ornamentals may germinate more evenly in a warm root zone, while cool-germinating annuals, perennials needing stratification, and species whose packets specify lower temperatures can be delayed or damaged by the same mat. Read the current packet and compare it with an Extension or botanical-institution source for that genus before buying equipment.
Measure the place where the tray will sit for a full day. Record medium or surface temperature at dawn, midday, and after lights switch off, along with drafts, radiator cycles, sun through glass, and shelf material. A room described as 68°F can have a stone sill far colder than the air or a sunny enclosure far hotter. Added heat is justified when the verified root zone stays below the species range; it is not justified merely because the calendar says seed-starting season.
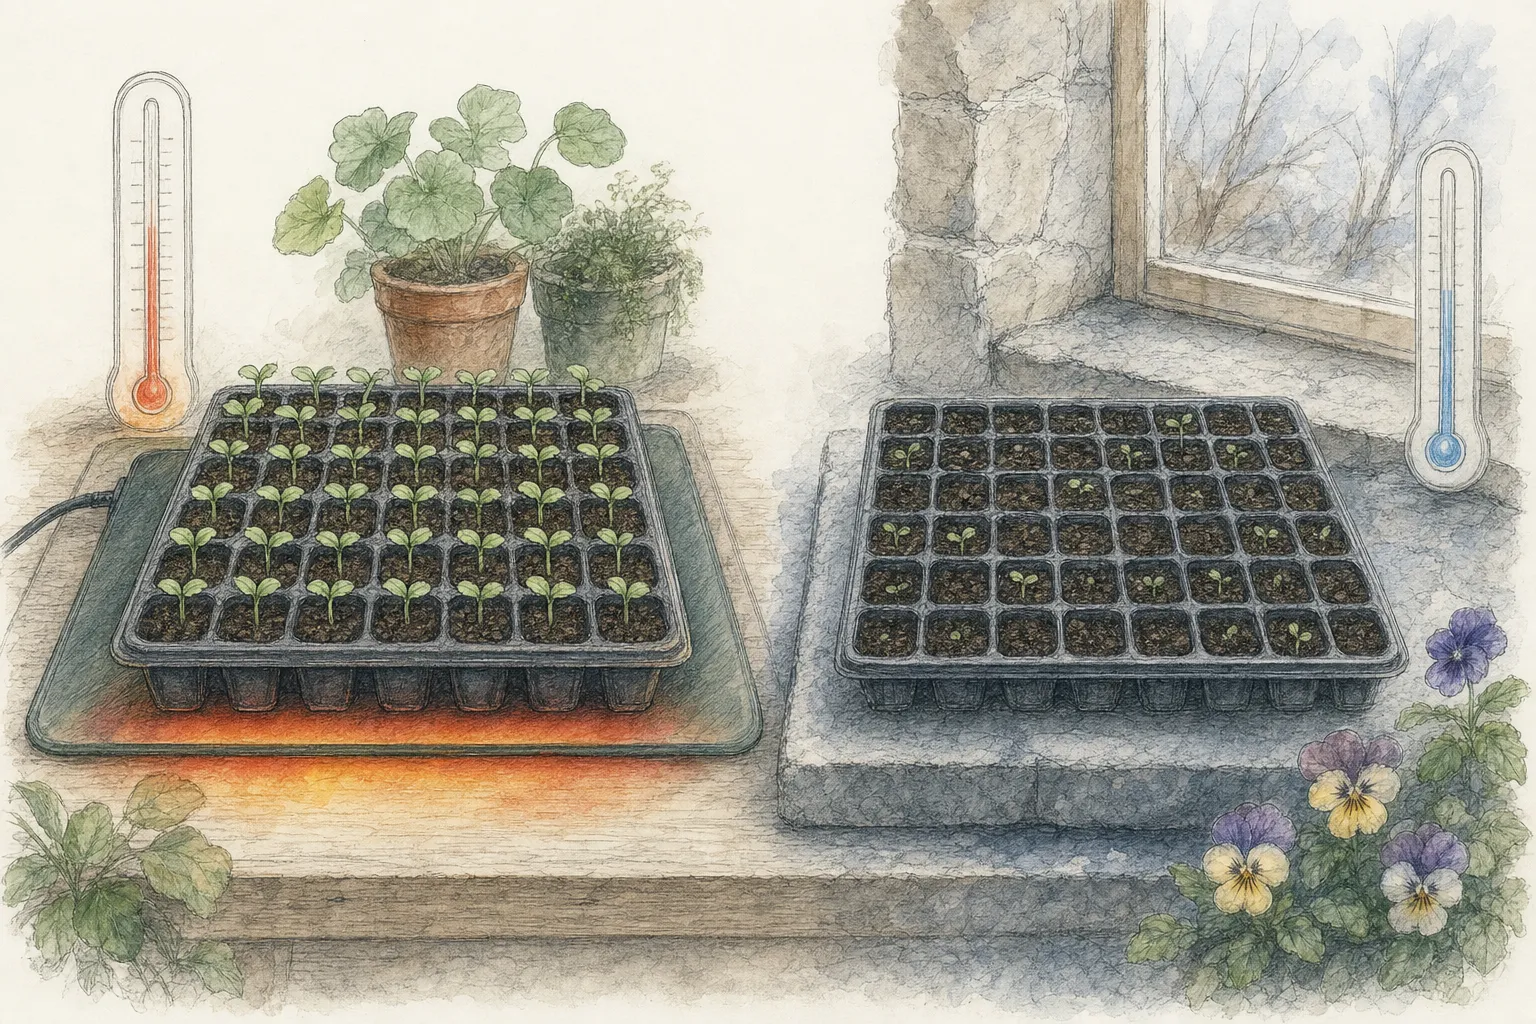
Separate germination needs from seedling needs. A species may benefit from warmth until the radicle emerges and then require cooler air, strong light, and open circulation for compact growth. If nobody can inspect the tray daily or move it immediately after emergence, constant bottom heat can turn a useful treatment into a long warm, wet interval. The complete plan therefore includes the destination under lights before the first seed is sown.
Choose mat size by the real tray footprint
Measure the flat base that will contact the mat, excluding wide rims and handles. A mat that warms only the middle of a tray can produce a central band of faster drying and emergence; one extending beyond the listed use may be misused or damaged. Follow the manufacturer’s approved orientation, surface, clearance, load, and number of trays. Do not fold, overlap, cut, puncture, or trap a mat under insulation unless the product instructions expressly permit that configuration.
Count future batches and outlet capacity, not just the first tray. A large mat may appear efficient, but varieties with different temperature ranges and emergence dates cannot be controlled independently when they share one thermal zone. Several smaller zones can be more useful than one broad surface if the shelf has safe electrical capacity and each zone can be labeled. Conversely, one small mat moved between trays is unsuitable when germination periods overlap.
Select equipment sold and listed for horticultural propagation in the region of use. Examine cord length, water-resistance instructions, warranty, storage limits, and whether the mat requires a separate thermostat. A cheap device with vague temperature claims and no accessible safety information is difficult to audit. Bottom heat operates near water for days at a time; documentation, intact strain relief, and a predictable controller are practical horticultural features, not optional electronics trivia.
Use a thermostat when the margin is narrow
An uncontrolled mat raises temperature by an amount that depends on room conditions, shelf material, tray mass, cover, and evaporation. It does not hold one universal germination temperature. A compatible thermostat can switch power according to a probe, but the result is only as good as probe placement and controller range. Choose a controller rated for the mat’s electrical load and wet propagation setting, with an adjustable range that covers the target species and a display readable without disturbing the tray.
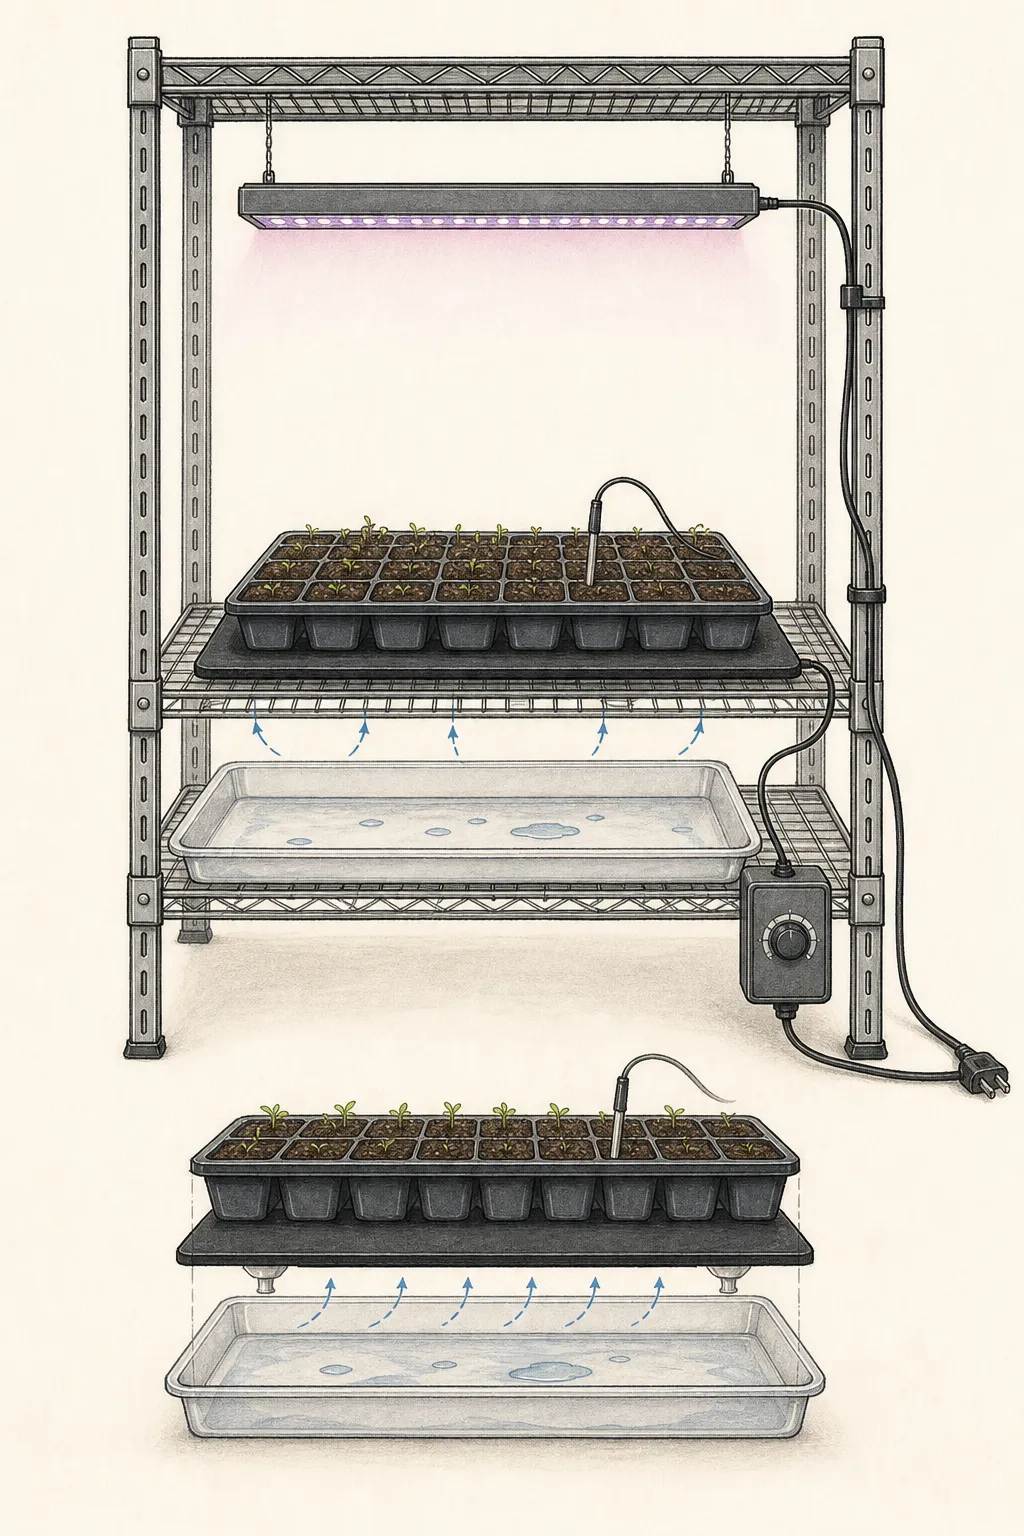
Place the probe according to the controller instructions, commonly within representative moist medium rather than dangling in room air or touching the mat. Secure it so watering and tray movement cannot pull it out. Do not place it in the coldest corner while the center overheats, or directly beside a heater cable where it cycles prematurely. Check the controller against a separate clean thermometer during setup and after any major change in tray, cover, shelf, or room temperature.
Treat the set point as a monitored target, not proof of actual uniformity. Measure several cells after the system stabilizes. Dense plug trays, heavy ceramic containers, and shallow open flats transfer heat differently. If one edge remains cooler, improve tray contact or relocate the whole setup rather than increasing the setting until the warmest cells exceed the species range. Record both set point and measured medium temperature so future results can be reproduced.
Build a measured and electrically safe setup
Place the mat on the flat, dry, heat-compatible surface specified by its maker. Set a waterproof drainage tray above it if required, then the seed container, preserving the approved sequence and ventilation. Route cords so water cannot run toward plugs, create drip loops, keep connections above the floor and outside the watering path, and use a properly protected outlet appropriate to the location. Do not run a cord beneath rugs, across a walkway, through a pinched window, or under a tray edge that can abrade it.
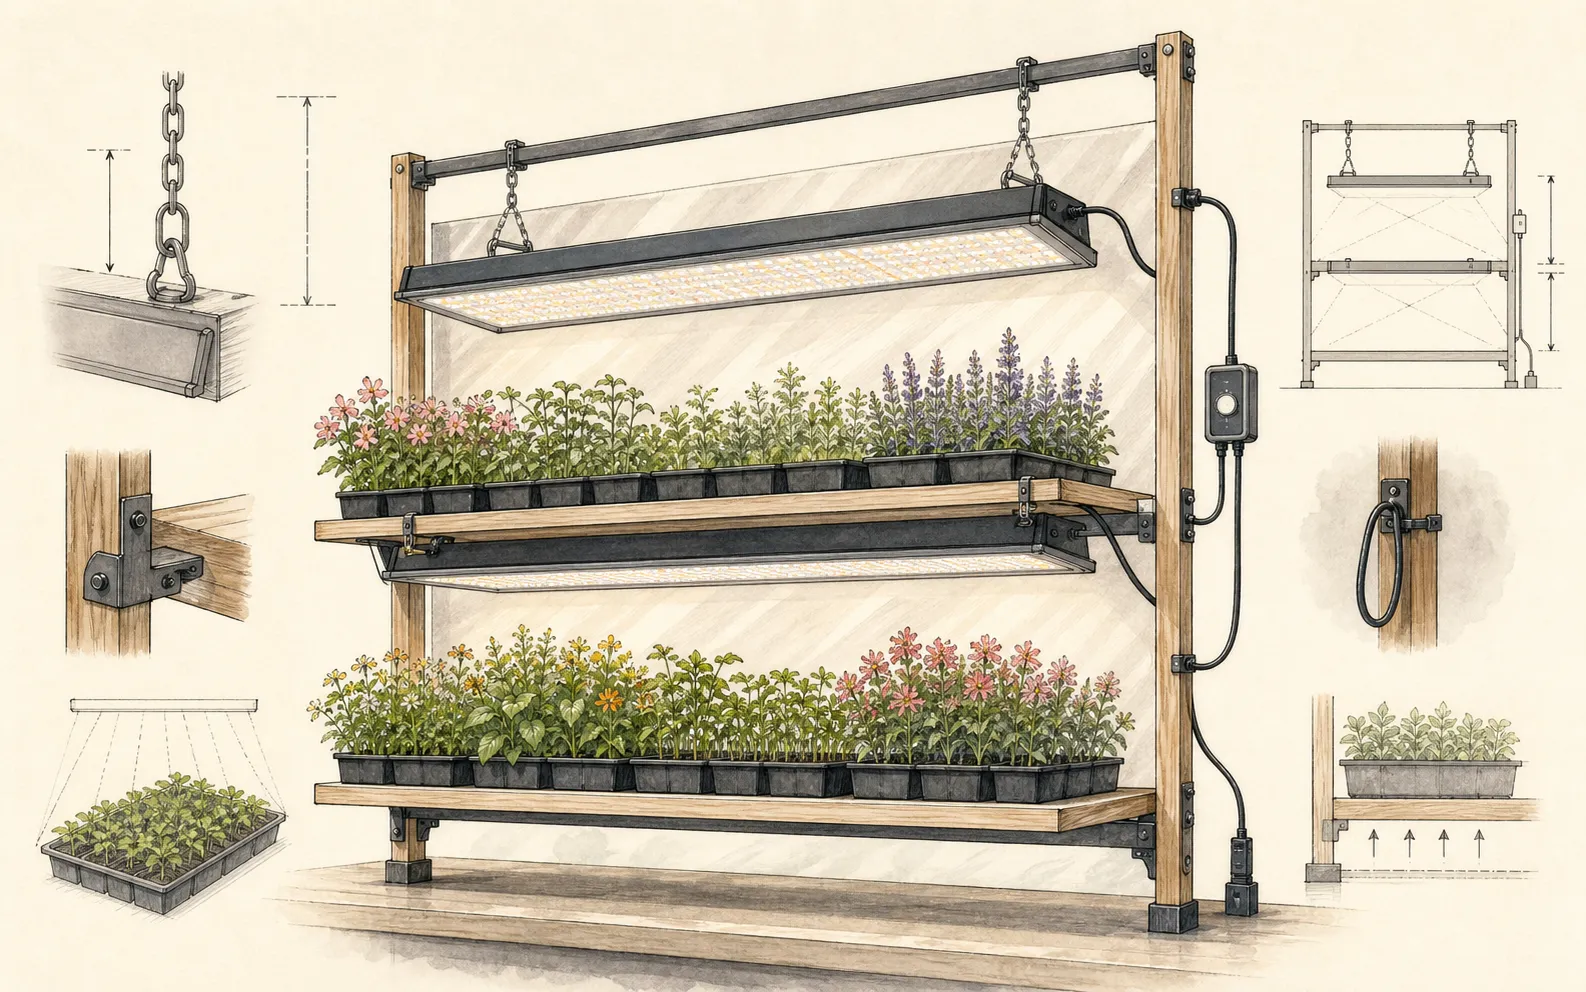
Provide light before germination begins. Some flower seeds require light to germinate, and all emerged seedlings need an appropriate source promptly. Mount the fixture securely, verify coverage over the complete tray, and keep heat from the lamp from combining unpredictably with the mat. A clear humidity cover also traps warmth; measure the covered medium and air rather than assuming the dome only affects moisture. Vent or remove it according to species and emergence, never to compensate blindly for an excessive heat setting.
Label each tray with species, cultivar, sowing date, target temperature range, light or darkness requirement, expected germination window, and the action due after emergence. Keep the label above condensation and use a waterproof record nearby. This prevents a helper from treating every covered tray alike and makes a stalled batch diagnosable. The best shelf can be understood at a glance without explanatory notes taped over vents or electrical equipment.
Balance warmth with moisture and oxygen
Warm medium loses water faster, yet excessive water fills pore space and favors damping-off conditions. Begin with fresh, fine, well-aerated seed-starting mix and a clean container with open drainage. Pre-moisten evenly so dry pockets do not repel later watering. Sow at the depth and light exposure required by the seed, then water gently enough that fine seed remains in place. Do not keep the tray saturated simply because the surface looks lighter over the heat mat.
Check moisture by cell weight, color, and feel below the surface rather than a fixed daily volume. Edge cells may dry first; covered trays may remain wet while the room appears dry. Bottom watering can rewet evenly when used carefully, but remove the tray from standing water once the medium has absorbed enough. Mist is useful for tiny surface-sown seed only when it replaces a measured need; repeated superficial misting can leave the root zone saturated while giving the impression of gentle care.
Air exchange changes at emergence. Remove or vent the cover when current guidance and the crop stage call for it, especially once most seedlings are above the medium. Maintain suitable warmth only as long as the species benefits. A closed, warm, constantly wet tray with seedlings touching the dome is not an advanced propagation environment; it is a high-risk microclimate. If moisture cannot be controlled at the chosen temperature, reduce the heat or redesign the container before sowing another batch.
Read the tray as a temperature map
Observe where germination begins. A uniform pattern supports the idea that seed quality, sowing, moisture, and temperature were reasonably even. A warm central rectangle may correspond to the mat; a slow edge may reveal poor contact or a cold draft; one completely empty cultivar may have a different dormancy or seed-quality issue. Photograph the tray from above on fixed dates. Pattern is more informative than the final percentage alone.
Do not increase heat immediately when emergence is late. Recheck packet timing, seed age, pretreatment, sowing depth, light requirement, actual medium temperature, and moisture. Some perennial seed is naturally slow or irregular and may need cold or alternating temperatures. Digging repeatedly destroys germinating seeds. If a test cell must be examined, use one at the margin and record what was found rather than disturbing the entire batch in search of reassurance.
Respond to signs of overheating: rapid drying, condensation paired with hot enclosed air, stretched pale seedlings, stalled roots, or medium readings above the documented range. Switch off and unplug according to instructions, move the tray to a safe stable surface, and let conditions normalize gradually. Do not flood hot medium with cold water. If the mat, cord, controller, or tray smells unusual, discolors, swells, sparks, or becomes damaged, disconnect power safely and remove the equipment from service.
Remove heat at the biological transition
The off date is determined by emergence and species guidance, not convenience. Once most seedlings have emerged, many ornamental crops should leave constant bottom heat and grow under bright light with appropriate cooler conditions. Move the tray or turn off the zone while protecting species that are still germinating separately. A mixed tray complicates this decision; sow crops with different temperature and timing needs in separate containers even when only a few seeds are involved.
Change one major condition at a time when possible. Remove the humidity cover, improve air movement, and reduce bottom heat according to the crop rather than exposing fragile seedlings simultaneously to cold draft, dry medium, and a distant lamp. Keep the light close enough for compact growth within the fixture’s instructions. Continue measuring the medium for a day after shutdown because a cold shelf may now fall below the healthy seedling range, especially at night.
Clean and dry the mat surface after the batch following the manufacturer’s method; never immerse or scrub connections unless explicitly permitted. Inspect for creases, cuts, discoloration, and damaged strain relief. Coil loosely for storage without sharp bends. Clean trays separately and discard diseased medium. Keep the batch record with the equipment, including measured temperature rise and controller behavior, so the next sowing starts from known performance rather than the printed wattage alone.
Buy only the control the crop requires
A gardener starting a few warm-germinating flower crops in a cool house may benefit from one correctly sized mat and a compatible thermostat. Someone with a naturally warm propagation room may need only a thermometer and better light. A collection dominated by cool-germinating hardy annuals or stratified perennials may gain little from bottom heat. Purchase follows the verified temperature gap, not the visual appeal of a complete propagation kit.
Prioritize accurate measurement, safe construction, and zone control over accessories. A dome, branded tray, or digital display is not useful if it makes watering difficult or hides actual medium conditions. Spare probes, remote alerts, and multiple outlets can help a larger operation, but each adds failure modes and setup time. Use the simplest system that keeps the target root zone within range and can be inspected daily without moving wet trays over live connections.
Evaluate value by batches improved, not speed alone. Earlier germination has little worth if seedlings outgrow the light shelf, damping-off losses increase, or extra equipment remains powered after emergence. Record germination distribution, days to emergence, losses, and subsequent compactness for heated and unheated tests of the same seed lot where practical. A small side-by-side trial provides the local evidence needed to retain, adjust, or retire the tool.
Compare heated and unheated batches on one sheet
Use these columns for the same seed lot: species and pretreatment; documented medium-temperature range; measured tray temperature; heated or unheated position; seed count; first and last emergence; usable seedlings; losses; date heat was removed. Compare the resulting seedlings and bench demand as well as speed. A blank temperature or emergence field is missing evidence, not proof that the mat improved the batch.
Tool notes
- Type
- Electric propagation heat mat with optional thermostat
- Purpose
- Raise and stabilize seed-starting medium temperature for ornamental species whose documented germination range is warmer than the measured propagation location.
- Affiliate
- No commercial links
Maintenance
- Before sowing, inspect the mat, plug, cord, strain relief, controller, and probe in bright light. Compare the controller with a separate clean thermometer in moist medium after the system stabilizes. Record the set point and center, edge, and coolest-cell readings; a controller display alone cannot establish tray uniformity.
- During germination, check that the probe remains in its reviewed position, containers sit flat, and drainage water stays outside every connection. Log actual medium temperature and moisture at least daily and after a cover, tray, shelf, light, or room-temperature change. A growing warm-center or dry-edge pattern calls for contact correction, not a higher setting.
- At emergence, separate finished containers from seeds that still require warmth. Transfer or shut down the heated zone according to the species, put seedlings under their prepared light, and measure the unheated medium through the next night. This check catches a shelf that becomes too cold once the mat stops operating.
- After the batch, isolate power, allow the equipment to cool, and clean only by the manufacturer's approved method. Dry the mat, controller, probe, cord, and connectors completely. Store the mat flat or loosely rolled as directed, free of sharp bends and weight, with each controller-probe-mat pairing labeled.
- Review germination distribution, days to emergence, damping-off losses, and seedling compactness against an unheated comparison when available. Retire a mat with physical damage, controller drift, or irreducible hot and cold zones. Keep the manual, purchase record, measured temperature rise, and retirement reason with the propagation inventory.
Related reading
Sources
- Starting seeds indoors. University of Minnesota Extension. Source record · Accessed 2026-08-30.
- Starting Plants From Seed [fact sheet]. University of New Hampshire Extension. Source record · Accessed 2026-08-30.
- How to sow seeds indoors. Royal Horticultural Society. Source record · Accessed 2026-08-30.
- How to prevent seedling damping off. University of Minnesota Extension. Source record · Accessed 2026-08-30.