Plant problems · ornamental flower seed germination failure differential
Diagnose Flower-Seed Germination Failure Before Reseeding the Same Tray
Use a seed-lot control, temperature and moisture records, excavation, and seedling patterns to separate dormancy, dead seed, burial, rot, damping-off, and environmental error.
Published Last updated
In this guide
- Freeze the failed setup before changing it
- Check the seed protocol before rebuilding the whole tray
- Verify species biology and pretreatment
- Read the tray pattern as evidence
- Excavate a small representative sample
- Run a seed-lot control outside the tray
- Correct moisture, temperature, light, or air deliberately
- Decide whether to wait, thin, restart, or replace
- Close the diagnosis after garden establishment
- Diagnosis
Freeze the failed setup before changing it
When a tray remains empty, the fastest action is often to water again, increase heat, scrape the surface, and add more seed. That sequence destroys the evidence and can repeat the cause. Photograph the full tray, label, cover, shelf, light, heat source, and drainage. Stop routine changes long enough to record conditions. Keep another healthy tray separate so diagnostic handling does not spread a possible disease problem.
Write the botanical name, cultivar, seed source and lot, packet date, storage history, sowing date, pretreatment, seed count, depth, medium, container, and expected interval. Record actual root-zone temperature, not only room air or a heat-mat setting. Note watering dates, method, tray weight, cover use, light, and any move between locations. A failure without a timeline becomes guesswork.
Define what “failed” means. No visible emergence before the packet’s earliest day is not failure. A few seedlings followed by collapse differs from no germination. Cotyledons trapped beneath crust differ from seeds that never swelled. Count empty cells, living seedlings, collapsed stems, algae, mold, and disturbed areas. The stage at which progress stopped determines the useful tests. Quarantine trays with collapse, fungal growth, foul odor, or unexplained spread. Do not carry them across active propagation shelves or reuse their drainage water. Wash hands and tools afterward. Keep products out of the diagnosis until a cause is supported and the label matches the plant, setting, and problem. A blanket fungicide can injure seedlings and still leave drainage or temperature unresolved.
Check the seed protocol before rebuilding the whole tray
Distinguish an untreated or not-yet-ready seed from a decaying seed, a failed emergence, or a tray-position pattern. Verify identity and the complete treatment interval first. When restarting a small batch, change the condition supported by evidence and retain the lot record. A successful restart cannot identify the original cause if every variable was changed together.
Verify species biology and pretreatment
Read the current packet and an authoritative propagation source. Many ornamental perennials need cold moist stratification, scarification, alternating temperatures, light, darkness, or extended time. An untreated dormant seed can remain sound in a warm tray while the gardener assumes it is dead. Conversely, an annual that ordinarily emerges promptly under suitable warmth should not be granted months of saturation because some perennials are slow.
Check sowing depth. Fine light-requiring seed buried under several millimeters of mix may germinate weakly and fail before reaching the surface. Darkness-requiring seed left exposed can be inhibited. Large seed placed too shallowly can dry during radicle emergence. Measure actual depth in representative cells rather than relying on the intended action. Watering can move seed into corners or expose it.
Review treatment sequence. Cold moist treatment requires both temperature and moisture for the documented duration; dry refrigeration may only store seed. Scarification should alter the coat without damaging the embryo. Hot water and chemical treatments carry species-specific limits and safety requirements. Do not apply a second treatment blindly to seed already weakened by the first. Keep treated and untreated records separate. Confirm seed identity. Mixed packets, reused labels, volunteer seed in homemade compost, and seed saved from hybrids can produce unexpected timing or seedlings. If the label is uncertain, do not distribute results or design a border around them. Preserve a sample for identification and test the known lot separately. An unknown seedling is not evidence that the named seed germinated.
Read the tray pattern as evidence
Map every cell or row. Edge failure with healthy center cells suggests rapid drying, strong airflow, uneven heat, or light exposure. Center failure with wet edges can reflect cover condensation or watering pattern. One end of a heat mat may run warmer, or a tray can extend beyond it. A gradient implicates the environment more strongly than a genetically identical seed lot failing randomly.
Lift the tray and inspect drainage. Inserts can seal against a solid catch tray, roots or medium can block holes, and a warped corner can hold water. A green surface does not prove the lower profile is safe. Feel weight, examine holes, and sample moisture at depth. Standing water and foul smell indicate oxygen stress and decay; a pale dry core beneath a misted surface indicates incomplete watering.
Measure temperature in several cells over a full cycle. Germination temperature requirements vary by species, while heat mats can overshoot in covered trays or on insulated shelves. Direct sun on a dome creates rapid spikes. Cold media can delay or rot warm-requiring seed. Record minimum and maximum at root level. Changing the thermostat without measuring the tray does not test the hypothesis.
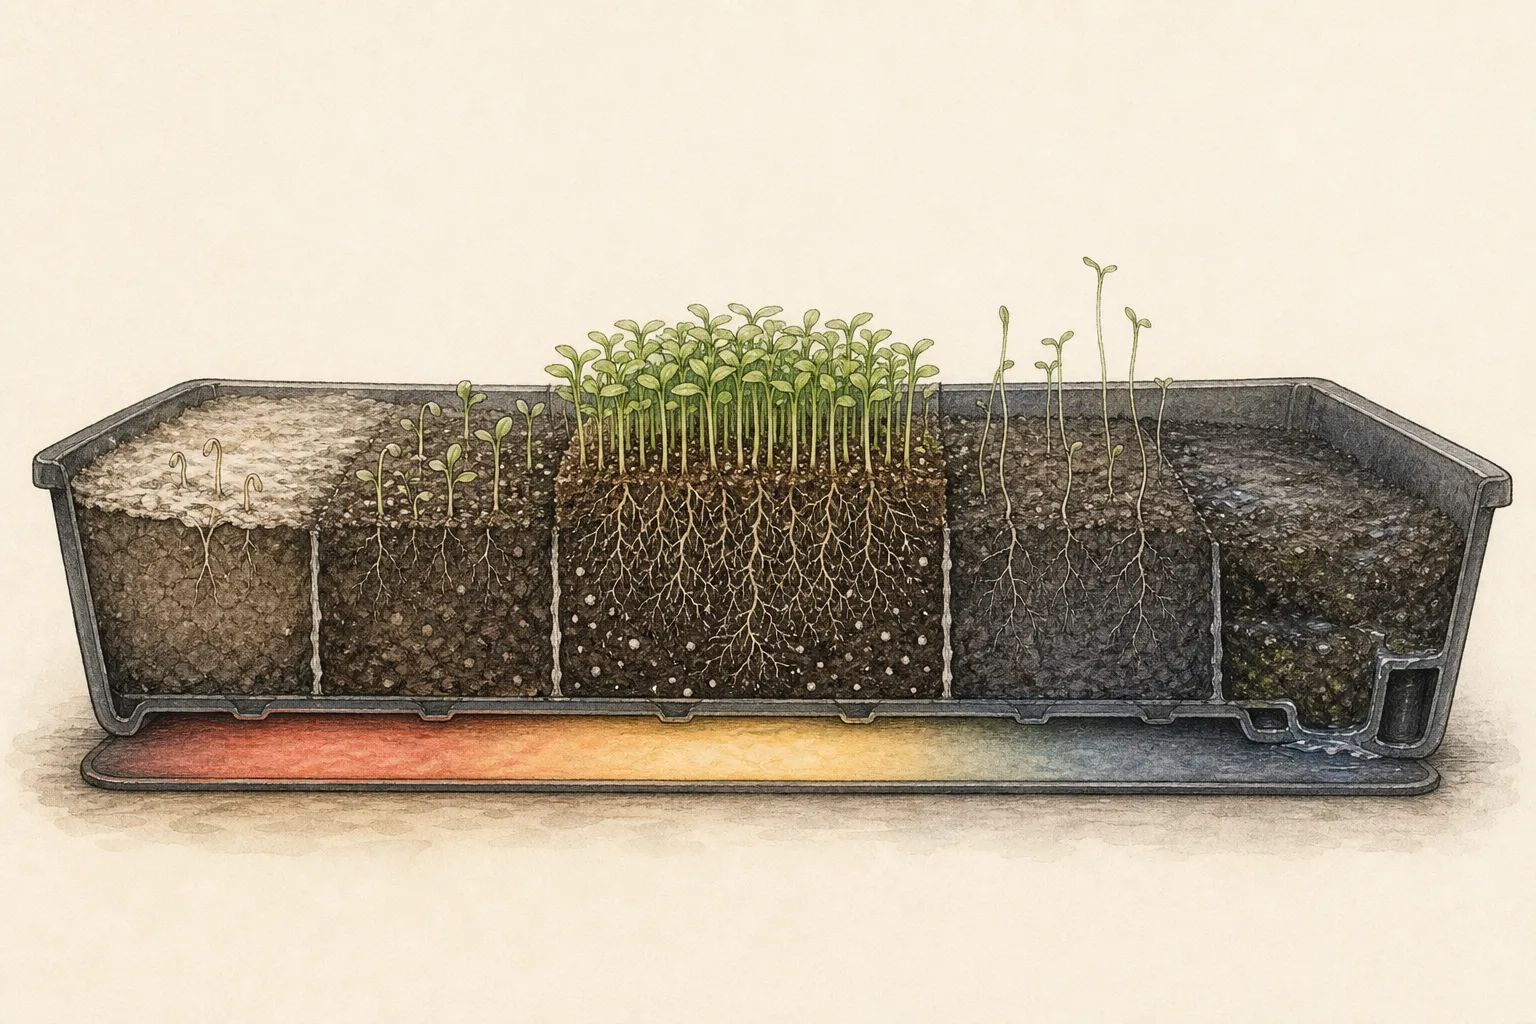
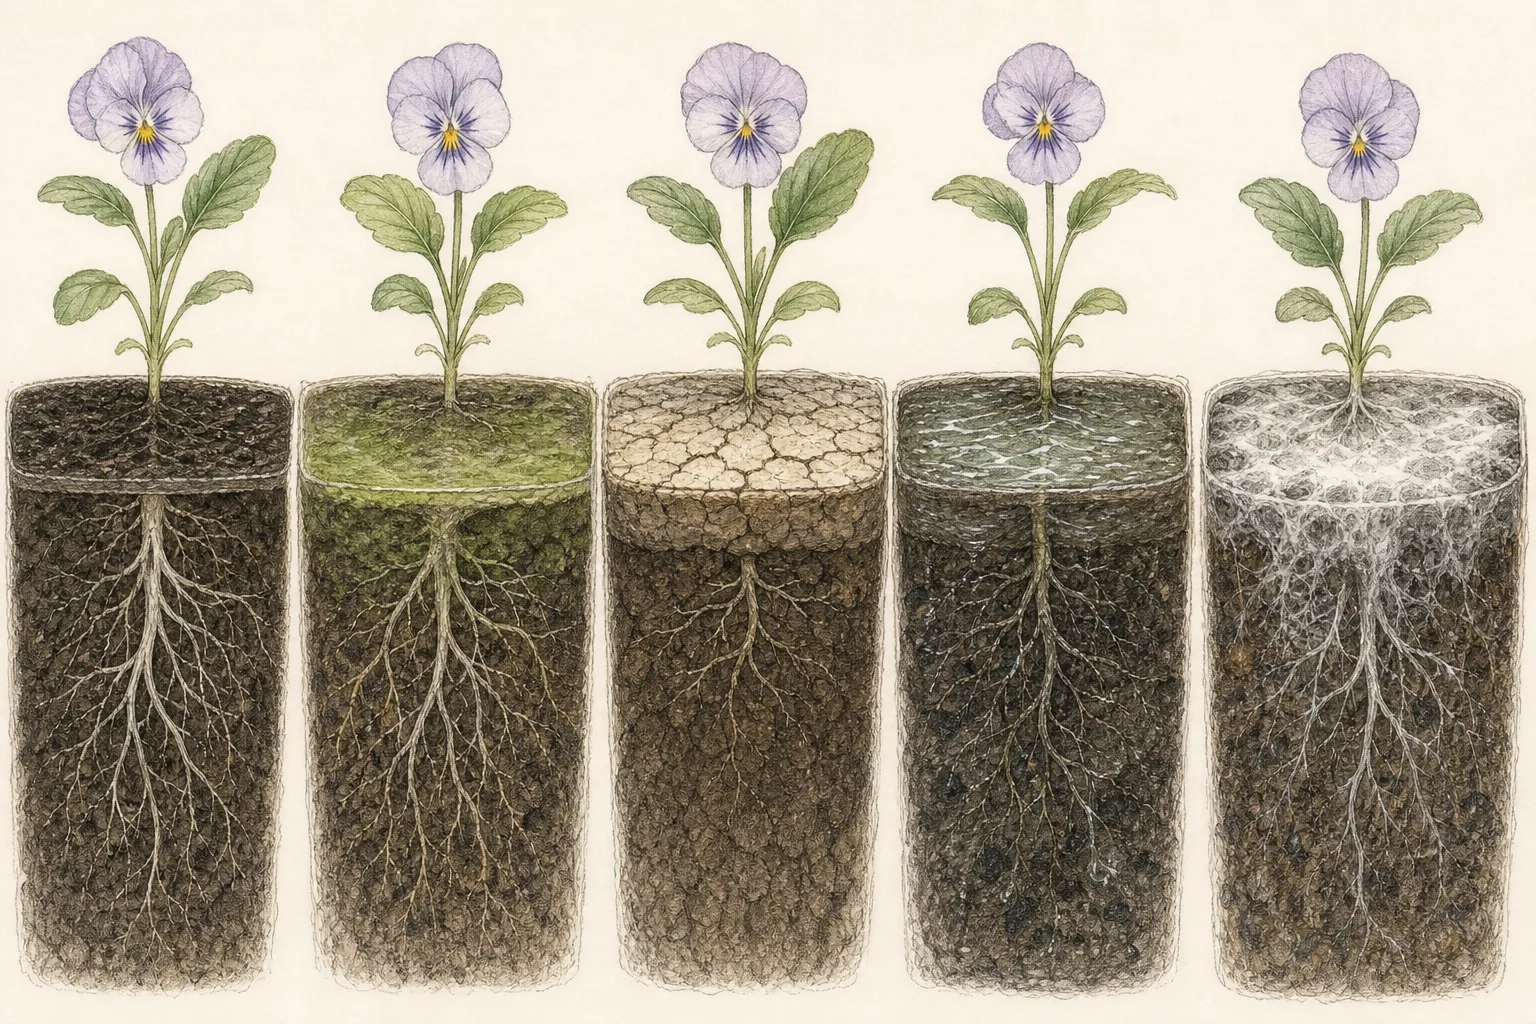
Inspect surface structure. Crusting, algae, salt deposits, compressed mix, deep settling, and moss each reveal different conditions. A forceful watering rose can seal fine particles or wash seed into one corner. Garden soil can compact and carry pathogens. Fresh seed-starting medium should still be filled lightly and drained; a reputable bag does not protect against compression, blocked holes, or chronic saturation.
Excavate a small representative sample
Choose cells from the failed center, edge, and any transition to healthy emergence. Mark them and gently lift medium with a clean label or spoon. Do not dig through the whole tray. Find the seed at its actual depth and position. Photograph it with scale. Record whether it is firm and unchanged, swollen, split with a stopped radicle, soft, hollow, moldy, missing, or attached to a dead seedling.
A firm unchanged seed can be dormant, too dry, too cold, light-inhibited, or nonviable. A swollen soft seed often indicates decay after imbibition. A radicle that emerged and dried points to moisture interruption; a radicle brown in saturated medium points toward oxygen stress or infection. A pale elongated shoot below the surface suggests excessive depth. These are working interpretations, not pathogen identifications.
Look for a constricted or water-soaked stem at the medium line where seedlings collapsed. Damping-off can affect seed before emergence or young stems after emergence, and is favored by wet, crowded, poorly ventilated conditions. Submit a sample to a local diagnostic service when repeated or valuable losses matter. Do not identify a fungus from white growth in a photograph; saprophytic molds can colonize already dead tissue.
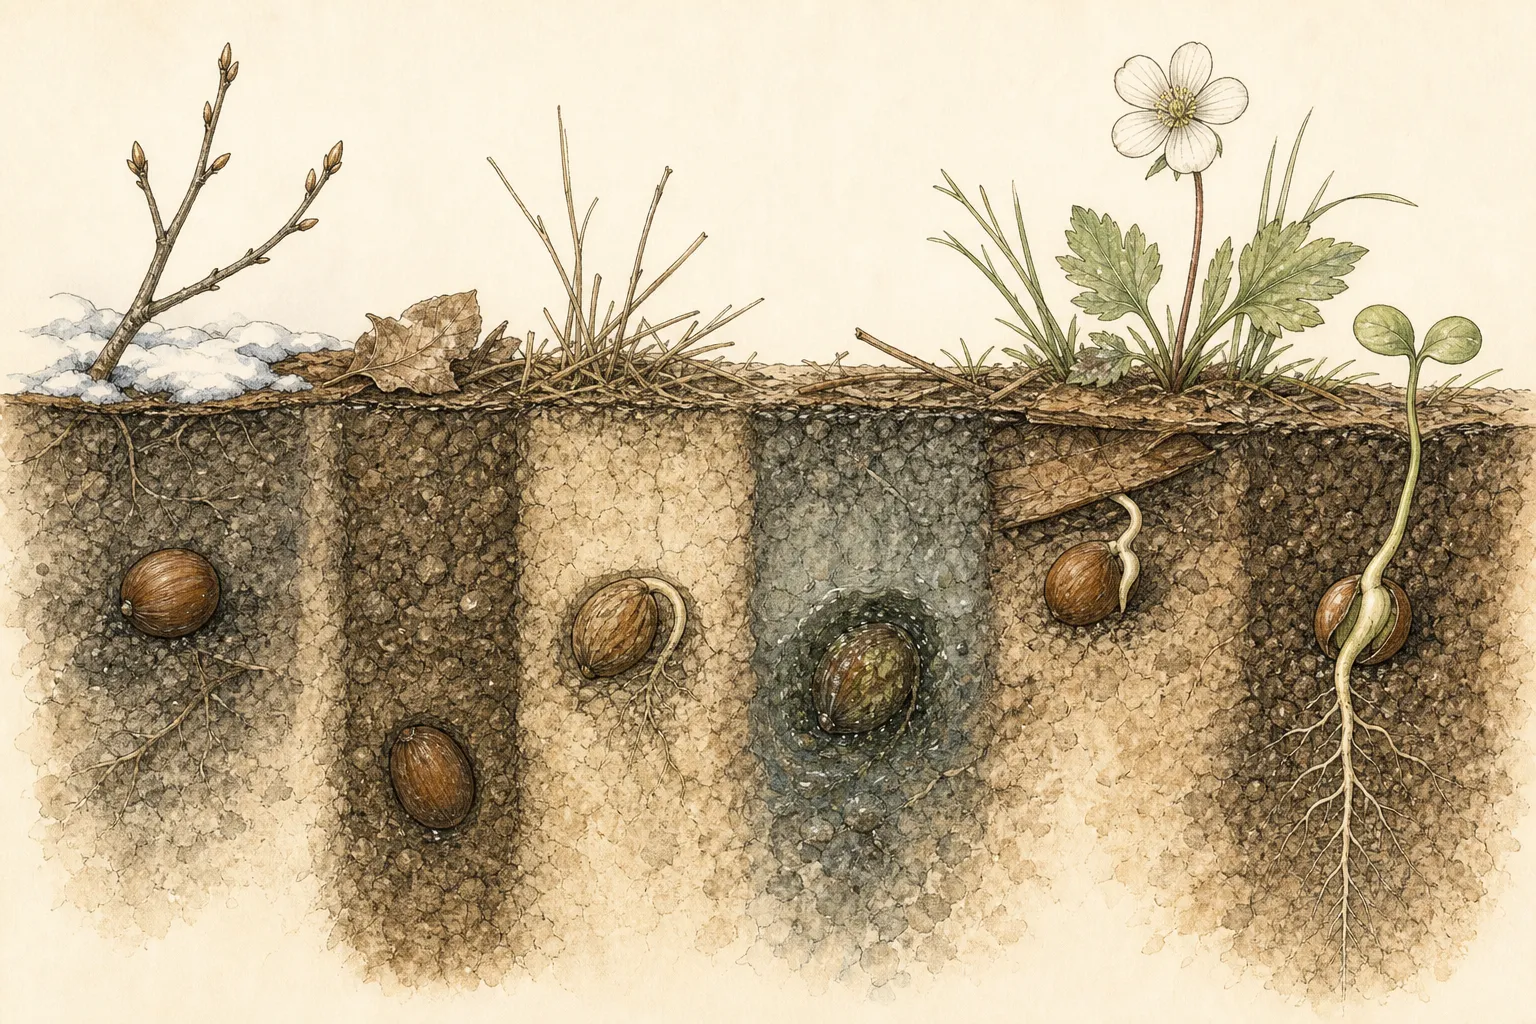
Replace excavated material only if doing so will not bury neighboring shoots, and label sampled cells as disturbed. Dispose of soft or moldy seed separately. Clean the tool between trays. If the sample reveals a correctable environmental gradient and most seed remains firm, preserve the tray while changing the single evidenced condition rather than reseeding immediately.
Run a seed-lot control outside the tray
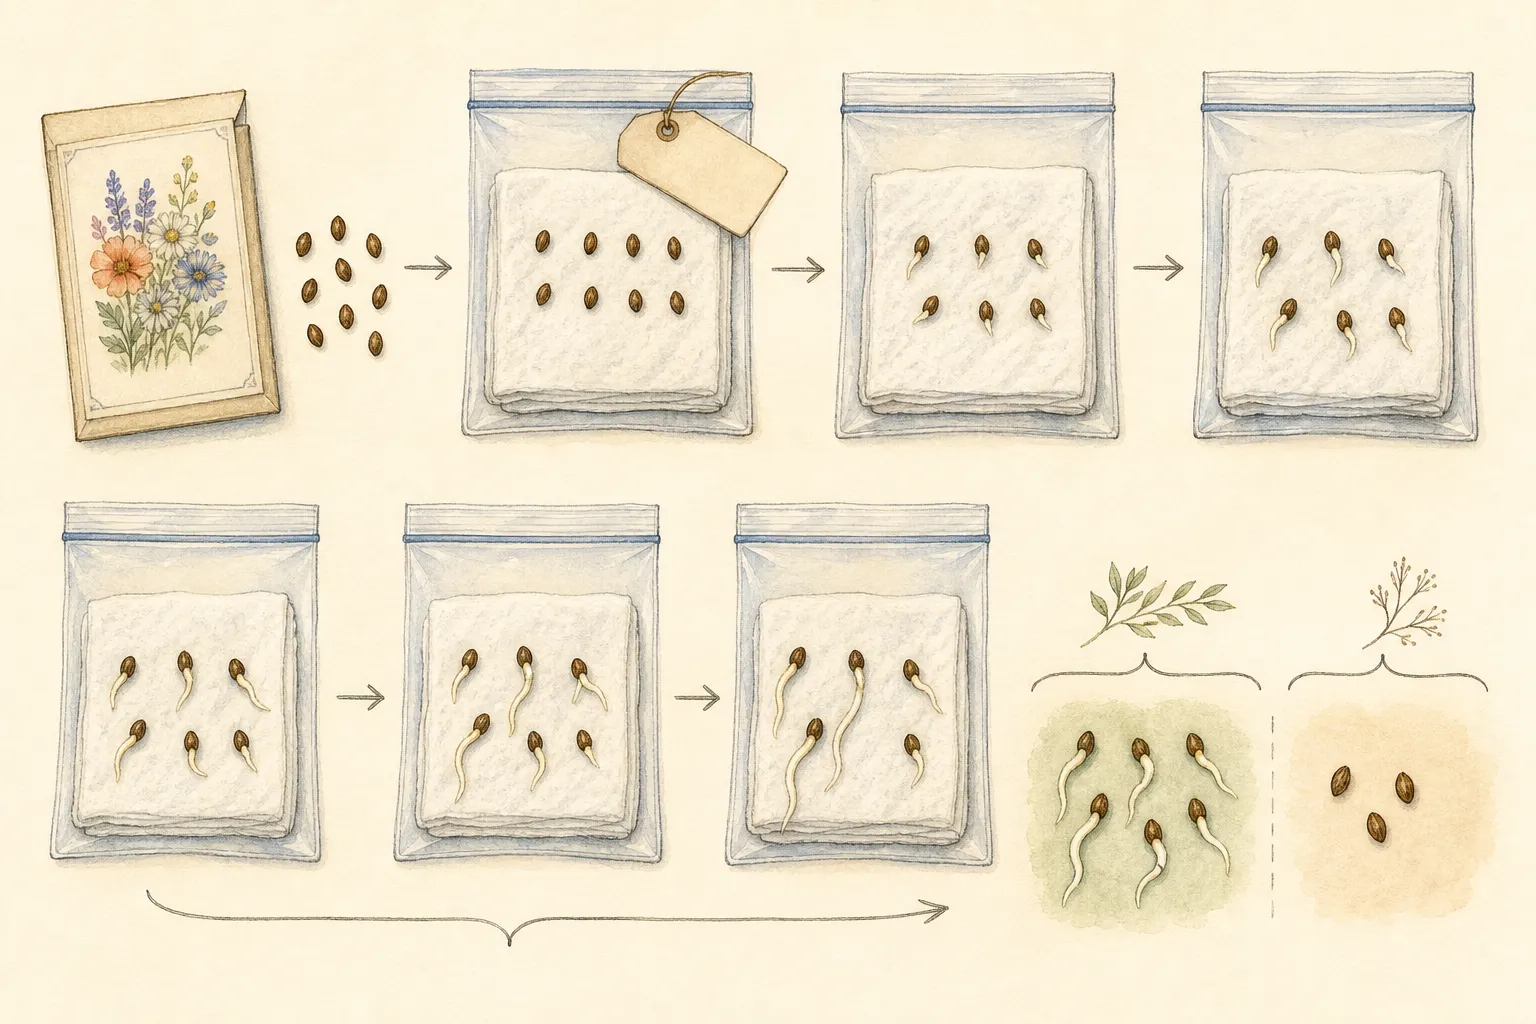
When enough seed remains, count a small replicate and test it under documented species-appropriate conditions in clean paper or fresh medium. Include the required pretreatment. Label lot, count, start date, temperature, light, and final interval. This control separates a generally viable seed lot from a tray-specific failure, although it cannot reproduce every soil and microbial condition.
Use two replicates when quantity allows. A single small container can dry, flood, or mold and falsely condemn the lot. Keep moisture uniform without free water and measure temperature. Count normal seedlings, abnormal seedlings, decayed seed, and unresolved firm seed. A cracked coat is not yet a normal seedling. Preserve raw counts and timing rather than reporting a percentage without sample size.
If the control germinates and the tray does not, focus on depth, moisture, temperature, medium, cover, and handling. If both fail under correct conditions after the full interval, old or damaged seed becomes more likely. If required dormancy treatment was absent, neither result tests viability fairly. A second source-supported treatment may be justified; repeated improvised rescue is not. Do not move germinated control seedlings carelessly. Transfer healthy correctly labeled seedlings before roots penetrate paper, using clean medium and appropriate depth. They can join the crop if space exists. Keep them identified as control plants so later vigor and flowering can be compared. A normal radicle in a small test is promising but does not guarantee transplant establishment.
Correct moisture, temperature, light, or air deliberately
For a dry tray with firm seed, rehydrate gradually and uniformly using a gentle top watering or brief bottom uptake appropriate to the seed depth, then drain completely. Do not flood a crusted surface and wash seeds deeper. Reduce direct airflow and inspect edge cells more often. Keep the cover only if it stabilizes moisture without overheating or sustained condensation after emergence.
For saturation, remove standing water, reopen blocked drainage, separate inserts from sealed tray bases, and allow the medium to approach a suitable moisture level. Do not bake the tray on a heat mat to dry it quickly. Warm saturated media can accelerate decay. If foul odor, extensive rot, or damping-off is present, discarding the batch and cleaning the system may be safer than preserving a few seedlings.
For a measured temperature error, move the tray or adjust controlled heat gradually to the species range. Use a thermostat when the equipment supports it and monitor several positions. Keep covered trays out of direct sun. Once seedlings emerge, many species need a different temperature and much stronger light; do not leave them in warm germination darkness while waiting for slow cells.
For light error, surface-sown seed may need useful diffuse light, while emerged seedlings need broad close illumination and a daily dark period. A room that appears bright can still produce elongated weak seedlings. Follow fixture directions, keep water away from electricity, and measure canopy response across the tray. Light cannot repair dead seed, but it prevents post-emergence loss from being mistaken for non-germination.
Decide whether to wait, thin, restart, or replace
Wait when the full documented interval or dormancy sequence is incomplete, the seed remains firm, and conditions can be corrected without creating disease risk. Set a final review date. Waiting is an active decision with measured moisture and temperature, not indefinite warm saturation. Keep the tray label and protect any early seedlings from the delayed batch.
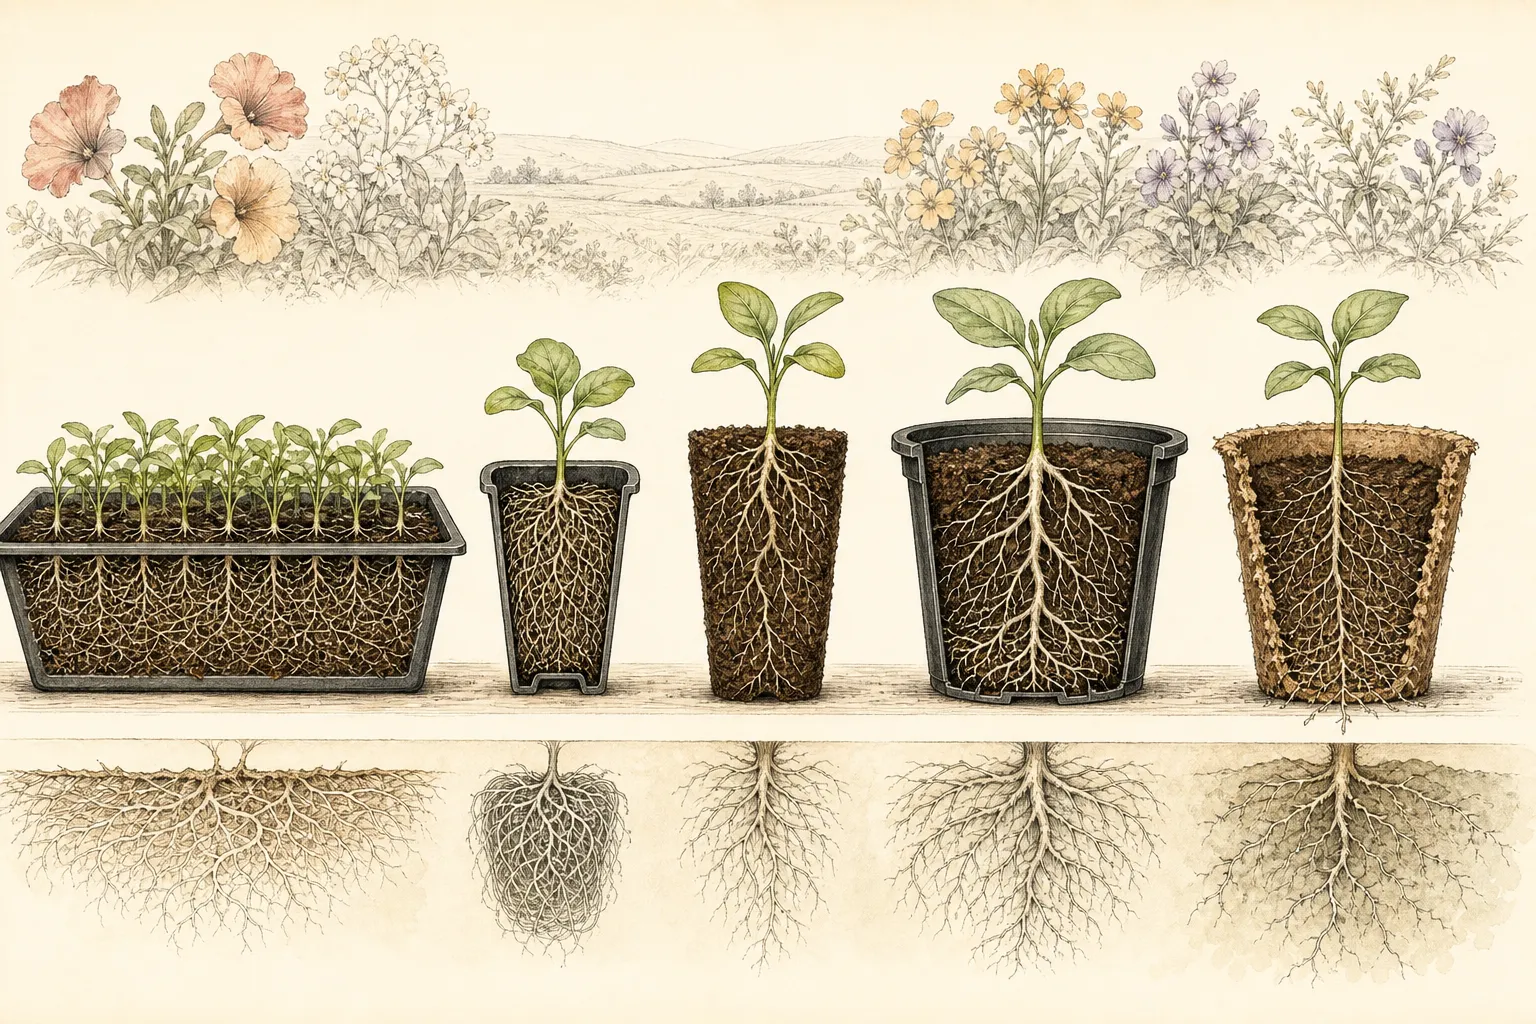
Thin and manage when emergence is patchy but enough normal seedlings exist. Do not reseed every empty cell into a tray whose older seedlings will shade the new cohort. Transplant or group by stage if the species tolerates handling. Reserve sufficient light and potting space. A smaller uniform batch often establishes better than a crowded mixture of vigorous, weak, and late seedlings.
Restart in clean containers and fresh medium when drainage, contamination, severe crust, salt, or extensive decay makes correction unreliable. Clean the whole propagation system, including catch tray and dome, and change the evidenced error. Retain a small control if helpful. Repeating the same depth, heat, water, and cover with more seed is not a restart; it is another replicate of the failure.
Replace the lot when correct pretreatment and conditions produce poor normal germination, the seed is extensively empty or decayed, or uniform timely plants are essential to the ornamental design. Rare seed may justify laboratory testing or specialized propagation. An inexpensive annual packet may not justify months of bench occupation. Match effort to plant value, uncertainty, and available space.
Close the diagnosis after garden establishment
Document the final cause as narrowly as evidence allows: “likely buried light-requiring seed with correct control germination” is more useful than “bad seed.” List unresolved alternatives and the correction. Record sample findings, control result, environmental measurements, and restarted method. Do not credit a product or treatment merely because some seedlings emerged afterward; timing alone does not establish causation.
Track survivors through potting, hardening, installation, and flowering. A tray can germinate well but produce weak plants after root damage, crowding, or prolonged warmth. Conversely, a modest count can yield enough excellent plants. The diagnostic objective is a healthy ornamental planting, not a perfect emergence percentage. Keep cultivar identity with every cohort.
Compare the failed and successful setups before next season. Standardize fill depth, drainage gap, watering volume, temperature measurement, cover removal, light position, and labels where evidence supports them. Change one variable at a time for future trials. A written propagation protocol prevents the same invisible error from returning when a different person sows the tray.
Discard failed material and clean containers according to disease history and local guidance. Do not save unidentified or moldy seed for sharing. Store remaining sound seed cool and dry with the test result attached. The most efficient response to germination failure is not more checking; it is a clear record that makes the next sowing simpler and more reliable.
Diagnosis
No seedlings appear by the end of the ordinary packet interval, and excavated seeds remain firm and unchanged. The lot may require an uncompleted dormancy treatment, different temperature, light or darkness, or more time; it may also be nonviable.
- Check
- Verify botanical identity, cultivar, seed age and storage, pretreatment, depth, temperature, light requirement, and complete credible interval from the packet and authoritative species guidance. Compare with any retained untreated or treated seed.
- Cause
- Physiological or physical dormancy, incomplete cold moist stratification, absent scarification, wrong light or temperature, insufficient interval, dead embryo, empty seed, or mislabeled material. Firmness alone cannot separate these possibilities.
- Action
- Complete only the documented species treatment, preserve a labeled control, and set a final observation date. If correct conditions and interval still produce few normal seedlings, replace the lot or use professional testing for rare material.
Seed is swollen, soft, foul, moldy, or hollow in wet medium. The tray feels heavy, drainage is blocked or sealed against a catch tray, condensation persists, and algae or odor may be concentrated in the same cells.
- Check
- Lift and weigh the tray, inspect every drain and the catch tray, measure moisture at depth, smell without inhaling close dust, and excavate representative center and edge cells. Run a clean seed-lot control when enough seed remains.
- Cause
- Oxygen deprivation and decay caused by saturated medium, blocked drainage, standing water, compressed mix, excessive cover humidity, or already damaged seed. Fungi may be primary or may colonize tissue that died from the environment.
- Action
- Remove standing water, restore open drainage, reduce cover humidity, and let sound medium return gradually to suitable moisture. Discard extensive foul or rotted batches, clean the complete system, and restart with fresh medium rather than applying an unidentified fungicide.
Radicles emerge but brown, dry, or stop; tiny shoots are found below the surface or under a crust. Moisture may have fluctuated, seed may be too deep, or the surface may have sealed after forceful watering.
- Check
- Map actual seed depth and surface structure, review watering force and drying intervals, and inspect a few stopped seedlings with magnification. Compare root direction and tissue condition with undisturbed healthy seedlings of the same species.
- Cause
- Seed buried beyond its energy reserve, a light-requiring species covered, crusting or compaction, radicle desiccation after intermittent misting, or mechanical displacement by forceful watering. Salt or chemical injury can create a similar stop.
- Action
- Correct depth and moisture only where viable tissue remains and disturbance will not bury neighbors. For a restart, pre-moisten fresh mix, sow at the documented depth, water gently, prevent crust, and monitor the whole root profile rather than misting the surface.
Seedlings emerge and then constrict or collapse at the medium line, often in expanding patches. Crowding, excess moisture, contaminated containers or medium, poor air movement, and high humidity support damping-off risk.
- Check
- Quarantine the tray, photograph the collapse boundary, review sanitation, cover duration, watering, temperature, density, and airflow, and submit a correctly handled sample to a local diagnostic clinic when the crop is valuable or losses repeat.
- Cause
- Pre- or post-emergence damping-off involving one or more pathogens, favored by wet crowded conditions and contaminated material. Exact organism cannot be identified reliably from collapse or surface mold alone.
- Action
- Isolate affected material, remove it according to local guidance, improve drainage, spacing, temperature, useful light, and air exchange, and seek diagnosis. Use a pesticide only when the cause, crop, setting, timing, and current label all match.
Emergence follows a strong tray pattern: dry edges, wet center, one warm end, one side washed deeply, or cells beyond the light or heat footprint. The same seed lot performs differently within one container.
- Check
- Measure root-zone temperature and moisture at center, edges, and both ends over a full cycle. Check mat footprint, dome sun exposure, fixture coverage, airflow, tray level, and irrigation distribution rather than relying on room settings.
- Cause
- Uneven physical setup: heat gradient, dry airflow, poor light footprint, tilted tray, sealed cells, variable fill, edge evaporation, or nonuniform watering. A strong geometric pattern makes a whole-lot genetic explanation less likely.
- Action
- Level and reposition the tray, control root-zone heat, move domes out of direct sun, broaden light, shield severe airflow, separate insert from standing water, and standardize fill and irrigation. Preserve a few fixed cells as a comparison after correction. When several causes remain plausible, build a small controlled restart rather than altering the failed tray repeatedly. Use the same labeled seed lot in fresh medium and a clean draining container, follow the documented pretreatment and depth, measure root-zone temperature, fix useful light before emergence, and record water by volume or tray weight. Preserve a small portion of the original setup unchanged when safe so the comparison remains meaningful. Change only the variable supported by the evidence—such as drainage, temperature, depth, or seed treatment—then compare normal seedlings and timing through the full interval. If the control also fails, narrow the claim to seed-lot viability or unresolved dormancy and seek specialized guidance for valuable material. If the restart succeeds, close the record with the physical cause instead of crediting every difference between the two setups. Preserve one clearly labeled final sample and the complete timeline when the failure remains unresolved. A local diagnostic clinic or seed laboratory can use intact boundary tissue, the original seed lot, and measured environmental history more effectively than a tray already treated, stirred, or repeatedly reseeded.
Related reading
Sources
- Seed and Seedling Biology. Penn State Extension. Source record · Accessed 2026-08-19.
- How to Prevent Seedling Damping Off. University of Minnesota Extension. Source record · Accessed 2026-08-19.
- Guide to Starting Seed Indoors. Iowa State University Extension. Source record · Accessed 2026-08-19.