Grow · winter sowing hardy ornamental perennials
Winter-Sow Hardy Perennials Without Turning a Jug into a Greenhouse
Use ventilated outdoor containers as protected seedbeds for suitable hardy ornamentals, with species-specific pretreatment, drainage, weather exposure, and spring aftercare.
Published Last updated
In this guide
Use winter sowing for the right seed
Winter sowing places seed in a ventilated translucent container outdoors so it experiences seasonal cold and moisture while receiving some protection from washout, animals, and abrupt drying. It is not a universal shortcut and not an indoor greenhouse moved to the patio. The method best fits hardy ornamentals whose germination biology and regional timing are compatible with outdoor exposure. Begin with the species, not with an empty milk jug.
Read the current seed packet and an authoritative species source for cold stratification, light requirement, sowing depth, germination temperature, and transplant sensitivity. Terms such as “cold moist stratify,” “sow outdoors in fall,” or “may self-sow” can support the method, but they are not interchangeable. Some seeds need a defined cold interval; some require alternating temperatures; some germinate readily without winter and may emerge too early in a warm spell.
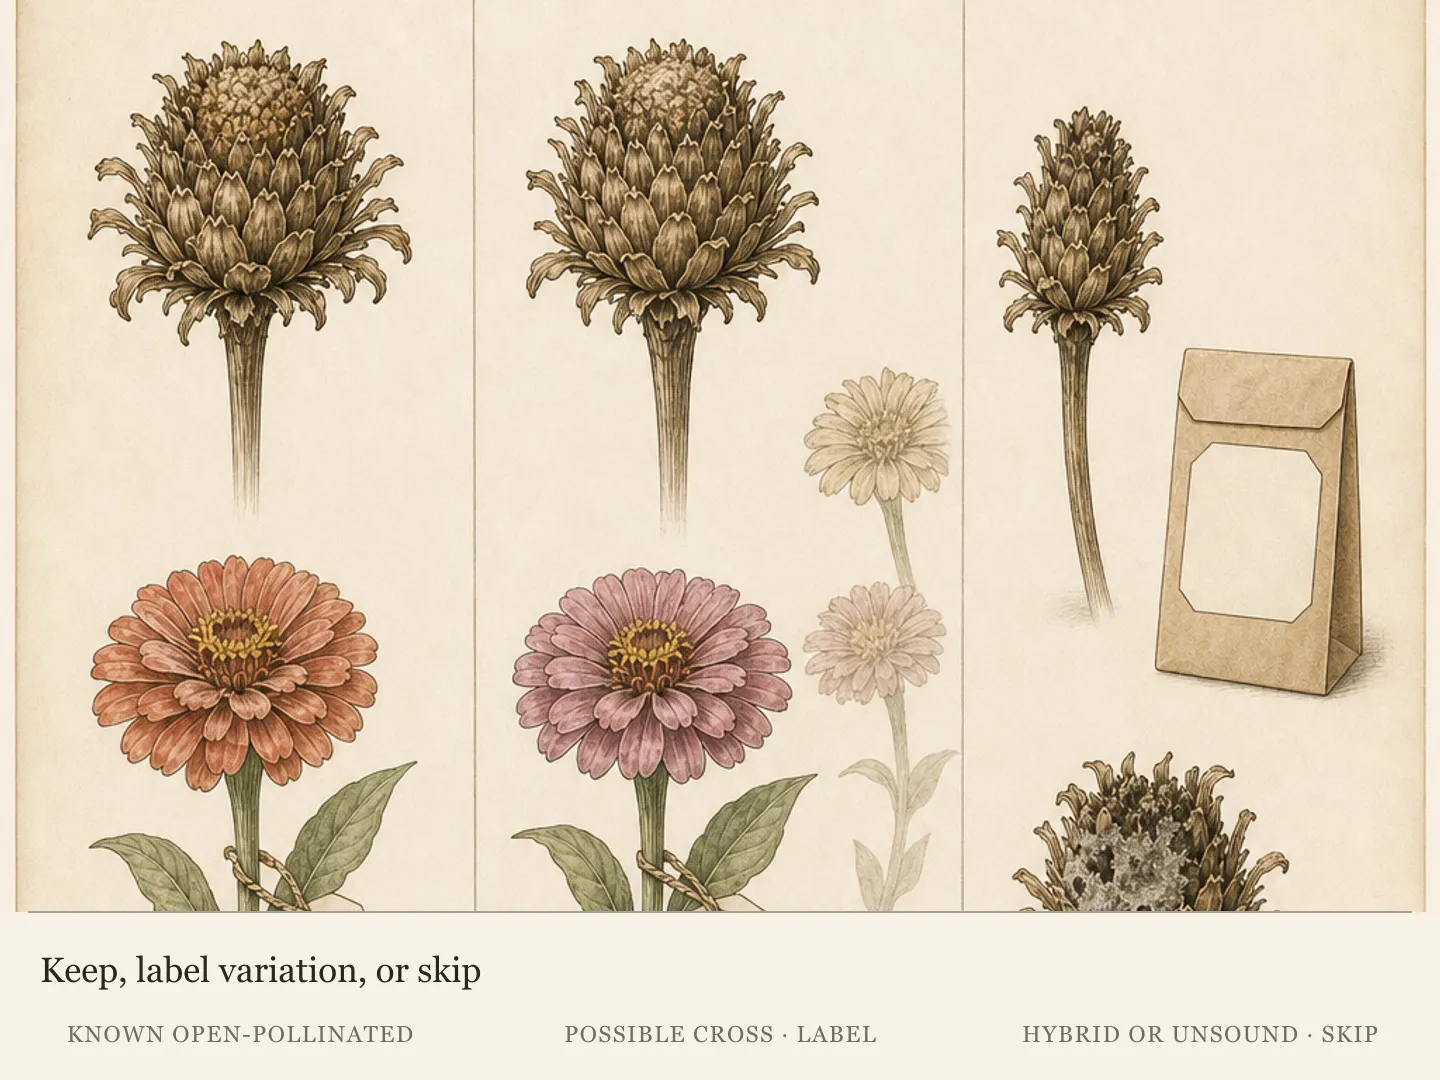
Prefer fresh, correctly identified seed from a reputable source or a documented garden collection. Keep cultivar expectations realistic. Seed from hybrids or open-pollinated garden plants may not reproduce the parent’s color, height, or form. For restoration or habitat work, verify provenance and regional recommendations. Never introduce a species near natural areas without checking local invasive status and the consequences of seed escape. Reserve a small batch for a second method when seed is rare. Winter weather is variable, containers can be disturbed, and one February cannot guarantee a prescribed number of chilling days. A labeled indoor or refrigerator stratification control, when appropriate for the species, creates useful comparison. The purpose is reliable propagation and learning, not proving that every seed must be exposed to one fashionable technique.
Translate dormancy guidance into a calendar
Count backward from a reasonable spring germination period using the species’ documented chilling range where one is known. Local winter is not a fixed appliance: warm spells, snow cover, rainfall, and container location change temperature and moisture. A December sowing in Minnesota and a February sowing in a mild coastal climate are not equivalent. Use regional Extension guidance and actual weather records to choose the exposure window.
Separate physiological pretreatment from ordinary storage. A packet kept dry and cold in a shed has not necessarily received cold moist stratification. Moisture allows biochemical changes, while excess water and poor oxygen can kill seed. Prepare the medium and outdoor placement so it remains moist and aerated rather than frozen in a solid water-filled cup. The container should follow weather while buffering its most damaging extremes.
Anticipate germination during a warm interval. Hardy seedlings may tolerate cool conditions, but tiny roots can be damaged if a sealed jug overheats by day and freezes hard at night. The open top and ventilation are essential. Do not cap the jug after sowing, and do not place it against a sunny reflective wall to accelerate spring. The calendar must allow gradual seasonal response rather than forcing early growth. Write a batch plan with species, source, sowing date, any prior treatment, number of seeds, container code, and intended garden location. Add a spring inspection date rather than a rigid opening date. The correct transition depends on emergence and weather. Durable records also show whether poor germination resulted from old seed, inadequate chilling, burial depth, drought, flooding, or damage after seedlings appeared.
Build a container that drains and breathes
Choose a translucent food-safe container large enough for several inches of medium and headroom for early seedlings. A one-gallon water or milk jug is common, but the principle matters more than the brand. Clean it thoroughly. Avoid containers that held chemicals, brittle plastic that shatters in cold, dark walls that block useful light, or narrow shapes that cannot be filled and transplanted without crushing roots.
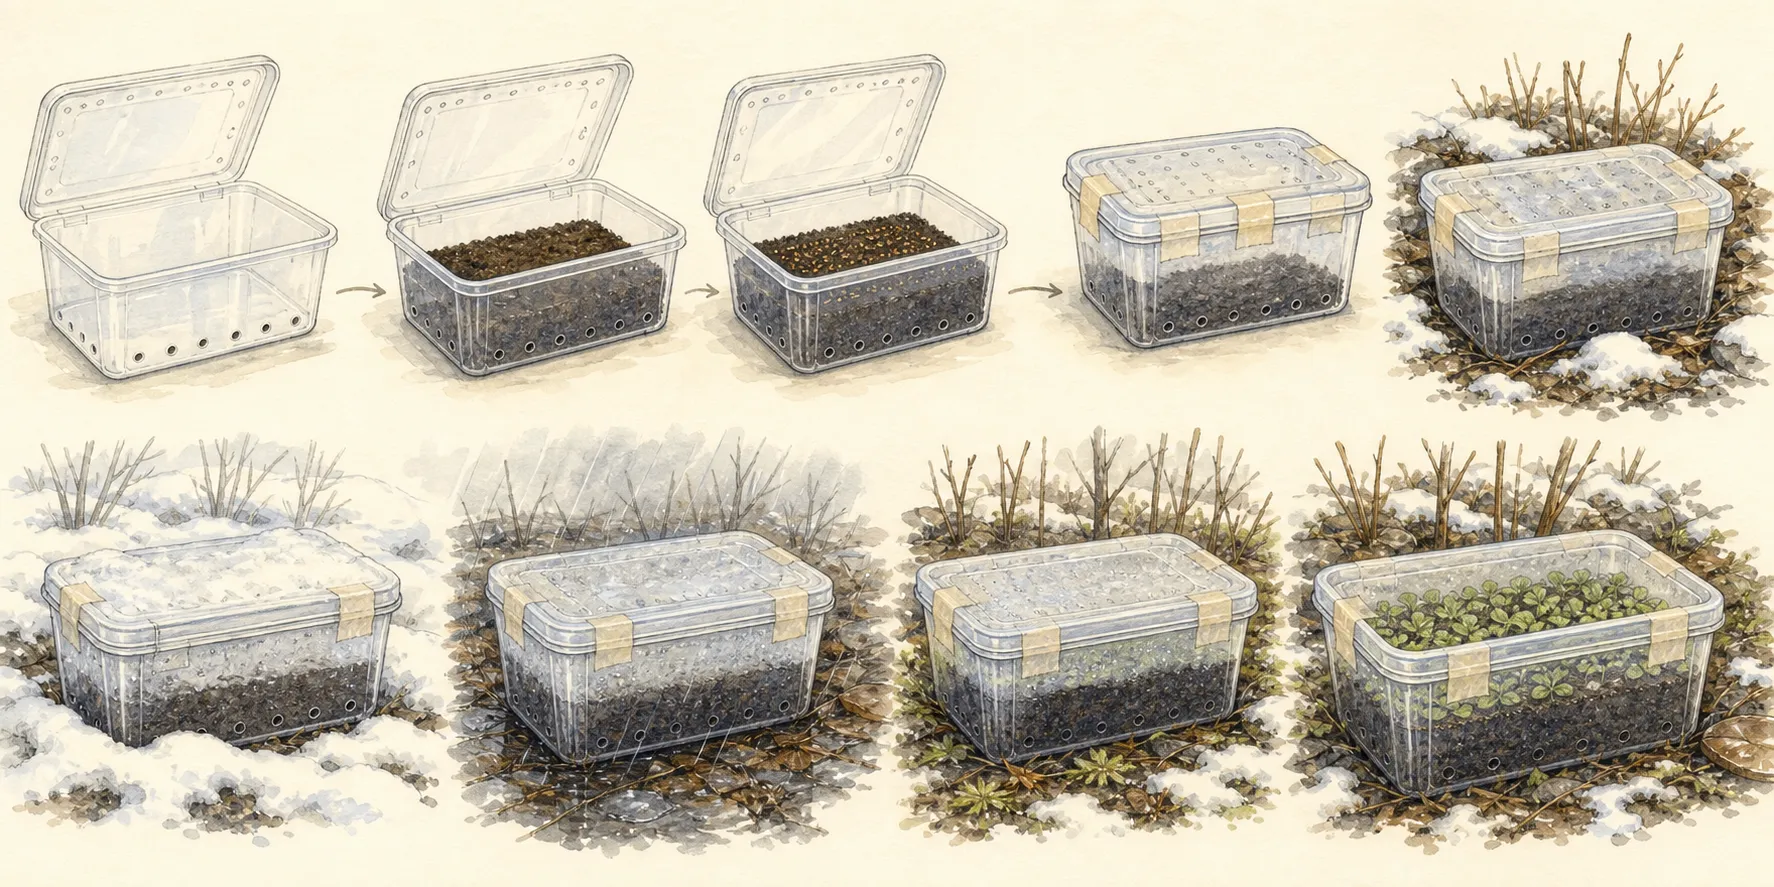
Cut around the jug below the handle, leaving a hinge. Smooth hazardous edges and work on a stable surface with a suitable tool. Make multiple generous drainage holes across the bottom and low sides; one small puncture can seal against soil or ice. Test with water before adding medium. The cap stays off so precipitation and air can enter. Additional upper ventilation may be needed as spring sun strengthens.
Add fresh, moistened seed-starting or fine container medium deep enough to buffer moisture and support roots until transplanting. Garden soil compacts unpredictably in a small vessel and can carry weed seed and pathogens. Settle the medium lightly without pressing out pores. Water through and confirm free drainage. If the bottom holds a visible pool, rebuild the container before sowing. Label inside and outside with a durable system. Include botanical name, source, date, and container number. Marker on thin plastic often fades, and an exterior label can detach during thaw or wind. Place a weatherproof label in the medium and keep a separate map or photograph. Tape the cut seam closed after sowing, but never tape drainage or ventilation. The jug should open later without destroying the label.
Sow at the species depth
Distribute seed so emerging roots and leaves have room to separate. Winter sowing does not require dumping the entire packet into one protected clump. Fine light-requiring seed may be pressed onto the surface; larger seed may need a measured cover. Follow the species instruction. A generic rule based on seed diameter is only a fallback and cannot override known light or dormancy requirements.
Use enough seed for credible germination but avoid a mat that must be torn apart in spring. If the seed is very fine, mix it with a small amount of dry horticultural material only when that does not obscure counting or create unsafe dust. Sow half the container, then inspect distribution before adding more. Keep different species in separate jugs unless their germination timing and identification are unmistakable.
Water gently after sowing if the surface was disturbed, then let the container drain completely. Close the hinged top and secure the seam with weather-resistant tape. Leave the cap opening clear. Check that the container remains upright when empty of snow and that no sharp cut edge is exposed. The finished jug should admit precipitation, release excess water, and resist ordinary wind without being airtight.
Photograph the surface and label before moving outdoors. For larger seed, record count and approximate positions. This evidence helps distinguish failed germination from lost labels or bird disturbance. Do not apply fertilizer at sowing. Seed reserves support emergence, and nutrients can increase salts or algae before roots are active. Fresh medium, correct moisture, oxygen, and temperature are the first requirements.
Place the jug in real winter weather
Set containers outdoors where they receive rain and snow and experience seasonal temperature, while remaining safe from roof slides, plows, pets, foot traffic, and concentrated runoff. A level open shelf, crate, or stable ground position can keep jugs together without sealing their bottoms. Do not bury drainage holes in mud or place the group inside a closed shed that excludes precipitation and changes temperature cycles.
Sun exposure should broadly resemble an outdoor seedbed but avoid a severe reflective heat pocket. The translucent walls can warm rapidly during a late-winter sunny day. Open ventilation reduces the spike; spring management reduces it further. A north wall may remain frozen and dry long after the garden thaws, while a south masonry corner can trigger premature emergence. Choose a moderate, observable position.
Secure containers without covering the top. A ventilated crate can prevent tipping, but tightly packing jugs together reduces inspection and can trap ice between them. Keep labels visible and create a route that does not require walking across frozen beds. If animals investigate the openings, use a rigid broad mesh above the group that preserves air and precipitation rather than replacing the open system with plastic film.
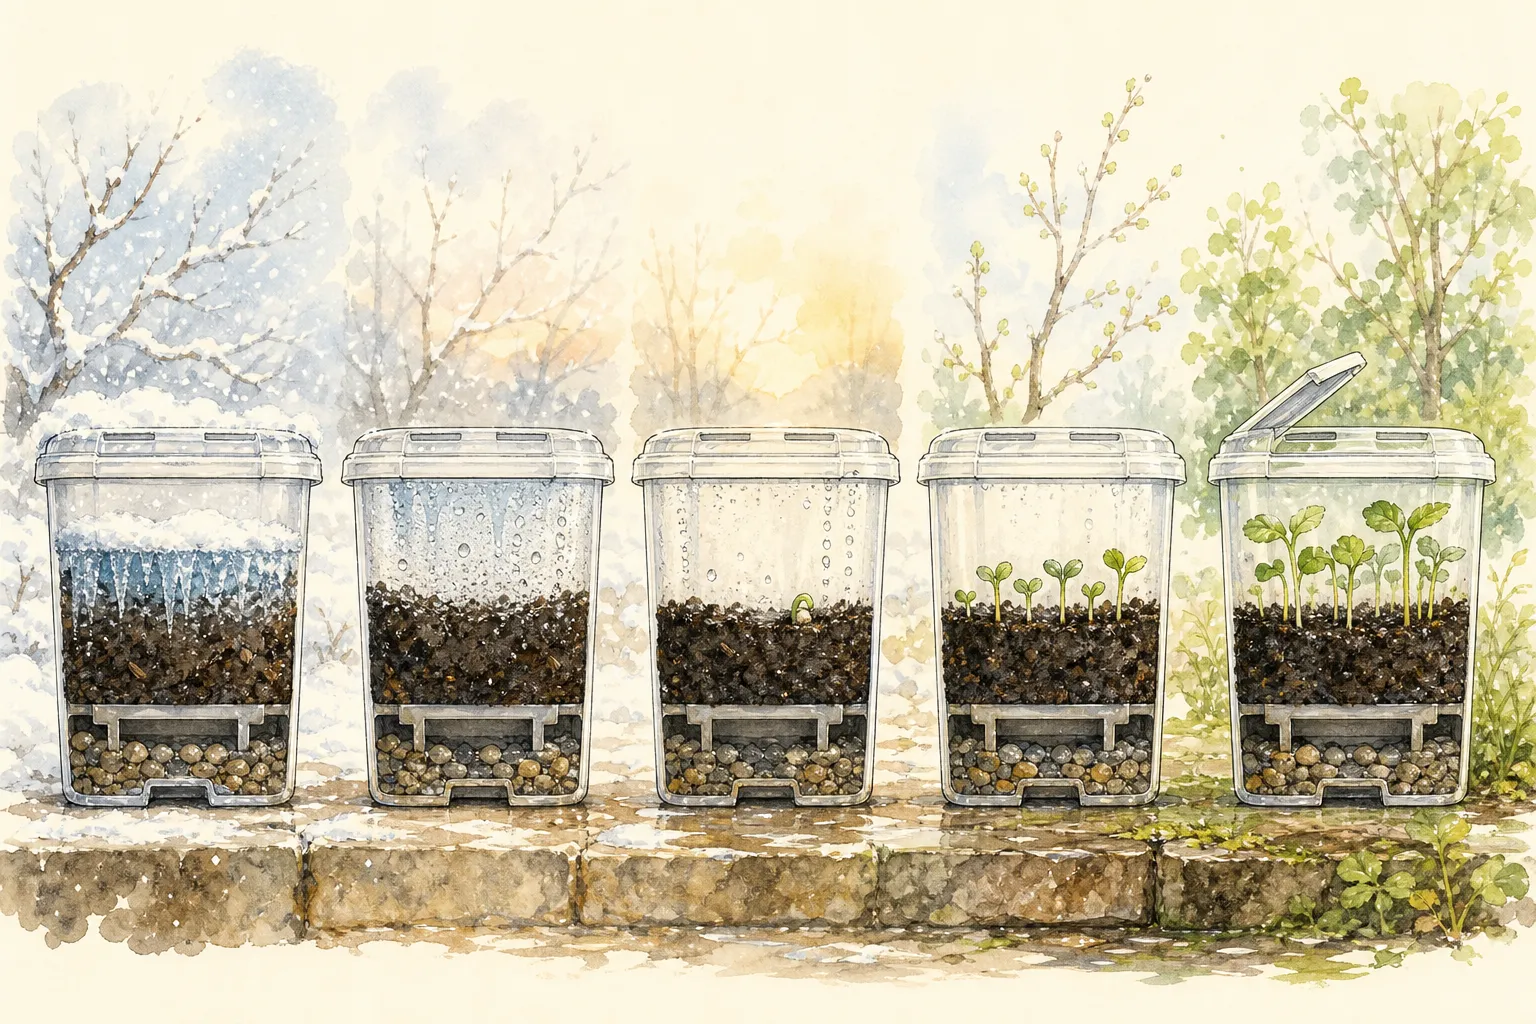
Let snow remain unless its weight collapses the container or blocks a safety route. Snow can moderate temperature and contribute moisture as it melts. After heavy rain or thaw, confirm that water leaves the bottom. Do not bring a frozen jug indoors to inspect it; sudden warmth can alter the treatment and start growth. Examine it in place and wait for a safe natural thaw.
Monitor moisture without defeating winter
Check periodically and after unusual warm, dry, or wet weather. Look through the wall and judge container weight. The medium should remain moist, not submerged. If it dries during an extended snowless period, add a small amount of water through the opening on a mild day and confirm drainage. Do not establish a weekly watering schedule independent of precipitation and freeze state.
Algae on the surface signals light and moisture but does not alone diagnose failure. Thick growth, foul odor, or constantly saturated medium requires attention to drainage and container position. Avoid opening and stirring the seedbed. If the entire jug has become waterlogged, move it only enough to restore open holes and a level stance. Record the incident because germination results must be interpreted in that context.
Inspect labels, tape, and animal damage. Replace an exterior label from the backup record without pulling the interior marker. Repair a split seam while preserving ventilation. If seed has washed to one side, do not rake it blindly through the medium; leave the documented disturbance and thin or transplant carefully after emergence. Repeated handling can do more harm than the original shift.
Do not interpret an empty surface in February as failure. Dormancy release and germination are distinct stages, and suitable seed may wait for spring conditions. Equally, do not assume the first green point belongs to the sown species. Compare cotyledons with reliable references and watch for weed seedlings introduced by wind or contaminated material. Preserve uncertainty until true leaves support identification.
Open the system gradually in spring
As seedlings emerge and days warm, increase upper ventilation and monitor the medium more often. The jug now behaves differently: leaves transpire, roots occupy the profile, and spring sun can overheat the enclosure. Open the hinged top during suitable days and protect the group from abrupt drying wind. Close or partially shelter it only for credible cold or storm risk, not as a permanent return to high humidity.
Thin early enough to preserve remaining roots. Snip unwanted seedlings at the surface when pulling would disturb neighbors. For plants that transplant well, lift small groups or plugs once roots hold the medium, then separate only if species guidance and root development permit. Taprooted or sensitive species should move before roots coil or interlace. Prepare the destination before opening the jug so seedlings are not left exposed.
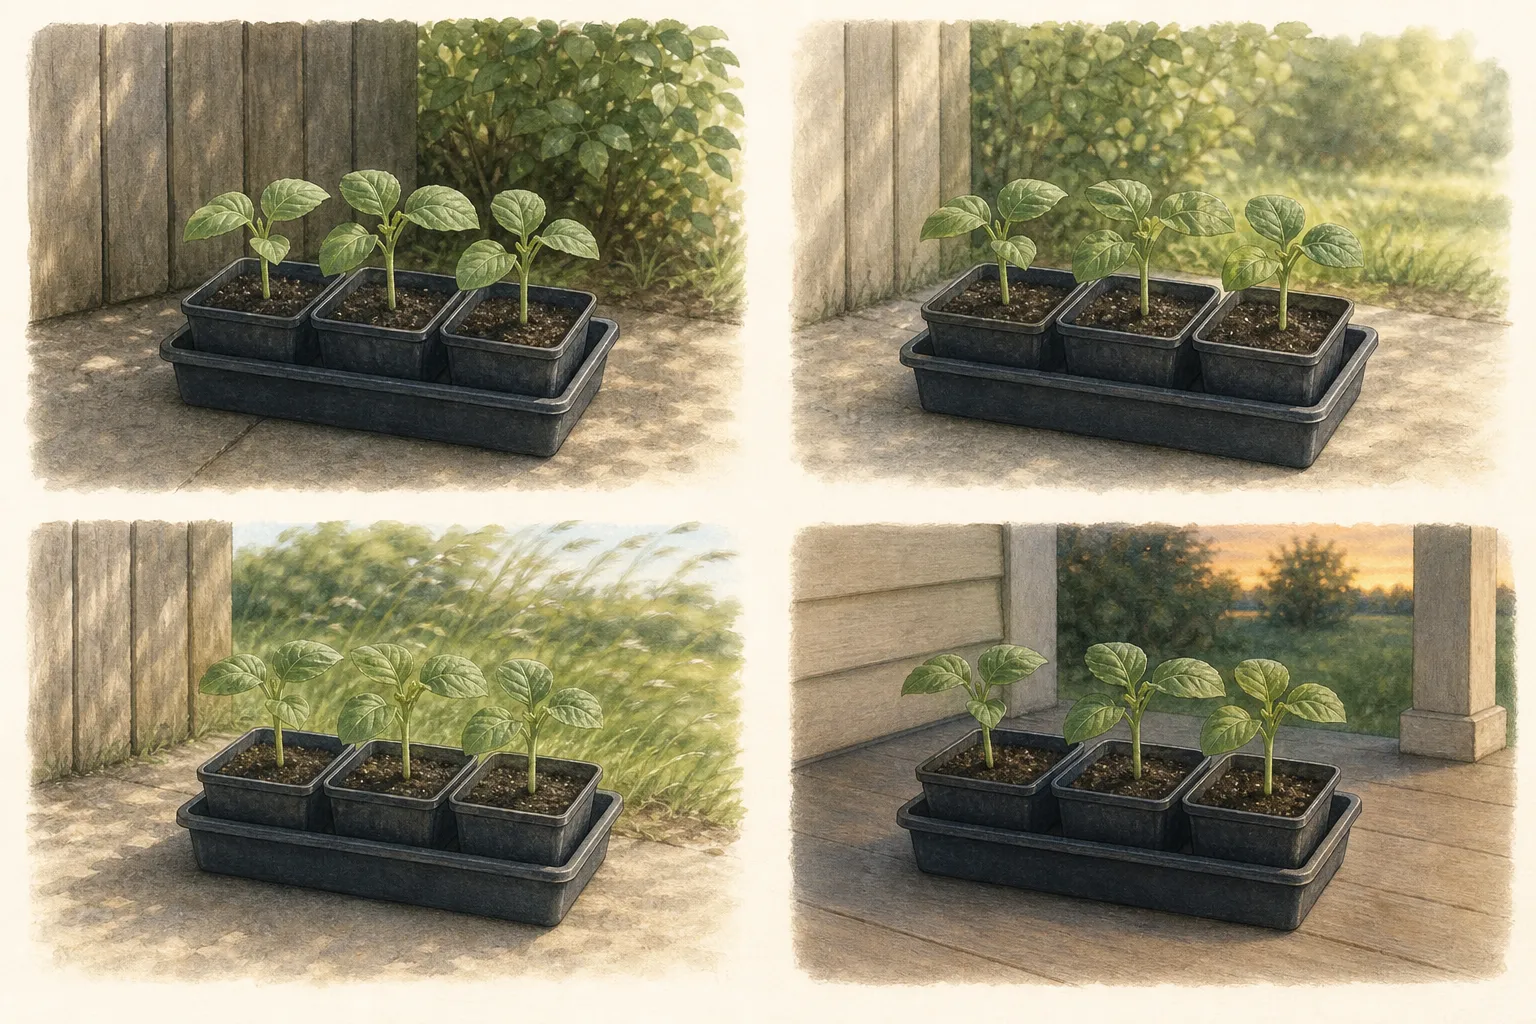
Harden according to the actual enclosure history. Seedlings have already experienced outdoor temperatures and some sun, but the translucent walls and restricted wind provided protection. Increase open-air exposure over several days, watching leaf response and moisture. A winter-sown seedling is not automatically ready for an exposed garden bed the moment snow melts. Match installation to local frost tolerance and species stage.
Retain the jug label with the planted group and record germination percentage or at least a useful count. Note emergence date, losses, root quality, and transplant recovery. Compare with any control method. Clean reusable parts and recycle or discard damaged plastic locally. If the method failed, change the specific weak point—seed viability, treatment duration, drainage, moisture, or spring timing—rather than sowing a larger anonymous batch next winter.
Steps
- Level
- moderate
- Time
- 30 minutes to prepare one container, plus seasonal monitoring
- Tools
- Clean translucent jug, Safe cutting tool and stable work surface, Awl or drill suited to the plastic, Weatherproof labels, Watering can with gentle rose
- Materials
- Fresh suitable hardy-perennial seed, Fresh seed-starting medium, Weather-resistant tape, Rigid open crate or support if the site is windy
- 1Verify the species treatment
Confirm botanical identity, seed age, cold-moist requirement, light requirement, sowing depth, regional suitability, and transplant sensitivity before choosing winter sowing.
- 2Prepare deep drainage and open air
Clean and cut the jug, leave a hinge, make multiple bottom and low-side holes, test drainage, and keep the cap off. Smooth or cover hazardous edges.
- 3Fill and label twice
Add several inches of uniformly moist fresh medium. Put a weatherproof botanical label inside, a container code outside, and retain a separate batch record.
- 4Sow at the documented depth
Space seed deliberately, press or cover according to species guidance, water gently, drain, tape the seam, and photograph the surface and label.
- 5Expose without creating a heat trap
Place the jug level in real weather, clear of roof slides and runoff, with open drainage and moderate winter exposure. Secure it against ordinary wind without covering ventilation.
- 6Monitor exceptional conditions
After drought, thaw, or heavy rain, check weight, moisture, holes, tape, and labels. Correct a measured problem without warming, sealing, or repeatedly disturbing the seedbed.
- 7Vent, thin, and transplant by stage
Increase ventilation as seedlings and sun develop, thin before roots tangle, harden from the jug’s protected conditions, and install according to species and local weather.
- 8Keep a comparison batch
When seed is scarce or treatment is uncertain, reserve a small documented portion for a second source-supported method. Compare emergence date, percentage, root quality, and transplant recovery rather than judging success from the first green shoot in either container.
- 9Thin before roots become communal
Identify the sown plant from reliable seedling characters, then snip excess seedlings or lift compatible plugs while roots remain separable. Prepare labels and destination soil first. Do not preserve every seedling at the cost of tearing the roots of the plants intended for the garden.
- 10Close the seasonal record
After installation, count survivors, note root form and weather losses, clean reusable support, and recycle damaged plastic locally. Link results to seed source, exposure, drainage, and treatment duration, then change only the evidenced weak point before the next winter batch.
- 11Protect the planted label
Move the durable container label with each garden group and add the location to the garden record. Keep botanical identity through first flowering, when seedling variation and an unexpected volunteer can be resolved without guessing or distributing a mislabeled plant.
Related reading
Sources
- Jug It and Grow: Winter Sowing for Pollinator Gardens. University of Minnesota Extension. Source record · Accessed 2026-08-19.
- Seed and Seedling Biology. Penn State Extension. Source record · Accessed 2026-08-19.
- Starting Seeds Indoors. University of Minnesota Extension. Source record · Accessed 2026-08-19.