Grow · seedling hardening
Harden Off Seedlings Before Transplanting
Acclimate indoor-grown seedlings by changing light, wind, temperature, and outdoor time in controlled increments, then transplant only when both the plants and the forecast are ready.
Published Last updated
In this guide
The transplant site sets the target
Harden off indoor-grown seedlings by starting with a few sheltered hours outdoors, then increasing exposure only after the plants tolerate the current conditions. A calendar can reserve time for the transition, but it cannot declare the job finished: the seedling must handle a full day of the planting site's light and ordinary air movement, recover its upright posture, and show no expanding injury. The crop's safe planting weather must also have arrived. Plan roughly one to two weeks when possible, while allowing plant response, crop hardiness, and weather to control the actual pace.
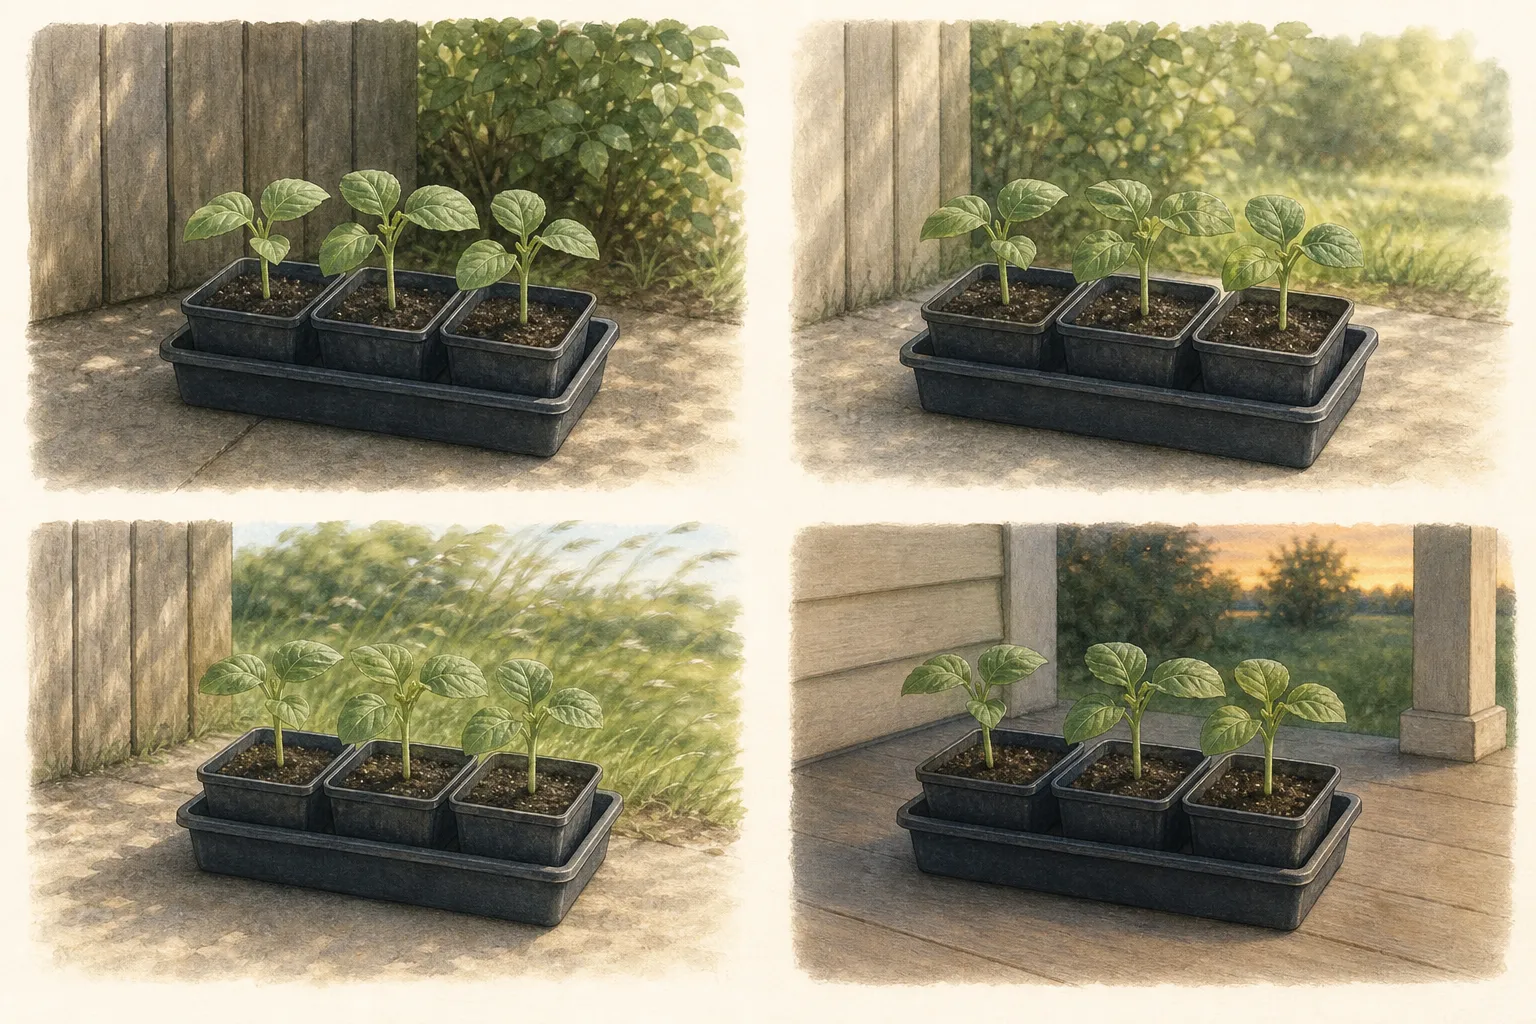
An indoor growing station and a garden bed impose different combinations of light, wind, and temperature variation. Before the first outing, identify the light and ordinary air movement at the planting spot. An open, sunny bed presents a different final exposure from a site buffered from wind or the strongest light. Each increment should approach those actual conditions. Early shelter is the departure point, while the planting spot defines the finish.
Published schedules do not supply one universal countdown. Several home-garden recommendations allow about one to two weeks, while another example describes three to five days depending on variety and weather. The disagreement shifts the completion test away from elapsed days. After each exposure, decide whether the plant can repeat the same load, accept a modest increase, or needs a retreat. A poor-weather pause creates no obligation to compensate with a larger dose tomorrow.
Plant readiness and planting readiness are separate. A seedling may look steady after a long outdoor day while the forecast remains unsuitable for that crop. Cool-season vegetables generally tolerate cool conditions better than warm-season crops, yet freezing can still injure unhardened seedlings in either group. Hardening changes acclimation; it neither makes a tender plant frost-proof nor replaces crop-specific guidance and the current forecast.
Sun, wind, and temperature are separate loads
Outdoor duration and light intensity are separate loads, even when they change during the same outing. Duration tests whether the plant can sustain conditions it already recognizes; a brighter interval tests a different stress. When both rise together, a setback cannot reveal which load exceeded the plant's present tolerance. Keeping them conceptually separate makes the response legible: a plant that remains stable through more time in familiar shelter has answered a different question from one that remains stable through a brief increase in direct light. That distinction, rather than a fixed daily increment, is what lets the next exposure be chosen from evidence.
Sunlight is not just a brighter version of an indoor lamp or window. Indoor-grown seedlings have not experienced its full intensity, and a sudden move can sunburn, scorch, or wilt exposed tissue. Increase direct light in controlled increments, then inspect the plant after it returns indoors. A limited dry edge or an older leaf that yellows while new outdoor-grown tissue develops can occur during the transition. Fresh or expanding scorch, continuing wilt, or collapse is different: it calls for a hold or a step back, not another increase intended to toughen the plant.
Wind is a mechanical load as well as a drying influence, so a gusty day is a poor first test. Tender stems and leaves can lodge or break when they meet strong movement before they have tolerated sheltered outdoor time. Introduce ordinary air movement later, after a mild shaded exposure no longer causes continuing stress, and increase it only in amounts that leave stems upright and foliage intact. Damaging gusts have no place in the test.
Temperature must stay tied to the crop and forecast throughout the sequence. Bring seedlings indoors before unsafe nighttime cold during early hardening, and avoid freezing exposure. Do not treat a sunny afternoon as permission for an overnight trial when the low falls outside the crop's safe range. Warm-season crops and cool-season crops do not share one tolerance, and neither group receives a universal temperature promise here. Local crop guidance, the current forecast, and the plant's prior conditioning still decide whether a particular night belongs in the sequence.
A cold frame can supply a sheltered intermediate environment, but it does not run itself. Progressively wider opening lets conditions move toward the outdoors, while timely closure keeps freezing outside the trial. Use the frame only when you can open, close, and observe it as conditions change. Its useful role is control: it gives you another way to moderate exposure, not an excuse to leave seedlings unattended through a variable day.
Advance, hold, or step back
Advance when the current exposure has become uneventful. The seedling remains upright, injury is not expanding, and any post-outing wilt resolves after it returns indoors. Make the next change modest and identifiable—more time, more direct light, or more ordinary air movement—so the response can still guide the following decision. Repeating the same exposure is useful when conditions were near the plant's present limit; increasing something every day is not a goal in itself.
Read the container before making moisture part of the stress test. Outdoor air movement and brighter, drier conditions can raise water demand, even though some hardening guidance describes less frequent watering. Reconcile those directions by observing the medium and plant instead of prescribing a fixed interval. Compare container weight, media color, and how the surface feels, then water before wilting when those cues show the medium has dried enough. Do not keep roots continuously wet, but do not withhold needed water to manufacture a tougher seedling. Deliberate wilt makes exposure response harder to interpret.
Limited, non-expanding change and continuing injury carry different evidentiary weight. Dry edges or some yellowing may accompany replacement of older protected-grown tissue, but they do not prove that hardening is proceeding correctly. Recovery under shelter and a stable boundary around the affected tissue make the observation bounded. Fresh scorch, lodging, breakage, or persistent wilt means the exposure no longer supplies a clean acclimation signal; it may reflect an excessive load or a separate problem. In that state, additional stress would blur the diagnosis instead of clarifying whether hardening is succeeding.
Step back further when recovery is incomplete. Wilt or deterioration that continues after the seedling returns to shelter may have more than one cause, including problems outside the scope of outdoor exposure. Stop escalating light, wind, temperature, or duration until the plant is assessed separately. Hardening cannot distinguish disease, nutrient trouble, root restriction, or chronic irrigation problems from one symptom. Pausing prevents an uncertain condition from being mislabeled as a normal stage of acclimation.
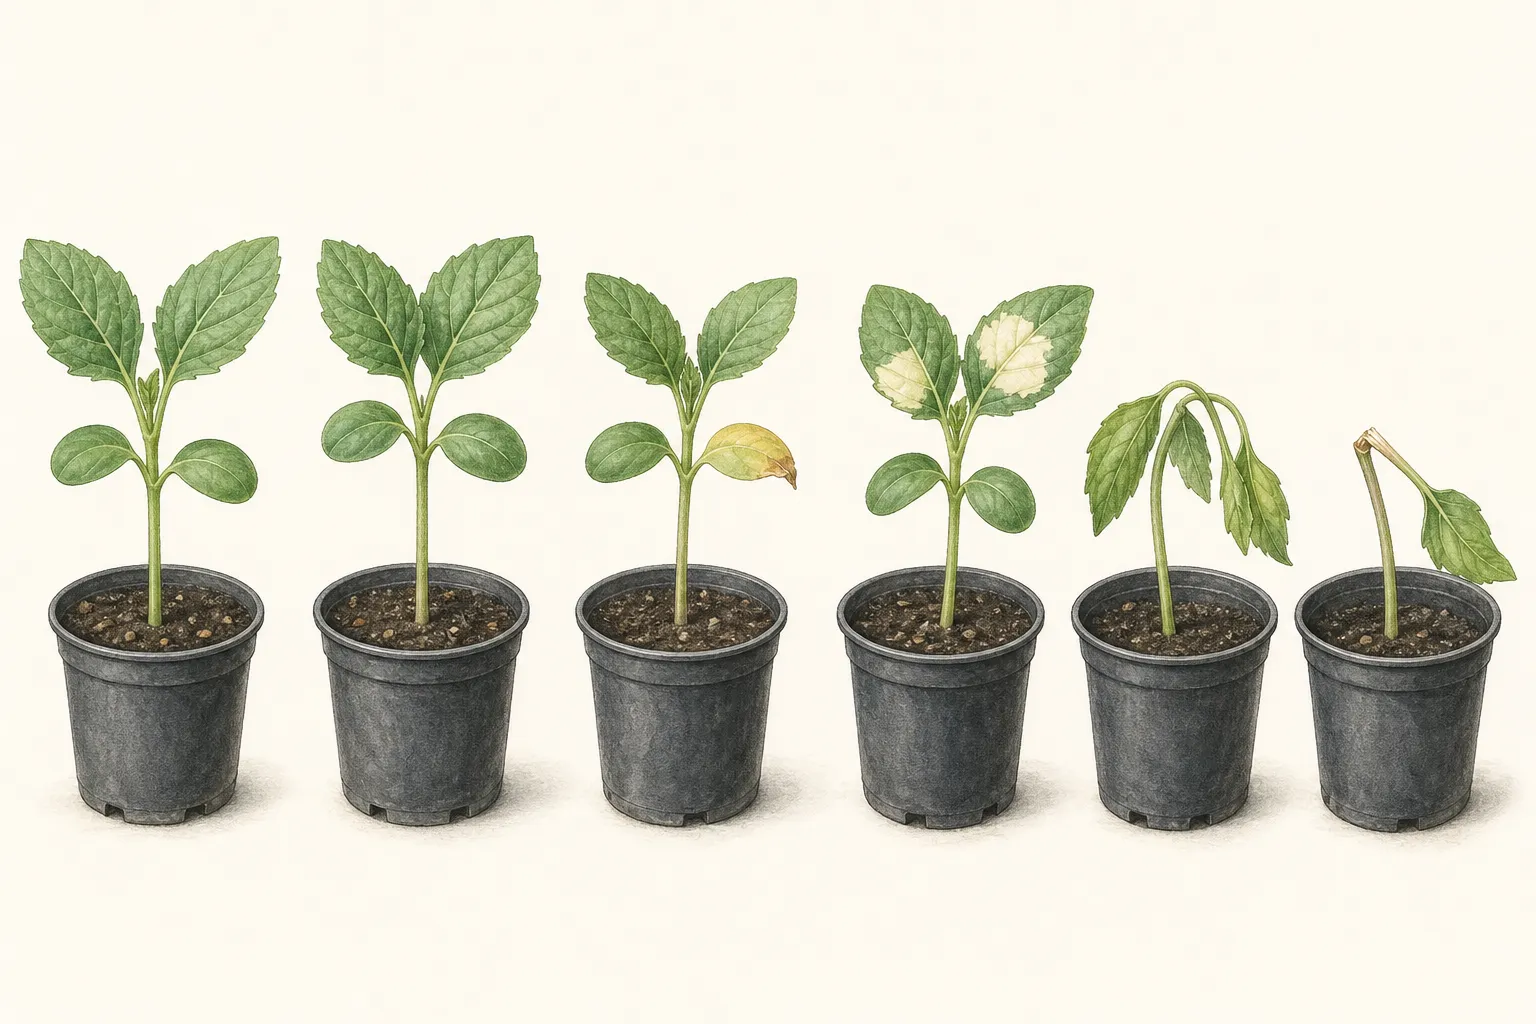
Severe stress is not the desired endpoint. Hardening should condition growth, not stop it. Excessive treatment can damage some crops; reported examples include buttoning in cauliflower and stopped growth in cucumbers and melons. Those outcomes are warnings against intentional deprivation, not a checklist for diagnosing every tray. If growth stalls or plants decline, do not assume they have become extra hardy. Reduce the environmental load and investigate the plant's condition before resuming.
Keep nutrition decisions outside this exposure loop. Extension recommendations differ: one source discourages fertilizer before or during hardening, while another continues seedling nutrition according to the product label and warns about both excess and deficiency. Do not add or withhold fertilizer solely to intensify hardening. Follow the crop-specific guidance and the label for any product already in use. New yellowing or stunting calls for a separate assessment before changing both nutrition and outdoor exposure at once.
Weather can pause the schedule
Check the forecast for each planned exposure, not only for transplant day. The useful early window is mild, sheltered, and free of strong wind. When the day does not offer the condition you intended to test, keep the seedlings indoors or repeat a lower exposure. Missing an outing is safer than making a large, poorly controlled jump. If conditions change so substantially that the planned load is no longer clear, end the outing; no calendar appointment is worth an ambiguous stress test.
Cold is a firm boundary because acclimation does not erase a crop's temperature limits. For tender warm-season vegetables, roughly 45°F (7°C) is a conservative lower screening boundary in Extension guidance, not a promise that every plant is safe immediately above it. A sunny afternoon says nothing about safe overnight exposure. Cool-season crops may tolerate cooler conditions, but species, cultivar, growth stage, previous conditioning, and the local forecast still matter. When those facts are uncertain, the uncertainty belongs to crop guidance and the forecast; exposure cannot safely resolve it.
Strong wind differs from ordinary air movement in the same way that a damaging extreme differs from a target condition. A plant can be ready for normal site airflow without needing to survive gusts that lodge stems or break leaves. A weather interruption does not automatically erase prior acclimation, but it removes the clean continuity of a planned test. The last clearly tolerated combination therefore remains the best comparison point; after a long interruption or continuing stress, a lower familiar condition yields more information than a leap intended to catch up.
Do not compress several missed increments into one long, bright, windy outing. The published range of schedules already shows that elapsed days alone do not define readiness. If weather has not allowed a controlled observation under the intended site conditions, readiness remains untested even when the planned transplant date is close. Adjust the planting date or keep the seedlings sheltered; missed time is not a reason to combine exposures.
The planting-day handoff
Confirm two conditions before removing a seedling from its container. It must have tolerated a full day of the planting site's light and ordinary air movement, recovered its posture, and avoided expanding injury. Current crop guidance and the forecast must also place planting within a safe planting window. Meeting only one condition is not readiness. Continue controlled outdoor outings when the plant is acclimated but the planting window is not, and delay planting when the target exposure has not yet been demonstrated.
Choose a lower-stress planting interval. A cloudy day, a cool morning, or late afternoon into early evening can reduce the immediate burden compared with the harshest hot, bright part of the day. The exact choice still depends on local weather and crop tolerance. This is the final environmental adjustment in the transition: it gives the root system and foliage their first hours in the ground under conditions that do not maximize heat and light at the same moment.
Water the seedlings several hours before planting when their current moisture condition calls for it, and keep each root ball moist during the move. Use the container and medium to decide the amount; there is no universal volume. Release and support the root ball without pulling the plant by its stem. Handle by the root ball or leaves as needed, and protect roots and stems from bruising. For planting depth and crop-specific root handling, follow that crop's planting instructions.
Establishment creates a new water balance even after acclimation is complete. Temporary shade or wind shelter can reduce an immediate load, but each measure also changes light, airflow, humidity, and access to soil cues. That tradeoff makes direct observation essential: protection after planting is contingency support, not delayed hardening or a substitute for it. A cover left in changing weather can conceal moisture loss or heat gain, so success is assessed in the plant and root zone, not by the mere presence of shelter.
Look for recovery and stable tissue, not instant growth as proof of success. Limited older-leaf change may stop as outdoor-grown tissue develops, while failure to regain posture or expanding injury calls for a separate diagnosis. Assess moisture, roots, disease, or nutrition through the appropriate guidance if deterioration continues after shelter is restored. The transition is complete when the seedling remains stable at the planting site and the weather remains suitable—not when the last square on a hardening calendar is crossed.
Steps
- Level
- moderate
- Time
- Plan about one to two weeks; plant response, crop hardiness, and weather determine the actual pace.
- Tools
- No special tools
- Materials
- Indoor-grown seedlings in their containers
- 1Choose a plausible planting window
Check local crop guidance and the current forecast before beginning. Reserve roughly one to two weeks when possible, but do not assign a fixed completion day. Mark unsafe overnight cold and keep freezing outside the plan; use crop guidance rather than a one-size-fits-all number to set any temperature threshold. The checkpoint is a forecast window that could support both daytime acclimation and later planting. If the crop-safe window is uncertain, resolve it before advancing beyond daytime outings.
- 2Run the first sheltered outing
Choose a mild part of the day and place the seedlings outdoors in shade, shielded from wind, for a few hours. Check the medium before and during the outing by its appearance, feel, and the container's weight; water before wilt when those cues show it is needed, without leaving roots excessively wet. Bring the tray indoors before conditions deteriorate. Complete this step when the seedlings remain upright and do not develop persistent injury after returning inside; repeat the same sheltered exposure if their response is uncertain.
- 3Extend time without maximizing every load
Lengthen the stay in the already tolerated sheltered setting before making the light substantially stronger. Alternatively, test a short interval of more direct light while keeping the total outing familiar. Continue checking the medium instead of using a fixed watering interval, because brighter light and moving air can change demand. Inspect foliage after the outing. Advance only when wilt resolves promptly and any leaf change stays limited; hold the same combination when the response is borderline.
- 4Add direct light and ordinary air movement separately
Increase direct sun or normal site airflow as one identifiable change at a time, always within the crop's safe temperature range. Avoid damaging gusts and bring seedlings back before unsafe nighttime cold. Once each load has been tolerated separately, combine them only as a final integration test under the garden's ordinary conditions. The checkpoint is a full day with upright plants, intact stems, and no fresh or expanding injury. Overnight exposure remains a separate crop-and-forecast decision.
- 5Repeat, hold, or step back from the response
Classify the result after each outing with the response framework above: advance by changing one load, repeat an uncertain load, or return to shelter after fresh injury. If weather interrupts, restart from the last clearly tolerated combination. Continued decline ends this sequence and moves the plant to separate diagnosis.
- 6Transplant during a lower-stress interval
After both readiness gates pass, transplant during a lower-stress window. Prewater as the medium requires, support the root ball or leaves, and follow crop-specific depth guidance. Recheck posture and root-zone moisture that evening and during establishment; add temporary shelter only in response to observed sun or wind stress. Continuing decline exits this procedure for separate diagnosis.
Related reading
Sources
- Starting Seeds Indoors. University of Minnesota Extension. Source record · Accessed 2026-08-18.
- Hardening Off Vegetable Seedlings for the Home Garden. University of Maryland Extension. Source record · Accessed 2026-08-18.
- Starting Vegetable Seeds Indoors: IV. Seedling Culture and Transplanting. Utah State University Extension. Source record · Accessed 2026-08-18.
- An Educator's Guide to Vegetable Gardening. Oregon State University Extension Service. Source record · Accessed 2026-08-18.
- Starting a Garden: Hardening Off Indoor Seedlings. University of Illinois Extension. Source record · Accessed 2026-08-18.