Grow · ornamental sweet pea netting training
Train Ornamental Sweet Peas on Netting From Planting
Install a stable, reachable net before ornamental sweet peas go into the ground, then guide their tendrils into an open flowering screen without confusing the toxic crop with edible peas.
Published Last updated
In this guide
- Confirm the plant and the kind of display
- Assign the ornamental vine a reachable lane
- Choose a site that keeps flowers and work in reach
- Make the net safe before it becomes green
- Plant for roots, access and separate mesh lanes
- Start the first ties while shoots are short
- Keep the flowering screen open and hydrated
- Remove the annual vines without leaving a net trap
- Steps
Confirm the plant and the kind of display
Begin with the packet or nursery label. This guide is for ornamental annual sweet pea, Lathyrus odoratus, grown for fragrant flowers and garden display. It is not a guide to garden pea, snow pea or snap pea, and it does not make any Lathyrus pod or seed edible. North Carolina Extension identifies sweet pea fruit as poisonous, while the RHS separately warns that its pods resemble edible pea pods. Keep the botanical name attached to every tray and row from sowing through removal.
Check the cultivar's habit before assigning support. Many sweet peas are climbers, but compact and bush forms may need little or no netting. For one documented UK example, Thompson & Morgan lists Lathyrus odoratus 'Nimbus' at up to 180 cm (71 in) high and 30 cm (12 in) wide. The complete worked setup below uses that named climber; another cultivar requires a fresh comparison between its current supplier dimensions and the support rather than an assumption that every sweet pea has the same envelope.
Choose between a relaxed garden screen and exhibition-style cordons. A garden screen keeps several shoots and lets tendrils grip mesh, producing a broad flowering surface. A cordon is trained as a restricted stem, has tendrils and side growth managed differently, and requires repeated tying to individual canes. The two systems should not be mixed casually. This plan uses a broad netted screen because it is forgiving, ornamental and legible for a home border.
Read the season as a cool-weather opportunity rather than a fixed national date. RHS timing reflects UK conditions, while UC Marin guidance describes autumn or late-winter sowing in a mild summer-dry climate. In a colder region, planting-out may follow local frost and hardening guidance; in a hot region, the display may finish as heat arrives. Keep the support plan constant but let local Extension advice and the cultivar packet control sowing and transplant timing.
Assign the ornamental vine a reachable lane
Confirm Lathyrus odoratus and the intended growth habit, then install the empty net before vines require support. Give young shoots accessible lanes and guide them while flexible. Maintain harvesting and inspection access as the canopy fills. Keep any retained seed explicitly labeled as ornamental and separate from food when the vines and net are dismantled.
Choose a site that keeps flowers and work in reach
Give climbing sweet peas a sunny position in fertile, well-drained soil, adjusting for the light shade tolerated in some regions. More important for the net is the route around it. Reserve a continuous strip from which you can plant, tie, pick flowers, water and remove the annual vines without stepping through neighboring crowns. A screen pressed against a thorny shrub or inaccessible boundary turns simple training into repeated stretching and snagging.
Orient the display so mature stems do not close a path, hide a gate latch or lean into a doorway. Long flowers and tendrils need room on both faces. If only one side can be serviced, leave enough clearance behind the net to see loose growth and retrieve cut stems. Keep the top within a safe working reach from the ground. A taller support is not useful when every tie and flower above shoulder level requires unstable improvised access.
Separate the ornamental row from all edible peas and from food-growing labels, tools and harvest containers. Do not grow sweet peas through an edible pea trellis or let their pods fall into a vegetable picking route. Use a durable label stating ORNAMENTAL SWEET PEA — DO NOT EAT at both ends of the row. In a household where children, visitors or animals may investigate pods, choose a site they cannot access or choose another ornamental.
Assess wind before planting. A leaf-covered net behaves like a sail, and UC Marin's example of a collapsed light structure is a useful warning. An exposed corner needs stronger end supports or a more sheltered location, not tighter ties around tender stems. The soil must hold the support as well as the plants. Where anchoring is uncertain, use a manufactured freestanding system according to its instructions or obtain site-specific installation advice.
Make the net safe before it becomes green
Install the complete support before seedlings are set out. For the bounded 'Nimbus' example, use the RHS Plants self-assembly pea and sweet-pea frame at its listed 120 cm length, 80 cm width and 200 cm finished height. The kit specifies bamboo canes, flexible joints, 10 cm polyethylene netting and six galvanized steel pegs. Its 200 cm height stands above the supplier's 180 cm cultivar height without pretending that spare structure authorizes another row or a taller cultivar. Recheck the live product sheet before purchase because product specifications can change.
Assemble the kit exactly to its current instructions, clip the supplied 10 cm mesh to the complete frame and use all six supplied pegs in the intended base and anchor positions. Bring the net to the frame's lowest designed attachment rather than suspending an improvised loose panel; that clipped bottom is the lowest working edge for this setup. Keep it visible and reachable from the service side, with no sagging loop between frame and soil. Manufacturer instructions remain the safety override if their current anchor or clipping sequence differs from this planning description.
Use one 120 cm net face for one four-plant row. Mark centers 15, 45, 75 and 105 cm from one end, producing 30 cm between plants, and place each root ball 5–7.5 cm (2–3 in) from the support. Those values preserve the RHS UK garden range of 20–30 cm between sweet peas and its 5–7.5 cm climber-to-support offset, while the selected 30 cm interval also matches the supplier's stated mature spread for 'Nimbus'. Do not add a fifth plant, a side pocket or a second staggered line to fill first-year gaps.
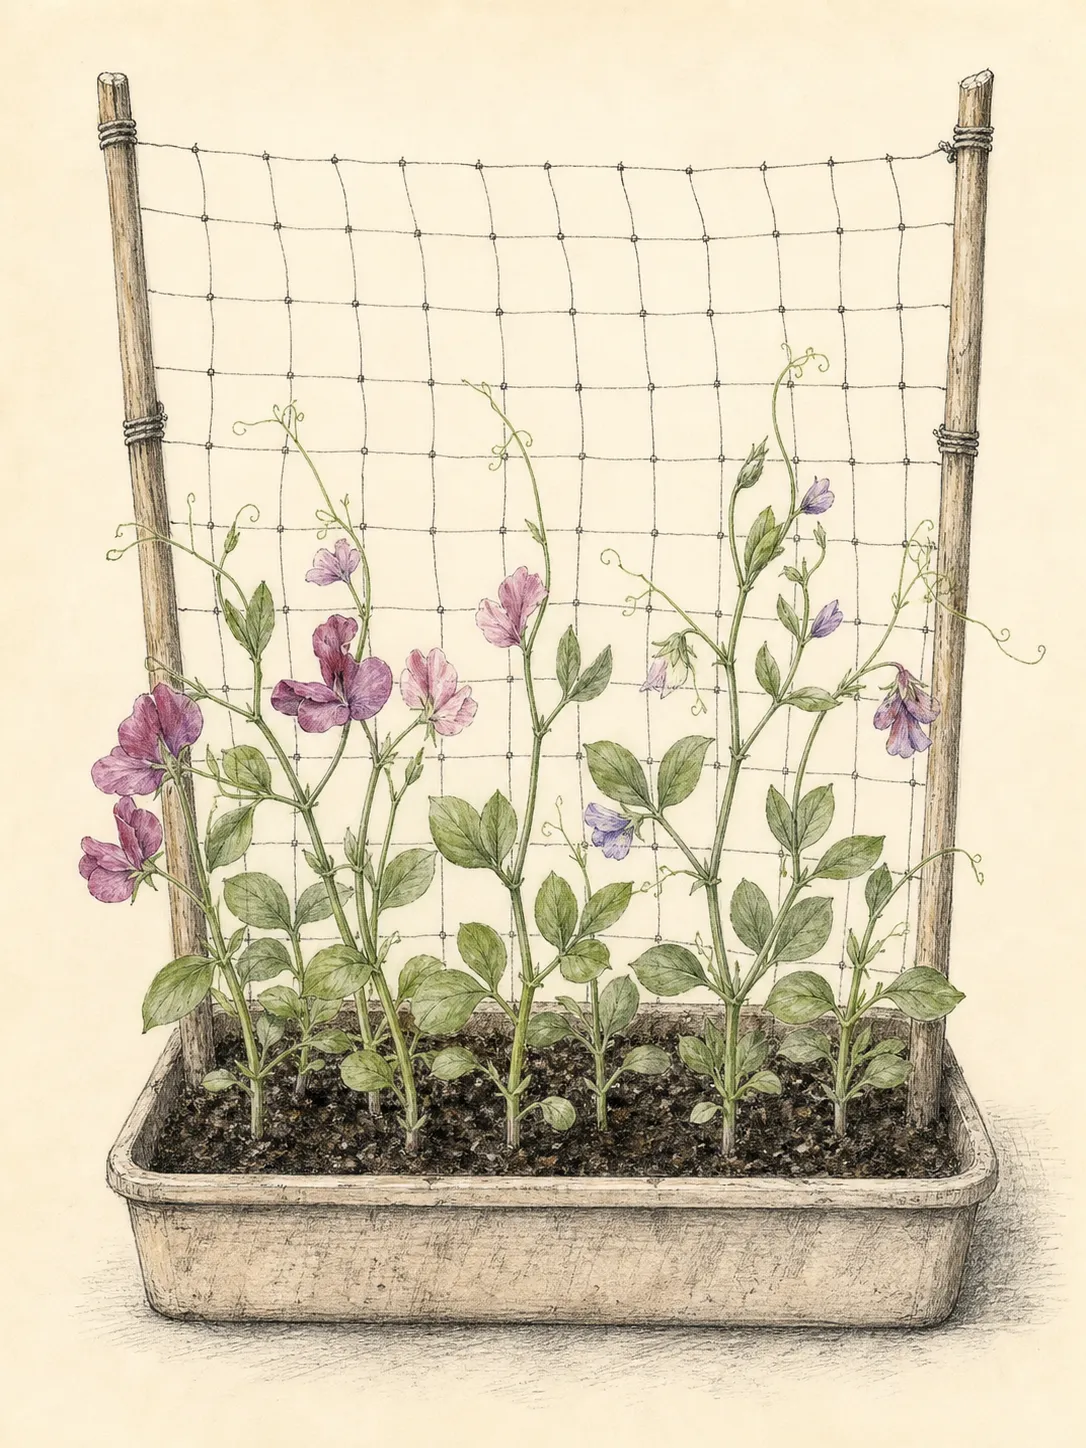
Walk around the finished framework and load-test only as the product instructions allow. Look for post movement, slackening corners, exposed cut ends and cord tails. Do not pull on the center as an improvised strength test. Instead, correct visible movement, recheck approved fasteners and keep the support free of other loads. Lights, tools and heavy decorations do not belong on a net engineered only for plants.
Plant for roots, access and separate mesh lanes
Harden home-raised seedlings according to local guidance, water their root balls before planting and handle the slender stems without squeezing them. In the documented UK 'Nimbus' setup, retain the four marked centers at 30 cm intervals along the 120 cm face and keep every root ball 5–7.5 cm from the mesh. The 30 cm interval is the upper end of the RHS 20–30 cm garden range and agrees with this supplier's stated 30 cm spread. For another cultivar or product, preserve the RHS ranges but recalculate the row from the new mature dimensions and usable net length before opening holes.
Set each plant at the depth it occupied in its nursery cell or pot unless its label directs otherwise. Ease circling roots only as the root ball permits, backfill gently and water to settle contact. Do not mound compost against the stem or bury the crown while trying to reach the net. The first objective is an intact, evenly moist root system; training begins above it. Replace the ORNAMENTAL — DO NOT EAT label immediately if it was moved during planting.
Assign each plant a vertical lane of mesh with room to fan. The lanes are not rigid walls, but they prevent all leading shoots from being gathered at the nearest strand. Point the strongest shoot toward its lane and keep neighboring shoots separated at the base. If a plant has branched, spread those branches gradually rather than twisting the crown. Open beginnings create an open flowering screen later.
Mulch only where it suits the local soil and climate, keeping material away from stems and labels. The RHS recommends organic surface mulch to conserve moisture, but a wet, heavy site may need a lighter hand. The support should not pin mulch against the row. Preserve a visible watering basin and a bare inspection collar around each stem so drying, damage or movement can be read without dismantling the net.
Start the first ties while shoots are short
Do not wait for stems to sprawl and tangle. As a shoot approaches the net, bring it gently to the assigned lane with soft garden twine or a flexible plant tie. Form a loose figure-eight between stem and mesh so the tie supports without rubbing or constricting. Place it below a useful leaf joint, never across a tendril, flower stem or tender tip. The tie is a bridge to the net, not a permanent clamp.
Let tendrils do the routine attachment. RHS guidance notes that tendrils grip when they contact a support, while wayward shoots may still need tying. Position a tendril near a strand rather than winding the soft stem through several openings. Weaving looks secure but makes picking, removal and correction difficult. A stem supported on the face of the net can be released cleanly; a stem threaded through it may have to be cut into fragments.
Fan several shoots across adjacent openings and keep their tips facing upward. If two stems cross, redirect the younger, more flexible one before tendrils lock them together. Do not pull a gripping tendril free from a tender stem; snip the tendril if separation is necessary. The purpose is not geometric perfection. It is enough separation to see each principal shoot, reach flower stems and allow air to move through the screen.
Inspect the first ties after wind and after each strong growth flush. Loosen anything pressing into a thickening stem and remove ties that tendrils have made redundant. Add support only where a shoot can whip or fold. A net covered in forgotten string becomes harder to dismantle and can hide constriction. Keep a small count of active ties at each plant so the final cleanup does not leave plastic or wire in the bed.
Keep the flowering screen open and hydrated
Once vines are moving, check direction and root moisture in the same round. Sweet peas flower poorly when allowed to dry, but frequency cannot be universal: soil texture, weather, root depth and container exposure change demand. Probe below the surface and water the occupied root zone thoroughly when it is beginning to dry. Apply water at soil level without blasting stems off the mesh or leaving the center root ball untouched.
Pick flowers or remove spent blooms regularly so annual sweet peas do not divert the display into seed production. Work from the service strip, support the flower stem with one hand and cut with clean snips. Do not drag cut stems through the mesh. Keep any developing pods out of food baskets and dispose of them where they cannot be mistaken for edible peas. The no-edible-use rule applies whether pods are green, dry or saved for ornamental seed.
Redirect new shoots into empty lanes instead of compressing them over flowers. A bare patch is preferable to a dense lump that catches wind and conceals ties. Where the cultivar branches heavily, retain a manageable set of sound shoots and remove damaged or misplaced growth conservatively. Exhibition advice about removing tendrils and side shoots belongs to cordon culture; a garden net generally benefits from natural tendril attachment and a broader fan.
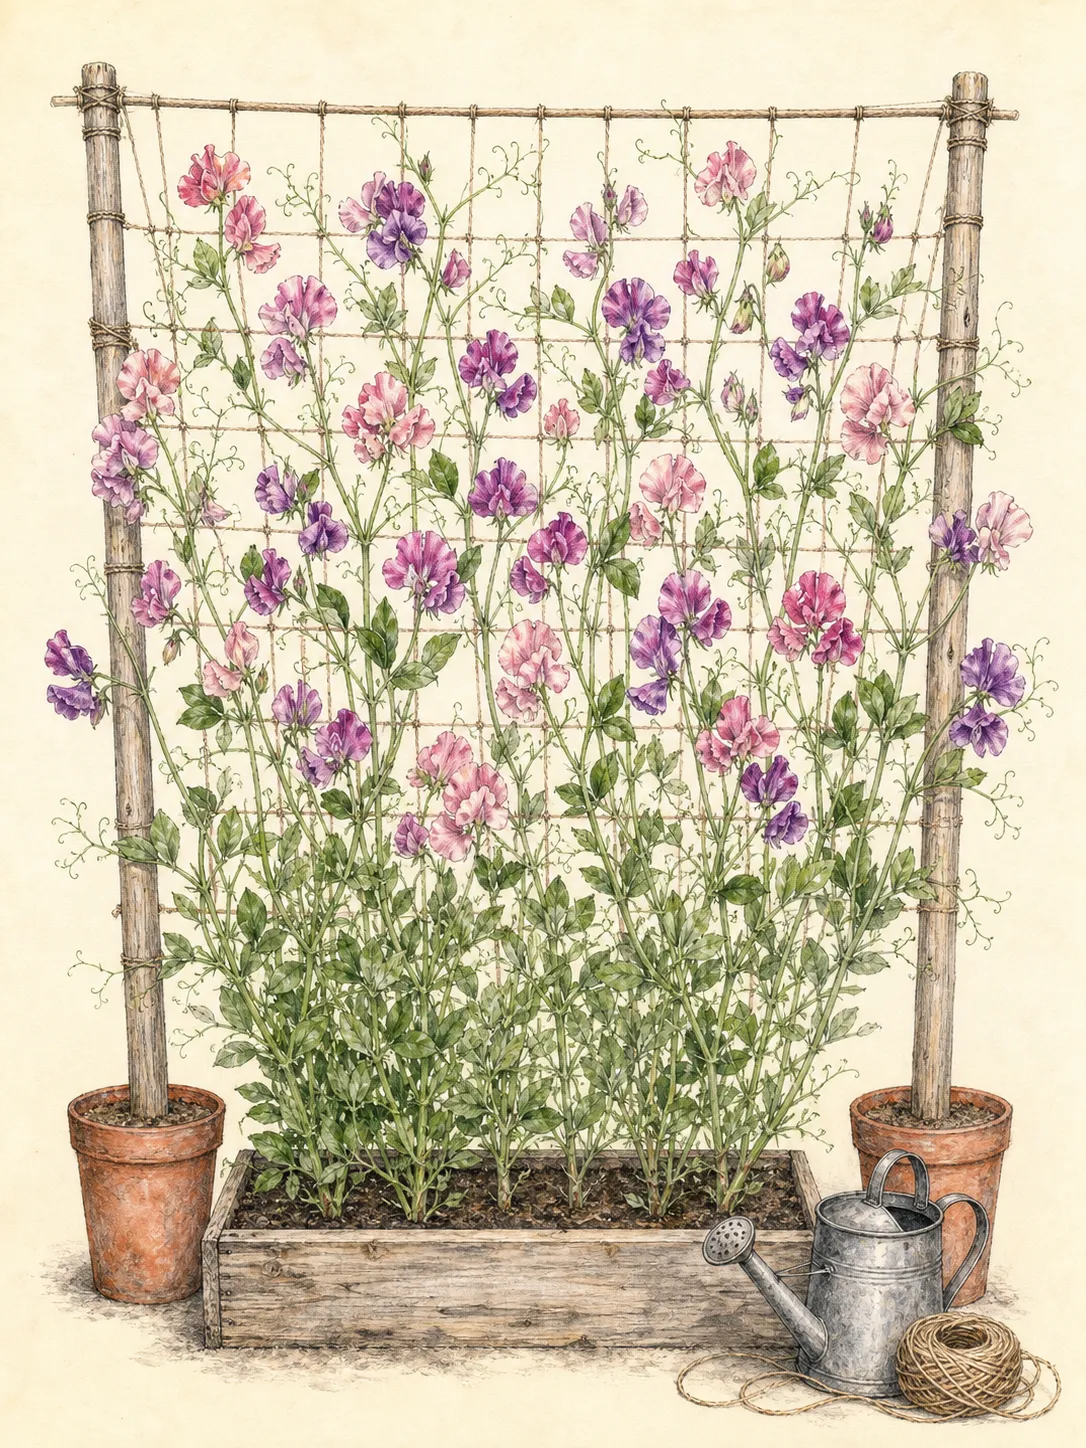
Read regional limits honestly. In a cool season, growth may remain productive for weeks; in hot, humid weather, flowering can decline even with adequate water. Do not respond by saturating well-drained soil or adding unmeasured fertilizer. Continue picking, maintain even moisture and accept the annual's seasonal finish. Next year, alter sowing time or choose a locally proven heat-tolerant cultivar rather than forcing the current planting past its climate window.
Remove the annual vines without leaving a net trap
At the end of flowering, stop treating the screen as a permanent hedge. Confirm that no pods are entering food use, then cut the vines into controlled sections from the service side. Release remaining ties before pulling stems. Dry tendrils can hold strongly; snip them rather than yanking the net off its anchors. Collect ornamental pods and seeds separately, label any intentionally retained seed as non-edible and store it away from kitchen seed or dried peas.
Inspect plant material for local disposal restrictions and compost only what your local system accepts. Remove the roots if the annual bed is being reset, minimizing disturbance to neighboring plants. Do not leave a dry vine sheet on nearly invisible netting through an active path. Once foliage no longer makes the barrier obvious, either remove the net promptly or mark and isolate it until safe dismantling is possible.
Wash soil from reusable lower fixings, dry the net and examine every edge and junction. Discard mesh that has become brittle, stretched or sharp; do not save it because most of the panel looks intact. Coil sound netting without loose loops and label its dimensions. Store posts and anchors together with their manufacturer's instructions so next season's installation starts with known components rather than an anonymous bundle.
Record the facts that will improve the next screen: cultivar, planted spacing, support height, first and last flowering, places the net sagged, lanes that became crowded and whether picking access remained comfortable. The successful system is not the one with the most vine. It is the one that stays stable and reachable, displays flowers across the mesh and preserves an unmistakable boundary between ornamental sweet peas and anything grown to eat.
Steps
- Level
- moderate
- Time
- One installation and planting session, followed by short tying and picking rounds
- Tools
- Tape measure and garden marker, Tools specified by the support manufacturer, Hand trowel, Watering can or wand, Clean flower snips, Gloves
- Materials
- Exterior-rated climbing-plant netting, Matched posts, anchors and fasteners, Soft plant ties or garden twine, Labeled Lathyrus odoratus seedlings, Two durable ORNAMENTAL — DO NOT EAT labels, Locally suitable mulch if needed
- 1Verify ornamental identity and habit
Confirm Lathyrus odoratus on the packet or nursery label and reject any plan that mixes the row with edible peas. For the worked UK setup, verify 'Nimbus' and its supplier dimensions of up to 180 cm high by 30 cm wide. Decide on a garden screen rather than cordon training. Place durable ORNAMENTAL — DO NOT EAT labels at both ends and choose another site if children, visitors or animals could mistake the pods for food.
- 2Map a reachable support line
Mark the mature screen, an uninterrupted planting strip and the service route used for tying, watering, picking and removal. Keep the net away from gates, doors, play areas, utilities and night-time paths. Check wind exposure and keep the top within safe reach from the ground; relocate the screen if routine care would require improvised climbing or leaning through neighboring plants.
- 3Install and inspect the empty net
For 'Nimbus', assemble the current RHS Plants 120 × 80 × 200 cm frame with its supplied canes, joints, 10 cm polyethylene mesh and six galvanized pegs. Clip the net to the full frame and take its lowest designed attachment as the bottom working edge. Follow the live instructions for every joint and anchor, eliminate loose loops and sharp ends, test access with a pot and watering wand, and keep unrelated loads off the frame.
- 4Plant into assigned mesh lanes
On one 120 cm face, mark four centers at 15, 45, 75 and 105 cm and place each root ball 5–7.5 cm from the net. This gives 30 cm plant spacing within the RHS UK range and matches the listed 'Nimbus' spread. Set root balls at their existing depth, water to settle, preserve a visible stem collar and assign each plant a lane; do not add a fifth plant or a second staggered row.
- 5Bridge young shoots to the mesh
Use a loose, soft figure-eight tie to bring each short shoot onto the face of its lane. Keep ties below useful nodes and clear of tips, flowers and tendrils. Place tendrils near strands and let them grip naturally; never weave the stem repeatedly through mesh. Redirect crossings while growth is flexible and snip a locked tendril rather than tearing it free.
- 6Maintain flowers, moisture and access
Probe the root zone and water thoroughly when it begins to dry, adjusting to soil and weather instead of following a national interval. Pick flowers and deadhead from the service side, keep all pods out of food containers and remove redundant ties after tendrils take over. Fan new shoots into openings without turning the screen into a dense, wind-catching mat.
- 7Dismantle and record the season
Cut finished vines into manageable sections, release ties and snip dry tendrils before removing the net. Keep retained ornamental seed clearly labeled and separate from food. Clean and dry reusable components, discard brittle or sharp mesh, and record cultivar, spacing, flowering period, sag points and access problems so the next installation begins with evidence rather than guesswork.
Related reading
Sources
- How to Grow Lathyrus. Royal Horticultural Society. Source record · Accessed 2026-08-19.
- Sweet Pea: Lathyrus odoratus. North Carolina Extension Gardener Plant Toolbox. Source record · Accessed 2026-08-19.
- Sweet Peas Grown With Ease. UC Marin Master Gardeners. Source record · Accessed 2026-08-19.
- Sweet Pea 'Nimbus' Seeds. Thompson & Morgan. Source record · Accessed 2026-08-19.
- Pea and Bean / Sweet Pea Frame. RHS Plants. Source record · Accessed 2026-08-19.