Grow · climbing rose horizontal training
Train a Climbing Rose on Horizontal Wires With Air and Access
Build a serviceable wire framework, preserve principal canes and guide flexible growth sideways so a climbing rose flowers across the support without becoming an inaccessible thicket.
Published Last updated
In this guide
- Confirm that the rose belongs on this framework
- Preserve the principal canes while directing flexible growth
- Design the support around future access
- Trace principal canes before moving any stem
- Lower flexible canes in stages
- Tie for support without creating a constriction
- Fan the framework without filling every gap
- Prune laterals by flowering habit
- Audit the framework through a full season
- Steps
Confirm that the rose belongs on this framework
A climbing rose does not cling to a wall by itself. Its long canes must be secured to a support, and that support becomes part of the permanent care system. Confirm the exact cultivar, mature dimensions, hardiness and flowering habit before installing wires. A rose expected to cover a broad wall needs a different footprint from a compact climber beside a narrow doorway, even when both nursery labels say climbing.
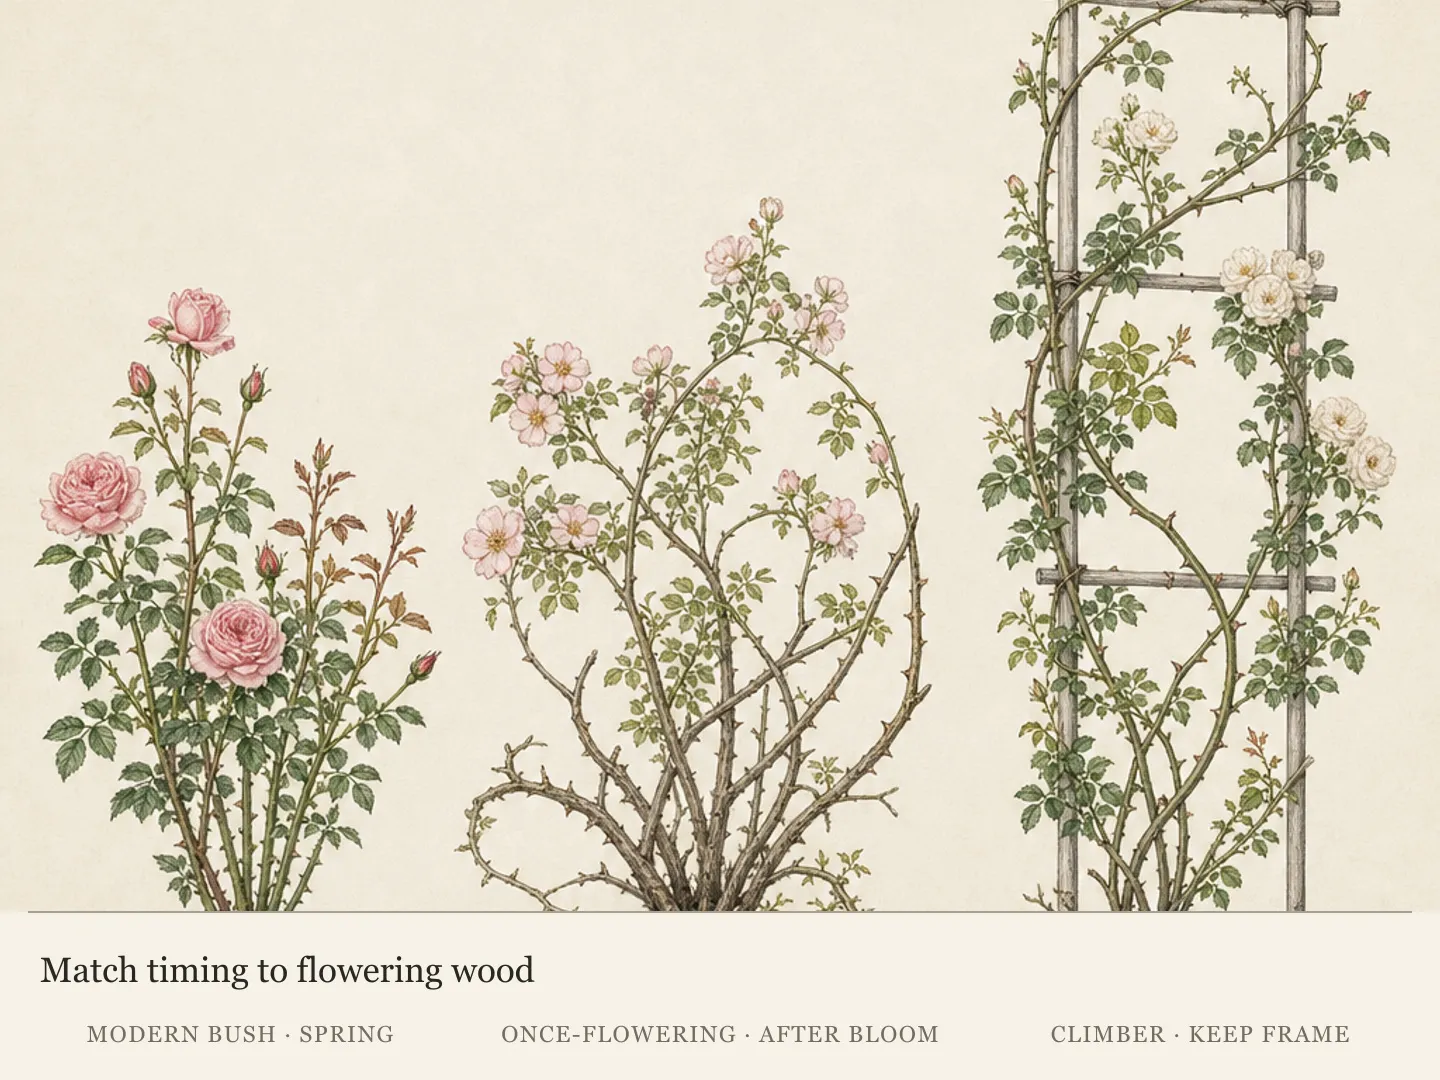
Separate a repeat-flowering climber from a once-flowering rambler or old garden rose. RHS and Iowa State guidance distinguish their pruning windows because some flower mainly on previous growth while others renew bloom on current growth. Training can begin without a severe cut, but renewal and lateral pruning depend on that record. If identity is uncertain, preserve sound long canes and observe a full flowering cycle before making structural reductions.
Read cane character as well as the label. A young flexible shoot can often be guided sideways gradually; an older stiff cane may split when forced to the same curve. Cultivars differ in vigor, thorn density and pliability. The drawing on a training guide shows a destination, not permission to bend every stem immediately. Let sound anatomy determine which cane can occupy each wire and how many stages the move requires.
Check whether the site can support both plant and gardener. The rose needs suitable light, soil and air movement, while the wall or fence needs room for fixings, inspection and repair. Keep doors, windows, vents, gutters, meters and electrical equipment clear. If the mature plant would cover a service point or require unsafe ladder work every season, choose a smaller cultivar, a freestanding support or another location before planting.
Preserve the principal canes while directing flexible growth
Identify the rose and its flowering wood before selecting a framework. Lower suitable flexible canes gradually and tie them from a reachable service side with expansion room. A stiff or overloaded cane changes the training choice; it should not be forced into the drawing. Check ties and flower distribution after growth to guide later lateral pruning.
Design the support around future access
Install the wire system before canes demand it. RHS presents a regularly spaced horizontal framework as a practical starting point, but exact spacing and fixings must suit the wall material, rose scale, expected wet foliage load and local construction guidance. A wire that merely looks straight on planting day is not enough. Use corrosion-resistant components and anchors designed for the actual substrate, or have the system installed professionally when the structure is uncertain.
Hold the wires away from the surface with suitable vine eyes or stand-offs. The gap gives ties somewhere to wrap, reduces scraping and lets hands reach behind a cane. It also makes the rose easier to inspect than a stem pressed flat to masonry or timber. Do not claim the gap alone prevents disease; its practical value is that foliage, wall and hardware remain visible and the canopy can be spaced rather than compressed.
Reserve a continuous service line at the base. Keep enough open ground or stable stepping space to trace canes, prune laterals, replace a tie and reach every anchor without standing on the rose's roots or neighboring perennial crowns. A lush underplanting may hide bare stems, but it should not close the only working route. Draw the mature footprint of both rose and companions before filling the bed.
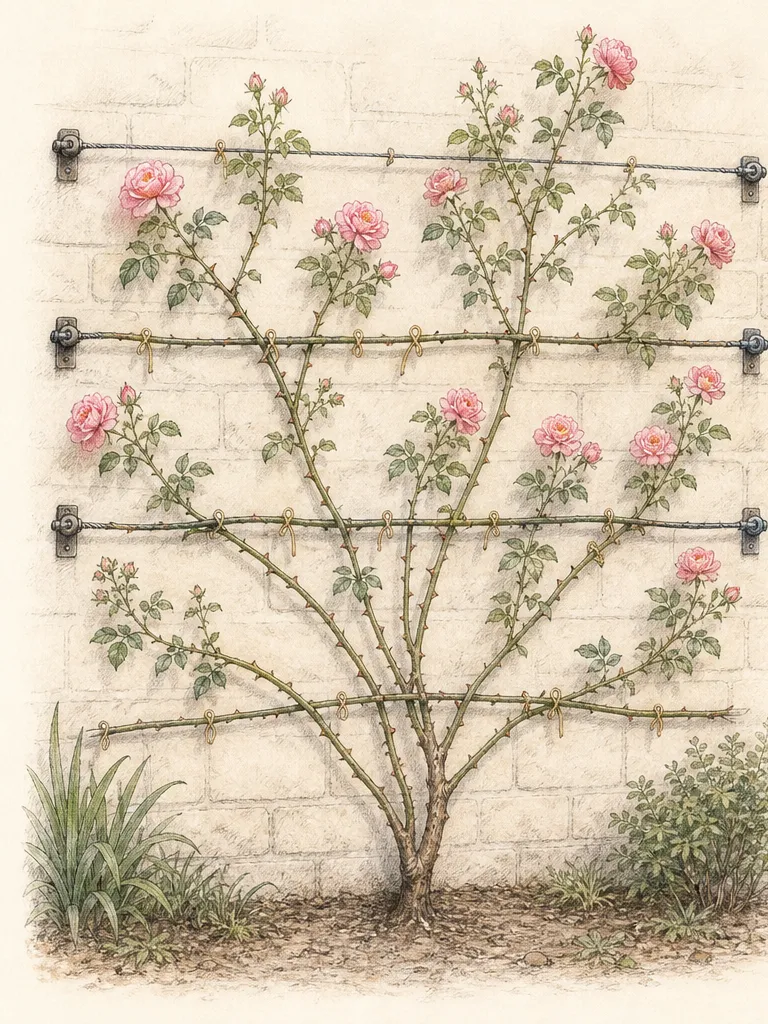
Plan clear edges around openings and boundaries. Finish wires far enough from a window, roof edge or property line that new growth can be tied without crossing the limit. Leave one accessible end or tensioning point on each wire. Concealed hardware eventually loosens, and a support cannot be maintained when every fixing sits behind crossed thorny canes. The empty margin is functional design, not unfinished coverage.
Test access with the tools you will use. Stand where pruning must happen, reach the upper planned wire without overextending and imagine removing a long cane in controlled sections. If the route requires leaning a ladder into the plant or stretching across glass, redesign the framework. Training should bring flowers into view while keeping routine work at a safe, reachable scale.
Trace principal canes before moving any stem
Start at the crown and follow every long cane to its tip. Mark the sound principal canes temporarily with loose colored ties. These stems create the durable framework; the shorter shoots arising from them form much of the flowering layer. UC Cooperative Extension specifically separates main canes from laterals. Cutting a long cane because it looks bare in one section can remove years of reach and the base from which flowering shoots would develop.
Remove only clearly dead, diseased or broken material before training. Scratch or cut questionable tips in small stages until sound tissue is found, using local rose guidance for live-wood cues. Preserve vigorous replacement canes that begin near the base. A congested plant may eventually need renewal, but first establish which young stem can replace the old route. Removing the old framework before its successor reaches the wire leaves an avoidable gap.
Untangle from the tips inward. Release obsolete ties one at a time while another person controls long heavy growth when necessary. Do not pull a thorny cane through the entire plant; cut discarded pieces into manageable sections. For retained canes, note crossings and places where one stem rubs another or the wall. The finished fan should reduce those conflicts rather than reproduce them at a different angle.
Choose canes that can occupy separate horizontal runs without sharp folds. A lower cane can travel outward along the first useful wire; another may rise before turning across a higher wire. Alternate directions to balance the wall, but do not force mathematical symmetry onto an asymmetrical crown. Preserve the natural origin and bend of each stem while leaving working space between the principal routes.
Lower flexible canes in stages
Work with young, hydrated, flexible growth in calm conditions. Hold a cane at two points and test a broad curve, never a tight kink at one node. Move it only to the angle it accepts without cracking, then secure it provisionally. A forty-five-degree diagonal is useful progress when horizontal would break the stem. The goal is a durable sideways framework, not a perfect line achieved in one damaging session.
Return after growth and weather have allowed the cane to settle, then lower it another increment if it remains sound. The number and timing of stages depend on cultivar, cane age and climate, so no national interval is appropriate. Check the outer bark, nodes and tie points before each move. A crease, split or sudden loss of firmness ends the bending attempt; support the injured area and seek plant-specific advice.
Guide the cane along the face of the wire rather than weaving it tightly in and out. Weaving makes later removal difficult and can press expanding wood against metal. Place soft ties at stable intervals that prevent wind whip without converting the wire into a splint at every node. Keep buds and emerging laterals free. The cane should be supported, visible and removable without dismantling the entire framework.
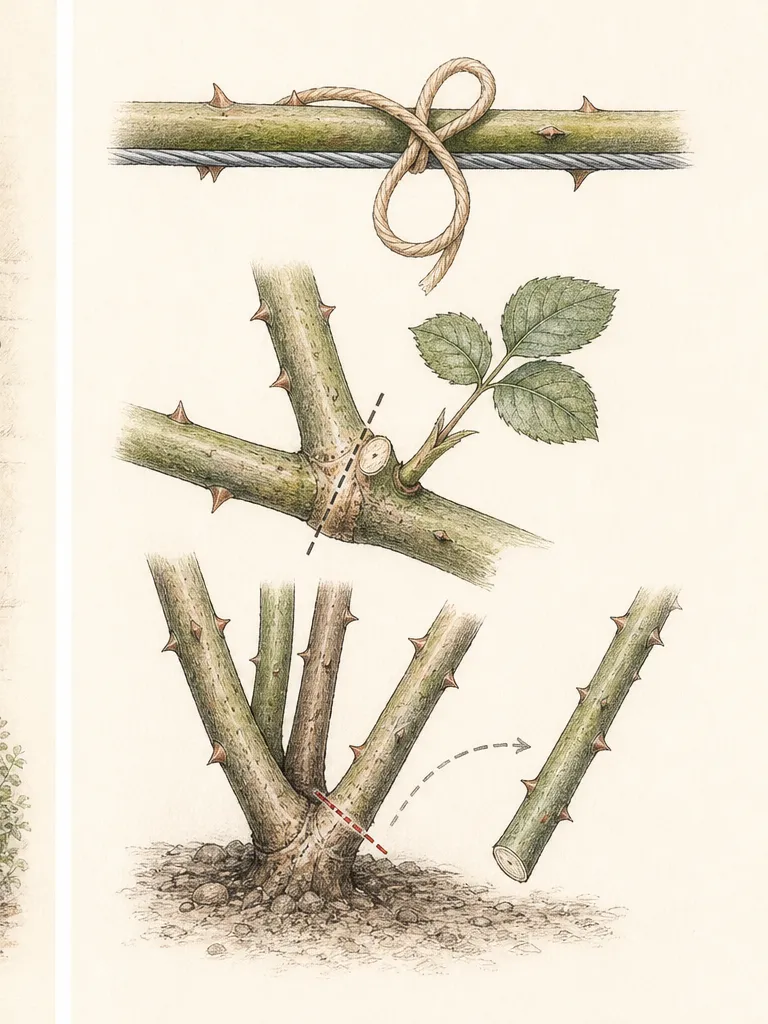
Sideways orientation encourages flowering laterals along more of the principal cane, as all three retained sources describe. Treat that response as a tendency, not a guarantee of identical bloom from every bud. Cultivar, light, age, winter survival and pruning history still matter. The practical aim is distributed opportunity: more of the retained cane is positioned to carry upright side shoots instead of concentrating growth only near a vertical tip.
Do not train a fresh basal cane across a busy path while waiting for it to lengthen. Tie it loosely upward to a temporary stake or safe wire, then redirect it when it can reach the planned route without a sharp bend. Protect the tip from foot traffic and doors. A replacement cane is future structure, so its temporary position deserves the same access and safety review as the finished framework.
Tie for support without creating a constriction
Use soft, flexible plant ties rather than bare wire around living cane. Form a loose figure-eight or another accepted tie that separates stem from support and leaves room for thickening. The tie should stop damaging movement without pinching. Check that its knot or fastener faces the service side, where it can be released with gloved hands rather than hidden between cane and wall.
Place ties near enough to control long spans but not directly over buds, flower laterals or a damaged section. Support the weight before tightening anything. A tie is not a repair for a cracked cane, and tightening several ties cannot make an undersized anchor safe. If the wire deflects or a fixing moves as the cane is positioned, stop, unload the section and correct the support.
Label replacement canes and old framework discreetly for the first season. The marks help during winter pruning when leaves no longer reveal which stem filled a gap successfully. Remove temporary identification before it constricts. Permanent knowledge belongs in the garden record: cultivar, flowering habit, wire route, renewal candidates and the season each principal cane entered the framework.
Inspect ties after a growth flush, strong wind and the first heavy flowering. Loosen or replace any tie pressing into bark, and add support where a new lateral changes the load. Remove redundant ties rather than layering new material over old. The ideal framework remains legible enough that every attachment can be counted, reached and understood from the service line.
Fan the framework without filling every gap
Distribute principal canes across the support, then let shorter laterals occupy the spaces between them. Do not solve an empty patch by crossing three main canes through it. Crossings create rubbing, hide ties and complicate renewal. A temporary gap is preferable to a knot that becomes inaccessible after leaf-out. Train a new replacement into the opening over time or accept visible wall as breathing and working space.
Keep laterals from pressing into one dense outer sheet. Shorten or redirect them according to flowering habit and local pruning timing, preserving enough separation to see stems and reach ties. Iowa State connects selective rose pruning with improved light penetration and air movement. That is a framework goal, not a demand for a hollow geometric center. Retain healthy foliage and the rose's natural flowering character.
Protect the wall's own ventilation and drainage features. Never train canes across vents, weep holes, downspout joints or removable panels. Keep foliage from resting permanently against surfaces that need inspection. When a cane repeatedly reaches into a gutter or under cladding, redirect it while young; annual hard cutting at the same inaccessible edge shows the original support footprint is too large.
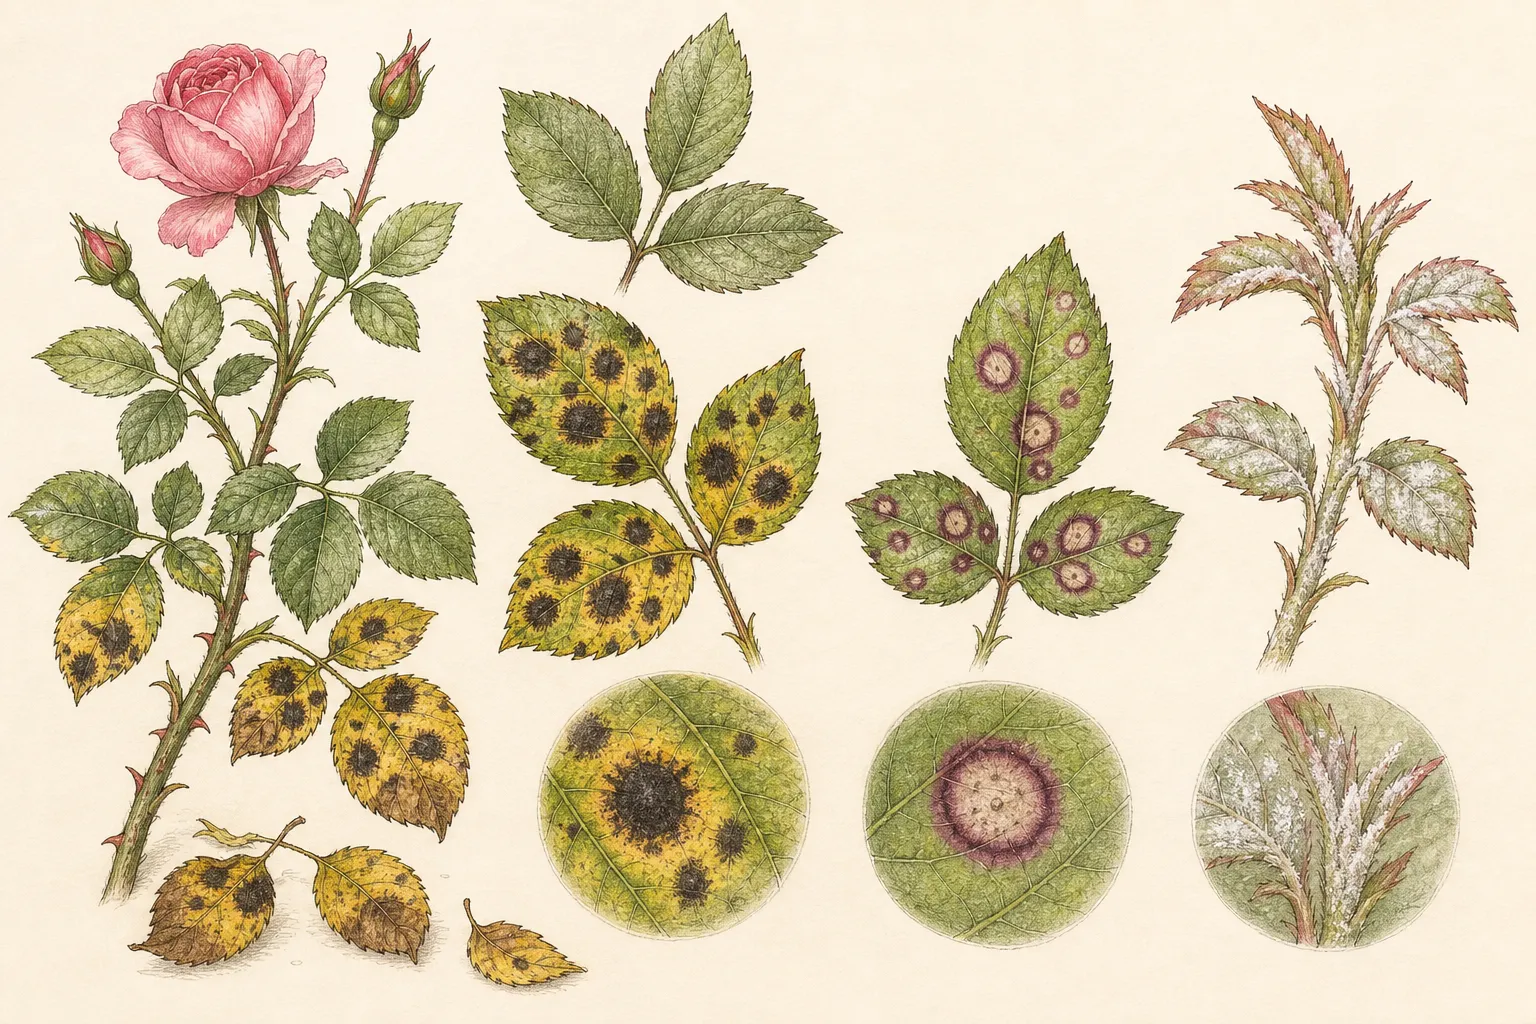
Allow room to deadhead and remove diseased leaves without dragging material through the canopy. A hand should be able to follow a lateral to its origin, and a cut section should have a clear exit toward the service side. This access becomes especially valuable where black spot or another leaf problem requires careful cleanup. The training system supports plant care only when it remains open enough to perform it.
Prune laterals by flowering habit
Once-flowering ramblers and climbers that rely on older wood are not pruned on the same schedule as repeat-flowering climbers. UC guidance places major work on once-blooming types after flowering, while repeat bloomers commonly receive dormant-season lateral pruning. Use the exact cultivar and regional record. Horizontal training can be shared across categories, but the cut that follows must preserve the wood carrying the next display.
On an established repeat-flowering climber, keep principal canes that still serve the support and shorten flowered laterals during the appropriate dormant window using current regional guidance. On a once-flowering plant, delay substantial post-display renewal until bloom has finished. In both cases, remove confirmed dead, diseased and broken wood, and avoid reducing every main cane simply because the side shoots look congested.
Renew one route only when a younger cane can take over its function or the old cane has become unproductive, damaged or structurally obstructive. Trace both stems from the base, transfer ties gradually and photograph the before state. Cut the retiring cane into controlled sections from the service side. A staged replacement preserves coverage and prevents a heavy released stem from tearing through the retained framework.
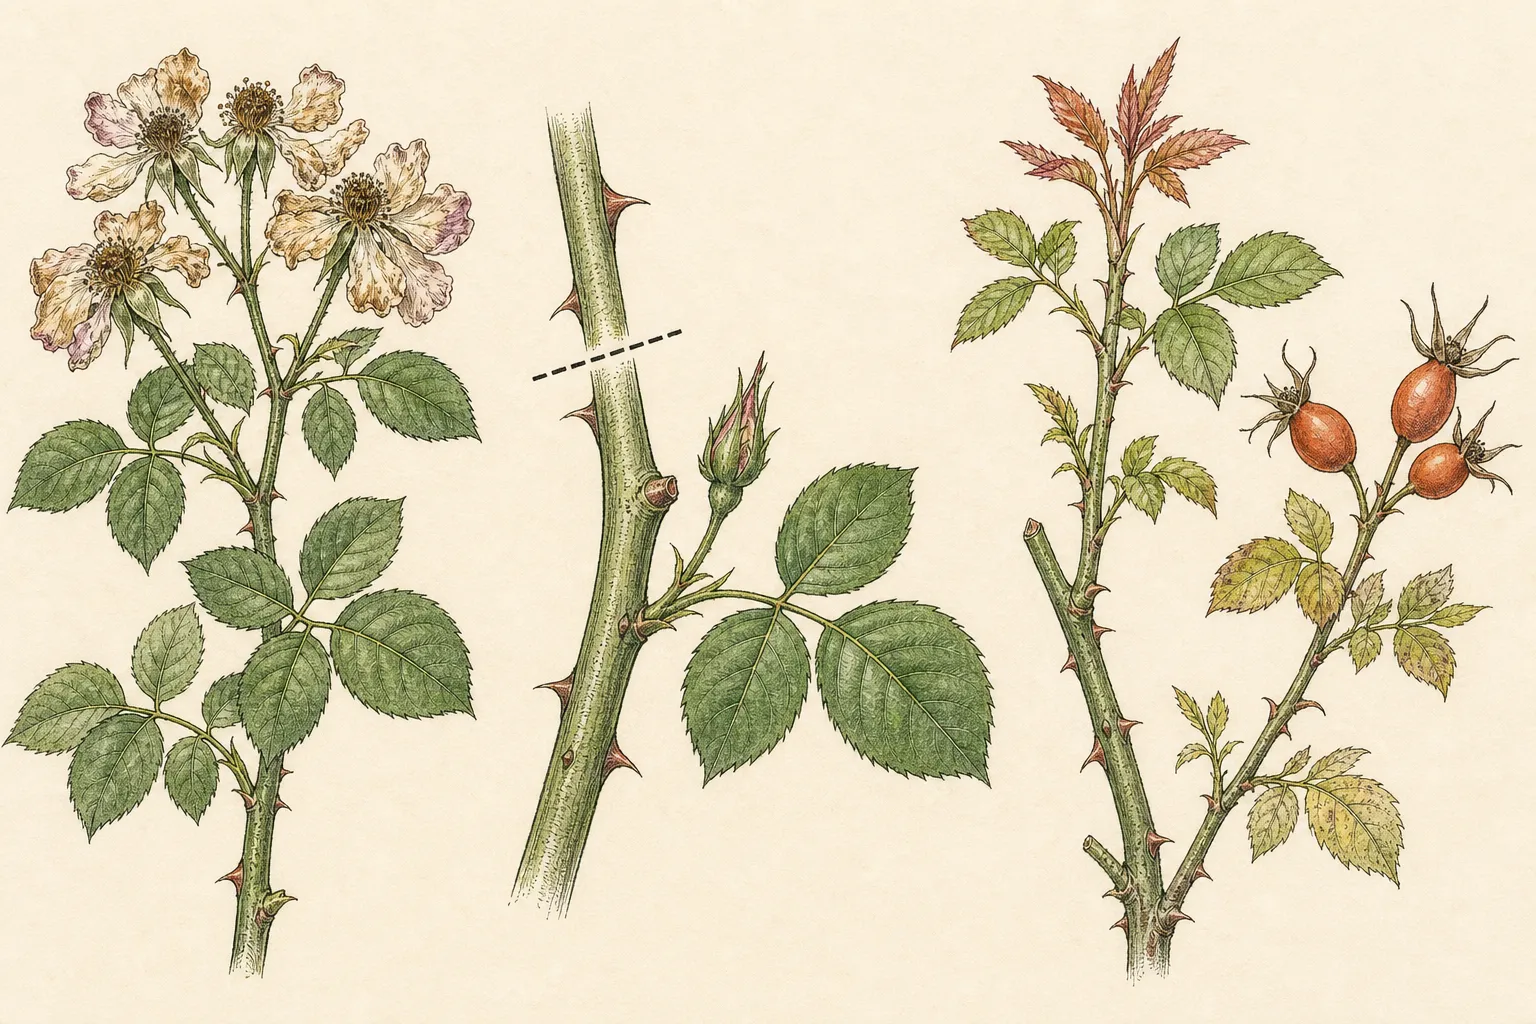
Keep summer deadheading separate from structural training. Remove spent flowers on repeat bloomers according to plant vigor and regional timing, leaving hips where they are part of the display. Tie useful new principal growth as it develops, but do not reopen the whole dormant pruning plan after every flush. Each session should have one job: flower grooming, new-cane guidance, tie inspection or structural renewal.
Audit the framework through a full season
After leaf-out, view the rose from the front and the service side. From the front, flowers should occupy more than the highest tips. From behind, principal canes, ties and fixings should remain visible. Mark dense areas, empty routes and points of contact with the wall. Do not correct everything immediately; distinguish growth that can be guided now from pruning that belongs to another flowering window.
After rain and wind, check load and abrasion. A secure cane should not saw against a wire, and the wire should not pull away from its anchors. Tighten structural components only under the manufacturer's or installer’s method and with the plant safely unloaded. Replace a soft tie that has stretched or cut in. If masonry, timber or hardware shows movement, use a qualified repair rather than hiding it behind foliage.
At flowering, record where laterals developed along each principal cane. A vertical bare lower section and flowers only at the top may suggest that more flexible growth could be redirected sideways, but low light or cultivar habit may also contribute. Change one route at a time and compare the following season. Training is an incremental experiment with living wood, not a one-day guarantee of wall-to-wall bloom.
In the quiet season, clear fallen leaves, inspect the crown and review the service path. Update the cane map before pruning laterals. The successful framework holds sound canes in broad curves, distributes flowering growth, keeps wall features and ties reachable, and allows an old route to be replaced without dismantling the rose. Preserve those functions even when the plant has not filled every visual gap.
Steps
- Level
- moderate
- Time
- One support-planning session, several short training visits and seasonal tie inspections
- Tools
- Clean bypass pruners, Thorn-resistant gloves and eye protection, Two-handled loppers or pruning saw for old canes, Appropriate wall-fixing tools used by a competent installer
- Materials
- Corrosion-resistant horizontal wire system suited to the substrate, Soft flexible plant ties, Temporary cane markers, Stable access equipment where professionally appropriate
- 1Identify the rose and its flowering wood
Recover the cultivar, mature size, hardiness and whether it flowers once or repeats. Observe an uncertain rose for a full cycle and restrict early work to sound training plus removal of clearly dead or broken material. Record whether the plant is a climber, rambler or another rose being trained upward, because later renewal timing depends on that distinction.
- 2Build a reachable horizontal framework
Use fixings and wires suited to the wall, expected plant load and local building requirements. Stand the wire away from the surface, keep windows, vents, meters and boundaries clear, and leave a continuous service route below. Test access to every tie and anchor before planting beneath the rose, and use professional installation when the substrate or safe working height is uncertain.
- 3Map principal and replacement canes
Trace each long cane from the crown, mark the durable framework and identify young basal shoots that can replace older routes. Remove only confirmed dead, diseased or broken sections first. Untangle tips in controlled order, choose separate wire paths and avoid crossings that hide ties, rub bark or prevent a future cane from being removed in sections.
- 4Lower flexible growth gradually
Test a broad curve with two-handed support and move a young cane only as far as it bends without cracking. Secure a diagonal position when horizontal is not yet safe, then return in a later growth stage to lower it further. Keep new basal canes protected on a temporary route until they can reach the planned wire without crossing a path.
- 5Tie loosely from the service side
Fasten the cane with soft flexible ties that separate it from the wire and leave room for thickening. Keep ties off buds and damaged tissue, face fasteners toward the working route and stop if the wire or anchor moves under load. Label replacement routes temporarily and transfer the permanent information to the rose record before removing the markers.
- 6Manage laterals without erasing the framework
Let shorter flowering shoots rise from the sideways principal canes, redirect congestion and preserve working gaps. Prune laterals in the cultivar's correct window: substantial once-flowering work follows bloom, while repeat-flowering climbers commonly receive dormant-season pruning. Renew an old principal cane only when a sound replacement or a clear structural reason makes the exchange possible.
- 7Inspect load, access and flowering distribution
After growth, wind, rain and bloom, inspect every tie, anchor and rub point from the service side. Loosen constrictions, correct one training route at a time and keep wall features open. Record where flowering laterals formed, clear fallen leaves in the quiet season and preserve the empty margins that allow future pruning and structural repair.
Related reading
Sources
- Rose Pruning: Climbing Roses. Royal Horticultural Society. Source record · Accessed 2026-08-19.
- How to Prune Roses. Iowa State University Extension and Outreach. Source record · Accessed 2026-08-19.
- Pruning Climbing Roses. University of California Cooperative Extension Master Gardeners. Source record · Accessed 2026-08-19.