Plant problems · rose black spot
Manage Rose Black Spot From the First Marked Leaves
Confirm expanding black lesions and yellowing on paired leaves, remove affected material without stripping the canopy, and protect new growth through sanitation, airflow, and local preventive guidance.
Published Last updated
In this guide
- Confirm the lesion pattern before removing leaves
- Judge the next action on marked new growth
- Separate black spot from scorch, other leaf spots, and feeding
- Measure impact through canopy function
- Reduce local carryover without stripping the rose
- Keep needed water at the root zone
- Protect new growth when prevention is justified
- Use pruning and feeding only for their proper roles
- Plan for resistance and site fit when recurrence is severe
- Close the diagnosis when new evidence no longer fits
- Audit nearby roses without treating them as one canopy
- Protect the rose after partial defoliation
- Prepare a clean spring start from the winter record
- Define the point at which treatment can stop
- Keep one untreated observation shoot where practical
- Diagnosis
Confirm the lesion pattern before removing leaves
Rose black spot typically produces black lesions with irregular or fringed margins, often surrounded by yellow tissue. Spots enlarge and affected leaves may yellow and drop. Photograph upper and lower surfaces of several attached leaves, including early lesions at the advancing edge and apparently clean new growth. The oldest fallen leaf may be too decayed to show the original pattern.
Map the plant from lower interior foliage to upper new shoots. Splash and moisture can contribute to a pattern that begins low and moves upward, but distribution alone does not identify the disease. Pair it with lesion form and progression. Mark one clean shoot and several first-spotted leaves. Existing spots remain visible; the next verdict is whether new lesions appear on previously clean foliage.
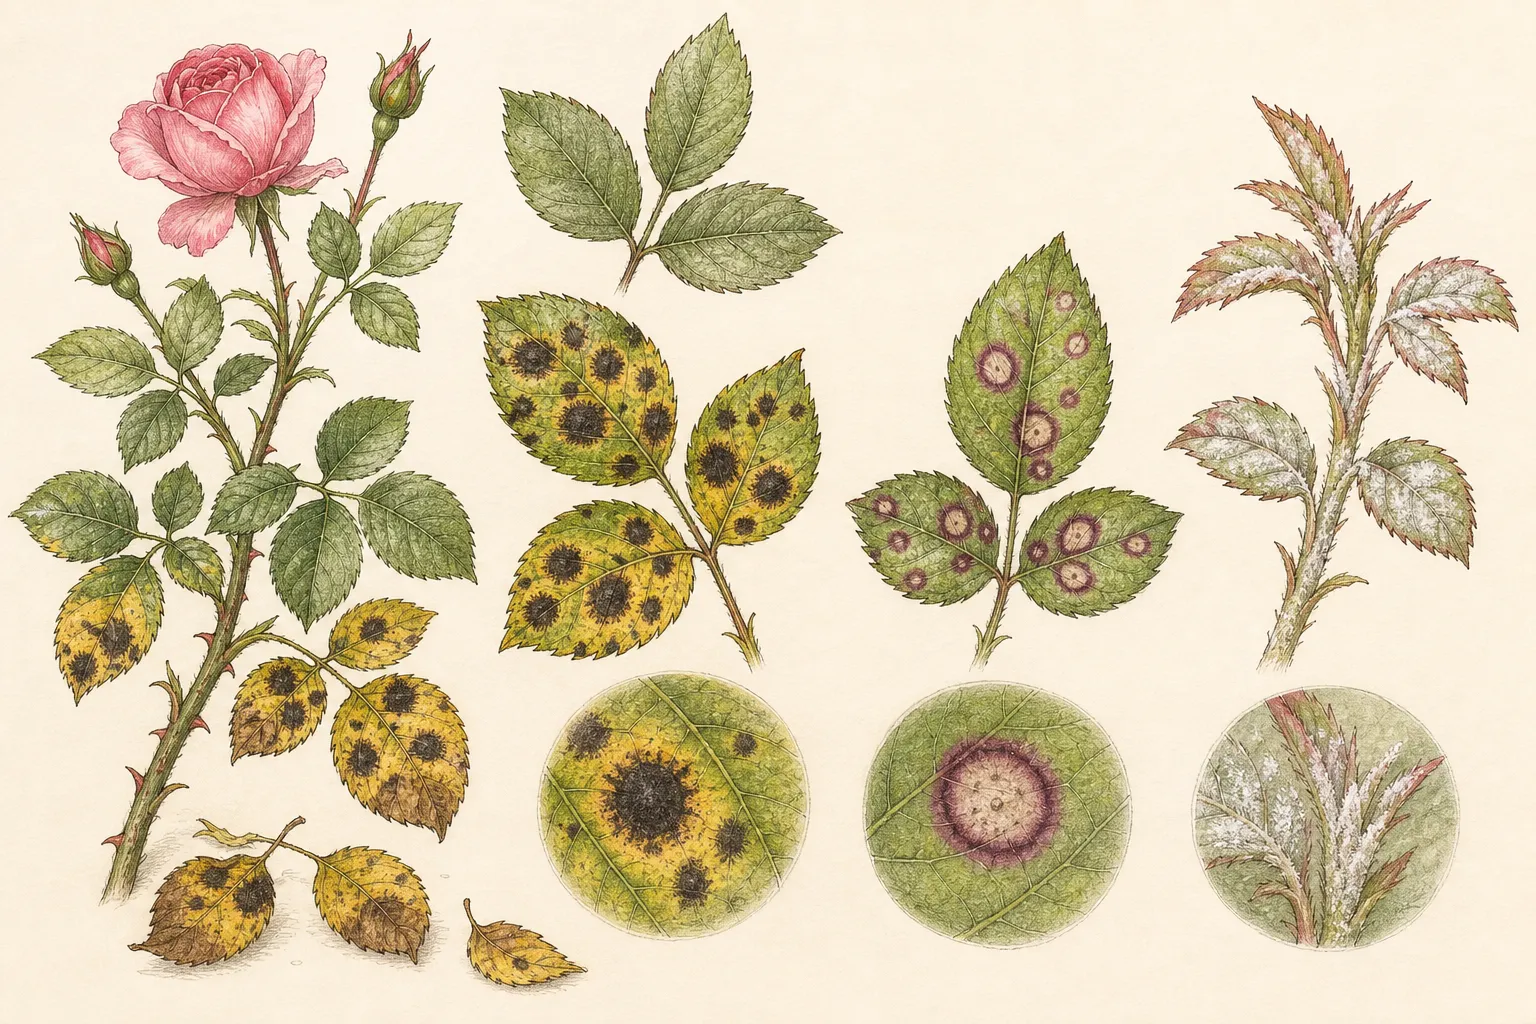
Do not strip every spotted leaf before the diagnosis is recorded. A rose needs green tissue, and severe defoliation can weaken it. Preserve a fresh sample in a paper wrap or as directed by the diagnostic service. When lesions are ambiguous, bring the sample, whole-plant photographs, cultivar, recent products, and weather history to local Extension or a plant clinic.
Judge the next action on marked new growth
Match attached lesions and their progression to the diagnostic rows, keeping spray history, insects and water stress in view. Preserve a clean shoot as the next comparison. Old spots will remain after a useful correction, so assess new injury and leaf loss before escalating treatment. Wider decline that black spot cannot explain needs a broader plant assessment.
Separate black spot from scorch, other leaf spots, and feeding
Scorch produces dry brown edges or exposed patches linked to heat, wind, drought, or root stress. It generally lacks expanding black fringed lesions with surrounding yellowing. Insect feeding creates holes, skeletonization, stippling, or mines and should be paired with the feeder. A dark edge around a hole is wound response, not automatically fungal black spot.
Other fungal and bacterial leaf spots can form purple, tan, gray, or black lesions with different centers and borders. Downy or powdery mildew involves surface growth or distinctive discoloration, while rose mosaic produces patterned chlorosis. Mixed problems occur. Keep separate samples and label canopy positions rather than forcing every symptom on one rose into one name.
Spray injury can follow droplets, application zones, heat, or incompatible products. Review every foliar treatment, concentration, weather, and date. If marks remain tied to one application and clean untreated leaves develop normally, preserve that route. If lesions expand and recur on untreated growth with yellowing and leaf drop, black spot becomes more coherent.
Measure impact through canopy function
Count affected leaves in representative sectors and estimate how much green canopy remains. A few lower lesions on a vigorous established rose are different from repeated early defoliation on a young plant. Record shoot extension, flowering, and whether new leaves stay attached. Severity should describe plant function and progression, not the emotional impact of a close-up.
Note cultivar and recurrence. Some roses are more susceptible, and local disease pressure varies with weather. One wet season can produce an episode; repeated early loss every year may justify a resistant replacement. Do not assume a rose sold as resistant is immune. Resistance reduces risk and maintenance, but site and local strains still matter.
Protect the remaining canopy from unnecessary pruning. Remove dead or crossing wood only under appropriate rose guidance. Shearing spotted tips can remove flowering wood and create dense new growth without addressing fallen infected leaves. Keep the architecture open enough to inspect while retaining leaves that continue to function.
Reduce local carryover without stripping the rose
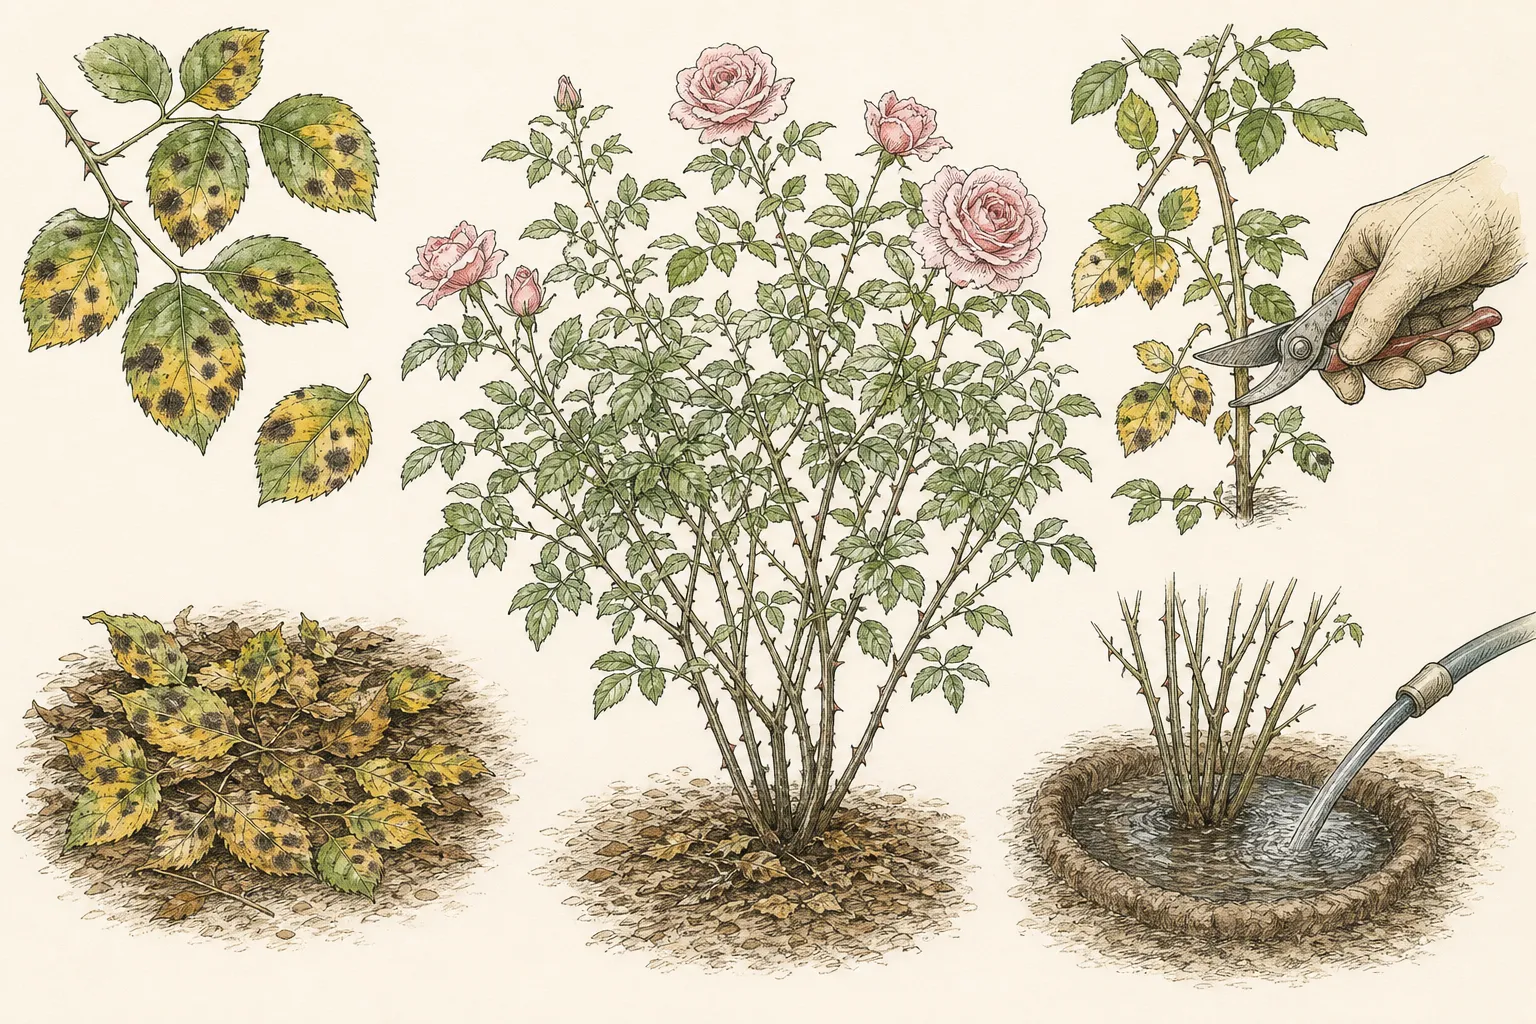
Collect fallen affected leaves and remove heavily spotted leaves selectively when the rose retains ample green foliage. Work when leaves are dry. Keep debris out of nearby crowns and dispose according to local guidance. Home compost conditions may not reliably destroy all disease material, so use the locally recommended route.
Remove clippings and petals from inside the plant where moisture and debris collect. Refresh only the surface mulch that is contaminated or matted, keeping total depth moderate and away from canes. Do not dig deeply through rose roots. Sanitation reduces local inoculum; it does not promise that airborne spores will never arrive.
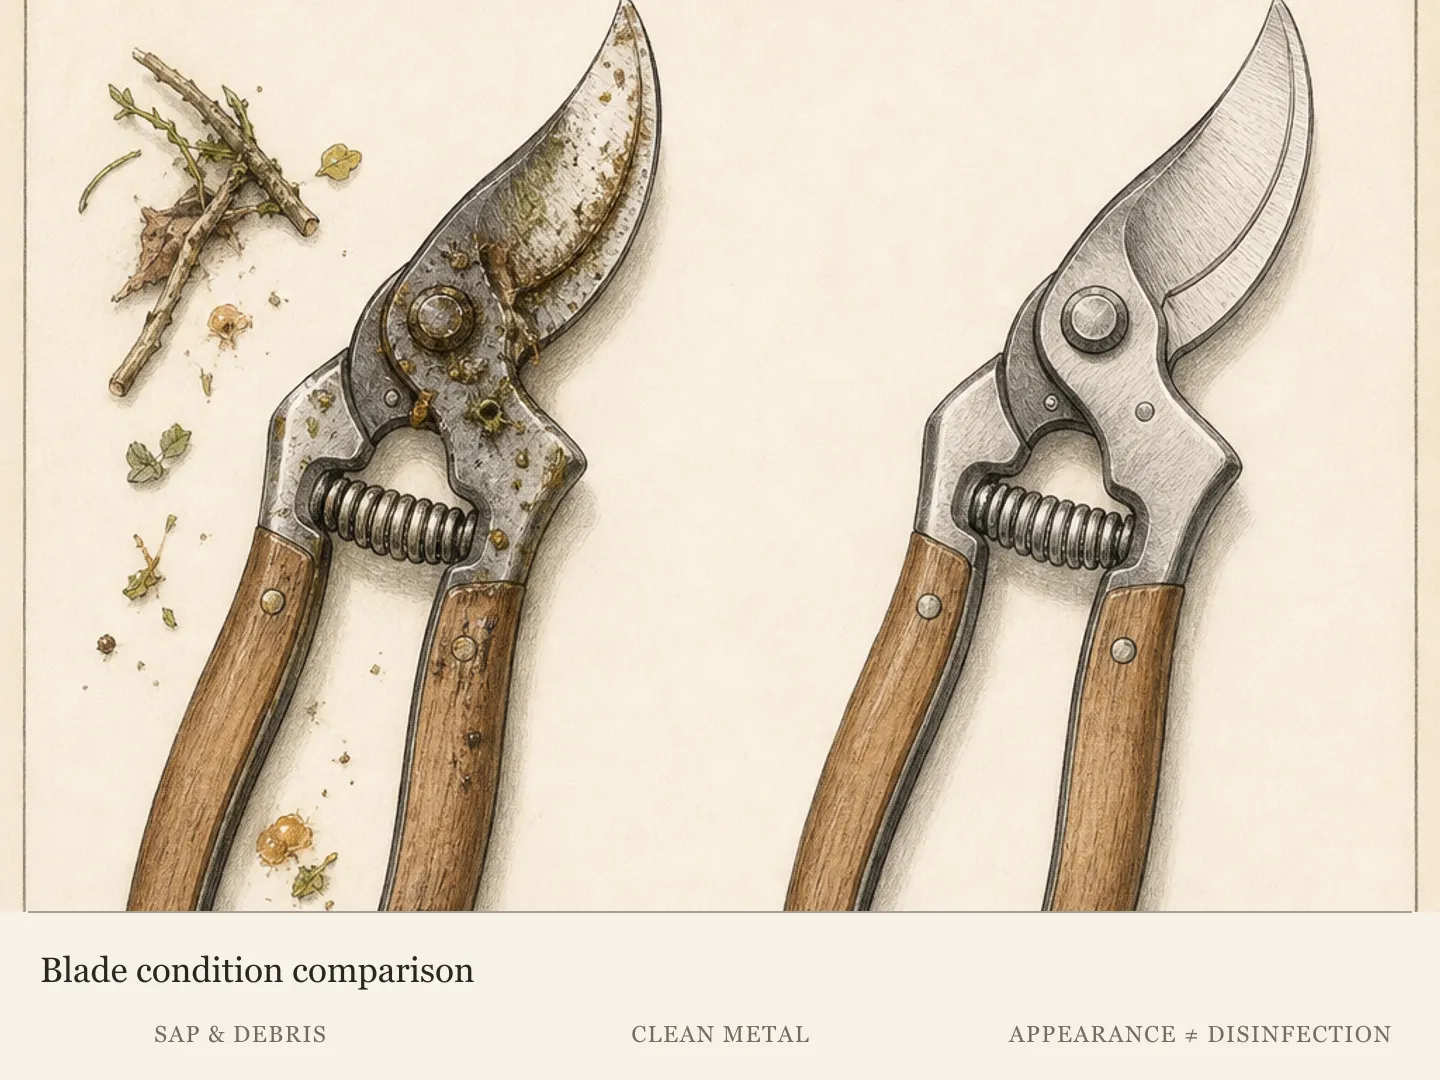
Clean pruners after suspect tissue and before moving to another rose. Tool sanitation supports a careful workflow, though splash and infected leaves are more central to black spot spread than every cut. Do not let sanitation theater replace leaf cleanup, root-zone watering, and monitoring of new growth.
Keep needed water at the root zone
Water according to soil moisture and rose need, delivering it slowly to the root zone. Avoid overhead irrigation that keeps foliage wet where practical, especially late in the day. If overhead watering is the only option, water early enough for leaves to dry and ensure the root zone is actually wetted. A damp canopy over dry roots creates both stress and disease opportunity.
Probe below mulch at several points. Roses can wilt from dry soil or root damage, and repeated shallow watering can encourage surface roots. Deep saturation in poorly drained soil also reduces root function. Stabilize moisture without keeping the crown wet. Healthy roots improve tolerance but do not cure infected leaves.
Maintain spacing and external airflow. Move encroaching annuals, tie a long cane appropriately, and avoid dense mulch against stems. Do not open the plant so severely that previously shaded leaves and canes scorch. The useful endpoint is a readable canopy that dries in normal conditions and retains enough foliage for growth.
Protect new growth when prevention is justified
Fungicides work preventively and do not erase existing spots. A recurring susceptible rose may require a locally appropriate preventive program begun before infection is widespread. Product selection, rotation of modes of action, timing, weather, coverage, local registration, and label restrictions all matter. This guide cannot supply a universal schedule.
Consult current local Extension recommendations and follow the label exactly. Confirm the product lists roses and black spot, observe reentry and pollinator precautions, and avoid drift onto open flowers and other plants. More product or more frequent use than the label allows is not stronger prevention and can injure plants or increase environmental risk.
Judge the program on marked new leaves. Old lesions remaining black do not mean prevention failed. New unspotted growth through a risk period is the useful result. If lesions continue, review timing, coverage, weather, identification, and plant stress before adding another product. A wrong diagnosis cannot be corrected by rotating fungicides.
Use pruning and feeding only for their proper roles
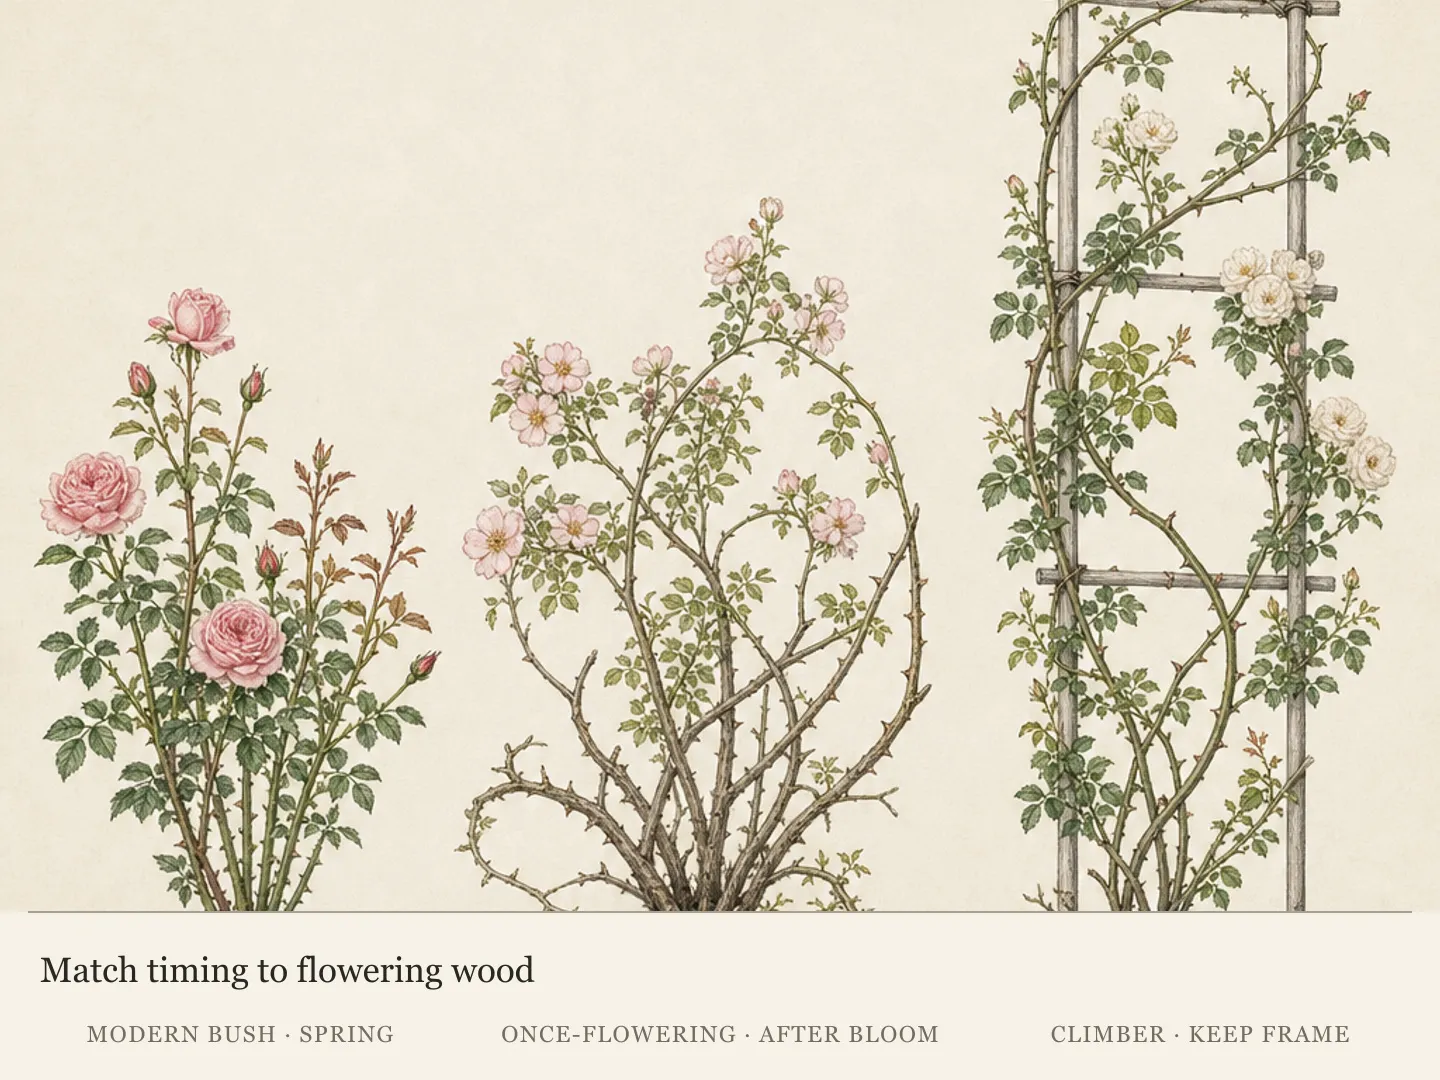
Prune according to rose class, bloom habit, and season. Remove dead, diseased, damaged, or crossing wood with proper cuts. Do not hard-prune an actively growing rose in midsummer merely to remove spotted foliage unless local guidance specifically supports it. Severe leaf loss plus pruning can reduce reserves and expose canes.
Do not feed to replace dropped leaves. Excess nitrogen can stimulate soft susceptible growth. Continue a soil-test-based or established rose fertility program, accounting for container volume and previous products. Pale leaves with black spots do not diagnose nitrogen deficiency. Let roots and healthy leaves stabilize before any scheduled feeding.
Deadhead only as the rose’s vigor and flowering habit allow. A heavily defoliated plant may benefit from reduced seed development but should not be repeatedly cut for long stems. Preserve healthy nodes and leaves. Separate flower management from disease treatment so the effect of each action remains clear.
Plan for resistance and site fit when recurrence is severe
Keep a two- or three-season record of first lesion date, defoliation, weather, products, and clean new growth. Repeated broad early loss despite sound care indicates a high-maintenance mismatch. Choose a more resistant cultivar recommended for the region rather than repeating an intensive program indefinitely. Confirm mature size, rose class, and bloom habit as well as disease claims.
Correct the site before replacement. Improve drainage, root-zone access, spacing, and light within the needs of the new rose. Remove old debris and prepare from a soil test where useful. Do not plant a new susceptible rose into the same crowded wet pocket and expect the cultivar label alone to carry the entire outcome.
Diversify rose plantings with other suitable shrubs and perennials. A mixed border can retain structure and bloom when one rose has a disease year. Preserve access and airflow around every mature footprint. The design response reduces dependence on one plant and one repeated treatment while keeping roses as valued components rather than mandatory monoculture.
Close the diagnosis when new evidence no longer fits
If marked lesions stop expanding and new symptoms appear as dry margins, holes, webbing, or one-time spray patterns, reopen the diagnosis. Keep the black spot record but follow the current symptom. Plants can carry old black spot damage and a new unrelated problem at the same time. Management should respond to the active condition.
Escalate to a diagnostic service when defoliation is rapid, stems canker, several roses decline differently, or treatment history complicates appearance. Submit fresh attached leaves at multiple stages and whole-plant images. A precise diagnosis may prevent unnecessary removal or identify a separate disease that requires different sanitation.
End the season by collecting affected leaves and recording the last clean and spotted growth. Review the plant again as new leaves emerge next year. The aim is not a spotless archive of old foliage. It is a rose that retains enough healthy new canopy and flowers under a management plan proportionate to its value and susceptibility.
Audit nearby roses without treating them as one canopy
Inspect each rose separately for cultivar, lesion stage, lower-leaf pattern, and new growth. One susceptible plant may defoliate while a neighboring rose remains clean. Keep tools and samples labeled by plant. A shared bed does not mean every dark spot has the same diagnosis or severity.
Map splash paths from sprinklers, walls, and dense companions. Adjust irrigation and spacing around the affected rose while preserving the healthy plant’s conditions. Do not prune the clean rose to match an airflow intervention aimed at its neighbor. Compare new leaves across both as an untreated site reference where practical.
If several cultivars show synchronized progression, bring representative samples from each to local diagnosis. Record product coverage and timing separately. The comparison can distinguish a broad weather-driven disease period from one plant’s susceptibility or a local wet pocket.
Protect the rose after partial defoliation
A rose that has lost many leaves has reduced capacity and more exposed canes. Maintain stable root-zone moisture, avoid high nitrogen, and postpone unnecessary transplanting or structural pruning. Temporary relief from extreme reflected heat may be appropriate without moving the plant into deep shade that further reduces vigor.
Keep remaining healthy leaves even when the outline looks uneven. Support long canes and remove decaying petals from the center. Allow new shoots to harden under appropriate light. A sudden cosmetic cut can compound disease defoliation and make the plant more dependent on soft replacement growth.
Adjust flowering expectations. Remove developing hips when seed is not a goal, but do not take repeated long-stem flowers from a weakened canopy. Mark new leaves and judge recovery by retention and firm shoots. Resume ordinary deadheading only as vigor returns.
Prepare a clean spring start from the winter record
After leaf fall, collect affected debris and inspect canes according to local rose care. Keep mulch moderate and do not bury the crown or graft. Record the last lesion date and any clean late growth. Winter sanitation supports a lower local starting load but does not guarantee exclusion next spring.
Before budbreak, confirm the preventive plan for a repeatedly susceptible rose. Obtain current local product, timing, and resistance-rotation guidance. Repair sprayers and calibrate only if treatment is justified. Do not carry a leftover schedule forward after changing cultivar, site, or diagnosis.
Mark the first new leaves and begin observations before symptoms are widespread. Early clean growth provides the baseline that midsummer records often lack. If the rose remains healthy, avoid adding treatment merely because the previous year was severe; follow the risk and locally advised program.
Define the point at which treatment can stop
A preventive program should have a stated seasonal endpoint based on local disease risk, product label, plant growth, and weather. Do not continue spraying because old spots remain visible or because supplies are left. Mark the last treated healthy leaves and watch whether later growth remains functional as the season changes.
Record every application, rainfall interval, and new lesion date. If clean growth holds, stop according to local guidance and maintain sanitation. If lesions return, review timing and diagnosis before resuming. The record supports a narrower program next year and reduces unnecessary exposure.
Remove and store equipment safely, dispose of rinsate and containers according to the label, and keep products in original packaging. Treatment is complete only when the garden and equipment are left safe, not when the final spray tank is empty.
Keep one untreated observation shoot where practical
On a rose whose health and disease pressure permit it, mark one small untreated shoot apart from the preventive comparison. Photograph the same leaves and record weather. This does not replace a formal trial, but it can reveal whether seasonal pressure declined across the plant while treatment timing was being credited for every clean leaf.
End the comparison if disease becomes consequential or the product label and local program require complete coverage. Plant health outranks the experiment. Keep the limitation in the record so a small home observation is not presented as proof that a product works or fails generally.
Diagnosis
Rose leaves develop enlarging black spots with irregular or fringed margins, surrounding yellowing, and premature leaf drop, often beginning on lower or interior foliage and recurring on new growth.
- Check
- Photograph early and advanced lesions on attached upper and lower leaves, map canopy position, and mark a clean shoot. Track lesion expansion, yellowing, leaf drop, and new spots after rain or irrigation. Preserve a fresh sample and cultivar record for local confirmation when needed.
- Cause
- Rose black spot is infecting susceptible foliage under favorable moisture and temperature conditions. Local infected leaves and repeated wetness contribute to recurrence.
- Action
- Collect fallen infected leaves, remove heavily affected foliage selectively, water the root zone, preserve airflow and healthy leaves, and follow local preventive fungicide guidance only when recurrence and plant value justify it. Judge success on marked new growth, not old spots.
Leaf edges or exposed patches turn dry tan or brown after heat, wind, drought, or root stress, without the expanding black fringed lesions and yellow halos found on paired leaves.
- Check
- Compare exposed and sheltered foliage, review heat and wind, and probe the root zone at several points. Look for continuous crisp margins and absence of new black fringed lesions. Mark injury boundaries and judge only new tissue after moisture and exposure are corrected.
- Cause
- Environmental scorch or water-balance failure is damaging tissue. Existing brown areas cannot recover, and the root-zone or exposure problem requires correction.
- Action
- Close the black spot route for the injured tissue. Stabilize root-zone moisture, protect from abrupt harsh exposure, retain functioning leaves, and avoid unnecessary fertilizer or pruning. Existing scorch remains visible; the checkpoint is a halt in new margin injury.
Leaves show holes, skeletonization, stippling, mines, webbing, or visible insects rather than lesions that expand within intact tissue.
- Check
- Inspect both surfaces and stems at several times for insects, larvae, mites, webbing, frass, mines, and fresh feeding edges. Retain a specimen or clear photograph. Do not use holes with darkened wound edges as proof of black spot.
- Cause
- An insect or mite is feeding on the rose. The active animal and feeding pattern must be identified before selecting a management route.
- Action
- Follow a pest-specific integrated management plan after identification. Use direct removal or least-disruptive controls where appropriate and protect pollinators. Keep black spot sanitation separate if confirmed lesions also exist.
Spots follow a recent foliar spray pattern or exposed droplets, remain limited to treated tissue, and do not progress on marked untreated leaves.
- Check
- List every recent product, concentration, date, temperature, and treated area. Compare droplet geometry with marks and monitor an untreated shoot. A one-time fixed application pattern supports injury; progressive lesions and yellowing on untreated growth weaken it.
- Cause
- Phytotoxicity or residue from a foliar product has injured or marked the treated surface. Timing, droplet distribution, product history, and clean untreated growth support this route.
- Action
- Stop the suspected product, preserve the label and application record, and seek local advice if injury is severe. Do not counter one chemical injury with another foliar mixture. Maintain normal root care and compare only leaves that developed after exposure ended.
A rose has broad dieback, stem cankers, root decline, or rapid defoliation involving several lesion types that do not remain coherent with black spot alone.
- Check
- Collect whole-plant photographs, root-zone observations, several fresh symptom stages, and the full treatment history. Seek a plant clinic when stem lesions, root failure, rapid mixed defoliation, or different responses among nearby roses make field diagnosis unreliable.
- Cause
- A mixed or different disease, planting problem, or root disorder is causing wider decline. Black spot may be present but cannot explain the complete plant pattern.
- Action
- Pause broad treatment and obtain a diagnosis. Correct planting depth, drainage, roots, cankers, or another identified disease under current guidance. Remove only clearly dead or hazardous tissue and keep samples intact before sanitation changes the evidence.
One rose repeatedly loses most foliage to confirmed black spot early in the season while nearby cultivars in similar care retain substantially cleaner canopies.
- Check
- Compare multiple seasons of lesion onset, defoliation, new-leaf retention, treatment timing, and neighboring cultivar response. Confirm site conditions and diagnosis with fresh samples. Verify that the affected rose, not a wetter pocket or irrigation fault, consistently carries the severe pattern.
- Cause
- High cultivar susceptibility is interacting with local disease pressure. The recurring loss makes the plant a disproportionate maintenance burden even after sanitation, root-zone watering, spacing, and correctly timed prevention.
- Action
- Replace during a suitable season with a more resistant locally recommended rose or a different shrub that serves the design role. Correct drainage, spacing, and irrigation before planting, diversify the bed, preserve mature access, and begin a new record rather than transferring the old treatment schedule automatically.
Related reading
Sources
- Rose: Identify and Manage Problems. University of Maryland Extension. Source record · Accessed 2026-08-19.
- Managing Diseases and Pests. University of Illinois Extension. Source record · Accessed 2026-08-19.
- Rose Diseases Outdoors. Penn State Extension. Source record · Accessed 2026-08-19.