Grow · empty garden pot winter storage
Store Empty Garden Pots to Prevent Freeze Cracks
Empty, dry, sort, and stabilize unused garden pots before freeze-thaw cycles turn trapped moisture and leftover soil into cracked containers.
Published Last updated
In this guide
Separate empty-pot storage from living-container protection
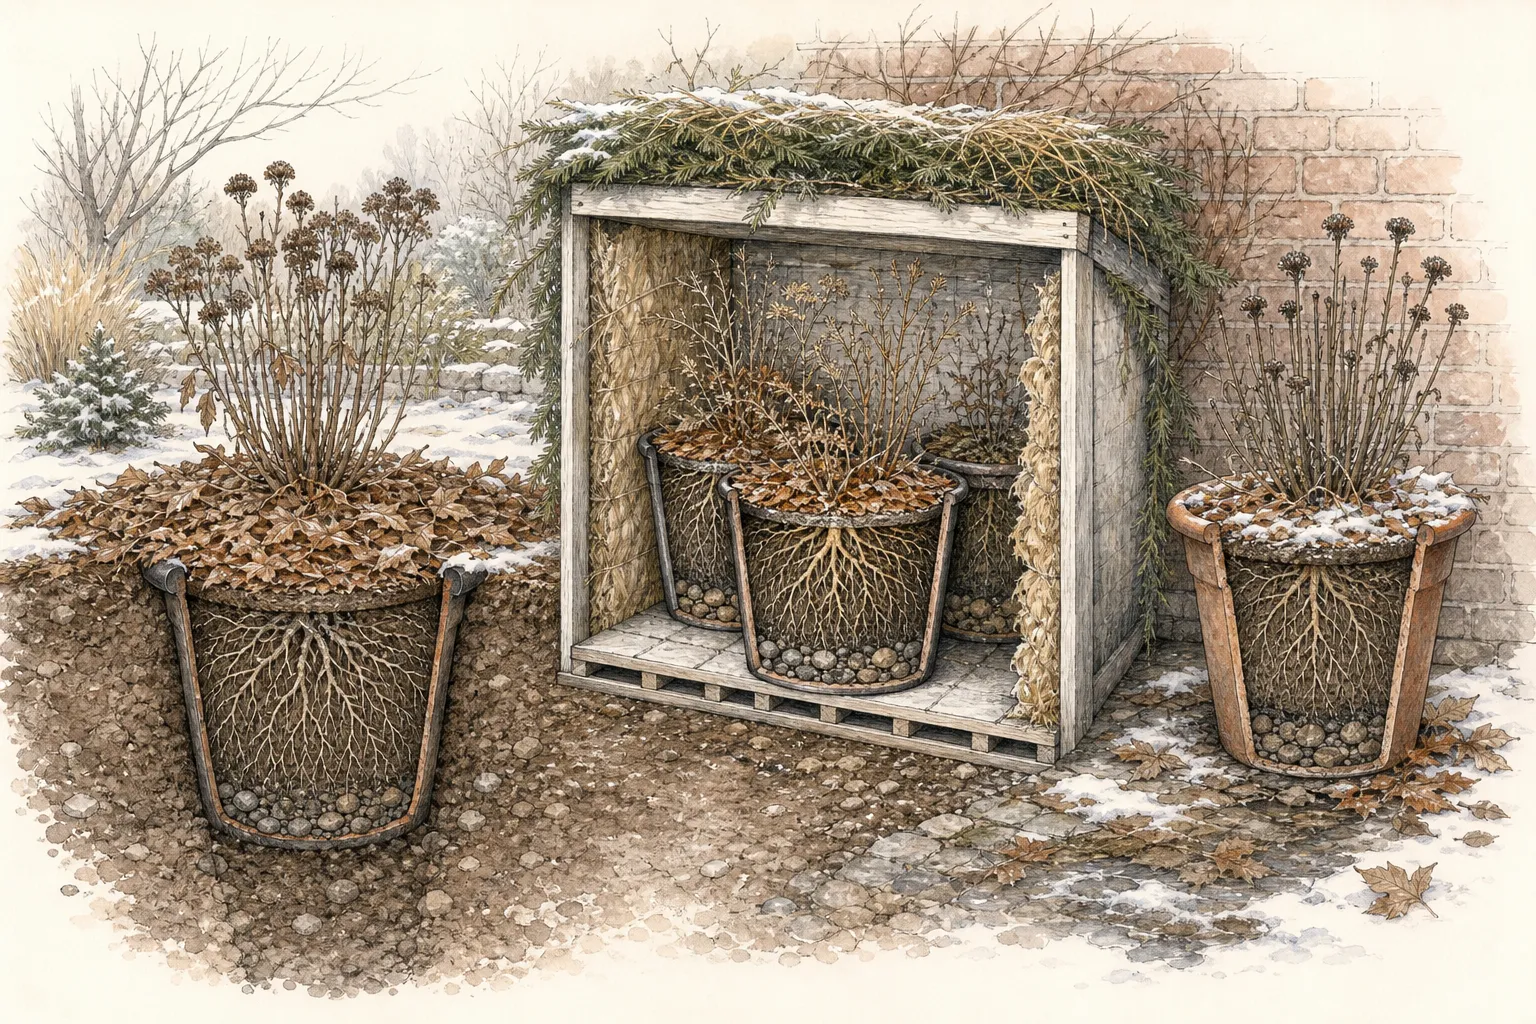
This task is for containers no longer carrying a plant. A pot with a perennial, shrub, bulb planting, or intentional winter arrangement needs a plant-and-root survival plan; emptying it would destroy the planting. Make two groups before cleanup: truly unused pots to be emptied and stored, and planted containers to be handled under species, material, climate, and root-hardiness guidance. The labels prevent an efficient cleanup from becoming an accidental disposal.
Illinois Extension advises emptying and storing most containers because soil left in them through winter can contribute to damage, while noting that very large concrete or wood planters may be exceptions to ordinary moving and emptying practice. The distinction is practical as well as horticultural. A small unused terracotta pot can be made dry and sheltered; a massive planted trough may require drainage checks and in-place protection rather than lifting.
Inventory material before choosing storage. Separate unglazed terracotta and other porous earthenware, glazed ceramic, concrete, wood, plastic, fiberglass, and metal. Virginia Cooperative Extension identifies porous terracotta as vulnerable to cracking or shattering in freezing weather, while nonporous materials avoid that particular moisture-absorption problem. Glaze, coating, thickness, drainage design, and existing damage still matter, so material is a risk class rather than a guarantee. Photograph an unreadable maker's mark or unusual construction before shelving. It may help recover care information without repeatedly handling a fragile pot.
Inspect each empty candidate before adding weight or water. Look at the rim, handles, feet, base, drainage hole, and transitions between thick and thin walls. Mark cracks, loose glaze, flaking surfaces, rot, bowed plastic, and sharp metal. A damaged pot may be kept for a safe nonstructural reuse or discarded according to local rules, but it should not be hidden in a stack where the flaw will be rediscovered during a winter lift.
Understand why empty and dry are separate requirements
Removing the plant does not remove the winter risk. Soil and roots can hold water against the wall, plug the drainage opening, and freeze as a solid mass. Illinois Extension warns that most containers can be damaged when soil is left in them over winter and recommends emptying and storing them upside down. The first job is therefore to remove retained growing medium and expose the drainage path.
Porous pot walls can also retain moisture after the soil is gone. University of Nevada, Reno Extension notes that repeated freezing and thawing is especially hard on earthenware, ceramic, and terracotta containers and advises emptying unused pots. Virginia Tech explains that terracotta absorbs water and may crack or shatter during freezing weather. An empty pot washed and left wet outdoors is still not ready for a freeze.
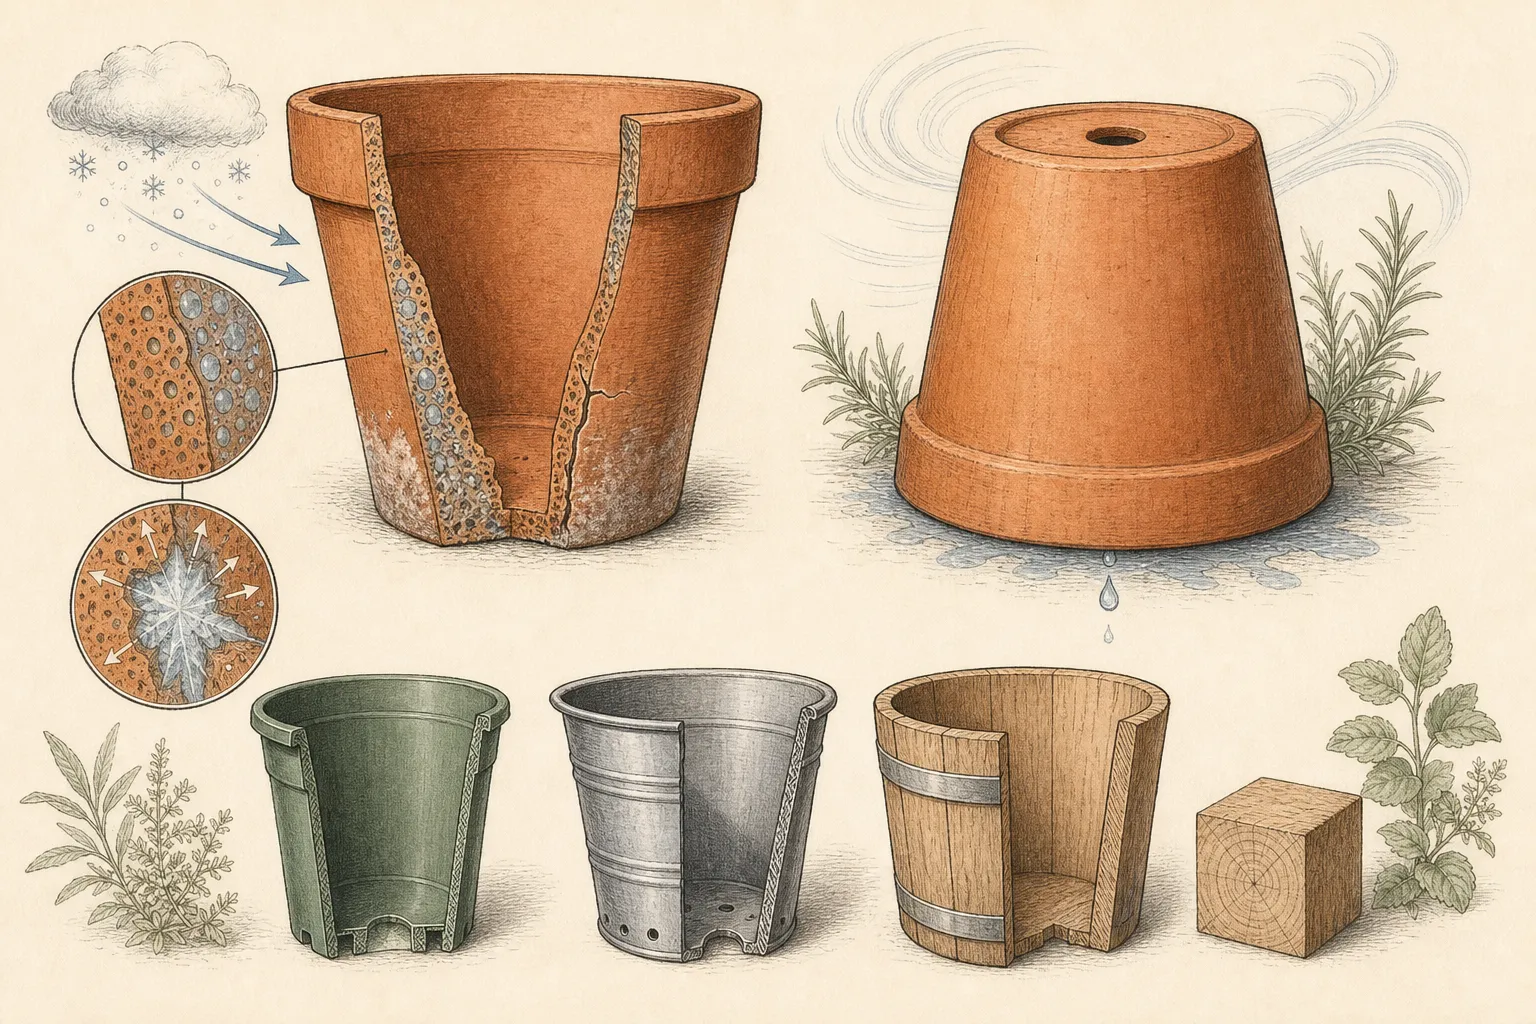
The Royal Horticultural Society distinguishes frost-proof terracotta from pots described only as frost-resistant and notes terracotta's tendency to crack in cold climates. Read the manufacturer's actual claim when it remains available, but do not treat a label as permission to leave a pot waterlogged. Drainage and storage conditions continue to matter, and unknown older pots should receive conservative handling.
Interrupt the chain at several points: remove soil, clear the hole, let the wall and base dry, keep new precipitation out, and prevent the pot from standing in water. These actions do not make fragile pottery indestructible; they reduce avoidable exposure. The useful standard is visible emptiness plus completed drying and protected storage, not a quick inversion while a saturated soil plug remains inside.
Empty, inspect, and dry one pot at a time
Work before the soil mass freezes. Support the pot at its base, tip out loose mix onto a tarp or into an appropriate reuse or disposal container, and ease compacted material away with a plastic or wooden tool that will not strike the wall. Do not pound a ceramic rim or pry against a drainage hole. If roots bind the mass, cut the root ball into manageable portions rather than forcing the container to flex.
Brush away dry residue and open the drainage hole from both sides without enlarging it. Where the pot and workspace allow rinsing, use ordinary water to remove remaining soil and then manage the runoff. This article does not prescribe a universal chemical disinfection treatment; disease history, material compatibility, label directions, and local plant-health guidance would determine whether a separate sanitation step is justified.
Inspect again when the surface is clean enough to read. Moist soil can disguise a hairline at the base, and mineral crust can hide a glaze edge. Set questionable pots apart and let them dry before deciding. If a crack changes under gentle handling, the pot sounds unstable, or a rim sheds sharp flakes, stop using it as a load-bearing container. Photograph unusual damage if replacement, warranty, or future material choice matters.
Dry on a stable rack or protected surface with air reaching the base and opening. Do not declare the pot dry because only the rim has changed color. Thick feet, double walls, attached saucers, and porous bases can remain damp longer. Keep the drainage opening unobstructed, turn the pot as needed, and move it to winter storage only after the whole container has had time to dry. Keep wet arrivals physically separate from finished pots. A simple drying zone prevents a rinsed container from being slipped into the protected group merely because shelf space is available.
Store by material, weight, and exposure
Give porous and fragile containers the most protected location available: dry, sheltered from precipitation, and not subject to standing water. A shed, garage, covered utility area, or sound enclosed cabinet can work when it stays suitably dry and the floor or shelf is stable. Illinois Extension specifically recommends storing emptied containers upside down. Use that orientation where it keeps precipitation and debris out without loading a delicate rim unsafely.
Do not assume every pot benefits from the same inversion. A flared or decorated rim may be the weakest bearing surface, and an attached saucer can trap water when turned. Support the pot on its strong points and maintain an open drainage path. The objective is dry protected storage, not obedience to an orientation that makes a particular shape unstable. Record exceptions so a helper does not later flip them onto a fragile edge.
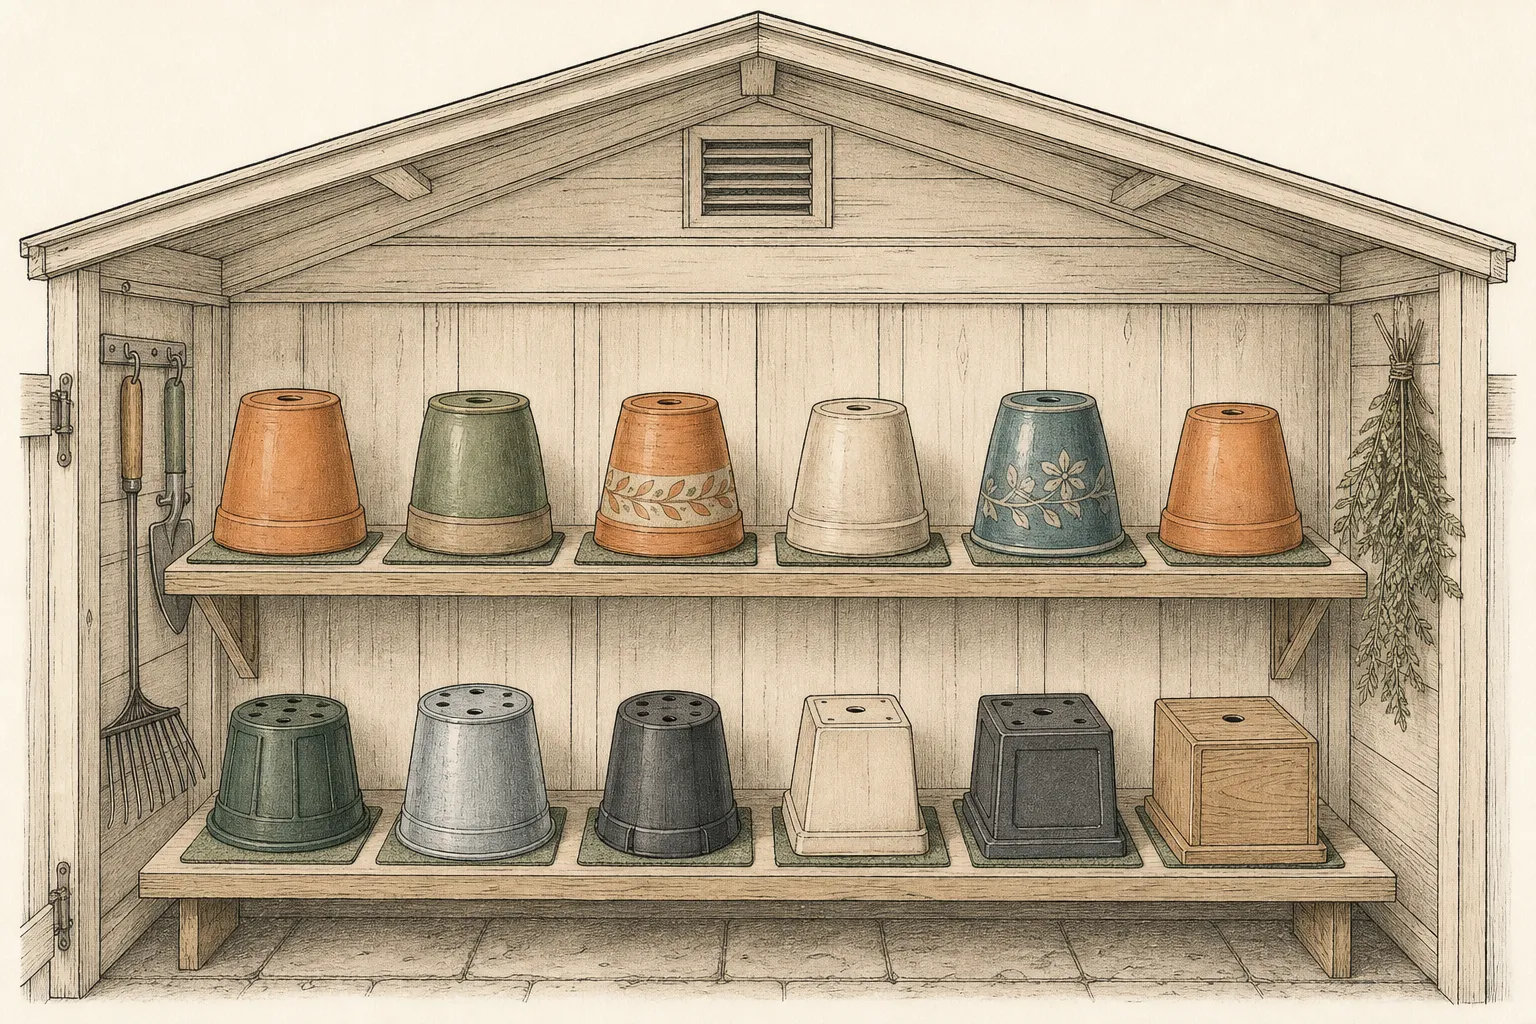
Keep heavy concrete, stone-like composite, and large wooden containers low or in place. Illinois Extension notes that large concrete and wood pots are often handled differently from ordinary containers. If an empty heavy planter remains outdoors, remove soil when practical, confirm unobstructed drainage, take away saucers that collect water, and protect it according to manufacturer and material guidance. Do not attempt a hazardous move solely to make the storage area uniform.
Plastic, fiberglass, and metal are not subject to porous-terracotta absorption in the same way, but they still need orderly storage. Unsupported plastic can warp or become brittle, metal edges can cut, and any container can collect water or become windblown. Clean, dry, and stabilize them; keep lightweight pots secured without crushing them under heavy ceramic pieces. Store matching components nearby without blocking the pot's drainage opening.
Build a stable shelf instead of a hidden stack
Place the heaviest sound pots on the lowest rated shelf or directly on a dry stable floor. Keep each footprint fully supported and inside the shelf edge. Fragile pots are safest when visible, not tucked behind a tower that must be dismantled blindly. Leave enough hand space to lift from the base and enough visual space to notice water, pests, or a new crack during winter checks.
Avoid tight nesting of valuable terracotta or glazed pots unless the shapes are designed for it and each contact point is protected. A small rim chip can wedge two pots together, while unseen grit can scratch glaze. Separate fragile containers with stable nonabsorbent or fully dry padding that does not seal in moisture. Never force a nested pair apart in cold conditions; bring it to a controlled workspace and support both pieces.
Keep saucers, feet, hangers, and labels organized separately. The RHS advises removing saucers before winter so containers do not stand in retained water. Once empty and dry, saucers can be stored on edge or in a shallow bin that will not be overloaded. Do not balance them inside pots where they can strike the wall when the container is moved.
Make the storage zone resistant to ordinary bumps. Keep pots clear of vehicle paths, swinging doors, falling tools, snow-slide areas, and shelves that vibrate. Secure lightweight containers against wind if the storage is open-sided. A freeze crack is only one winter failure; a dry pot can still be lost to a falling shovel or an unstable pile. Leave the most frequently needed items near the entrance so winter access does not require reaching over pottery. Put an inventory note at eye level rather than taping labels to porous walls or delicate glaze.
Audit after storms and before spring planting
Check the storage area after wind-driven rain, roof leaks, snow intrusion, or a major freeze-thaw sequence. Look for new moisture below pots, water collected in odd profiles, shifted padding, sagging shelves, and containers pushed against one another. Correct the exposure only when access is safe. If ice has formed around a pot, let it thaw rather than striking or twisting the container free.
Keep an inventory of questionable pots. A hairline may remain stable, enlarge, or reveal itself only after the pot warms. Do not test it by filling immediately with heavy wet mix. Support the base, examine it in good light, and retire containers whose structural reliability is uncertain. Decorative reuse should not place a failing pot overhead, on a railing, or where shards could fall into a path.
Before spring planting, return saucers and feet only after confirming drainage. Check that the chosen pot is large enough for the new plant, that the opening is clear, and that manufacturer-specific limits still apply. 'Survived storage' does not mean 'suitable for any plant.' Match material, volume, weight, exposure, and irrigation plan to the next use.
Close the season by noting which materials and shapes demanded the most work. Repeatedly cracked low-fired terracotta, attached saucers that trapped water, or containers too heavy to move safely may guide future purchases. The winter storage system succeeds when it protects pots and simplifies spring setup—and when the collection gradually shifts toward containers the garden can drain, handle, and house responsibly.
Record the shelf location of valuable or matched sets. Spring retrieval should not require moving every heavy pot or separating fragile containers during a hurried planting session.
Steps
- Level
- easy
- Time
- About 1 to 3 hours, depending on the number and size of containers
- Tools
- stiff dry brush, plastic scraper, hose or utility sink where appropriate, work gloves, hand truck or plant caddy for large pots
- Materials
- absorbent drying surface or rack, shelf liners or individual padding for fragile rims, weatherproof material labels, shallow bin for intact saucers and pot feet
- 1Divide planted from truly empty pots
Tag living containers for plant-specific winter care and remove them from the storage workflow. Sort unused pots by material, size, weight, attached components, manufacturer frost claim, and existing damage. Keep large concrete or wood containers in a separate in-place decision rather than treating every vessel as safely movable.
- 2Empty before the mix freezes
Support each pot from the base and remove soil and roots in manageable portions. Use a nonmetallic scraper without striking the rim or prying against the drainage hole. Stop if a crack opens or the container becomes unstable, and contain soil and fragments so the work area remains safe.
- 3Clear drainage and read the surface
Brush away residue, open the existing drainage path, and rinse with ordinary water where appropriate. Manage runoff rather than sending soil to a storm drain. Inspect the rim, handles, walls, feet, glaze, and base once they are visible, setting cracked or flaking containers aside for a separate keep-or-discard decision.
- 4Dry the entire container
Set the pot on a stable protected rack or surface with air reaching its base and opening. Allow thick, porous, double-walled, or attached-saucer forms enough time to dry beyond the visible rim. Keep fresh rain and standing water away; empty is not winter-ready until retained moisture has also been addressed.
- 5Choose a material-appropriate position
Prioritize dry sheltered storage for terracotta, earthenware, and fragile glazed ceramic. Store upside down when that excludes water without loading a weak rim; otherwise support the pot on strong points with drainage open. Keep large or heavy containers low or safely in place and stabilize lightweight materials without crushing them.
- 6Separate, support, and secure
Put heavy pots on rated low shelves, keep fragile rims visible, and avoid forced tight nesting. Use dry stable padding where containers might touch, organize saucers and feet separately, and keep the whole group out of doors, vehicle paths, falling-tool zones, wind, and roof runoff.
- 7Reinspect before filling in spring
After winter exposure and again before planting, check for moisture, new cracks, loose glaze, unstable shelves, and blocked drainage. Let frozen pots thaw naturally. Retire containers whose structure is uncertain, then match each sound pot to its next plant, load, exposure, and watering plan instead of assuming storage survival proves universal suitability.
Related reading
Sources
- Growing Plants in Containers. University of Nevada, Reno Extension. Source record · Accessed 2026-08-20.
- Overwintering Plants in Containers. Illinois Extension. Source record · Accessed 2026-08-20.
- Growing Plants in Containers. Royal Horticultural Society. Source record · Accessed 2026-08-20.
- Choosing a Container for Planting. Virginia Cooperative Extension. Source record · Accessed 2026-08-20.