Grow · container perennial root zone winter protection
Protect Container-Grown Perennials Through Freeze-Thaw
Overwinter hardy ornamental perennials in containers by protecting the root zone, stabilizing temperature, preserving drainage, and inspecting dormant plants without forcing early growth.
Published Last updated
In this guide
- Audit every plant and container before cold arrives
- Choose one complete overwintering method
- Build a cold, stable holding area
- Manage moisture while roots are dormant
- Inspect without waking or injuring the plant
- Release protection gradually in spring
- Use the outcome to improve the collection
- Separate survival protection from forced growth
- Steps
Audit every plant and container before cold arrives
Container winter survival begins with plant identity and local climate, not a generic instruction to wrap pots. Record genus, species, cultivar, nursery source, stated hardiness, current vigor, planting date, pot dimensions, material, drainage, and whether the plant is normally evergreen or dormant. A perennial rated hardy in the ground may lose roots when the small container volume reaches lower temperatures than surrounding soil. Borderline-hardy and newly planted material deserves more protection than an established locally adapted clump.
Inspect crowns and roots before hiding them. Remove only clearly diseased, decayed, or infested material according to current guidance; healthy standing stems can help trap snow and mark the crown. Check whether the plant sits at the correct grade, the medium has pulled away from the pot, roots circle densely, or water stands after irrigation. Do not repot or divide automatically in late autumn. Major disturbance can leave fresh roots poorly established just as growth is shutting down.
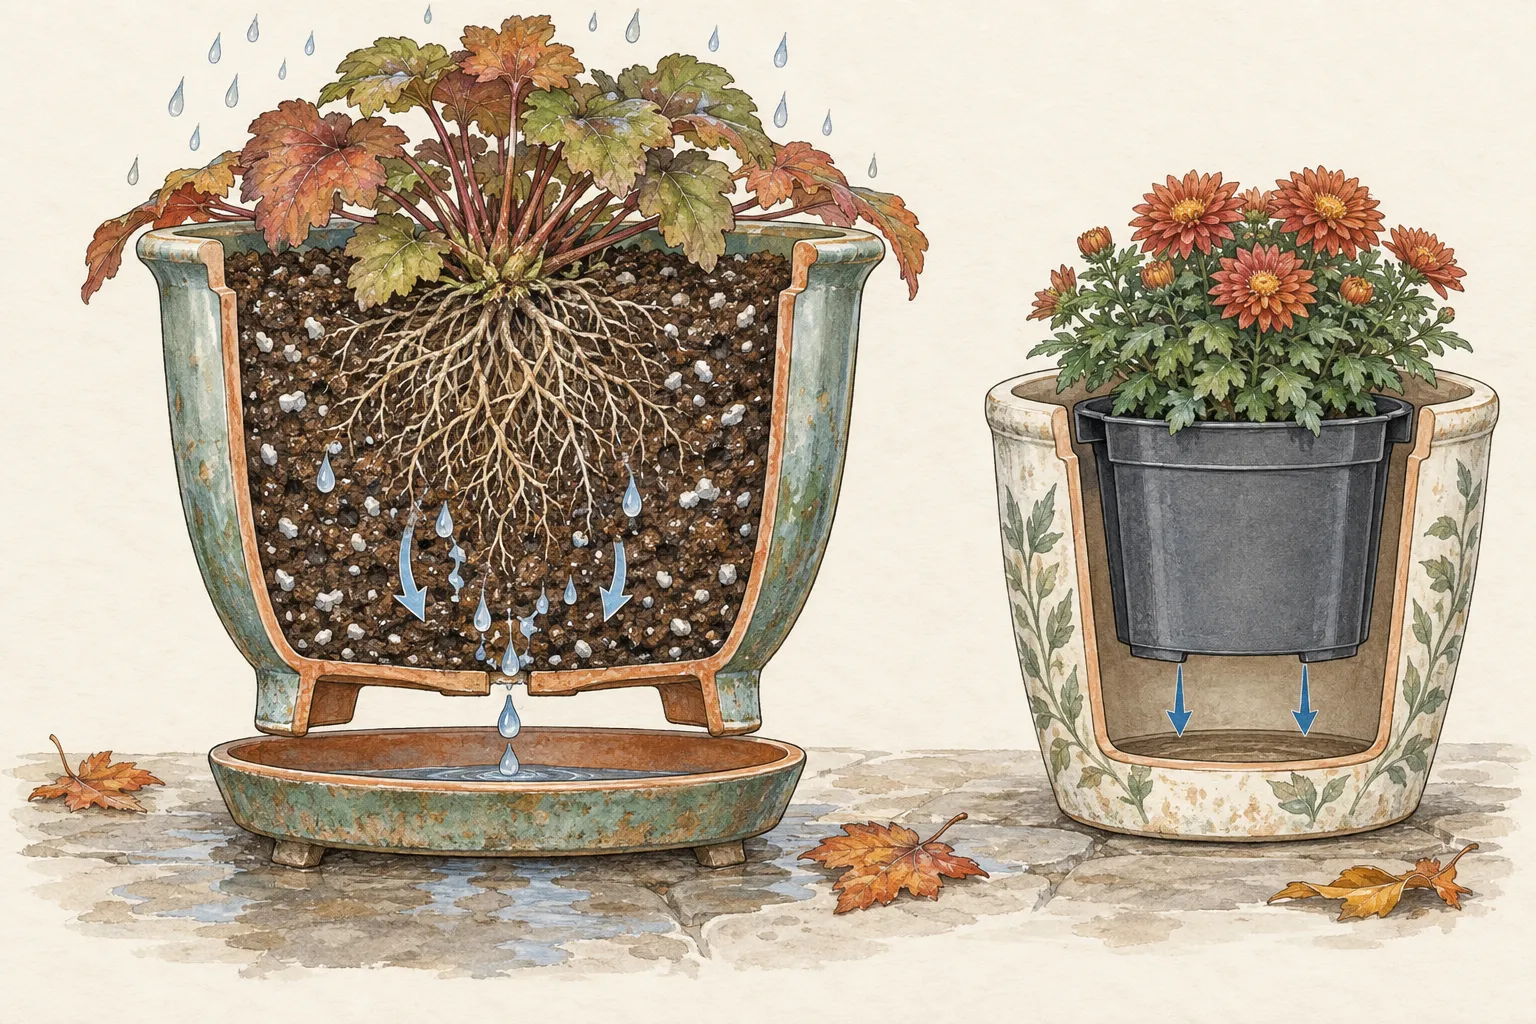
Assess the vessel as a structure. Confirm that its material can tolerate freezing, every drainage hole is open, feet or saucers do not trap water, and cracks have not begun around seams or rims. Vulnerable terracotta and decorative ceramics may need to be emptied and stored rather than trusted outdoors. A large frost-safe pot can still fail if water freezes in a blocked base. Label each plant permanently before pots are grouped or buried, because dormant crowns are easy to confuse.
Choose one complete overwintering method
Burying or heeling pots into garden soil after dormancy and before the ground freezes is one reliable method described by Iowa State Extension. Soil buffers the container walls and root ball from extreme air temperature. Choose a well-drained holding bed without valuable roots or spring bulbs, set pots at the appropriate level, fill gaps with soil, and preserve drainage. Do not bury a pot in a low basin where winter rain collects or where it will be struck by a snowplow.
A cold unheated structure can work when its temperature remains within a suitable dormant range and does not swing warm on sunny days then plunge at night. Iowa State describes moderately cold storage and emphasizes moisture monitoring. Measure the actual structure through representative weather before relying on it. An attached garage, shed, porch, or cold frame is not automatically safe; exhaust, salt, darkness, rodents, roof leaks, and rapid warming may make one corner unsuitable.
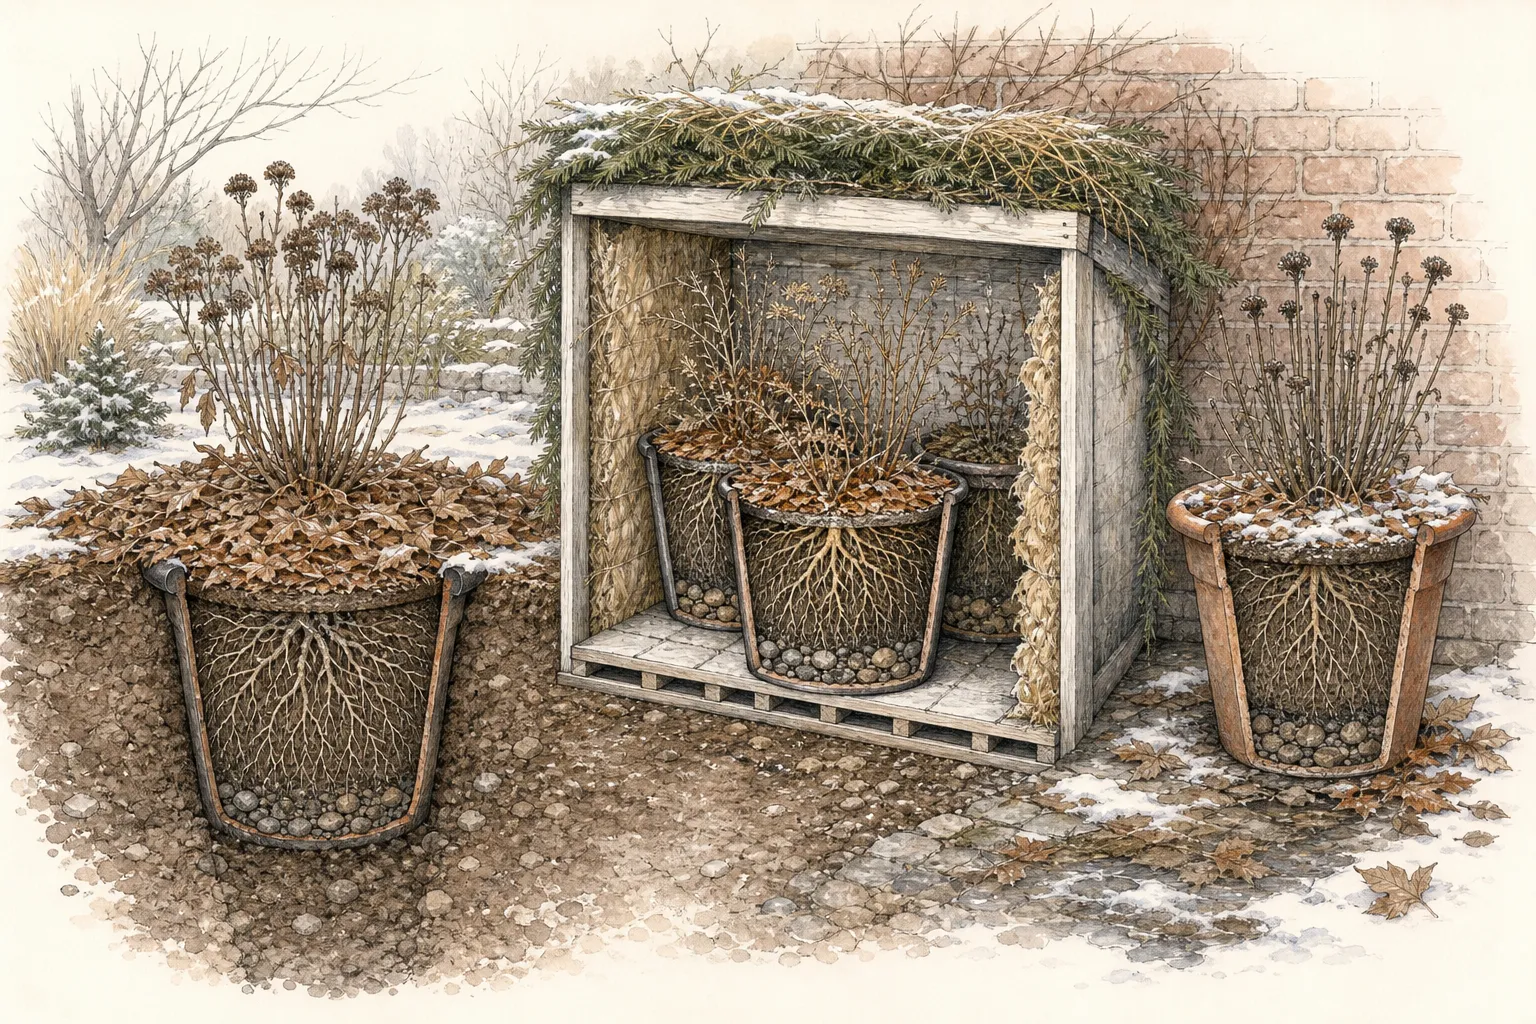
For large frost-safe pots that cannot be moved or buried, create an above-ground protection plan based on local guidance: group containers, reduce wind exposure, insulate the root zone with a breathable dry system, and keep tops and drainage open. Wrapping foliage and pot together in impermeable plastic traps moisture and solar heat. Decorative bubble wrap visible on the outside is not a complete method if the base remains exposed and the crown alternates between saturation and premature warming.
Build a cold, stable holding area
Select shade or winter shelter that prevents repeated warming without creating chronic wetness. North or east exposure may remain more stable than a south wall, but local wind, snow, roof runoff, and building heat matter. Map water flow during a thaw. Keep pots away from dryer vents, vehicle exhaust, deicing piles, reflective glass, and places where falling ice can strike. The holding area should be cold enough for dormancy, accessible for inspection, and secure from tipping.
Group pots close enough to reduce exposed wall area while leaving drainage outlets and labels reachable. Put the most vulnerable small containers toward the protected center and heavier stable pots around the edge only if they do not form a water barrier. Preserve a firm maintenance aisle; stepping between pots on frozen or saturated soil damages the site and makes emergency checks unsafe. Do not stack pots or place one on another plant’s crown to save footprint.
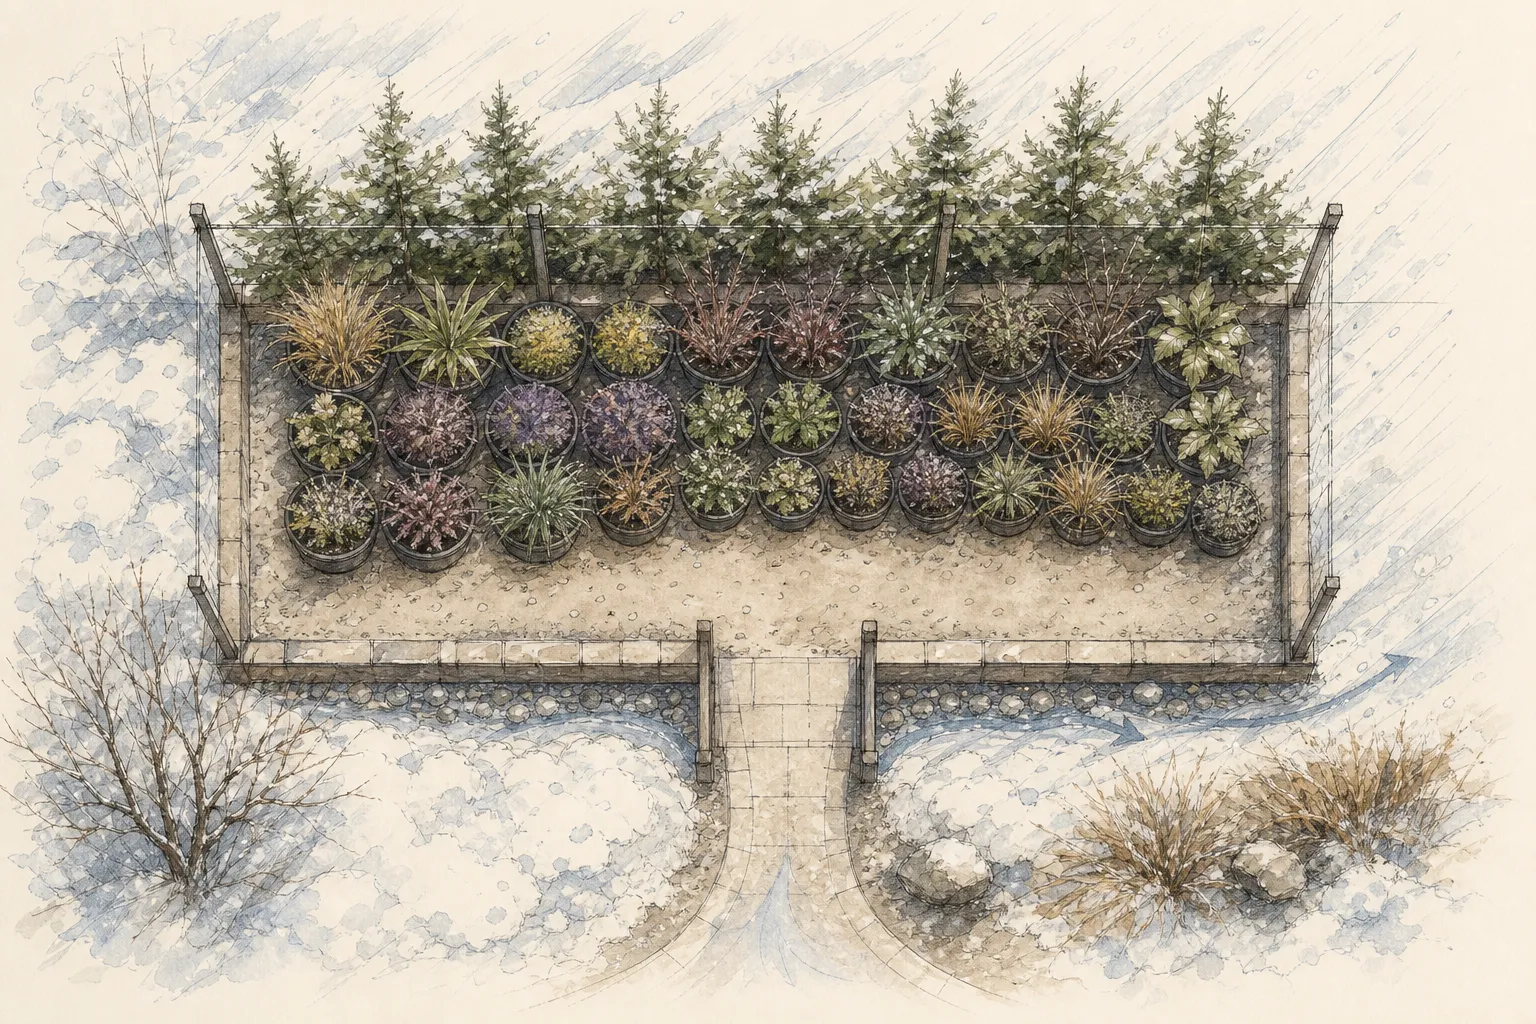
Add insulation after plants are dormant and conditions are appropriately cold, following regional guidance. Loose straw, pine needles, or another recommended material can fill a ventilated enclosure around pots; compacted wet leaves can mat and exclude air. Keep insulating material from blowing away without sealing the top. Protect woody stems from abrasion and tie only loosely if necessary. Animal guards must not become a tight humid sleeve around the crown or a trap that cannot be inspected.
Manage moisture while roots are dormant
Water thoroughly before the medium freezes if autumn has been dry, then allow drainage. Once a buried root ball and surrounding soil are frozen, routine irrigation is usually unnecessary; in an unheated structure above freezing, moisture may need periodic attention. Check below the surface and judge pot weight rather than wetting on a fixed date. Dormant roots need protection from complete desiccation, but cold saturated medium deprives roots of oxygen and encourages crown and root decay.
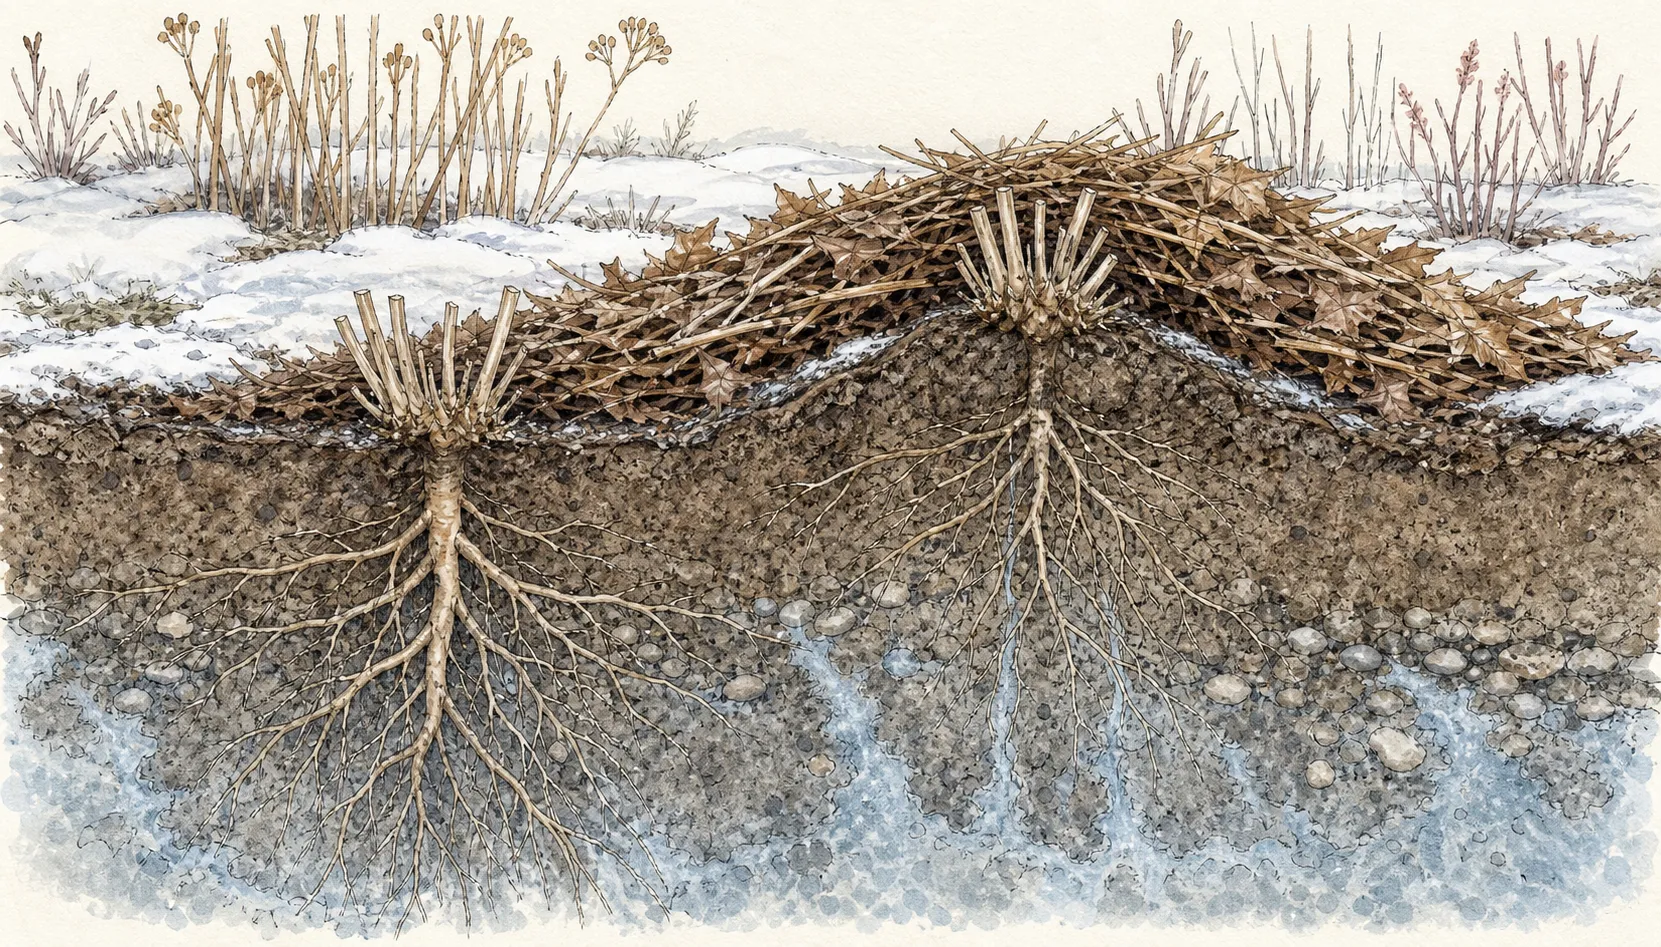
Use snow thoughtfully. A stable snow cover can insulate, but roof piles and plowed banks can crush stems, block drainage, hold contaminated salt, and delay thaw unevenly. Do not shovel dense street snow onto valuable containers. After rain on frozen medium, confirm that water can leave the base and that an outer cover has not sagged into a reservoir. Raise or correct the shelter, not the plant’s grade, when runoff changes.
In a structure, inspect condensation and air quality as well as the mix. A sealed plastic wrap may keep the surface wet while the interior root ball dries irregularly. Open the enclosure during safe weather if the system is designed to vent, and remove standing water promptly. Keep hoses and cans from freezing where they create a trip or burst risk. Record every watering, temperature reading, and abnormal smell; memory over several quiet winter weeks is unreliable.
Inspect without waking or injuring the plant
Schedule brief checks after major thaws, wind, ice, or building temperature changes. Look for tipped pots, exposed walls, displaced insulation, blocked drainage, animal damage, gnawing, soft crowns, mold, shriveled evergreen foliage, and premature shoots. Do not pull dormant perennials to test whether roots are alive. A firm crown and stable root ball are more useful than breaking fine roots for inspection. Photograph uncertain change and compare at the next check.
Remove diseased or rotten material with clean tools only when leaving it will spread decay; avoid a general midwinter cleanup. If one container smells sour or leaks discolored water, isolate it and inspect drainage. Do not move all pots into a warm room for easier work. Temperature transition can break dormancy and make plants more vulnerable when returned to cold. Correct the local fault in the cold setting whenever safely possible.
Evergreen or semi-evergreen perennials can lose water through leaves while roots are cold. Shelter from drying wind and intense winter sun according to the species, but maintain light appropriate to evergreen growth. Brown foliage does not always mean dead roots, and watering frozen medium does not cure winter burn. Wait for a safe diagnostic window, inspect stems and crowns, and postpone irreversible pruning until the extent of living tissue is clear.
Release protection gradually in spring
Remove heavy insulation after severe cold has passed and the material can be handled, but before retained warmth and moisture drive pale growth. Regional timing matters more than a calendar date. Iowa State recommends early removal in its climate; other regions differ. Open the top first, restore air and light, and watch the forecast. Keep loose protection available for a late cold event instead of leaving every crown buried until daytime warmth becomes consistent.
Unbury containers when soil has thawed enough to lift them without tearing roots, cracking pots, or destroying the holding bed. Water as needed after thaw and let excess drain. Move plants first to a sheltered outdoor position with conditions close to storage, then toward their growing-season exposure. A dormant perennial does not require the same hardening as a leafy indoor seedling, but newly emerging shoots can still scorch or freeze after an abrupt move.
Inspect roots, crowns, and containers before the plants return to display. Repot, divide, or root-prune only when the species, season, and plant condition support it. Replace damaged medium without burying the crown. Keep nonviable plants separate until diagnosis is reasonably clear; do not empty unknown rotten mix into a garden bed. Clean the holding area and store reusable insulation dry so pests and decay are not carried into the next winter.
Use the outcome to improve the collection
Record survival by species, cultivar, pot size, method, minimum temperature, exposure, and spring condition. Distinguish root death, crown rot, winter burn, animal damage, and delayed emergence. A plant emerging late should not be declared dead on the schedule of another genus. Mark pots and compare with authoritative phenology information. When a diagnosis is uncertain, consult a local Extension service or plant clinic before changing the entire method.
Reduce recurring risk at the purchasing stage. Favor locally hardy ornamentals, larger winter-suitable containers, replaceable inner nursery pots, and designs that permit movement before they become too heavy. Do not collect more borderline plants than the available cold shelter can hold. A realistic winter footprint is part of container design, just as mature width is part of border design. Summer beauty does not cancel the annual labor or energy required to preserve it.
Retire a method that repeatedly produces saturated crowns, broken pots, or early growth. More wrapping is not always more protection; stability, drainage, dormancy, and root-zone buffering are the goals. Keep the approach simple enough that every pot can be labeled, checked, watered when necessary, and released at the right time. The best system protects valuable plants while making winter work predictable rather than turning the collection into an inaccessible insulated pile.
Separate survival protection from forced growth
The goal is a stable dormant root zone, not a warm pot. A bright heated room can wake shoots while roots remain stressed, and repeated moves between warmth and freezing create the fluctuation the protection was meant to reduce. Choose the coolest suitable protected position available for the exact plant, then keep light and temperature appropriate to whether growth remains dormant or resumes.
Check the complete setup after thaws and before forecast cold. Confirm that drainage holes remain open, the pot has not settled into standing water, insulation is dry enough to function, and covers have not pressed against crowns. Lift only when the container and body mechanics make the move safe. For large planters, improving shelter in place is usually better than repeated emergency relocation.
Spring removal is a staged handoff. Open or thin protection as weather moderates, retain material needed for a documented late freeze, and prevent pale growth from receiving abrupt sun or wind. Once normal drainage and growth resume, remove hidden ties and insulation, inspect the crown and roots, and record which location kept temperature and moisture most stable. That record should determine next winter’s setup before containers freeze again.
Keep the empty winter footprint in the garden record. It shows the sheltered area, access route, insulation volume, and lifting help that the collection truly requires before another container is added.
Steps
- Level
- moderate
- Time
- 1–3 hours for setup, plus brief winter inspections
- Tools
- Weatherproof plant labels, Soil and air thermometers, Watering can, Gloves, Clean pruners, Stable stakes and ventilated enclosure if needed
- Materials
- Locally appropriate loose insulating material, Frost-safe containers or movable inner pots, Animal guard where justified, Clean soil for heeling-in, Weatherproof record sheet
- 1Inventory plants and pots
Label each perennial by species and cultivar, then record local hardiness, planting date, crown condition, pot material, diameter, and drainage. Move a marginal plant, a cracked vessel, or a pot whose outlet cannot be cleared to a more suitable winter system before insulation hides the failure.
- 2Choose the method
Assign every sound pot to one complete method: heel it into a draining bed, hold it in a measured unheated structure, or group and buffer it above ground. Write the expected temperature, light, moisture, access, and release conditions for that method. A location that repeatedly warms enough to start growth fails the dormant-storage test.
- 3Prepare drainage and labels
Clear every outlet, remove water-holding saucers, and run water through each pot while the mix is still receptive. Mark the crown level and map labels before containers are buried or grouped. Repair an unstable support or blocked runoff route now; winter ice makes the same correction harder and riskier.
- 4Place after dormancy
Move dormant plants before the holding bed or containers become frozen in place. Set heeled pots at the planned level in draining soil; in an above-ground block, put smaller vulnerable pots toward the protected center without blocking outlets. Record placement date, medium condition, and the first temperature reading.
- 5Insulate without sealing
Add the locally recommended loose insulation after dormancy and the appropriate cold threshold. Fill side exposure while leaving labels, drainage, ventilation, and an inspection aisle open. Rebuild a layer that blows away, mats wet, presses on crowns, or forms a reservoir; extra depth cannot compensate for failed drainage.
- 6Check moisture and temperature
During mild intervals, check pot weight or probe below the surface only where the medium can accept water. Record root-zone and holding-area temperature after thaws, wind, roof runoff, or unusual warmth. A sour smell, soft crown, standing water, premature shoot, or one pot drying faster than its group triggers a labeled local inspection.
- 7Correct local failures
Open a blocked outlet, replace displaced dry insulation, isolate a decaying pot, and vent a structure that overheats on sunny days. Keep healthy dormant plants in their cold system while the local fault is repaired. Mark every temporary change so the next check confirms whether moisture and temperature returned to the intended range.
- 8Release gradually
Open the top of the protection as severe cold recedes, then remove side insulation in regional stages. Lift heeled pots only after soil is workable, move them first to a sheltered outdoor position, and inspect crowns, roots, and vessel cracks before display. Schedule division or repotting from the species and active-growth stage, not the shelter-removal date.
Related reading
Sources
- Overwintering Unplanted Trees, Shrubs and Perennials. Iowa State University Extension and Outreach. Source record · Accessed 2026-08-30.
- How should I prepare my perennial beds for winter?. Iowa State University Extension and Outreach. Source record · Accessed 2026-08-30.
- Overwintering Plants in Containers. University of Illinois Extension. Source record · Accessed 2026-08-30.
- Preparing Nursery Plants for Winter. NC State Extension Publications. Source record · Accessed 2026-08-30.