Grow · midwinter thaw perennial crown inspection
Check Winter Mulch and Perennial Crowns After a Thaw
Inspect a thawed ornamental perennial bed for frost heaving, trapped water, matted mulch, exposed crowns, and premature growth, then make the smallest correction before cold returns.
Published Last updated
In this guide
Wait for a safe inspection window
Use a thaw to inspect a perennial bed, not to perform a full spring cleanup. Choose a mild, snow-free period when the approach is free of ice and the bed surface is soft enough to reveal crown position without becoming sticky mud. Iowa State University Extension specifically recommends checking heave-prone perennials on warm winter days with no snow cover. Chicago Botanic Garden adds the important limit: working a bed while it is too wet can damage soil structure. Start from the edge. University of Delaware Cooperative Extension identifies foot traffic on wet soil as a compaction cause, while Chicago Botanic Garden warns against digging beds that are too wet. If a boot sinks, leaves a glossy smear, or squeezes water to the surface, postpone entry and inspect only what can be reached from a firm path. A thawed surface over frozen soil is not the same as a workable root zone.
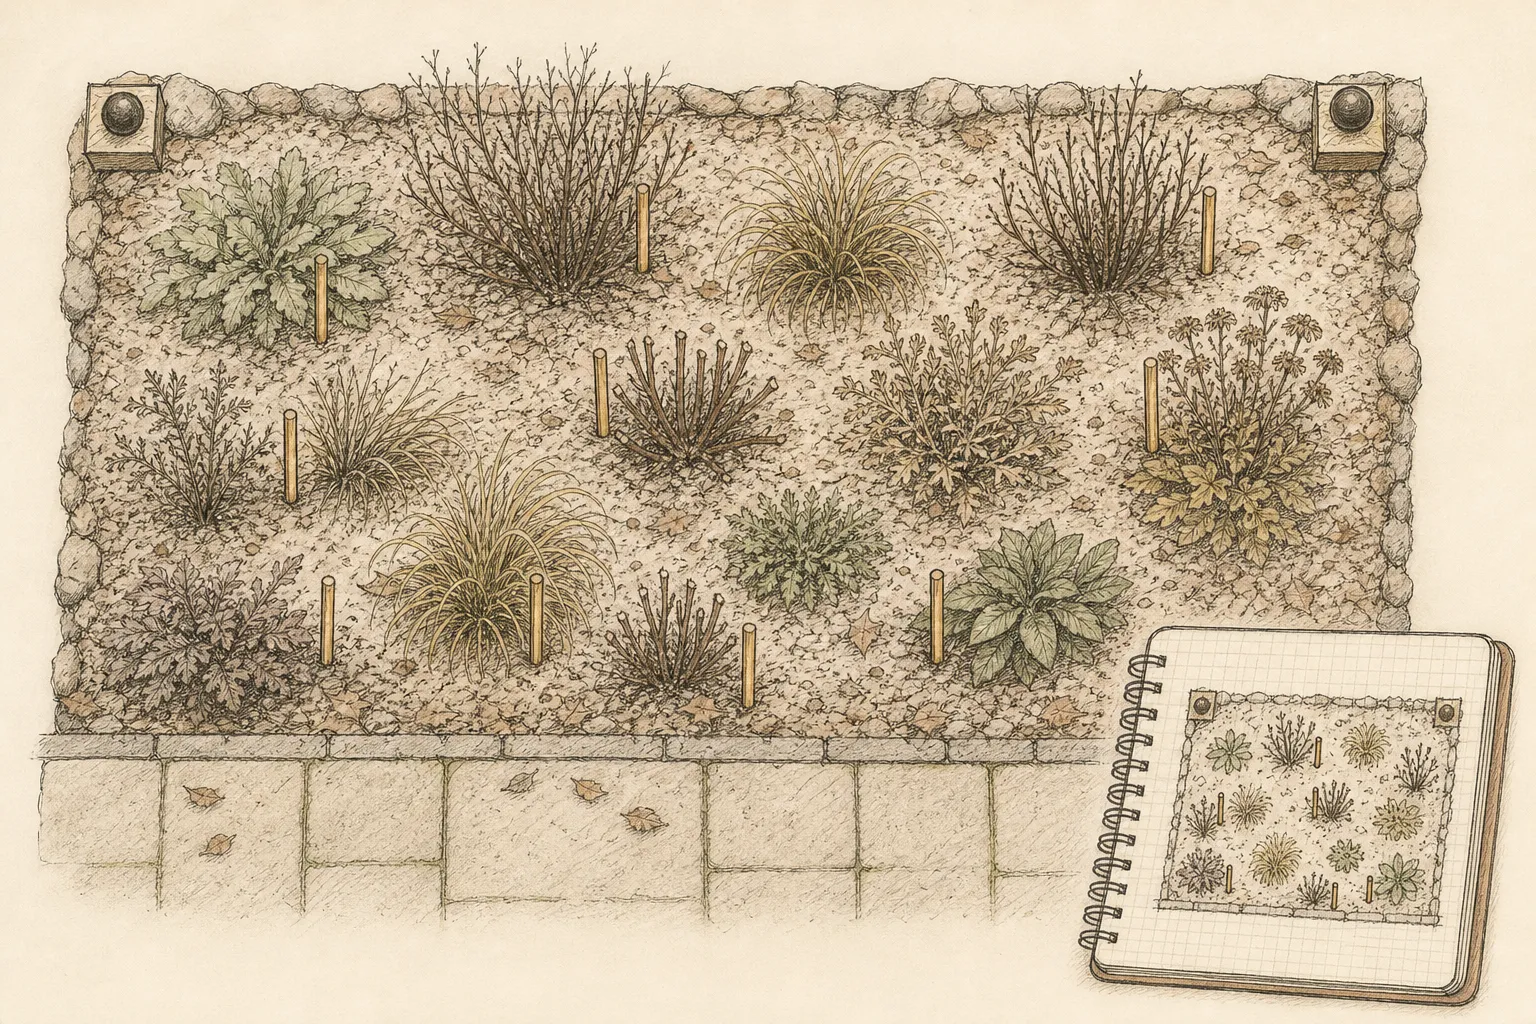
Bring the planting map, weatherproof labels, gloves, a hand fork, a shallow tray, a ruler, and a small amount of dry loose cover that matches the original material. Photograph the whole bed before moving anything. Record snow cover, pooled water, displaced mulch, animal disturbance, visible stems, and the forecast low; those observations determine whether the useful action is repair, marking, or simply waiting.
Limit the first pass to several representative points: a newly planted crown, a known shallow-rooted perennial, the wettest low spot, a wind-scoured edge, and an apparently undisturbed control. Opening every plant creates exposure without adding much information. Expand the inspection only when the samples show that the same fault extends through the bed.
Read crown position and surface water
Find the crown from the label, last season's stems, or a planting photograph, then uncover only enough material to see its relationship to the surrounding soil. Frost heaving usually presents as a plant raised above its earlier grade, often with a gap, exposed fine roots, or a tilted root mass. Iowa State explains that repeated warming and cooling of the upper soil can lift plants and expose roots to drying; newly planted and shallow-rooted perennials are especially susceptible.
A visible crown alone does not establish heaving. Bearded iris rhizomes, peony eyes, creeping stems, evergreen rosettes, and the crowns of ordinary clump-forming perennials occupy different positions. Illinois Extension uses the plant's established container depth as its general perennial planting reference and cautions that a plant set too low is vulnerable to crown rot. Confirm the exact taxon's grade before adding soil over a specialized storage organ or growing point.
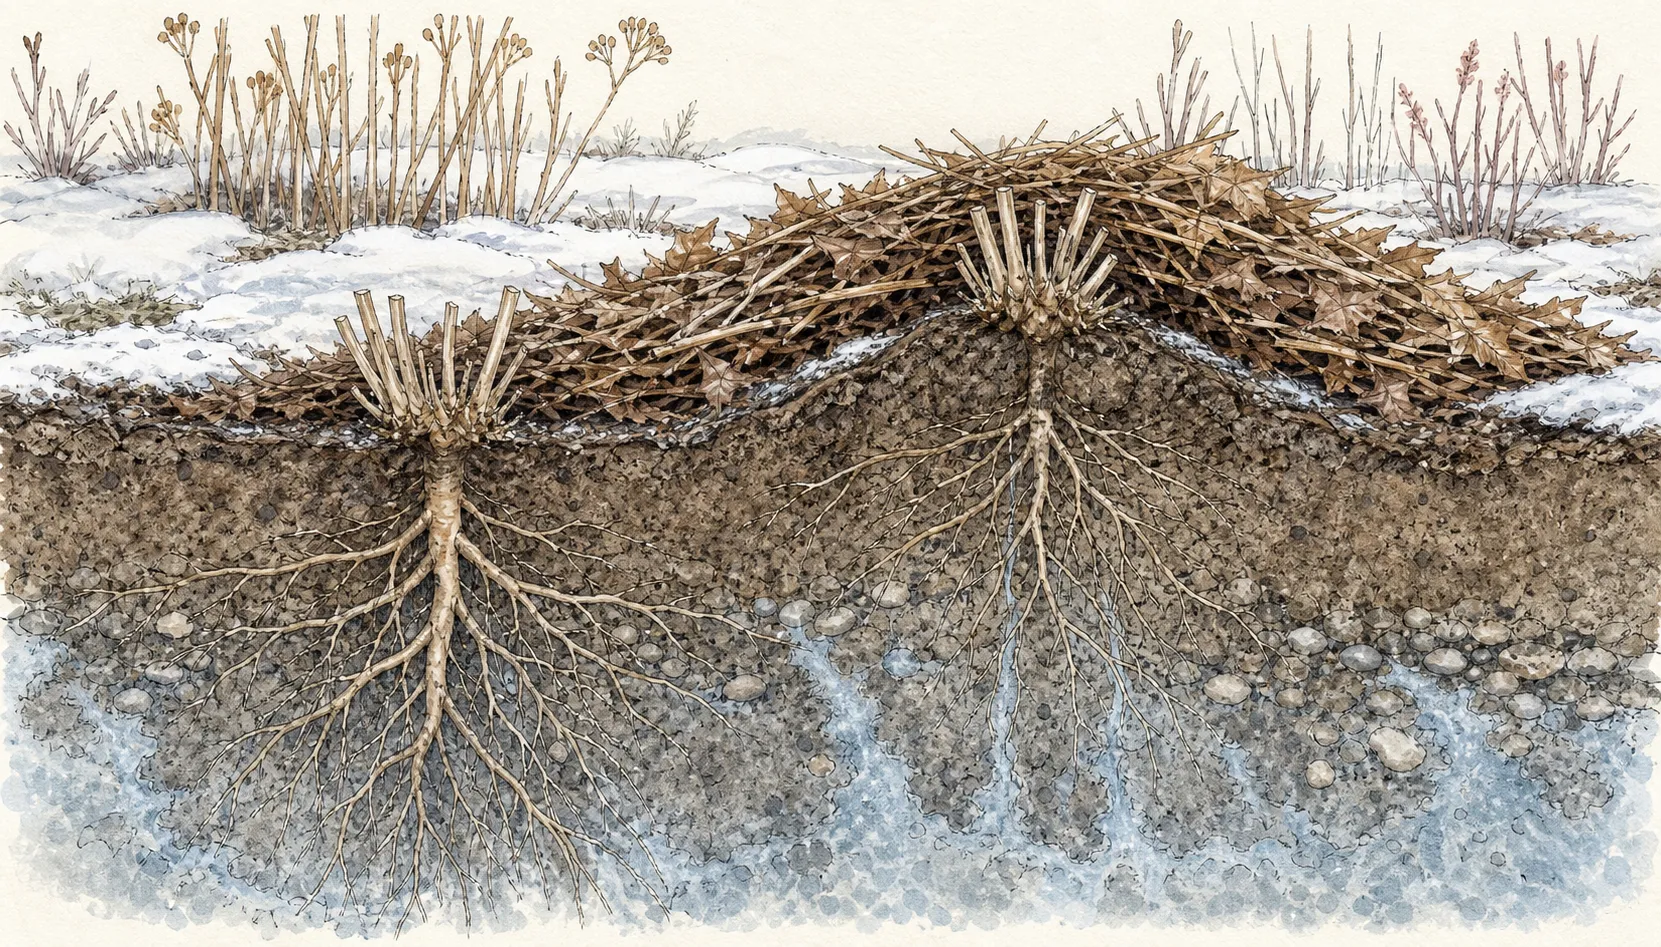
Map water separately from heaving. Mark the edge and depth of each puddle, the downhill direction, and any contribution from a downspout, path, compacted snowbank, or blocked outlet. A brief film of meltwater over frozen ground may disappear as the profile thaws. Water that repeatedly collects against the same crowns points to a grade, compaction, or drainage problem that mulch cannot correct.
Firm pale roots above grade call for protection; dark, soft, hollow, or foul-smelling tissue suggests decay and needs a different response. Leave the dormant plant anchored because pulling it can break the roots being assessed. Note the tissue condition, isolate visibly decayed debris in the tray, and wait for a workable spring inspection before deciding whether the root system can be reset or the plant should be replaced.
Separate protective mulch from a wet mat
Lift one edge of the cover and identify the material before judging it. Loose straw, pine needles, evergreen boughs, coarse leaves, shredded leaves, compost, and bark settle differently. University of Missouri guidance warns that soft leaves can become soggy enough to smother small plants or tender shoots, while stiffer leaves and pine needles behave differently. The relevant failure sign is a dense wet sheet pressed over living growth, not the mere presence of damp organic matter.
Measure what remains rather than guessing from the surface. Regional recommendations differ: Minnesota Extension describes five or six inches of whole or shredded leaves, partially decomposed compost, corn stalks, or straw for its climate, while Missouri calls for at least two inches of loose winter cover and distinguishes materials placed over green crowns from those around plants. These numbers are evidence of regional and material dependence, not a range to average for every garden. Remove a matted section only when it blocks emerging shoots, traps free water against the crown, contains diseased debris, or has been contaminated. Place it in the tray and expose the smallest area needed to inspect tissue. Fluff sound dry material nearby and keep it off crowns that should remain open and winter-green foliage that needs light and air.
Wind-scoured gaps are the opposite fault. A crown originally designated for winter protection may be bare while intact mulch has drifted against edging or another plant. Redistribute only clean, loose material after confirming the species needs cover and the soil is not ponded. If the source depth cannot be reconstructed from the record, protect exposed roots provisionally and obtain local guidance before adding a deep blanket.
Inspect roots, shoots, and old stems
Examine exposed fine roots for color and flexibility without bending them. Healthy appearance varies by species, but roots that are firm and continuous deserve immediate cover from wind and the next freeze. Severed, desiccated, or mushy roots should be photographed and left attached unless a plant-specific repair requires trimming in workable spring soil. A winter inspection cannot reveal the full surviving root system without destructive digging.
Look at the crown for cracks, soft areas, rodent feeding, tunnels, and mold concentrated beneath the cover. A little surface fungal growth on dead mulch is not automatically crown rot. Trace the pattern to living tissue: localized mold on a fallen leaf can be removed, while softening that enters buds or the crown warrants isolation and later diagnosis. A fungicide belongs only to a confirmed diagnosis and a currently labeled use.
Pale shoots under mulch have begun growth without normal light. Keep them shielded from abrupt bright sun, drying wind, and a forecast hard freeze while loosening the cover enough to prevent crushing. Note the shoot length and weather, then use the plant's regional spring-uncovering guidance. Minnesota Extension recommends keeping movable cover available after spring removal because late freezes can follow an early warm period.
Old stems can mark crown position and catch snow. Leave sound stems until the normal species-specific cleanup time. Remove only a stem that is diseased, detached, or sharp enough to make the inspection unsafe, using clean pruners and containing the debris. A brown stem is not proof that the perennial crown below has died.
Correct only the failed part of the protection
When a plant has risen slightly and the soil is moist but friable, support the root mass with one hand and settle it gently toward its former grade. Iowa State advises lightly tamping frost-heaved perennials back down on warm winter days. Chicago Botanic Garden similarly recommends gentle tamping during mild weather and a small layer of soil over exposed roots. Stop if the root mass resists, the soil smears, or frozen ground prevents even movement. Cover remaining exposed roots with a small amount of loose soil from a clean stored supply, keeping the plant's true crown at its correct grade. Leave an unknown crown, emerging shoots, and frozen gaps unmounded until the proper grade and a workable root zone can be confirmed. A plant lifted far enough to tilt, split, or expose a substantial root ball needs a marked spring reset rather than repeated midwinter pressure.
Treat water as a mapped site fault, not an invitation to trench through dormant roots. Clear only loose debris blocking an existing safe surface outlet. Leave the root-zone grade intact and keep runoff away from walks, buildings, neighboring property, and other beds during a thaw. Mark the high-water line and trace the source for a planned drainage correction when the profile is workable.
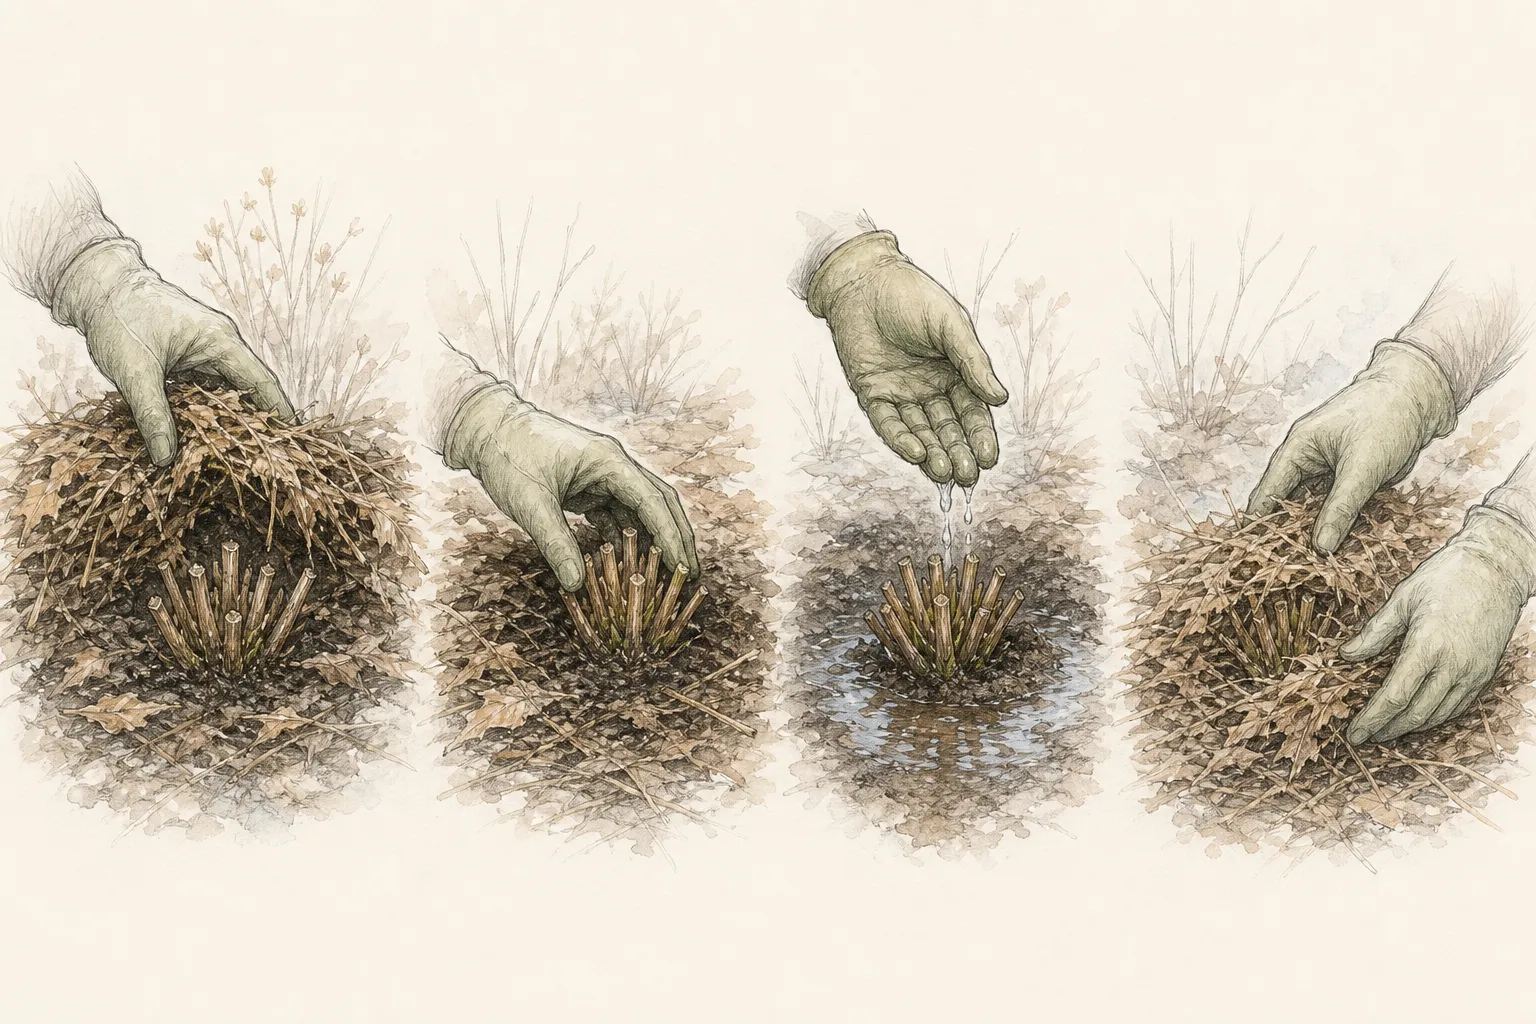
Replace protection only after free water has drained. Restore clean loose material around the repaired area to the plant- and region-specific depth, keeping pale shoots uncrushed. A marker should identify every provisional soil addition, exposed root, decay concern, and water route so spring work can find the exact plant after stems and mulch shift.
Prepare for refreezing
Finish before the surface begins to glaze. Remove the tray, tools, ruler, temporary access aids, and wet rejected material from the bed and path. Recheck every opened crown from the edge: roots are covered, growing points are at the proper grade, loose protection is stable, and no label or fastener can be hidden as a spring hand hazard.
Water only when the root zone is genuinely dry, local winter guidance supports irrigation, and the thawed profile can accept and drain the application. Frozen subsoil can prevent drainage, and Missouri identifies poor drainage as a contributor to winter damage. Standing water, not a mild date on the calendar, is the immediate stop sign.
Secure evergreen boughs or a loose cover against ordinary wind without compressing shoots or sealing the crown. Use the original system or a locally recommended ventilated replacement whose spring removal is already scheduled. Winter protection should moderate temperature changes while respecting the plant's need for air and, for winter-green growth, light. Take an after photograph from the same position as the opening view. Note which crowns were checked, the greatest heave, material removed or returned, soil added, water marks, observed shoots, and the next forecast freeze. Attach a spring action to every marker; otherwise a provisional winter repair can disappear into routine cleanup.
Return in early spring with the record
Begin spring removal when the upper layer is thawing and the regional guidance says growth should be uncovered. Minnesota Extension advises removing winter mulch as it thaws to reduce crown-rot and fungal problems, while keeping cover available for a late freeze. Pull material back in stages so emerging shoots receive light and are not broken by one heavy lift. Move reusable mulch to the surrounding soil only where normal growing-season depth is appropriate.
Revisit each marker when the root zone is workable. Reset a mildly lifted plant at its species-appropriate grade, close air gaps with friable soil, and water to settle only when drainage is functioning. A severely torn or rotten crown may need replacement, but wait for the normal emergence window before declaring an intact dormant crown dead. Some perennials start much later than nearby plants.
Use the winter water map to investigate recurring causes. Check bed elevation, downspout discharge, compacted access, edging that dams runoff, and soil structure across the whole low area. Correct the source rather than raising each crown into a small mound. Where drainage design or runoff ownership exceeds a simple garden repair, obtain qualified local advice.
Record survival, root damage, first emergence, repair date, and the performance of each mulch material. Plants that repeatedly heave may need earlier establishment, a more suitable site, or different winter protection next autumn. Clean and dry reusable guards and tools, discard diseased debris appropriately, and revise the bed map while the evidence is visible.
Steps
- Level
- moderate
- Time
- 20–60 minutes for a representative bed
- Tools
- Clean gloves, Hand fork, Shallow debris tray, Camera or phone, Planting map and weatherproof marker
- Materials
- Dry loose replacement mulch if needed, Temporary crown markers, Clean soil only where a safe minor grade correction is appropriate
- 1Check weather and access
Choose a mild snow-free interval with an ice-free approach and enough time to close the inspection before refreezing. Stay at the edge if a boot sinks, the surface smears, water is moving across the bed, or overhead snow and ice make access unsafe.
- 2Photograph before moving material
Take a fixed overview and close views of the new planting, shallow-rooted taxon, wet low spot, wind-scoured edge, and undisturbed comparison. Include labels and a ruler where scale matters, then note forecast low, snow cover, and standing water.
- 3Open one test area
Lift only enough mulch beside a labeled crown to identify its material, depth, moisture, and contact with shoots. Compare the crown with its known proper grade. Expand the check only if the same matted cover, heave, or water fault appears at representative points.
- 4Map water and heaving
Mark every exposed root, tilted root mass, soil gap, puddle edge, and incoming runoff route. Distinguish brief water over frozen soil from a repeated low pocket. Leave emergency trenches closed; spring drainage work needs a workable profile and a safe discharge route.
- 5Remove only failed material
Tray material that has formed a saturated sheet over living growth, carries diseased debris, or blocks free water. Retain clean loose cover nearby. Measure remaining depth and check the plant's regional recommendation before replacing what was removed.
- 6Make a reversible correction
Assign each flagged plant one status: exposed roots with firm anchorage, tilted crown, soft tissue, or frozen root zone. Only the first status receives a bridge of clean loose soil up to its known grade. Tag every other status with the observed failure and the spring task; this thaw visit leaves the plant unpressed and unexcavated.
- 7Restore measured protection
After free water clears, return clean loose cover only to the documented plant- and region-specific depth. Keep it from crushing pale shoots or sealing winter-green crowns. Secure boughs gently and flag any provisional soil, exposed root, decay, or water repair.
- 8Prepare for the next freeze
Remove tools, wet rejected material, and access aids before surfaces glaze. Inspect all opened points from the path, confirm roots are covered and labels remain visible, then take an after photograph and record material removed, soil added, and observed shoots.
- 9Mark spring follow-up
Assign each flag a specific spring action: uncover, reset grade, inspect decay, restore drainage, or wait for the normal emergence window. Recheck as upper soil thaws, remove excess winter cover in regional stages, and update the map with survival and repair outcomes.
Related reading
Sources
- Winter Garden Tasks. Iowa State University Extension and Outreach. Source record · Accessed 2026-08-30.
- Mulch perennials and bulbs after the soil freezes. University of Minnesota Extension. Source record · Accessed 2026-08-30.
- Winter Plant Protection. University of Missouri Integrated Pest Management. Source record · Accessed 2026-08-30.
- Frost Heave. Chicago Botanic Garden. Source record · Accessed 2026-08-30.
- Combating Soil Compaction. University of Delaware Cooperative Extension. Source record · Accessed 2026-08-30.
- Planting and Care. University of Illinois Extension. Source record · Accessed 2026-08-30.