Grow · dormant perennial crown marking
Mark Dormant Perennial Crowns Before Winter
Mark late-rising and easily disturbed perennial crowns with consistent off-crown stakes and a simple bed map before winter removes the visible cues.
Published Last updated
In this guide
- Mark the plants most likely to disappear from memory
- Mark a crown from evidence that still exists
- Decide whether standing stems can remain part of the marker
- Place each marker beside the crown without changing its site
- Build a marker-and-map system that can lose one part
- Audit the bed after cleanup, mulch, and the first snow
- Carry the record through thaw and late emergence
- Steps
Mark the plants most likely to disappear from memory
Marking dormant crowns is a protection task, not a labeling project for every plant in the border. The highest priorities are perennials that emerge late, recent additions whose positions are not yet familiar, small divisions, crowns close to a spring planting area, and valuable plants beside bulbs or self-sown seedlings that will draw early attention. These are the places where an empty-looking patch can invite a spade before the plant has produced visible shoots.
Iowa State University Extension specifically advises marking late-emerging perennials and waiting before removing them or planting into their space. Its late-riser list includes balloon flower, butterfly weed, hardy hibiscus, Japanese forest grass, milkweeds, switchgrass, and several other plants that may require warm soil and air before appearing. Use the list as a prompt, then include any perennial that has emerged late in your own garden even if it is not named there.
Walk the border while some evidence remains. Seed heads, basal leaves, cut stems, faded labels, and gaps recorded in summer photographs can still connect a name to a crown. Begin with certainty. If you cannot locate a plant closely enough to place a marker beside it, draw a broader no-dig zone on the map and leave the soil unpierced. A guess driven into the bed can injure the very crown the system is meant to protect.
Give each marked plant a spring decision date based on its normal local emergence, not a universal calendar deadline. Iowa State notes that some late perennials may not appear until June in its regional context. The operational rule is patience: compare with the plant's previous timing, local conditions, and regional guidance before declaring an unoccupied-looking mark available for replanting.
Put that date on the record rather than the outdoor marker, where a long note will fade or crowd the bed. A calendar reminder keeps the waiting rule active at the moment spring planting becomes tempting.
Mark a crown from evidence that still exists
Locate the crown while stems, labels or a reliable map still establish its position. Put the marker in readable open soil with a consistent relationship to that crown, then record permanent reference points. An unmarked spring gap remains protected until the plant's emergence window has been checked; apparent emptiness is not permission to dig or insert another plant.
Decide whether standing stems can remain part of the marker
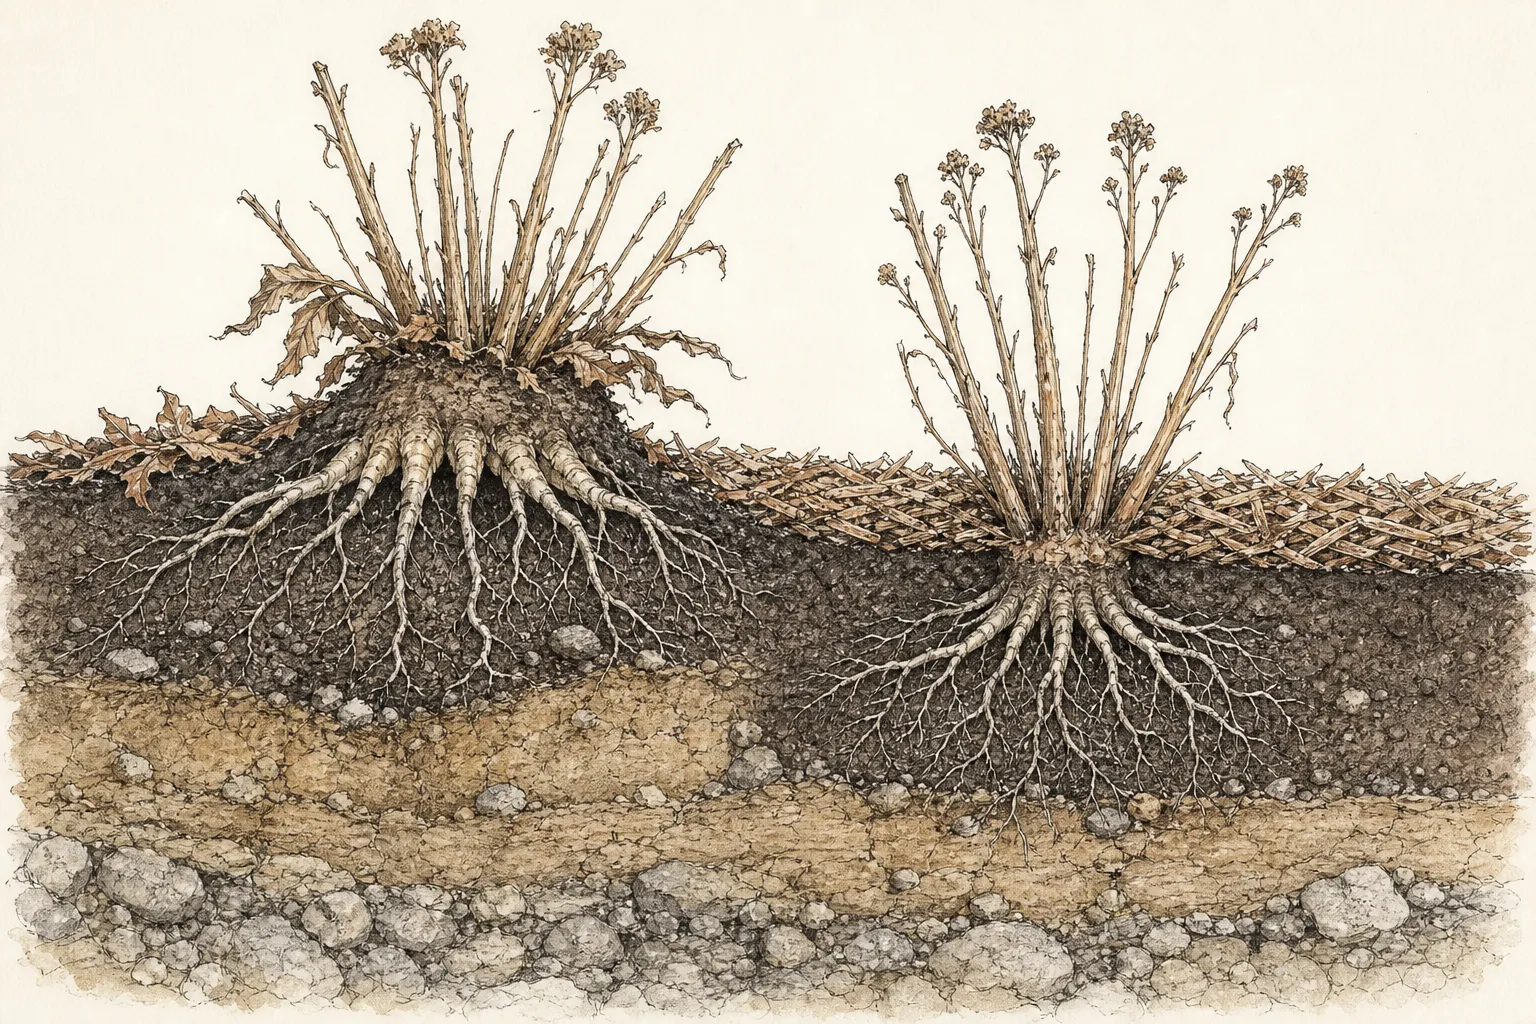
Healthy stems are often the best first location cue because they already arise from the plant and show its footprint. Illinois Extension notes that leaving stems can mark a late-rising perennial and help prevent accidental digging. University of New Hampshire Extension makes the same connection and adds that standing stems can support winter interest, wildlife, and protection around some crowns. Retaining them can reduce the number of artificial markers needed in a quiet border.
Keep the sanitation exception visible. UNH advises prioritizing removal of diseased top growth, and Illinois also recognizes fall removal when foliage disease has been a problem. Powdery, spotted, collapsed, or otherwise infected stems should not be saved solely because they identify the crown. Remove and dispose of problem material as locally recommended, then place a marker and map the position while the crown location is still known.
Do not treat fall cutback as an all-or-nothing aesthetic rule. A border can retain strong seed heads and useful stems, remove diseased or messy material, and mark the plants that become ambiguous after that edit. The goal is a readable winter bed with protected crowns. Leaving every stalk can obscure paths and low evergreen plants; cutting every plant to the soil can erase the spatial record. Make the decision plant by plant.
When a few stems remain, note whether they show the crown center or only the outer edge of a spreading plant. A marker placed beside a peripheral stem may misrepresent the plant's main footprint. Look for the base where stems converge and compare it with summer photographs. The marker should identify the crown location accurately enough that spring cultivation, dividing, or planting can stay outside the protected area.
Place each marker beside the crown without changing its site
Use one consistent relationship between marker and plant. Place the stake just outside the crown on the same compass side whenever the bed allows, such as the path side or north side. Consistency turns the marker from a vague sign into a reference point: the crown lies a known short distance beyond it. The exact distance varies with plant size, but the stake belongs in open soil, never through the cluster of buds, roots, rhizomes, or basal stems.
University of Maine Cooperative Extension lists labeled aluminum markers, tent stakes, small sticks, and similar options beside herbaceous perennials, while warning that marking must not change the plant's growing conditions. It specifically cautions against a broad stake that shades a small plant or causes root damage. Apply that restraint at home: choose the narrowest marker that remains visible and insert it with minimal disturbance.
Push only into soil you can read. If the ground is frozen, saturated, or resistant, postpone insertion rather than hammering blindly. Use a nearby fixed reference and a temporary surface cue until conditions are workable. Beds with drip tubing, shallow cables, mesh, or dense bulbs require extra caution. A map can identify the crown without adding a stake in a place where safe insertion is uncertain.
Set marker height for winter visibility and ordinary access. It should remain above expected mulch and light snow, yet stay low enough to avoid becoming a snag or a substitute plant stem. Keep it out of walking and mowing lines. In a public-facing front bed, a discreet uniform marker can read as intentional; bright flagging may be reserved for short-term work zones where visibility matters more than appearance.
Build a marker-and-map system that can lose one part
A field marker can fade, tilt, heave, or disappear. A hand-drawn map can also become ambiguous if it floats without fixed references. Use both. The marker protects the immediate crown; the map rebuilds the pattern if weather, animals, cleanup, or garden work moves the marker. Redundancy is useful because winter conditions attack exactly the small objects on which a single-record system depends.
Start the map with permanent geometry: path corners, bed edges, steps, walls, large stones, or established woody plants. Measure the marked crown from two references when the bed is crowded. A single distance from a path locates an arc; two distances locate a point. For a simple narrow border, measured offsets along and inward from the path edge may be enough. Draw the method consistently so spring interpretation does not require reconstructing your November thinking.
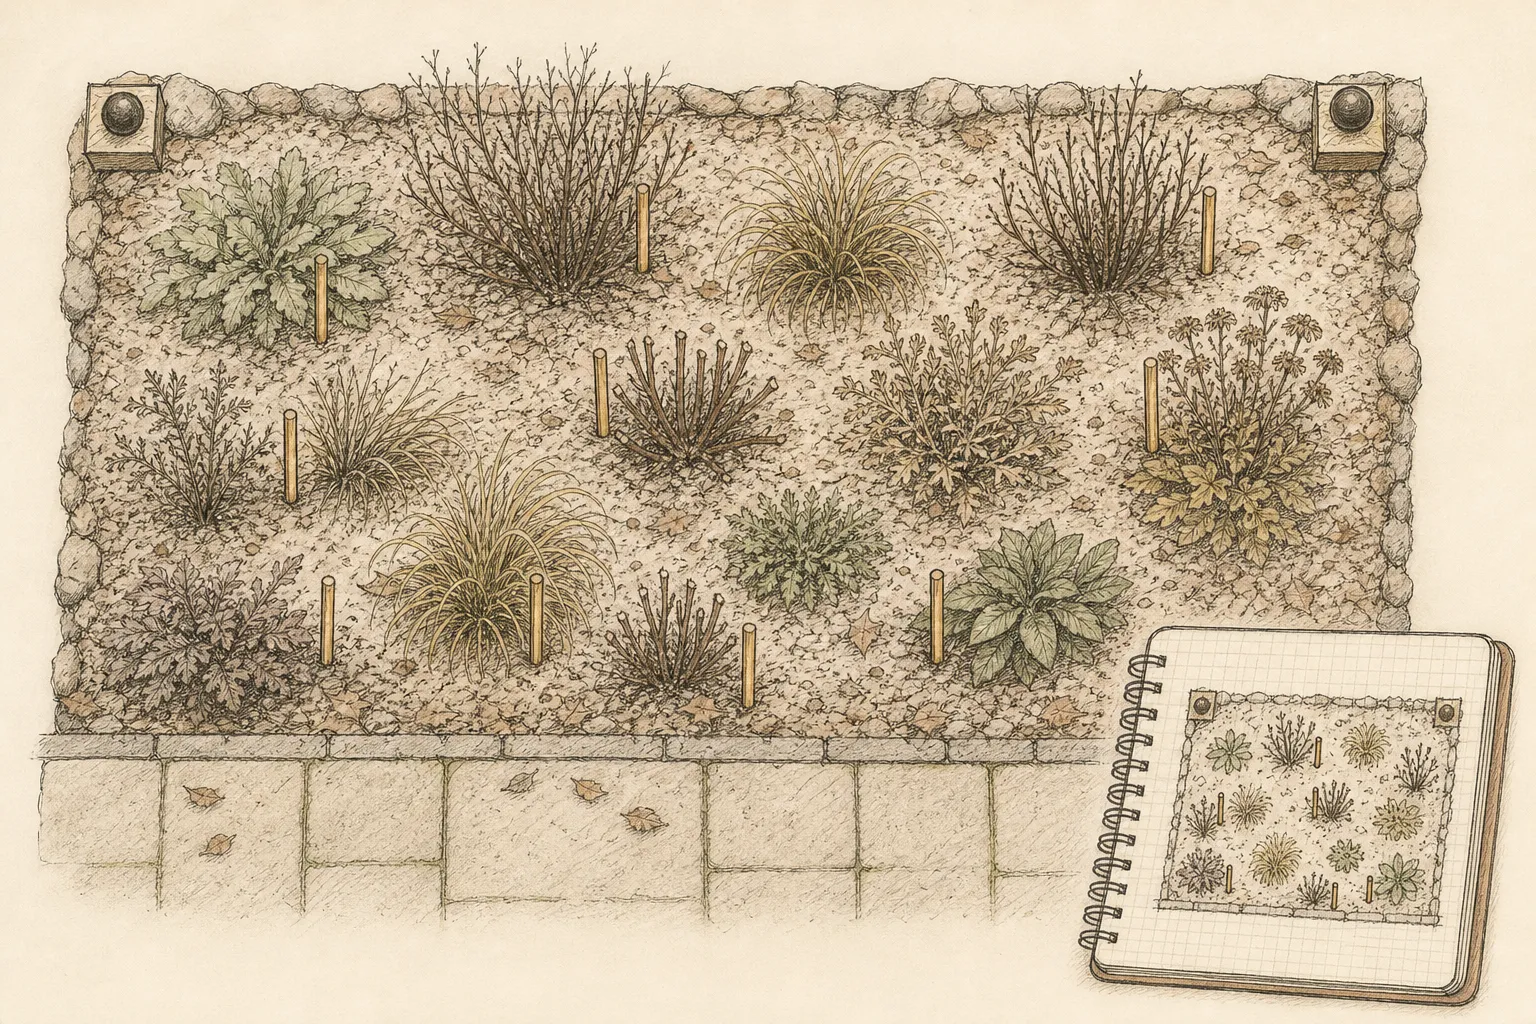
Give every marker an identifier that matches the map and plant list. The identifier can be the plant name when space and material permit, or a short code that resolves to a separate record. Include cultivar when that distinction changes emergence, size, flower, or care. Maine's field guidance advises an indelible marker for labels and notes that outdoor markers need periodic replacement as they weather and become unreadable. Plan an inspection instead of assuming permanence.
Add one overview photograph from a fixed direction and one closer image for complicated clusters. Photographs preserve relationships that a spare line map may omit, while the map remains useful when foliage, snow, or a changed camera angle makes the photograph hard to interpret. Store the map where spring work begins, not in a forgotten folder. The record only protects a crown if the gardener can find it before digging.
Audit the bed after cleanup, mulch, and the first snow
Rewalk the border after any fall cutback. A marker that seemed obvious beside standing foliage can become isolated or can now point toward two possible crowns. Compare every priority plant with the map, correct identifiers, and make sure retained stems still match the recorded location. This is also the moment to add a marker for any plant whose final visible cue disappeared during cleanup.
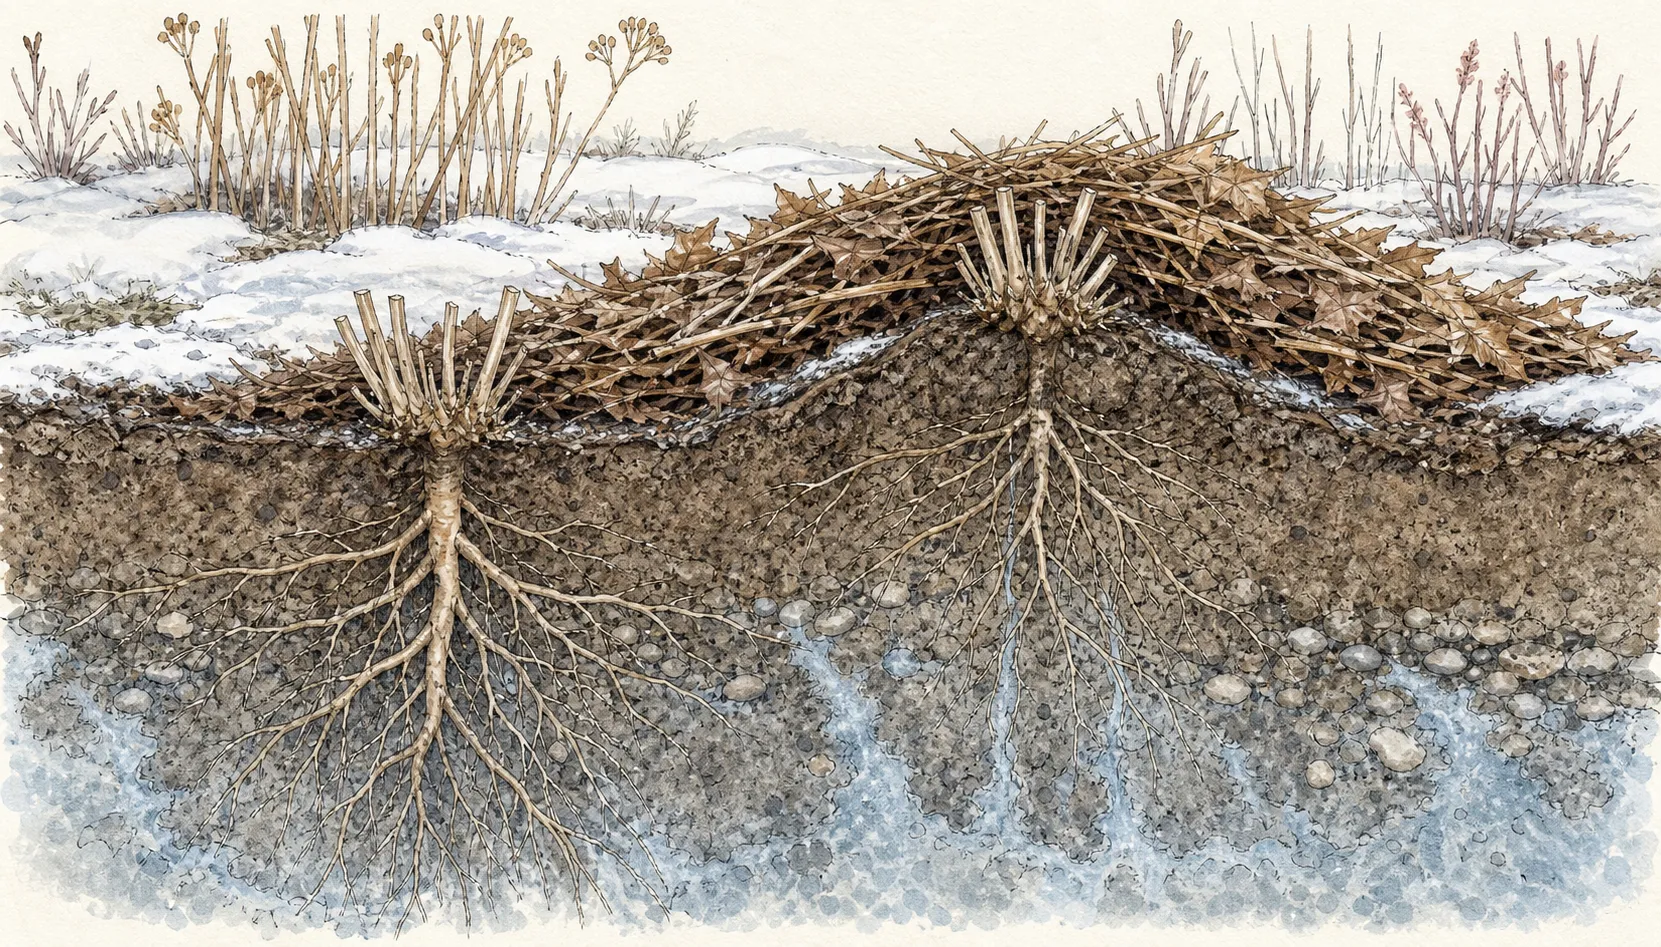
Keep crown protection separate from marker visibility. Mulch should follow the plant's needs and should not be piled over perennial crowns merely to anchor or highlight a label. If mulch raises the surrounding grade, lift or replace the marker so it remains readable while keeping its off-crown position. The marker describes where the plant is; it does not authorize changes to planting depth or surface cover.
After the first snow or strong freeze-thaw cycle, inspect from the path. The same field guide notes that markers weather and require replacement. Look for stakes that have leaned, heaved, become buried, or created a sharp projection. Reset only when the soil is safely workable and the crown position remains certain. Otherwise update the map and wait. Repeated probing around a dormant plant creates more risk than a temporarily imperfect marker.
Use the audit to remove excess signs. A marker is valuable when it changes a spring action: it prevents digging, preserves a rare identity, distinguishes nearby crowns, or sets a later check date. Markers that serve none of those jobs add visual noise and make the important ones harder to read. The finished winter bed should present a small, deliberate protection system rather than a forest of unexplained stakes.
Carry the record through thaw and late emergence
Bring the map into the first spring cleanup. Work outward from known paths and early plants, leaving marked crown footprints untouched. Do not rake, cultivate, divide, or install new plants through an apparently bare position simply because neighboring perennials have emerged. Different species respond to different soil and air temperatures, and a late riser may remain invisible for weeks after the border looks active elsewhere.
Check markers as the soil thaws. Frost heaving can lift a stake and can also affect shallow-rooted perennials, so read the plant and marker separately. A displaced label does not prove the crown moved, and a raised crown is a plant-care issue rather than a reason to drive the label deeper. Use the map's fixed references and retained stems to re-establish the protected footprint before touching either one.
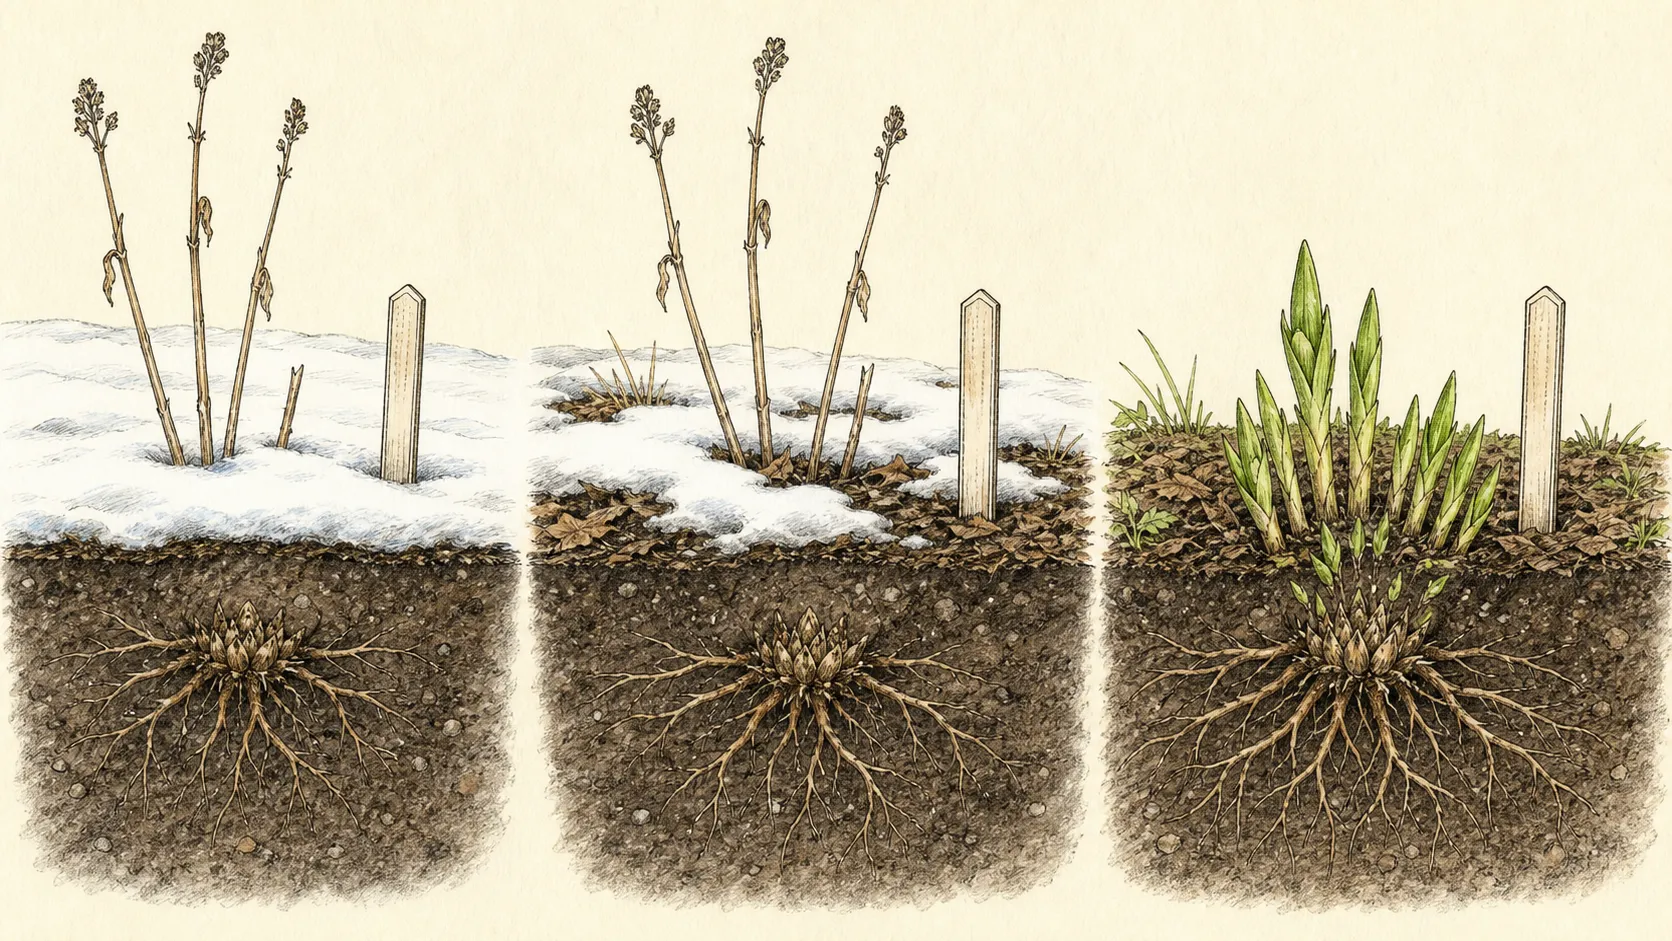
Record the first clear shoot date and photograph the plant with its marker. That observation turns a general regional range into a local history for next year. After emergence is unmistakable, move or remove temporary flags that could shade, rub, or disappear into foliage. A permanent identification label may remain beside the plant if it is still useful and does not interfere with growth or maintenance.
Close the loop by correcting the bed plan. Remove records for plants confirmed gone only after an appropriate waiting period and local check; add offsets for divisions or moves; replace faded labels; and note where standing stems proved sufficient. The November system becomes better each spring because it records real emergence rather than relying on memory. Its success is measured by quiet outcomes: crowns left intact, planting gaps used knowingly, and no late perennial discovered on the edge of a spade.
Steps
- Level
- easy
- Time
- About 45 to 90 minutes for a mixed home perennial border
- Tools
- small weather-tolerant plant markers or narrow stakes, indelible marker or embossing tool suited to the label, tape measure, notebook or printed bed plan, camera or phone
- Materials
- current plant list or saved nursery tags, replacement markers for faded or broken labels, pencil for the duplicate bed map
- 1List the crowns that need protection
Start with late-emerging species, recent plantings, small divisions, unfamiliar cultivars, and crowns near planned spring work. Add plants that have emerged late in your own garden even if they do not appear on a general list. Give each one a provisional spring check date based on local history and regional guidance, then carry the list into the bed.
- 2Locate each crown while evidence remains
Use basal foliage, stem bases, old labels, summer photographs, and the planting record to identify the crown. If the exact position remains uncertain, draw a no-dig area instead of inserting a guessed stake. Remove diseased top growth as appropriate, but retain healthy stems where they provide a clear, useful location cue and suit the winter border.
- 3Choose one marker relationship
Decide that every stake will sit just outside the crown on a consistent side, preferably toward the path or another easy reference. Use a narrow marker that stays visible above normal mulch without shading the plant or creating a snag. Keep identifiers short, readable, and matched exactly to the separate plant list and map.
- 4Insert only into readable open soil
Place the marker beside, never through, the known crown. Stop if the ground is frozen, saturated, or unexpectedly resistant, or if irrigation and buried services make insertion uncertain. Do not hammer through resistance. Record the position from fixed features and return under safer conditions rather than converting a protective task into root or utility damage.
- 5Map from permanent references
Draw the bed edge, path, wall, stones, or woody plants first. Locate each crown with two measurements in crowded areas, or with consistent along-edge and inward offsets in a simple border. Copy the marker identifier onto the map, add one overview photograph, and store the record where it will be consulted before spring digging begins.
- 6Recheck after cleanup and weather
Walk the system after final cutback, mulch, the first snow, and a strong freeze-thaw period. Correct ambiguous positions and replace unreadable labels. Keep mulch appropriate to the plant rather than piling it over the crown or marker. If a stake shifts while the soil is frozen, rely on the map until a safe, certain reset is possible.
- 7Confirm emergence before releasing the space
In spring, protect the mapped footprint from rakes, hoes, spades, divisions, and new planting until the species has reached its locally appropriate emergence window. Record the first clear shoots, correct the map, and remove temporary flags once foliage makes them unnecessary. Retain permanent labels only where identification or future protection still has a real job.
Related reading

Sources
- Late-Emerging Perennials: Some Species Just Get a Late Start to Spring!. Iowa State University Extension and Outreach. Source record · Accessed 2026-08-20.
- Signs of the Seasons Field Guide: How to Observe. University of Maine Cooperative Extension. Source record · Accessed 2026-08-20.
- Planting and Care: Perennials. Illinois Extension. Source record · Accessed 2026-08-20.
- Should perennials be cut back in fall?. University of New Hampshire Extension. Source record · Accessed 2026-08-20.