Grow · frost heaved perennial crowns
Reset Frost-Heaved Perennial Crowns After the Soil Thaws
Recognize a lifted crown, wait for workable soil, and restore root contact without burying the growth points or compacting a wet spring bed.
Published Last updated
In this guide
Separate heaving from ordinary spring exposure
Frost heaving lifts a crown or root mass above its previous grade as soil freezes, thaws, expands, and contracts. Look for fresh gaps beneath the plant, exposed pale roots, torn fine roots, or a whole clump sitting higher than its label or neighboring crowns. This is different from an evergreen perennial that naturally carries leaves above the soil or a rhizome that belongs at the surface.
Compare the plant with a photograph, marker, or intact individual of the same species. Heuchera, tiarella, gaillardia, mums, and other shallow-rooted or recently planted perennials are commonly heaved, but each crown has its own correct position. Restore each species to its documented crown or rhizome grade. Restore the grade the species occupied before winter, keeping buds and crown tissue where its planting guidance requires.
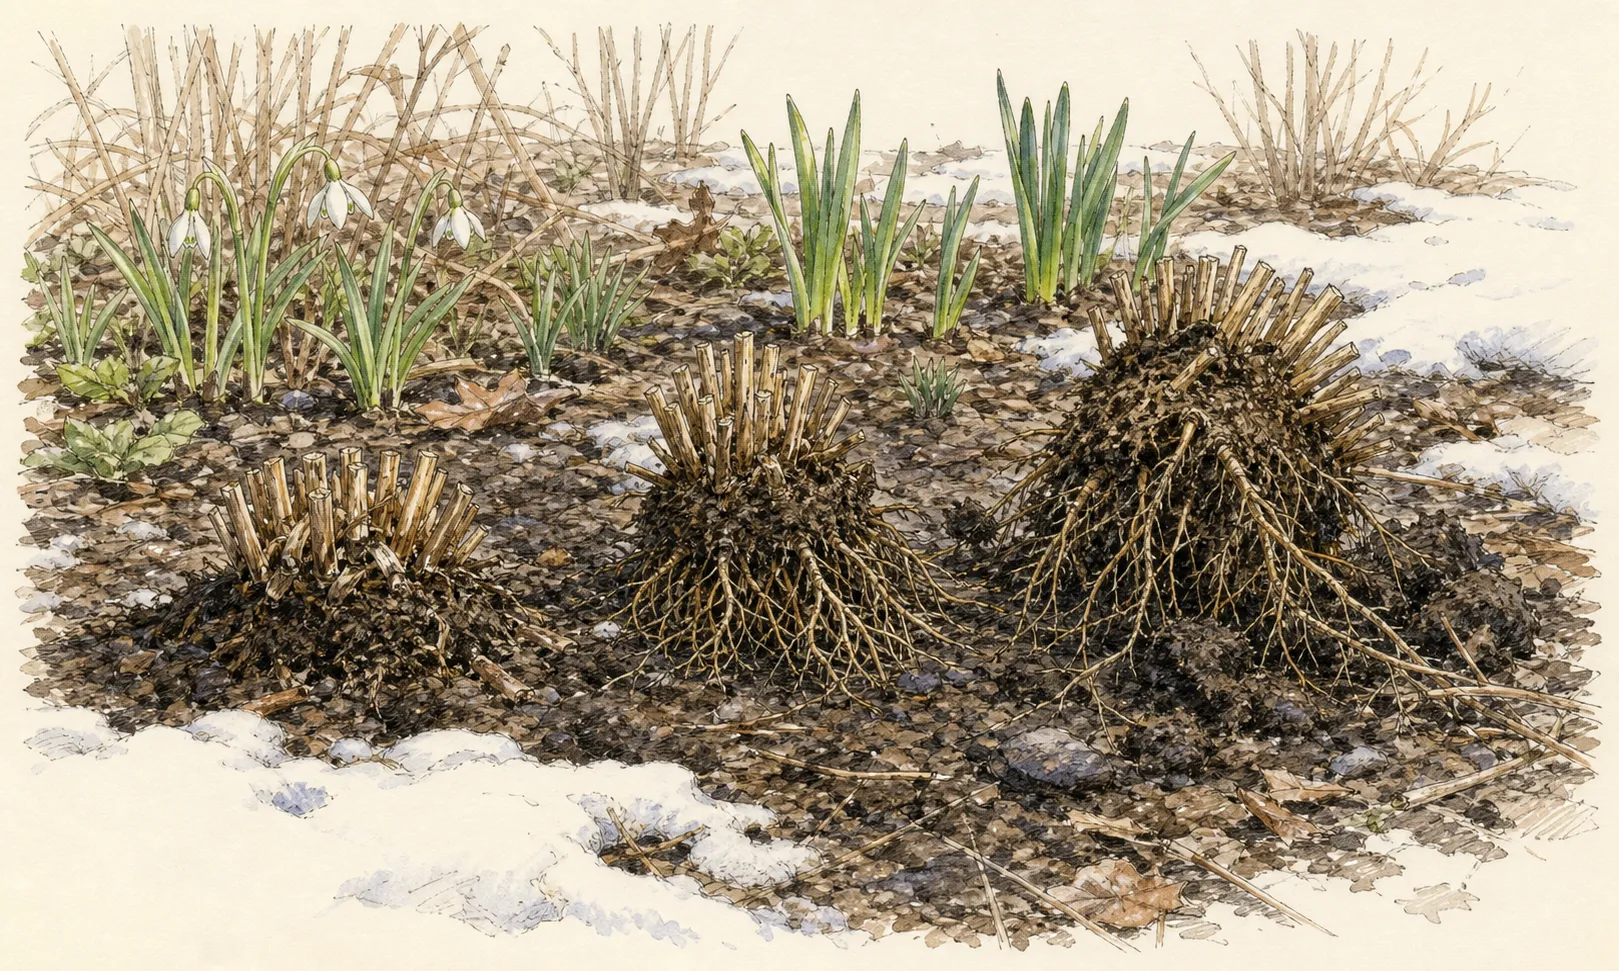
Assess whether the crown is still alive before moving it. Firm tissue, viable buds, flexible roots, and new growth are encouraging. A crown that is mushy, hollow, extensively desiccated, or detached from most roots may not recover by being pushed into soil. Mark uncertain plants and inspect again as temperatures settle and distinguish ordinary dormancy from death.
Rule out animal disturbance, runoff erosion, and ordinary settling. Voles can loosen crowns from below, squirrels may pull recent divisions, and flowing meltwater can wash soil from roots without lifting the whole plug. Frost heave usually appears with a raised, tilted root mass and freeze-thaw history. The cause matters because replacing soil alone will not stop burrowing, runoff, or a decayed crown from repeating the symptom.
Map why the soil moved
Repeated freeze-thaw cycles are the direct mechanism. Water in the soil freezes and expands, the surface lifts, and later thawing leaves a shallow-rooted plant displaced. Iowa State Extension notes that exposed crowns and roots then face cold and drying wind, while broken roots reduce water uptake. Snow and winter mulch help by moderating temperature change, not by keeping soil warm all winter.
Recently planted or divided perennials are especially vulnerable because their roots have not yet anchored a broad soil volume. Late planting, a small nursery root ball, or division close to freeze-up leaves less time for establishment. A plant repeatedly heaved each winter may be signaling that the planting season, drainage, or site exposure needs correction, not simply that more soil should be added every spring.
Poor drainage intensifies movement and root injury. Water collects in fine-textured or compacted soil, freezes, and creates stronger expansion around a shallow crown. Bare south- or west-facing beds can also cycle rapidly between sun-warmed afternoons and freezing nights when snow cover is absent. Map the pattern: several heaved plants in one wet patch call for a site-level response.
Winter mulch is preventive only when timed correctly. University of Minnesota guidance applies protective mulch after the soil begins to freeze, using it to reduce temperature fluctuation and premature warming. Mulch applied too early can delay dormancy or shelter active growth. In spring, remove or loosen it as the soil thaws so wet material does not promote crown rot.
Susceptibility is not evenly distributed. Iowa State lists coral bells, foamflower, garden mums, blanket flower, coreopsis, shasta daisy, and other shallow-rooted perennials among frequent casualties, and emphasizes newly planted or late-divided stock. Use that list as a risk prompt and verify every plant. Inspect every recent planting after open winters, especially where snow cover blew away and south-facing soil repeatedly warmed.
Wait until the bed can carry the work
Wait until the soil is thawed through the root zone and crumbles when handled. Frozen soil cannot be reshaped around roots, while saturated spring soil smears and compacts under tools and knees. If water shines in the hole or a squeezed handful stays as a slick ribbon, postpone resetting and give exposed roots temporary protection from sun and drying wind.
For a short delay, tuck loose soil around exposed roots without covering the crown, then shade the area with a light breathable mulch. Keep air around a wet crown with loose breathable protection. The temporary objective is to reduce drying until soil is workable, not to complete the planting while frost remains below or the bed cannot carry foot pressure.
Set boards or a kneeler outside the occupied root zone before work. A gardener stepping beside a heaved plant can compress wet soil and shear remaining roots. Prepare a hand fork, narrow trowel, labels, and water in advance so the crown is exposed for the shortest practical time once the repair begins.
Keep temporary cover loose enough for air and emerging shoots. A few inches of straw or pine needles can buffer a late freeze-thaw interval, as Iowa State advises, but a dense wet mat over an actively growing crown creates darkness and poor airflow. Check the plant daily during a delay, remove waterlogged material, and proceed with resetting as soon as the entire working depth becomes friable.
Reset the root mass without burying the crown
Open soil around the lifted root mass with a hand fork, positioning the fork beyond surviving roots and keeping force off the crown. Preserve as much soil-root contact as possible. If the whole plug is intact, lift it only enough to loosen the base and return it to its documented level. Release the root mass from beneath while keeping pressure off buds and crown.
Restore support beneath roots while keeping the crown visible. Crumble compatible site soil into voids, arrange flexible roots outward, and bring the crown to the height appropriate for that perennial. Iowa State's immediate advice covers exposed roots with soil and carefully tamps a heaved plant back down; use gentle hand pressure, not body weight or a tool blow.
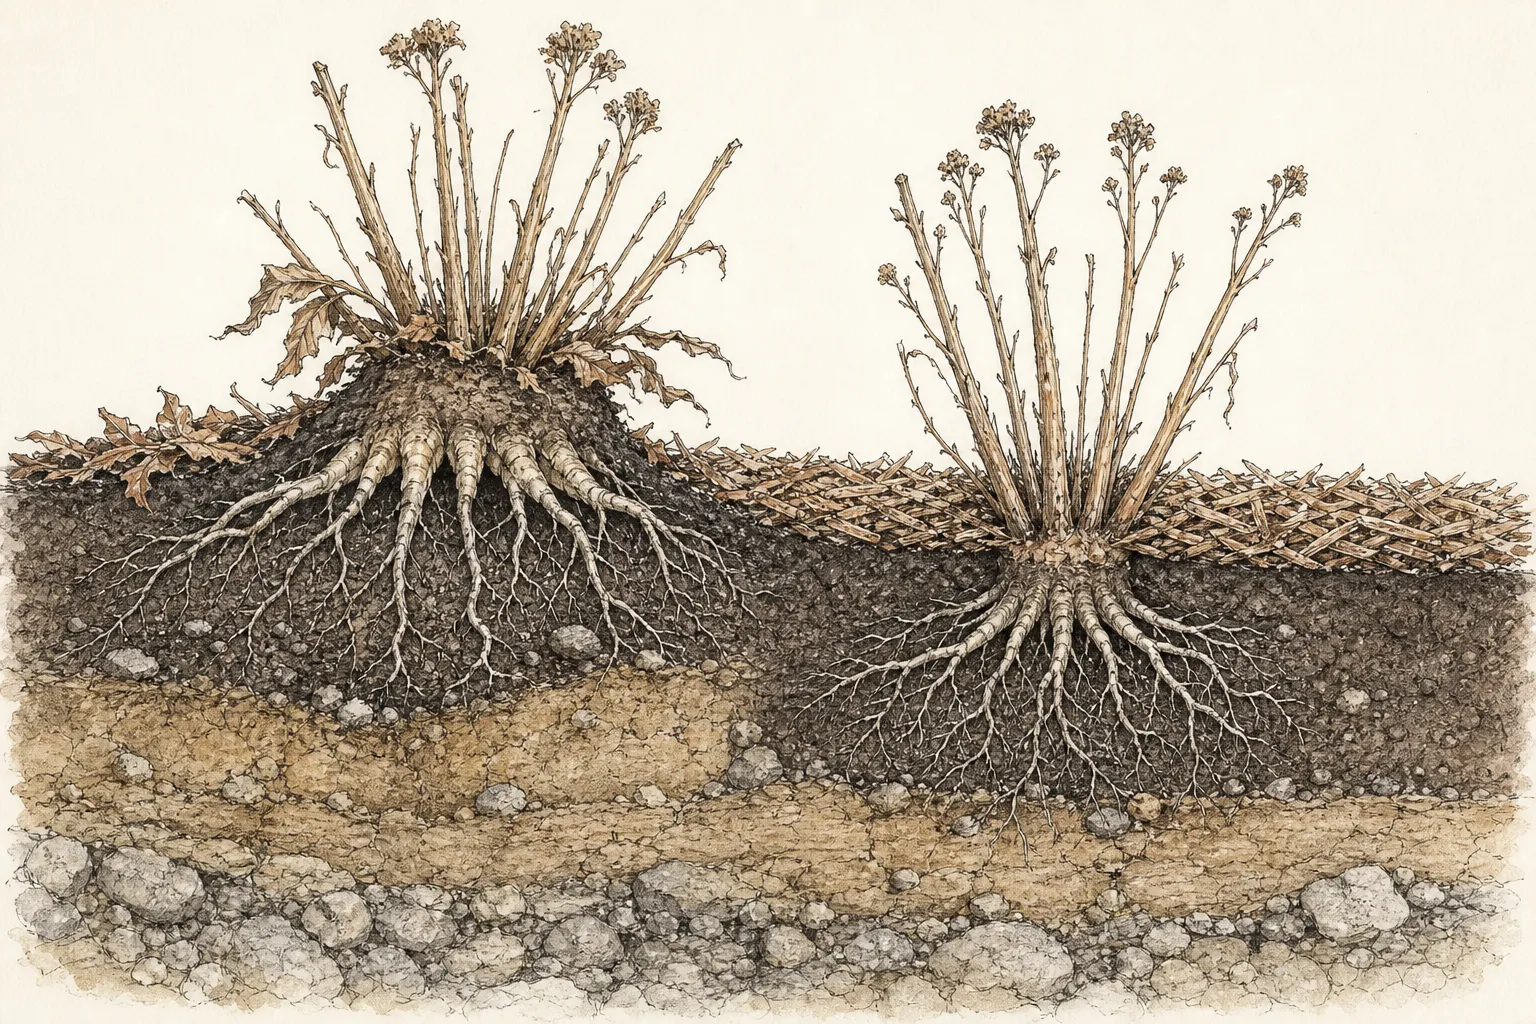
Keep growth points visible. A heuchera crown, peony eyes, iris rhizome, and hosta crown require their own planting grades, so consult the plant's own guidance. Soil placed over living buds can exchange one winter injury for crown rot or failed emergence. Use an intact plant or old soil mark on the crown as the local reference.
Water lightly after resetting if the soil is not already wet. The aim is to settle fine soil against roots and reveal remaining air pockets, not saturate a cold bed. If water ponds or the plant sinks, lift and correct the grade while the intervention is still small. Mark the crown so later settling can be distinguished from normal foliage expansion.
Fill the underside void continuously so a shallow crown has full root support. Work crumbly soil gently into the underside void so the root mass has continuous support. At the same time, avoid packing a hard pedestal that sheds water away from roots. The correct finish combines firm contact, species-appropriate grade, and a surrounding surface that drains with the rest of the bed.
Decide whether division or replacement is kinder
Some heaved plants are already due for division, but the repair day is not automatically a division day. Divide when the species tolerates spring division, the crown is healthy, and each section can retain viable buds and roots. University of Minnesota advises keeping divisions moist, shaded, and replanted promptly. Keep a weak crown intact until health and species timing support division.
Replace a plant whose crown is rotten, roots are almost entirely severed, or site repeatedly exceeds the species' tolerance. A healthy outer section may be saved if disease is not involved, but diagnose unexplained rot before distributing divisions. Replanting the same species at the same wet low point without drainage correction repeats the cause.
Choose a new position from the failure pattern. Improve drainage across the bed, avoid late-season planting for heave-prone shallow-rooted species, or use spring planting so roots establish before winter. Improve the broad compacted bed with compatible soil conditions; one rich pocket can hold water against the new crown.
If division is appropriate, follow the species calendar and require a healthy crown. Spring suits many perennials, but peonies, irises, poppies, and other plants have more specific handling and crown requirements. Keep each division large enough to retain roots and viable buds, replant immediately at correct grade, and reduce top growth only when established foliage exceeds the damaged root system's ability to supply water.
Rebuild a stable surface
Finish with the original soil grade continuous across the repaired area. Close holes gently by hand, keeping the crown visible and the surrounding surface able to drain. A raised ring around the plant can collect spring water, while a depression invites puddling and another freeze. Check the result from several sides because a tilted root mass may look correct from only one angle.
Apply a light growing-season mulch around, not over, the crown after the surface settles. Keep coarse material away from emerging shoots. For winter prevention, plan a separate protective layer after the ground begins to freeze; University of Minnesota recommends five or six inches of leaves, compost, corn stalks, or straw for perennial beds in its regional guidance.
Address the wider bed where several plants moved. Redirect runoff, relieve only verified compaction when soil is dry enough, and re-establish a stable organic cover. Avoid rolling or pounding the bed. Agricultural research warns that rolling heaved stands can do more harm, and the same principle supports gentle individual resetting with no heavy pressure on crowns or wet soil.
Separate summer mulch from winter cover in the garden record. A shallow layer during growth conserves moisture and suppresses weeds while keeping crowns visible. A deeper loose winter layer is applied only after freeze to stabilize temperature, then removed or opened during thaw. Treating both as one permanent mound invites buried crowns, rodents, and spring wetness, defeating the protective reason for using mulch.
Monitor recovery through active growth
Watch the plant through active growth. A successful reset holds its grade, produces normally colored shoots, and remains firm when gently tested. Some root loss may delay size or bloom, so compare progress with the plant's normal season against the plant's normal seasonal progress. Water during dry periods across the surviving root zone without keeping damaged roots continuously wet.
Recheck after a soaking rain and after the next cold night. New settling may expose a root or tilt the crown; correct a small void with crumbly soil while preserving grade. Persistent wilting in wet soil, spreading discoloration, or a soft crown suggests root or crown disease and warrants a separate diagnosis and deserves diagnosis.
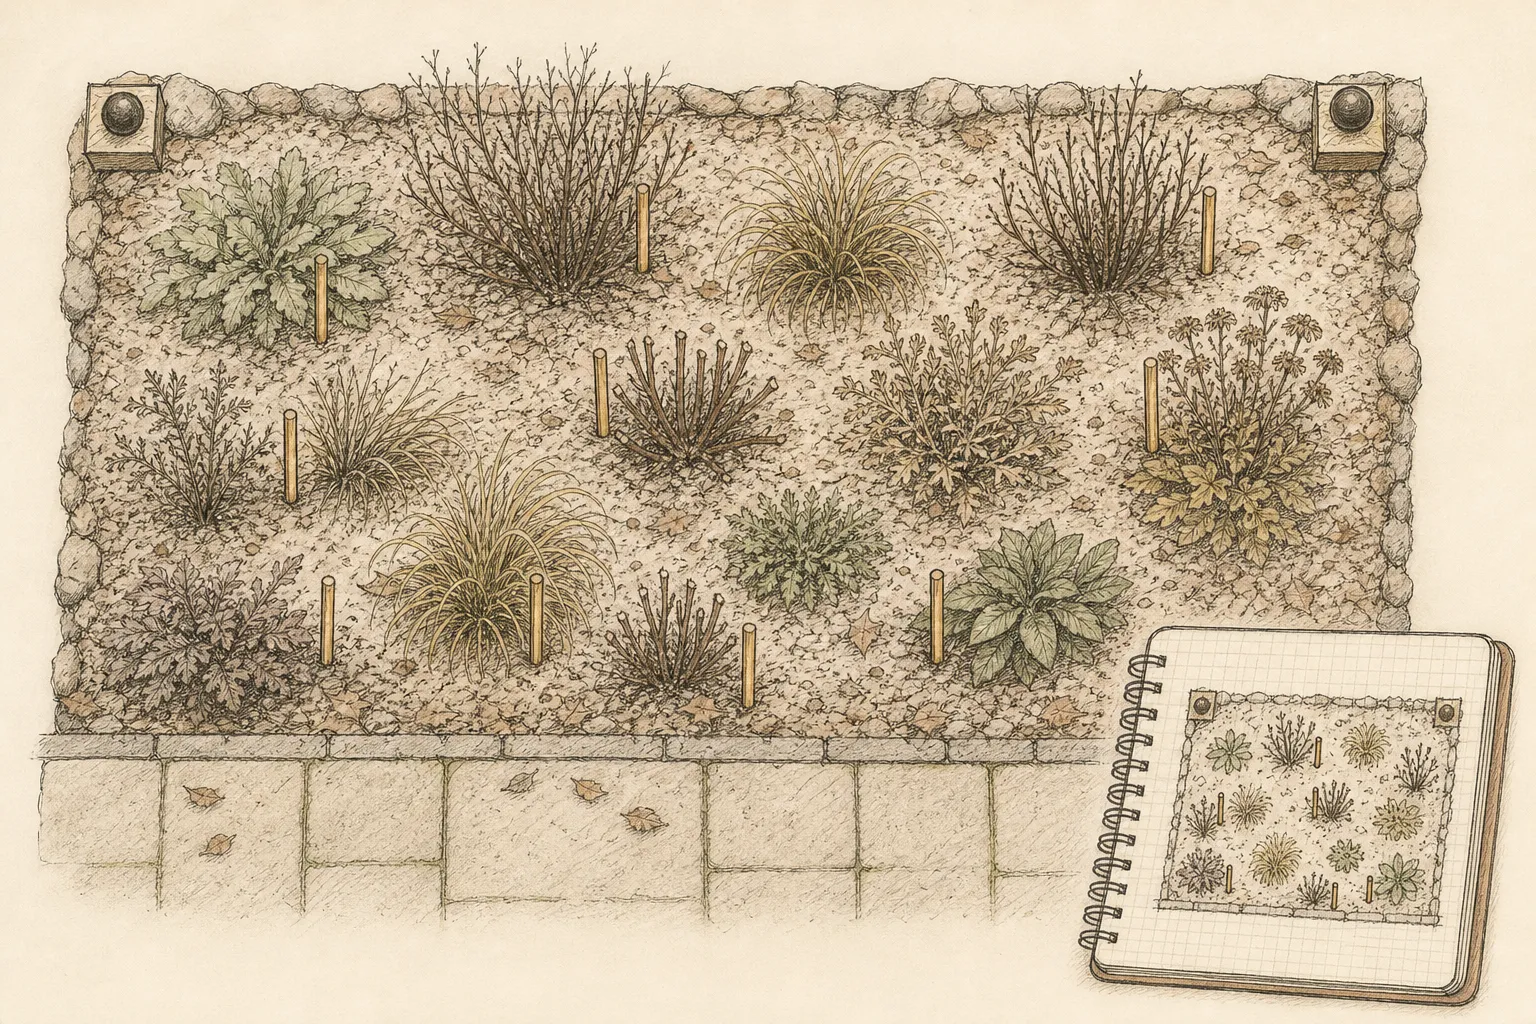
Record species, planting or division date, amount of lift, root damage, repair date, and winter cover. If the same bed repeats the pattern, change fall planting timing, drainage, or mulch practice before another cycle. The finished repair is not just a level crown in April; it is a plant that remains anchored, correctly graded, and capable of normal growth through the next winter.
Expect a root-damaged plant to need a conservative first season. Delay division, heavy flowering expectations, and unnecessary feeding while roots re-establish. Keep the site weeded so competition does not hide moisture stress, and leave sound foliage to rebuild reserves. If growth remains weak into the plant's normal active period, reassess crown health and site fit using undisturbed growth and crown health as evidence.
Prepare autumn prevention from the repair notes. Finish new planting early enough for root establishment, correct runoff before freeze, and apply loose winter mulch only after the ground begins freezing. Mark shallow crowns so spring cleanup finds them. During winter thaws, inspect exposed edges without pressing frozen plants. This sequence stabilizes temperature and root contact while preserving the species-specific crown grade restored in spring.
Keep extra loose mulch available for snow-poor cold periods, then open the cover during spring thaw so air reaches the crown and meltwater can drain.
Steps
- Level
- moderate
- Time
- 10–30 minutes per plant
- Tools
- hand fork, narrow trowel, watering can, garden kneeler or board
- Materials
- crumbly site soil, fine finished compost only where locally appropriate, light mulch
- 1Confirm that the crown lifted
Confirm true heaving by finding a lifted root mass, fresh gaps, exposed roots, or a changed crown height. Compare with the species' correct grade and an intact plant; preserve naturally exposed rhizomes and verify dormancy before judging death.
- 2Wait for crumbly soil
Wait until soil is thawed, crumbly, and able to carry the work without smearing. During a short delay, tuck loose soil around exposed roots and use light breathable cover against drying, keeping the crown and buds uncovered.
- 3Open the surrounding soil
Work a hand fork outside the surviving roots and loosen soil around and beneath the plug. Preserve root-soil contact, lift only enough to release voids, and keep all pressure and twisting force off the crown.
- 4Restore the correct grade
Return the root mass to its documented species-specific grade. Crumble compatible site soil beneath and among roots, keep growth points visible, and use an old soil mark or intact neighboring plant to set the species-specific grade.
- 5Firm and settle gently
Firm gently by hand and water only enough to settle soil if the bed is not already wet. Correct ponding, sinking, or tilt immediately; mark the plant so later movement can be recognized.
- 6Mark and revisit
Apply light mulch around the crown for the growing season, monitor through new growth and soaking rain, and plan winter mulch only after the soil begins to freeze. Correct drainage or planting timing if several plants heaved in the same area.
Related reading
Sources
- Protecting trees and shrubs in winter. University of Minnesota Extension. Source record · Accessed 2026-08-30.
- How and when to divide perennials. University of Minnesota Extension. Source record · Accessed 2026-08-30.
- Mulching Landscape Trees. Penn State Extension. Source record · Accessed 2026-08-30.
- Frost Heaving Perennials. Iowa State University Extension and Outreach. Source record · Accessed 2026-08-30.