Grow · cordyline australis winter protection uk
Cordyline australis Winter Protection in UK Gardens
Choose frost-free shelter or outdoor protection for Cordyline australis, gather dry foliage safely, and distinguish ordinary leaf shedding from winter crown damage.
Published Last updated
In this guide
- Choose shelter before reaching for the fleece
- Confirm the plant and keep its living head intact
- Give a portable cordyline a workable winter station
- Gather dry leaves with soft, releasable ties
- Protect the stem and roots as distinct parts
- Open the covering when the weather allows
- Release the head as spring conditions improve
- Steps
Choose shelter before reaching for the fleece
For a Cordyline australis staying outside in a UK garden, gather the dry leaves upward with soft ties before frost, then add fleece protection where the exposure requires it. Protect the stem and root area as well as the leafy head. Keep the covering easy to release during mild spells. A small plant that can be moved into suitable frost-free shelter has a more dependable option than an outdoor bundle in a severe winter.
The first decision is whether this particular plant should remain outside. The RHS identifies C. australis as the hardiest cordyline, but qualifies outdoor survival by mild UK conditions and a sheltered position. Young plants and coloured-leaved cultivars are more vulnerable. A green, established specimen beside a sheltered coastal wall and a recently bought red-leaved pot on an exposed inland terrace warrant different plans, even though both labels say Cordyline australis.
Use November as preparation time, with the local forecast deciding the actual work. By the second half of the month, protection may already be needed in one garden while another remains mild. Prepare the ties, covering and indoor space ahead of the first frost warning. Waiting for visible leaf collapse means the task has changed from prevention to assessing damage. Equally, a mild calendar date alone gives little reason to leave a healthy crown enclosed indefinitely.
Choose an arrangement that lets you reach the plant’s head from a stable position. A mature, branching cabbage tree can put its growing points far above ordinary reach. Assess access while the weather is still settled. If the necessary cover cannot be fitted and reopened safely, arrange appropriate help and discuss the practical protection limits with a local specialist. The height of an old trunk does not make its crown accessible or frost-proof.
Confirm the plant and keep its living head intact
Check the full name on the original label. Tender cordylines such as C. fruticosa belong indoors or in suitable heated shelter through winter; the outdoor routine for C. australis cannot establish their temperature requirements. Leaf colour also needs the cultivar name beside it. A red-leaved plant may be a C. australis cultivar, but colour alone is a poor identification method. Ask the supplier to resolve a missing or ambiguous label before choosing permanent outdoor care.
The New Zealand Plant Conservation Network describes C. australis as a palm-like tree with tough, long, narrow leaves in tufts at the ends of its branches. Young plants may have little obvious trunk. Look for the leaves emerging around the central growing region, where the new foliage develops. Phormium, another strappy-leaved garden plant, makes fans; Crocus draws that distinction in its cordyline guidance. A photograph of the whole plant and its leaf arrangement is more useful for identification than a detached leaf tip.
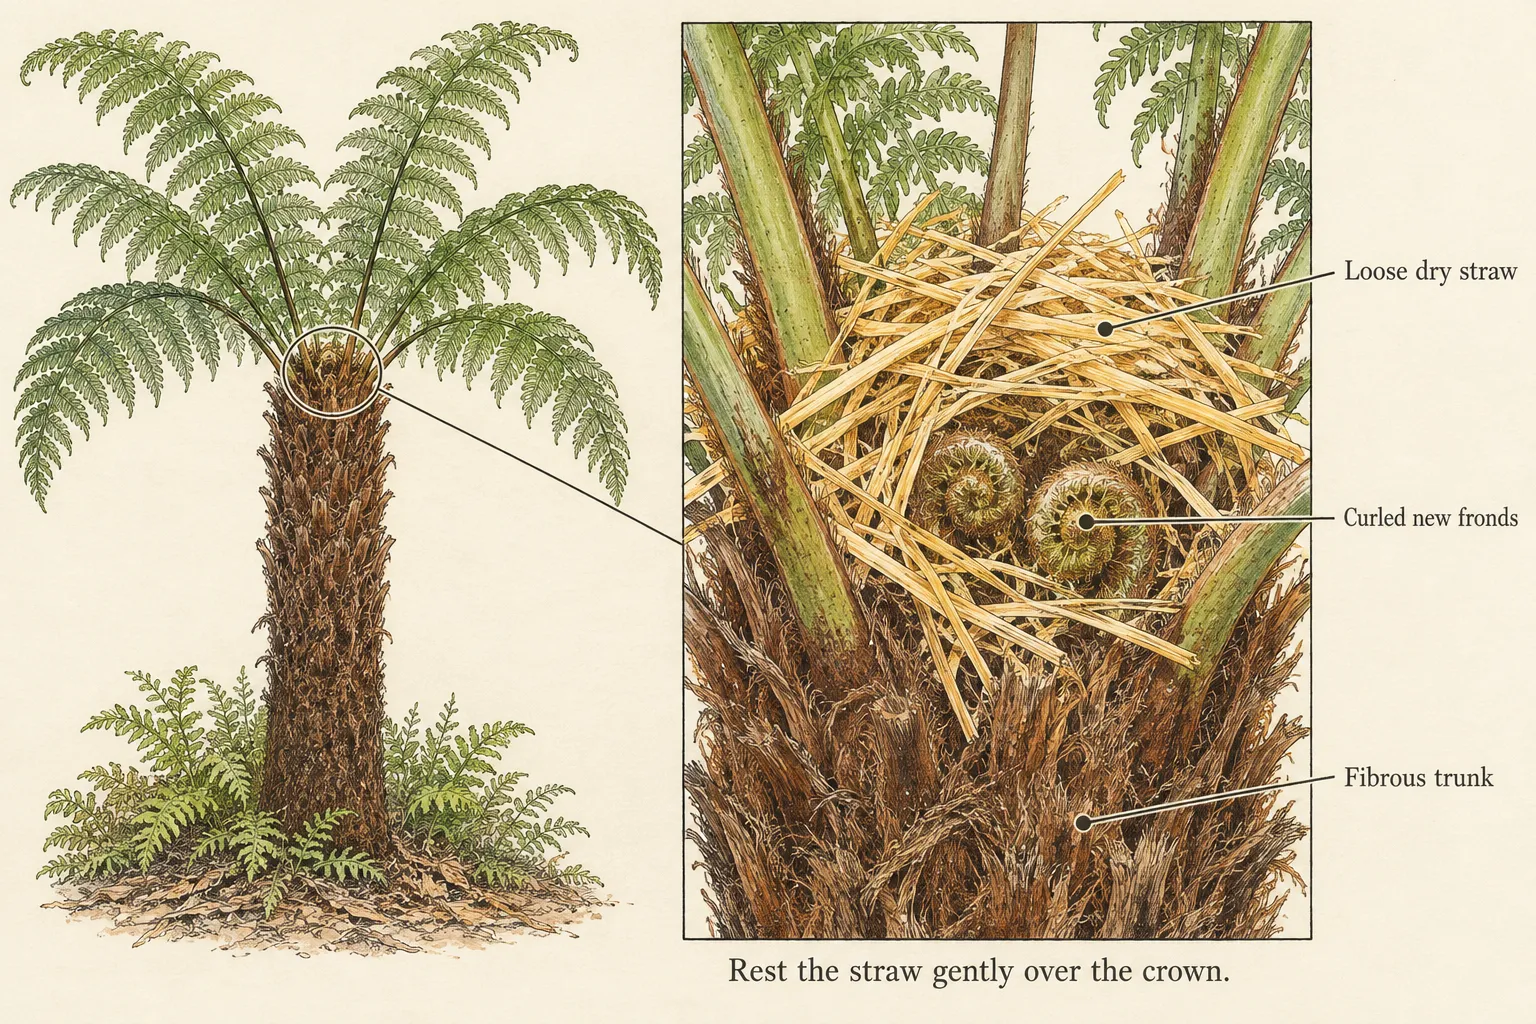
Preserve sound leaves for the winter arrangement. This plant is an evergreen, and the method uses its own foliage gathered around the growing point. Cutting the entire head off produces a quite different treatment. The leaf-removal stage used for a protected banana pseudostem is therefore a poor model here. Likewise, the straw placed among a tree fern’s croziers belongs to a different anatomy. Start with the living cordyline head and bring its leaves together gently.
Old lower leaves can turn brown and hang beneath a healthy tuft. NZPCN describes that retained skirt, and the RHS notes gradual natural loss of older leaves. Notice where change occurs: an occasional dry outer leaf is different from the centre becoming soft while the whole head flops. Before covering, photograph the head and visible trunk. This gives you a useful comparison when the leaves have spent weeks gathered together and their normal outline is less familiar.
Give a portable cordyline a workable winter station
For a vulnerable pot, choose the winter station while you can still move it easily. The RHS offers a frost-free greenhouse, porch or conservatory for container cordylines. A greenhouse roof alone does not establish that condition: check the overnight temperature where the pot will stand. Include the height of the intact leaves when judging the space. A shelf that accommodates the container but bends the central foliage sharply is an unsuitable fit.
Keep a plant staying under cover for the season in bright light. Temporary shelter in a shed or garage during a cold snap is another RHS option, but that short interruption is different from months in a dark store. As a practical plan, decide where the plant will return when the cold spell passes and keep that route clear. Leave space to inspect the crown, reach the compost and remove any collected runoff beneath the pot.
Cordyline compost should be kept fairly dry in winter, with occasional watering for sheltered plants. Assess the mix before adding water and let excess escape. A watering schedule carried over from summer is unlikely to reflect a cooler, slower-growing plant. Conversely, shelter from rain means the container receives only the water you supply. The useful observation is the condition of the potting mix, not whether the outdoor paving happens to be wet.
For a pot remaining outdoors, use a sheltered position protected from excessive winter rain and insulate the container separately from the foliage. Reused bubblewrap around the pot is an RHS option; keep drainage openings functional. The leafy head and stem receive horticultural fleece when needed. Treat those as two accessible pieces: one limits exposure around the roots, while the other can be opened to check the living crown. A single opaque parcel makes both jobs harder.
Gather dry leaves with soft, releasable ties
Choose a dry interval for handling the head. Crocus specifically warns that wrapping wet cordyline foliage encourages rot and recommends waiting for a drying spell. Check between overlapping leaves as well as the outer surface. If the plant is portable and cold is imminent, move it under suitable shelter while it dries. For a rooted plant, prepare early enough to use a dry opportunity before the frost arrives; the forecast and the foliage condition both matter.
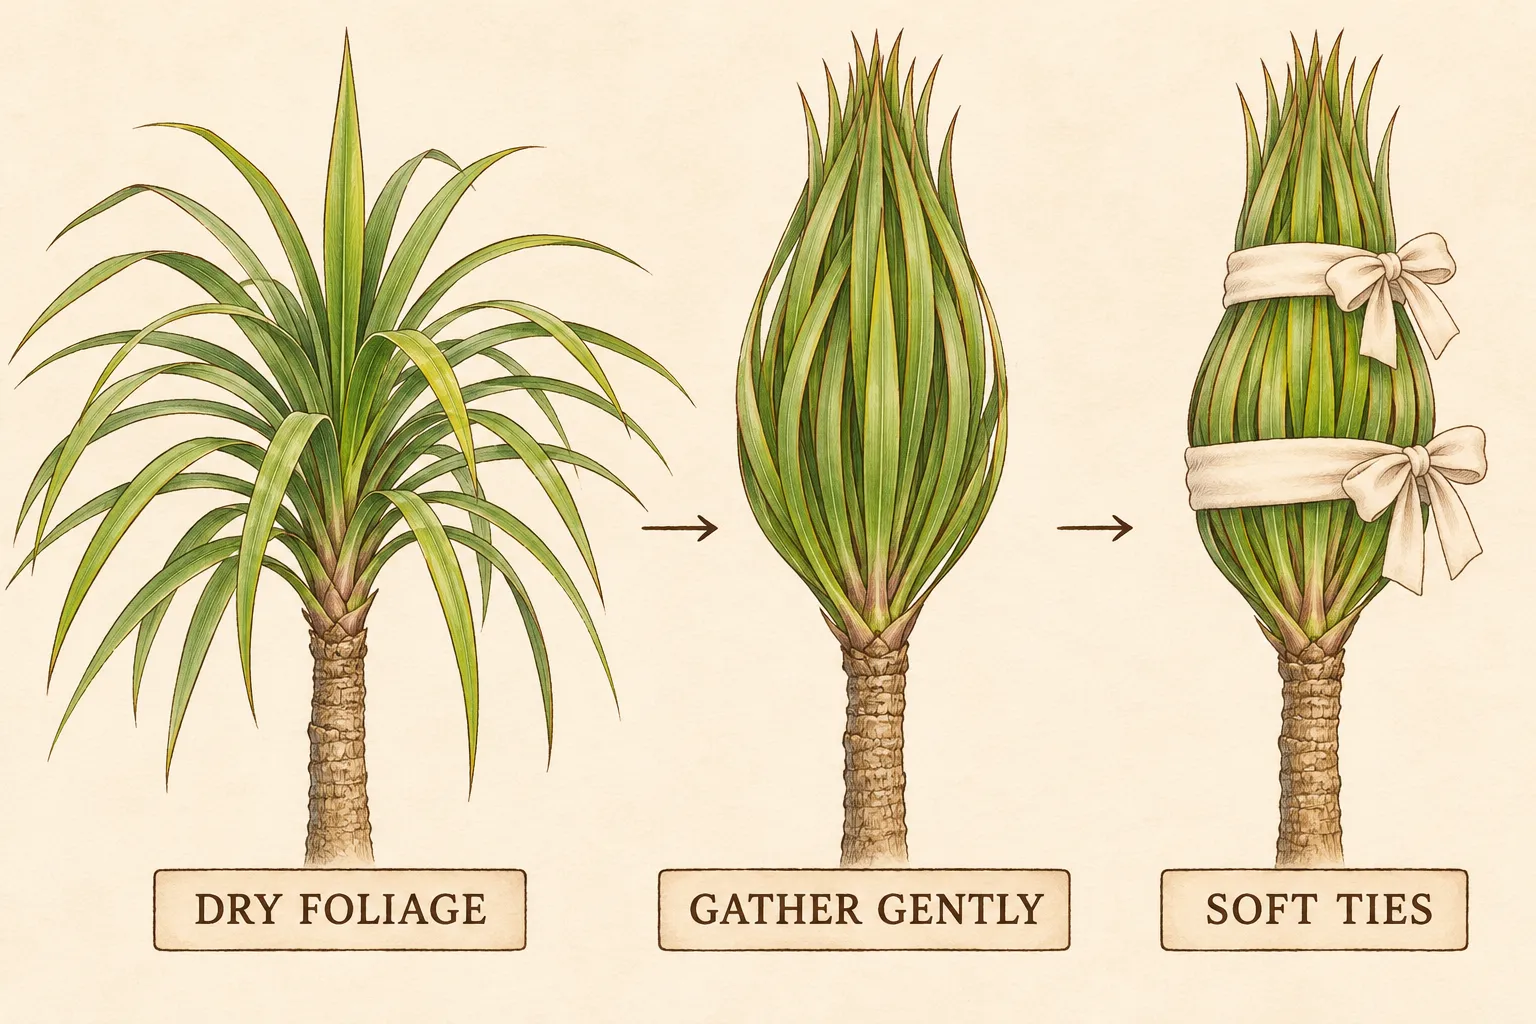
Bring the long blades upward around the centre, supporting their length as you work. Picture closing an umbrella: the leaves move closer to the central axis while their bases remain attached. Gather small groups, pausing where a blade catches beneath another. The aim is a narrow upright bundle with the growing region protected inside it. Stop if a leaf is being sharply folded across its width; release that part and arrange it again. The RHS recommends this gathering to reduce wind damage and water collecting at the growing points.
Hold the bundle with a forgiving material such as a strip of fleece, soft raffia or old tights, as Crocus recommends. Set the tie where it holds the gathered leaves steadily and make a fastening that can be undone. Use only enough tension to retain the shape, keeping the blade surfaces free of cuts or indentations. Check the far side of the bundle too: a leaf trapped sideways beneath a tightened band may be hidden from your first viewpoint.
Choose the number and position of ties to suit the length and spread of this head. One support point may leave a large fan splayed below it, while extra bands can create unnecessary constrictions on a compact plant. After securing the foliage, inspect the outline and the leaf surfaces at each band. You should still be able to release the arrangement with cold hands when a mild spell allows inspection.
Protect the stem and roots as distinct parts
In colder positions, extend protection down the main stem with layers of horticultural fleece. The RHS also specifies a 15 cm layer of mulch, such as bark, over the root area for this situation. That depth describes the soil covering; it is neither a fleece thickness nor material to push into the crown. Keep the mulch around the root zone with a clear space immediately against the trunk, so its base remains visible and free of a wet mound. Apply it over moist, unfrozen soil; leave any drainage channel clear.
For a small planted specimen, a useful inspection order is head, stem, then soil. Check that the gathered leaves are supported, that the stem covering stays in place, and that runoff can leave the planting area. These checks expose different faults. A beautiful fleece sleeve around the trunk leaves a spread-open crown untreated; a neatly tied head leaves cold-exposed roots in a container untreated. The diagram below separates those areas so the relevant protection can be selected.
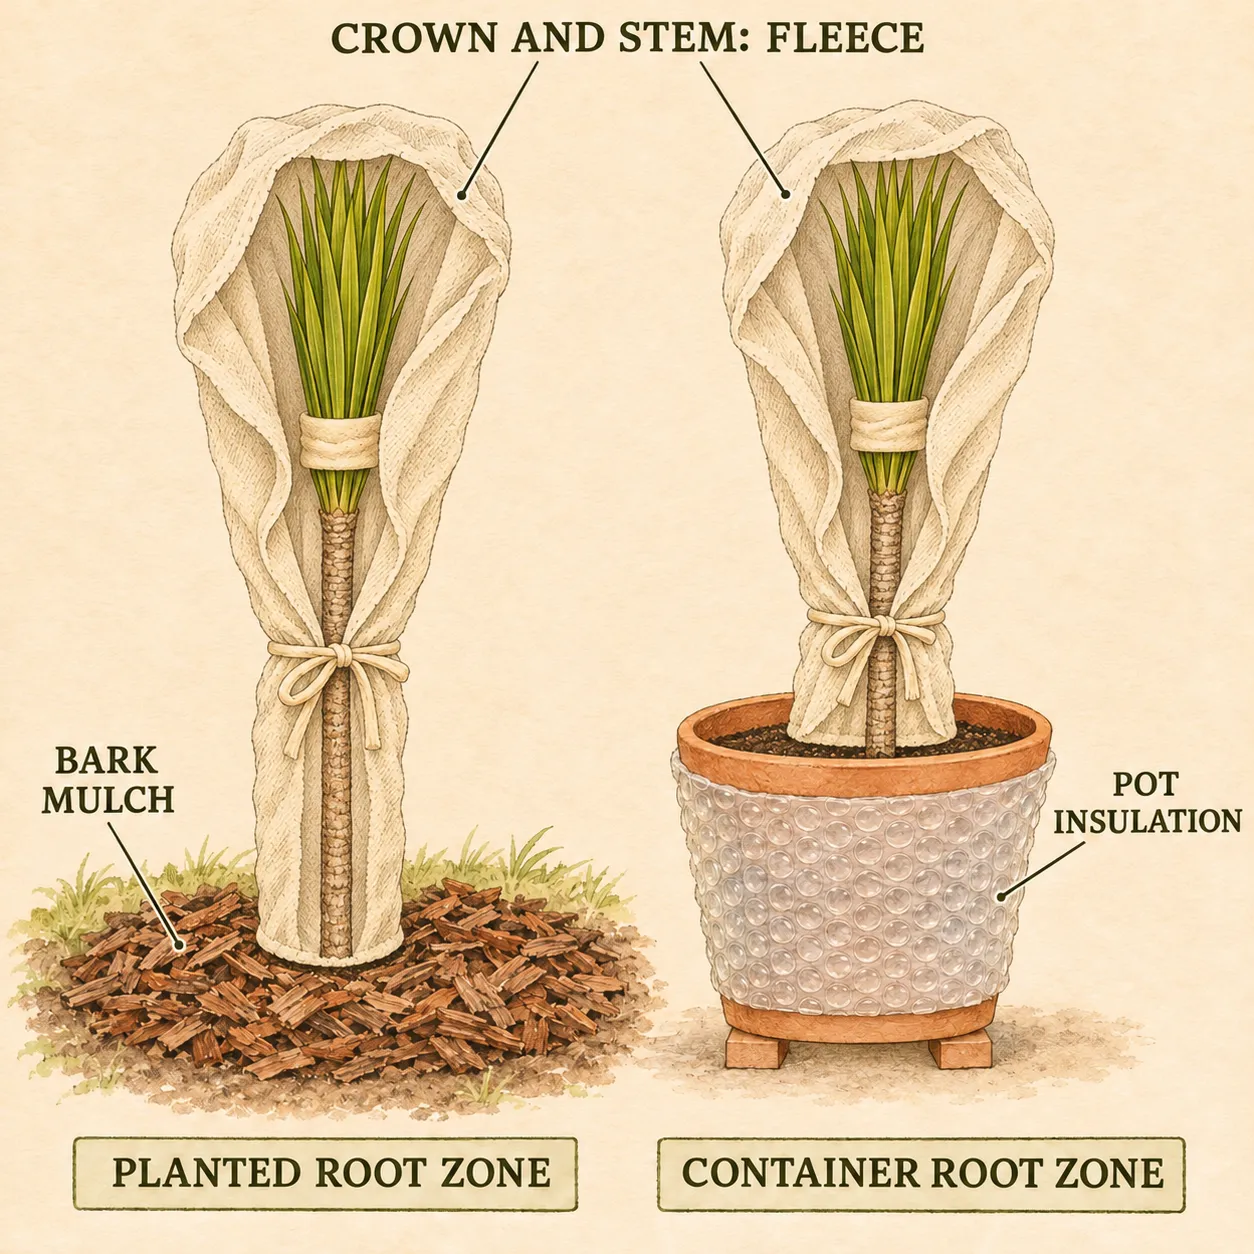
Fleece supplies limited insulation. The RHS describes heavier grades as providing roughly 2°C of frost protection, and its cordyline damage advice warns that even additional wrapping cannot defend a plant against a really cold winter. That figure is not a temperature guarantee for your bundle. A four-degree allowance for two layers would be an unreliable assumption. Wind, duration and the plant’s condition still matter when deciding whether outdoor protection is a reasonable risk.
For example, consider a small coloured cultivar in a pot with suitable indoor space available. Adding more outdoor fleece leaves it exposed to the same prolonged cold spell; moving it changes the winter environment. For an established rooted specimen, relocation may be impractical, so the plan is to reduce exposure and maintain the covering while accepting the remaining risk. Choose between those situations before purchasing extra material. The purpose is to protect a plant that can realistically stay there.
Open the covering when the weather allows
Watch for extended mild spells as well as freezing nights. RHS wrapping guidance advises removing covers during prolonged very mild weather to reduce trapped damp and rot, then replacing them when cold returns. Undo the accessible fastening and inspect the inside of the leaf bundle. Dry outer fleece can conceal damp foliage beneath it, so judge the plant itself. Let the head air and dry in suitable conditions before gathering it again.
After wind, look for a slipped tie, a torn edge or a covering that is rubbing across leaf tips. Release pressure where a band has shifted. After rain, inspect the crown and the root environment separately: water held among the leaves and water collecting at the pot base need different adjustments. A spare dry covering is useful while the first dries. Keep the original cause in view when replacing materials, especially where roof runoff or an exposed position repeatedly wets the plant.
Leave a healthy head intact through winter. A few browned tips give little basis for cutting through the trunk, and routine size reduction belongs to spring in RHS guidance. If the centre collapses, becomes brown and soft, or sheds many leaves after frost, record those changes and seek a closer assessment. Foul-smelling white or orange-tinged ooze on the stem can accompany bacterial slime flux in damaged tissue. A dry older leaf skirt is a different observation.
RHS advice allows frost-damaged cordylines to be cut back to sound tissue, with possible new shoots below the cut or from the base; substantial pruning is assessed in spring. Basal recovery may emerge during June to September, so a bare winter outline cannot predict the final result. Recovery is possible, not assured. Extensive softening, decay or an unstable trunk needs specialist assessment. The winter cover cannot repair tissue already lost, and enclosing a deteriorating stem more tightly is no remedy.
Release the head as spring conditions improve
Once severe frost danger has passed and growth is starting, remove protection gradually or choose a dull day, following RHS wrapping advice. Undo each tie before drawing the fleece away. Separate caught leaf tips gently and give the head room to spread. Keep a temporary covering available if another cold spell is forecast. A warm afternoon can be a useful inspection opportunity while the longer-term decision to leave the plant uncovered still depends on local conditions.
Assess the restored head from the centre outward. Note new growth, then distinguish dry older foliage from damage extending into the stem. If pruning is necessary, the sound tissue and any living sideshoot determine the cut. Preserve the sound structure that remains. Resume growing-season container care as conditions and growth warrant. Keep the winter record focused on this cordyline: whether its crown stayed dry, which ties marked the leaves, and whether the chosen shelter actually remained frost free.
Steps
- Level
- moderate
- Time
- About 30 minutes for a small reachable plant, plus checks during winter
- Tools
- Scissors for cutting ties and fleece, A minimum thermometer for the proposed indoor station, Gloves for handling the foliage
- Materials
- Horticultural fleece, Soft raffia, fleece strips or old tights for ties, Bark mulch for a planted specimen in a colder position, Reused bubblewrap for the container if it stays outside
- 1Assign the plant to outdoor protection or shelter
Read the species and cultivar label, note whether the plant is young or established, and check access to the head. For a vulnerable movable pot, prepare bright frost-free space with clearance for the intact foliage. Check its overnight temperature before relying on it. Keep tender species on their own appropriate indoor care route. For brief garage shelter, decide where the pot will return once the cold snap passes; reserve a light position for an entire winter indoors.
- 2Prepare the head during a dry interval
Use the forecast to act before frost. Check the central leaves and stem, photograph existing damage, and clear detached debris that conceals the working area. Let wet foliage dry before enclosing it. Bring sound blades upward in small groups, keeping their bases attached and easing any leaf caught beneath its neighbour.
- 3Secure the leaves and fit the selected protection
Tie the gathered head with a soft releasable band, checking every side for trapped or sharply folded blades. Add fleece around the head and stem where cold exposure requires it. For a planted specimen in a colder position, spread the specified 15 cm mulch over the root area while keeping the immediate trunk base clear. Insulate an outdoor container separately and preserve drainage. Leave the fastenings facing an accessible side for later checks.
- 4Maintain the arrangement through winter weather
During extended mild spells, open the cover and check the foliage beneath it. Release shifted ties, dry or replace wet material, and restore protection before the next cold spell. Assess potting-mix moisture independently of crown dampness. Record the location of central collapse, soft tissue or smelly stem ooze so a diagnosis can distinguish these symptoms from ordinary old-leaf shedding.
- 5Remove protection and assess spring growth
When severe frost risk has passed and growth starts, release the covering gradually or on a dull day. Undo ties before freeing the leaves. Assess any required damage pruning in spring, cutting only on a sound basis or obtaining specialist help for an unstable trunk. Allow time for possible later basal shoots when judging the plant’s recovery.
Related reading
Sources
- How to grow cordyline. Royal Horticultural Society. Source record · Accessed 2026-11-06.
- Cordyline. Crocus. Source record · Accessed 2026-11-06.
- Cordyline australis. New Zealand Plant Conservation Network. Source record · Accessed 2026-11-06.
- Overwintering tender plants: wrapping. Royal Horticultural Society. Source record · Accessed 2026-11-06.
- Cordyline slime flux. Royal Horticultural Society. Source record · Accessed 2026-11-06.
- Preventing winter damage. Royal Horticultural Society. Source record · Accessed 2026-11-06.
- Mulches and mulching. Royal Horticultural Society. Source record · Accessed 2026-11-06.