Grow · tool maintenance
Clean and Oil Garden Hand Tools for Winter Storage
Remove soil and sap, dry every surface, protect metal and wood appropriately, and store each hand tool in a dry system you can reopen quickly in spring.
Published Last updated
In this guide
- Start with a maintenance batch, not a storage scramble
- Separate soil, sap, rust and looseness before you reach for oil
- Choose the right protection for metal, pivots and wood
- Repair what spring pressure will punish
- Build a dry storage system you can reopen quickly
- Combine hygiene, inventory and spring access in one final pass
- Steps
Start with a maintenance batch, not a storage scramble
Do not begin with a peg hook and a half-empty bottle of oil. Begin with a batch. Bring every hand tool that cuts, scrapes, lifts, probes, weeds, labels, or ties into one dry working area and sort by what each tool needs next. A muddy border fork, a sap-coated bypass pruner, a soil knife with a loose handle, and a trowel that only needs drying should not all receive the same rushed treatment.
That sorting step changes the quality of the work. University of Vermont Extension recommends cleaning, inspecting, and making needed repairs before storage rather than simply stashing tools until spring. In practice, that means grouping tools by material and mechanism: fixed steel digging tools, edged cutting tools, wood-handled tools, and items with pivots, screws, springs, or replaceable parts. The point is not tidiness for its own sake. The point is that the next action becomes obvious.
A batch also reveals what the season actually did. Some tools carry only ordinary soil. Others show resin, rust freckles, loosened bolts, or swelling wood. A few may have crossed diseased plant material and should be cleaned with hygiene in mind before they re-enter general storage. When those differences stay hidden in a hurried pile, oil gets applied over moisture, sharp tools are stored dirty, and cracked handles survive until they fail under spring pressure.
Lay out a staging surface that can stay dry while tools wait their turn. Old towels, a brush, a bucket for clean water, rags, sandpaper, steel wool, and the chosen protective oils should already be within reach. The work becomes short and repetitive after setup, and that is helpful. Winter storage succeeds when the last trowel is treated as carefully as the first, not when the first few tools receive all the attention and the rest are hung up damp.
Separate soil, sap, rust and looseness before you reach for oil
Oil is not a cleaning substitute. It is the finish of the maintenance pass, not the opening move. The Royal Horticultural Society advises removing soil with a stiff brush and, when needed, washing muddy tools before drying them thoroughly. Illinois Extension similarly recommends using a wire brush, paint scraper, or strong blast from a hose for caked soil, then wiping smaller hand tools to remove sap and moisture from blades. Those steps matter because every later decision depends on seeing the bare surface clearly.
Treat soil and sap as different jobs. Dried soil hides pits, cracks, and the true extent of corrosion. Sticky sap keeps blades tacky, attracts grime, and can make secateurs or shears seem mechanically worse than they are. Use brushing and water first for soil, then a small amount of soap or an appropriate sap-loosening wipe for cutting tools that stay gummy after washing. Once the debris is gone, dry the tool enough to judge its condition rather than smearing residue from one surface to another.
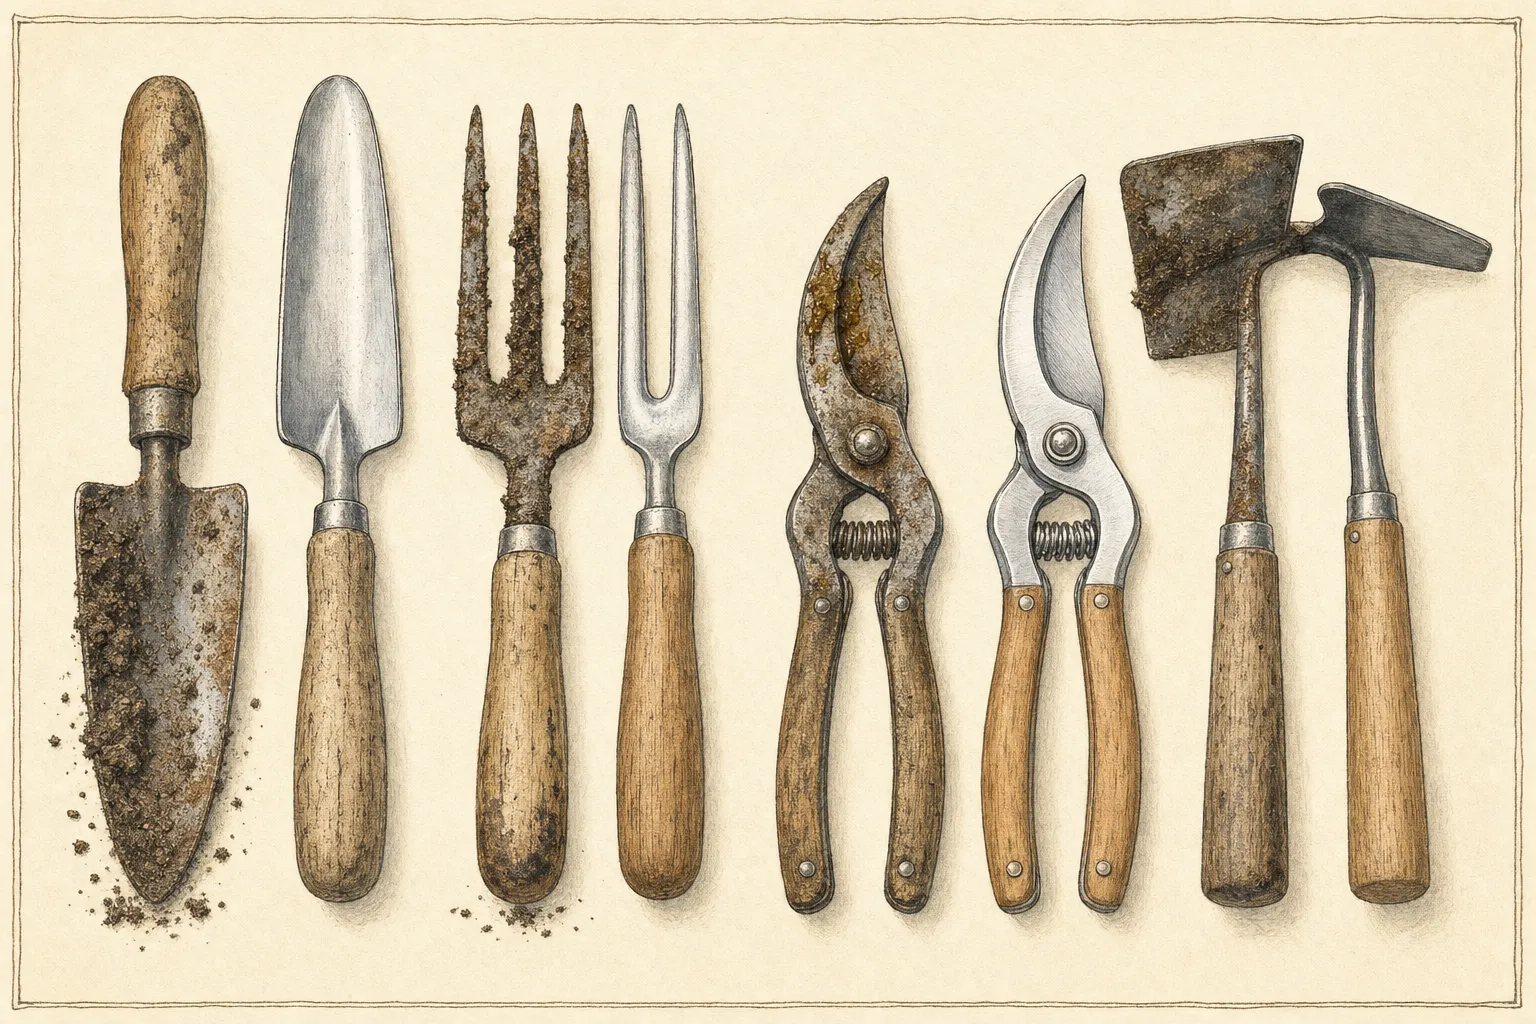
Rust should be reduced only after the tool is clean enough for you to see whether you are dealing with light surface oxidation or deeper damage. UVM notes that steel wool or sandpaper can handle rust spots. Illinois Extension adds that steel wool or sandpaper can also clear dirt, rust, and sap from pruner blades before sharpening or storage. Work until the surface is serviceable and smooth, not until every stain is cosmetically erased. Winter storage is about reliable spring function, not showroom polishing.
Inspection belongs in this same stage because cleaning exposes the evidence. UVM recommends checking for bent blades, loose screws, cracked or rough handles, and other needed maintenance while each tool is already in hand. Illinois Extension specifically calls out cracks, nicks, and burrs on cutting edges. Take those notes now. A loose ferrule, a spreading handle grain, or a pivot that still drags after grime is removed is a repair decision, not a storage detail.
Choose the right protection for metal, pivots and wood
The tool must be dry before any protective coat goes on. RHS emphasizes drying after washing so wooden handles do not swell and metal does not rust. UVM makes the same point plainly: once clean, be sure to dry garden tools thoroughly. Moisture trapped under oil is not protection. It is a slow storage problem. Give special attention to pivot joints, blade overlaps, ferrules, screw heads, and the shoulder where a metal head meets a wooden handle.
For plain metal on hand tools, a thin film is enough. UVM recommends wiping metal parts with mineral oil before storage. RHS notes that occasional oiling may still be required even on modern tools, depending on the quality of the metal. Illinois Extension advises an oil-based protective coating on cleaned, dry metal surfaces and a light lubricant on sharpened blades. Those sources point in the same direction: protect bare metal from moisture without leaving a thick greasy layer that collects dust or creeps onto grips.
Wood deserves a separate decision. Illinois Extension recommends sanding rough wooden handles and applying boiled linseed oil as a protective coating. UVM advises smoothing rough wood with sandpaper and wiping on a light coating of mineral oil to save hands from splinters and help the handle surface stay sound. The practical boundary is simple. Remove roughness first, then apply a light coat suited to the handle, working it into the surface rather than leaving a wet finish that stays tacky in storage.
Moving parts need lubrication where friction lives, not everywhere. RHS advises dropping oil into the central pivot point of cutting tools and opening and closing the tool to work it in. Illinois Extension and the Illinois Master Gardener guidance both tell readers to oil moving parts so the tool continues to work properly and efficiently. That means pivot bolts, hinge points, springs, and similar mechanisms get a small controlled dose. A lightly oiled pivot and wiped blade serve better than a tool dripping with excess.
Repair what spring pressure will punish
Winter storage is the best moment to decide which tools are worth another season and which should be repaired, rehandled, or retired before they can interrupt work. UVM says to inspect for damage and needed maintenance while cleaning, and Illinois Extension recommends examining blades for cracks, nicks, or burrs. The key is to judge failure under load, not appearance on the bench. A tiny crack near a socket, a bent digging edge, or a handle split that opens under grip pressure will only worsen when spring soil is wet and work accelerates.
Treat loose hardware as a repair signal, not an annoyance to ignore. Tighten screws and bolts only after the surfaces are clean enough to seat correctly, then reopen and close moving tools to confirm that adjustment improved function instead of binding it. If a pivot still chatters, twists, or fails to hold alignment after cleaning and lubrication, that tool should be tagged for parts, replacement, or a more detailed service pass rather than returned to the general storage group.
Be honest about handles. Roughness can be sanded. Minor looseness may be corrected. A handle that is cracked through its working area, twisting in its socket, or shedding splinters deeply enough to keep reopening will not become trustworthy because it looks neater after oil. Illinois Master Gardener guidance is clear that handles with considerable wear and tear should be repaired or replaced. Winter is the season to make that call while no one is leaning into a stubborn root or compacted path edge.
Light edge maintenance may belong here for simple hoes, spades, or hand tools whose geometry is straightforward, but storage repair is not a reason to improvise on specialized cutters. Illinois Extension warns against power grinding stones for garden tools because friction heat can make metal brittle. Use that reminder to keep this article's scope disciplined: smooth burrs, remove rust, and prepare simple edges only where you can clearly preserve the original form. More exact pruning-blade geometry deserves its own controlled sharpening session.
Build a dry storage system you can reopen quickly
A good storage system does three things at once. It keeps moisture away from the tool, keeps the tool visible enough to retrieve by task, and keeps next-season replacements obvious before you actually need them. UVM recommends an organized storage space that is dry and safe from winter weather. RHS reduces the same idea to the essential instruction for cleaned cutting tools: store in a clean dry place. Those are small phrases, but they define the entire end state.
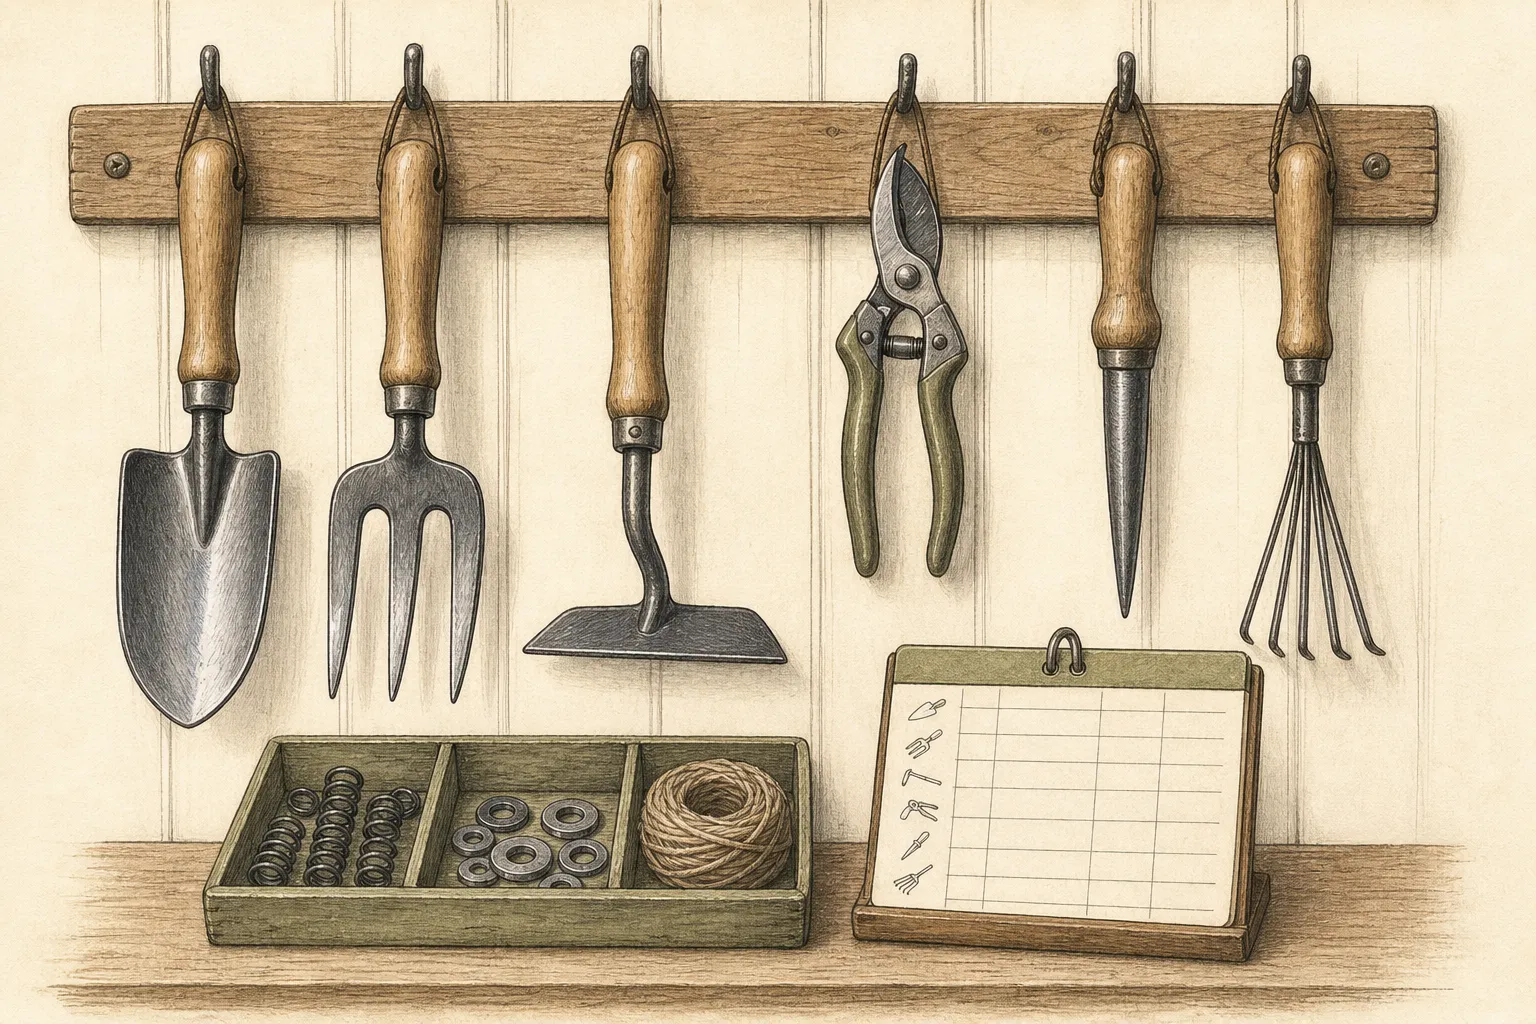
Get metal off the floor and away from corners where condensation lingers. Hang long-handled tools, stand them in a dry rack only if air can circulate and metal does not sit in damp debris, and keep small cutters in trays or bins where blades do not strike one another. Group by job rather than by size alone. Border tools, cutting tools, and measuring or labeling tools should reopen as working sets. You are building spring access, not simply reducing visual clutter.
Use the storage pass to solve the small shortages that always steal time later. UVM advises taking inventory and making note of replacements, parts, and accessories that will be needed. That can mean spare springs for pruners, replacement labels, fresh twine, extra blade covers, or a handle repair you have postponed too long. A winter inventory is more useful than a spring shopping memory because the missing items are still standing in front of you.
Write the storage logic down where it can survive the season. If parts are stored away from the tool, note the location. If a tool was withheld because it needs a new handle or replacement blade, mark it clearly and keep it out of the ready group. The goal is that the first workable day in spring becomes a retrieval exercise, not a re-diagnosis exercise. Clean tools are valuable, but a clean tool hidden under three unsorted compromises is not truly ready.
Combine hygiene, inventory and spring access in one final pass
Some tools need a last hygiene decision before they disappear for winter. RHS advises disinfecting used blades that have contacted contaminated soil or plant material, then drying and oiling them afterward. Illinois Master Gardener guidance offers hydrogen peroxide or rubbing alcohol as options and warns that bleach is corrosive enough that it is not the best choice for sharp-edge tools such as pruners. That distinction matters because disease prevention and rust prevention have to live in the same workflow.
Keep the disease boundary narrow and specific. Not every trowel needs a disinfection ritual after ordinary use, but tools that worked through suspect roots, blighted stems, or obviously diseased tissue should not be returned dirty to the same crate as healthy-season cutters. Clean first, disinfect when the use history warrants it, rinse or wipe according to the product directions if needed, dry fully, then restore the protective oil film. Hygiene is not complete if the disinfection step simply creates a corrosion problem in storage.
Finish with one written record that connects condition to action. Note what was cleaned, what was repaired, what still needs parts, and what should be replaced before spring buying shifts attention elsewhere. Illinois and UVM both push inventory for a reason: once the tools are hidden away, remembered shortages become surprisingly unreliable. The short record can be a shed card, notebook page, or digital list, but it should identify the exact tool and the next action it needs.
When the pass is finished, every tool should fall into one of three states: ready, ready after one missing part arrives, or retired. That clarity is the real reward of winter maintenance. Oil on clean metal, conditioned wood, sound pivots, a dry storage place, and a readable inventory are not separate chores competing for time. Together they are what turns a season-ending pile into a spring-opening tool set that behaves predictably from the first cut and first shovel mark.
Steps
- Level
- easy
- Time
- About 60 to 90 minutes for a typical home-garden hand-tool batch
- Tools
- stiff brush, bucket or hose, old towels or clean rags, steel wool or sandpaper, screwdriver or wrench for tool hardware
- Materials
- light protective oil for metal surfaces, boiled linseed oil or equivalent handle treatment if wood needs conditioning, mild soap for soil and sap residue, appropriate disinfectant for tools that contacted diseased material
- 1Gather the full batch and sort by need
Bring all hand tools into one dry work area and separate fixed digging tools, cutting tools, wood-handled tools, and items with pivots or replaceable parts. Set aside anything that contacted diseased plant material so it can be cleaned with hygiene in mind. Sorting first keeps oil, sanding, tightening, and storage decisions from getting mixed together.
- 2Remove soil, sap, and obvious rust
Brush or wash away caked soil, then clear sticky sap and grime from cutting tools so the metal surface is visible. Use steel wool or sandpaper on light rust only after the tool is clean enough to judge the damage honestly. Stop when the surface is serviceable and smooth rather than polishing every stain for appearance alone.
- 3Dry every hidden moisture point
Dry blades, sockets, ferrules, pivots, springs, and the shoulder where wood meets metal before any protective coat goes on. Open and close bypass pruners or shears while drying so trapped water leaves the joint. Handles should feel dry, not merely less wet, because oil over remaining moisture stores the problem instead of solving it.
- 4Smooth wood and protect bare metal
Sand rough wooden handles until splinter risk is gone, then apply a light protective coat suited to the handle. Wipe a thin film of protective oil over plain metal surfaces and sharpened edges that are already clean and dry. Keep the finish light. Excess oil attracts dust and can migrate onto grips, gloves, and storage surfaces.
- 5Lubricate pivots and tighten hardware
Add a small amount of oil to pivots, springs, and hinge points, then work the tool open and closed so lubrication reaches the bearing surfaces. Tighten loose screws, nuts, and bolts only after the mechanism is clean enough to seat correctly. Tag any tool that still binds, twists, or rattles after cleaning and lubrication for parts or retirement.
- 6Disinfect only where use history requires it
If a tool worked through diseased tissue or contaminated soil, clean it first, then apply the chosen disinfectant according to its directions. Allow required contact time, dry the tool again, and restore a light oil film before storage. Keep this step specific to tools with a genuine hygiene reason so ordinary maintenance stays efficient and corrosion risk stays low.
- 7Store by task and record what spring will need
Hang or rack long-handled tools off the floor, group small tools by job, and keep cutters where blades do not strike one another. Write down missing parts, replacement needs, and any separate storage location for springs, covers, or labels. The batch is finished only when you can tell at a glance which tools are ready, which need one purchase, and which are retired.
Related reading
Sources
- Smart Garden Tool Storage. University of Vermont Extension. Source record · Accessed 2026-08-19.
- Cleaning Hand Tools: Maintenance Tips. Royal Horticultural Society. Source record · Accessed 2026-08-19.
- Proper maintenance extends lifespan, saves money on garden tools. Illinois Extension. Source record · Accessed 2026-08-19.
- Master Gardener Q&A - Readying Your Garden Tools. Illinois Extension. Source record · Accessed 2026-08-19.