Grow · seed zonal geranium compact transplants
Start Zonal Geraniums from Seed for Compact Garden Plants
Sow seed-grown Pelargonium early enough for summer flowers, then manage warmth, light, moisture, roots, and potting space without stretching the plants.
Published Last updated
In this guide
- Count backward from the outdoor planting window
- Build a clean, drainable propagation station
- Sow by seed size and packet evidence
- Change the environment as soon as seedlings emerge
- Water the root zone, not the calendar
- Pot on before roots and leaves become a single mat
- Move a compact plant into the garden gradually
- Steps
Count backward from the outdoor planting window
Seed-grown zonal geraniums, Pelargonium commonly sold as annual bedding plants, need a long indoor interval. University of Minnesota Extension gives roughly three to four months from sowing to outdoor planting and places seed starting early in the year for its climate. That is a regional example, not a universal February command. Begin with the local frost pattern, intended planting temperature, cultivar packet, and the time required for hardening.
Choose the garden role before buying seed. Compact bedding strains, container selections, and seed-grown mixtures differ in height, color range, uniformity, and time to flower. Read the current packet for days or weeks to transplant size and any cultivar-specific germination instructions. A long schedule makes mislabeled or unsuitable seed expensive in shelf space even when the packet itself was inexpensive.
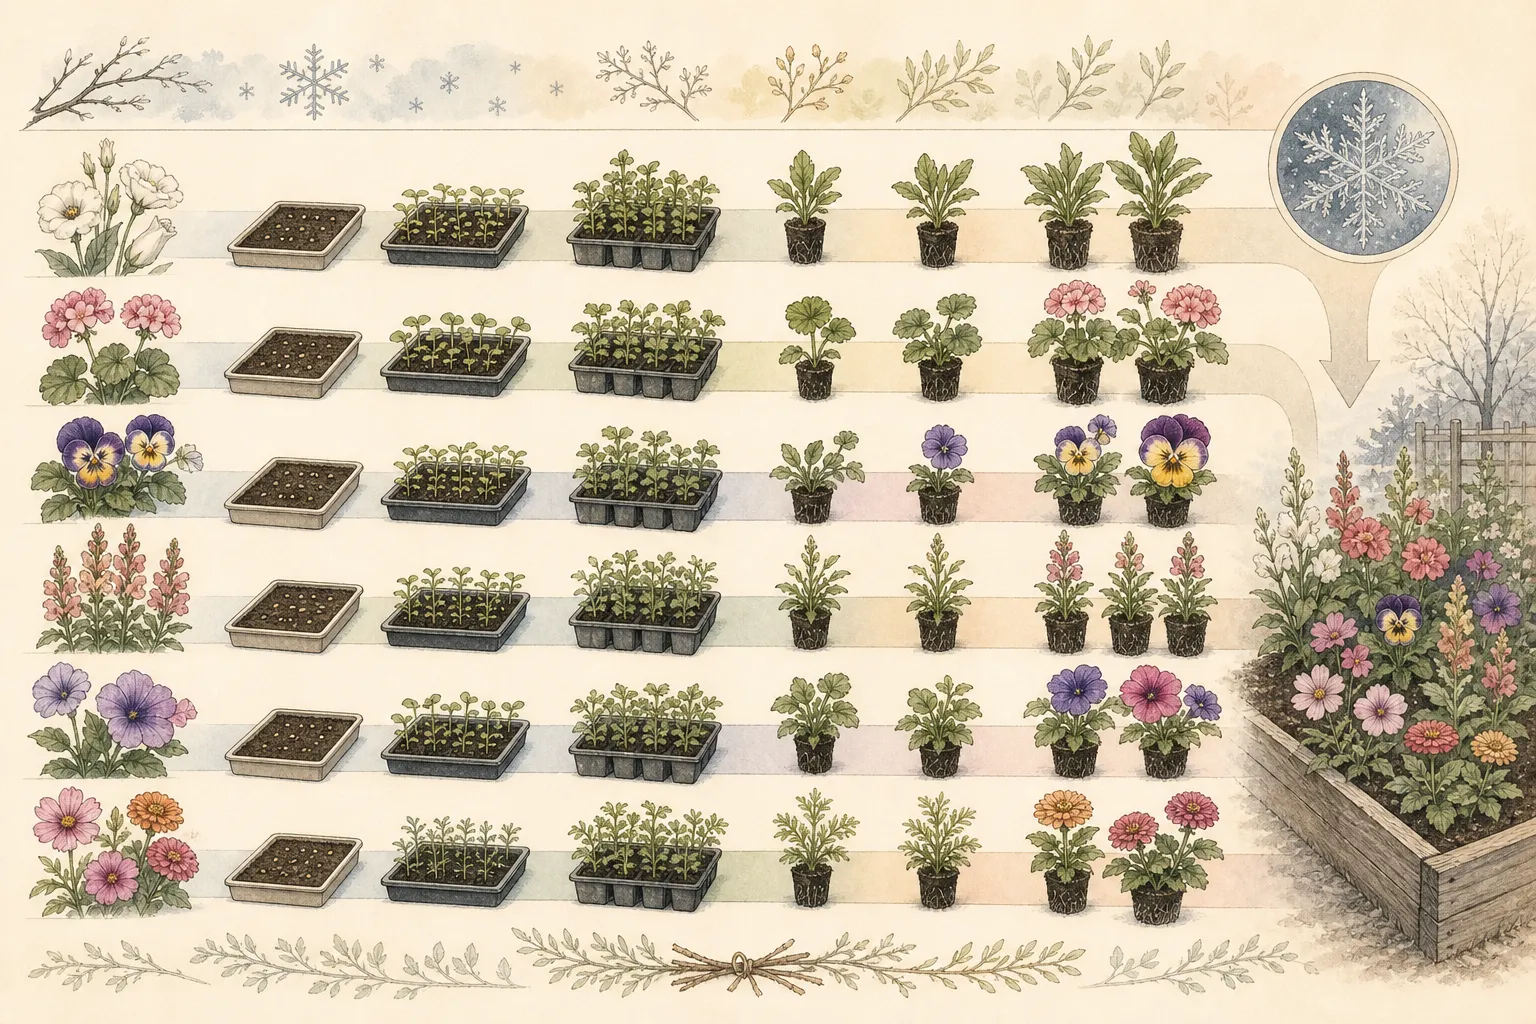
Mark four dates: sowing, expected emergence, first potting, and start of outdoor acclimation. Add room for slower batches rather than sowing months early as insurance. Oversized transplants become root-bound, shaded, and difficult to water under lights. The best calendar produces a stocky plant that can be hardened at the right local temperature, not the largest plant that can be kept alive indoors. Inventory the shelf before sowing. Every cell that germinates may need a three- or four-inch pot, broader light coverage, and more watering access. Reserve that footprint on paper. If the mature indoor stage exceeds the available fixture, reduce the number of seeds or plan a second shelf now. Crowding is not solved by moving half the plants to a dim windowsill after they have become valuable.
Build a clean, drainable propagation station
Use clean containers with open drainage and fresh commercial seed-starting medium. Garden soil is too variable and can introduce weed seeds or pathogens into warm, wet trays. Pre-moisten the mix so it is evenly damp rather than dusty or saturated. Fill cells without compressing away pore space, settle them gently, and top up any cell that drops far below its neighbors after watering.
A divided tray limits root tangling and allows individual plants to be moved later. The cell must still be large enough to hold stable moisture during germination. Very shallow cells dry quickly under warm conditions; oversized pots remain wet around tiny roots. Select a repeatable cell size and provide a waterproof catch tray that can be drained after bottom watering.
Place the station away from pets, cold drafts, radiators, and direct sun through covered domes. Confirm that electrical equipment is rated and arranged for the damp environment. Lights need secure adjustable supports, timers need dry access, and cords need drip loops. A heat mat should be controlled according to its instructions and monitored at medium level, because shelf air and root-zone temperature can differ. Label every batch at sowing with cultivar, date, and packet lot. Put one label in the tray and retain the packet in a separate dry file. Pelargonium seedlings from different strains can look similar while young. Reliable labels prevent a mixed tray from becoming an anonymous group whose spacing, final height, and color can no longer be planned.
Sow by seed size and packet evidence
Pelargonium seed may be sold natural or pelleted. Pelleting changes handling, not the genetics inside. Follow the packet depth rather than treating every coating the same. Minnesota guidance describes barely covering seed in seed-starting mix. Create a shallow depression, place one viable seed in each cell, and cover evenly enough that moisture remains stable while the emerging shoot can reach the surface.
Water the filled tray before sowing or use a very gentle method afterward so seeds are not washed into cell corners. A clear cover can slow moisture loss during germination, but it is not a sealed aquatic chamber. Condensation should not rain constantly onto the medium. Open or adjust the cover if water pools, and never leave a covered tray in direct sun where temperatures can rise rapidly.
Provide the cultivar’s recommended warmth. The Minnesota guidance uses about 75°F for germination of annual geranium seed. Measure the medium instead of relying on a thermostat across the room. A mat that heats one side of a metal shelf or a tray resting partly beyond the mat can produce uneven emergence. Rotate only if doing so does not disrupt the light and moisture plan.
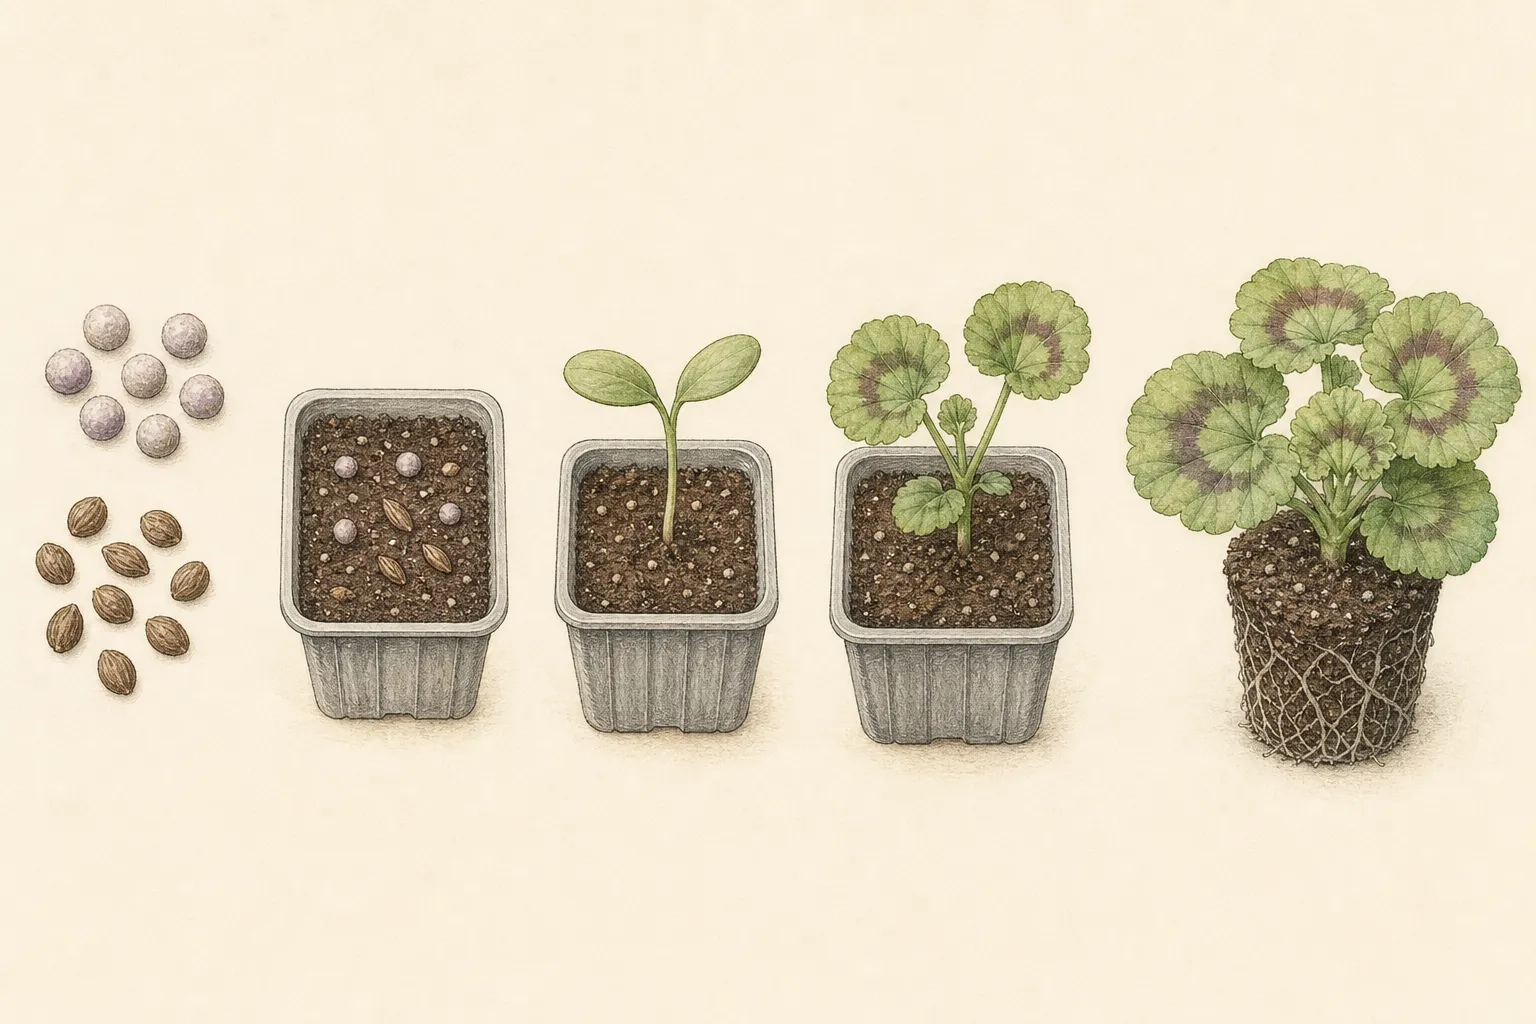
Do not dig through slow cells every day. Record the packet’s expected range and examine from above. A seed can be viable but delayed by temperature or moisture; repeated disturbance damages emerging roots. Once most seeds in a batch have exceeded the credible window, investigate the setup and a sample cell rather than reseeding blindly into the same unresolved conditions.
Change the environment as soon as seedlings emerge
Remove or vent the humidity cover when shoots are established enough to remain upright. Prolonged enclosure after emergence keeps the surface wet and limits air exchange. Move the tray under broad artificial light immediately. A bright room is not equivalent to useful canopy light, especially during a northern winter when low sun and cloudy days produce leaning, elongated seedlings.
Keep the fixture close enough and broad enough for even compact growth, following the light manufacturer and the plant response. That regional guidance places fluorescent lights only a few inches above annual geranium seedlings for a long daily photoperiod. Modern fixtures vary, so measure coverage and watch the edge cells. Raise the entire fixture as leaves approach it rather than letting one tall plant dictate a wide gap.
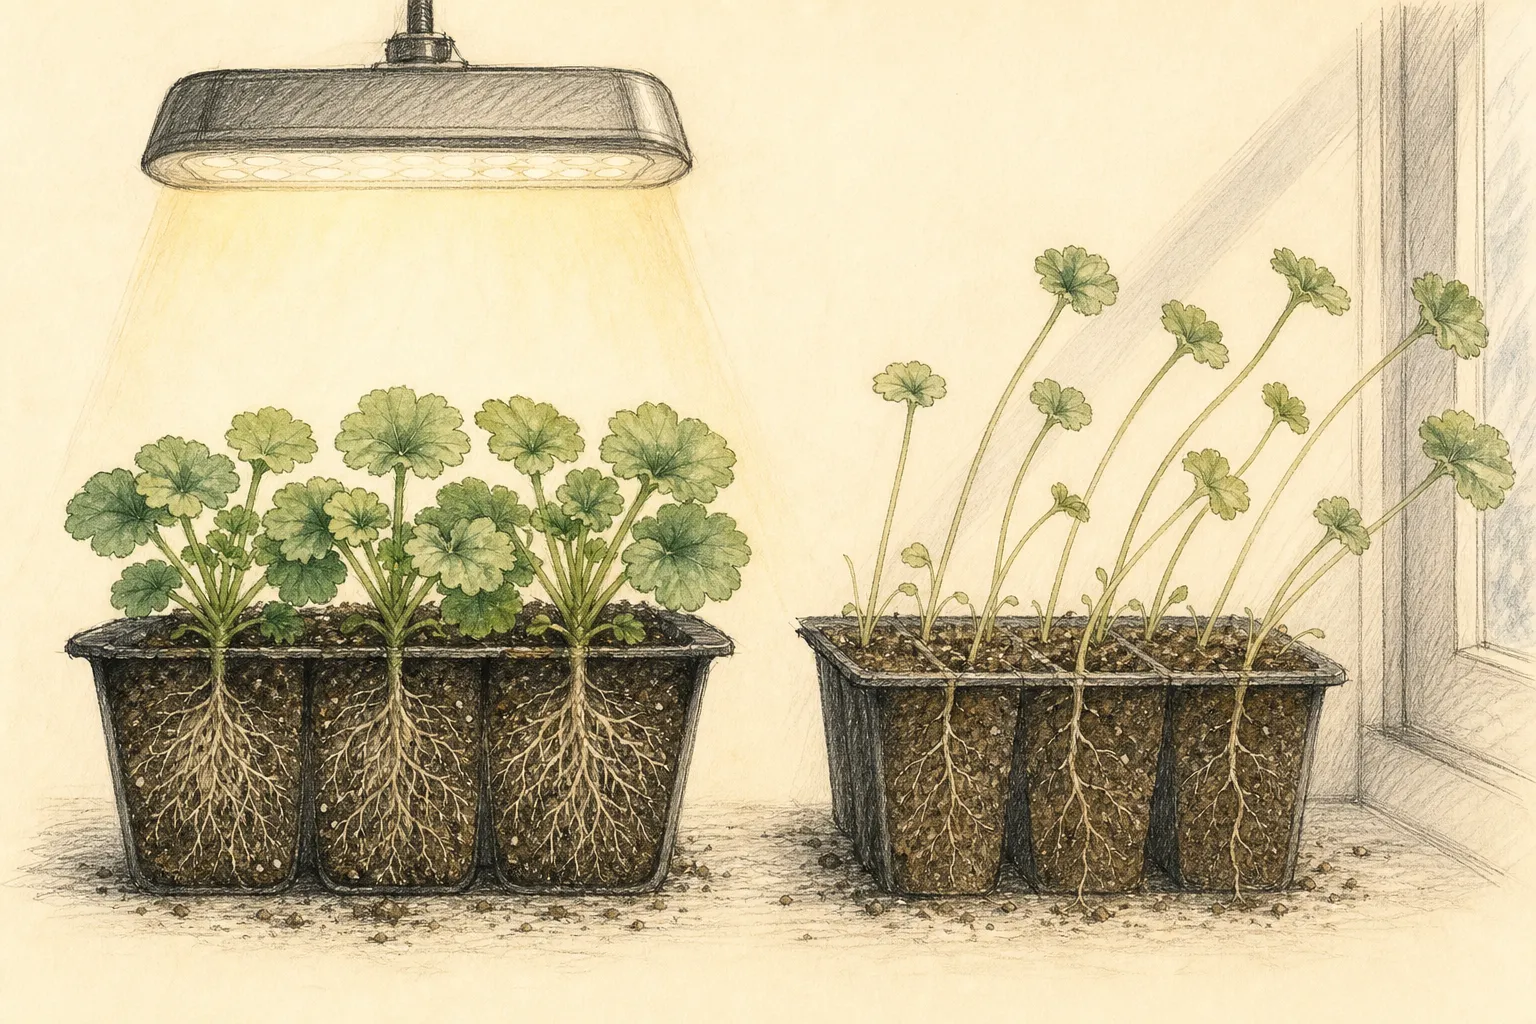
Reduce excessive warmth after emergence while remaining within the cultivar’s safe range. Warm, dim conditions accelerate stem extension faster than the plant can build sturdy tissue. Minnesota guidance describes day temperatures in the 70s and nights no lower than about 60°F for its method. Use those values as a documented regional system, then reconcile them with the current packet and the actual equipment.
Provide gentle air movement in the room without blasting the tray. A small fan can mix air around shelves, but constant direct wind dries cell edges and can chill wet seedlings. Observe leaves and medium, then adjust. Sanitation, drainage, useful light, and appropriate temperature matter more than trying to toughen tiny plants with a strong artificial breeze.
Water the root zone, not the calendar
Lift the tray to learn its weight after thorough drainage, then compare it as the medium dries. Check representative center and edge cells with a finger or wooden label. A misted surface can look damp while the lower cell is dry; a heavy tray can hide saturated roots beneath a pale crust. Apply enough water to wet the root volume and empty standing water after capillary uptake.
Bottom watering limits disturbance once roots are active, but trays should not sit indefinitely in water. Top watering can work with a fine rose when stems are stable and splash is controlled. Choose the method that wets cells evenly and allows complete drainage. Record how long the tray takes to lighten under the current fixture rather than assigning every other day as a permanent rule.
Seed reserves support early emergence, so fertilizer is unnecessary before true leaves and active roots. Extension guidance commonly recommends dilute feeding only after seedlings establish, especially in nutrient-free soilless mix. Read the medium label first; products with incorporated fertilizer change the decision. Apply a measured dilute solution to moist roots, observe growth, and avoid using fertilizer to correct low light or waterlogged media.
Pale foliage can result from nutrient shortage, cold roots, saturated media, high soluble salts, damaged roots, or inadequate light. Compare the entire tray pattern. Uniform paling after several true leaves in an inert mix differs from yellowing concentrated in wet corner cells. Correct the environmental cause supported by the pattern before increasing concentration.
Pot on before roots and leaves become a single mat
Minnesota guidance moves geranium seedlings to four-inch pots when they have several sets of leaves. Use plant development and root occupancy, not leaf count alone. A cell ready for potting should hold together through active roots without being a tight circling plug. If roots are sparse, improve light, temperature, and moisture before moving a weak seedling into a large wet volume.
Fill the new pot with fresh, free-draining container medium and water it before the plant wilts. Lift the plug by its root ball, supporting it with a plant label or small spoon. Handle a leaf if the top needs steadying; a damaged leaf can be replaced, while a crushed stem or growing point may not recover. Set the plant at its former depth and firm only enough to remove large voids.
Return potted plants to strong, even light with enough spacing that leaves do not overlap heavily. Expand shelf capacity as planned. Rotate pots when edge exposure differs, but fix a persistent coverage gap rather than turning every plant daily. Continue to judge watering by pot weight and medium condition because a newly potted root ball can dry at a different rate from the surrounding fresh mix.
Pinching is cultivar- and schedule-dependent. Many modern seed strains branch compactly, and an unnecessary pinch delays flowers. Observe internode length, natural branching, and packet guidance. If a plant is leggy because of low light, cutting the tip does not correct the shelf; new shoots will stretch under the same conditions. Repair the environment before shaping the plant.
Move a compact plant into the garden gradually
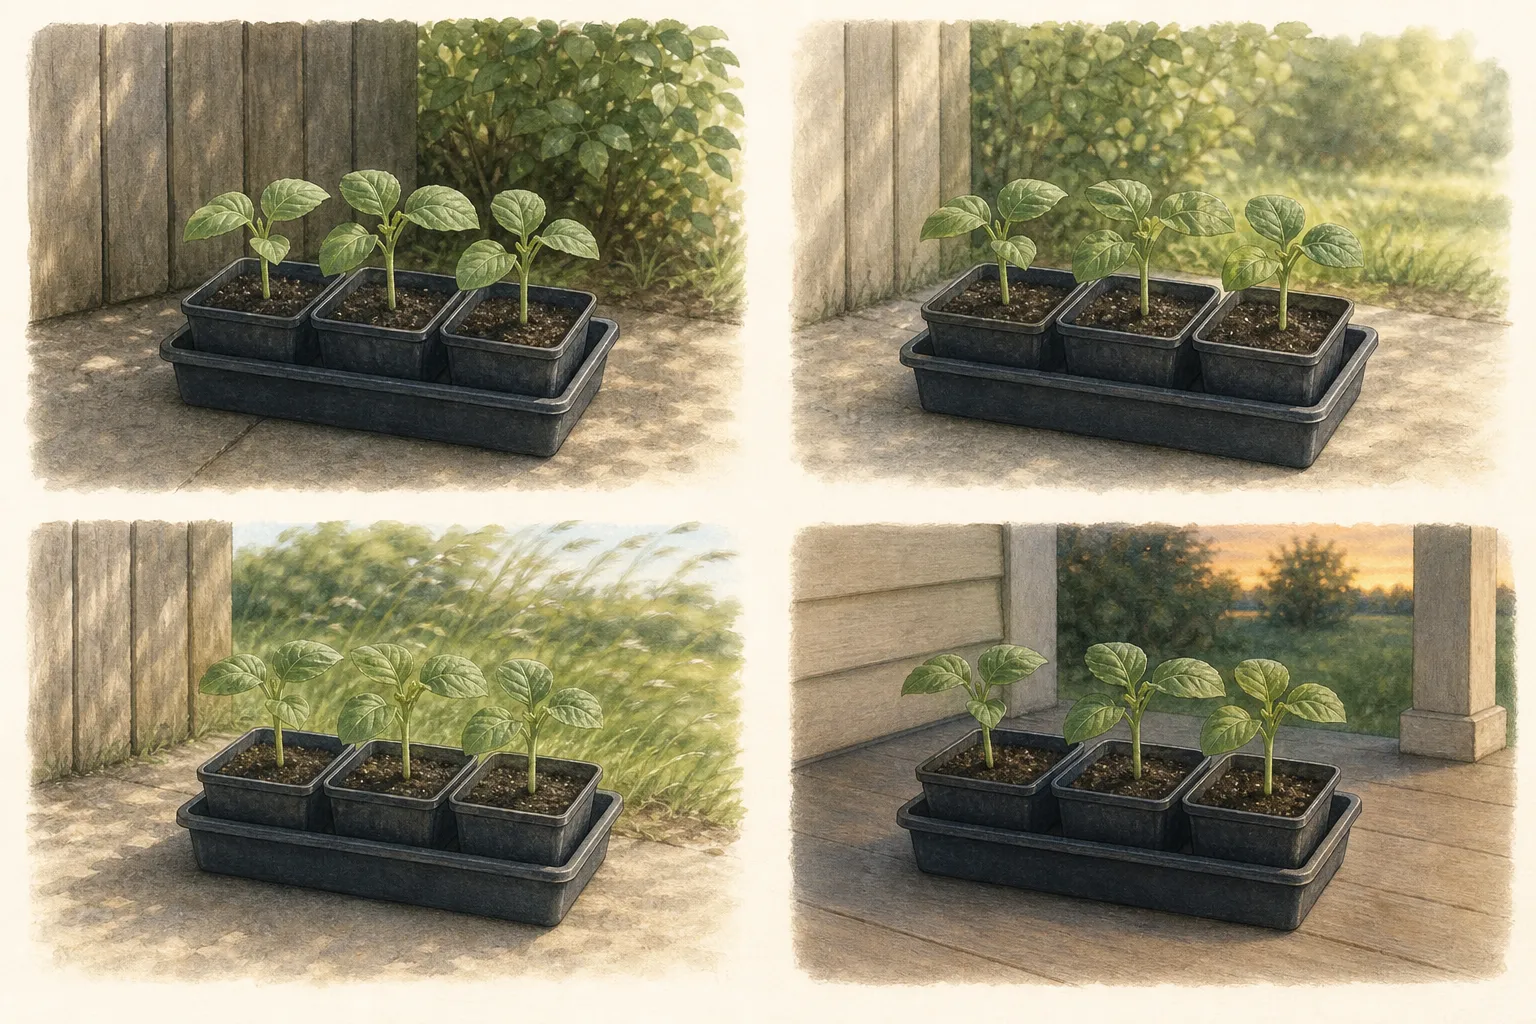
Begin hardening when the local planting window approaches and the plants have a stable root ball. Indoor leaves are not prepared for full sun, wind, and rapid temperature changes. Start with a short period in bright shade protected from wind, then increase exposure over roughly one to two weeks as conditions allow. Bring plants inside when nights fall below the safe range for Pelargonium.
Use the garden destination during acclimation. A plant headed for a sunny container needs gradual direct sun; one intended for morning sun should not be hardened permanently in deep shade. Keep pots from drying during outdoor wind, but do not compensate by leaving them in standing water. Check forecasts rather than following a rigid day-by-day exposure chart through a cold front.
Plant after the local frost risk and temperature conditions suit the cultivar. Preserve the root ball, set the crown at the same depth, and water the surrounding medium or soil. Container displays need drainage and room for mature spread. In beds, relate spacing to the named strain rather than the small transplant. A compact start is valuable because it establishes without a top-heavy canopy.
Keep one photograph from sowing, emergence, potting, hardening, and first bloom. Compare sowing date, shelf occupancy, and final garden performance. If flowering came late, examine the cultivar schedule and environmental delays before moving next year’s sowing dramatically earlier. A measured adjustment of one or two weeks is more useful than doubling the indoor season.
Steps
- Level
- moderate
- Time
- 20 minutes to sow, then 12–16 weeks of staged care
- Tools
- Clean divided seed tray, Waterproof drainage tray, Adjustable broad grow light and timer, Root-zone thermometer, Small spoon or plant label for lifting plugs
- Materials
- Fresh zonal geranium seed, Fresh seed-starting mix, Free-draining potting mix, Three- or four-inch pots, Durable labels
- 1Set the calendar and capacity
Count back from the local safe planting window using the packet and a regional Extension schedule. Reserve future pot and light space for every seedling you intend to keep. Reduce the sowing quantity when the potted stage would extend beyond the fixture or watering access.
- 2Prepare clean, evenly moist cells
Use a divided tray with open drainage and fresh seed-starting medium. Wet the mix throughout, let it drain, and refill cells that settle. Label the tray and retain the seed packet so the cultivar, lot, and sowing depth remain attached to the batch.
- 3Sow shallowly and warm the medium
Place one seed per cell and cover according to the packet; documented geranium guidance commonly uses a bare covering. Maintain steady measured root-zone warmth and humidity during germination, while preventing pooled water or rapid overheating beneath a clear cover.
- 4Move emergence into strong light
Vent or remove the cover as seedlings stand, place the entire tray beneath broad close light, and provide a daily dark interval. Lower post-emergence warmth within the cultivar’s safe range if stems begin to extend faster than leaves and roots develop.
- 5Water and feed from observed need
Judge moisture by tray weight and representative cells, wet the whole root volume, and drain excess. Wait for true leaves and active roots before dilute feeding, then account for nutrients already present in the mix. Treat pale growth as a diagnosis rather than an automatic fertilizer request.
- 6Pot, space, and harden on time
Move a rooted plug before circling roots or overlapping leaves force competition. Set it at the same depth in a modestly larger pot, restore even light coverage, and harden gradually near the local planting date. Install only after frost and temperature conditions suit Pelargonium.
- 7Audit shelf performance before planting out
Compare center and edge plants for internode length, root occupancy, leaf color, and watering frequency. Correct uneven fixture coverage, warm pockets, or crowding before the final weeks indoors. Keep one representative plant and its sowing record through first bloom, then use the actual transplant size and flowering date to adjust next year’s sowing window instead of automatically starting earlier.
Related reading
Sources
- Growing Geraniums as Annual Flowers in Minnesota. University of Minnesota Extension. Source record · Accessed 2026-08-19.
- Guide to Starting Seed Indoors. Iowa State University Extension. Source record · Accessed 2026-08-19.
- Starting Seeds Indoors: Materials. Utah State University Extension. Source record · Accessed 2026-08-19.