Grow · ornamental gladiolus succession planting
Stagger Gladiolus Planting for a Measured Flower Sequence
Divide ornamental gladiolus corms into comparable batches, reserve the full border footprint, plant on a recorded regional interval and use actual emergence and bloom dates to read the sequence.
Published Last updated
In this guide
- Define the gladiolus group before scheduling it
- Make each planting date conditional on a comparable batch
- Find the local planting window and its hard stop
- Reserve the whole bed before the first batch
- Sort corms into comparable batches
- Plant each batch as a controlled comparison
- Read emergence before predicting flowers
- Support and water without erasing the batch design
- Close the season with a sequence you can reuse
- Steps
Define the gladiolus group before scheduling it
This plan is for ornamental summer-flowering garden gladioli grown from corms in a home border or dedicated flower bed. It is not a universal schedule for every Gladiolus species. The RHS distinguishes familiar tender garden hybrids, earlier Nanus types, hardy Gladiolus communis subsp. byzantinus and specialist container species, each with different planting and winter treatment. Keep the packet's full cultivar or group name attached to every batch and exclude unlike types from the comparison.
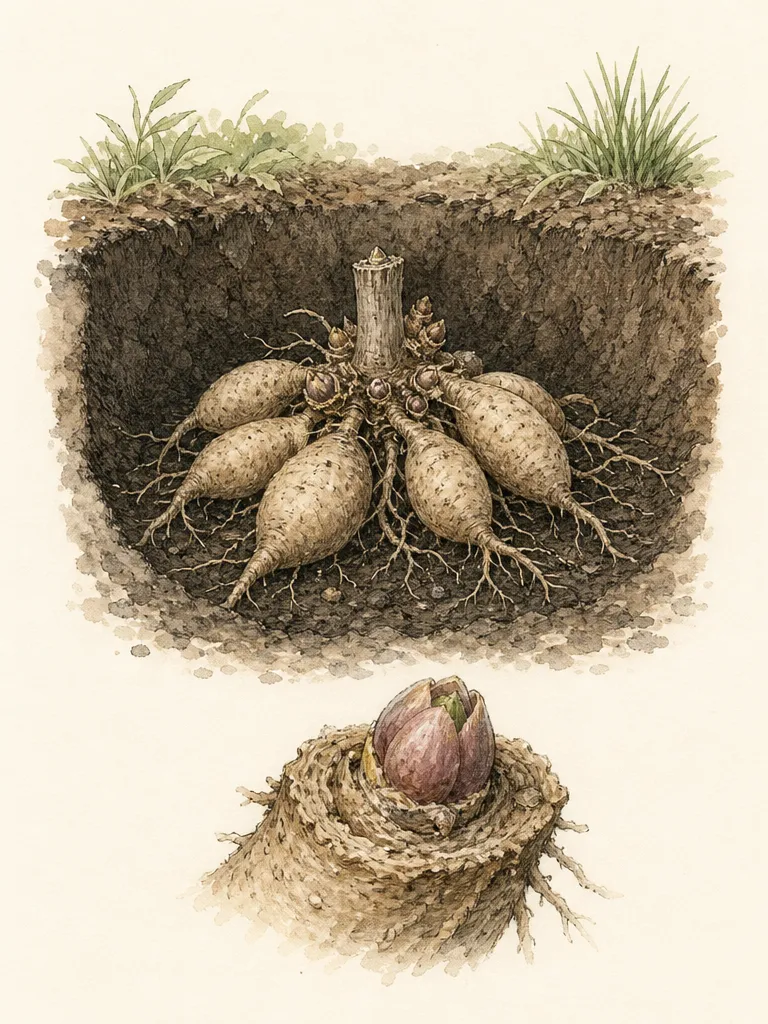
A corm is a solid swollen stem base, not a true bulb. Planting uses the current corm to produce leaves and a flower spike while a replacement corm develops for the next cycle. Choose firm, sound corms from one lot where possible. Separate visibly different sizes, because corm grade can affect vigor and flowering. A measured sequence starts with comparable planting material; a mixed bag of cultivars and sizes makes date effects impossible to interpret.
Decide whether the primary job is a border display or closely managed cut-flower production. Illinois Extension gives tighter spacing for flower production than for landscape planting, while the RHS also distinguishes rows for cutting from informal borders. This guide preserves landscape spacing and an attractive group rhythm. Do not import dense production spacing into a mixed perennial bed, where every batch needs light, root room, support and access through the whole season.
Set a realistic promise. Successive planting can prevent every corm from beginning on the same date, but it cannot guarantee flowers opening at the same interval. Soil temperature, cultivar, corm size, moisture, light and weather can compress or stretch the sequence. Iowa State's Iowa-context estimate of roughly eight to ten weeks from planting to bloom is a planning reference, not a national countdown. The useful result is a recorded sequence that can be adjusted next year.
Make each planting date conditional on a comparable batch
Use comparable named gladioli and corm lots before interpreting the effect of staggered dates. Reserve each mature planting cell in advance, then repeat planting only while local soil and remaining season support it. Record emergence and flowering separately. If later batches compress their flowering interval, revise the next schedule; equal date gaps need not produce equal bloom gaps.
Find the local planting window and its hard stop
Start with local frost and soil guidance. Iowa State advises planting after frost danger in Iowa, while Illinois Extension describes an earlier relationship to its regional last-frost date and the RHS gives spring timing for UK garden hybrids. Those are different climates, not instructions to average into one date. Ask local Extension when tender gladiolus corms can enter well-drained soil, then write that locally supported opening date at the top of the batch plan.
Choose an interval that your evidence supports. All three retained sources describe planting additional batches about every two weeks for summer succession in their contexts. A fourteen-day interval is therefore a useful first trial where local guidance agrees, because it is easy to mark and compare. It is not botanically exact. If the local spring window is short, use fewer batches rather than squeezing corms closer or extending planting into conditions unlikely to mature a display.
Establish the final planting date before the first hole is opened. Work backward from the region's likely first damaging cold, the packet's days-to-flower information if supplied and the time needed for foliage to remain after flowering. Iowa State's early-July finish is explicitly an Iowa example. A warmer or colder region needs its own stop. Late corms that cannot flower and replenish themselves are not a successful extension of the sequence.
Write weather exceptions into the plan. Do not plant into saturated soil merely because the interval arrives, and do not excavate a prepared bed during dangerous heat or storms. Record the delay and plant when soil is workable within the local window. Keeping the actual date preserves the experiment. A delayed batch is more informative than a nominal date that conceals poor conditions and produces rot, compaction or an unsafe work session.
Reserve the whole bed before the first batch
Draw the mature display at ground level. Mark existing perennial crowns, their expected spread, paths, irrigation lines and the route used for cutting or supporting flower spikes. Reserve complete cells for every gladiolus batch now, even though later cells will remain empty for several weeks. An empty marked cell is future root space. Without that reservation, later corms are easily tucked between emerging shoots and established companions until the bed becomes inaccessible and overcrowded.
Choose a rhythm that reads as ornamental planting. Repeating small groups through a border can weave the batches into one design, while three adjacent blocks make date comparison easier. Whichever pattern you choose, give each batch the same number of cells and similar light, shelter and soil. Do not place the first batch in full sun and the last beneath a leafing shrub, then attribute all bloom differences to planting date.
Keep tall hybrids away from path edges and wind funnels. The RHS recommends an open sunny place, with shelter for tall types or a planned support. Mark the support line before corms enter the soil so later stakes or mesh will not pierce them. Preserve a narrow working route beside the display. The ability to tie, water and cut without walking into the cells is part of the spacing plan.
Label every reserved group before it contains a plant. Use batch letters, planned dates, cultivar and corm grade. Put the label outside the digging and support zone, and duplicate the map in a notebook or photograph. Marking only the first batch invites the remaining spaces to be mistaken for gaps. A clear map protects the measured sequence from mid-spring additions and from accidental cultivation over dormant corms.
Sort corms into comparable batches
Empty the package onto a clean dry surface and keep cultivars separate. Reject corms that are soft, extensively damaged or visibly decayed. Do not peel sound protective tunics merely to make every corm look alike. Sort the remaining corms into a few size bands, then distribute similar sizes evenly among batches. If only the earliest batch receives the largest corms, vigor and bloom timing will be confounded with planting date.
Make batches equal by usable corm count, not by package weight. Record shortages rather than filling a cell with another cultivar. A missing plant remains a visible gap in the data; an unrecorded substitute changes flower height, color and timing. If the quantity does not divide evenly, place the extras in a separately labeled accent group outside the measured sequence.
Store later batches according to supplier guidance in a dry, ventilated place protected from frost, heat and moisture. Inspect at each planting date and record shrinkage, sprouting or decline. Do not seal damp corms in plastic or keep them beside fruits, chemicals or food. Storage changes are another reason later batches may differ, so the record should say whether a corm remained dormant or had already begun to grow.
Prepare one batch card for each group. Include cultivar, source lot, size band, number planted, planned and actual dates, bed cell, depth rule, spacing rule, first emergence, first visible spike, first open floret and end of useful display. The card turns succession planting from a vague memory into a garden measurement. It also reveals whether a cultivar is too variable for the desired relay.
Plant each batch as a controlled comparison
Set depth from the corm size, cultivar packet, soil and local guidance, then keep that rule consistent across comparable batches. The RHS uses about 10–15 cm for large-flowered garden hybrids and spacing similar to depth; Illinois gives a broader 2–6 in depth range by corm size and about 6 in landscape spacing. These references describe different systems. Do not average them. Follow the locally appropriate landscape instruction and record exactly what you used.
Prepare all reserved cells to the same standard before the sequence starts. Correct drainage across the bed, remove perennial weeds and avoid a rich pocket around one batch. At each planting, loosen only the marked cells and preserve the surrounding soil structure. Place corms with the growing point upward and the basal plate downward. If orientation is unclear, follow the supplier's method rather than cutting or peeling the corm to investigate.
Hold spacing constant and never insert later corms between shoots from an earlier batch. If a reserved cell has been invaded by a companion, move or edit the companion according to its care before planting; do not halve gladiolus spacing. If the space is no longer suitable, mark the cell missed. Maintaining room is more important than keeping the planned corm count, because overcrowding changes light, water demand, support and the quality of the flower spike.
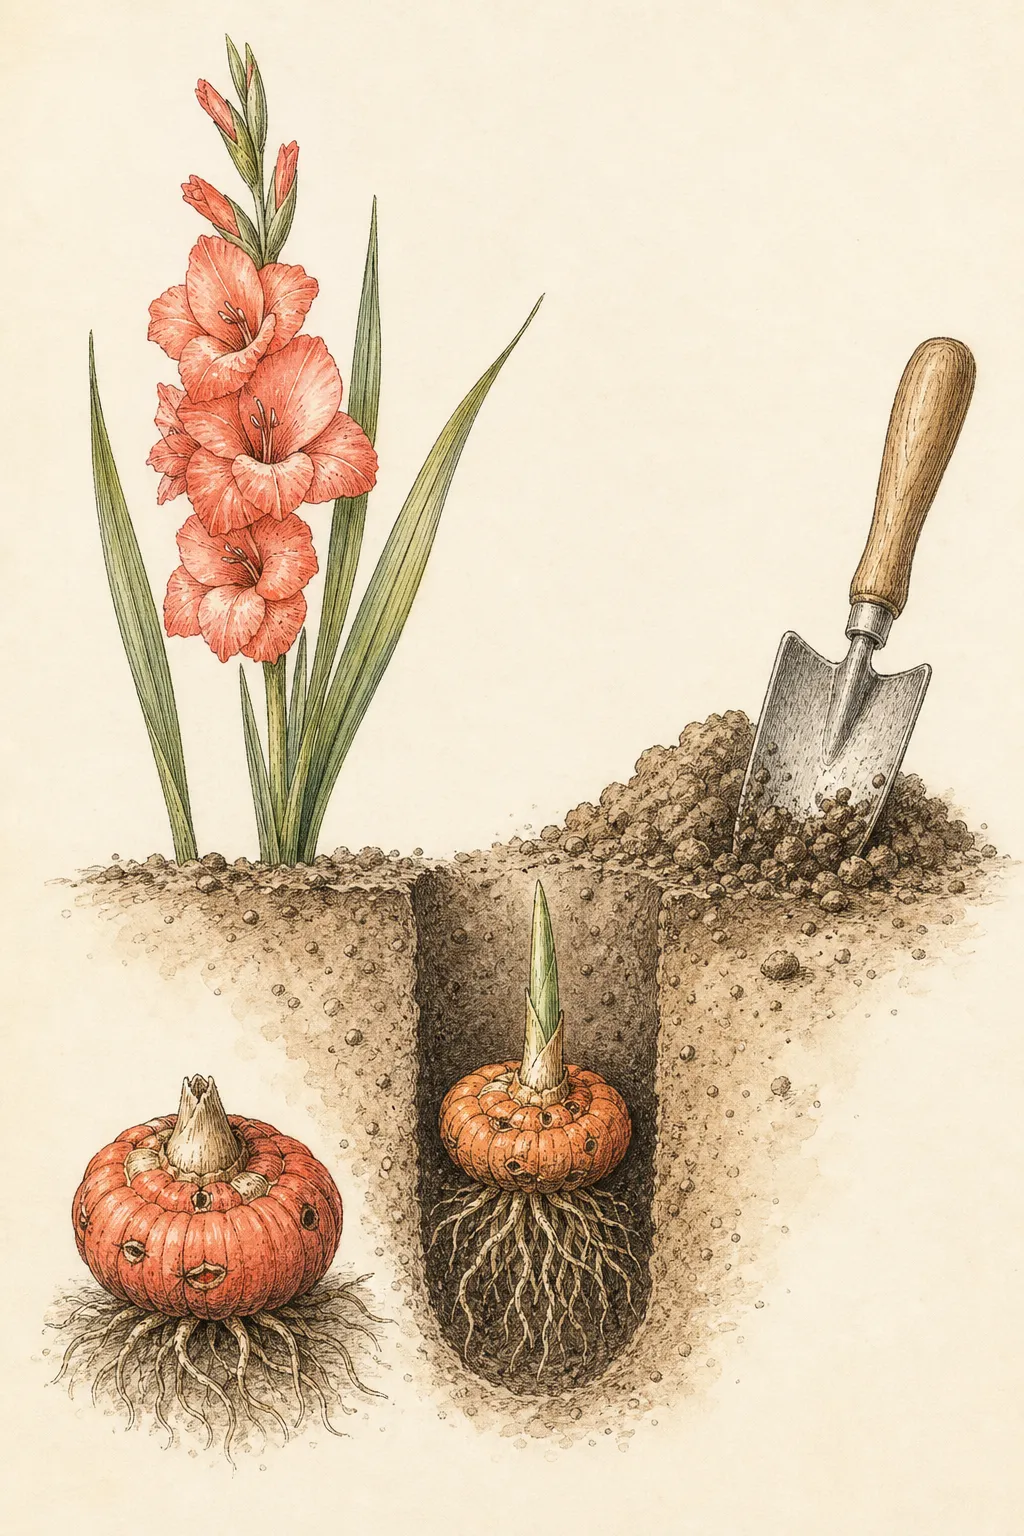
Backfill to the recorded depth, firm without compacting and water to settle soil when conditions require it. Replace the batch marker immediately. Photograph the bed from the same point after each session. The image should show remaining empty cells, not just planted ground. This repeated view makes encroachment, uneven growth and support placement visible before they compromise the sequence.
Read emergence before predicting flowers
Check the bed on a regular observation day without digging. Record first emergence for each batch and the proportion of marked cells that have shoots. Do not excavate a late cell after a few quiet days; soil temperature and corm condition can delay growth. A failed or damaged shoot should remain on the record. Replacing it mid-sequence with an unmarked corm creates a second planting date inside one batch.
Compare planting-to-emergence intervals before comparing flower dates. If the first and second batches emerge close together after the soil warms, their flowers may overlap even though planting was fourteen days apart. That is a valid result. If later batches emerge quickly but flower after a similar growth period, the garden may need a wider interval next year. Do not respond during the current season by crowding another batch into the bed.
Mark the first visible flower spike and the first lower floret opening on each batch card. Gladiolus spikes usually open from the lower portion upward, so use the same stage for every batch. A single precocious plant is different from the batch beginning its display. Record both first flower and the point when several plants contribute to the border; the second measure may better describe ornamental continuity.
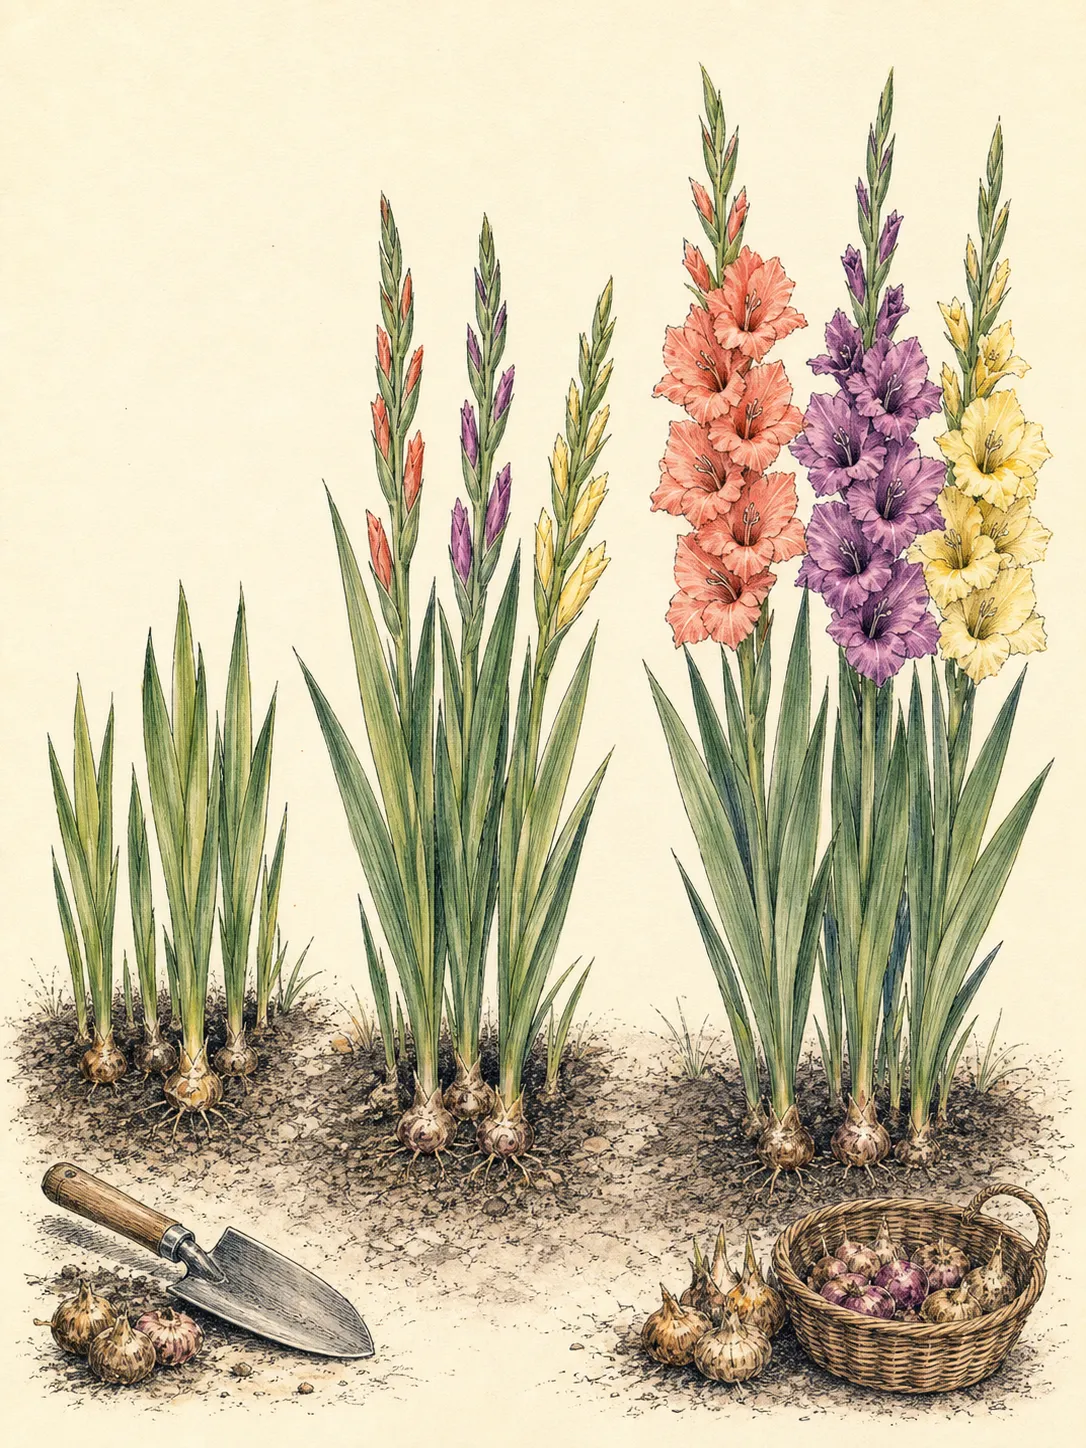
Note weather and care only when they change interpretation: a cold spell, saturated week, drought, shade from a neighboring plant, support failure or missed watering. Avoid inventing precision with daily temperature sums unless you have a valid local model. The simple sequence of actual planting, emergence, spike and bloom dates is enough to improve a home-garden plan while keeping uncertainty visible.
Support and water without erasing the batch design
Install the planned support before spikes become top-heavy. Individual canes must be placed far enough from corms and roots to avoid damage, as the RHS warns; horizontal mesh belongs above known rows, not pushed blindly through the bed. Use soft ties that hold stems without constriction and keep labels visible. Support should preserve the repeated groups rather than gathering separate batches into one bundle.
Water according to the active root zone and weather, not the batch date. Gladioli need useful moisture during growth but require drainage. Probe comparable cells and apply water evenly when soil is drying. Do not give a late batch extra water simply to make it catch up, and do not keep an early flowering batch saturated while maintaining younger neighbors. A soaker layout can serve the bed only if output is reasonably even across every cell.
When cutting flowers, leave as much foliage as practical, following the RHS emphasis on foliage supporting the replacement corm. Use the same cutting threshold across batches if flower timing is being compared. A spike removed before opening no longer contributes to the border display, so distinguish cut-flower harvest dates from in-garden bloom dates. Keep paths and support access open rather than reaching across later shoots with long blades.
After each batch finishes, remove spent spikes if seed is not part of the plan but retain healthy leaves. Do not clear an early batch to make room for a late one; its foliage still occupies the reserved cell and works for the corm. The original footprint lasts until foliage completes its cycle. Succession is temporal separation inside one fully spaced design, not serial reuse of the same small patch.
Close the season with a sequence you can reuse
At the end of the useful display, compare the batch cards. Calculate the observed days from planting to emergence and from emergence to first bloom for each group, then look for overlap. Do not force one average if a batch was shaded, delayed by saturated soil or stored in poorer condition. The exceptions are the practical lesson: they show which variables must be controlled or accepted in the next garden cycle.
Choose next year's interval from the pattern. If all batches flowered together after a cold start, the first dates may have been too early to create separation. If the last batch missed the safe season, the sequence extended too far. If flowers were separated but the design looked thin, increase the number of corms only by reserving more area at full spacing, not by reducing distance within existing cells.
Follow the cultivar and local region for winter treatment. The RHS notes that many common garden hybrids need lifting and frost-free storage, while some types and favorable free-draining climates differ. Keep foliage until the locally appropriate lifting stage, then handle corms by regional guidance. Never assume that planting deeper converts a tender hybrid into a hardy perennial. Record which corms are new replacements and keep cultivar labels attached through storage.
Archive the map with photographs and the three decisive dates for every batch: actual planting, first meaningful emergence and first useful bloom. The measured result is not an uninterrupted wall of flowers promised by a calendar. It is a full-spaced ornamental bed whose changing groups can be read, maintained and improved without sacrificing root room, foliage or access.
Steps
- Level
- moderate
- Time
- One planning session and three or more short planting sessions across the local spring window
- Tools
- Garden plan, pencil and weatherproof batch cards, Tape measure and plant markers, Hand trowel or narrow spade, Watering wand, Clean flower snips, Support tools appropriate to the chosen system
- Materials
- One named lot of ornamental summer-flowering gladiolus corms, Permanent batch labels, Locally appropriate soil amendments only if a test or site assessment requires them, Canes and soft ties or a planned horizontal support, Dry ventilated storage for later batches
- 1Define one comparable gladiolus group
Use a named summer-flowering garden hybrid or one clearly identified group, not a mixture of hardy species, Nanus types and large-flowered hybrids. Record cultivar, source lot and corm size. Decide that the project serves a fully spaced ornamental border. Set aside unlike or extra corms as separately labeled accents so they do not blur the measured batches.
- 2Set regional opening and closing dates
Obtain the local safe planting window for tender gladiolus in workable, well-drained soil. Where local guidance agrees, mark a first trial at roughly fourteen-day intervals, but establish the final date before planting begins. Consider the cultivar's supplied timing and the season needed for post-flower foliage; never copy Iowa, Illinois or UK calendar dates into another climate without translation.
- 3Reserve every landscape cell
Map equal batch groups with comparable sun, soil and wind, plus a permanent path and support line. Mark all future cells before planting batch A and protect the empty spaces from companion spread or spring additions. Use landscape spacing from the packet and local guidance; do not plan to insert later corms between the roots and shoots of earlier batches.
- 4Sort and document the corms
Reject soft or extensively damaged corms, keep cultivars separate and distribute similar size bands evenly among equal-count batches. Store later groups dry and ventilated under supplier guidance. Give each batch a card for planned and actual planting, depth rule, spacing, emergence, visible spike, first open floret and display finish. Record sprouting or storage decline before planting.
- 5Plant the first batch consistently
Prepare drainage across the full bed, then apply one locally appropriate depth and spacing rule to the comparable corms. Place growing tips upward, backfill and water to settle without saturating the soil. Keep support locations clear of corms, replace labels and photograph the reserved empty cells as well as the planted group from a repeatable viewpoint.
- 6Repeat by condition, not calendar alone
On each planned date, assess soil and weather first. Delay work in saturated soil or unsafe conditions and record the actual date. Plant only the reserved cells at the same depth and spacing. If a companion invaded a cell, correct the companion or mark the cell missed; never halve spacing or substitute an unnamed cultivar to preserve a nominal batch count.
- 7Record emergence, spikes and flowers
Observe without digging and use the same definitions for all batches: first emergence, first visible spike, first lower floret and first useful group display. Note only care or weather events that alter interpretation. Do not replace late corms inside a batch or add rescue plantings. Overlap after warming is valid evidence, not a reason to crowd the current bed.
- 8Preserve foliage and revise next year
Support stems without piercing corms, water comparable root zones evenly and leave useful foliage when cutting or removing spent spikes. At season's end, compare planting-to-emergence and emergence-to-bloom intervals, respecting exceptions. Adjust future interval, opening date or batch count only within a newly reserved full-spaced footprint, then follow regional guidance for lifting or overwintering the named hybrid.
Related reading
Sources
- How to Grow Gladioli. Royal Horticultural Society. Source record · Accessed 2026-08-19.
- When Should I Plant Gladiolus Bulbs Outdoors?. Iowa State University Extension and Outreach. Source record · Accessed 2026-08-19.
- Tender Bulbs Make for Summer Delights. University of Illinois Extension. Source record · Accessed 2026-08-19.