Grow · autumn direct sowing hardy annuals
Sow Hardy Annuals in Autumn for a Fuller Spring Border
Choose hardy annual seeds for a cool-temperate garden, prepare a weed-free bed, sow shallowly, protect young rosettes, and thin for spring flowers.
Published Last updated
In this guide
- Use the first cool, moist window—not a fixed date
- Sort true hardy annuals from look-alikes
- Give each seed a garden job
- Prepare a bed that can carry small seedlings
- Choose a drill, patch, or a managed self-sown edge
- Sow shallowly and mark every group
- Build a modest autumn rosette
- Protect after germination without trapping wetness
- Thin for the mature flower, not the seedling gap
- Know when autumn sowing is the wrong tool
- Let spring decide what stays
- Keep a one-season record
- Steps
Use the first cool, moist window—not a fixed date
Sow hardy annuals outdoors when the autumn bed is moist, workable, and beginning to cool—not simply because a calendar has reached September. In a cool-temperate garden, that window lets selected annuals make a small, sturdy plant before winter and return to growth early enough for a fuller spring display. Prepare the ground, sow thinly, cover lightly, water with a fine rose, and label the patch before the seed disappears into the soil.
September 18 is a useful planning checkpoint for many Northern Hemisphere gardens, but it is not a universal sowing date. The Royal Horticultural Society places autumn sowing in September and October under its UK conditions, while winter severity, soil temperature, rainfall, and the approach of frozen ground vary elsewhere. Use the packet's regional advice and your own weather record to move earlier or later. The goal is a settled root system, not a tall flush of soft growth before cold arrives.
This method is for ornamental beds and containers in climates where autumn cools and winter provides a meaningful cold season. It is not a promise for a warm-winter garden, a waterlogged border, or any seed packet that specifies spring sowing only. If the ground is dry and hot, wait for rain or irrigate enough to restore workable moisture; if it is sticky and compacted, improve the surface before you sow. A good autumn window is a set of conditions, not a date to force.
Sort true hardy annuals from look-alikes
Start with the seed packet's hardiness and sowing instructions. Illinois Extension describes hardy annuals as plants that tolerate cold soil, cool air, and light frost; half-hardy annuals tolerate cool conditions but are damaged by frost, while tender annuals need warm soil and air. A packet's word “annual” does not tell you which class it belongs to. The distinction determines whether a seed can safely spend the winter outdoors or needs spring warmth and protection.
Calendula, cornflower, larkspur, and love-in-a-mist are useful starting groups where the supplier lists autumn sowing for the named seed. The RHS autumn guide includes Calendula officinalis, Centaurea cyanus, Consolida, and Nigella damascena among its suitable hardy annuals, with distinct mature heights and spacing. Treat those examples as a menu, not a universal guarantee: cultivars differ, and a local packet can narrow the timing because its seed line or climate differs from the general species.
Keep half-hardy and tender choices out of this direct autumn bed. Zinnia, coleus, impatiens, and similar warm-season annuals may be excellent spring or summer plants, but Illinois Extension places them in the tender category. A late-summer plant that still looks vigorous is not evidence that its seedling can survive winter. Put those packets into a spring schedule instead of filling an autumn patch with seed that has no realistic winter route.
Give each seed a garden job
Choose the planting role before opening the packet. Use low, broad foliage at the front edge, medium-height stems where they can be seen through a border, and taller spires behind them or in a cutting patch. This makes spring thinning a design decision, not a rescue operation. Leave enough open soil to identify seedlings and reach nearby perennials; a dense green carpet is difficult to edit and often hides weeds or weak plants.
The ranges in the RHS guide are useful for a first sketch under its UK conditions: calendula is listed around 45–60 cm tall with 30–37 cm spacing, cornflower around 30–90 cm with 23–45 cm spacing, larkspur around 45 cm–1.2 m with 30–45 cm spacing, and love-in-a-mist around 30–45 cm with 15–20 cm spacing. Use the named cultivar's packet as the final authority, especially for compact, dwarf, or cutting selections.
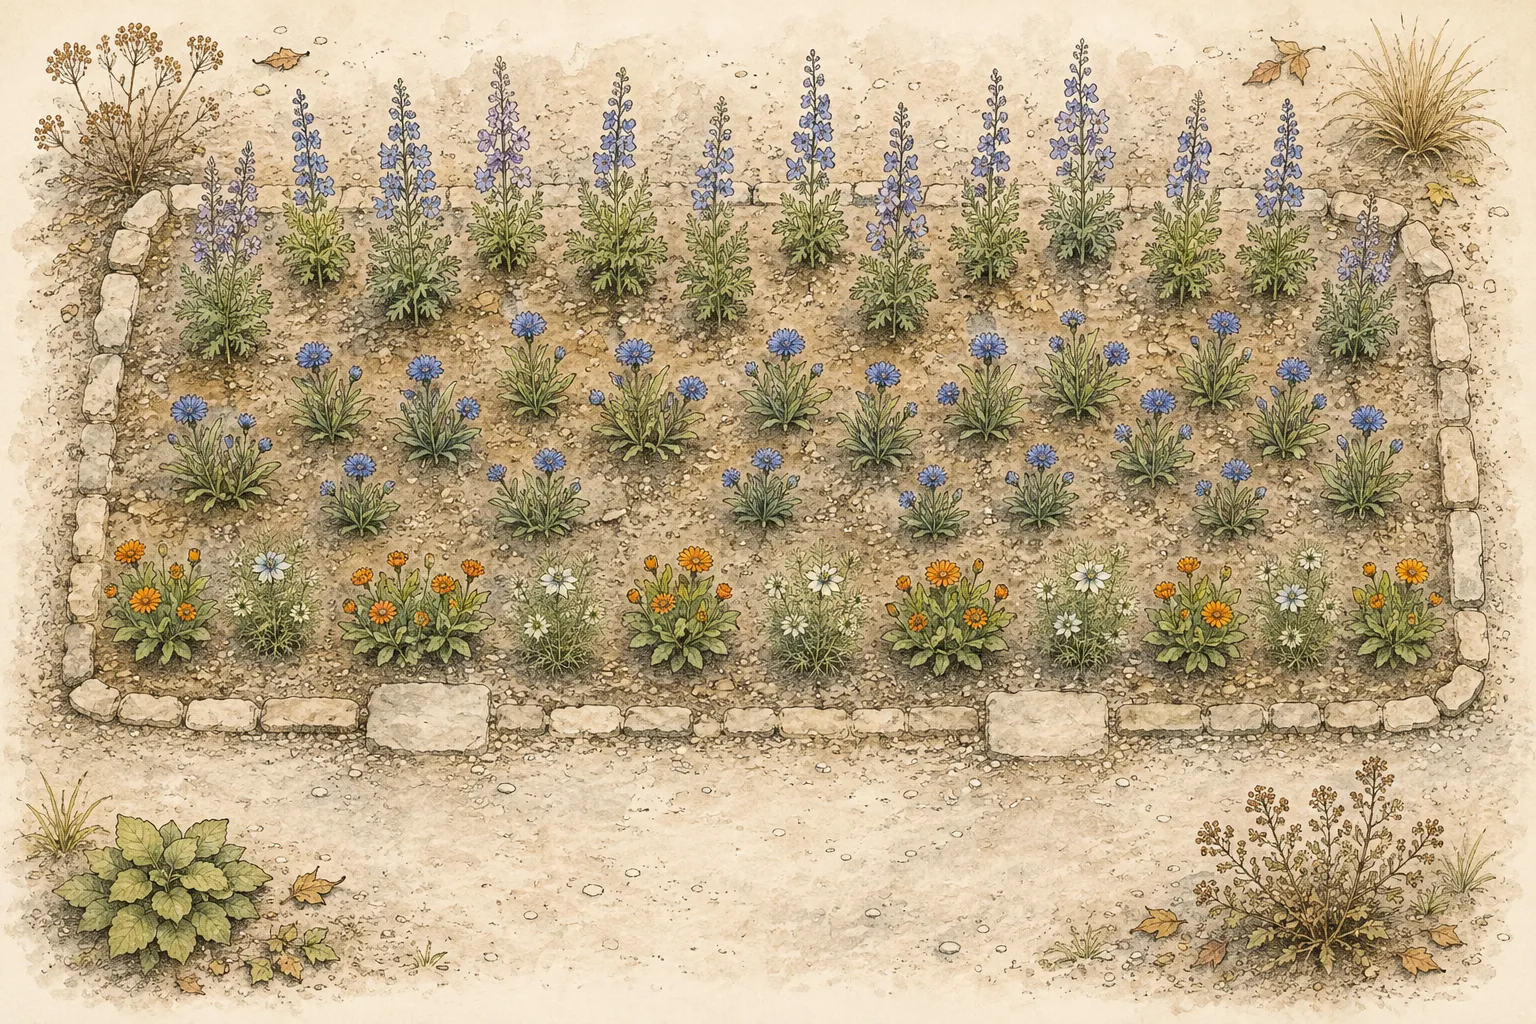
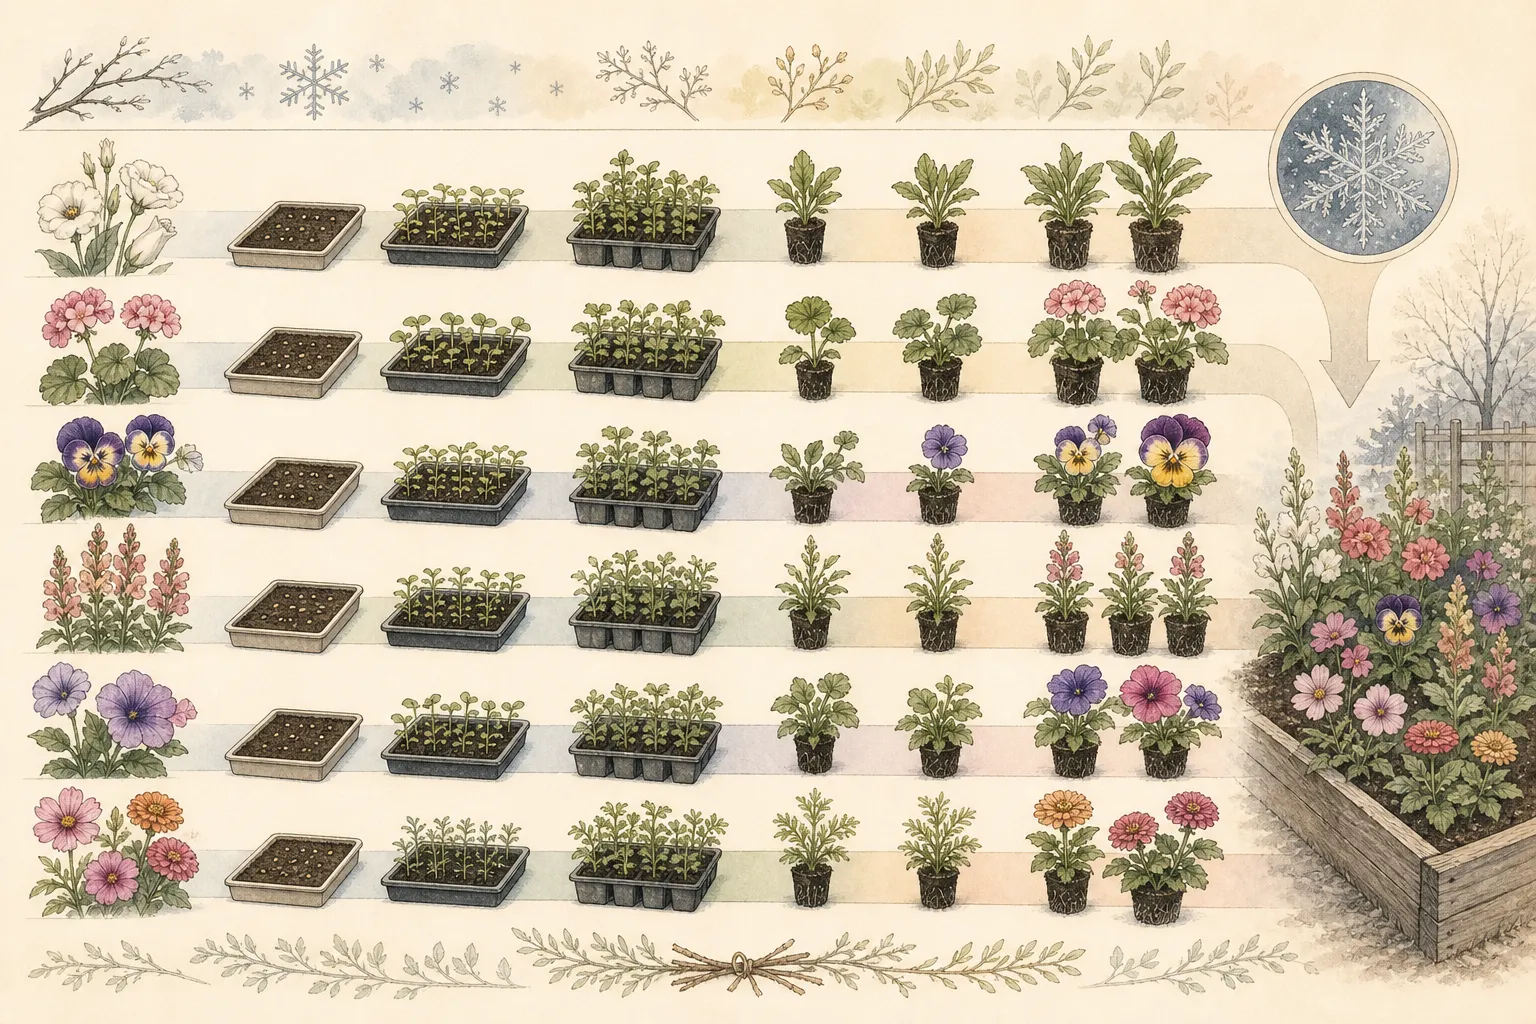
A small border can hold three deliberate zones: calendula and love-in-a-mist along the front, cornflowers through the middle, and larkspur toward the rear where their height will not shade everything behind them. Keep one species per marked patch when you are learning its seedling form. A repeated color or shape can look natural without becoming anonymous. The plan should still make sense when all that is visible is a row of tiny leaves in November.
Prepare a bed that can carry small seedlings
Clear the sowing area before you work the soil. Pull perennial weeds, remove large stones and old stems that will obstruct a shallow drill, and separate wanted self-sown seedlings from the patch you intend to reset. The RHS preparation sequence calls for a weed-free area, digging to a spade's depth, raking, and firming. The point is not to create a deep, fluffy trench; it is to make a level surface where seed has consistent contact and water will not collect in hollows.
Work on a dry enough day that your boots and tools do not smear the bed into a sealed layer. Break clods, rake off ridges, and firm gently with the back of a rake or the flat of a hand. A firm seedbed supports shallow sowing; loose soil can settle over seed after rain and bury it. In heavy soil, solve drainage and surface structure before sowing. A thin layer of fine, compatible soil can help a small patch, but do not hide a wet basin beneath a cosmetic skin.
Do not add fertilizer to the sowing strip as a default. The RHS warns that soil that is too rich can encourage leafy growth at the expense of flowers. Record the bed's light, drainage, and last cultivation date, then mark its front and rear edges with short stakes or a map. The future seedlings need a stable place to grow, and the gardener needs a stable reference for thinning, weeding, and deciding whether autumn protection is actually needed.
Choose a drill, patch, or a managed self-sown edge
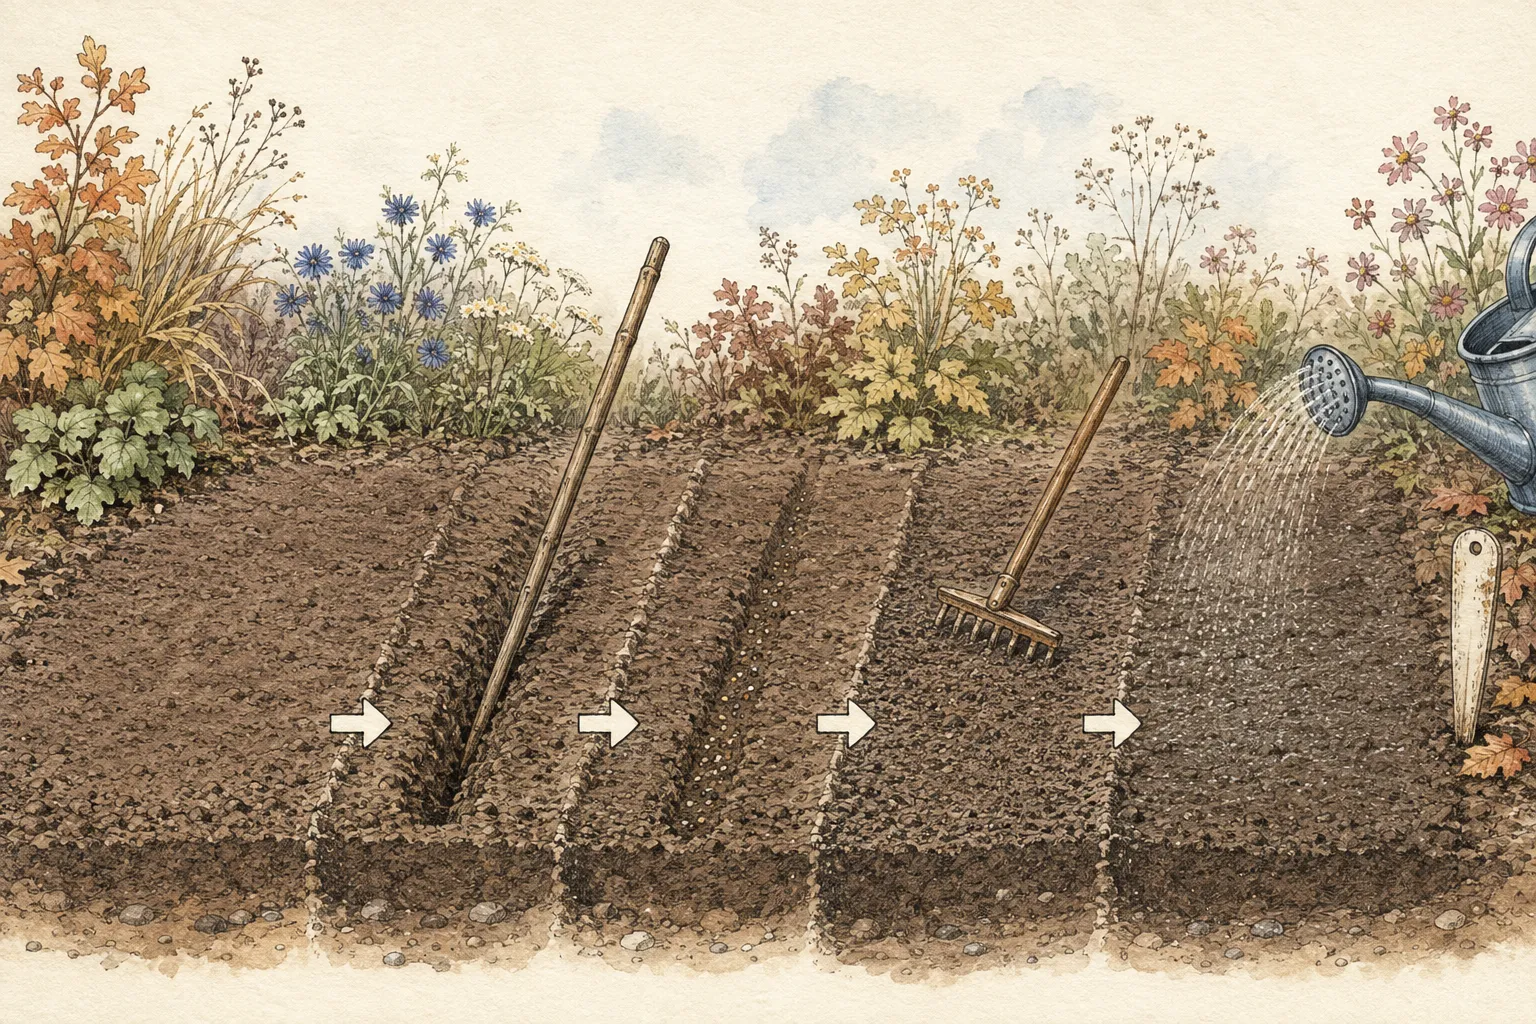
Use drills when you need to identify the crop, compare germination, or keep a mixed border legible. The RHS guide suggests shallow grooves in offset directions for a natural appearance, with drills 15–45 cm apart according to the eventual plant size and seed sown about 0.5 cm apart within the drill. That seed-to-seed figure is a sowing guide, not the final plant spacing; thin the surviving plants later to the packet's mature distance.
Broadcasting suits a defined, open patch where a loose drift is part of the design. Scatter thinly over the prepared soil, cover lightly, and record the patch outline. Do not broadcast three species together merely to avoid making decisions: seedlings will emerge at different densities and their colors will not help you identify them at first. A narrow drill or a separate patch usually produces a more useful spring edit than a handful of indistinguishable seed across the whole bed.
A managed self-sown edge is a different choice from deliberate sowing. Oregon State University Extension recommends allowing selected annual heads to dry and drop in September, while noting that winter severity and site conditions determine how reliably they return. Self-sowing works where the planting can move a little; it is a poor fit beside a path, a formal color block, or a young perennial whose crown must remain visible. Keep a boundary and remove volunteers that cross it.
Sow shallowly and mark every group
Make the groove to the depth on the packet, then place seed evenly enough that future thinning will be possible. For very small seed, a folded packet or a pinch mixed with a little dry, fine material can help you distribute it, but the seed still needs contact with the prepared surface. Cover with the packet's recommended amount of fine soil; autumn rain should not be asked to excavate or relocate a buried seed.
Water immediately with a fine rose so the surface settles without a jet cutting channels through the drill. The RHS guide uses a fine-rose watering can for both broadcast and drilled sowings. Keep the surface evenly moist while germination begins, adjusting for rain and soil. If a storm exposes seed or forms a crust, repair only the affected strip with a light rake and a shallow dusting of soil; do not cultivate the whole patch and lose the original placement.
Label each patch with the common name, scientific name where supplied, cultivar, sowing date, and source of the seed. Add a simple map showing the front edge, drill direction, and any nearby perennial crown. Markers matter more in spring than they do on sowing day: a calendula seedling, a weed, and a volunteer from last year may share an unhelpful early silhouette. A durable label turns an uncertain patch into an observation you can improve.
Build a modest autumn rosette
After emergence, aim for compact, balanced growth instead of maximum size. Keep the occupied root zone from drying out, but let excess water leave the bed. Avoid feeding the young sowing in response to slow growth; the RHS specifically advises against fertilizer in an overly rich seedbed because lush foliage can displace the flower-making role you want next season. The plant needs time to root and settle, and a late flush is easily damaged.
Watch the plants after rain and after a cold night. A small, firm rosette with intact leaves is a useful autumn result; stretched stems, pale growth, standing water, or bare patches point to a surface, light, moisture, or seed-placement problem. Correct the bed gently while plants are small. Do not keep resowing a failed strip without finding out whether birds, runoff, crusting, rot, or a wrong seed class caused the gap.
Thin only when you can recognize the chosen seedlings and the plants are large enough to handle, unless the packet gives an earlier instruction. Remove the weakest or misplaced plants first and leave a little breathing room around the survivors. Autumn thinning is about preventing obvious crowding, not achieving the final spring grid. A measured second pass in spring is safer than pulling wanted seedlings before their identity is clear.
Protect after germination without trapping wetness
Hardy does not mean immune to every winter. The RHS notes that autumn sowings may need protection from hard frosts, particularly in colder areas or severe winters. Use the local forecast to decide when a cloche or horticultural fleece is justified, and protect the young plants only when conditions call for it; do not cover the bed continuously from the day of sowing. A short cold snap and a long, wet enclosure are different management problems.
Support or secure any cover so it does not press on the foliage, scour the soil, or lift in wind. Leave enough ventilation for damp air to move, and inspect after rain for condensation, flattened seedlings, slugs, or a crusted surface. Remove or open the cover as conditions ease according to the material and local practice. Protection is a temporary weather response; it should not turn a free-draining border into a sealed box.
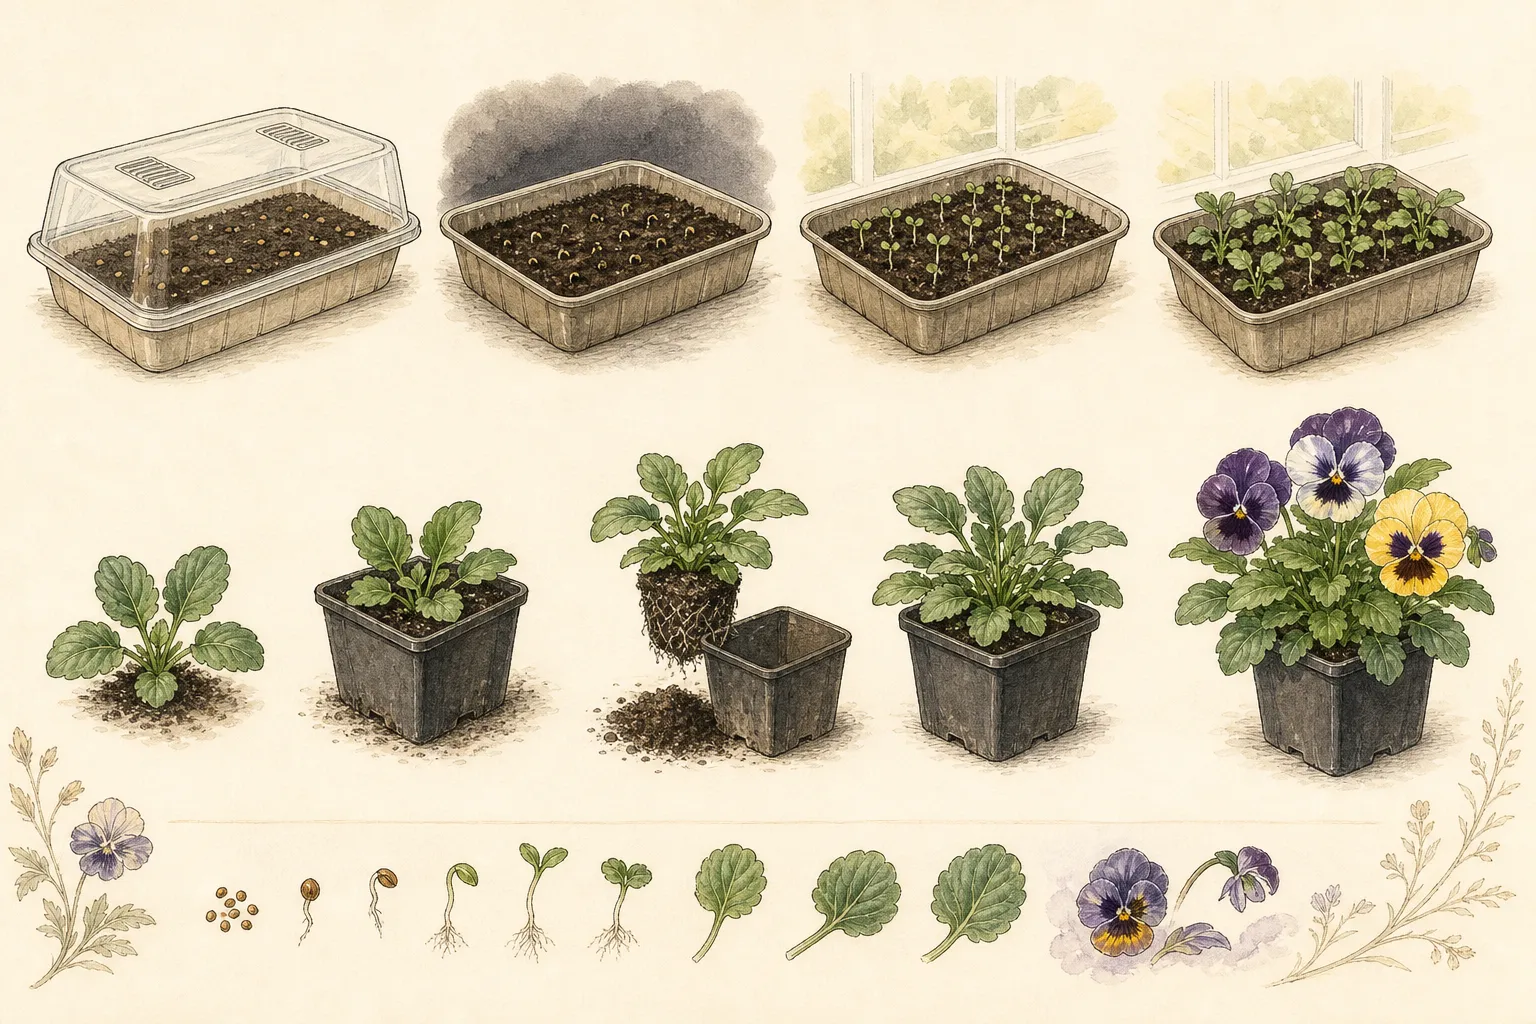
Containers can be sown using the same selection logic, but they cool and dry differently from beds. Place them where they receive light and rain without sitting in a saucer of water, and keep the label with the pot not on a nearby shelf. If winter exposure is severe, an exposed pot is less reliable than a sheltered unheated structure. Do not move a container into warm indoor air simply because the seedlings are small; that changes the seasonal signal and often produces weak growth.
Thin for the mature flower, not the seedling gap
Return to the packet's mature spacing when spring growth begins. The wide ranges for annual height and spacing reflect why one universal thinning distance is misleading: a compact love-in-the-mist group needs a different allowance from a tall larkspur grown for cutting. Pull surplus plants while the soil is slightly moist, or snip them at the surface when neighboring roots are close. Avoid disturbing the plants you intend to keep.
Use the original map and the visual plan together. Keep lower calendula from being hidden behind a dense wall of cornflowers, and leave the rear larkspur enough room to carry stems without leaning across the path. If a patch germinated unevenly, close the largest gaps only with a compatible plant whose identity is certain. A perfect grid is unnecessary; a readable group with air, light, and access is the useful result.
Some seedlings will fail over winter, and some will appear outside their marked line. That is a reason to edit, not to judge the whole method by a single count. Replace a missing role in spring only after checking the cause of the gap and the season left for flowering. If the bed is still cold or wet, do not fill it with a tender annual just to restore color. Keep the promise of the season and change the plan honestly.
Know when autumn sowing is the wrong tool
Move a packet to the spring list when its instructions require warmth, when the cultivar is half-hardy or tender, or when your garden cannot offer a workable autumn window. Illinois Extension's cold-tolerance categories are more useful here than a seed rack's broad label. A seed that needs warm soil may sit unchanged through autumn and then rot when cold rain arrives; sowing it earlier does not convert it into a hardy annual.
Delay direct sowing in a bed that stays saturated, is shaded by a persistent canopy, or is still occupied by a summer plant that cannot be cleared without damaging roots. The autumn method depends on a prepared surface and enough light for a settled seedling. Use a separate nursery patch, a protected sowing, or a spring start when the permanent border cannot meet those conditions. The right response to a bad site is a different site, not extra seed.
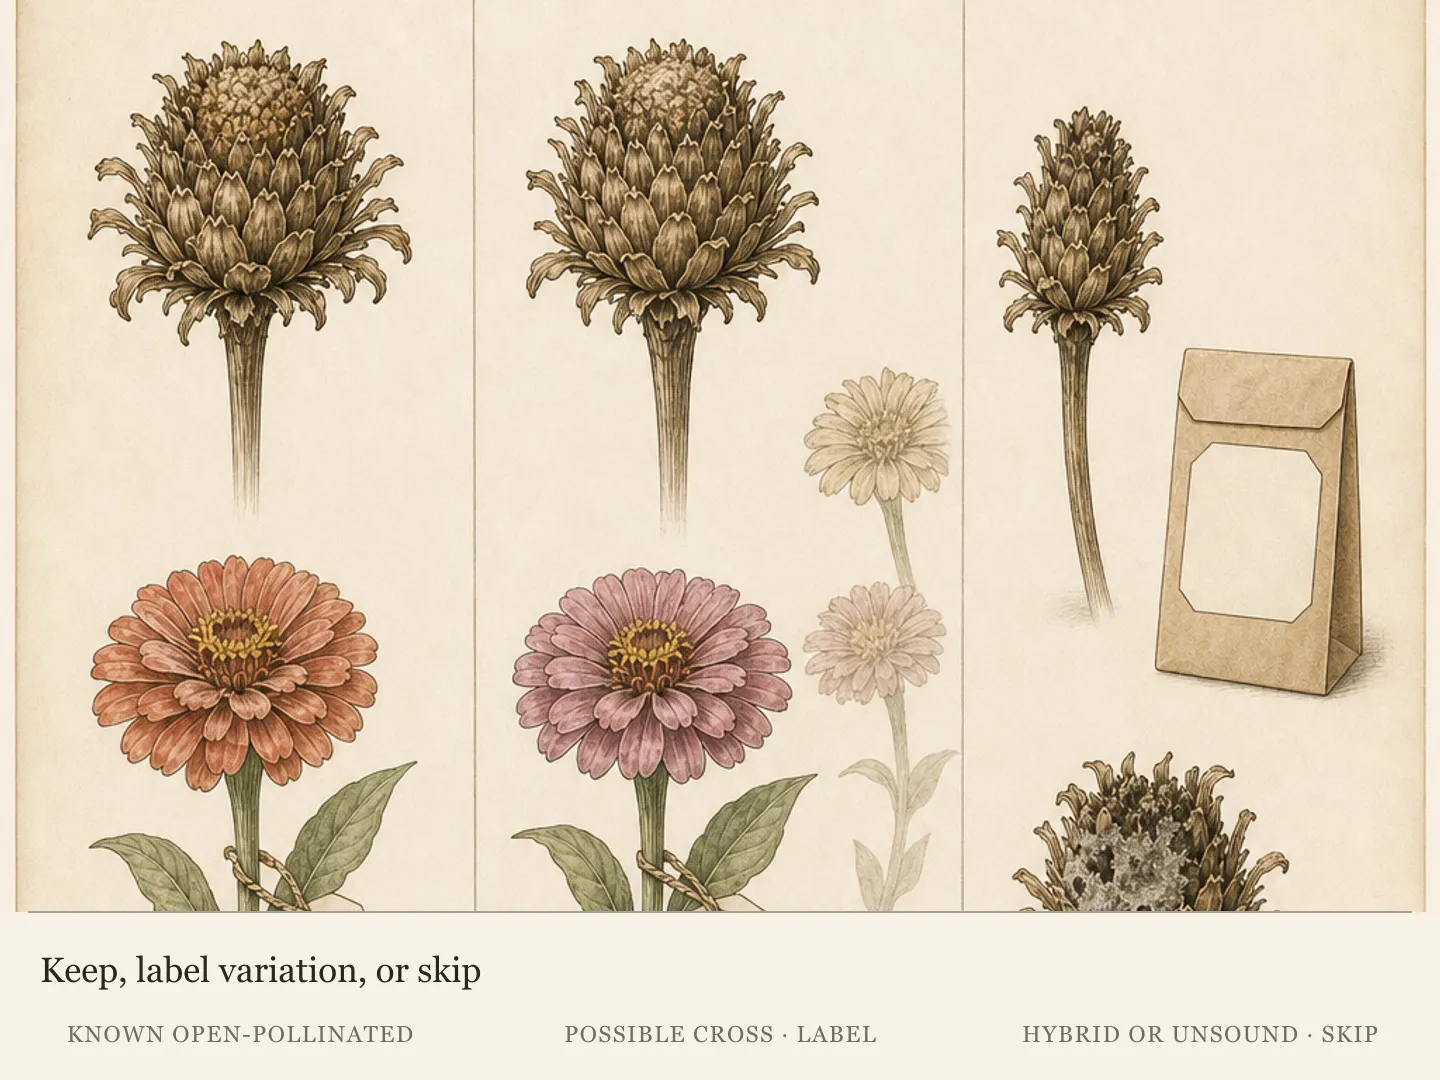
Treat a named hybrid as a design choice without a guaranteed source of identical volunteers. Oregon State Extension notes that hybrid annuals do not reliably return true to type from saved seed. That matters when you need a precise height, color, or flower form. You can still allow a hybrid to self-sow for an informal effect, but label it as variable and do not promise that next year's plants will repeat the packet photograph.
Let spring decide what stays
As the soil warms, uncover the map before you weed. Compare the marked rows with the emerging plants, and keep the labels in place until the first true leaves or other useful features make identification secure. Remove seedlings that sit in paths, press into perennial crowns, or clearly belong to a different volunteer. Early editing protects the design without demanding that every autumn-sown seed become a permanent member of the border.
Autumn sowing is valuable because the plants can flower earlier than spring-sown counterparts under the conditions described by the RHS. That advantage is a head start, not a fixed flowering date. Spring cold, wet soil, winter loss, cultivar maturity, and light all change the result. Record when growth resumed and when the first flowers opened; your own bed will eventually give you a more useful calendar than a generic reminder to sow in September.
Let the surviving plants carry the spring display, then decide which seed heads to keep. If you want a controlled color block, remove fading heads before they scatter and collect only fully mature, dry seed for a labeled envelope. If you want a looser edge, Oregon State Extension's approach—allowing selected annuals to dry and drop—can be used within a defined boundary. The boundary is the design tool that keeps natural increase from becoming accidental crowding.
Keep a one-season record
Write down the sowing date, the soil condition, the seed lot or supplier, the patch position, and the first autumn emergence. Add the date of any fleece or cloche use, the winter loss you observed, and the spring thinning distance. Those small notes let you distinguish a poor seed lot from a wet patch, a late sowing from a tender species, and a spacing mistake from a winter event.
By the next September, use the record to decide whether to repeat the same patch, move it into brighter ground, reduce the seed rate, or choose a different annual. Keep the strongest plants' mature size and flowering window beside the map, not only the color name. A successful autumn sowing is not the maximum number of seedlings; it is an earlier, healthier, more legible spring role that the garden can carry.
The practical sequence is simple: identify a genuinely hardy annual, wait for a cool and moist bed, prepare a firm weed-free surface, sow in a marked drill or patch, water gently, protect only when weather requires it, and thin to the plant's mature space. When those conditions do not align, spring sowing is not a failure. It is the season that fits the seed.
Steps
- Level
- moderate
- Time
- Two to three hours to prepare and sow one small border, followed by brief moisture and protection checks through autumn
- Tools
- Hand fork or spade, Rake, Cane or dibber for shallow drills, Watering can with a fine rose, Weatherproof labels and pencil
- Materials
- Hardy annual seed packets that permit autumn sowing, Fine soil from the prepared bed for light covering, Horticultural fleece or a cloche for locally forecast hard frosts
- 1Check the autumn window
Choose a cool-temperate bed when autumn soil is moist and workable, adapting the September–October guidance to local weather, the packet, and the time remaining before frozen ground. Do not sow into hot, dry, sticky, or waterlogged soil simply to meet a calendar date.
- 2Choose genuinely hardy seed
Confirm that the named annual tolerates cold soil, cool air, and light frost, and keep half-hardy or tender packets for spring. Calendula, cornflower, larkspur, and love-in-a-mist are examples only when the named seed line includes autumn sowing directions.
- 3Map each garden role
Reserve low, medium, and tall positions before sowing, using the packet's mature size. Mark the front edge, rear edge, nearby perennial crowns, and access gaps so the spring border can be thinned as a composition instead of a random seedling carpet.
- 4Prepare a firm seedbed
Remove weeds and stones, dig and rake the surface, break clods, and firm gently. Avoid fertilizer in the sowing strip, correct obvious drainage problems, and wait for soil that is workable without smearing or compacting underfoot.
- 5Sow drills or defined patches
Make shallow grooves or outline a controlled broadcast patch. Space drills 15–45 cm apart according to eventual plant size, distribute seed thinly, and use the packet's depth and final spacing and remember that the initial seed distance is not the mature planting grid.
- 6Water and label immediately
Cover the seed lightly with fine soil, settle it with a fine-rose watering can, and keep the surface evenly moist while germination begins. Label common name, scientific name, cultivar, sowing date, and seed source, then sketch the layout.
- 7Protect only during hard frosts
Watch the local forecast after emergence. Use a secured cloche or horticultural fleece for a severe cold snap, allow ventilation, inspect after rain, and open or remove the cover as conditions ease. Do not keep a damp enclosure over the bed by default.
- 8Thin and review in spring
Keep labels until seedlings are identifiable, then thin to the named cultivar's mature spacing and preserve the planned height order. Record winter survival, flowering time, and self-sowing behavior so the next autumn's decision comes from the actual bed.
Related reading
Sources
- How to grow hardy annuals from seed in autumn. Royal Horticultural Society. Source record · Accessed 2026-09-04.
- Annuals. University of Illinois Extension. Source record · Accessed 2026-09-04.
- Let some annuals go to seed in the fall. Oregon State University Extension Service. Source record · Accessed 2026-09-04.