Grow · snowmelt path site analysis for bed design
Read Snowmelt Paths Before Designing a New Bed
Watch where thaw water runs, ponds, and infiltrates before outlining a new bed so the border sits on the right shoulder of the site instead of in the seasonal drainage chute.
Published Last updated
In this guide
- Water movement shapes the bed before plants ever do
- Choose the bed boundary after locating the water route
- Catch thaw evidence from roof, walk, drive, and plowed edges
- Distinguish fast flow, ponding, and ordinary spring moisture
- Test infiltration before you call the spot a border
- Decide whether the site wants a border, a rain-garden logic, or a correction first
- Place the new bed on the shoulder, not in the chute
- Keep the thaw map for spring and summer decisions too
- Steps
Water movement shapes the bed before plants ever do
A new ornamental bed is often drawn first and tested later. Snowmelt argues for the opposite order. By late winter and early thaw, the property reveals how water leaves the roof, where plowed snow concentrates, which walk edges shed melt first, and where shallow depressions hold cold water longer than the gardener expected. Those paths are not temporary noise. They are the seasonal hydrology the new bed will inherit. If the planting outline ignores them, the border may be beautiful on paper and constantly stressed in real spring weather.
University of Georgia's site-analysis guide tells the gardener to observe where water ponds or moves rapidly and to record downspouts, drain lines, and poor drainage before planting. Nebraska's stormwater guidance adds the broader landscape truth: rainwater and melting snow can either be pushed off the property in a hurry or slowed, infiltrated, and directed intelligently. A new bed sits inside that choice whether you mean it to or not. The question is not simply where the bed will fit, but whether the proposed outline belongs in a flow path, beside it, or in a place where water can be retained beneficially without drowning ordinary border plants.
Snowmelt is especially revealing because it combines several water sources at once. Roof discharge, melt from piled snow, compacted walkways, and frozen soil all operate together. The bed that looks gently sloped in summer may turn into a spring chute because frost still blocks infiltration lower in the profile. Watching that moment gives the designer information a hose test in warm weather may miss. It is the difference between understanding where water prefers to travel and merely where you wish it would go.
Choose the bed boundary after locating the water route
Separate flowing runoff from a basin where meltwater stands, then inspect the shoulder and soil beyond it. Keep an ordinary planting bed out of an unresolved water path. Where the intended garden depends on drainage or rain-garden design, complete that separate assessment first. Retain the thaw map so later summer appearances do not erase the original siting evidence.
Catch thaw evidence from roof, walk, drive, and plowed edges
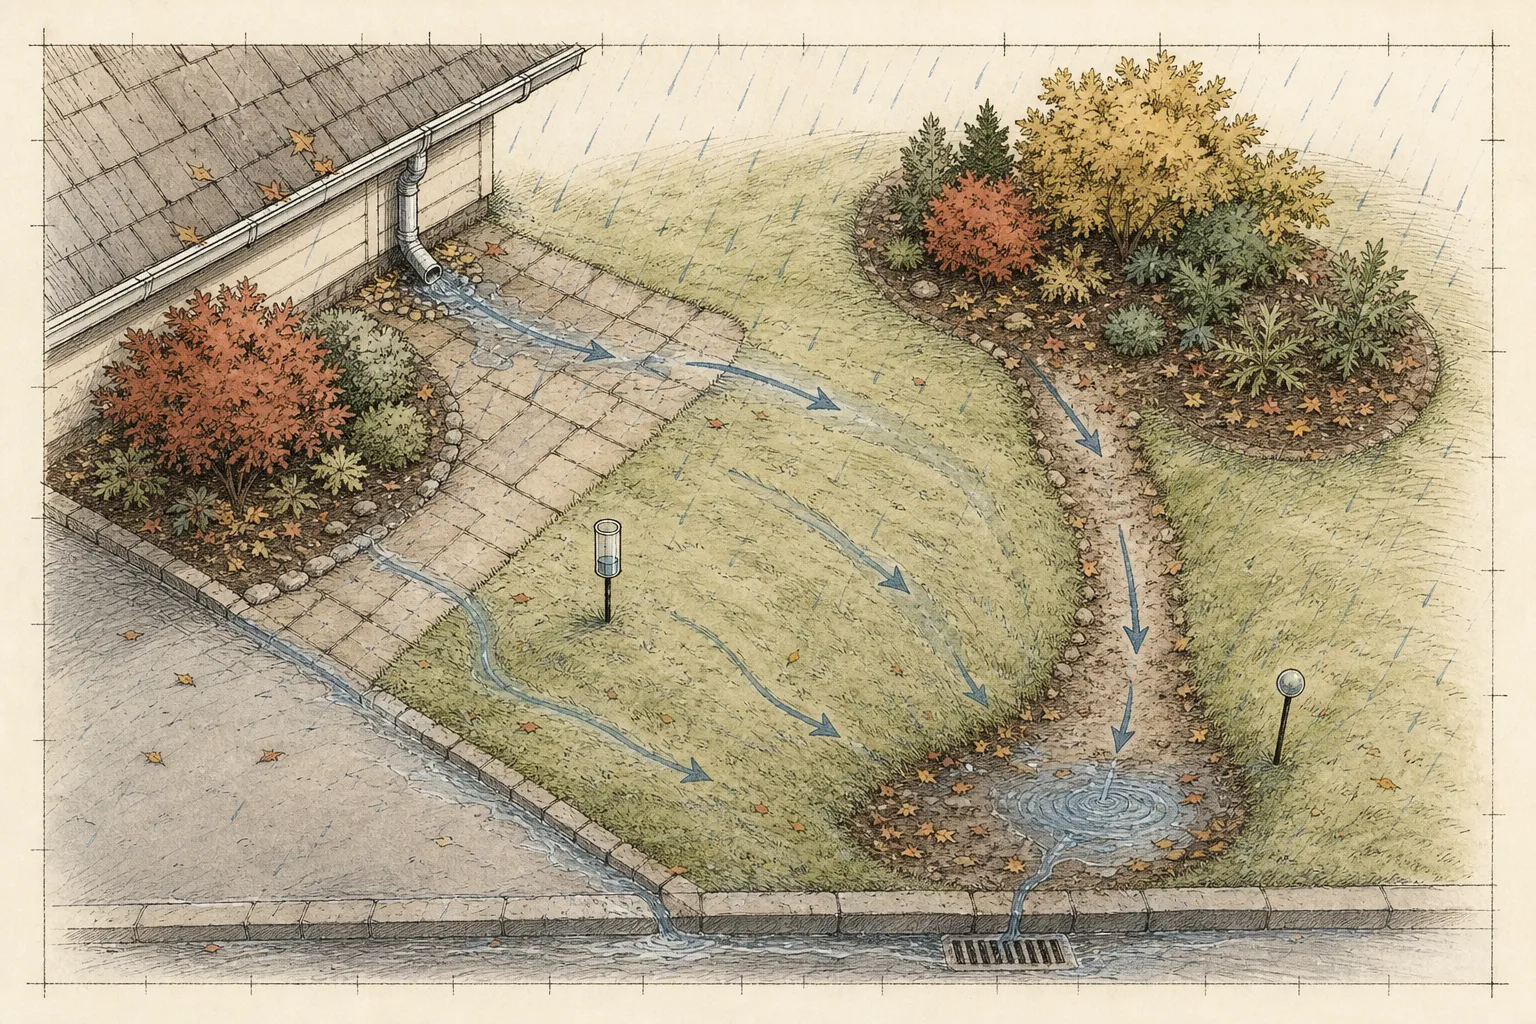
The first job is to watch the property during thaw, not after it has dried and reset. Follow every downspout, every walk edge, and every shoveled or plowed snow ridge. Mark where water exits the roof, where it cuts across the soil, and where it disappears or stalls. Georgia recommends observing the site during a downpour, but the same reasoning applies to melting snow: note where water moves rapidly and where it ponds. The source does not care whether it arrived from rain or thaw. What matters is the recurring route across the bed you are about to design.
Plowed and shoveled snow need their own layer on the map because they change the timing and concentration of runoff. A bed beside a drive may look open enough for shrubs in August, yet every winter storm rebuilds a frozen ridge that melts in the same place for weeks. The soil can stay colder there, and the concentrated water may cut through mulch, expose roots, or keep one end of the bed persistently wetter than the rest. If you do not map the pile zone, you are not mapping the spring water honestly.
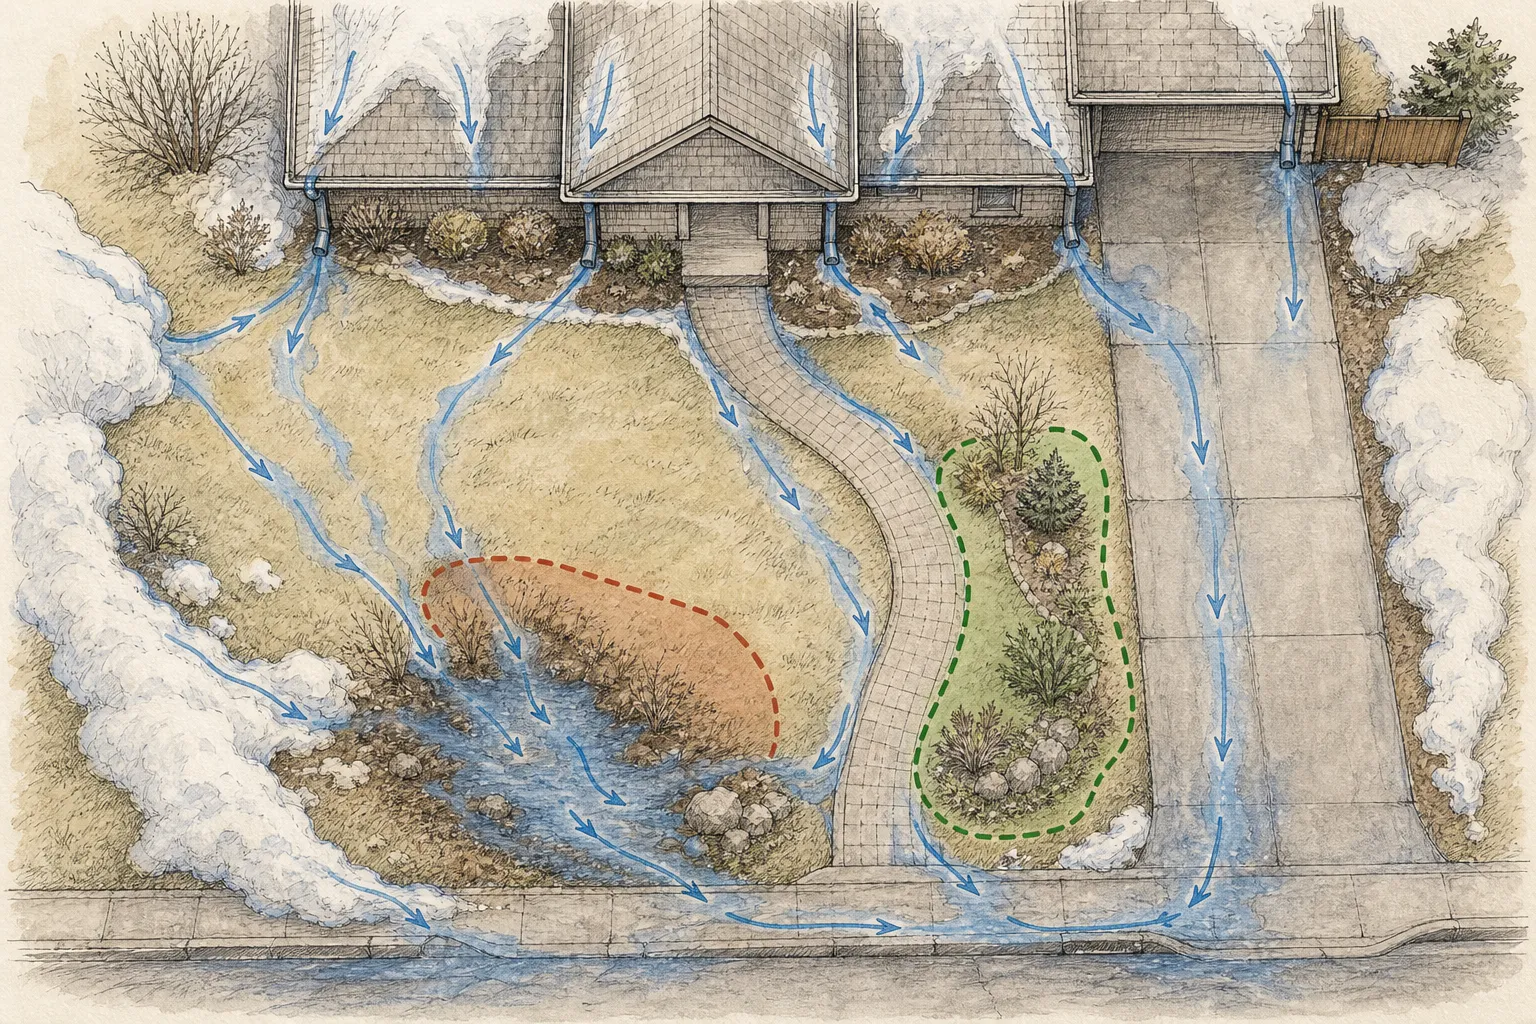
Take pictures from the same place over several thaws if you can. One warm day may show a shallow film; the next may reveal a real runoff line from the roof corner to the curb. The repeated pattern is what the design should answer. A single photograph of wet soil does not tell you whether the bed is in a drainage chute. A series usually does.
Distinguish fast flow, ponding, and ordinary spring moisture
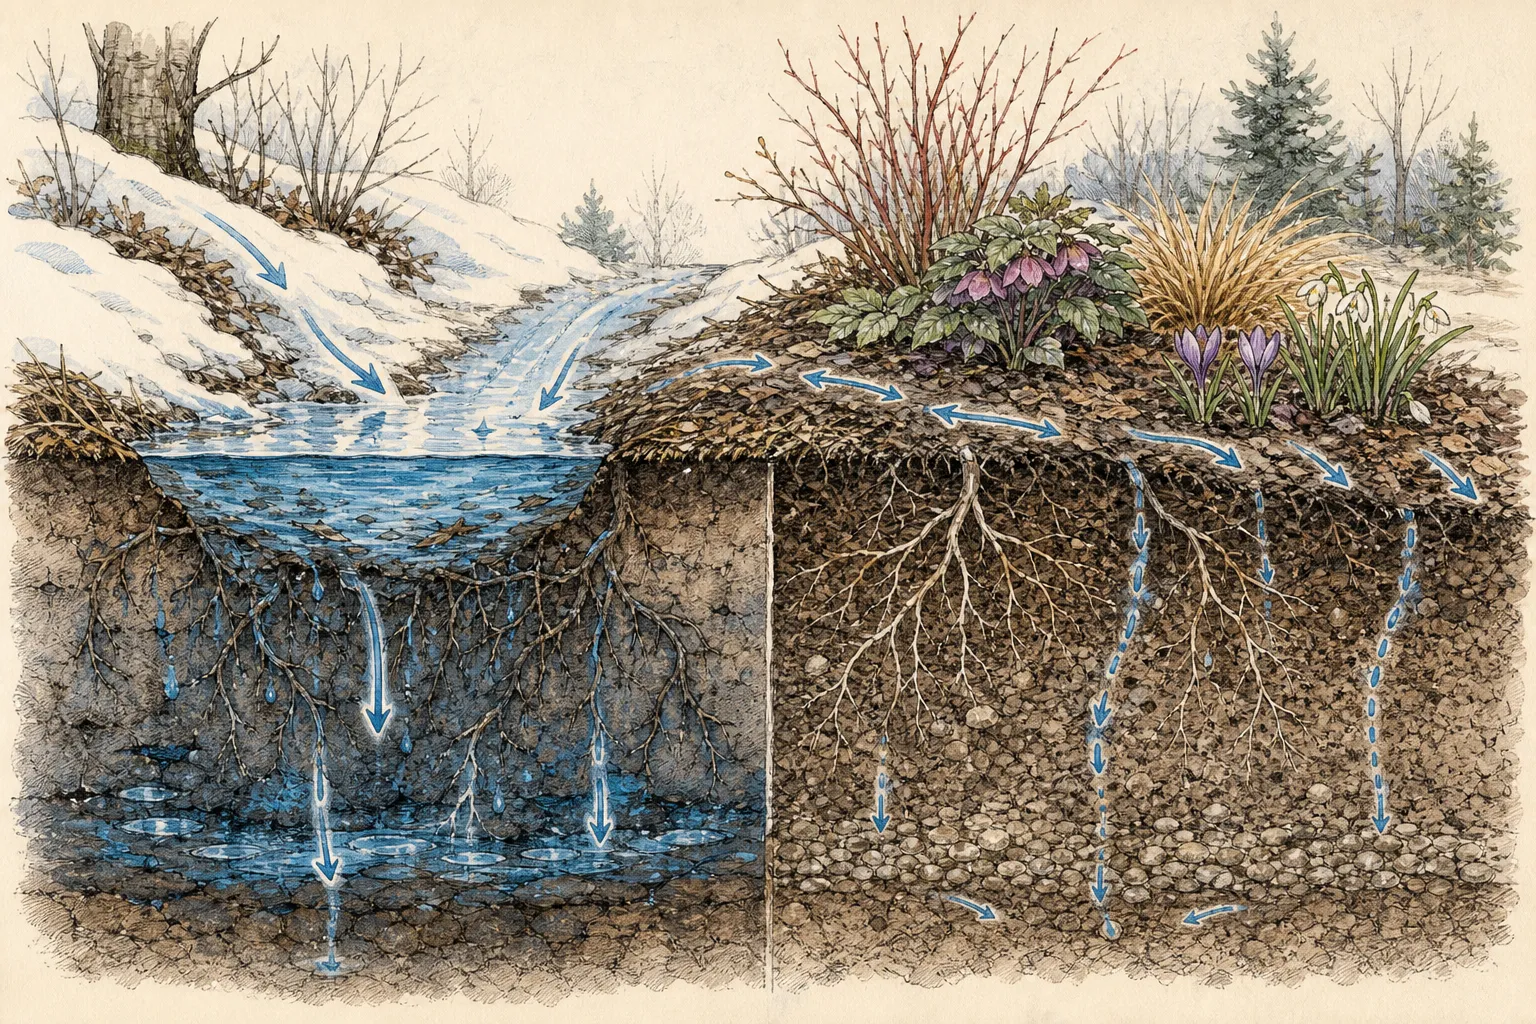
Not every wet surface is the same kind of problem. Fast flow erodes mulch, carves rills, and physically moves water through the proposed bed before it has time to soak. Ponding leaves water standing in a depression, often where frozen subsoil or compaction slows infiltration. Ordinary spring moisture is different again: the bed may be evenly damp yet still workable once the surface warms and drains. If these conditions are treated as one generic wetness, the designer either overreacts and rejects good planting ground or underreacts and places the border in the exact place that will fail after every thaw.
This distinction is where cross-section thinking helps. A standard ornamental bed wants a root zone that drains and re-oxygenates after wet weather. It does not need to be desert dry, but it does need to stop acting like a channel. Penn State's introductory rain-garden guidance is helpful as a boundary marker even if you are not designing a rain garden: sites intended to hold or infiltrate runoff should drain back within a reasonable period rather than remain standing water indefinitely. If your proposed bed behaves more like runoff infrastructure than like a border soil, the plant list or bed type has to change.
Look at the plant evidence already on site as well. Mossy crust, algae, bare scour lines, repeatedly exposed mulch fabric, or one persistent dark strip through the lawn are all hydrology notes written by the property itself. Cornell's site-assessment materials emphasize learning the site before deciding what belongs there. In thaw season that means reading the marks water leaves behind, not merely the moisture you feel underfoot at one moment.
Test infiltration before you call the spot a border
Once you know where the water goes, test whether the soil in the safer-looking shoulder can actually receive it. A simple drainage or infiltration check tells you far more than surface appearance. Georgia recommends conducting drainage tests in multiple locations because soil moisture and drainage vary across one site. That warning matters in snowmelt design, where a raised shoulder beside a runoff path may drain well while the low center fails badly. If you test only one point, you can easily generalize the wrong condition across the whole future bed.
The point of the test is not to prove the site perfect. It is to locate the line between soil that can behave like a garden bed and soil that needs another function. If the shoulder drains and re-sets within a workable time while the chute remains soft or standing, the bed outline should honor that difference. Do not draw the border into the low area just because the composition looks more balanced on paper. Water has already told you where the roots will suffer most.
If the entire proposed area drains poorly, stop and reclassify the problem. The answer may be to correct roof discharge, install or revise drainage, choose a rain-garden or swale logic, or reserve the area for plants that genuinely tolerate those conditions. A standard mixed ornamental bed is only one of several possible outcomes. Site testing keeps you from mistaking it for the default.
Decide whether the site wants a border, a rain-garden logic, or a correction first
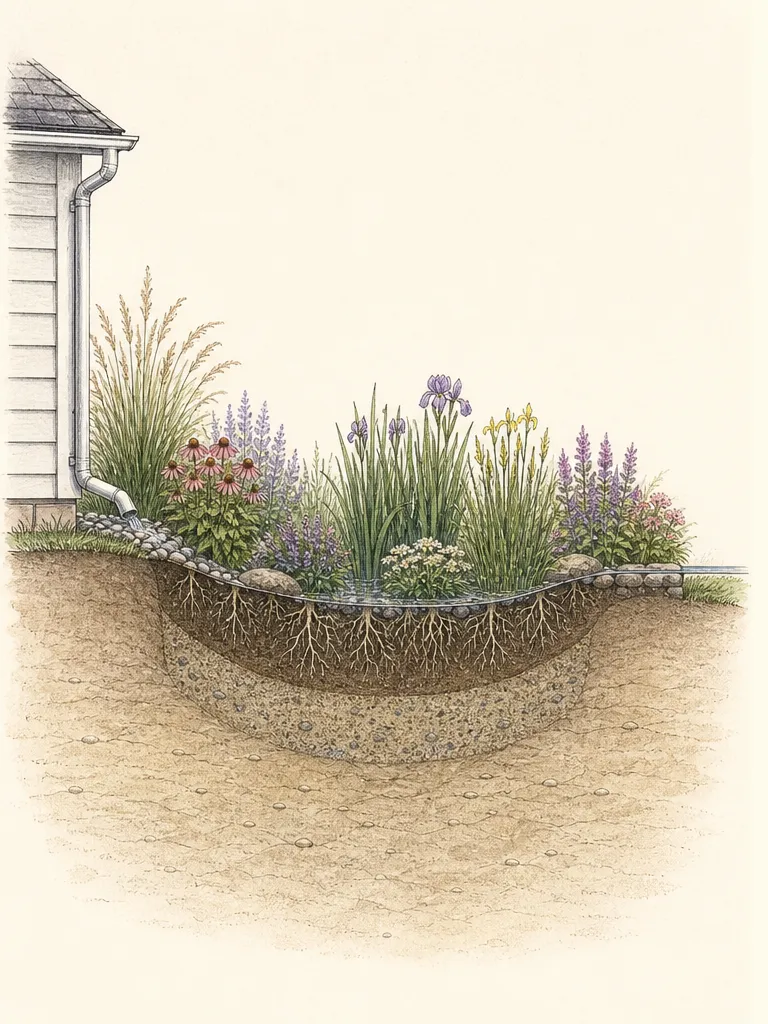
Design gets simpler once you accept that not every wet place wants the same kind of planting. A bed on the shoulder of the runoff can work beautifully with ordinary ornamental plants if the root zone drains and the main flow stays outside the border. A true capture zone receiving roof water or repeated snowmelt may want a rain-garden or bioswale approach instead, with different grading, different soil preparation, and different plant expectations. Nebraska's stormwater material is useful here because it treats melting snow as a resource to direct and infiltrate rather than as a nuisance to ignore. That perspective helps you choose the right planting type instead of forcing every site into the same template.
Sometimes the right answer is not a planting answer at all, at least not yet. A downspout extension, a revised snow-pile location, a small regrade, or a change to hardscape runoff may be the real prerequisite before any ornamental design becomes stable. If the bed is being asked to compensate for concentrated roof discharge or a badly chosen snow-storage zone, the plants will only reveal the error later. Correct the hydrology first. Then draw the border for the improved site, not for the flawed one you hope the planting will repair.
This is where restraint saves money. Gardeners often rush to fill a visually empty space beside a path or foundation because the outline is obvious. Snowmelt analysis slows that impulse and asks a better question: does this space want roots here, or does it want water movement here? The answer can still produce a beautiful garden, but it may change the kind of beauty you build.
Place the new bed on the shoulder, not in the chute
The shoulder is the zone where the bed can receive incidental moisture without becoming the main drain. It often sits just above the obvious water path, where the soil still benefits from nearby moisture but the root crowns remain outside the flow line. That is the position many ornamental beds actually want: close enough to use the site's moisture pattern, far enough to avoid erosion, ponding, and repeated saturation. The runoff map usually reveals this shoulder once you stop drawing the bed as a symmetrical shape and start drawing it as a response to the site.
This often leads to a more irregular but more durable outline. One edge may pull back from a downspout fan. Another may widen where the soil stays evenly moist but never holds water. The resulting bed can still be elegant, but its geometry is earned rather than imposed. It reflects where roots can realistically live. That is better design than insisting on a perfect oval whose lowest third will always sit in thaw runoff.
If the shoulder is too narrow for the plants you want, change the plant list or change the grading before enlarging the bed into the problem zone. Mature size, access, and snow storage still matter. A bed that begins on the shoulder and expands into the chute is still partly a chute. Draw the whole root zone where it can succeed, not just the prettiest central view.
Keep the thaw map for spring and summer decisions too
A good snowmelt map continues working after the snow is gone. The same route that carried thaw water may explain where summer irrigation runs off, where mulch shifts after storms, or where a border dries unevenly because runoff leaves the bed too quickly. The map also helps with future corrections. If you later decide to add a swale, redirect a downspout, or change the snow-storage plan, you already know the recurring path of water rather than starting the diagnosis again from memory.
Store the map with notes on date, weather, remaining frost, and how quickly the area reset after the thaw. That context matters because not every spring behaves the same way. A year with deep frozen ground and late melt can exaggerate the channel; a gentler season may show a smaller but still recurring pattern. The designer needs the recurring truth, not the most dramatic single day. Repetition turns the thaw from a nuisance into a design survey.
By the time you buy next year's plants, the new bed should have passed a simple test: it lies where roots can grow, where water can move without commandeering the border, and where the site's winter behavior is no longer a surprise. If the thaw map can support that claim, the bed is probably ready. If not, keep reading the water and delay the planting. That delay is far cheaper than replacing plants that were asked to grow in the path of spring runoff they never had a chance to outrun.
Steps
- Level
- moderate
- Time
- One thaw observation session plus one drainage test
- Tools
- Base map or printed site sketch, Camera or phone, Flags or landscape marking paint, Trowel or soil probe, Bucket or hose for drainage testing
- Materials
- Observation notes for multiple thaws if available, Downspout and snow-storage annotations on the site plan
- 1Watch the property during thaw
Observe the site while snow is actually melting. Follow roof discharge, downspouts, walk edges, plowed ridges, and driveway runoff from source to outlet. Photograph the same route more than once if possible. Thaw-season evidence is more reliable than a dry-season guess about where spring water ought to go.
- 2Mark the true flow line and the standing basin
Separate moving water from ponding water. The bed may need to avoid both, but they demand different responses. Mark the chute where water repeatedly travels and the basin where it lingers. Those are not simply wet spots; they are different hydrologic behaviors that affect root survival in different ways.
- 3Locate the shoulder beside the runoff path
Identify the adjoining ground that stays moist without functioning as the main drain. This shoulder is often the best place for a standard ornamental bed because it receives the site's moisture pattern without carrying its heaviest flow. Draw that zone before you begin sketching the final bed outline.
- 4Test drainage in more than one point
Run a simple infiltration or drainage check in the proposed shoulder and in the obvious low zone. Compare how each behaves. If the shoulder drains and the center does not, keep the border out of the center. If neither drains acceptably, solve the runoff or rethink the bed type before planting anything.
- 5Choose the right bed logic
Decide whether the site wants an ordinary ornamental border, a rain-garden style planting, or a runoff correction first. Do not force a standard shrub-and-perennial bed into a water-capture zone just because the shape feels convenient. The water pattern decides the bed type before the plant list does.
- 6Draw the final outline around the hydrology
Let the border pull back from the chute and expand where the soil can actually support roots. Irregular outlines are often more honest and durable than symmetrical ones here. The finished bed should stay entirely on ground that can drain, re-oxygenate, and be maintained without repeated scour or standing meltwater.
- 7Keep the thaw map with the planting plan
Save the notes, photographs, and bed outline for later irrigation, grading, and maintenance decisions. The same map that improves spring siting will often explain later mulch movement, summer runoff, or recurring wet-foot problems. It should travel with the bed as part of its design record.
Related reading

Sources
- Drawing a Landscape Plan: Site Analysis. University of Georgia Extension. Source record · Accessed 2026-08-19.
- Landscaping and Stormwater. University of Nebraska-Lincoln Water. Source record · Accessed 2026-08-19.
- An Introduction to Rain Gardens. Penn State Extension. Source record · Accessed 2026-08-19.
- Site Assessment Booklet. Cornell Garden-Based Learning. Source record · Accessed 2026-08-19.