Grow · plant tulip bulbs outdoor pots autumn
Plant Tulip Bulbs in Outdoor Pots This Autumn
Plant border tulips in a single layer for spring pots, with clear depth measurements, close spacing and a winter plan for cold and rain.
Published Last updated
In this guide
- Plant for spring outdoors, with a winter place already chosen
- Choose bulbs for one coherent first-spring display
- Select a container with room below the bulbs
- Measure the planting level from a clear reference
- Arrange one layer, then water it into place
- Keep winter cold, rain and freezing in separate decisions
- Check moisture and protect the planting from disturbance
- Give emerging shoots light and finish the flowering cycle
- Steps
Plant for spring outdoors, with a winter place already chosen
Plant border tulip bulbs in a freely draining pot in autumn, cover them with potting mix and leave space at the rim for watering. Keep the planted pot cool through winter, protecting it from prolonged saturation and the freezing conditions that its exposed root zone cannot safely tolerate. Move emerging growth into good light. The intended result is a pot that flowers outdoors in its normal spring season, with the winter location chosen before the bulbs go in.
In the UK, the RHS places tulip planting in October or November, making early November a useful moment for this job. That calendar belongs to a temperate autumn. In colder districts, workable conditions and the arrival of sustained freezing may bring planting and protection forward. In warm-winter districts, ordinary outdoor exposure may supply insufficient chilling; obtain a locally appropriate bulb and chilling plan before committing to this routine. A November date alone cannot supply the necessary cold.
Start with ordinary dry border tulip bulbs sold for autumn planting. A pot of already sprouted tulips or a pack supplied for a timed indoor display has a different starting history. Our [prechilled tulip forcing guide](/grow/force-prechilled-tulips-indoors/) covers that separate sequence. For outdoor pots, retain the cultivar label and accept a seasonal flowering window. A sunny wall, a sheltered courtyard and a cold inland garden can bring the same cultivar into flower at different times.
Choose bulbs for one coherent first-spring display
Use one cultivar for the simplest pot: its expected height and flowering group provide a coherent starting point for the display. If mixing cultivars, compare those two details on their labels so one finishes well ahead of its companions only when that succession is intentional. Choose the display position with the mature stems in mind. A tall tulip can be attractive beside a doorway, but its flowers should have room clear of a door swing and frequent foot traffic.
Inspect each bulb while it is easy to see and handle. The RHS recommends firm bulbs with no sign of mould; a loose, papery brown outer skin alone is harmless. Iowa State describes soft, discolored or foul-smelling tissue as a concern in bulb rot. Set questionable bulbs aside and use sound stock for the pot. Handle the basal plate and pointed nose gently, retaining intact bulbs instead of trimming damaged material into an apparently tidy shape.
Distinguish large border tulips from specialist species tulips. The RHS gives specialist tulips their own container mix and notes differing needs among them. The single-layer recipe below follows its border-tulip method. Keep any cultivar-specific supplier direction with the label, especially where stock has special handling requirements. A photograph of a small wild tulip in a gravel bed is insufficient evidence that a large bedding tulip needs the same summer and winter treatment.
Plan this as a first-spring display. Border tulips often flower less reliably in a second year, and repeated container performance is particularly uncertain. The RHS identifies some groups with better return potential, including Darwin hybrids and Kaufmanniana types, but even those groups carry no annual flowering guarantee. Budgeting for fresh bulbs next autumn lets the spring pot be judged on the display it was planted to give, while leaving an optional recovery route for healthy bulbs.
Select a container with room below the bulbs
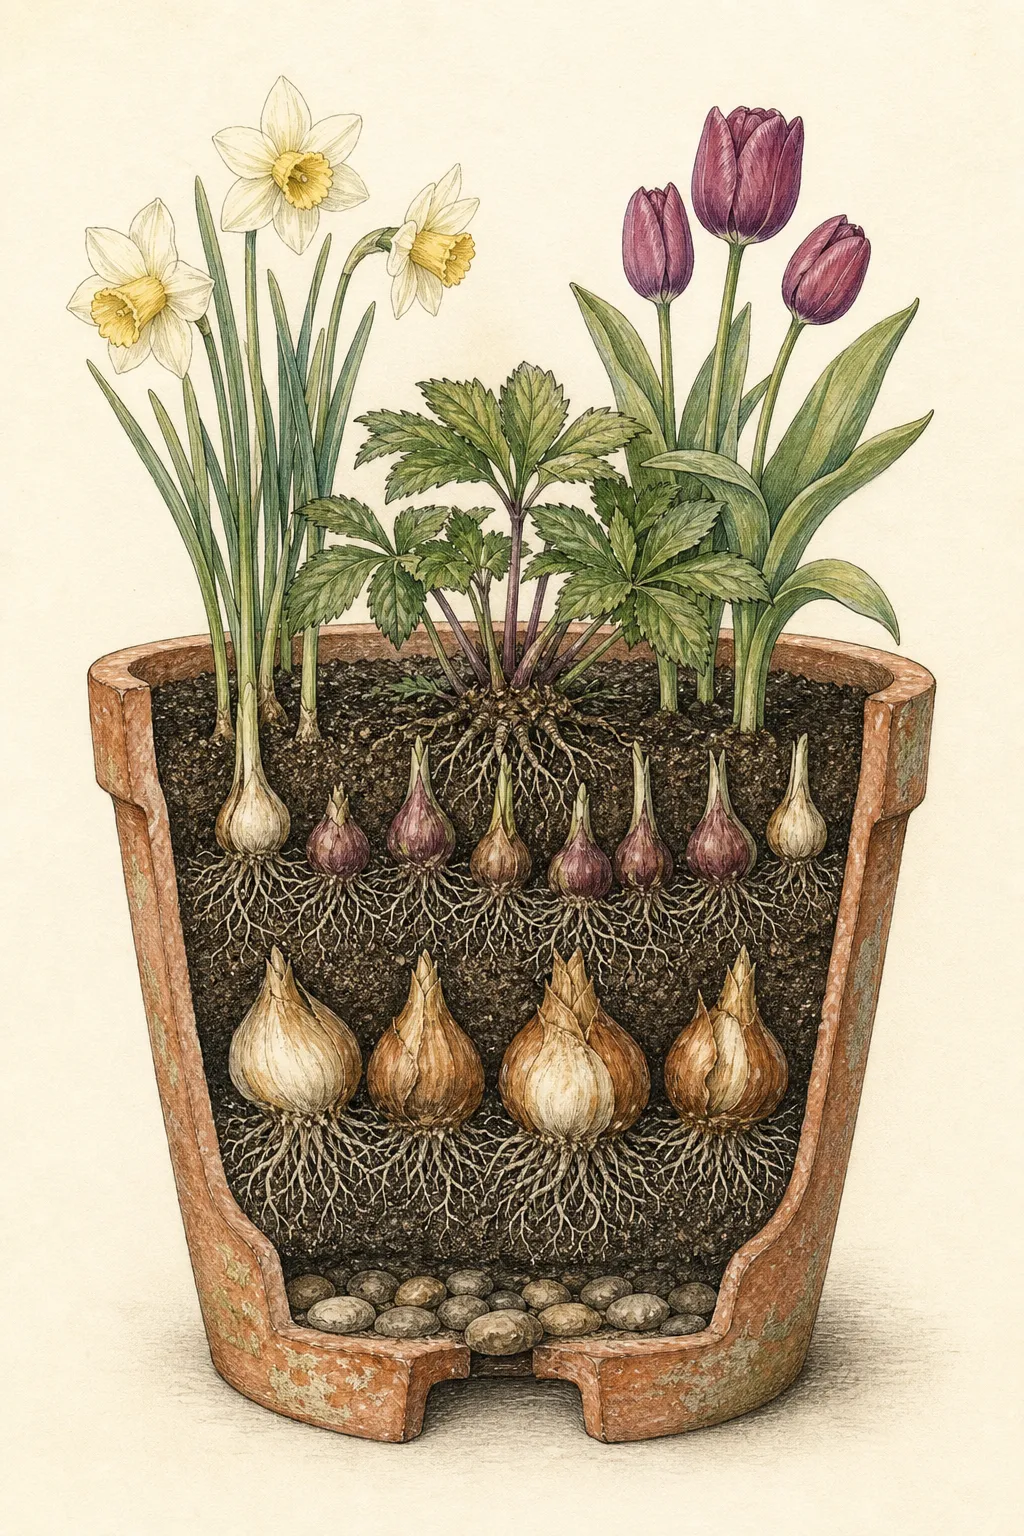
Choose a clean container with functioning drainage holes and enough depth for mix below the bulbs as well as their covering layer. Rutgers specifically calls for this lower rooting space. A wide, shallow decorative bowl can fit many bulbs across its surface yet leave very little room beneath their basal plates. Check the internal depth with the intended bulb level marked before buying the count of bulbs; the outside height includes the base and rim.
The RHS suggests about 12 tulip bulbs for a 45 cm, or 18 inch, wide pot, increasing to 20 for a fuller display. Treat that as a useful starting range for that size, then lay out the actual bulbs. Their size, the internal width and the taper of the pot determine what fits at planting level. A pot that measures 45 cm across its lip may be considerably narrower where the bulbs will sit.
Keep the planting manageable through winter. A large pot offers more insulation than a small one, as Oregon State notes, but it also becomes harder to relocate once filled and watered. Where winter protection requires moving into a shed or garage, choose a vessel that fits the route and can be handled with suitable help. For a display inside an ornamental outer container, preserve an open drainage route and empty collected runoff. A drainable inner pot still suffers if its outer vessel holds water.
Measure the planting level from a clear reference
For a first-season border-tulip pot, the RHS recommends three parts peat-free multipurpose potting compost to one part grit. Here, compost means a manufactured growing medium, not garden compost. Rutgers likewise calls for potting soil and excludes garden soil and topsoil. Blend the mix before filling so the grit is distributed through it. Keep the drainage openings functional and fill the bottom with enough mix to support the chosen bulb level.
The RHS container method measures the height of two or three bulbs end to end, then leaves that distance between the supporting mix and the top edge of the pot. Set the bulbs on this level, cover them, and finish the surface 2.5 cm, or 1 inch, below the rim. The rim is the reference for the first measurement; the finished mix is lower. This matters because a general instruction about bulb depth may instead measure from the finished soil surface.
For a worked example, suppose each bulb is 4 cm tall and you choose the three-bulb-height end of that recipe. Set the bulb bases 12 cm below the rim. Their tips then sit 8 cm below the rim. Finishing the mix 2.5 cm below the rim leaves 5.5 cm of mix above the tips and 9.5 cm between the bulb bases and the finished surface. Those figures explain this particular recipe; they are not a universal depth for every tulip bulb.
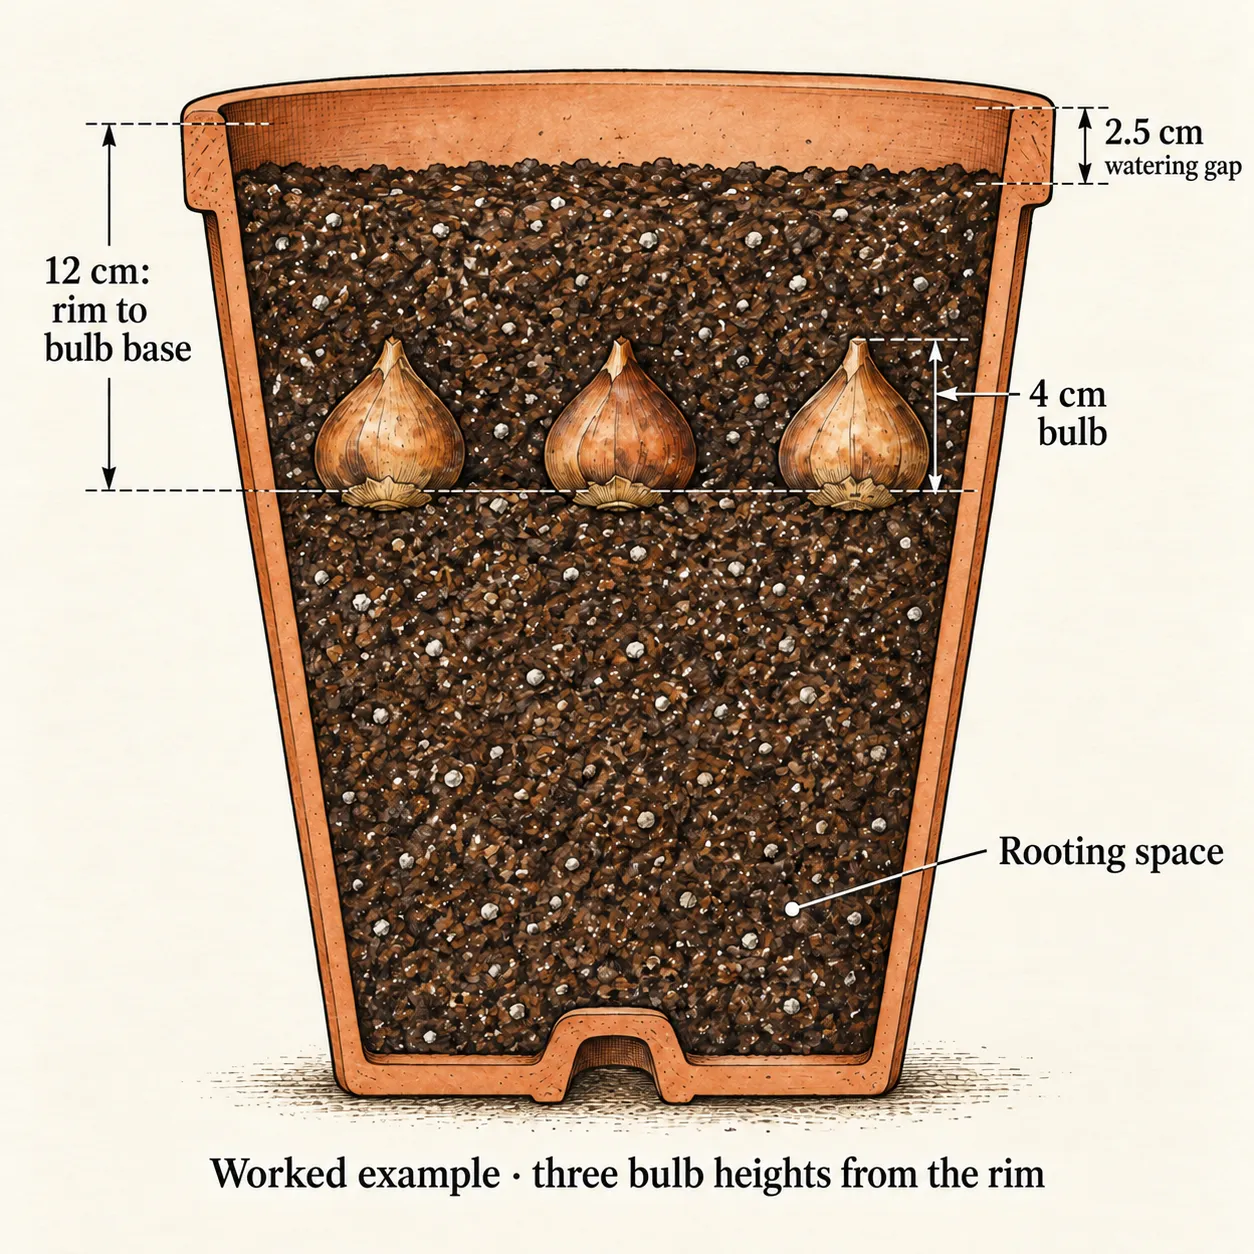
Use a ruler, a bulb and the actual container together to make those reference points visible. If following a supplier's depth instead, establish whether its number means cover above the tip or depth to the base, and measure from the surface it specifies. Keep that method consistent. Combining a rim-based allowance with an additional full planting-depth layer can bury the bulbs more deeply than either instruction intended. Preserve room below the basal plates for roots in either approach.
Arrange one layer, then water it into place
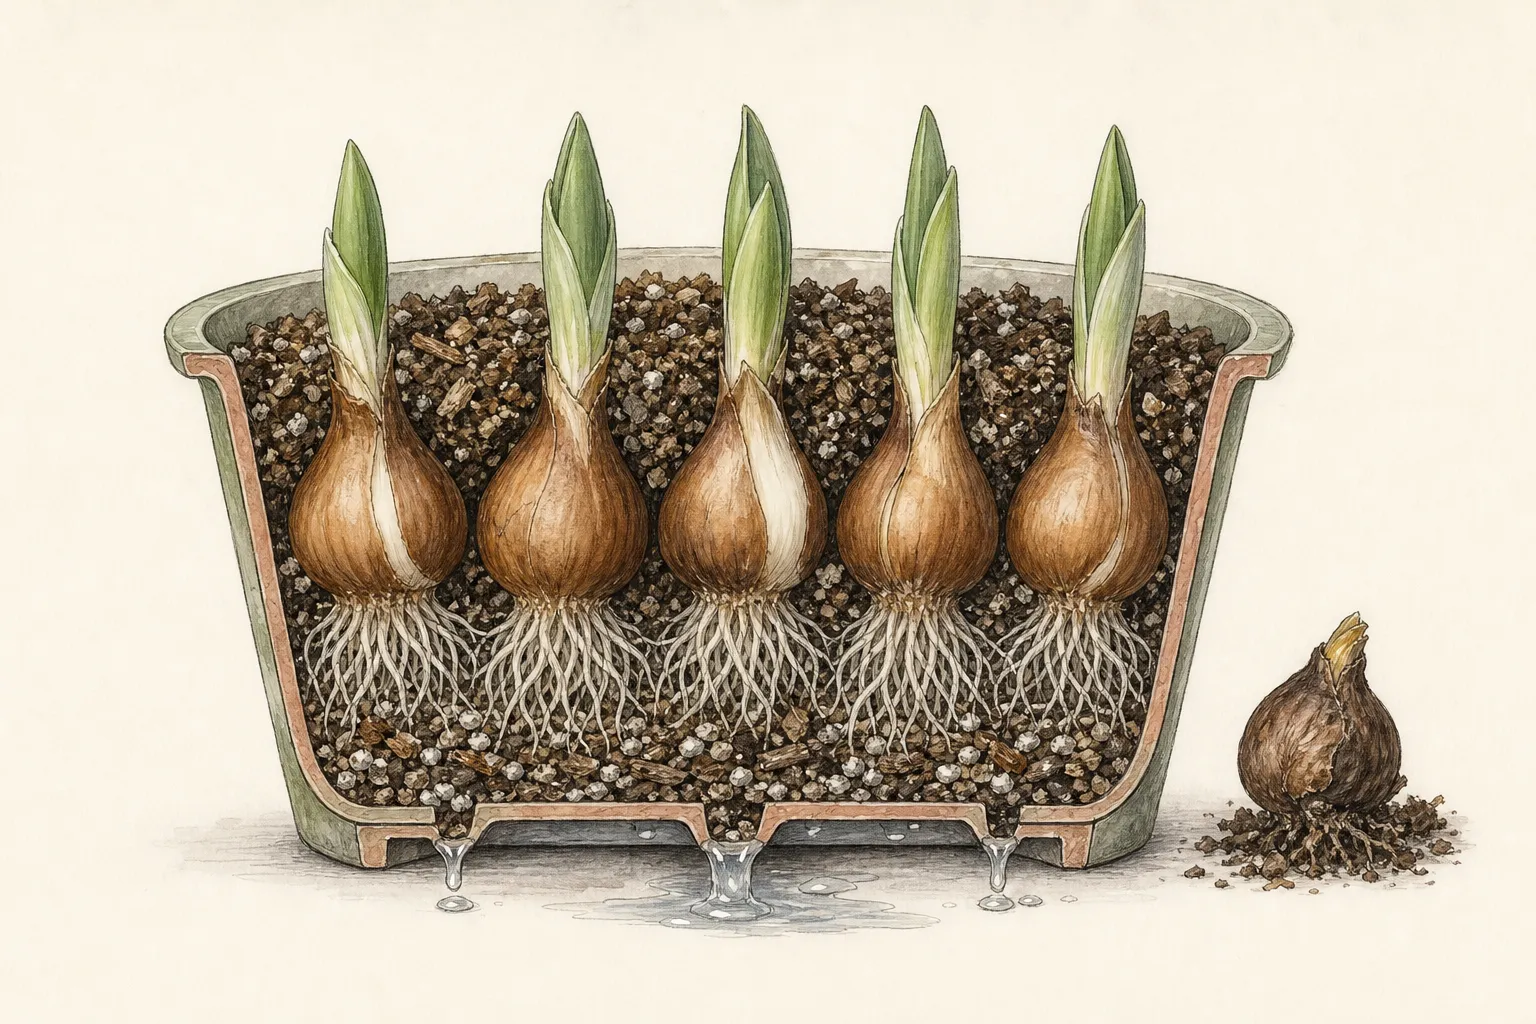
Place the bulbs pointed end upward, resting on the prepared mix. The RHS calls for roughly a finger's width between border tulips in containers; Rutgers also allows close spacing but keeps bulbs clear of the pot wall. Distribute the bulbs across the usable area so they remain separate. A fuller display comes from using the available space deliberately, not pressing bulbs together or forcing the outside ring against the container sides.
Check the level of the entire layer before covering it. A sloping support surface leaves some bulbs with less cover, and adding more bulbs after filling often disturbs those already positioned. Label the cultivar and planting date at the edge where the tag remains readable. For a simple pot, this single layer makes later inspection and the first spring display easier to understand than a stack of different bulbs with several flowering schedules.
Cover with the remaining mix, gently firm it and retain the watering gap. Water thoroughly after planting, allowing excess to leave through the holes, then move the container to its planned sheltered position. Verify drainage after that first watering. The finished surface should cover the bulb noses: an exposed-tip arrangement used for some indoor forcing pots is a different method. For a mixed perennial-and-bulb composition, use the separate [layered container planting plan](/grow/layer-bulbs-perennials-container/).
Keep winter cold, rain and freezing in separate decisions
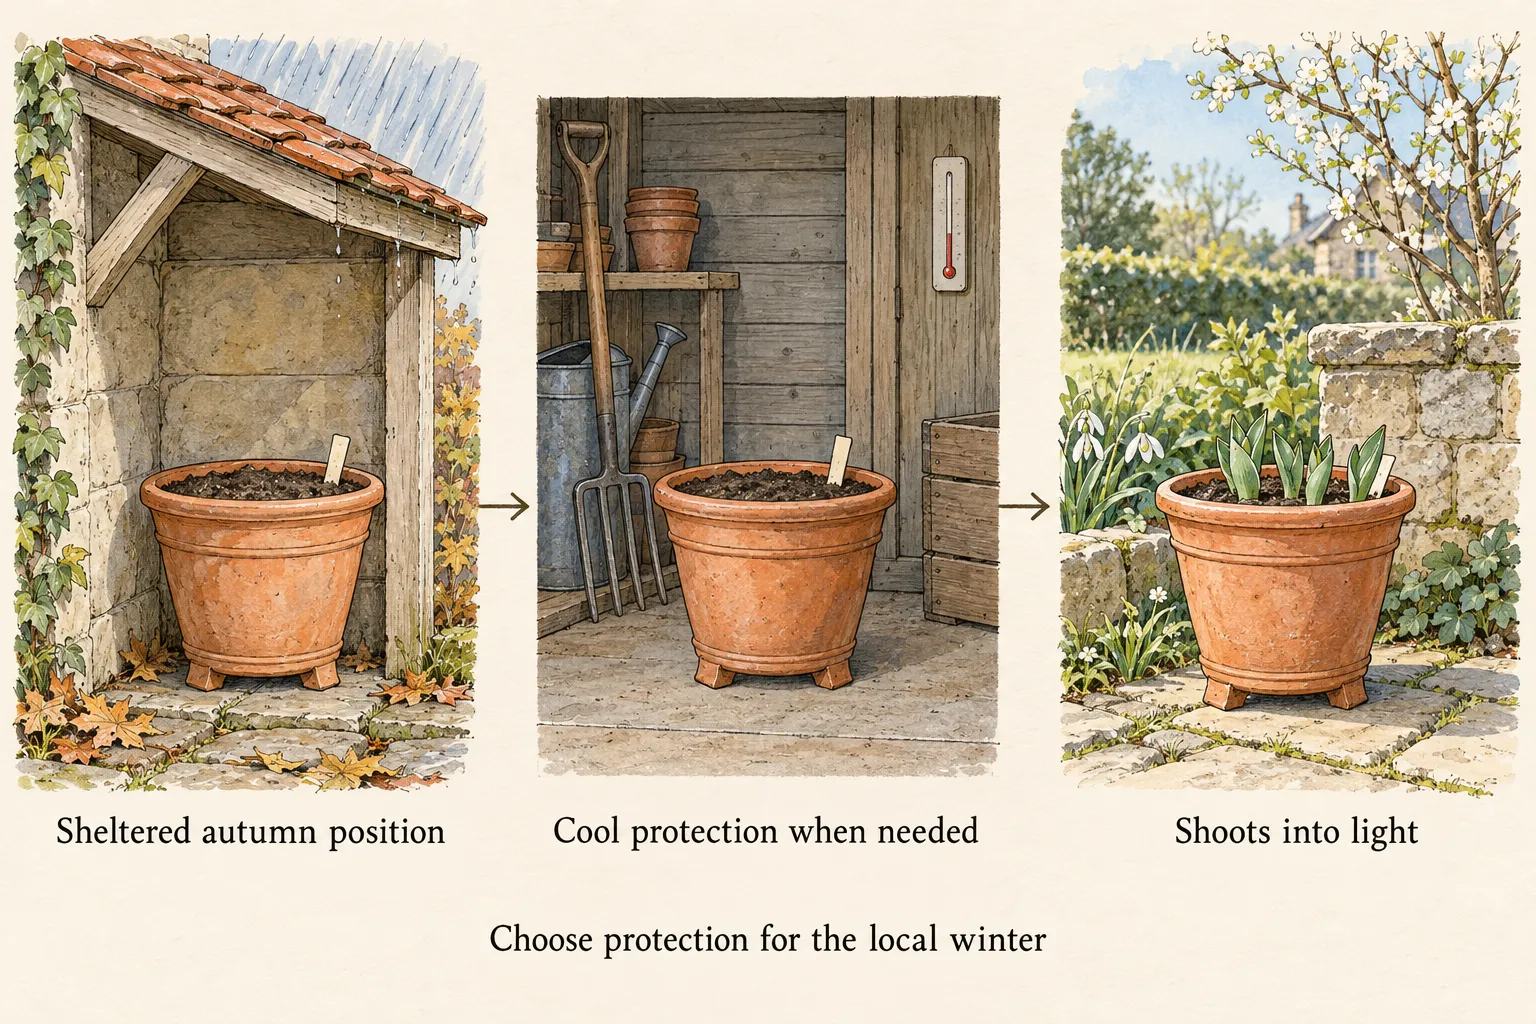
Tulips need a cold period for flower development, so a heated living room is a poor default winter station for this outdoor planting. In a suitable mild climate, a sheltered outdoor position can provide that cold while giving access for checking moisture. Keep the pot away from concentrated roof runoff. The RHS advises temporarily moving a sodden container near a wall or fence, or into an unheated greenhouse, until the mix dries a little.
A cold continental winter calls for more deliberate protection. Rutgers' New Jersey guidance lists a cold frame, unheated shed or garage, or a protected outdoor position, with protection from freezing and excess precipitation. The name of a structure is insufficient: an unheated garage can still become very cold. Rutgers describes 35–45°F, approximately 2–7°C, for chilling its fall bulb containers. This is a useful cool-holding reference, not a cultivar-specific completion timetable. Use a thermometer where the pot will stand and confirm local tulip requirements, especially in a structure that heats strongly by day. Set up a dependable fallback before a prolonged freeze.
Oregon State offers a specific container precaution: move bulb pots temporarily indoors when temperatures fall below about 28–30°F, approximately −2 to −1°C, to prevent freezing. That is its protection cue for container bulbs, not a universal lethal temperature for a tulip or a claim that garden bulbs die at that air temperature. Use cool protected holding that maintains the winter treatment, and return the pot as conditions allow. A larger vessel provides more buffering but does not establish a guaranteed safe minimum.
Treat the winter position as adjustable. A pot can need rain shelter during a wet spell and additional cold protection during a later freeze. Inspect it after each move because the amount of rain reaching the mix changes immediately. Record the lowest temperatures and whether the container remains wet; those observations add the pot's own conditions to the regional forecast. Preserve access for both water checks and the arrival of shoots.
Check moisture and protect the planting from disturbance
After the initial watering, check the mix before adding more. A pot receiving winter rain may remain wet, while one under a roof or inside a shed can dry between visits. Keep the rooting mix from becoming completely dry, and let excess water drain whenever watering is needed. The RHS specifically warns about sodden tulip containers; increasing water because the surface has no green growth can worsen an already wet root zone.
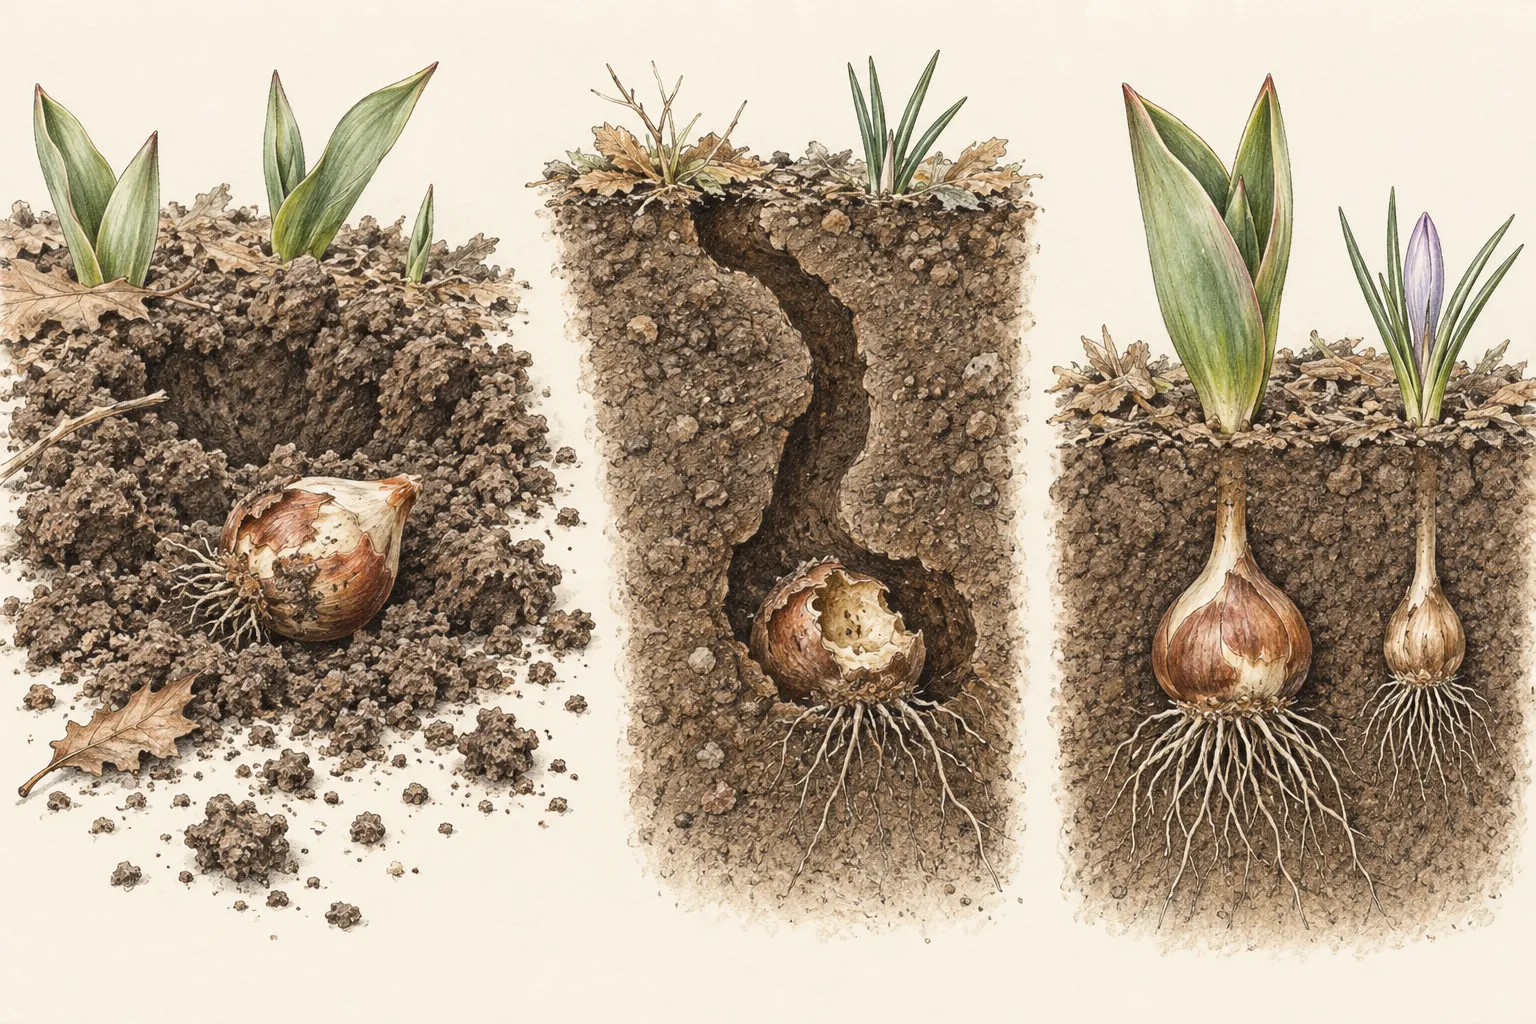
Newly planted tulips can attract digging animals. Iowa State identifies physical exclusion as the most useful prevention and describes surface mesh that is removed as foliage emerges. Fit protection to the container and inspect it for emerging tips so the developing shoots stay clear of the barrier. The dedicated [tulip and crocus mesh guide](/grow/protect-tulip-crocus-bulbs-wire-mesh/) covers the construction decisions. A disturbed surface warrants checking whether bulbs have been displaced before simply replacing the mix.
Record persistent failure cues separately from ordinary winter waiting. A bulb that has been dug up and is soft, discolored or foul-smelling is different from a firm bulb beneath a quiet surface. Iowa State advises discarding diseased bulbs and some surrounding soil, then addressing drainage. Stunted yellow shoots or failure to emerge can have several causes; inspect affected material when a problem is evident. Keep any disease diagnosis tied to actual symptoms, with local advice for an unclear or spreading problem.
Give emerging shoots light and finish the flowering cycle
When shoots appear, provide bright conditions and prepare the outdoor display position. Oregon State specifically moves emerging growth into light. A dark garage may have served as temporary winter shelter, but it becomes unsuitable as a continuing display site for growing leaves. Maintain the cold-weather fallback while moving toward the intended spring position; emergence alone says little about the next severe forecast. Inspect any surface protection at the same time.
As growth becomes active, water according to the mix and weather. RHS guidance highlights dry periods from February onward or once leaves appear, because shortage can impair flower development and shorten flowering. Those are UK seasonal cues, so the visible growth stage is more useful elsewhere. Water the pot well when needed and let it drain. A mass of leaves can conceal the surface, making it worth checking the mix directly instead of judging moisture from the flowers.
Keep fertilizer decisions consistent with the plan for the bulbs. The RHS says feeding is unnecessary when tulips will be discarded after flowering as seasonal bedding. If retaining them, its advice is a potassium-rich liquid feed during active growth, following the product directions. Autumn fertilizer is not a substitute for sound bulbs, drainage or winter chilling. After flowering, remove spent flower heads while retaining the leaves; their work supplies the bulb's future reserves.
Allow the foliage to yellow naturally before clearing or lifting bulbs for a possible future planting. A conspicuous doorway pot can be moved to a less prominent suitable position while its leaves finish. RHS guidance suggests roughly six weeks after flowering for this yellowing period, but the plant's actual condition decides the clearing point. Record how the cultivar performed and whether the pot stayed manageable through winter. Select fresh stock or a recovery plan next autumn with realistic expectations for the next display.
Steps
- Level
- moderate
- Time
- About 45 minutes for one pot, followed by winter checks
- Tools
- Ruler or tape measure, Watering can, Plant label and pencil, Minimum–maximum thermometer for the winter position, Gardening gloves
- Materials
- Firm border tulip bulbs labelled by cultivar, Clean container with drainage and adequate root space, Peat-free multipurpose potting mix, Horticultural grit, Suitable cool winter shelter for the local climate, Removable digging protection if needed
- 1Match the bulbs to the display and winter site
Check the cultivar name, flowering group and expected height, then choose sound, firm bulbs. Decide where the pot will receive winter chilling and where it can move during severe cold or prolonged rain. Confirm that the filled container will fit this route and that the planned spring position has room for its flowers.
- 2Check the pot and prepare its growing medium
Clear the drainage openings and measure the internal width and depth. Allow potting mix beneath the future bulb bases for roots. Blend three parts peat-free multipurpose potting mix with one part grit for the RHS first-season border-tulip method. Lay out the actual bulbs to check capacity before filling the container to its support level.
- 3Set a measured support level and one bulb layer
Measure two or three actual bulb heights down from the rim for the RHS container recipe. Fill to that support level and place the bulbs upright, leaving about a finger's width between them and clearance from the wall. Confirm that the layer is level and that the depth reference agrees with the method being used.
- 4Cover, label and check drainage
Add the remaining mix and firm gently, finishing 2.5 cm below the rim for watering space. Keep all bulb tips covered. Insert the cultivar and date label, water well and watch excess water escape. Move the pot into its prepared winter position, clearing trapped runoff from an outer container if one is being used.
- 5Maintain the winter conditions and watch for shoots
Check moisture and temperature in the actual holding position. Shelter a sodden pot from continued rain and provide cool protection when local freezing conditions require it. Water when the mix needs it, with free drainage. Inspect any digging barrier and remove or adjust it before emerging foliage meets an obstruction. Give new shoots good light.
- 6Manage the spring display and decide what follows
Move the growing pot toward its outdoor display position while retaining protection for severe weather. Check moisture beneath the leaves during dry spells. Remove spent flowers and keep foliage until it yellows naturally. Use the retention plan to decide on feeding, then clear or lift the bulbs when their foliage cycle has finished.
Related reading
Sources
- How to grow tulips. Royal Horticultural Society. Source record · Accessed 2026-10-23.
- How to grow bulbs. Royal Horticultural Society. Source record · Accessed 2026-10-23.
- Plant bulbs in pots now for vibrant blooms in spring. Oregon State University Extension Service. Source record · Accessed 2026-10-23.
- Plant Fall Bulbs in Containers for Spring Blooms. Rutgers Master Gardeners of Hunterdon County. Source record · Accessed 2026-10-23.
- How to Manage Potential Problems Growing Tulips. Iowa State University Extension. Source record · Accessed 2026-10-23.