Grow · prechilled tulip indoor forcing staged growth
Force Prechilled Tulips Indoors Without Stretching
Bring properly chilled potted tulips into bloom by checking roots and shoots, staging cool light, managing water, and avoiding the warm dim conditions that produce weak stems.
Published Last updated
In this guide
- Confirm what was chilled and for how long
- Resolve the cold record before warming the pot
- Verify chilling, roots, and bulb health
- Stage the move from cold to bloom
- Provide broad light and controlled water
- Prevent and support stretching early
- Read bud and foliage problems accurately
- Extend bloom and finish the display
- Steps
Confirm what was chilled and for how long
A prechilled label is useful only when it comes with a temperature and duration record. Iowa State gives potted spring bulbs 12 to 15 weeks at 40 to 45°F (4 to 7°C). UConn gives hardy bulbs 12 to 16 weeks at 35 to 50°F (2 to 10°C), while Minnesota uses at least 12 to 13 weeks at 35 to 48°F (2 to 9°C). Those are overlapping institutional ranges, not permission to average an unknown history. Follow the named cultivar or supplier protocol when it is more specific, and ask whether the quoted chill occurred before or after potting. Count only time spent inside the stated cold range. A cool room that repeatedly rises above it, or an outdoor pot that freezes, has not received the same treatment. UConn notes that verified refrigeration before potting can count toward the total; Iowa State emphasizes that critical root growth and flower development occur while potted bulbs are cold. For a loose prechilled bulb, therefore, the supplier must also explain the rooting stage that follows potting. For a potted product, record the cold start, cold end, temperatures, cultivar, and lot before deciding it is ready.
Keep cold-stored tulips separate from ripening fruit. Iowa State specifically warns that ethylene from fruit such as apples can inhibit flower development and growth. Keep the medium moist through the cold period, every drainage hole open, and each pot clear of runoff. Do not allow the bulbs to freeze. A few emerging shoots do not cancel the remaining chill requirement, so protect them from crushing while the recorded cold period finishes.
Plan the display from the end of the cold period, not from the purchase date. Iowa State reports that most forced bulbs flower about two to four weeks after leaving cold storage, with cultivar, light, and temperature changing the result. Pots may be removed in succession after the minimum treatment is complete. If a target date matters, keep more than one pot, stagger their move by one or two weeks, and let each unready pot complete its cold stage.
Resolve the cold record before warming the pot
A verified cold treatment and a ready rooted pot are separate requirements. Keep an unknown loose-bulb chilling history unresolved until the supplier clarifies both chilling and subsequent rooting. When the recorded treatment and plant condition agree, begin the cool-light transition. Do not substitute shoot height alone for the missing temperature or rooting record.
Verify chilling, roots, and bulb health
Finish the recorded chill before using growth as a readiness check. Iowa State's practical endpoint is a pot with roots visible through the drainage holes and yellow shoots emerging above the bulbs. Both signs matter: shoots can rise before the cold period is complete, while visible roots show that the pot has built the system that must supply the fast forcing phase. Leave a fully labeled pot in cold storage if its required weeks are incomplete, even when the shoot looks eager.
Inspect through the drainage holes and around the exposed bulb noses without pulling the rooted bulbs apart. Sound bulbs remain firm. Minnesota advises choosing bulbs free of mold and mildew; a bulb that has become soft, wet, badly shriveled, or foul-smelling is not a candidate for a warm display. Remove a failed bulb only when it can be lifted without tearing neighboring roots. If decay has spread through the mix, discard that pot rather than moving it beside healthy lots.
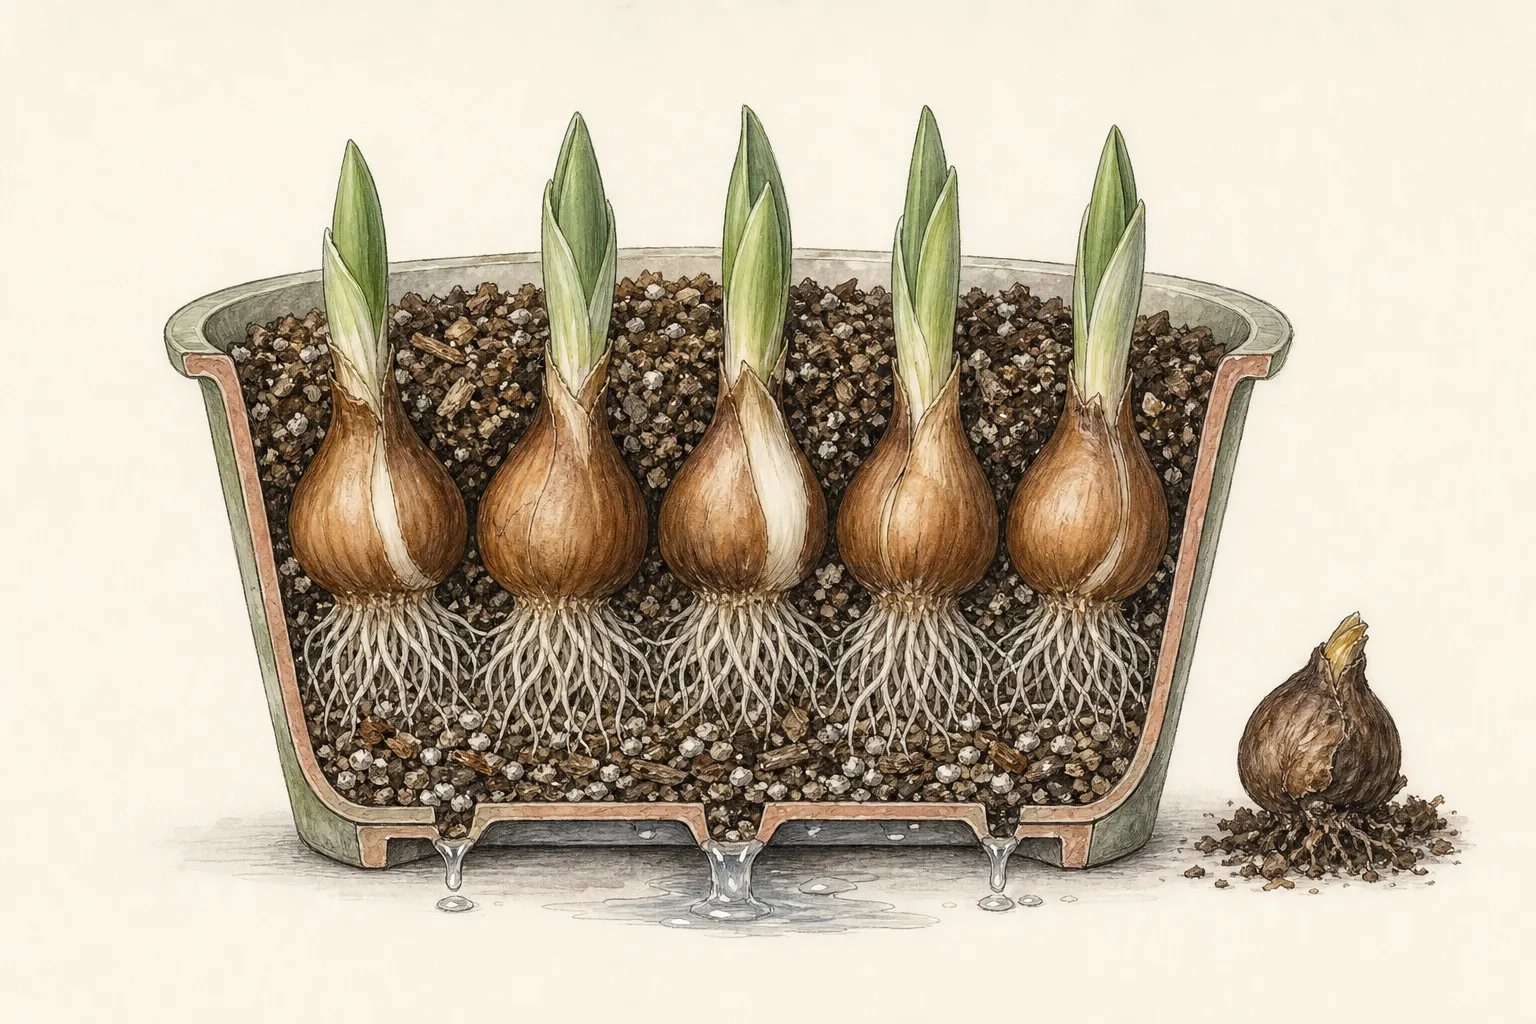
The medium should feel evenly moist, with open drainage and no sour odor or standing water. A dry surface can be watered until excess leaves the holes, then drained completely before the pot returns to storage or moves indoors. A saturated cachepot must be emptied. Do not add fertilizer to compensate for a weak root system: Minnesota states that bulbs contain enough stored food for one flowering, so fertilizer does not correct incomplete chilling, rot, or poor drainage.
Write the forcing-room move date on the same label as the chill record. Pots that share a cultivar and treatment can be compared by root visibility, shoot color, and later bloom date; pots from different suppliers cannot be assumed equivalent. If the minimum chill is complete but roots are absent, keep the pot cool while checking moisture and drainage. Warming a rootless pot merely accelerates the shoot's demand before the underlying problem is resolved.
Stage the move from cold to bloom
Move a ready pot first to 50 to 60°F (10 to 16°C) with low to medium light. Iowa State holds it there until the yellow shoots turn green, usually four or five days. This brief first stage is the useful stop condition: yellow shoots still need the transition, while green shoots can move onward. Keep the pot out of a warm living-room display during these days, and measure the temperature where the leaves actually stand rather than at a thermostat across the room.
After the shoots green, place the tulips in bright light at about 60 to 65°F (16 to 18°C), the narrower Iowa State range for the main forcing stage. A bright room is not automatically a cool one. Radiators, heat vents, fireplaces, and midday sun behind glass can raise leaf and pot temperature well above room readings. Move the pot far enough from these heat sources that the growing point receives light without a hot localized draft.
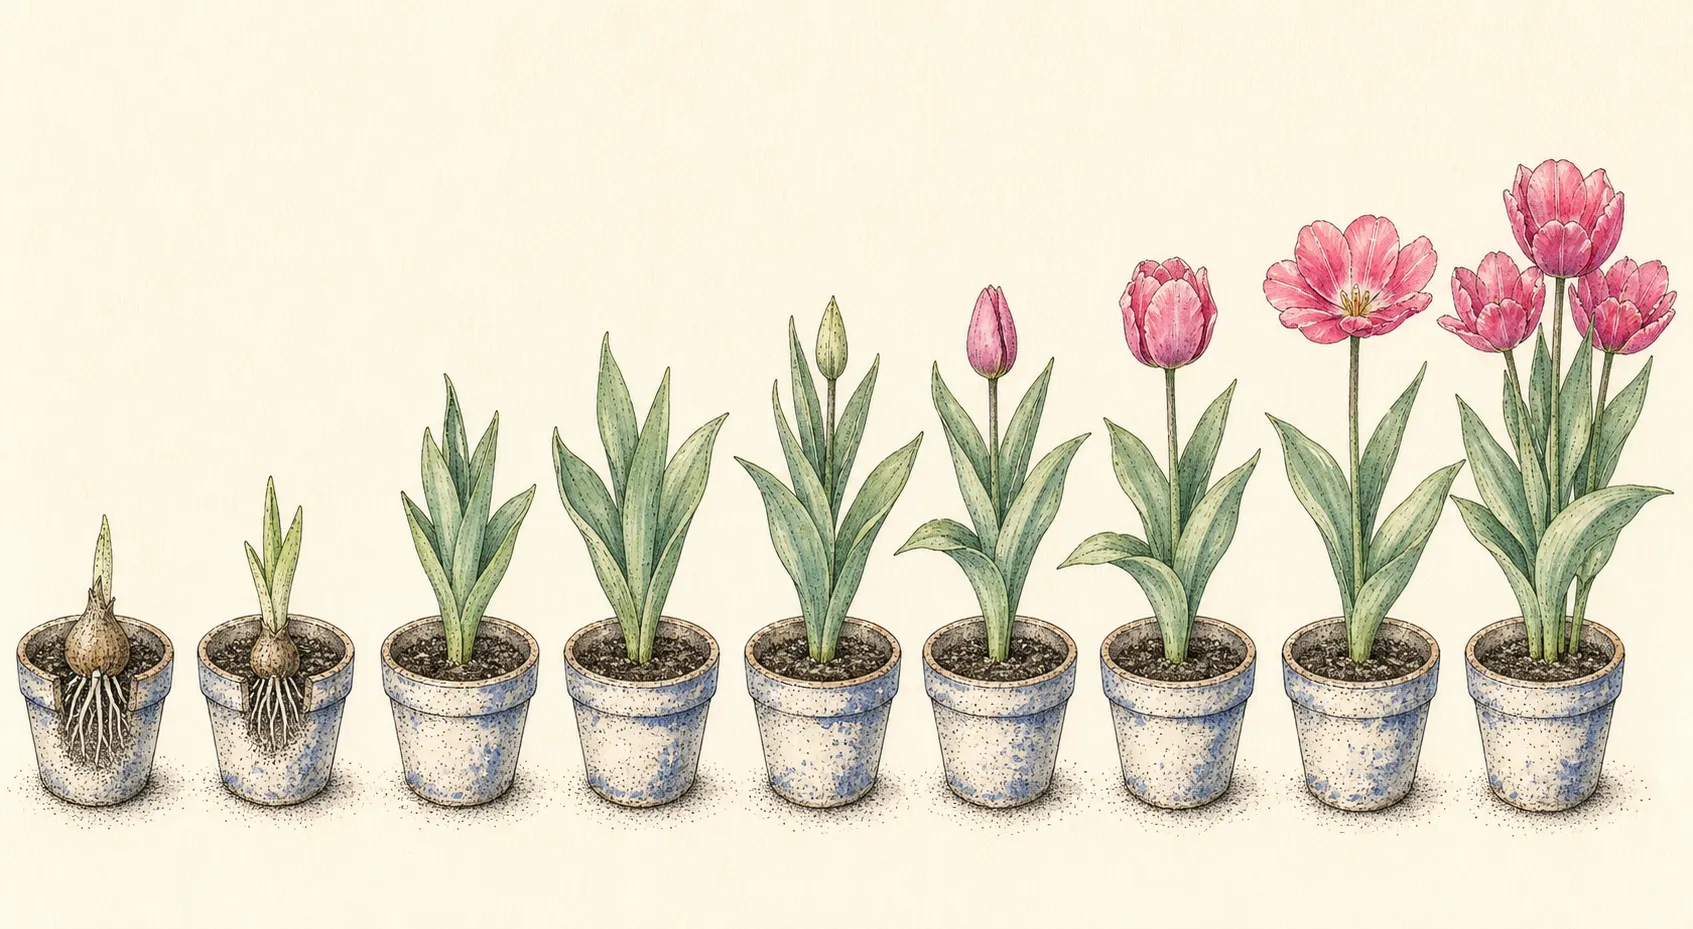
Keep leaves clear of cold window glass and give the whole pot an evenly lit field. A narrow side window encourages every stem to bend toward one direction; a broad fixture or a brighter open window position reduces that directional pull. Mark the pot's front and turn it only enough to balance exposure. Constant turning can hide a poor light position without improving the amount of light the leaves receive.
If shoots stay yellow after several days, verify that the site supplies usable light and remains within the transition range. If they pale and lengthen rapidly, check for excess warmth and dim light before adding water or fertilizer. Once shoots are green and the pot is in bright 60 to 65°F conditions, leave the environmental settings steady long enough to see whether new growth remains compact.
Provide broad light and controlled water
Minnesota recommends a cool sunny window below 65°F (18°C), while Iowa State specifies bright light after the shoots green. Read those together: the pot needs useful light without the heat accumulation of a closed sunny window. Check the canopy at midday. If the leaves feel warm or the thermometer climbs above the forcing range, increase distance from the glass or use a broad electric light in a cooler part of the room.
Water according to the medium, not a daily schedule. Minnesota directs watering when the soil surface feels dry, and Iowa State advises keeping forcing pots well watered. Press just below the surface and lift the pot to learn its moist weight. Apply water slowly across the mix so it penetrates evenly, then let excess drain. Empty the saucer or outer pot every time and return the bulbs only after all standing runoff is gone.
As leaves and flower stems enlarge, the pot may dry faster than it did in cold storage. That change calls for more frequent checks, not a larger dose poured into already wet mix. A pot that stays heavy for days, smells sour, or develops a soft bulb needs drainage and temperature checked. A pot that becomes unusually light and has mix pulling from the wall needs a thorough watering followed by complete drainage.
Skip fertilizer for a one-time display. The bulb's stored reserves carry the bloom, and Minnesota explicitly says fertilizer is unnecessary. Extra feeding cannot shorten the chilling requirement or restore a damaged flower bud. Use compact green growth, upright expansion, visible drainage, and intact buds as the daily checks. Correct a hot location, one-sided light, or trapped water individually so the response remains readable.
Prevent and support stretching early
Stretch prevention begins before the stem lengthens: complete the chill, wait for roots at the drainage holes, use the 50 to 60°F greening stage, then keep the main display bright and near 60 to 65°F. A warm dim room removes both controls at once. Select cultivars sold for forcing when possible, because the sources note that cultivars differ in their suitability and in the time needed to bloom.
Read the direction of lean. When the whole pot inclines toward one window edge, broaden or reposition the light and turn the container regularly as Iowa State recommends. When only one stem loses firmness while the others remain compact, inspect that bulb and its root area for softness or trapped water. Do not bend a creased stem upright; repositioning the environment can guide new extension but cannot repair folded tissue.
A dense forcing pot is intentional, yet its container still needs a stable base. Set a light plastic nursery pot inside a heavier outer pot only if the drainage holes remain above collected water and the inner pot can be lifted for each check. Keep flower heads from pressing against glass or a wall. If a simple loose support is needed after a stem leans, place it outside the bulb cluster and leave enough space for the stem to expand.
The prevention endpoint is not a perfectly vertical arrangement. It is a rooted pot whose new growth stays green, proportionate, and firm as buds enlarge. A slight phototropic curve is less damaging than repeated handling. When stems continue to extend quickly, reduce excess warmth first and verify that the light reaches the full canopy; neither extra fertilizer nor constant watering addresses that pattern.
Read bud and foliage problems accurately
A shoot without a flower is not automatically a feeding problem. Compare the cold record with the institutional minimums, then check whether roots were visible when the pot moved. Inadequate chill, an unverified prechilled history, poor bulb quality, freezing, and ethylene exposure are all consistent with failed flower development in the retained sources. The record cannot always separate them after the fact, but it can rule out claims that the pot received a documented treatment when it did not.
Pale, rapidly lengthening leaves point first to the forcing environment. Measure temperature at the canopy and compare the center and edge of the light field. If the pot is warm or one-sided, restore the bright cool conditions used after greening. Green leaves above a pot that remains heavy and wet require a drainage check; a soft or foul-smelling bulb indicates deterioration, not a need for more water.
Look through every drainage hole before disturbing the bulbs. Firm rooted bulbs in draining mix can remain in the staged program even if one shoot is slower. A soft bulb, spreading mold, or decayed root mass should be removed or the affected pot discarded. Clean the saucer and outer pot before they are used with another batch, and keep drainage water from a failed pot away from healthy containers.
Use the expected two-to-four-week interval after cold removal as a monitoring range, not a deadline that triggers more heat. Iowa State notes that cultivar, light, and temperature alter the schedule. A sound pot still developing within that interval needs stable care. A batch that repeatedly fails despite verified cold, roots, and forcing conditions is a reason to revisit cultivar and supplier choice before the next purchase.
Extend bloom and finish the display
Once buds show color, keep the pot bright and cool and move it away from direct heat. Minnesota recommends moving blooming pots to a cool location at night to prolong the display. Continue checking the medium and drain every watering. Open flowers use water, but a decorative outer pot still must not hold runoff around the bulb bases.
Expect flowering roughly two to four weeks after the pot leaves cold storage; Iowa State and Minnesota place many forced bulbs in that range. Record first green, first visible bud color, first open flower, and the temperature of the display site. Those dates reveal whether a cultivar was simply later than its neighbor or whether the entire batch responded slowly to the forcing room.
Set realistic expectations after bloom. Iowa State says tulips and most other spring bulbs are usually discarded after forcing because they commonly fail to bloom again; Minnesota likewise says forced bulbs are unlikely to perform well again and recommends composting them. UConn allows that outdoor recovery may be possible if foliage continues to grow, but it does not promise another display. Treat garden planting as an experiment only where climate and local guidance suit the cultivar.
For disposal, let the pot drain, remove any diseased material from reusable containers, and clean the pot and saucer before storage. Save the cultivar, verified cold range and duration, root-readiness date, forcing temperatures, and bloom interval. Use that record for the next purchase and favor lots that rooted strongly and flowered within the desired window.
Steps
- Level
- moderate
- Time
- 20 minutes per pot, followed by several weeks of staged forcing
- Tools
- Room and root-zone thermometer, Narrow-spout watering can, Clean support twigs or ring, Stable draining cachepot, Waterproof labels
- Materials
- Properly prechilled potted tulip bulbs, Clean water, Fresh draining mix only if a damaged setup must be repotted
- 1Verify the cold record
Confirm the cultivar, whether chilling occurred before or after potting, and the actual temperatures and dates. Use the supplier's narrower protocol when available; otherwise retain the institutional range rather than guessing. Do not count warm interruptions or frozen storage as completed chill, and keep the lot in cold storage until its documented minimum is complete.
- 2Inspect readiness
After the required cold period, look for roots at the drainage holes and yellow emerging shoots. Keep a rootless pot cool while checking moisture and drainage. Stop forcing a pot with soft bulbs, foul odor, spreading mold, or saturated mix; remove an isolated failed bulb only when neighboring roots can remain intact.
- 3Move into cool light
Place the ready pot at 50 to 60°F with low to medium light. Hold that setting until the yellow shoots turn green, normally about four or five days in the Iowa State method. Keep the pot away from radiators and fruit, and water only when the medium needs it.
- 4Increase light evenly
When shoots are green, move the pot into bright, broad light at about 60 to 65°F. Keep leaves off cold glass and out of hot midday pockets. Mark the front of the pot and rotate regularly only as needed to balance a directional window; change the light position if every stem still bends the same way.
- 5Water the active root zone
Check the surface and lift the pot before watering. Apply enough water to wet the mix, allow it to leave the drainage holes, and empty the saucer or outer pot. Recheck more often as leaves expand, keep the bulbs above collected runoff, and do not add fertilizer to correct weak stems.
- 6Watch buds and stems
Record greening, stem direction, first bud color, and canopy temperature. Rapid pale extension calls for cooler conditions and better distributed light. A single soft bulb or collapsing shoot calls for a root-zone inspection and separation from healthy pots, not stronger feeding or a warmer room.
- 7Keep colored buds cool
Once buds show color, keep the display bright, cool, and away from heat. A cool night location can extend flowering when it remains safe and above freezing. Continue even moisture and complete drainage; accept a gentle curve rather than sharply straightening a stem whose tissue has already folded.
- 8Finish and record
After bloom, compost or discard the forced tulips unless local guidance supports an outdoor recovery experiment. Clean the pot and saucer after removing failed mix. Save the cultivar, chill record, root-readiness date, transition temperatures, first color, and bloom interval so the next batch can be scheduled from demonstrated performance.
Related reading
Sources
- How to Force Spring-Flowering Bulbs Indoors. Iowa State University Extension and Outreach. Source record · Accessed 2026-08-30.
- Growing bulbs indoors. University of Minnesota Extension. Source record · Accessed 2026-08-30.
- Bulbs: Forcing to Flower. University of Connecticut Home Garden Education Office. Source record · Accessed 2026-08-30.