Grow · forced hyacinth post chill bloom staging
Bring Chilled Hyacinths into Bloom Without Rushing the Roots
Judge chilled hyacinths by root and shoot development, then stage light and temperature so flower stems open compactly rather than stretching or aborting.
Published Last updated
In this guide
- Confirm what was chilled and when
- Judge readiness from roots, shoots, and bulb condition
- Move first to a cool bright transition
- Water the medium and protect the bulb neck
- Stage light and temperature in two moves
- Diagnose short stems, blind bulbs, and flopping leaves
- Decide the bulb’s future after flowering
- Steps
Confirm what was chilled and when
Hyacinth forcing succeeds or fails before the pot enters the living room. Spring bulbs require a sustained cool period for roots and flower development, but exact duration depends on cultivar, preparation, and method. Retrieve the planting record: bulb name, whether it was sold as prepared for forcing, potting date, storage temperature range, and any interruptions. A generic February date cannot replace this history.
Count the actual cool weeks rather than the time since purchase. A pot left for days in a warm garage, shipping box, or refrigerator door did not receive uniform treatment. Iowa State and Minnesota Extension describe long cool periods for hardy bulbs, while prepared hyacinths may have different supplier instructions. Reconcile regional guidance with the exact bulb label and never shorten chilling merely because a shoot is visible.
Confirm the storage environment was appropriate. Potted bulbs need cold without deep freezing, darkness or low light during the rooting period, and medium kept moist but not saturated. Refrigerator storage must be separated from ripening fruit because ethylene can damage flower development. Record any freeze, drying, standing water, or fruit exposure; it changes how confidently a weak flower can later be diagnosed. Bring out one representative pot first when several were planted together. The sample reveals readiness and indoor response without committing the whole display. Keep remaining pots at their proper cold condition while observing the first for several days. Staggering also extends bloom and allows a slow batch to finish rooting instead of being warmed alongside a ready one.
Judge readiness from roots, shoots, and bulb condition
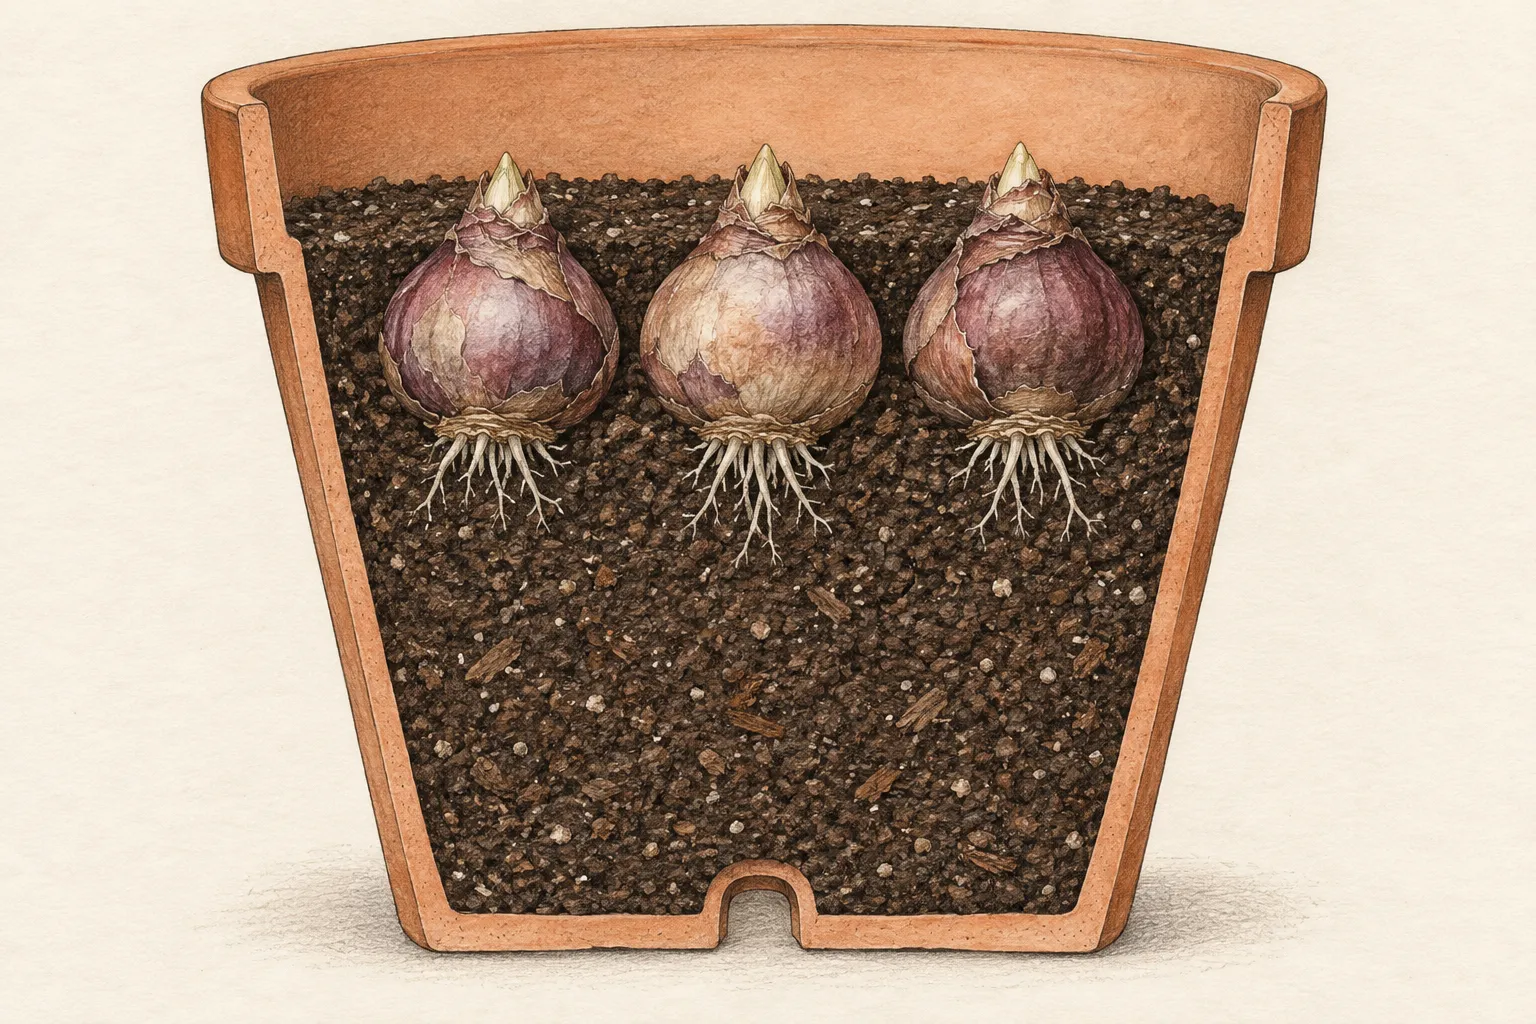
Look for roots at drainage holes or along the wall of a clear nursery pot, a developed shoot rising above the bulb, and a firm bulb seated securely in the medium. Extension guidance commonly uses visible root and shoot development along with elapsed chilling. Do not pull the bulb upward to check roots. Lift the pot and inspect openings; a rooted pot feels integrated rather than loose around the bulb.
Separate a leaf tip from a developed flower shoot. Hyacinth foliage can emerge while the flower truss remains low within the bulb. A long pale shoot in storage may indicate excess warmth, while a short compact point after adequate chilling can be normal. Compare with forcing diagrams and the cultivar label. Cutting or peeling the shoot to look for flowers destroys the evidence and may injure the bloom.
Inspect firmness, odor, and the basal area visible above the medium. A sound bulb is firm. Soft, foul, wet, or collapsing tissue suggests rot; dry papery outer scales alone are not the same condition. Isolate a questionable pot. Do not carry it into a warm humid room among healthy houseplants, and do not water repeatedly in an attempt to restore a softened bulb.
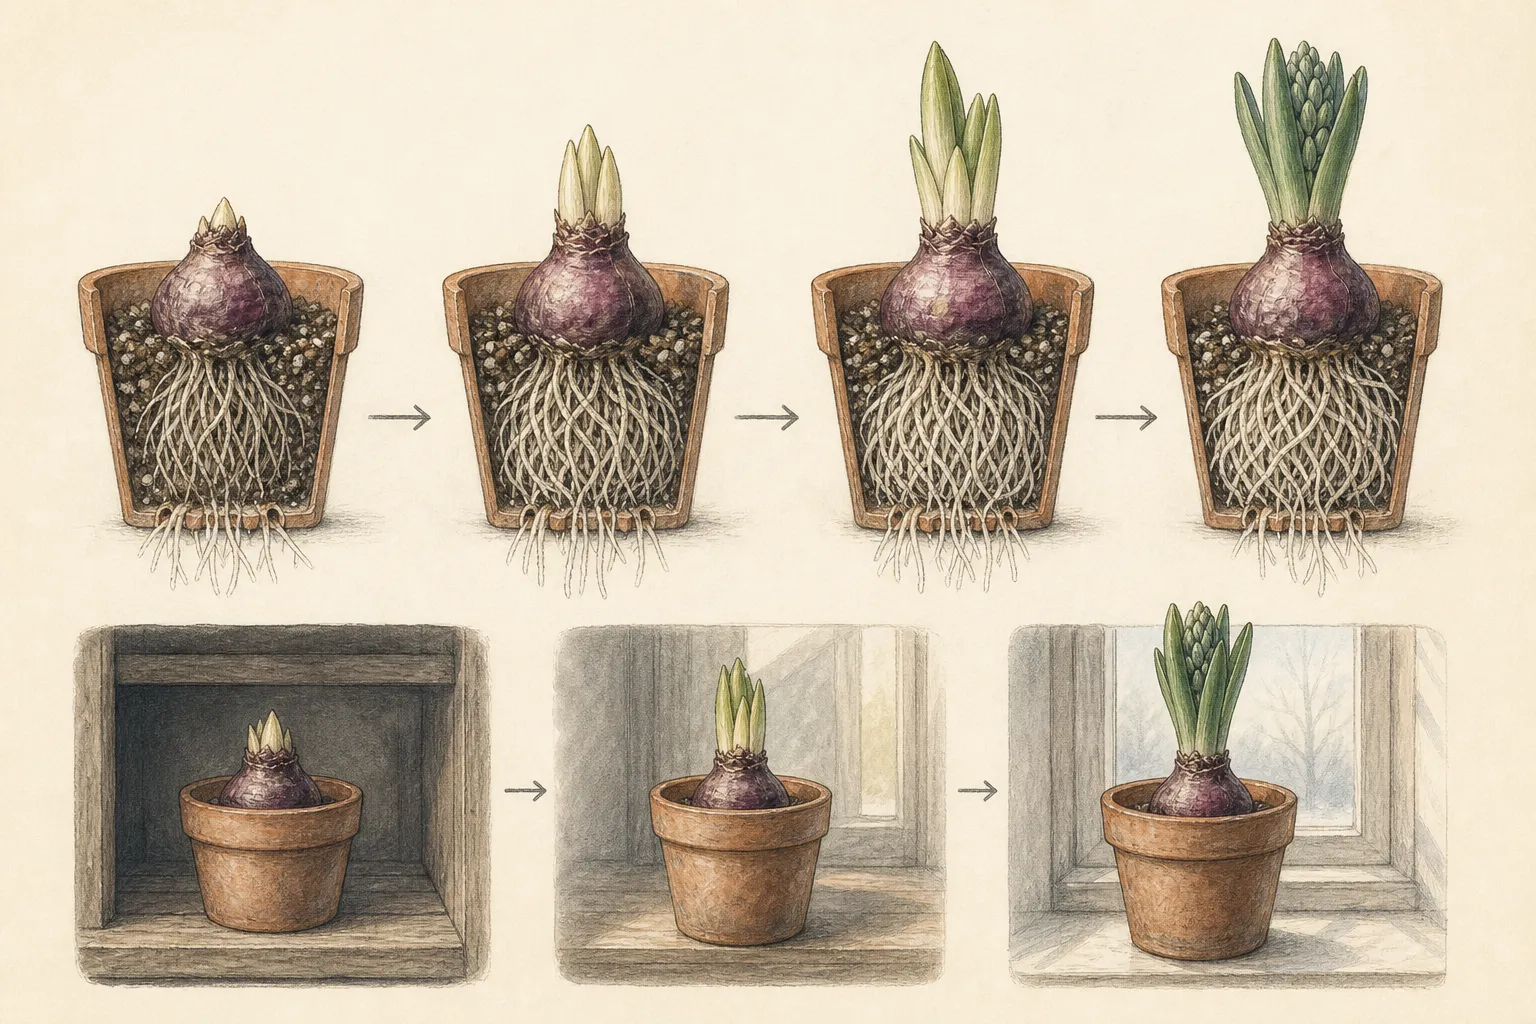
Check the medium throughout the pot. It should be lightly moist with open drainage, not shrunken from the wall or holding water in a decorative cachepot. Rehydrate a dry rooted pot gradually over a sink and let it drain; empty sleeves and saucers. A saturated pot needs drainage correction and diagnosis, not warmth. Readiness requires functional roots as well as a completed cold interval.
Move first to a cool bright transition
The first destination should be cool with bright indirect light, not the warmest display table. A sudden move from cold darkness to radiator heat encourages rapid extension and shortens flowers. Iowa State guidance stages forced bulbs in cool conditions before a warmer room. Use a frost-free porch, bright cool room, or other measured position whose temperature and light can be kept stable.
Place the pot where light reaches all shoots. Rotate a quarter turn when growth leans, but first correct side lighting or crowding. Do not set newly emerged pale tissue in intense direct sun behind glass. Increase useful light while the leaves green. A broad bright exposure supports sturdy development; a dim hallway produces stretched leaves even when the room feels comfortable to a person.
Keep the pot away from vents, appliances, fireplaces, and cold glass. Measure temperature at leaf height across a full day. A sunny sill can become hot at noon and cold at night. The goal is modest, even growth while the flower truss rises above the leaves. Use the plant response and source guidance, not an assumed room thermostat, to adjust the location.
Label the transition start date and photograph the shoot. Observe height, greening, and flower emergence each day without pulling leaves apart. A compact truss that begins to show color can move toward display. A shoot that races upward while remaining pale signals insufficient light or excessive warmth. Correct the environment before adding stakes or fertilizer.
Water the medium and protect the bulb neck
Water when the root zone begins to dry, judging pot weight and medium below the surface. Apply water to the medium around the bulb, not into the shoot cluster or over the exposed neck. Let water drain completely and empty the saucer. Constantly wet bulb scales and standing water favor decay, while a fully dry rooted pot can abort developing flowers.
The watering interval changes as leaves expand and the pot enters warmer air. Do not preserve the cold-storage schedule by habit. Check small pots more often, especially in porous clay or a dry heated room. Conversely, a decorative outer pot can hide water. Lift the nursery pot after every irrigation and inspect the cachepot before returning the display.
Forced bulbs carry stored reserves, so routine fertilizer is unnecessary for the bloom being opened. Feeding cannot repair incomplete chilling, weak roots, or a damaged flower bud. High salts can injure confined roots. If the bulb will be retained for future outdoor growth, follow regionally appropriate aftercare later; do not dose the flowering pot in hopes of making the current truss taller. Use clean water at a moderate temperature and avoid softener water where sodium is a concern. If a white crust develops, review fertilizer history and water quality rather than scraping it into the medium. Surface algae indicates persistent moisture and light; improve watering and air movement. It is not a reason to disturb established roots during flower development.
Stage light and temperature in two moves
Once the flower truss is distinct and color begins to show, move the pot to its final display. Choose bright indirect light and the coolest comfortable place that can be enjoyed. Cooler conditions generally prolong flowering, while warm dry air accelerates opening and decline. The display should be seen and smelled, but not placed where fragrance sensitivity, pets, or traffic create a problem.
Hyacinths can be top-heavy. Use a broad stable cachepot that does not block drainage, group compatible pots in a heavy tray, or add a discreet support before the stem falls. Do not force a skewer through the bulb or dense root ball. Turn the pot for balanced light, but accept the cultivar’s natural slight lean rather than binding flowers into a rigid bundle.
Keep flowers out of intense midday sun and away from ripening fruit. Remove individual faded florets only if they detach cleanly and the display needs tidying; avoid cutting green leaves. Check the floor or furniture for water after each irrigation. A decorative sleeve should be removed for watering and returned only after the pot has drained.
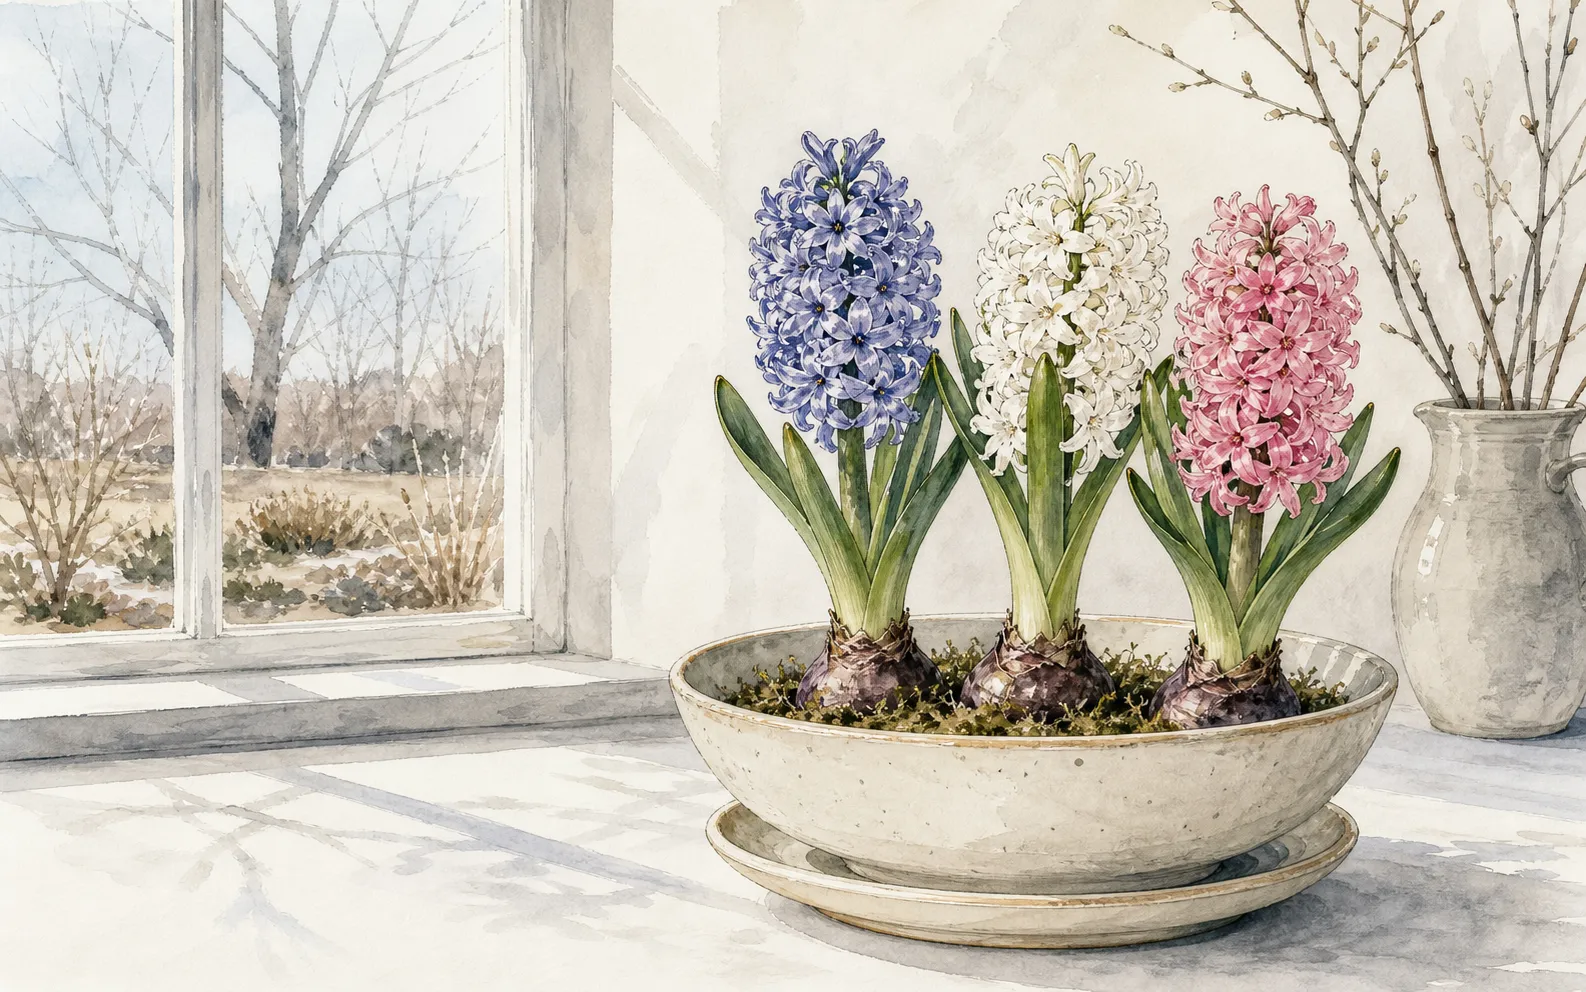
If several pots are available, bring them from cold storage in intervals based on readiness. Do not warm every pot to create one large photograph. A staggered sequence can provide weeks of flowers with fewer plants in the warm room. Record how long each transition took so the next forcing calendar reflects the actual cultivar and household conditions.
Diagnose short stems, blind bulbs, and flopping leaves
A flower cluster trapped low among leaves can result from insufficient or interrupted chilling, an overly warm transition, cultivar behavior, or bulb quality. Confirm the record before trying to pull the stem. Give bright cool conditions and time. A cardboard collar or dark treatment sometimes appears in informal advice, but use only a method supported for the specific forcing system; do not enclose a wet crown improvised.
Leaves without a flower may indicate a small or poor-quality bulb, flower-bud damage, ethylene exposure, incomplete cold treatment, or incorrect storage. Continue reasonable care until the diagnosis is clear, but fertilizer will not create a missing preformed flower. Photograph the bulb and retain supplier information. A repeated batch failure deserves discussion with the supplier or regional horticulture service.
Long weak leaves and a leaning truss usually point to warm temperatures, inadequate or one-sided light, crowding, or delayed transition management. Move the pot cooler and brighter within safe limits and support it if necessary. Do not cut foliage to improve proportions. The leaves are needed if the bulb will be planted outdoors, and cutting does not correct the environmental cause.
Soft basal tissue, foul odor, sudden collapse, or mold spreading from the bulb requires isolation. Stop watering, keep the pot away from other plants, and consult local diagnostic guidance if valuable material is involved. Discard extensively rotted bulbs and contaminated medium where they cannot be eaten by pets or returned to susceptible plantings. Clean the container before reuse.
Decide the bulb’s future after flowering
Cut the spent flower stalk after bloom if seed is not wanted, but retain every healthy green leaf. Continue bright light and measured watering while leaves photosynthesize. The bulb has spent reserves producing roots and flowers indoors. Foliage can rebuild some energy, but a forced bulb may not flower strongly again immediately and should not be promised as an effortless repeat indoor display.
Where hyacinths are hardy and suitable, transplant outdoors at the locally recommended time. Some guidance holds the pot until spring planting; mild regions may differ. Harden foliage if it has lived indoors, choose well-drained soil, and preserve planting depth. Do not move a warm leafy bulb into frozen soil or leave it in a water-filled pot waiting for a calendar date.
Prepared bulbs and bulbs grown in water may have reduced prospects for reuse. Evaluate firmness and roots, then follow the supplier and regional advice. If disposal is appropriate, keep bulbs away from children and pets because hyacinth bulbs can cause illness if eaten and may irritate skin. Wear gloves and do not place mislabeled bulbs near edible alliums.
Close the forcing record with bulb source, pot size, medium, chill start and end, observed temperature, root and shoot readiness, transition duration, first color, peak bloom, and decline. One season’s data can reveal that a cultivar needed another week of cold or a cooler display. Change the single evidenced weak stage instead of treating forcing as a mysterious success or failure.
Steps
- Level
- moderate
- Time
- 10 minutes per inspection, then two to four weeks of staged care
- Tools
- Chilling record, Thermometer, Watering can with narrow spout, Stable draining saucer, Optional discreet plant support
- Materials
- Fully chilled rooted hyacinth pot, Bright cool transition space, Stable display cachepot that preserves drainage
- 1Reconstruct the cold period
Confirm cultivar, prepared status, potting date, actual cool weeks, temperature interruptions, moisture, and any refrigerator fruit exposure. Do not use shoot visibility alone as proof of completed chilling.
- 2Inspect roots and bulb
Look through drainage holes for roots, confirm a developed shoot and firm bulb, and check medium moisture and odor. Isolate soft, foul, or collapsing pots.
- 3Trial one representative pot
Move one ready pot to a bright cool frost-free position while keeping the remaining batch cold. Label the date and observe greening and truss development before committing the group.
- 4Increase light without heat shock
Provide broad bright indirect light, rotate only to correct uneven exposure, and measure temperature away from vents, hot glass, and radiators. Let pale tissues green gradually.
- 5Water around the bulb
Use pot weight and root-zone moisture, apply water to medium rather than the neck, drain fully, and empty every saucer or sleeve. Do not fertilize to correct forcing errors.
- 6Move after color appears
When the flower truss is clear and buds show color, place it in a cool bright display. Stabilize a top-heavy pot without piercing the bulb or binding leaves.
- 7Retain green aftercare
Remove the spent flower stalk, keep leaves in light, water while active, and plant outdoors only when the species, region, and soil are suitable. Record the full forcing timeline.
- 8Stagger the remaining pots
Keep unopened pots at the correct cold condition and advance only those with comparable roots and shoots. Move the next group after the first response is understood. Staggering extends bloom and prevents slow bulbs from being warmed merely to complete one large display.
- 9Use temperature to extend display
After color appears, choose the coolest bright position that remains practical and enjoyable. Move flowers away from direct hot sun, vents, appliances, and ripening fruit. Cooler even conditions preserve the truss longer than supports or extra water can.
- 10Diagnose rather than force a blind bulb
For leaves without flowers, review bulb size, prepared status, chilling record, fruit exposure, storage moisture, and supplier batch. Continue reasonable care while tissue is sound, but do not cut leaves, add concentrated fertilizer, or pull at the crown to manufacture a flower.
- 11Prepare safe outdoor aftercare
Retain green leaves and water while active. Where the plant is hardy and suitable, harden and plant at the locally recommended time in well-drained soil. Label the bulb, wear gloves, and keep it separate from edible alliums and pet access.
- 12Compare the first pot with the batch
Before advancing the remaining bulbs, compare root visibility, shoot height, firmness, chilling duration, and storage position. A successful representative does not prove every pot is ready. Group comparable pots, leave slower ones cold within their safe schedule, and isolate any soft or foul bulb before it reaches the display room.
Related reading
Sources
- Growing Bulbs Indoors. University of Minnesota Extension. Source record · Accessed 2026-08-19.
- How to Force Spring-Flowering Bulbs Indoors. Iowa State University Extension. Source record · Accessed 2026-08-19.
- Hyacinths: Growing and Care. Royal Horticultural Society. Source record · Accessed 2026-08-19.