Grow · paperwhite forcing compact indoor growth
Force Paperwhites Indoors Without Weak, Top-Heavy Growth
Bring paperwhite narcissus into bloom with sound bulbs, a stable root zone, bright cool growth, careful water level, and support decisions made before stems collapse.
Published Last updated
In this guide
- Establish roots before encouraging fast top growth
- Select sound bulbs and a stable vessel
- Set bulbs above the waterline
- Let roots establish before demanding fast top growth
- Change conditions as roots and shoots develop
- Manage height without relying on a single trick
- Read problems before they spread through the bowl
- Finish the display responsibly
- Steps
Establish roots before encouraging fast top growth
For compact paperwhites, choose a stable pot or bowl, establish roots before forcing rapid top growth, then manage light and temperature as shoots develop. Keep bulb tissue out of standing water and add support before tall stems lean. Potting mix and pebble culture need different watering routines; a leaning stem alone is not a reason to add water. Use the staged rooting and growing conditions below; reserve a warm, dim table for brief display.
Paperwhites are tender narcissus commonly sold for indoor forcing because prepared bulbs can flower without the long cold treatment required by many spring-flowering narcissus. That convenience does not eliminate biological variation. Cultivar, bulb storage, purchase date, room temperature, light, and rooting conditions all affect timing and height. Use the supplier’s current directions as the starting point and treat calendar estimates as ranges with no fixed holiday promise.
Decide whether the goal is one immediate display or several batches. A full bowl planted at once creates a concentrated bloom but also a heavy canopy. Smaller vessels started at intervals are easier to rotate into the best light and discard when finished. Mark each planting date and keep cultivar lots separate. Mixing bulbs with different vigor can create an uneven arrangement in which early stems lean while later bulbs are still rooting.
Choose the final viewing location before planting, but do not assume it is the best growing location. A warm dim dining table encourages extension and leaning. Plan a bright, cooler place where roots and shoots can develop, then move the vessel briefly for display if necessary. Measure the shelf, sill, and mature headroom. Paperwhite fragrance can be strong; keep sensitive occupants and limited ventilation in mind rather than placing a large bowl in a small bedroom by default.
Select sound bulbs and a stable vessel
Buy firm, full bulbs from a reputable source. Reject bulbs that are soft, deeply shriveled, moldy, leaking, badly damaged at the basal plate, or giving off an unpleasant odor. A small dry surface blemish is different from spreading decay, but uncertain bulbs should not be packed tightly among sound ones. Keep purchase records and cultivar labels; named paperwhites can differ in flower form, fragrance, and stature, which matters when diagnosing a result.
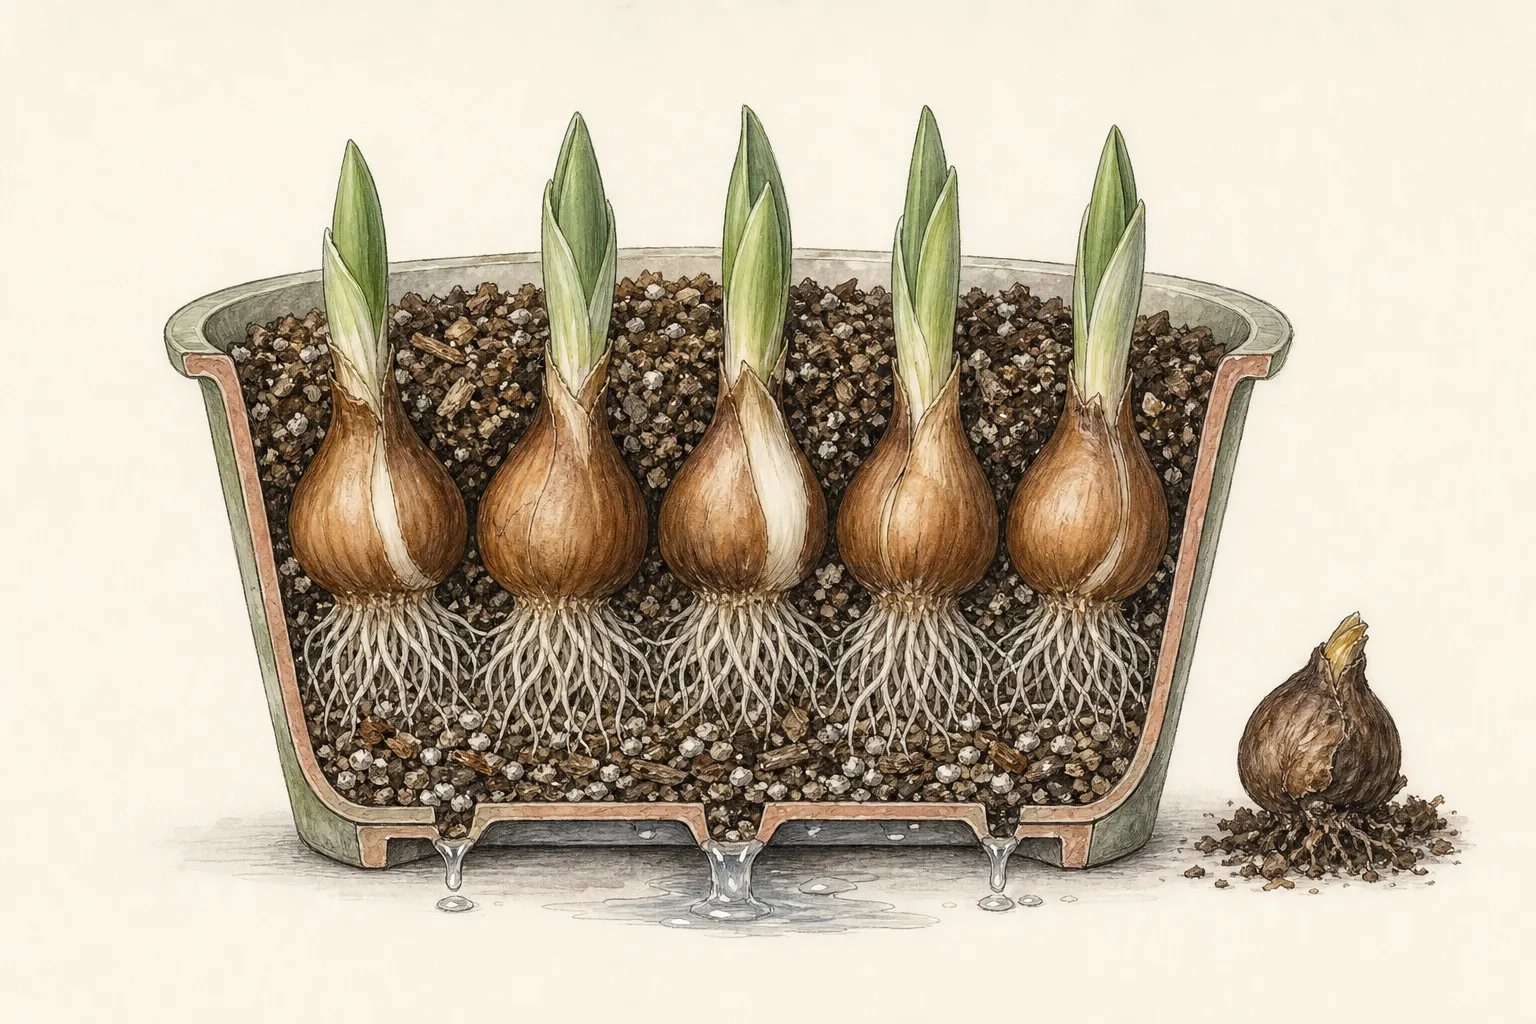
Use a clean container broad enough to resist the weight of mature stems. A transparent vessel makes water level and root health visible but also exposes algae and sediment; an opaque pot hides roots and therefore requires more deliberate moisture checks. If using pebbles, select clean material large enough to support bulbs without sealing every air space. If using potting medium, choose a fresh, free-draining mix and a pot with drainage rather than garden soil in a decorative cachepot.
Fit the planting density to the container. Bulbs may be placed close for a full display, but each must sit upright with enough support around its lower half and no pressure that damages neighboring scales. Keep the basal plate intact and leave sound dry tunics in place to protect the bulb.
Paperwhite is a Narcissus bulb and must be stored separately from edible onions. The National Capital Poison Center identifies all daffodil parts as toxic to people and the bulb as the highest-lycorine part; ingestion can cause nausea, vomiting, diarrhea, and abdominal pain. ASPCA explicitly includes Paper White under toxic Narcissus and identifies bulbs as the most poisonous part for pets. Keep loose bulbs, planted bowls, trimmings, and spent bulbs beyond child and animal reach and away from food storage.
Set bulbs above the waterline
For pebble culture, add a stable lower layer, position bulbs upright, and place more pebbles around them without burying the necks. Add water until it sits just below the basal plates. Roots will grow down toward moisture; bulb tissue should not remain submerged. Check from several angles because an uneven vessel can hide contact on one side. After roots extend into the reservoir, maintain access to water while continuing to keep the bulb bases above it.
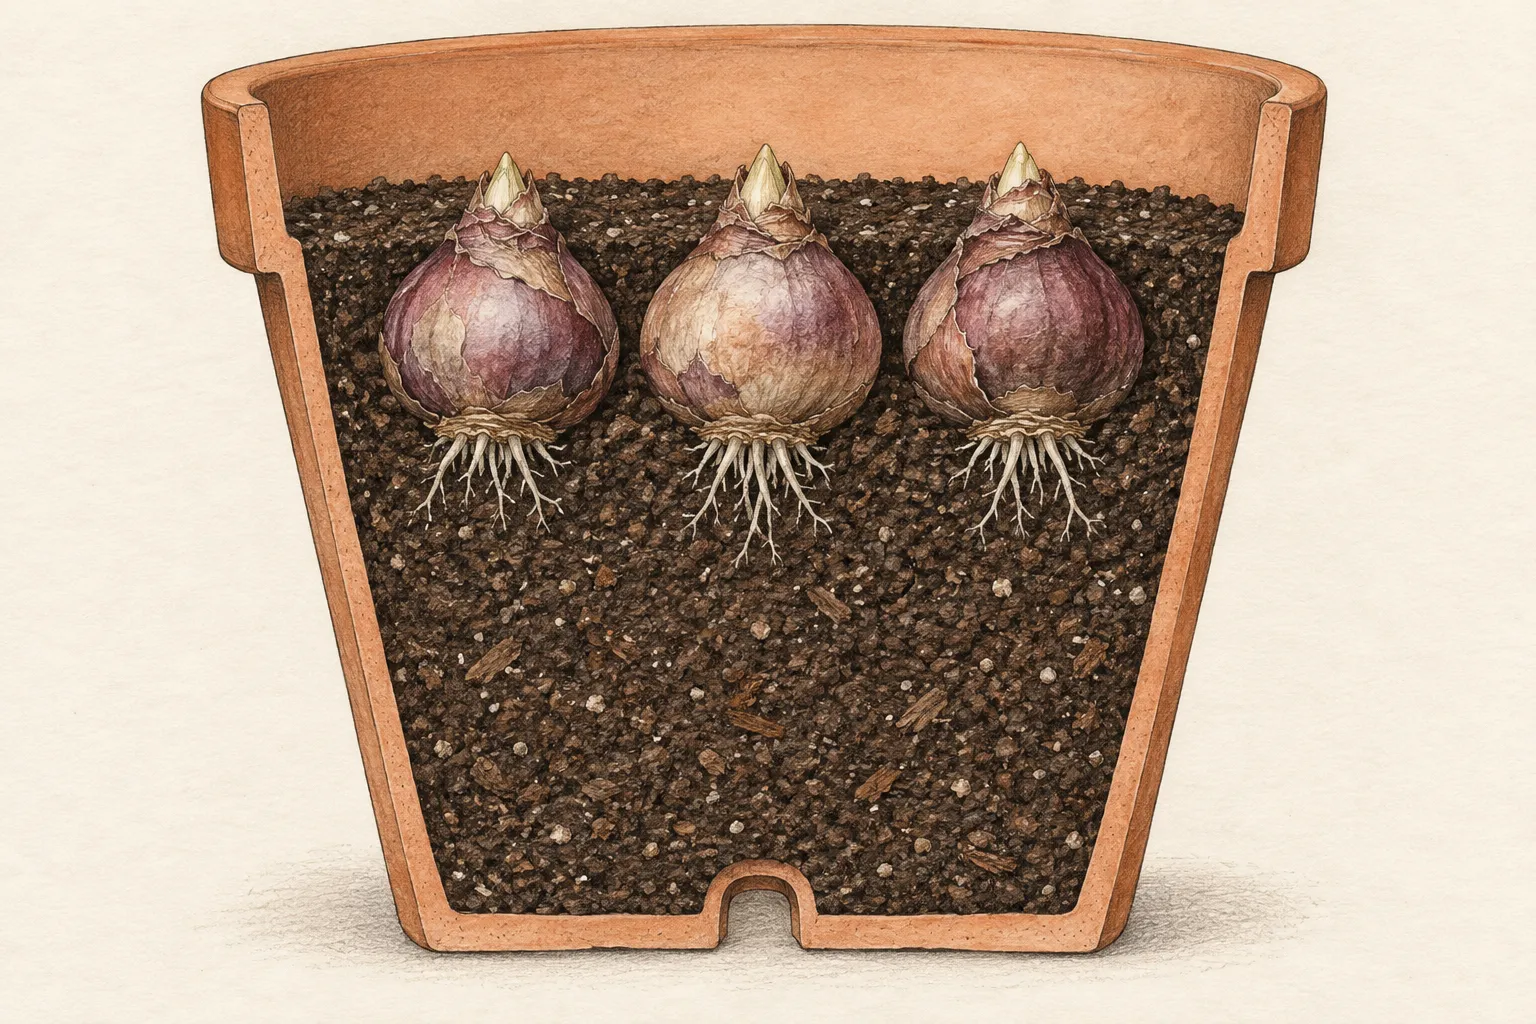
For potting mix, premoisten the medium until it is evenly damp but not dripping, set bulbs with their upper portions exposed according to supplier guidance, and firm gently so they do not tip. Water once to settle, then let excess drain completely. Never leave the inner pot standing in a full cachepot. Moisture should support roots without excluding air. A constantly saturated mix produces the same fundamental risk as bulbs sitting directly in water.
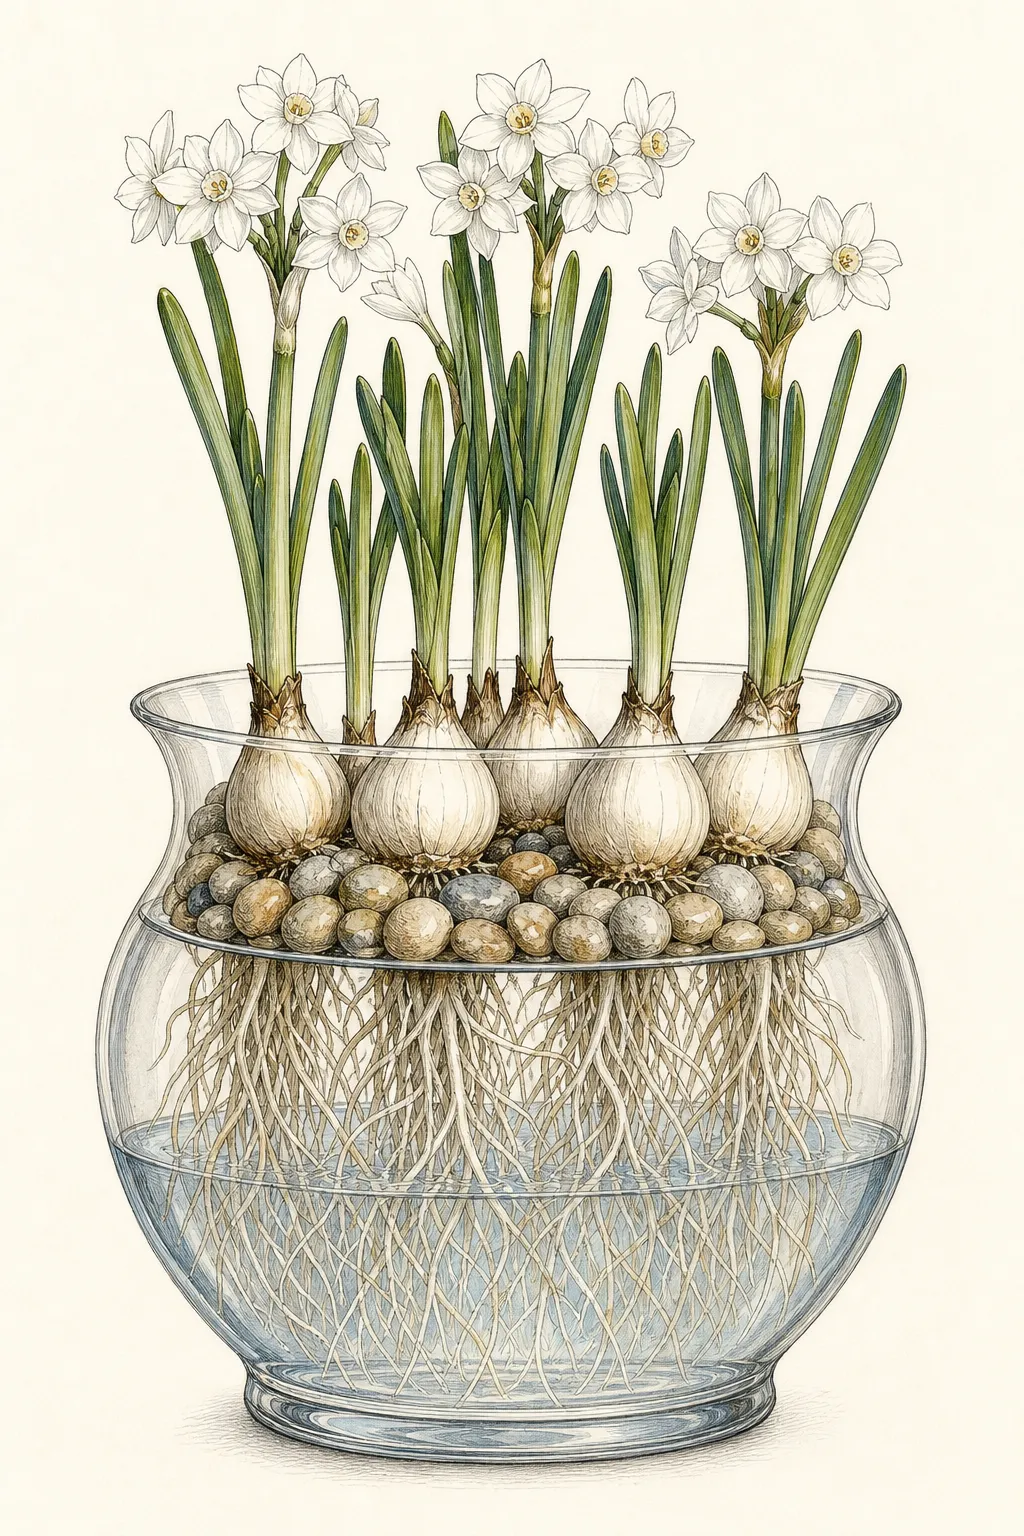
Label the vessel with cultivar and date before roots make it awkward to move. Examine it every day during establishment. Clear, pale roots and a firm basal plate are encouraging; a sour smell, cloudy water, softening tissue, or spreading discoloration needs immediate attention. Remove a failing bulb and adjacent contaminated material rather than hoping the bloom will compensate. Clean hands and tools before handling another vessel.
Let roots establish before demanding fast top growth
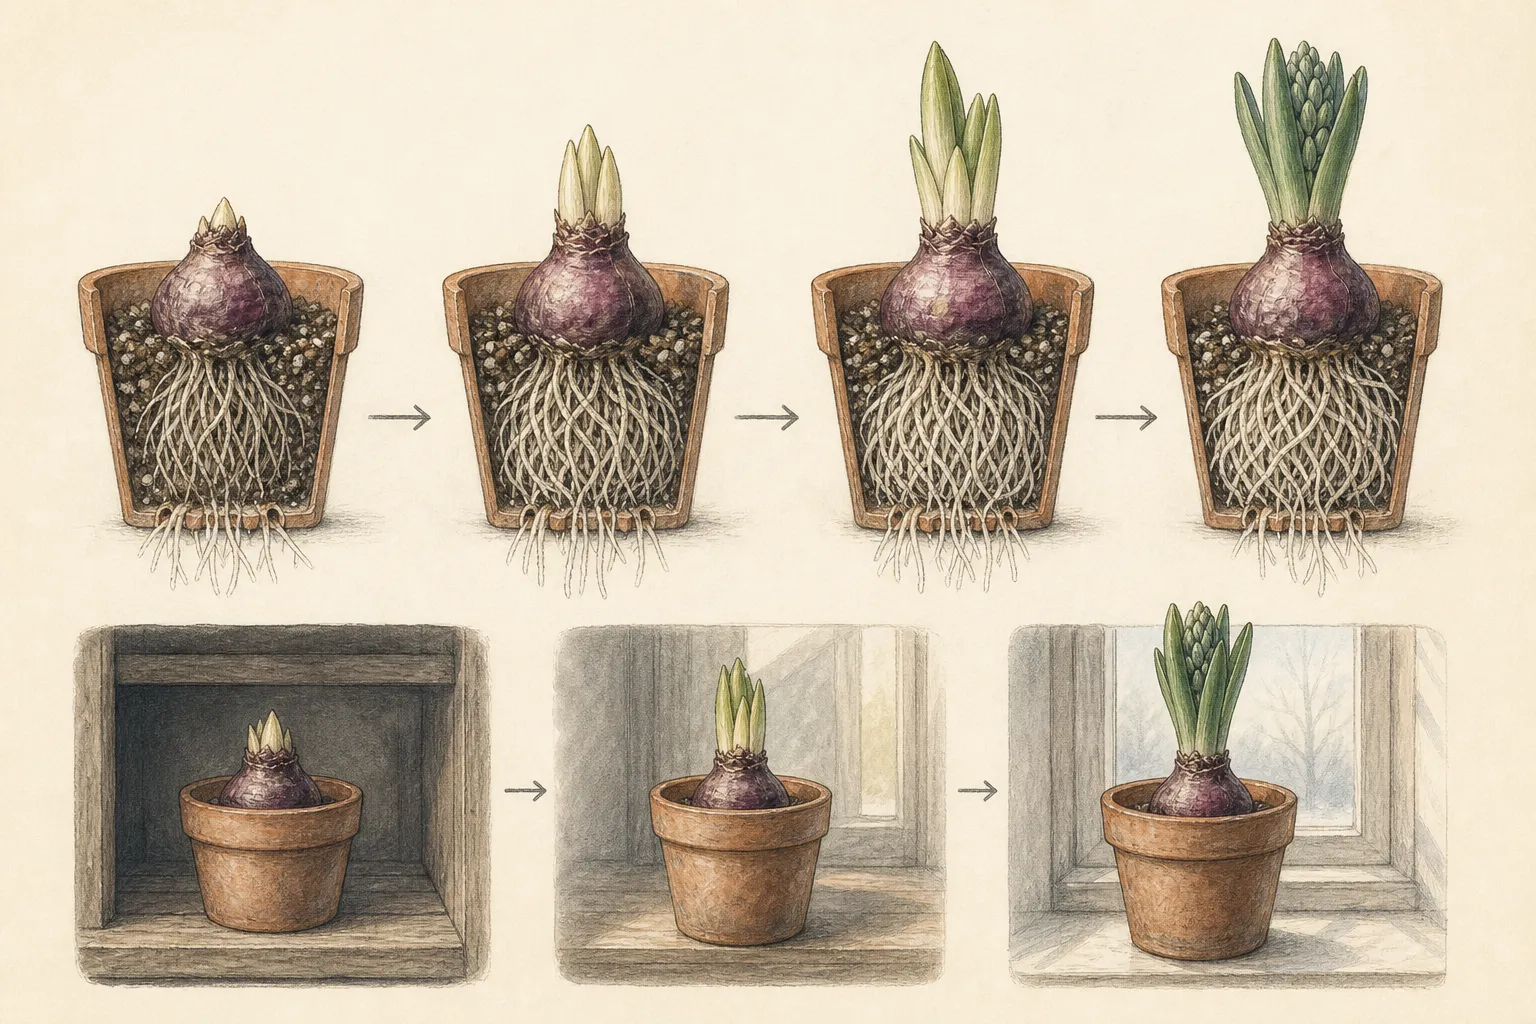
Place newly set bulbs in a cool location with bright indirect or moderate light, following the supplier or Extension method chosen for the cultivar. The aim is active roots and anchored bulbs before warm conditions accelerate shoots. Darkness is not a universal requirement for paperwhites, and a very dark warm cupboard can produce pale, unstable growth. Observe the roots through a clear vessel or test resistance gently rather than tugging a bulb out to check progress.
Maintain the original water relationship. Roots consume water, room air evaporates it, and a pebble surface can conceal a rapid drop. Refill slowly at the vessel edge so the water rises to the root zone without bathing the bulb bases. In mix, feel below the surface and judge pot weight. Do not alternate drought and flooding. The bulb contains stored resources, so routine fertilizer is unnecessary for a one-time indoor display and can add salts without solving poor light or weak roots.
Rotate the vessel a quarter turn only when shoots begin responding to directional light, and keep the base level during the move. Frequent rearrangement while roots are short can loosen bulbs. If different bulbs emerge at different rates, do not warm the entire bowl aggressively. Continue even conditions and remove only clearly failed bulbs. Natural variation of a few days is less damaging than forcing early shoots while the rest of the root system remains weak.
Change conditions as roots and shoots develop
When roots are well established and shoots are growing, give the vessel the brightest suitable indoor light available without placing tender growth against freezing glass or in a hot beam that overheats the roots. Light should reach the whole canopy. A bright room across the distance can still be weak at plant level. Watch direction: shoots leaning strongly toward one side indicate an uneven source and require a better location, not merely more frequent rotation.
Keep growth on the cool side recommended by authoritative guidance. Warm rooms accelerate elongation and shorten bloom duration. Avoid heating vents, radiators, fireplaces, appliance exhaust, and the warm pocket above electronics. Night temperature may be lower than daytime, but abrupt cold drafts can injure growth. Use an ordinary room thermometer near the leaves and roots; guessing from personal comfort does not reveal the temperature at a sunny sill or enclosed shelf.
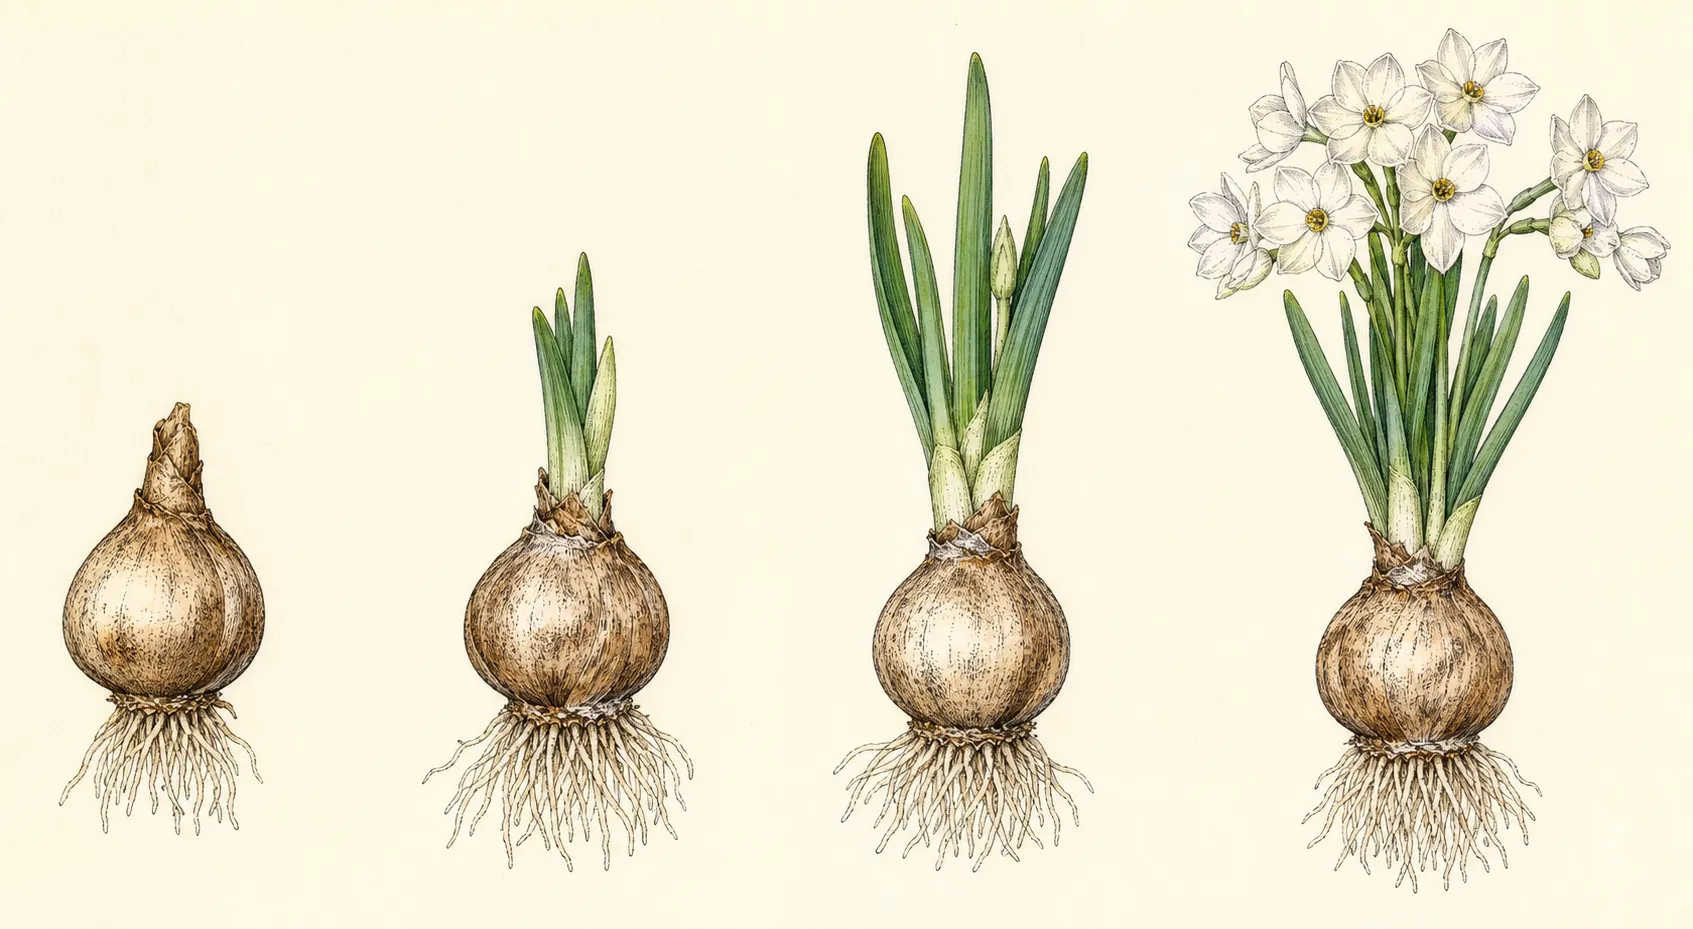
Continue water checks as leaf area and flower stems expand. A mature bowl can empty its available reservoir much faster than a newly planted one. Refill without splashing flowers or filling the bulb zone. Inspect the base for stability after every move. If the canopy begins to outweigh the vessel, relocate it to a secure surface and add a discreet support before stems fall. Do not wait for a crease; bent narcissus stems rarely regain their original mechanical strength.
Manage height without relying on a single trick
Iowa State notes that paperwhites may reach 18 to 20 inches and often require staking. Compact growth here means a well-rooted, evenly lit display that receives support before it falls. Strong bulbs, established roots, bright even light, moderate temperature, and a stable vessel do the useful work. Once warm dim conditions have produced elongated stems, improve the environment and add support without attempting a late chemical correction.
Use physical support early when the chosen cultivar naturally grows tall or the display must remain in a less-than-ideal room. A ring of slender twigs inserted without piercing bulbs can echo the foliage and hold stems as they rise. Soft ties should form a loose collar, not cinch individual stems. Alternatively, place the complete inner pot in a heavier cachepot while preserving drainage. Support should prevent sudden collapse and remain visually quiet, not force every leaf into an unnatural vertical bundle.
If stems already lean, correct the environment first. Move the vessel to brighter, cooler, more even light, check water and roots, and turn it once so the canopy can rebalance gradually. Brace the mass from the side toward which it is falling. Do not bend stems back sharply or rotate twice daily in pursuit of perfect symmetry. A slightly directional plant with intact tissue is healthier and more attractive than a damaged canopy trained into a rigid cylinder.
Read problems before they spread through the bowl
Soft bulbs, foul odor, collapsing roots, or rapidly yellowing shoots beginning at one bulb suggest decay rather than ordinary post-bloom decline. Isolate the vessel from other bulbs, remove affected material with clean tools, and replace contaminated water or medium when salvage is reasonable. If several bulbs are involved, discard the display safely. Reducing water after rot has advanced does not restore destroyed basal tissue, and adding fertilizer or cinnamon does not diagnose the pathogen or correct saturation.
Tall pale growth points first to insufficient light, excessive warmth, or both. Yellow leaf tips can also follow water stress, root damage, salt accumulation, or natural progression late in the display. Examine the sequence and distribution before acting. One damaged outer leaf is different from every shoot fading at once. Record room temperature, light direction, water history, smell, root color, and which bulbs changed first; the pattern prevents contradictory treatments.
Flowers that open and fade quickly usually reflect warm conditions, age, or a sudden environmental shift more than a need for plant food. Move blooms out of direct heat, maintain root moisture, and remove spent individual flowers if desired. Keep the whole arrangement until the display no longer serves its purpose, but do not retain deteriorating bulbs in an occupied room merely to reach a predicted number of days.
Finish the display responsibly
Paperwhite bulbs forced without a chilling cycle are commonly treated as one-season indoor display bulbs in cold climates because rebloom is uncertain and recovery requires favorable outdoor conditions. Do not promise a second display from depleted bulbs. If local climate and guidance support planting a particular cultivar outdoors, harden and plant at the appropriate season; otherwise dispose of plant material according to local green-waste rules. Never place narcissus bulbs where they can be mistaken for onions or edible bulbs.
Separate reusable pebbles, supports, labels, and containers. Wash away roots and organic residue, then clean and disinfect vessels by a method appropriate to their material before storage or reuse. Do not pour stagnant water containing rotted tissue into another plant pot. Check the cachepot and shelf for hidden moisture. Dry everything completely so the next forcing cycle begins with a clean, stable setup rather than an unexplained carryover problem.
Keep the record with the cultivar name: planting date, first visible roots, shoot emergence, move to brighter light, first bloom, support date, room temperature, and final height. Add one photograph at the same viewpoint each week. The record shows whether the next batch needs a cooler shelf, stronger light, fewer bulbs, a broader vessel, or a shorter cultivar. It replaces folklore with a small local trial while keeping the process simple enough to repeat.
Steps
- Level
- easy
- Time
- 30 minutes to plant; several weeks of observation to bloom
- Tools
- Clean broad vessel or draining pot, Small scoop, Room thermometer, Narrow-spout watering can, Clean support twigs and soft tie if needed
- Materials
- Firm paperwhite bulbs, Clean pebbles or fresh free-draining potting mix, Durable label, Clean water, Stable cachepot if using a draining inner pot
- 1Choose sound bulbs
Select firm bulbs with intact basal plates and no spreading mold, leakage, deep shriveling, or foul odor. Keep cultivar lots separate, copy the source and purchase date to the vessel label, and store unplanted bulbs away from onions or other edible bulbs. Discard a suspect bulb before it can contaminate a crowded bowl.
- 2Prepare a stable vessel
Wash the container and choose a base broad and heavy enough for an 18- to 20-inch flowering canopy. A potting-mix vessel needs an open drainage hole and saucer; a pebble bowl needs enough depth to brace each bulb. Set the empty vessel on its display surface and correct any wobble before planting.
- 3Set the correct water relationship
In pebbles, brace bulbs upright and add water only to the root zone at the underside of the basal plates, without submerging bulb scales. In mix, leave the noses exposed, water thoroughly, and empty the saucer after drainage. Mark the starting waterline where it can be checked without lifting rooted bulbs.
- 4Establish roots
Place the vessel at 45 to 50°F in a dark location for two to three weeks, following Iowa State's paperwhite method. Refill a pebble reservoir to its marked level or keep potting mix moist. Move on when roots visibly occupy the reservoir or the bulbs resist a gentle sideways touch and shoots approach three inches.
- 5Move into brighter growth
Move rooted bulbs to a sunny window at 60 to 70°F once shoots reach about three inches. Keep the foliage clear of freezing glass and heating outlets, and measure temperature beside the vessel. If one lot is still poorly rooted, leave that labeled vessel in the establishment area instead of warming every batch together.
- 6Maintain and rotate sparingly
Check the reservoir or mix each day as leaf area expands. Refill slowly at the bowl edge without raising water over the bulb bases, and rotate only when the shoots show a clear one-sided lean. Remove any soft, leaking, foul-smelling bulb with clean tools and replace fouled water before handling another vessel.
- 7Support before collapse
Install a twig ring, loose collar, or heavier outer vessel when the canopy first begins to outweigh the base. Insert supports between bulbs where roots are visible rather than through basal plates. Gather stems loosely at their natural angle; a stem that has already creased should be supported in place instead of forced upright.
- 8Dismantle and record
Move spent bulbs and cut foliage directly into a child- and pet-inaccessible waste container; Iowa State advises discarding forced paperwhites after bloom. Wash pebbles, supports, labels, and the vessel, then dry them separately. Record cultivar, planting date, rooting period, growth temperature, first bloom, final height, support date, and any rot before storing the kit.
Related reading
Sources
- Forcing Paperwhite Narcissus Bulbs. Iowa State University Extension and Outreach. Source record · Accessed 2026-08-30.
- How to Force Spring-Flowering Bulbs Indoors. Iowa State University Extension and Outreach. Source record · Accessed 2026-08-30.
- Forcing Bulbs. University of Wisconsin–Madison Extension. Source record · Accessed 2026-08-30.
- Daffodils: Beautiful but Potentially Toxic. National Capital Poison Center. Source record · Accessed 2026-08-30.
- Toxic and Non-toxic Plants: Daffodil. ASPCA Animal Poison Control Center. Source record · Accessed 2026-08-30.