Grow · fall pansy transplant timing
Plant Pansies for Fall Color When Nights and Soil Cool
Use soil temperature, transplant quality, drainage, and winter exposure to decide when fall pansies are worth planting and whether they may return in spring.
Published Last updated
In this guide
- Wait for a real cool-weather window
- Choose planting, a brief wait or an autumn-only display
- Calculate one small planting from the selected spacing
- Use the plug boundary to interpret an uneven planting
- Read the root zone before buying
- Choose compact plants with active white roots
- Plant the crown at grade and water the roots in
- Use moisture, not a feeding schedule, to establish the planting
- Decide whether winter survival is part of the promise
- Review the planting after each weather change
- Steps
Wait for a real cool-weather window
Plant fall pansies after summer heat has broken but while the soil is still warm enough for roots to establish. In early September, that may mean planting now in a cool-temperate garden and waiting several weeks in a warm-summer region. The display at the garden center is an invitation to measure conditions, not proof that every local bed is ready. Persistent heat produces stretched, yellowing growth; planting into a nearly frozen root zone leaves a compact top with little capacity to settle.
The modern garden pansy, Viola × wittrockiana, is a cool-season bedding plant rather than a dependable perennial everywhere. NC State describes pansies and violas as fall-planted annuals that flower through winter and early spring in suitable climates, then decline in summer heat. Illinois Extension places pansies in sun to partial shade and moist, well-drained soil. Those broad traits explain the season, but local temperature, winter exposure, and the chosen cultivar decide whether this is a short autumn display, a winter planting, or a fall-to-spring bridge.
Choose planting, a brief wait or an autumn-only display
Make the decision for the actual root zone and intended season. A suitable planting window requires more than cool air during one evening: the soil trend, sound plants, open drainage and enough establishment opportunity must agree. Write the intended outcome before purchasing. A short autumn display can be worthwhile even where overwintering is uncertain, but it should not be sold to the gardener as the same commitment as a fall-to-spring planting.
For a site still running warmer than its regional planting guidance supports, postpone the bed installation. If plants have already been bought, use the brief cool, bright holding arrangement described below and check their small plugs while waiting. A cell pack is temporary accommodation, so the decision must be revisited as weather and root condition change. Do not leave a growing tray indefinitely on the assumption that the bed will eventually become suitable; delay the purchase when a workable holding position is unavailable.
If the soil has entered the suitable regional window, inspect the stock and prepare the receiving area before planting. Where severe cold is already approaching and rooting time is inadequate, reconsider the promised season instead of expecting extra fertilizer to recover lost establishment. A replaceable container display or no purchase may fit better. Record the reason for the chosen route so spring survival is judged against the original aim, including whether survival through winter was ever part of it.
Calculate one small planting from the selected spacing
As an illustrative calculation, assume a prepared Georgia bed measures 60 inches long and 30 inches deep, and the selected series and site justify the 10-inch spacing included in UGA's professional guidance. Mark centers 5, 15, 25, 35, 45 and 55 inches along its length, with rows 5, 15 and 25 inches behind the front edge. Six positions in each of three rows give 18 plants. This is a hypothetical layout using one selected spacing, not a claim that every pansy series belongs at that density.
Keep the outside path or service edge out of those bed measurements. Compare the complete group with the named series' mature spread before ordering, and reduce the count if foliage would crowd the working edge or prevent inspection. Drainage outlets and existing plant bases also remove usable positions. Buying a full tray does not require finding a place for every remaining plant inside this rectangle. Keep any surplus in a separate suitable destination, not between the measured centers.
Planting depth is independent of that count. Each crown still belongs at the finished surface with roots covered, and a hole that collects water is still unsuitable. Lay the plants out in their containers first, then lift and plant them in a sequence that keeps the remaining plugs moist and the labels available. At the end, compare the installed centers and crown levels with the plan before disguising the surface with mulch. The quantity check prevents overbuying; it does not replace the root and drainage checks.
Use the plug boundary to interpret an uneven planting
When one pansy wilts while its neighbors remain firm, compare the original plug and adjacent soil at that exact position. A damp bed surface does not establish that the small nursery root ball was wetted evenly. Conversely, a plug that remains wet should not receive another automatic pour because the outer surface looks lighter. Correct the water delivery or drainage condition that is actually present, then keep the crown level visible so settlement is not hidden by the next watering.
Compare the pattern across the bed before changing its entire feeding program. Trouble concentrated against warm masonry suggests a different investigation from trouble confined to a low collecting edge. A whole tray of weak purchased plants supplies another piece of history. Keep the series, planting date, root inspection and exposure notes with the affected positions. Those records help separate stock quality, timing and site problems without claiming that a single yellow leaf identifies the cause.
After correcting a supported problem, return to the same plants and judge new growth, firm crowns and useful flowering. Existing injured leaves do not become an immediate test of recovery. If decline continues despite suitable temperature, moisture and drainage, retain a fresh sample and the site record for regional advice before adding treatment. At the seasonal review, record both the successful positions and the failures; repeating only the attractive part of the display photograph would conceal the conditions that need to change.
Read the root zone before buying
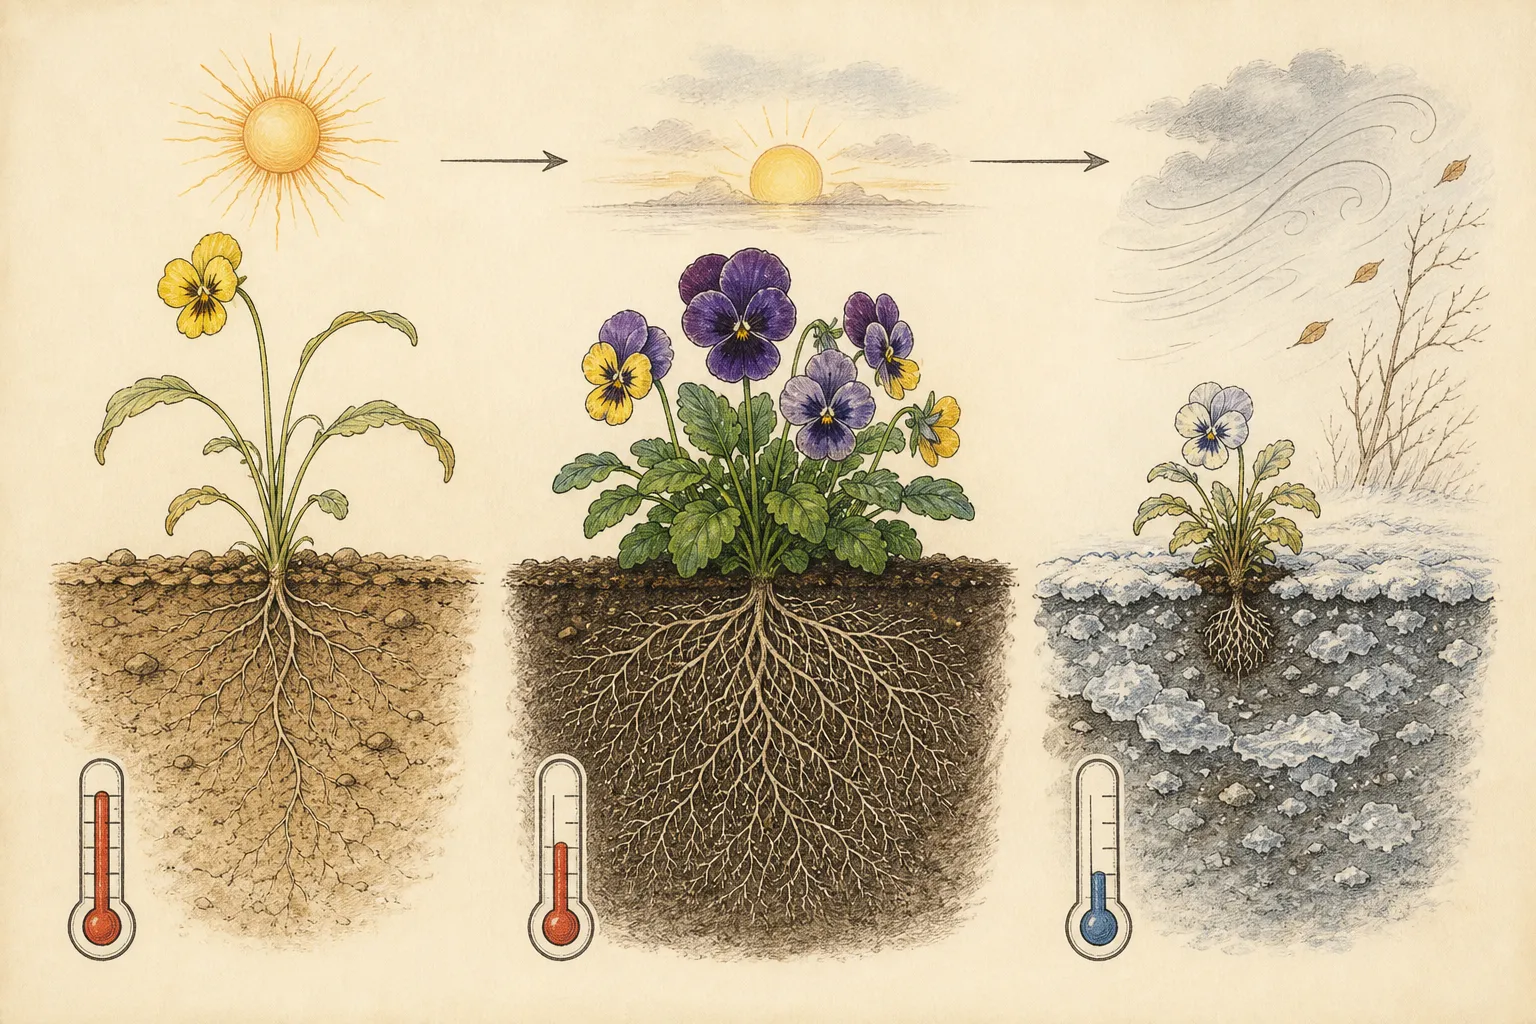
Use a soil thermometer in the actual bed or container position, several inches into the occupied root zone, at the same time on several days. University of Georgia guidance for its zones 6b through 8b gives 45°F to 65°F as the productive soil range for pansies: above the window, plants can stretch, yellow, and flower poorly; below it, root activity and nutrient uptake are sharply restricted. Treat those values as a useful Georgia-tested diagnostic, then pair them with local Extension timing rather than exporting Georgia's calendar dates to another climate.
The trend matters as much as one reading. A shaded pot may cool sooner than a south-facing masonry bed; an exposed raised bed can later freeze faster than adjacent ground. If warm afternoons keep the root zone above the regional planting range, stage the plants in a bright, cool nursery position and keep their plugs evenly moist for a brief wait. If the ground is already nearing its winter floor, use the pansies as a replaceable container display or postpone the purchase instead of expecting late roots to make up lost time.
Choose compact plants with active white roots
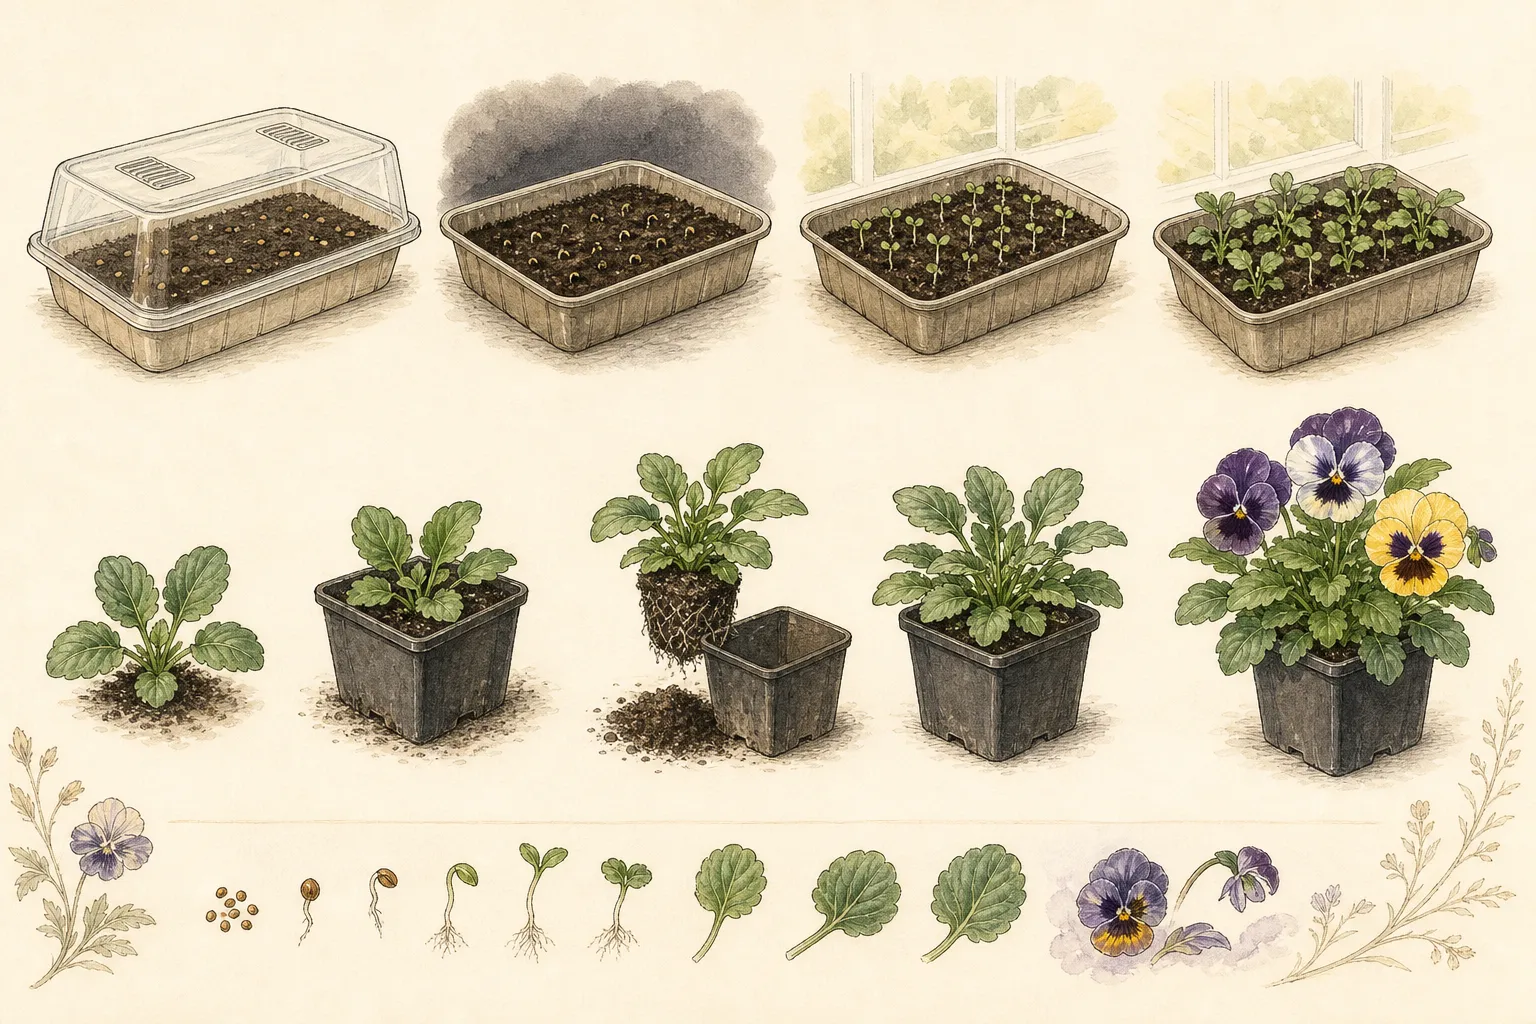
Select a dense, low crown with deep-green leaves and several branching shoots. Turn one plant out of its cell: healthy roots should be pale to white and distributed through the plug without forming a hard circling mat. University of Georgia advises rejecting leggy, overgrown, root-bound, diseased, or insect-damaged stock because stress at purchase follows the plant into the bed. A tray with many open flowers can be attractive, but crown structure and roots are better predictors of establishment.
Keep plants from the same named series together when you want an even block. Cultivars within a series usually share flower size and growth habit more closely than a random color mix. Smaller-flowered violas can be a useful alternative where winter continuity matters: Illinois Extension notes that many violas overwinter more successfully in the garden. That is a tendency, not a guarantee, so retain the series name and compare its documented cold performance with your local winter and site.
Plant the crown at grade and water the roots in
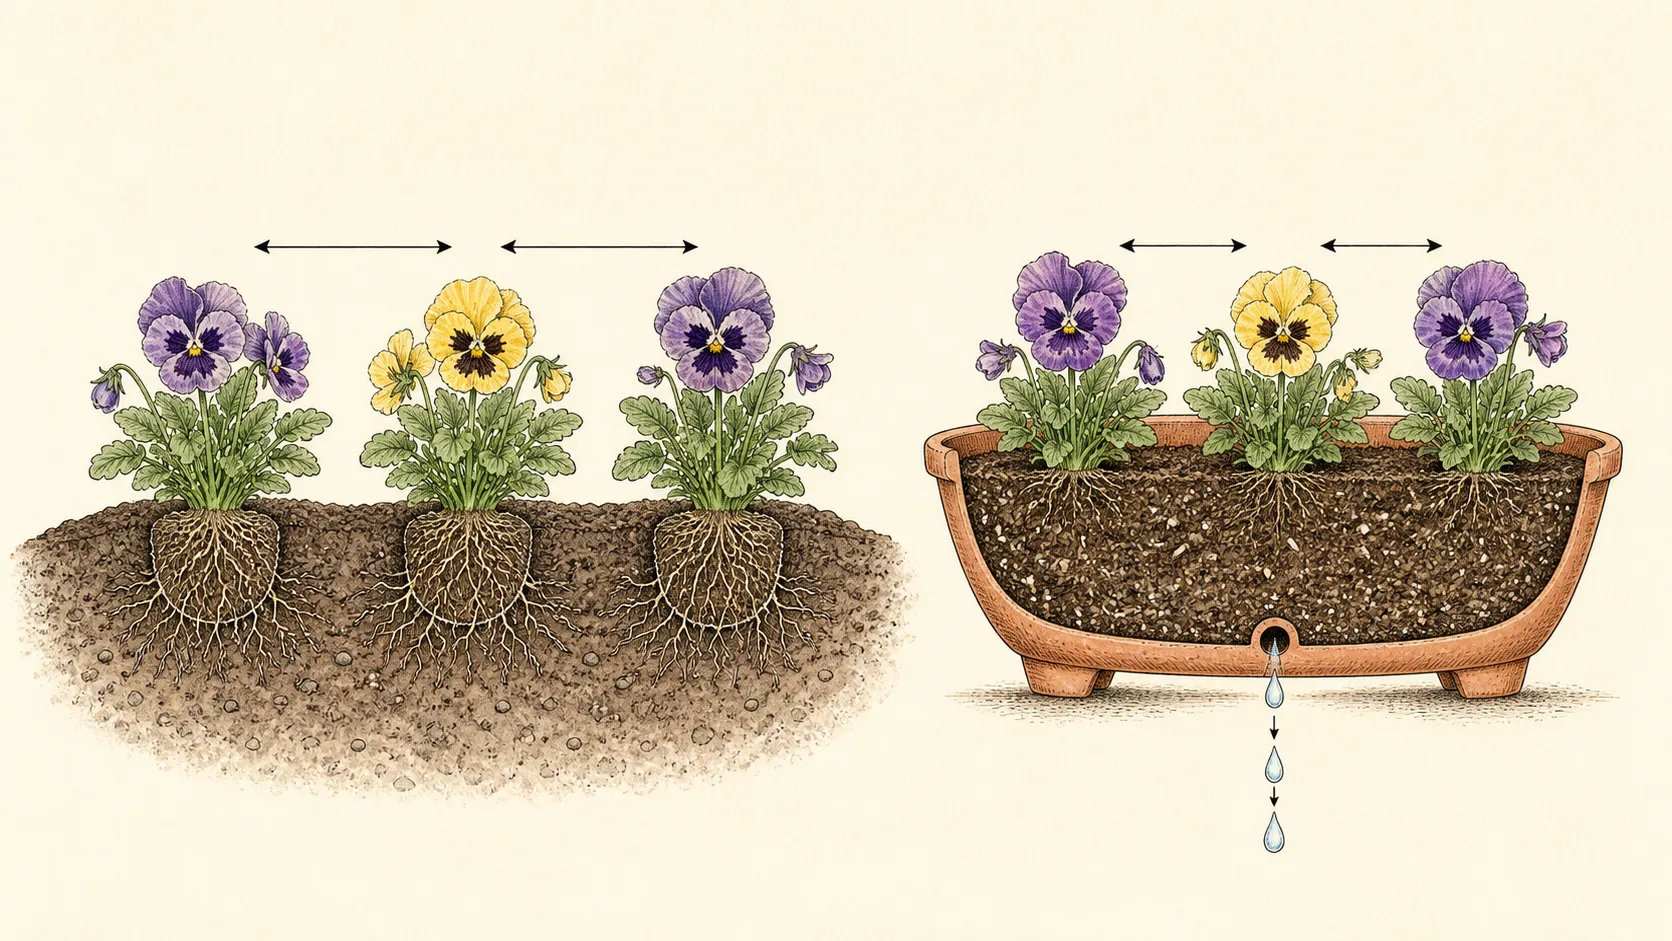
Choose a site with sun to partial shade and drainage that remains open after autumn rain. Loosen the bed broadly, correct a compacted or water-holding layer before planting, and lay out the whole group while it is still in pots. University of Georgia lists 6-, 8-, and 10-inch spacings in professional beds, warning that the tightest spacing can reduce air movement and increase crowding problems. For a home planting, use the mature spread on the series label and favor enough space to inspect and groom each crown rather than forcing instant carpet coverage.
Set each plug with its crown at the finished soil surface, not sunk into a collecting basin and not perched with roots exposed. Backfill around the original root ball, press only enough to close large air pockets, and water the entire plug and surrounding soil immediately. A container needs an open drainage hole and fresh, free-draining potting mix; empty any cachepot or saucer that retains water. Keep mulch off leaves and crowns. Drainage and crown visibility are more valuable than a thick decorative surface.
Use moisture, not a feeding schedule, to establish the planting
Check moisture inside the original plug and just beyond it until roots cross that boundary. Water when the occupied soil begins to dry, applying enough to wet the root zone and then allowing excess to drain. Mississippi State emphasizes consistent root-zone moisture for sustained flowering. Containers deserve more frequent checks because a small volume can dry during bright, windy weather even when a nearby bed remains moist, but no pansy should remain in standing water.
Do not turn yellow leaves into an automatic fertilizer order. Warm soil, cold roots, saturated soil, high pH, or a damaged root system can all limit performance. University of Georgia's production guidance is specific about pansy nutrition and soil pH, but a home gardener should begin with the product label, a soil or media test when a persistent problem exists, and regional recommendations. Heavy nitrogen during warm weather can make already stretched plants softer rather than solving the timing error.
Decide whether winter survival is part of the promise
A pansy can tolerate frost and still fail as a winter planting. University of Georgia's winter-landscape guidance generally reserves special protection for forecasts below 20°F for several hours, drying wind, or soil at risk of freezing, and reports that healthy established plants can survive brief colder episodes in that regional system. Those are not universal ratings. Duration of cold, soil freezing, wind, snow cover, cultivar, establishment, and exposure all change the result. A protected bed with unfrozen roots is different from a pot suspended in cold air.
Before buying, assign the planting one of two jobs. For autumn color, judge success by compact bloom until sustained cold and plan a replacement. For overwintering, choose a locally proven series, plant early enough to root, avoid a wind tunnel or rapidly freezing container, and learn the region's protection practice. Frozen foliage that wilts or turns gray-green can recover; a frozen root ball in drying wind is a more serious failure because the plant cannot replace lost water.
Review the planting after each weather change
Remove collapsed flowers and seedpods without cutting into the compact crown. Inspect the center for trapped wet petals, yellowing, or decay, and compare the plug with the surrounding soil before adding water. During an exceptional cold event, use the temporary cover recommended for the region and remove it when normal conditions return. Move portable containers to a sheltered position rather than wrapping foliage in a permanently damp layer.
In spring, record which series resumed bloom, which exposure thawed first, and where drainage or wind changed survival. Replace pansies when rising heat stretches stems and shrinks the display; that decline is the expected end of a cool-season planting, not a reason for increasingly heavy feeding. The durable lesson is the window: wait out late-summer heat, give active roots time before severe cold, and let the site—not the retail calendar—decide what the planting can promise.
Steps
- Level
- easy
- Time
- Thirty to ninety minutes to assess and plant one bed or container, followed by moisture checks through establishment
- Tools
- Soil thermometer, Hand trowel, Watering can or hose with a gentle outlet, Weatherproof plant labels
- Materials
- Compact pansy or viola transplants, Free-draining container mix for pots, Locally recommended light mulch or temporary cold cover if needed
- 1Measure the actual planting site
Track root-zone temperature and the forecast over several days in the bed or container that will receive the plants. Compare the result with regional pansy guidance, accounting for shade, masonry, raised beds and drying wind. If the site remains outside the suitable window, postpone installation and confirm a workable short holding arrangement before buying stock.
- 2Assign the display a season
Decide whether the pansies need to provide autumn color only or bridge into spring. Check whether the chosen series, exposure and remaining establishment period support that job. Keep the intended endpoint with the planting record. An attractive temporary display does not need an unsupported promise of winter survival to be a valid choice.
- 3Inspect crowns and roots
Choose compact, deep-green crowns with branching shoots and pale active roots. Inspect a representative plug as well as the flowers, and reject stretched, diseased, insect-damaged or tightly circling stock. Keep the named series together when uniform growth matters. Do not accept a weak tray merely because the planting date has already been booked.
- 4Prepare drainage and layout
Correct water-holding soil or select a draining container before exposing roots. Arrange the complete group by the selected series' mature spread and the usable bed dimensions, leaving crowns reachable for inspection. Reduce the order where a drain, path or existing plant takes space. Confirm where container runoff will go and remove any trapped-water arrangement.
- 5Plant at the finished grade
Set each plug with the crown at the finished soil surface, cover its roots and close large air pockets without packing the mix hard. Water the original plug and adjacent soil thoroughly, then check for settling and exposed roots. Correct the level immediately and keep mulch away from foliage and crowns so later inspections can see it.
- 6Check both sides of the plug boundary
During establishment, compare moisture in the original root ball with the surrounding soil before watering. Wet the occupied zone when it begins to dry and let excess drain. Recheck positions near a wall, a low edge or an exposed container independently. Do not use one wet surface or one wilting plant to assign the same treatment to every pansy.
- 7Respond to weather and record the seasonal result
Use temporary regional cold protection only when its conditions apply, remove spent flowers and inspect wet material caught near crowns. Reopen or remove protection when normal conditions return. In spring, record which series and exposures resumed growth, then compare that outcome with the season originally promised and the planting window actually used.
Related reading
Sources
- Success with Pansies in the Winter Landscape. University of Georgia Cooperative Extension. Source record · Accessed 2026-09-09.
- October Is Ideal Time to Plant Great Pansies. Mississippi State University Extension Service. Source record · Accessed 2026-09-09.
- Pansy, Viola. University of Illinois Extension. Source record · Accessed 2026-09-09.
- 10. Herbaceous Ornamentals. NC State Extension. Source record · Accessed 2026-09-09.