Grow · plant cool season annuals spring border
Set Cool-Season Annuals into a Spring Border Without Losing the Design
Place pansies and other cool-season annuals as measured drifts that bridge spring gaps without crowding permanent crowns or bulbs.
Published Last updated
In this guide
- Choose the planting window from cold tolerance and actual weather
- Read the site and the whole plant together
- Give the temporary color field a clear edge and exit
- Lay out every pot while the pattern is still reversible
- Carry out the central operation in a controlled sequence
- Read moisture and weather at the root balls after planting
- Diagnose decline by group position before replacing plants
- Hand the space back to bulbs and perennials on schedule
- Steps
Choose the planting window from cold tolerance and actual weather
Set cool-season annuals after the transplants have been hardened, the border soil crumbles under a trowel, and the selected plants fit the current frost risk. Illinois Extension classifies pansy and snapdragon among hardy annuals that tolerate cool soil, cool air, and light frost. Its regional example places hardy annuals about four weeks before the local frost-free date. Half-hardy and tender bedding follow later windows, so every tray needs a plant name and cold class.
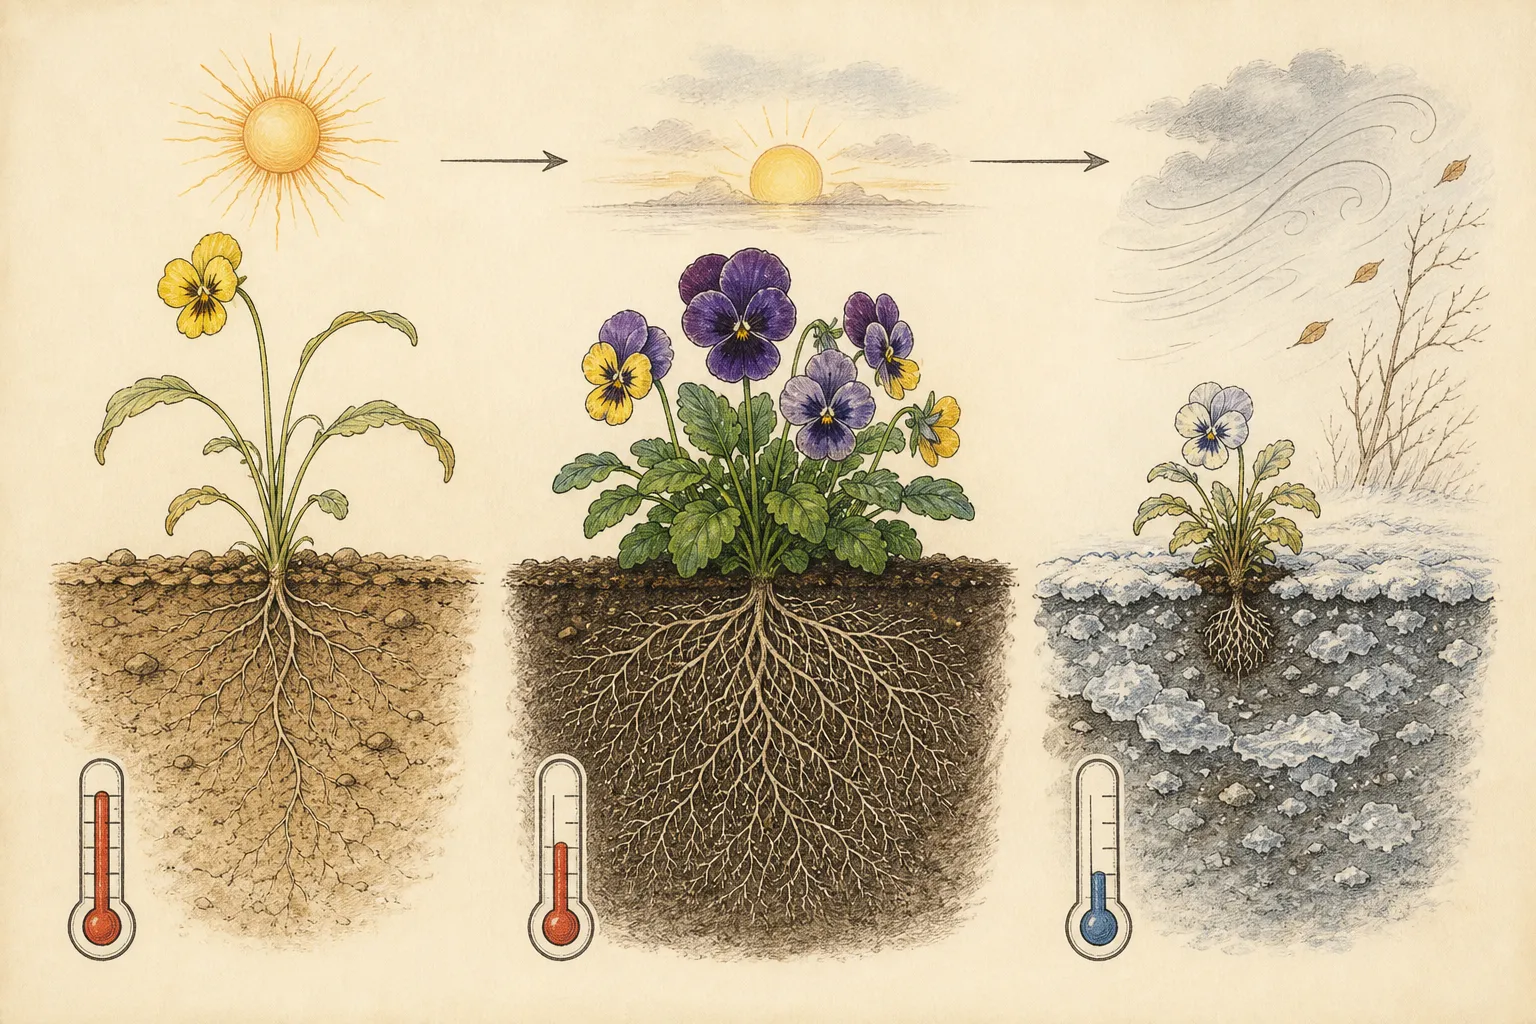
Pansies perform best during mild spring weather. Utah State gives an ideal growing range of about 40°F at night and 60°F by day, while noting that strong plants may flower through fall or winter in long frost-free regions. Treat that range as pansy guidance, not a blanket threshold for stock, snapdragon, viola, or another label. A hot garden may receive only a brief display, while a cold site may wait for workable ground and suitable acclimation.
Choose compact transplants with clean crowns, several healthy leaves, and roots that hold the medium together without forming a congested outer mat. White active root tips and unopened buds offer more establishment potential than a tray already carrying its full sale display. Water dry cells before planting and hold every cultivar label with its group. A stretched, soft plant raised under protection needs more acclimation even when its species is classed as hardy.
Read the site and the whole plant together
Map the permanent border before drawing any patch of temporary color. Mark emerging bulb leaves, dormant perennial crowns, shrub stems, irrigation outlets, path edges, and the areas needed for later staking or division. The border elevation belongs beside this map because the annuals must occupy true spring gaps while the future height and spread of permanent plants remain legible.
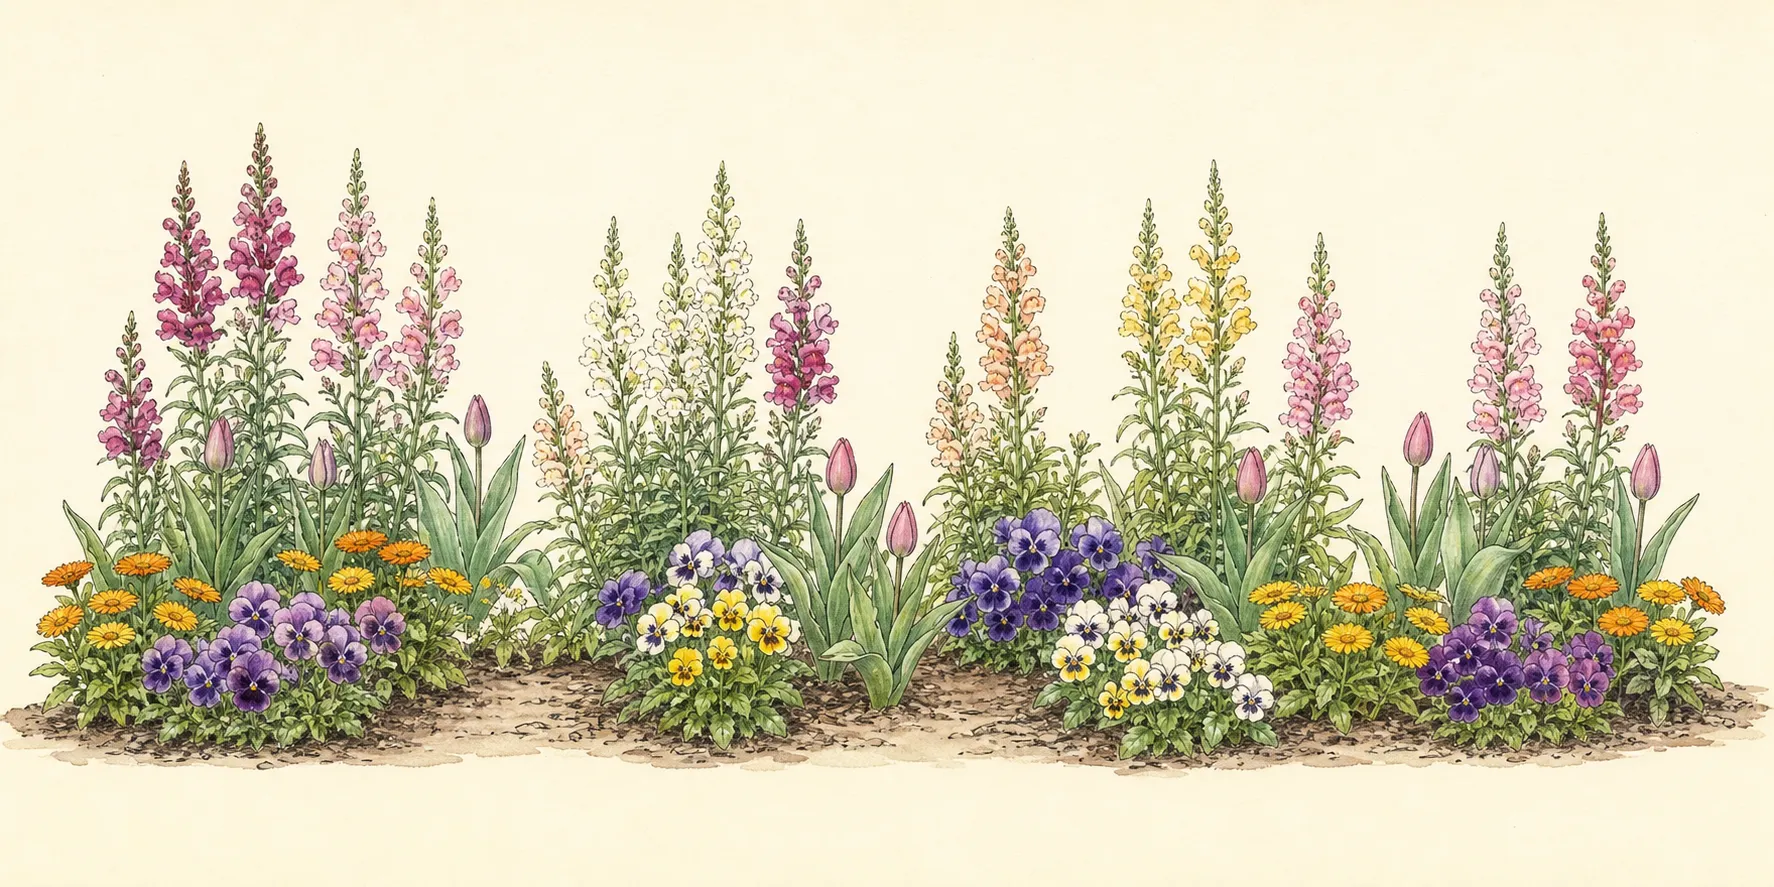
View the bed from its main approach and from the path used for care. Low pansies and violas can knit the front of a gap, while taller snapdragons or stocks may connect that color to the middle layer. Use the mature height supplied for each cultivar. A tray's current height gives a poor forecast, and a temporary plant placed over a rising perennial will become an obstruction within weeks.
Check light across the whole display period. Utah State places pansies in full sun or partial shade and notes that excessive shade reduces flower number and size while encouraging spindly growth. A leafless-tree opening can become much darker after canopy expansion. Warm reflected sites may also shorten a pansy display as spring advances. Assign those pockets to plants whose label and local guidance fit the later condition.
Calculate from mature spread, not the number of pots available. The RHS recommends using the supplier's ultimate spread as the spacing measure and sketching complicated groups to scale. Utah State gives pansies a bedding interval of about 7 to 12 inches. Preserve that pansy-specific range, then use named guidance for the other taxa. Subtract permanent crowns and bulb clusters from the plantable area before estimating quantities.
Give the temporary color field a clear edge and exit
Use repeated, irregular groups as one color field, with bare channels reserved around permanent crowns. A workable small-border composition might repeat one pansy color at the front, carry a related viola into two smaller pockets, and place one taller cool-season taxon behind selected groups. Confirm the taller plant's mature dimensions from its label. The composition succeeds when the eye connects the repeats while each bulb and perennial still has an unobstructed route into light.
Draw the removal boundary at planting time. Each annual group should be reachable from the path with a trowel, and its roots should occupy soil separate from the crown zone of a mapped perennial. Leave deliberate openings where bulb foliage must expand and where summer plants will fill the space. Those gaps are part of the design, not unfinished planting. They make the seasonal handoff possible with less disturbance.
Lay out every pot while the pattern is still reversible
Harden the transplants through the local acclimation sequence, then bring them to a moist, workable bed. Keep plants in their labeled trays while arranging them on the soil. Stand back after placing the first color group and again after the complete pattern is visible. Shift whole groups until their rhythm reads from the main viewpoint; single-pot adjustments made from kneeling distance tend to produce scattered dots.
Mark hidden crowns and bulbs with short stakes that remain visible during planting. Set trays on the path side, and use a kneeling board where the soil would otherwise receive concentrated foot pressure. The RHS recommends working from a board to limit compaction. Open individual holes with a hand trowel so permanent roots and spring shoots remain traceable.
Inspect each root ball as it leaves the cell. A cohesive young root system can be planted promptly after gentle release, while a dry peat-heavy core needs thorough wetting. Tease only the congested exterior roots that prevent outward contact, keeping the main ball intact. Reject soft crowns, broken stems, and signs of active rot from the design group; close spacing can spread their trouble through a short display.
Carry out the central operation in a controlled sequence
Plant one complete group first. Lift each plant by its root ball or leaves, set it at the depth it occupied in the container, and return fine site soil around the sides. Utah State advises preserving the transplant's previous level, while the RHS places the top of a bedding root ball just below the prepared surface. In practice, keep the crown clear, the root ball covered, and the surrounding grade continuous.
Hold the chosen spacing through the curve of the group. For pansies, measure within the cited 7 to 12 inch range according to cultivar size and the intended speed of fill. For another annual, use its supplier spread. Measure center to center, then look from above for the reserved crown gaps. Equal spacing inside a group can still produce an organic outline when the boundary is asymmetrical.
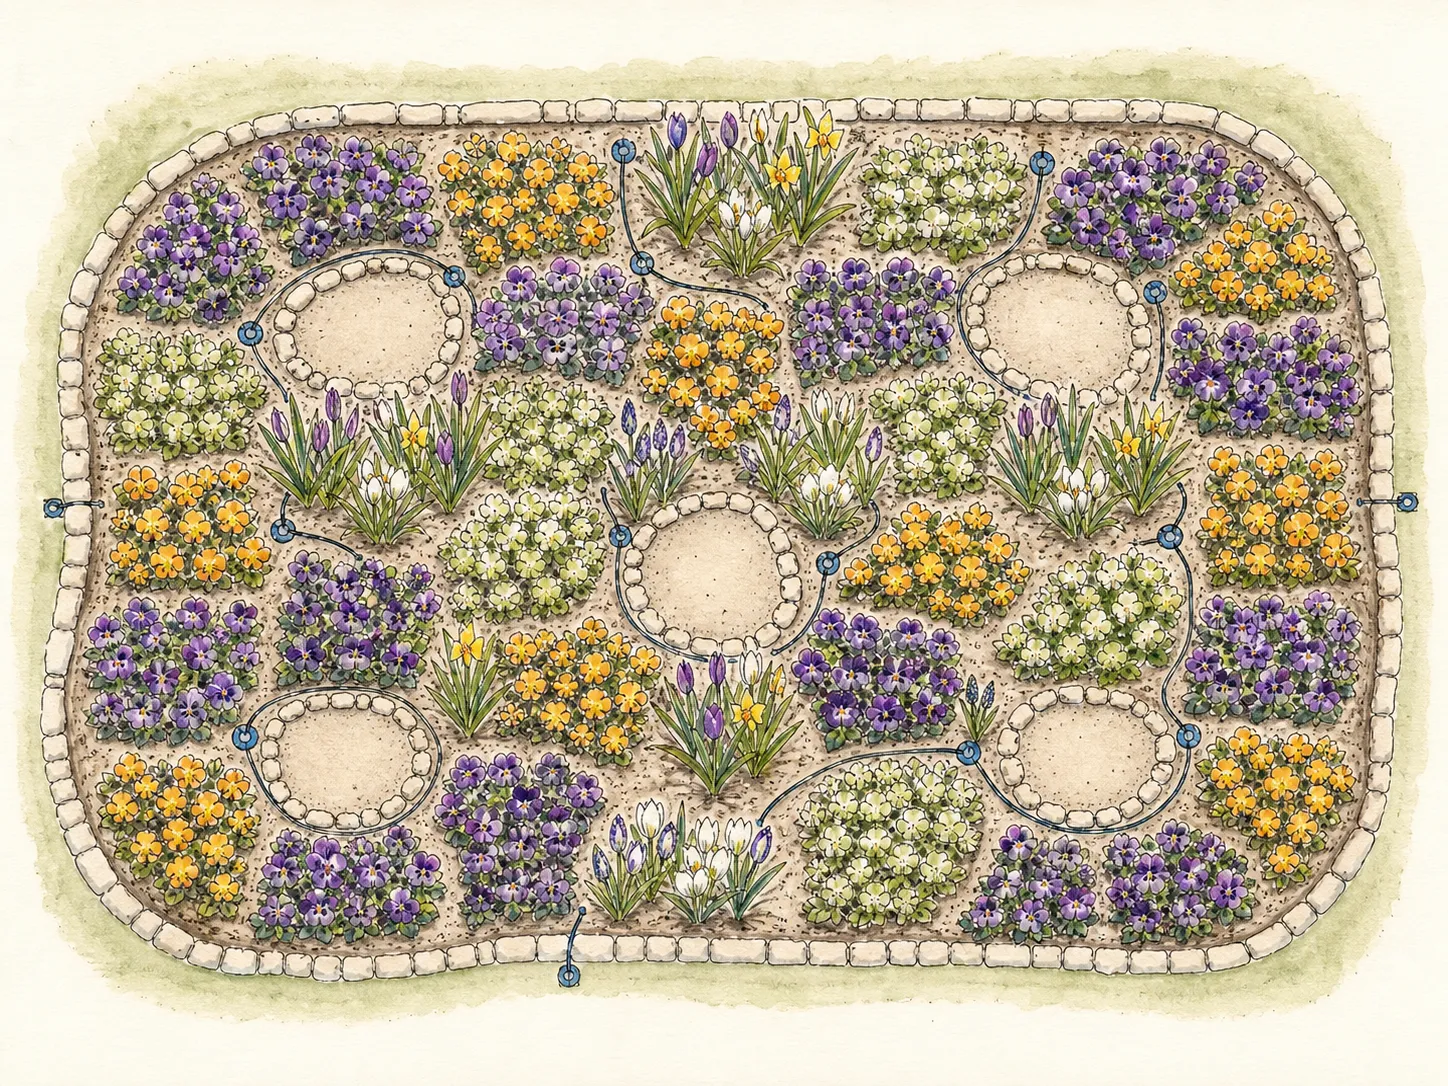
Water the first group before opening the rest of the holes. Watch whether the root balls accept water at the same rate as the bed and whether the finished grade settles. Lift and reset a sunken crown immediately. If water stands around the group or the soil smears under the trowel, pause that pocket and investigate drainage while the remaining pots stay protected in their trays.
Repeat the verified method group by group, keeping bulb leaves above the work and permanent crowns visible. Return only a light surface layer of the border's existing mulch between annuals, leaving stems and crowns open. The overhead plan should still be readable after planting: temporary color occupies bounded islands, and continuous access remains around the plants that own the bed for the rest of the year.
Read moisture and weather at the root balls after planting
Check moisture inside a representative root ball and in the adjacent border soil. Fresh potting medium can dry sooner than garden loam even when the surface looks equally dark. Water each group deeply enough to join those moisture zones, then let drainage restore air around the roots. Shallow-rooted bedding needs regular attention during active growth, but a fixed daily dose can saturate cool spring soil.
A late frost may leave foliage limp while the crown remains viable. Recheck after thaw and normal daylight before replacing the plant. A sudden warm spell creates the opposite test: pansies may fade as their preferred mild interval closes, especially near reflected heat. Preserve the mapped gaps when replacing a true loss; filling every opening after weather damage can crowd the permanent layer just as it expands.
Deadhead spent flowers when continued bloom is the aim, and remove damaged plant material from the crown. Feed according to the soil's amendment history, the plant label, and a demonstrated need. High nitrogen can favor soft leafy growth over a compact cool-season display. Water before any labeled fertilizer application, then track flower and shoot response across the whole group.
Diagnose decline by group position before replacing plants
Read the distribution before reaching for a replacement tray. One wilted plant may have a dry cell core, broken roots, or a buried crown. A whole group failing beside a downspout points toward excess water, while decline against a warm wall can mark the end of that plant's cool interval. Similar symptoms across scattered groups raise questions about acclimation, frost, stock quality, or a shared watering practice.
Lift one clearly failed annual only after comparing it with a healthy neighbor. Examine root color, new root contact with border soil, crown firmness, grade, and moisture inside both root balls. Correct the group-level cause first. Then replace a confirmed loss at the original interval or leave the opening for the permanent plant already mapped there. A replacement cannot compensate for saturated soil, advancing heat, or concealed bulb growth.
Hand the space back to bulbs and perennials on schedule
Review the border when bulb foliage reaches full spread and again as daytime heat changes the annuals' performance. Thin a group that presses against a perennial crown while the annual roots are still small. Once pansies or other cool-season plants show sustained heat decline, remove them before tired foliage hides the next layer. Grasp each root ball individually and support nearby soil so bulbs and perennial shoots stay anchored.
Leave bulb foliage to mature according to its own cycle and let mapped perennials expand into the reserved gaps. A summer annual belongs in the opening only when its heat tolerance, mature spread, and removal route fit the permanent composition. Some spaces need no replacement because the border's later growth already supplies cover. Seasonal restraint preserves the intended succession and reduces repeated root disturbance.
Photograph the color field at peak, then mark which groups held their shape, flowered longest, or conflicted with permanent growth. Keep cultivar labels with that record and note the actual weather window. Next spring, repeat successful groups at the proven spacing and edit the weak pocket by cause. The useful record is a map of placement and timing, not simply a list of colors purchased.
Steps
- Level
- moderate
- Time
- One focused session, followed by scheduled checks
- Tools
- Hand trowel, Bulb marker stakes, Watering wand, Kneeling board
- Materials
- Hardened cool-season annuals, Mulch matched to the existing border, Clean water
- 1Classify every tray before setting a date
Write the plant name, cultivar, and hardy, half-hardy, tender, or locally tested status beside each color group. Check the forecast and the local frost-free date against guidance for that class. Pansy and snapdragon fit the Illinois hardy examples; other labels may call for a later window. Confirm that transplants have completed acclimation and that the bed crumbles cleanly before bringing the full order outside.
- 2Reserve the permanent planting zones
Stake every visible bulb cluster and perennial crown, then add dormant plants from the garden map. Trace future spread, path access, irrigation reach, and any warm reflected pocket. Outline temporary planting islands in the remaining soil. Leave a trowel-width working route around sensitive crowns and a clear path for removing each annual group when later growth takes possession of the space.
- 3Draw the drifts and calculate the order
Sketch repeated color groups at mature spread, using 7 to 12 inches for pansies and supplier guidance for each other named annual. Subtract the staked no-plant zones from the drawing. Place taller selections behind low front groups according to their labeled height, then count centers inside each boundary. Buy to that count so leftover pots cannot pressure the design into filling intentional gaps.
- 4Harden, hydrate, and lay out the pots
Complete the locally appropriate hardening sequence. Moisturize dry cells and the receiving soil, retain all labels, and arrange closed pots across the drawn islands. View the complete pattern from the main approach before opening a hole. Move whole groups to improve rhythm or protect a rising shoot. Set a kneeling board from the path and keep unplanted trays sheltered while the first island is installed.
- 5Install and inspect one complete group
Release each plant by supporting its leaves or root ball, open an individual trowel hole, and set the crown at its previous relation to grade. Hold measured center spacing through the group's irregular outline. Return fine soil around the ball, keeping permanent roots and shoots visible. Water this first island, then correct any settling, dry core, or pooling before repeating the technique elsewhere.
- 6Join root-ball and border moisture
Water every planted island and probe both potting medium and adjacent garden soil at representative points. Recheck grade after drainage and expose any covered crown. Apply a light continuation of the existing mulch between plants while leaving stems open. During the first week, respond to the measured moisture inside the root ball, then deadhead for continued flowering and feed only under the label and soil plan.
- 7Edit crowding and complete the seasonal handoff
Inspect the mapped openings as bulbs and perennials expand. Thin an annual group that enters a permanent crown zone, and diagnose a failed pocket from roots, grade, moisture, and exposure before replacing it. Remove cool-season plants when sustained heat ends their useful display. Lift each root ball separately, settle disturbed soil around the permanent plants, and record the cultivar, spacing, weather window, and next-season change on the plan.
Related reading
Sources
- Growing Pansies. Utah State University Extension. Source record · Accessed 2026-08-30.
- Annuals. Illinois Extension. Source record · Accessed 2026-08-30.
- Best Bedding Plants for Colourful Displays. Royal Horticultural Society. Source record · Accessed 2026-08-30.