Grow · ornamental allium early summer structure
Plant Ornamental Alliums for Early-Summer Structure
Choose bulb-grown ornamental alliums by height and bloom window, repeat them through a sunny border, and use companion foliage to carry the planting into summer.
Published Last updated
In this guide
- Define the structural job before buying bulbs
- Let named bulb dimensions control the planting group
- Build the early-summer sequence from named selections
- Choose sun, drainage, shelter, and a quiet root zone
- Map a rhythm through companion foliage
- Lay out the bulbs before the soil is opened
- Plant to bulb size and named guidance
- Settle the bed and preserve the planting map
- Carry the structure from flower into seedhead
- Steps
Define the structural job before buying bulbs
Ornamental alliums are most useful when their stems and flower heads solve a specific gap in the border. Bulb-grown forms send clean vertical stems through lower plants, then hold globes or starbursts above them in late spring and early summer. Decide whether the planting needs a repeated mid-height beat, several tall exclamation points, or low starry heads near the front. That job determines the named selections and quantities; a bag chosen only by flower color can produce one oversized head, a scattered row, or three different bloom weeks that never read together.
This method concerns hardy ornamental alliums sold as dormant bulbs for autumn planting. It does not treat clump-forming hybrids such as 'Millenium' as if they were large bulbs. Iowa State University Extension distinguishes those leafy, later-flowering clumps from the bulb-grown types whose foliage commonly yellows around bloom. Keep the growth form on the label. It affects planting depth, spacing, division, foliage behavior, and whether the finished plant will create the early-summer vertical structure promised by the plan.
Record the view that needs structure before placing an order. Photograph the border at the end of spring from its normal path or window, mark bare vertical intervals, and note the height of neighboring foliage at that date. Allium heads should rise clearly above companions while their basal leaves remain among enough living foliage to look intentional. The design target is a sequence of related points across the whole view, not a close-up of a single perfect flower.
Let named bulb dimensions control the planting group
Match each bulb-grown allium to its documented height, flower-head scale, planting depth and spacing before counting the group. A later clump-forming allium is not interchangeable with this bulb-planting method. Keep the intended viewing height and companion foliage in the plan, then review flowers, fading leaves and retained seed heads before changing the next order.
Build the early-summer sequence from named selections
Use current descriptions from a reliable regional source and supplier because alliums span a wide range of heights and bloom times. Iowa State describes 'Purple Sensation' at roughly twenty to thirty inches, flowering in late spring or early summer, and 'Globemaster' at about twenty-four to thirty-six inches in early summer. Its profile places 'Gladiator' around thirty-six to forty-eight inches with early-summer flowers. These are reference dimensions, not guarantees; soil, climate, cultivar authenticity, and the way a nursery measures a stem can alter the result.
Choose one main form to repeat, then add a second scale only when it has a clear role. A run of medium purple globes can carry the eye through a mixed border, while three taller accents can mark a turn or hold the rear layer after tulips finish. Very large heads need breathing room. Iowa State reports ten- to twelve-inch heads for Allium christophii on shorter stems, a different silhouette from the dense elevated sphere of a tall hybrid. Place the head diameter on the plan as well as the stem height so adjacent globes will not merge into a congested mass.
Translate bloom descriptions through local records. Chicago Botanic Garden lists several alliums flowering between May and June in its climate, while the same cultivar can open earlier in a warmer region. Pair selections whose documented windows overlap locally, and treat catalog phrases such as late spring or early summer as ranges. If exact synchronization is essential, begin with a modest trial group and photograph it weekly for a season before extending the rhythm across the border.
Choose sun, drainage, shelter, and a quiet root zone
Border alliums flower best in strong light. The RHS recommends plenty of sunshine and a sheltered, free-draining site for bulb-grown border types; Iowa State notes that shade can produce floppy flower stems. Observe direct sun during the spring-to-summer handoff rather than relying on the leafless autumn view. A position shaded by a fully leafed shrub in May may not provide the same light it receives when bulbs are planted in October.
Read drainage across the entire group after rain. Both the RHS and Iowa State warn that bulbs can rot in wet or waterlogged soil. A layer of grit beneath each bulb cannot drain a sealed clay basin, and an isolated pocket of loose amendment can settle differently from the surrounding ground. Improve a broad bed, create a gentle raised grade, use a deep container, or select a more suitable site. Also note wind exposure: the taller the stem and larger the head, the more useful a protected open position becomes.
Reserve a root zone that will stay relatively undisturbed. The RHS cautions against regularly cultivated ground because later digging can damage dormant bulbs. Keep the mapped clusters outside annual bedding areas and beyond the reach of routine edging. At the same time, leave a route for labels, selective deadheading, and occasional division. The right position combines long-term quiet below ground with a reachable edge above it.
Map a rhythm through companion foliage
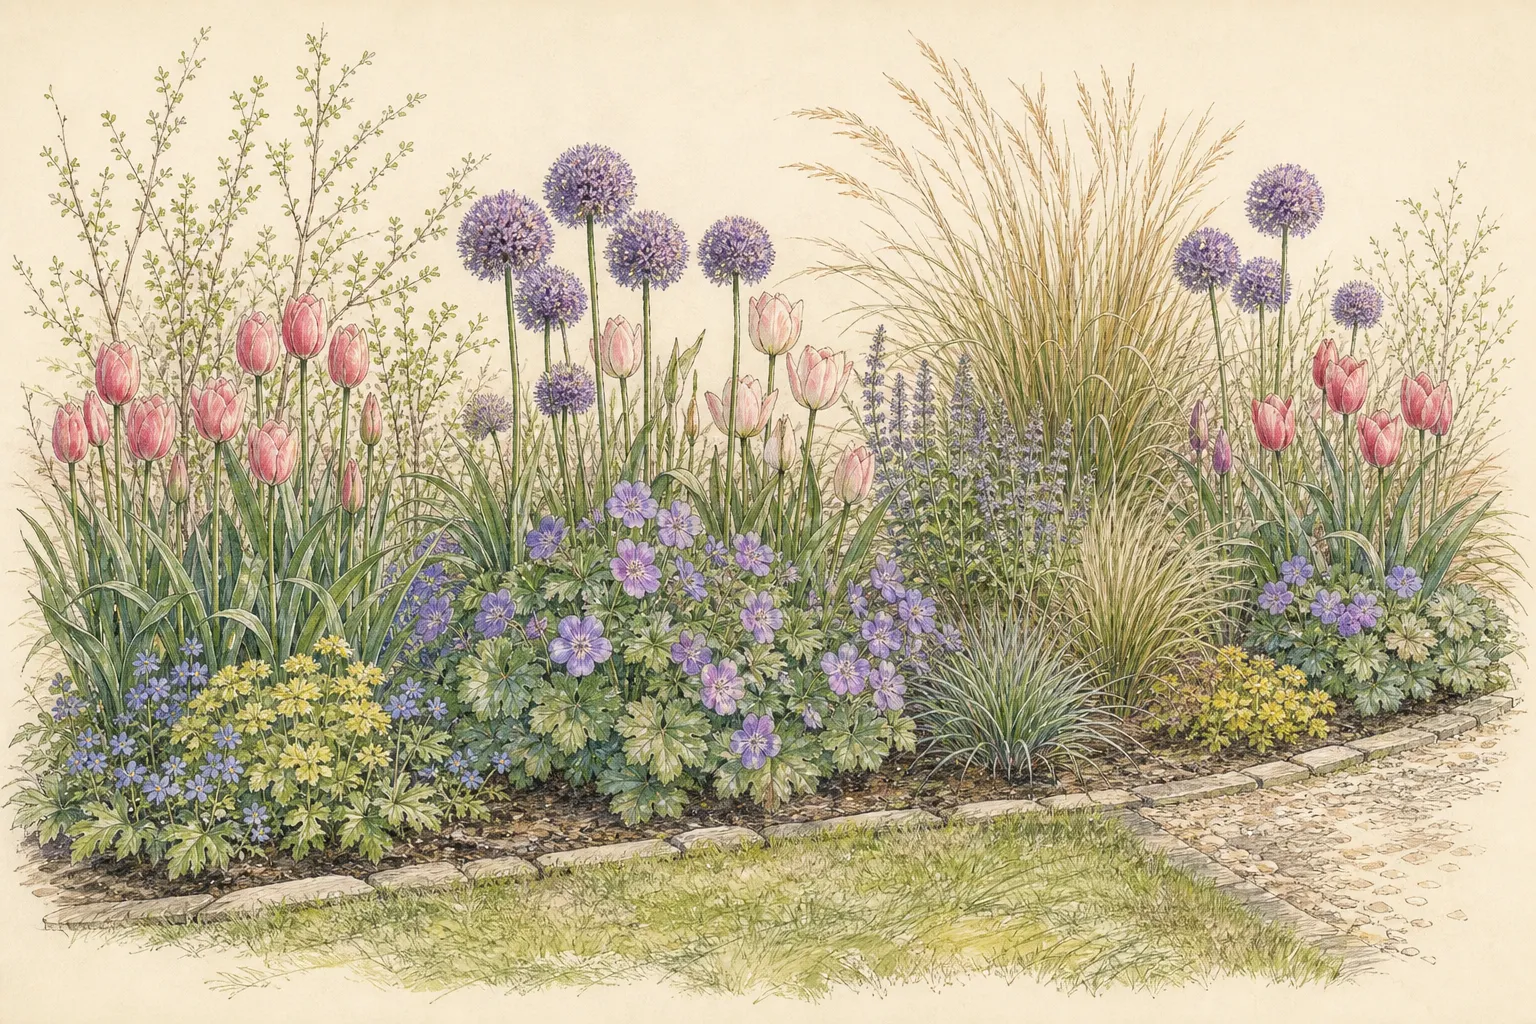
Draw the border to scale and mark the normal viewing direction. Place the first and last allium groups where they can frame the composition, then repeat the main selection at uneven but related intervals through the middle. Three groups often read more convincingly than one isolated cluster and one echo. Keep each group internally loose rather than drawing a perfect circle; the repeated height and head shape supply order, while small changes in interval keep the planting from resembling a row of posts.
Use companion foliage as the continuous lower layer. The RHS recommends placing alliums where other plants mask leaves that decline around flowering, and Chicago Botanic Garden describes alliums rising through clumping perennials and groundcovers. Select companions that are already expanding at the allium's bloom time, stay below the flower heads, and suit the same sun and drainage. In a temperate sunny border, mounded hardy geraniums, catmint, compact grasses, or similar locally hardy perennials can perform that visual job. Confirm their mature spread and water needs before treating any example as universal.
Keep companions outside the immediate bulb positions on the autumn plan. Their foliage may overlap visually in spring, but a dense crown planted directly over a bulb creates competition and makes future work difficult. Preserve small access seams between perennial crowns and place durable markers at the edge of each allium group. The elevation should show flower heads above a connected green field, with stems still visible enough to retain their vertical force.
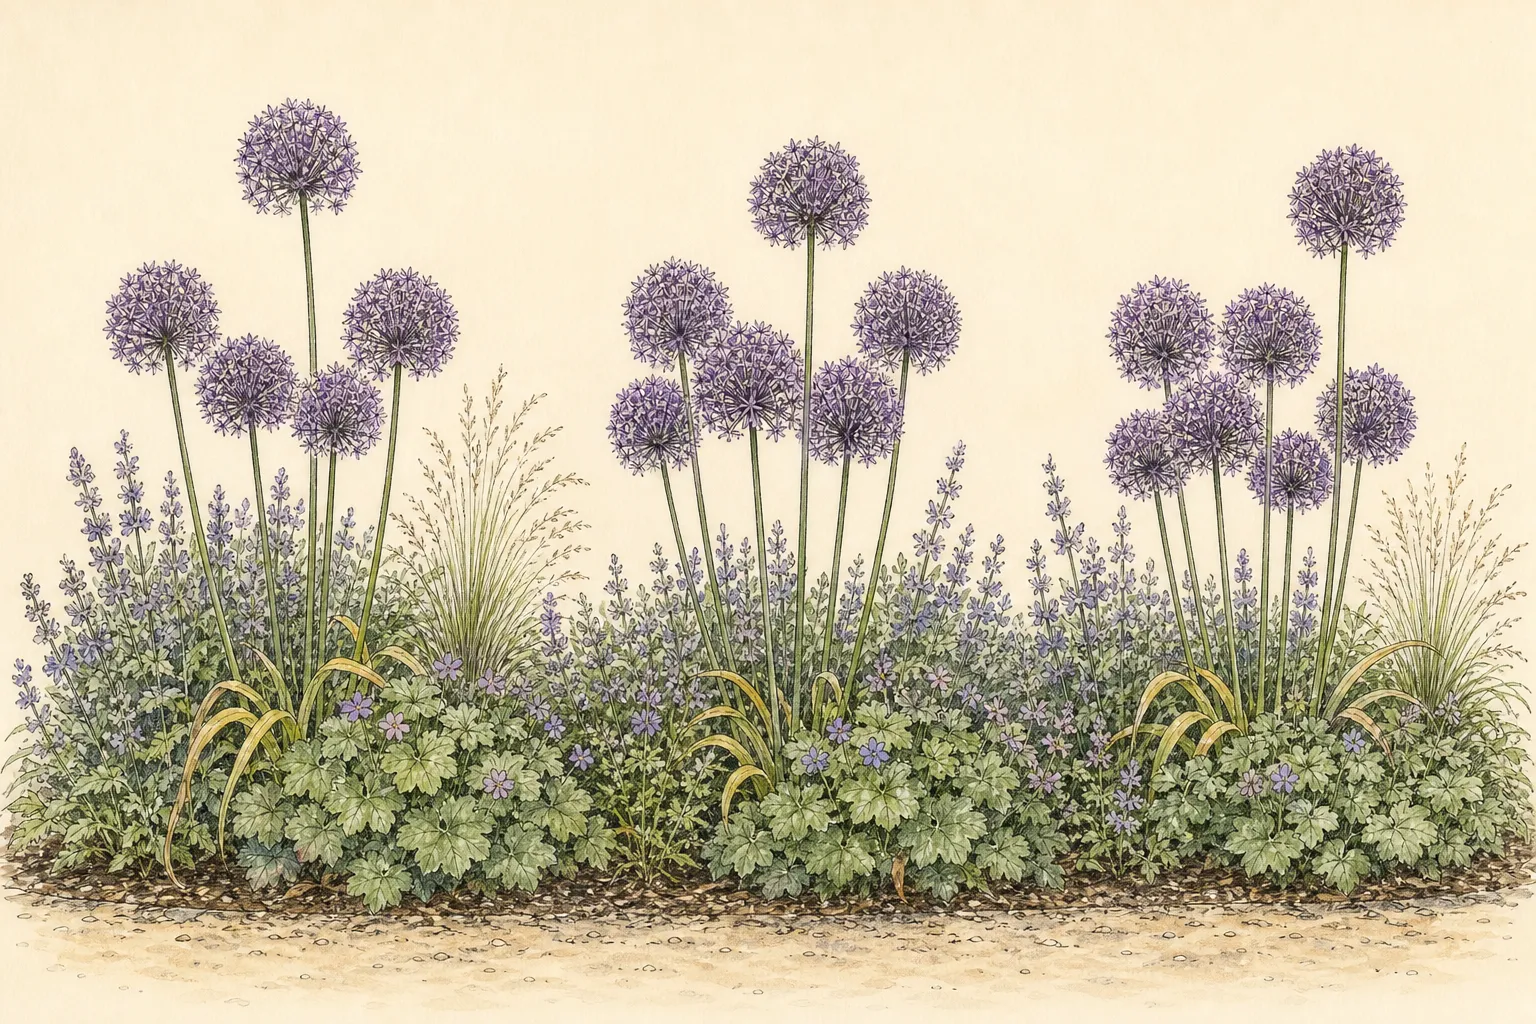
Lay out the bulbs before the soil is opened
Unpack bulbs in shade and keep every cultivar label with its lot. Choose firm, plump bulbs with an intact basal plate, following University of Maryland Extension's general quality guidance for spring-flowering bulbs. Isolate material that is wet, collapsing, or foul-smelling and document it for the supplier. Size variation within a named grade can occur, but a bulb with a damaged base should not be hidden in a group where failure will later be blamed on the design.
Set the sound bulbs on the soil over the paper plan. Stand at the viewing point and adjust the group centers while every bulb remains movable. For tall types, the RHS gives at least twenty centimetres, or eight inches, between bulbs; smaller types may be set about 7.5 to ten centimetres, or three to four inches, apart. Use those figures within the scope of the named plant and local supplier instructions. Head diameter, companion crowns, and mature access can justify more room than the minimum.
Count each group and photograph the final surface layout. An asymmetrical cluster of five or seven may feel more natural than four points on a square, yet consistency across repeated groups matters more than a magic number. If the budget provides only a few large bulbs, concentrate them where one coherent accent can succeed instead of thinning them across the full border. Empty future positions can be marked for a later order after the first bloom verifies scale and timing.
Plant to bulb size and named guidance
Planting references express depth in different ways. The RHS advises early-autumn planting at about four times the bulb's diameter for alliums. Iowa State gives practical ranges of six to eight inches for larger bulbs and three to four inches for smaller ones. University of Maryland offers a general bulb rule of roughly two and a half to three times bulb diameter and explicitly recommends checking a successful local source. These figures should remain attributed, not averaged into a false universal number.
Use the named supplier instruction and the most relevant regional authority as the working depth, then write down what the measurement means. Measure from finished soil grade to the bulb base or to its top exactly as the instruction shows. Loose mulch is not finished soil. Dig a broad cluster hole or individual holes with stable bottoms, keeping bulbs upright with their pointed growing side above the basal plate. Loosen compacted soil below without leaving a deep cushion that will collapse after watering.
Place small and large cultivars in separate depth zones even when their heads will share one visual layer. Keep fertilizer and fresh manure from direct bulb contact; the RHS advises against freshly manured planting soil, and Maryland recommends a soil layer between bulbs and fertilizer. Backfill with continuous site soil, work it around the bulbs, and firm by hand. Before closing the last inch, check group count, orientation, spacing, and the final-grade reference one more time.
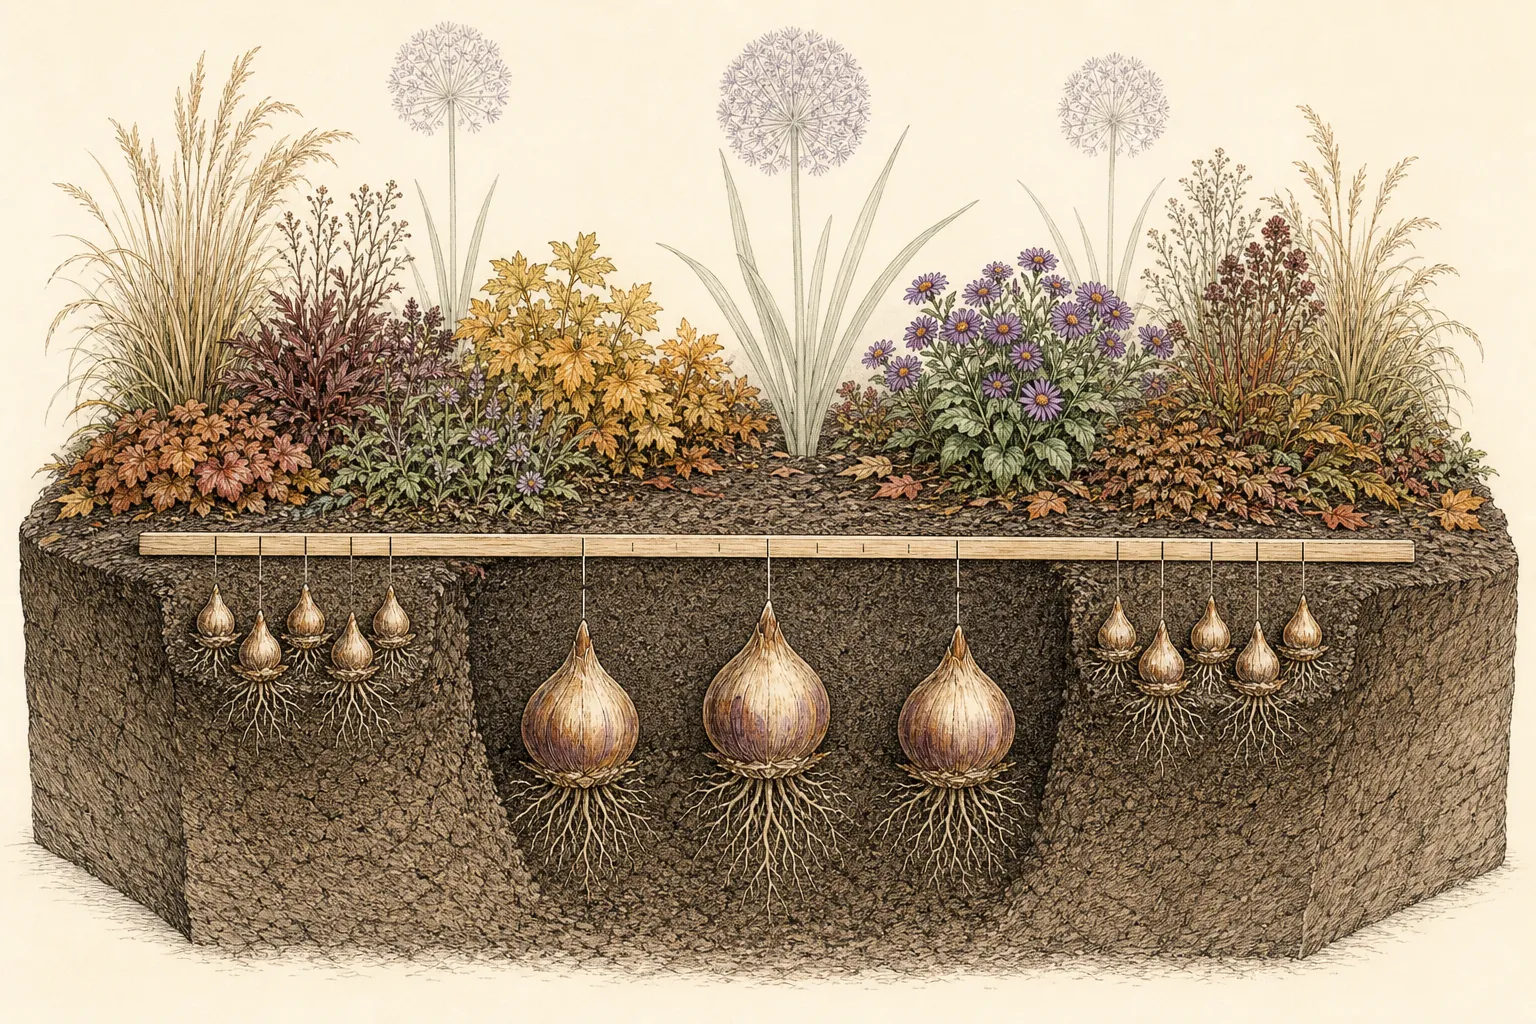
Settle the bed and preserve the planting map
Water after planting when the soil is dry enough to require settling, then observe how the surface behaves. Normal autumn rain may supply sufficient moisture, so repeated scheduled watering is unnecessary in an already wet bed. Repair any depression that channels water into the cluster and reset a bulb if loose fill has allowed it to sink markedly. The finished surface should accept rainfall without remaining saturated around the dormant bulbs.
Place labels outside the bulb centers and map each group against fixed edges. Include cultivar, bulb count, measured depth, and the planting date. Dormant alliums are easy to strike during spring division or fall editing, especially after their foliage has disappeared. A photograph taken from directly above and another from the normal border view preserve both the underground footprint and the intended visual rhythm.
Apply only locally appropriate mulch and keep its thickness separate from planting depth. Prevent heavy mulch from matting over low companion crowns or delaying the visibility of emerging shoots. If animals disturb newly worked soil, use a temporary surface barrier that does not trap wet leaves or puncture the bulbs. Remove temporary protection as growth begins and retain the quiet no-dig zone on the seasonal maintenance plan.
Carry the structure from flower into seedhead
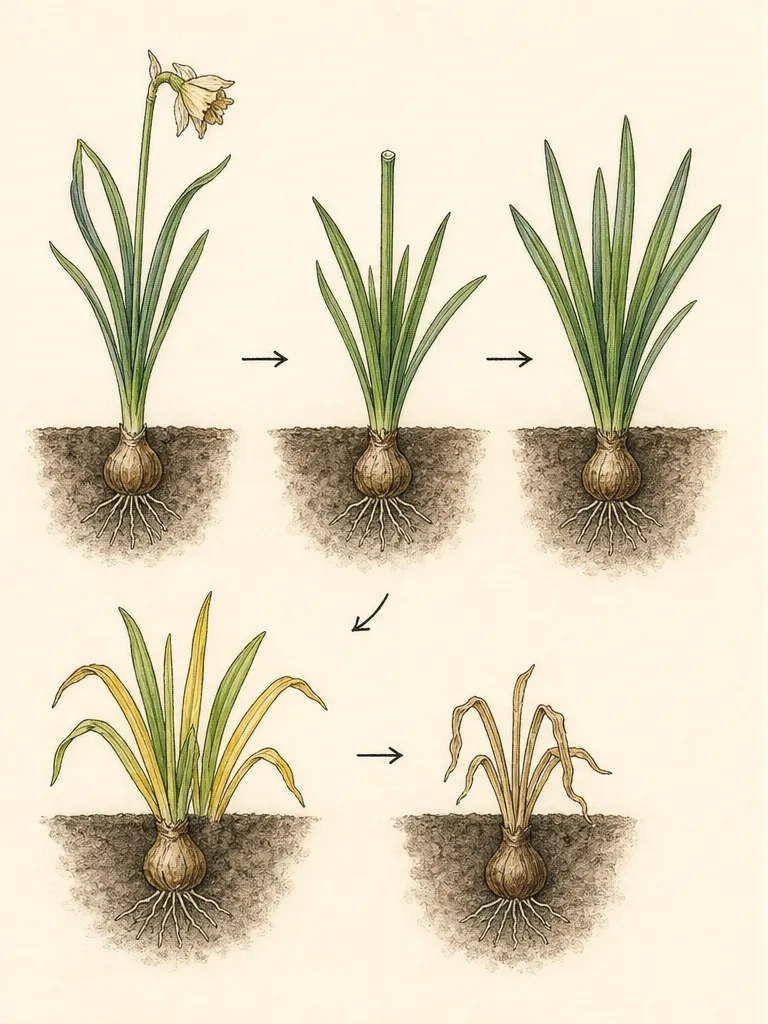
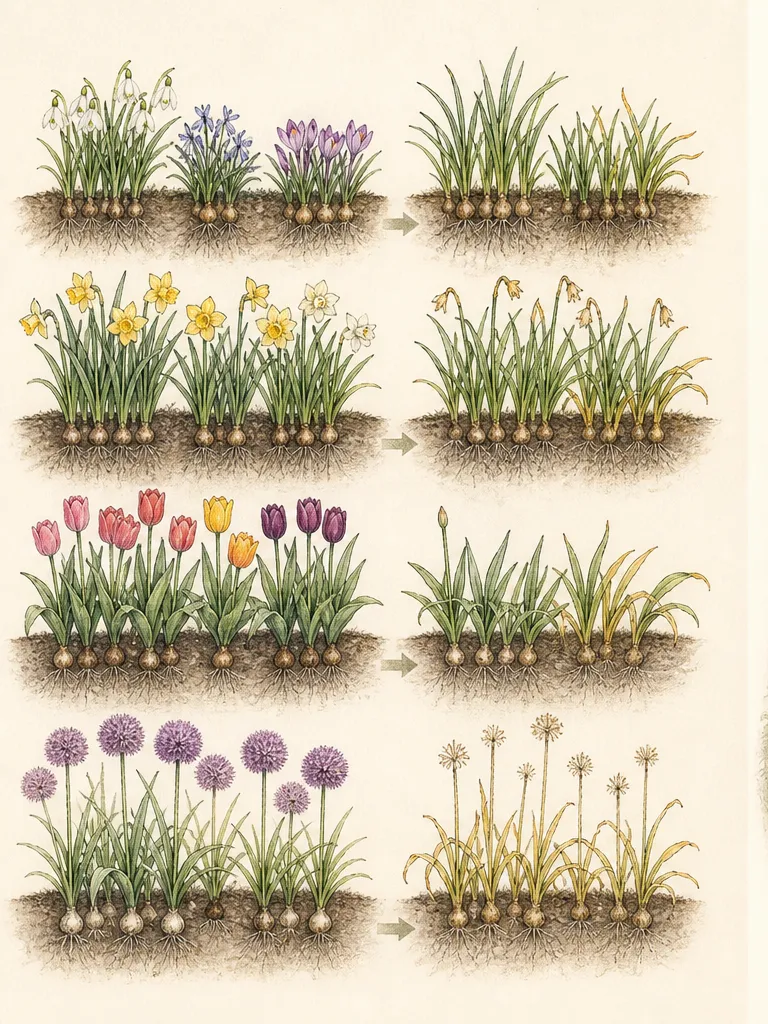
Allow green allium leaves to continue working as they naturally decline. Iowa State recommends leaving foliage until it is completely brown, while the RHS notes that declining leaves can be removed once they die back; both support placing bulbs among companions that screen this transition. Pulling or tying green leaves into bundles weakens the intended lower layer and exposes a maintenance gesture the design was meant to absorb. Let the companions conceal the change without smothering the bulb area.
Choose the fate of each flower head according to the design and the plant. Many allium heads dry into durable silhouettes, and Chicago Botanic Garden highlights their value as standing or cut forms. Iowa State also notes that some types reseed prolifically. Leave selected heads where their pale structure extends the composition, and deadhead cultivars known to seed too freely before ripening. A mixed decision—retaining the strongest heads and removing the rest—can preserve rhythm without creating an unmanaged seedling field.
Review the border from the original photograph point at bud, full flower, fading foliage, and dry seedhead. Record whether heights overlapped as intended, whether wind bent stems, and whether the companion layer hid leaves at the right time. Move or add bulbs in the next autumn only after the foliage has marked their positions and the planting map has been checked. The first year tests scale; a restrained correction will build a stronger repeated structure than a complete redesign based on one variable season.
Steps
- Level
- moderate
- Time
- 90–150 minutes for a repeated border group
- Tools
- Tape measure and graph paper, Trowel or bulb spade, Marked planting stick, Durable labels and pencil, Watering can or hose
- Materials
- Firm, named ornamental allium bulbs, Site-compatible companion perennials, Broad soil amendment only where a site assessment supports it, Temporary surface protection if animals disturb new soil
- 1Name the structural gap
Photograph the border at the end of spring, mark where vertical accents disappear, and choose whether the early-summer design needs one repeated middle height, taller punctuation, or a lower front-edge starburst. Keep the plan tied to a normal viewing route and record the surrounding foliage height at that date.
- 2Choose bulb-grown selections
Confirm growth form, documented height, head diameter, and local bloom window for every named allium. Use one main form repeatedly and add a second scale only for a distinct compositional role; keep later clump-forming hybrids outside this bulb-planting method and save the supplier descriptions with the plan.
- 3Audit the site
Verify strong spring light, free drainage after rain, shelter for tall heads, and a below-ground zone that routine digging will not disturb. Improve the broad bed or move the group when water has no route beyond an individual hole.
- 4Draw the repeated rhythm
Place first and last groups to frame the view, repeat the main allium through the middle, and map companion foliage as a connected lower layer. Leave access seams and enough head-to-head space for each cultivar's mature dimensions.
- 5Inspect and lay out bulbs
Keep labeled lots separate, retain firm bulbs with sound basal plates, and arrange every cluster on the soil before digging. Adjust centers from the viewing point, count the bulbs, and photograph the accepted surface pattern.
- 6Measure named depth and spacing
Use the supplier and closest regional authority, recording whether depth is measured to bulb base, top, or soil cover. Give large and small bulbs their own zones, set pointed sides upward, and measure from finished mineral soil rather than mulch.
- 7Backfill, settle, and label
Return continuous site soil, firm by hand, water only as conditions require, and repair settling or ponding. Label outside each cluster and save overhead and border-view photographs so dormant bulbs remain protected from later digging.
- 8Review flower, foliage, and seedhead
Let green foliage decline naturally among companions, retain selected dry heads where they extend the structure, and deadhead types that seed beyond the plan. Compare four seasonal photographs before changing group size or cultivar placement the following autumn.
Related reading
Sources
- How to Grow Alliums. Royal Horticultural Society. Source record · Accessed 2026-08-20.
- All About Ornamental Onions. Iowa State University Extension and Outreach. Source record · Accessed 2026-08-20.
- Bulbs. University of Maryland Extension. Source record · Accessed 2026-08-20.
- Alliums. Chicago Botanic Garden. Source record · Accessed 2026-08-20.