Grow · ornamental allium autumn bulb planting
Plant Ornamental Allium Bulbs in a Well-Drained Autumn Border
Choose a draining site for ornamental allium bulbs, then set the named species at the right depth and spacing before winter rain tests the bed.
Published Last updated
In this guide
- Choose the ground before you choose the depth
- Read a heavy bed and decide whether to use it
- Match the bulb and spacing to the future border
- Plant at the depth appropriate to the named allium
- Handle the first winter and spring without undoing the planting
- Troubleshoot the outcome before adding more bulbs
- Steps
Choose the ground before you choose the depth
Plant dormant ornamental allium bulbs in early to mid autumn where the soil drains freely and the border gets substantial sun. In a cool temperate garden, early October can be a useful planting window, but the calendar is only a prompt to inspect local conditions. The Royal Horticultural Society recommends early to mid autumn for bulbous alliums and a sunny, sheltered, freely draining site. If the intended bed stays saturated after rain, move the planting to a better-drained part of the garden or use a deep container with drainage holes. A carefully measured hole cannot rescue a bulb sitting inside a wet pocket.
Dormant ornamental border-allium bulbs, especially the large globed kinds, are planted for late-spring or early-summer flowers. Edible onions, garlic cloves, and clump-forming alliums have different planting needs. Some ornamental alliums are clump-forming perennials supplied as plants; their divisions and crowns have different handling. Read the botanical name and supplier instructions before applying a bulb depth. The species or cultivar also determines final height and spacing. A small allium placed at the front of a border is a different design decision from a tall giant onion that needs room and shelter.
Think about the site through winter, not only on a dry autumn afternoon. A low point where runoff gathers, a compacted path edge, a place beneath a downspout, and a narrow hole surrounded by dense clay all expose the bulb to persistent wetness. The RHS warns that cold, exposed or waterlogged conditions can rot allium bulbs, and its border guide specifically flags very wet heavy soil. Look at the bed after a sustained rain; surface puddles, a slick soil profile, or water standing in an exploratory hole are reasons to reconsider the position. One rain event cannot measure every winter condition, but it can expose an obvious unsuitable pocket.
Choose a bed whose surface can be prepared as a connected planting area. The bulb needs moisture to root, yet excess water must move through and away from the root zone. Pennsylvania Extension emphasizes drainage for fall-planted spring bulbs, and Illinois Extension notes that a prepared bed drains better than isolated holes. If drainage is marginal across a whole area, improve that area or raise the planting level across the whole planting area; a layer of loose material at the bottom of a clay-sided hole can hold water. The latter can leave water trapped around the bulb even when the material inside the hole looks gritty.
Read a heavy bed and decide whether to use it
Probe the bed to the depth at which bulbs will sit. A surface crust can hide loose soil below; conversely, a fluffy topdressing can cover a compacted layer that holds water. Push a trowel down at several points at several points across the bed. After rain, notice whether the soil crumbles when lightly handled or smears and shines when pressed. Workable clay is a legitimate garden soil, but persistent saturation around a dormant bulb is the problem. Compare the prospective location with a slightly higher edge of the same border. A modest change in level may change the winter water pattern more than a handful of grit in each planting hole.
If the entire flower bed is heavy but does not stay wet, broad soil preparation can make a useful planting zone. Loosen the bed over an area wider than the bulb group, remove perennial weeds and hard debris, and incorporate suitable organic matter according to local soil guidance. Avoid working the ground while it is so wet that the spade polishes its sides. Breaking structure into dense clods at planting time makes the task harder and the finished bed less even. The RHS recommends digging over the soil and removing weeds before planting and cautions against freshly manured soil that is too nutrient rich for these bulbs.
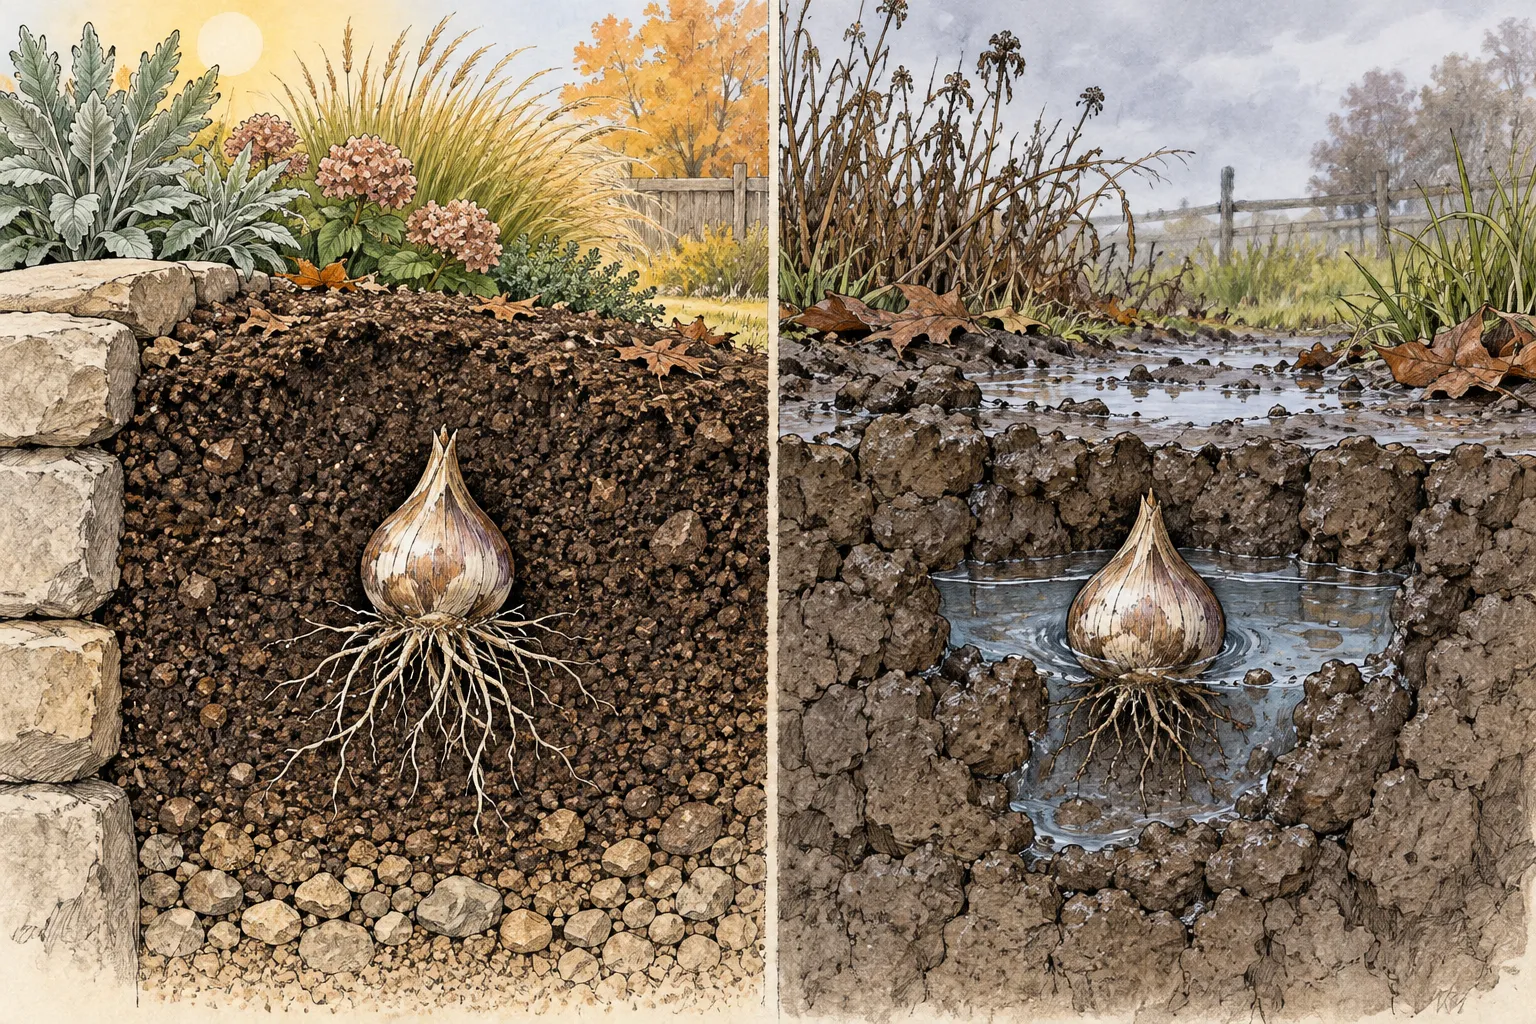
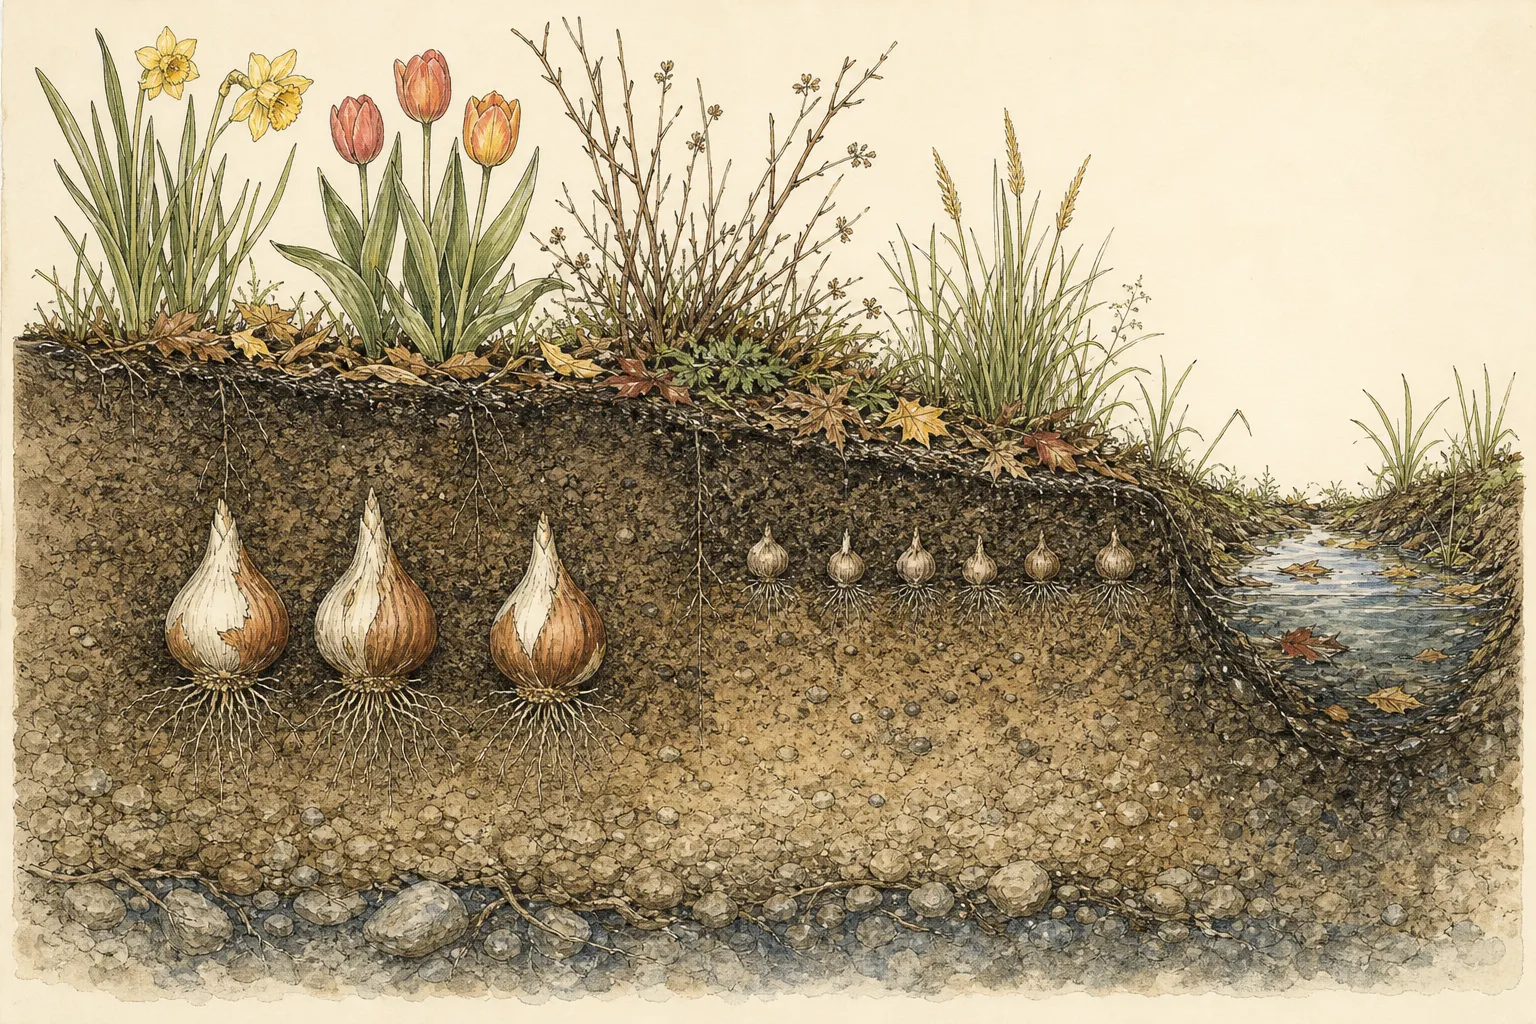
A visibly wet site calls for a stronger decision. Shift the group upslope, build a sufficiently broad raised planting area with an outlet for water, or use containers. Raising one bulb a little above the wet layer while leaving its roots in the same saturated profile is not a complete fix. The new grade must allow water to move away at its edge. Observe a proposed raised area after a subsequent rain before treating it as solved. A planting that survives one winter cannot by itself prove the design is right for every future season; document where the bulbs perform and use that evidence when expanding the group.
Choose a container when a sunny border is unavailable or drainage cannot be fixed this autumn. The RHS says most bulbous alliums can grow in deep pots and describes a well-draining potting mix. Use a substantial vessel with open drainage holes and enough depth for the chosen bulb and root growth; a shallow decorative bowl may satisfy neither. Set the container where it receives suitable light and where excess water can leave freely. Keep it out of a saucer that holds winter rain. In colder regions, the roots in a pot experience more exposure than bulbs in the ground, so follow local container-overwintering guidance for the selected species.
Match the bulb and spacing to the future border
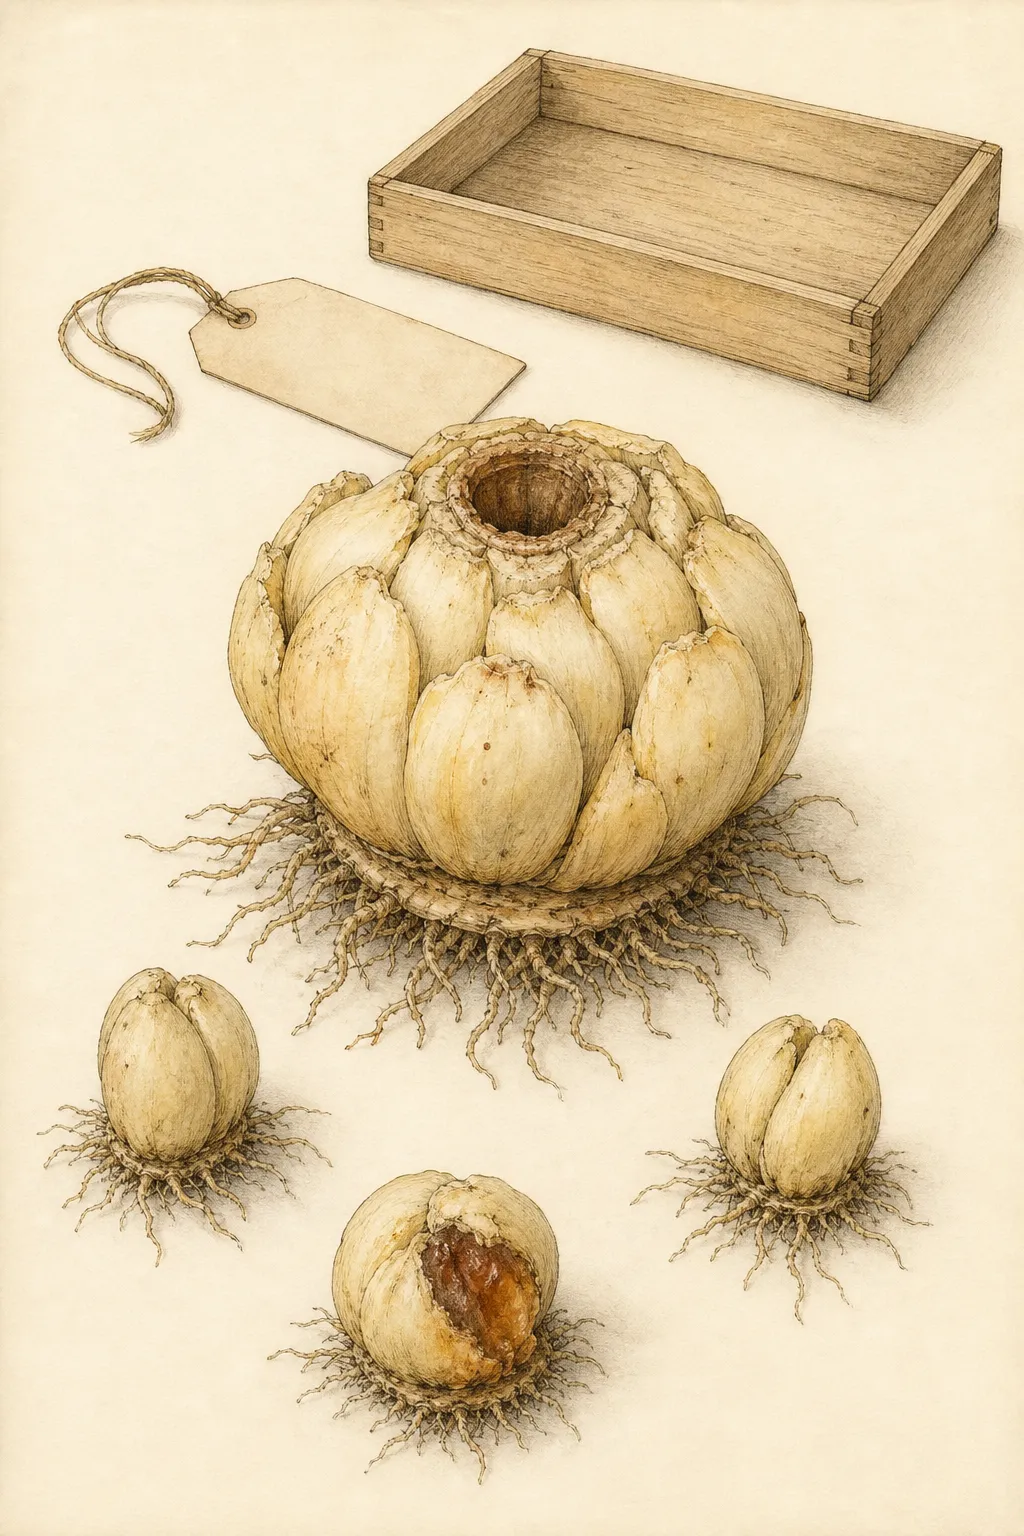
Buy bulbs while they are firm and intact. Reject soft, collapsing or badly damaged specimens because a planting method will not restore stored tissue already breaking down. Penn State Extension describes good spring-bulb stock as firm and free of cuts or gashes. A dry papery tunic on an allium is normal; it protects the bulb and is not a reason to peel it. Keep named cultivars separate as you lay out the bed. That preserves the intended height sequence and makes later gaps easier to diagnose. If a bulb is already sprouting, handle the shoot gently and follow the supplier's species-specific advice and check its specific requirements.
Put the taller alliums where their flowering stalks can be appreciated and remain clear of a path. The RHS recommends a sheltered site for border alliums because strong wind can topple flower spikes. Missouri Botanical Garden gives Allium giganteum a mature height of about three to five feet and a spread of about one and a half to two feet, recommending shelter from strong winds. That is a species example, not a universal dimension for all alliums. Space the actual bulbs from the named packet. This keeps a small front-of-border kind from being treated like a giant onion or vice versa.
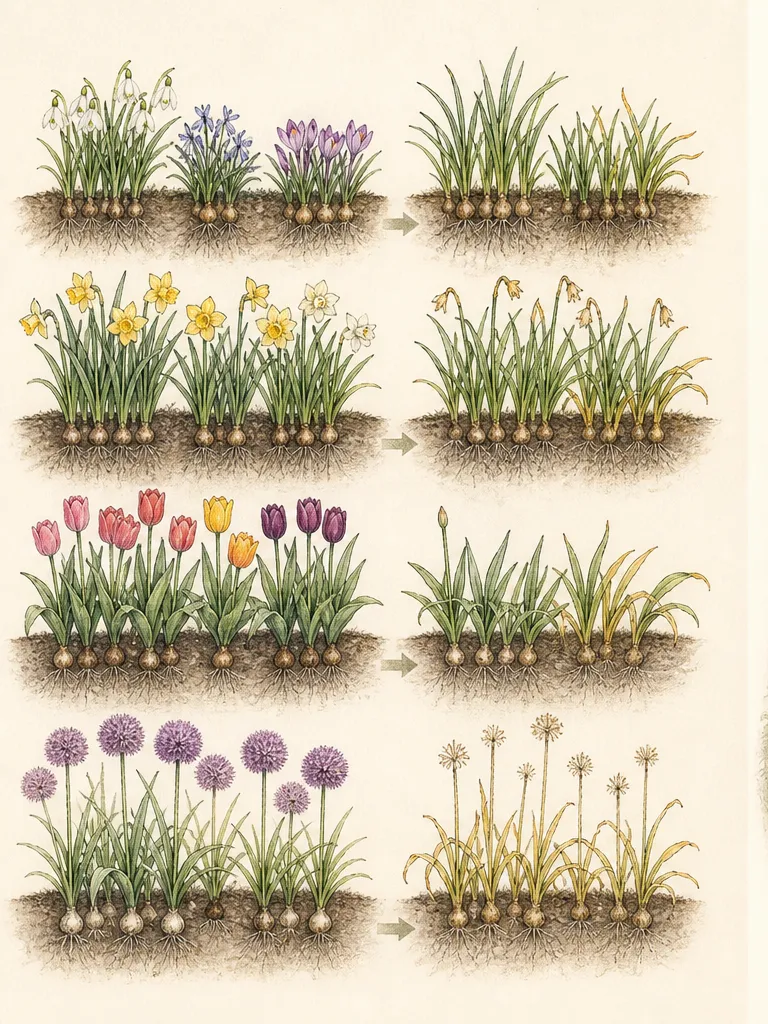
Plan for the foliage as well as the flower. Many tall ornamental alliums produce basal, strap-shaped leaves that fade around flowering time. RHS suggests placing bulbs where nearby plants can mask that foliage, and Missouri Botanical Garden reports the leaves of A. giganteum wither soon after bloom. A neighboring perennial can conceal yellowing leaves while the allium foliage finishes its season. Set the bulbs far enough from established crowns that the digging does not slice roots. Mark the positions so spring maintenance does not put a spade through the group.
The ornamental effect depends on grouping, but a group still needs growing room. RHS gives a general guide of about three to four inches between smaller alliums and at least eight inches for taller species. Missouri Botanical Garden recommends nine to twelve inches for A. giganteum bulbs. These figures describe different scales; match spacing to the named species. Lay the bulbs on the soil first, step back to judge the rhythm from the viewpoint that matters, and then measure the appropriate distances. If the bed is too narrow for the selected giant species, choose a smaller named allium instead of packing the bulbs against a wall or path.
Plant at the depth appropriate to the named allium
Use the supplier's species instructions as the first depth check. For a general border-allium rule, the RHS recommends planting at about four times the bulb's diameter. Missouri Botanical Garden gives A. giganteum a different, species-specific instruction of five to six inches deep. These are not identical ways of measuring every bulb; the guide on the actual bag is particularly useful where a named species has a known exception or where the soil and climate differ from a source's setting. Measure the planting depth consistently from the finished soil surface to the bulb's base or top according to the instruction you follow, so the measurements use the same starting point.
Set the pointed end or neck upward and the basal plate, where roots emerge, downward. Penn State gives this orientation for fall bulbs. If a bulb's shape is ambiguous, inspect the flatter basal end and any remaining root traces; handle a damaged bulb carefully when its tip is subtle. Make a planting hole wide enough to set the bulb without crushing it against hard sides. In a group, it can be easier to remove soil from a shared area at the required depth, lay out the bulbs, and return the excavated soil evenly. This also gives you a final opportunity to notice an unexpectedly wet layer.
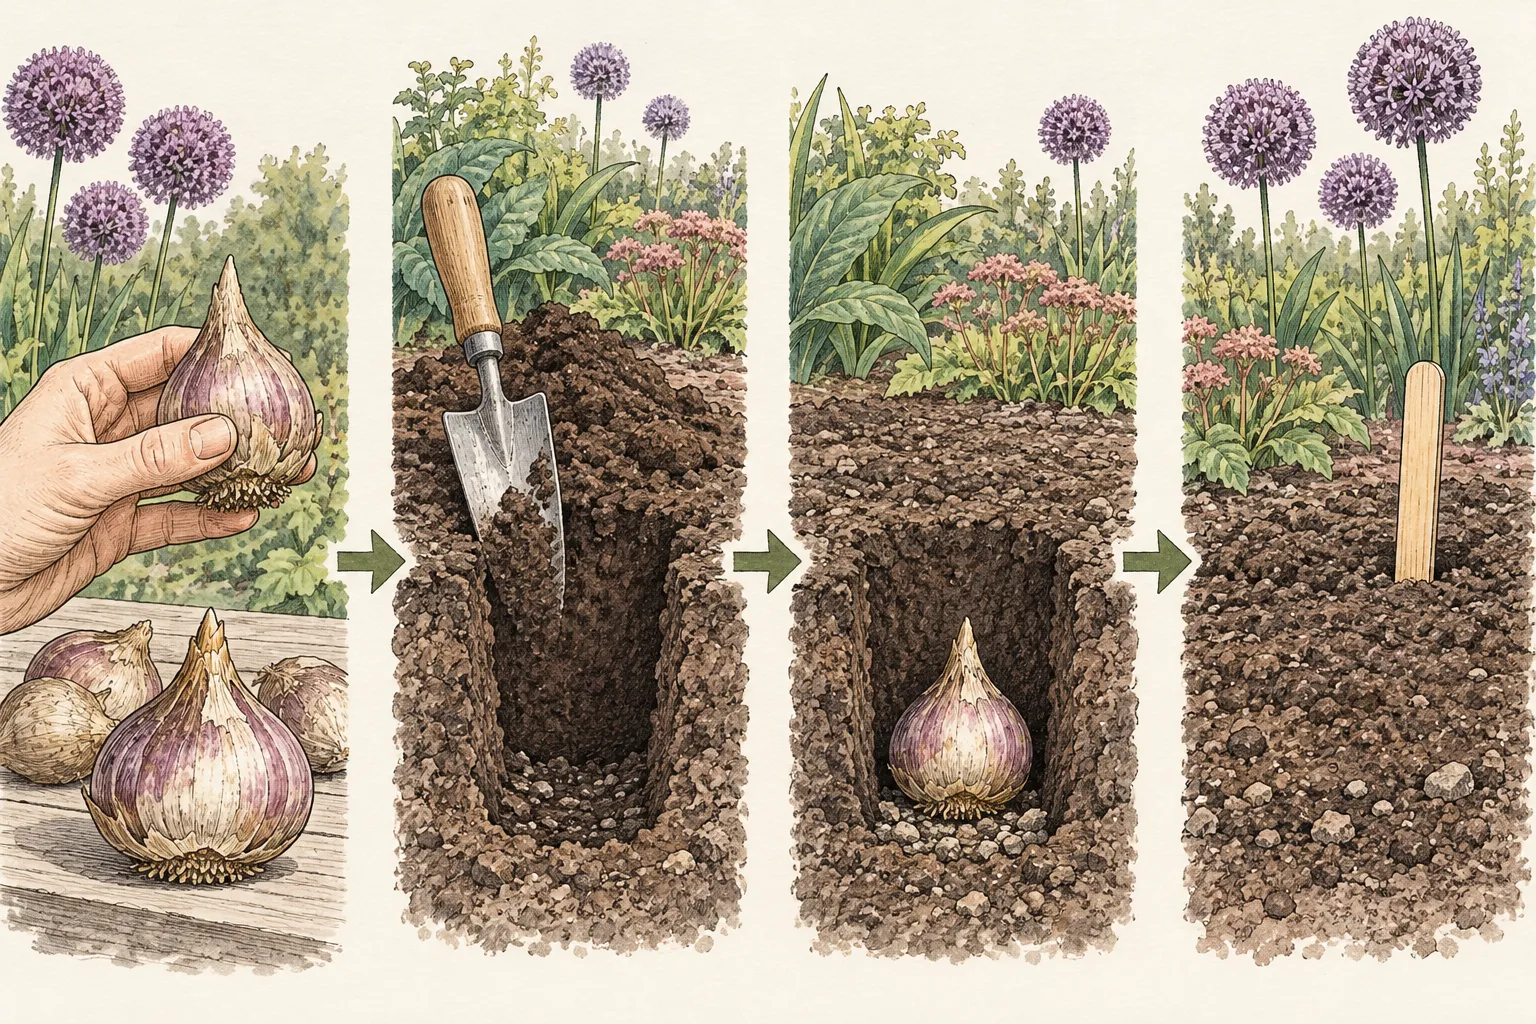
Backfill with the prepared soil and firm it gently enough to remove large air gaps while preserving an open soil surface. Water once if the soil is dry enough that bulbs would otherwise have no moisture for rooting; let the weather and soil condition guide any later watering. Dormant bulbs in autumn do not need the same routine irrigation as growing summer annuals. A soaked bed is a reason to withhold water, not a reason to follow a calendar. In a container, water to settle the mix and let it drain fully. Check that the pot's holes are open before the next storm.
A modest mulch layer can buffer soil temperature and help manage moisture, but keep the bed's drainage visible and keep wet material from mounding over bulb positions. Penn State describes a two- to three-inch mulch layer for fall-planted bulbs in its Pennsylvania context. Treat that as a regional reference, not a mandatory blanket depth for every climate or pot. The planting map and discreet markers matter more than a perfect-looking bare surface. They prevent accidental digging before the leaves reveal where the bulbs are.
Handle the first winter and spring without undoing the planting
After planting, the most useful autumn check is whether runoff actually leaves the area. Walk the border after the first sustained rain. If water has pooled over the newly planted group, correct the drainage or move the bulbs while the soil is still workable. Waiting for a spring failure would leave the underlying site question unanswered. A temporary puddle on the surface that drains quickly is different from a root zone that remains saturated for days; judge the whole soil profile and the pattern across several storms. Photograph a wet spot so next year's decision is based on observed conditions.
Leave a planted bulb undisturbed while it roots. The emergence date differs among species and climates, and winter shoots or delayed spring leaves can occur and are insufficient evidence of planting depth. A marker lets you avoid disturbing the bulb while you monitor the bed. If mulch shifts into a thick wet blanket after storms, level it. In containers, check that wind has not knocked the vessel sideways and that the drainage exit remains clear. A pot left in standing water defeats the reason for choosing a controlled mix.
When leaves arrive in spring, keep the planting free of competing weeds and observe whether the site is drying between rains. A no-show does not automatically diagnose rot; bulbs can be lost to damage, misplaced, planted at the wrong depth, or simply emerge later than expected. Compare the group with another planting of the same named allium if available. If several bulbs fail only in the wettest corner, that pattern is stronger evidence for a site problem than a single missing flower. Record the location before replacing bulbs in autumn, and inspect any lifted remnants for soft tissue before deciding to reuse the site.
Let green leaves remain until they die back naturally. RHS notes that allium leaves begin to decline around flowering time and can be removed as they fade, while Missouri Botanical Garden describes this specifically for A. giganteum. Cutting a green leaf solely to hide it from view removes tissue still connected to the bulb. Instead, use the companion planting planned earlier to make the fading foliage less conspicuous. The flower head can remain as structure if it is sound and the species is not spreading beyond your design. Decisions about seed heads belong to the actual plant's behavior in that garden, not to an automatic rule for the whole genus.
Troubleshoot the outcome before adding more bulbs
If a flower stalk leans or snaps, review wind exposure and support before blaming planting depth. Tall alliums can be vulnerable to strong wind, which is why the RHS and Missouri Botanical Garden both call for a sheltered placement. Staking a single stalk may protect this year's bloom, but the next autumn decision is to move the group, choose a shorter allium, or change nearby shelter. A crowded companion that pushes against the stalk can also change its direction. Photograph the full border, not just the flower head, so you can see how air and neighboring plants affect it.
If leaves are abundant but flowering is weak, check the named species, light, crowding, and bulb condition before adding fertilizer. RHS says border alliums flower less freely in shade and recommends ample sun. Very rich freshly manured soil is not its preferred preparation. A young or recently divided bulb may also behave differently from a mature one, and poor flower performance alone does not prove a nutrient deficiency. Compare the supplier's expected bloom season with what appeared. If the plant was actually a clump-forming summer allium, this autumn bulb guide may have been the wrong care model from the beginning.
If bulbs become soft or disappear in the wettest part of the bed, treat drainage as the first design question. Both RHS and Missouri Botanical Garden associate wet conditions with bulb rot risk. Remove spoiled material and evaluate the whole bed profile before replacing it. Substituting a larger bulb or planting extra deep does not turn a wet pocket into a suitable allium bed. Mark the failed zone and use it for plants whose documented water tolerance fits, while placing replacement alliums in a drier site or a well-drained pot. This response addresses the cause of repeated loss instead of purchasing the same bulbs for the same hole every year.
A successful allium planting is a sequence of site decisions that remains useful after bloom: the bulbs occupied ground that drains, the named species had enough space and shelter, the foliage could complete its season, and the record shows which parts of the border worked. Keep the packet or a label with the name and autumn location. When the next planting season arrives, you can enlarge a strong group with confidence or move a weak one for a specific reason. That is a more reliable autumn decision than treating every ornamental allium as a generic spring bulb.
Steps
- Level
- easy
- Time
- About 45 to 90 minutes for a small prepared bulb group, plus drainage checks after rain
- Tools
- Trowel or spade, Measuring rule, Plant labels, Notebook or garden map
- Materials
- Firm named ornamental allium bulbs, Suitable soil amendment if the whole bed needs preparation, Free-draining potting mix and a deep pot if the ground stays wet
- 1Identify the named bulb
Check that the purchase is a dormant ornamental border-allium bulb, as opposed to a clump-forming potted perennial or edible onion. Read the supplier depth and spacing, and reject bulbs that feel soft or badly damaged. Keep labels with each group so similarly colored bulbs do not get mixed.
- 2Test the intended border
Look at the location after sustained rain and open a small exploratory hole. Choose sun and a site where water drains through the profile. If the low spot remains wet, shift upslope, prepare a broad raised area with an outlet, or use a deep pot with open drainage holes.
- 3Prepare the whole group area
Remove weeds and loosen a shared bed while the soil is workable. Use soil that is not freshly manured and work clay only while it is friable. Lay out bulbs to reflect their mature height and packet spacing before any permanent hole is made.
- 4Set depth and orientation
Use the named supplier direction. The RHS general guide is roughly four bulb diameters; Missouri Botanical Garden specifies five to six inches for A. giganteum. Place each bulb with basal plate down and point upward, then backfill evenly while keeping the soil structure open.
- 5Mark and settle the planting
Mark the group on a bed map. Water only enough to settle dry soil, allowing containers to drain completely. Use mulch according to the local climate and soil, keeping it from becoming a wet mound over the planting. Check runoff after the first sustained rain.
- 6Review emergence and foliage
In spring, note which positions emerge and flower. Keep green leaves until they fade naturally, and let neighboring perennials screen them. Record wind damage, shade, or repeatedly wet soil before expanding or replacing the group next autumn. Compare the same named bulb in two parts of the garden before deciding that a missing stem proves rot. If a group fails only in the low wet section, relocate the next planting and leave the unsuitable ground to plants with documented moisture tolerance. Keep the original bulb label so the comparison is meaningful.
Related reading
Sources
- How to grow alliums. Royal Horticultural Society. Source record · Accessed 2026-09-23.
- Border alliums. Royal Horticultural Society. Source record · Accessed 2026-09-23.
- Plant Bulbs in the Fall for a Spring Celebration. Penn State Extension. Source record · Accessed 2026-09-23.
- Allium giganteum. Missouri Botanical Garden. Source record · Accessed 2026-09-23.
- Planting Bulbs. University of Illinois Extension. Source record · Accessed 2026-09-23.