Grow · ornamental lily bulb planting
Plant Lily Bulbs for Drainage, Depth, and a Natural Group
Match lily group to soil reaction, keep bulbs from drying, plant at documented depth in draining soil, and arrange loose groups among compatible perennials.
Published Last updated
In this guide
Choose the lily group for the soil
Confirm that the bulbs are true lilies in the genus Lilium, then identify the horticultural group and cultivar. Asiatic, Oriental, martagon, trumpet, American, longiflorum, and intergroup hybrids differ in height, fragrance, heat response, light, and soil reaction. A common name containing lily may describe an unrelated plant, so the botanical label controls both culture and safety.
Match soil chemistry to the group. RHS guidance places many Asiatic and trumpet lilies in neutral to alkaline conditions, while Oriental hybrids favor acidic, humus-rich soil; martagons tolerate more shade and dislike hot humid sites. Use a current soil test before changing pH. One amendment recipe cannot serve every lily merely because their bulbs look similar.
Gate the project for cat safety before buying or opening bulbs. FDA and ASPCA identify true Lilium and Hemerocallis daylilies as capable of causing severe, potentially fatal kidney injury in cats from very small exposures. Leaves, stems, flowers, pollen, and even vase water are hazardous. A household or shared outdoor space with cat access needs a non-lily choice, not a higher shelf or hopeful supervision.
Keep horticultural group names connected to real cultivar behavior. Asiatic hybrids are often shorter and unscented; Oriental and Orienpet lilies can be tall and strongly fragrant; martagons carry many smaller pendent flowers and prefer cooler conditions. These are selection tendencies, not guarantees. Read the named cultivar's mature height, bloom time, hardiness, and soil note before using a group summary to decide location or support.
Separate true lilies from other plants before applying either culture or emergency advice. Calla lily, peace lily, lily-of-the-valley, Peruvian lily, and gloriosa lily belong to different genera and have different underground organs and toxic effects. FDA and ASPCA specifically include Lilium and Hemerocallis in the acute cat-kidney warning. Photograph the plant label at purchase so a veterinarian can identify an exposure even after flowers or packaging are gone.
Inspect fresh bulbs promptly
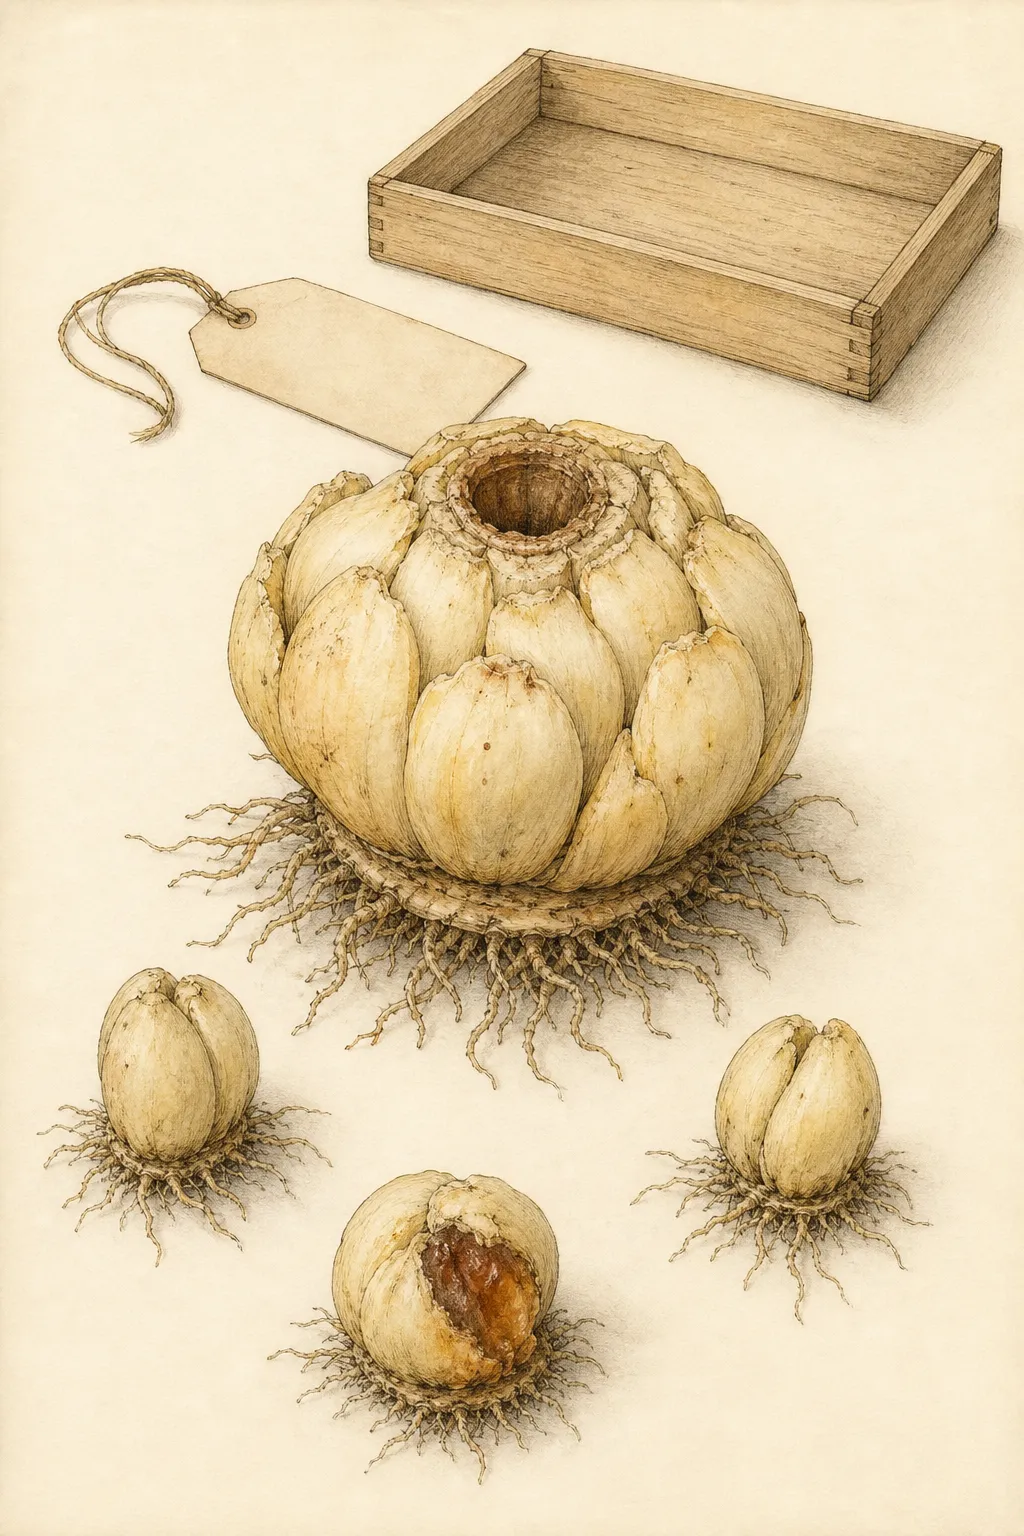
Open lily shipments promptly because scaled bulbs lack the dry protective tunic of a daffodil or tulip and can desiccate in storage. Keep firm, plump bulbs with intact fleshy scales, a sound basal plate, and healthy roots. Plant them promptly within the appropriate seasonal window so the scales stay plump.
Reject bulbs with spreading soft rot, foul odor, a collapsing basal plate, or extensive mold entering the scales. Surface bruising can be assessed, but a basal plate that no longer supports roots cannot anchor the plant. Keep questionable material away from sound bulbs and contact the supplier before planting evidence disappears in the bed.
Protect bulbs from sun and wind while the group is laid out. Use cool breathable packing for a short delay and keep roots slightly moist, not wet. Do not soak scaled bulbs overnight or seal them in a warm plastic bag. The objective is to preserve living scales and roots until they enter draining soil with air around them.
Inspect roots without stripping sound scales. Fresh roots may be long and brittle; support their full length in the planting hole. Remove only dead or damaged root ends. A few loose outer scales can be separated for propagation under a different protocol, but the planting task should preserve the bulb's stored reserves and the basal plate that organizes new growth.
Test drainage across the group
Test drainage across the entire proposed group after rain. Lily bulbs remain in place through winter, and wet soil favors bulb rot. North Carolina Extension specifies well-drained fertile soil and warns that excess moisture causes rot. If water remains in the rooting depth, improve the broad bed, use a raised position, or choose a draining container; isolated amended holes remain unsuitable.
Probe below the attractive surface layer. A gravel mulch can conceal compacted clay, and one spade-width pocket of loose compost can collect water at its edge. Loosen a continuous area for the whole group and preserve a route for surplus water. Gravel in the bottom of a closed hole does not create drainage; it shortens the aerated soil above the wet layer.
Match light to group and climate. Many garden lilies flower best with sun on stems and a cool shaded root zone, while martagons and some American lilies tolerate dappled conditions. Dense shade weakens stems and bloom; harsh reflected heat can stress groups adapted to cooler soil. Observe summer canopy and wall exposure, not only bare spring light.
Use mulch and companions to cool soil without burying stems or creating a wet mat. A shallow-rooted perennial can shade the root zone if its moisture demand is compatible and it leaves room for lily shoots. Keep aggressive groundcovers and irrigation-heavy plants away from bulbs that require airy winter drainage. Root cooling and saturation are different conditions.
Resolve pH across the group, not one bulb at a time. If a bed is strongly acidic and the chosen trumpets prefer a more neutral reaction, select an Oriental group better suited to the soil or adjust the broad bed from a soil-test recommendation. Filling individual holes with lime or acidic compost creates sharp root-zone differences and does not provide a stable long-term condition for offsets.
Arrange groups before opening holes
Arrange the bulbs before opening individual holes. Loose groups of three or more can read naturally, and group size remains a design choice, not a biological requirement. Keep enough spacing for the cultivar's mature stems, leaves, and offsets. A dense display planted for one season will need earlier division than a colony intended to remain for years.
Place tall Oriental, trumpet, or Orienpet lilies where stems can be supported before buds become heavy. Keep them clear of narrow paths and wind funnels. Short Asiatic hybrids can sit nearer the front. Check fragrance near doors and seating as well as height; an intense scented cultivar may be better where air circulation disperses it.
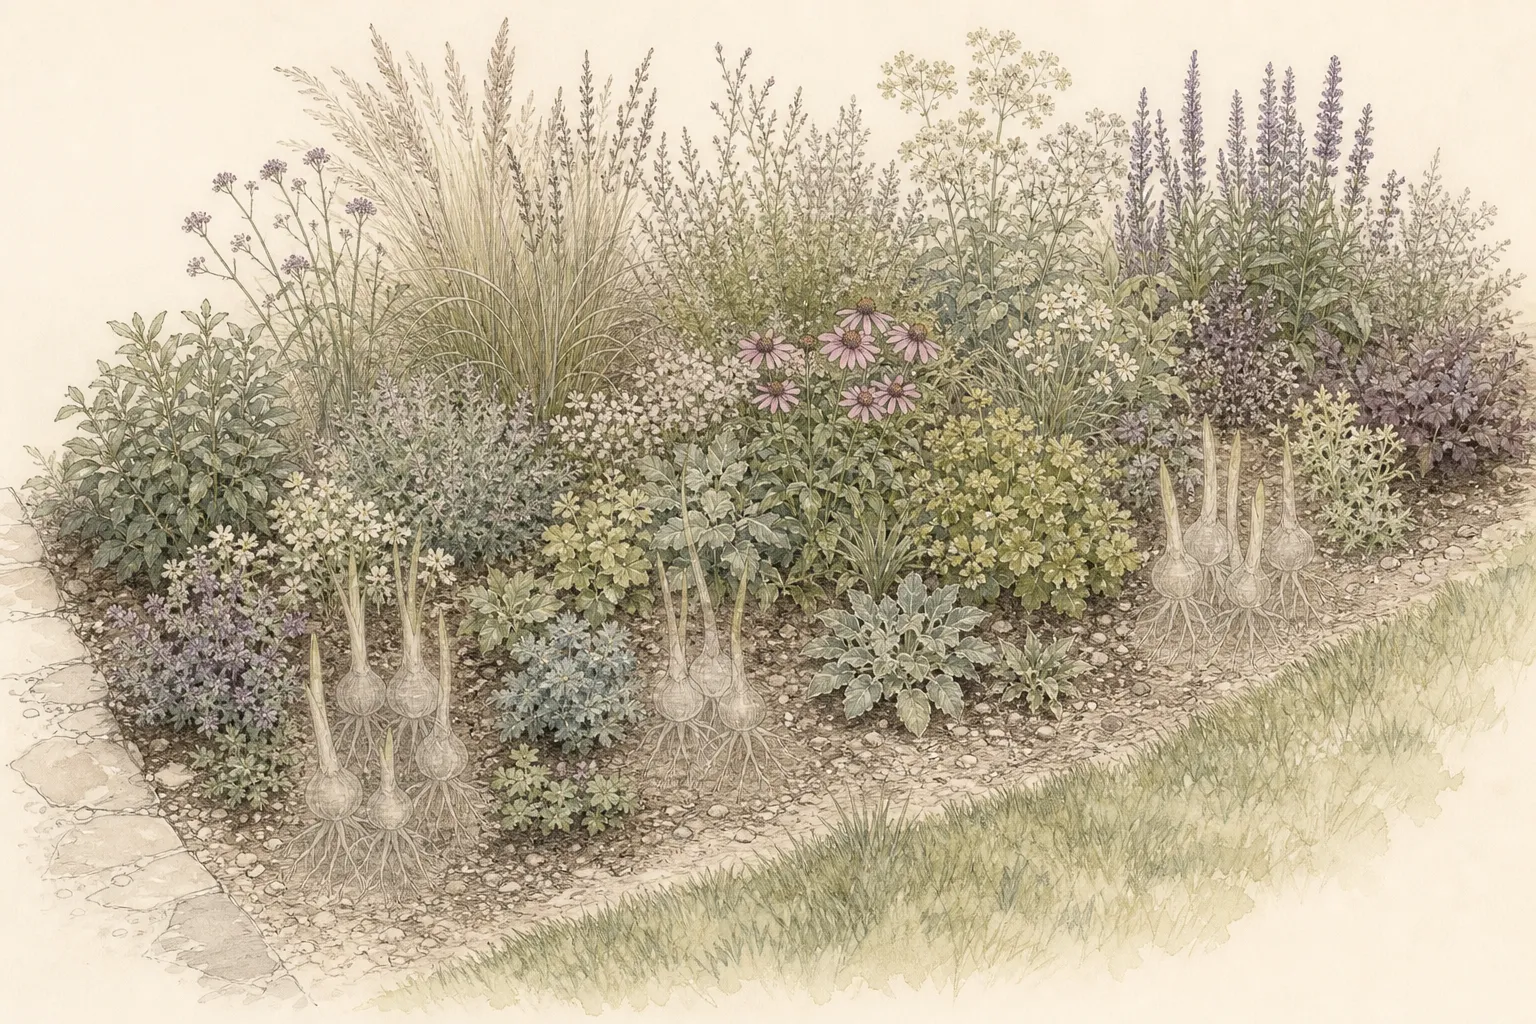
Mark the future support and maintenance route. Install a stake position beside, not through, each tall bulb location, and leave access for deadheading and beetle or disease inspection. Do not hide bulbs directly under a dense perennial crown. The lily's own leaves need light after bloom, and future offsets need room to emerge.
Use cultivar width and stem count for spacing; flower diameter alone is inadequate. A bulb may produce several stems as it establishes, and offsets can enlarge the clump. Leave enough air for foliage to dry and enough soil volume that neighboring perennials cannot immediately occupy the bulb's roots. A dense cutting row needs a planned lifting and division cycle.
Set orientation and depth deliberately
Place the basal plate and roots downward, the pointed growing tip upward, and roots spread without tight bends. Set a firm base beneath the bulb so it cannot sink after watering. If the bulb is irregular or already sprouting, use the basal plate and root origin, protecting the shoot from forced straightening.
Follow the named cultivar or group instruction first because retained sources use different measurements. The dedicated RHS lily guide uses about one bulb-height of depth for basal-rooting or unknown lilies and roughly two-and-a-half bulb heights for stem-rooting lilies; North Carolina Extension lists an 8-inch regional depth. The general bulb guide's three-times-height rule yields to these direct lily instructions.
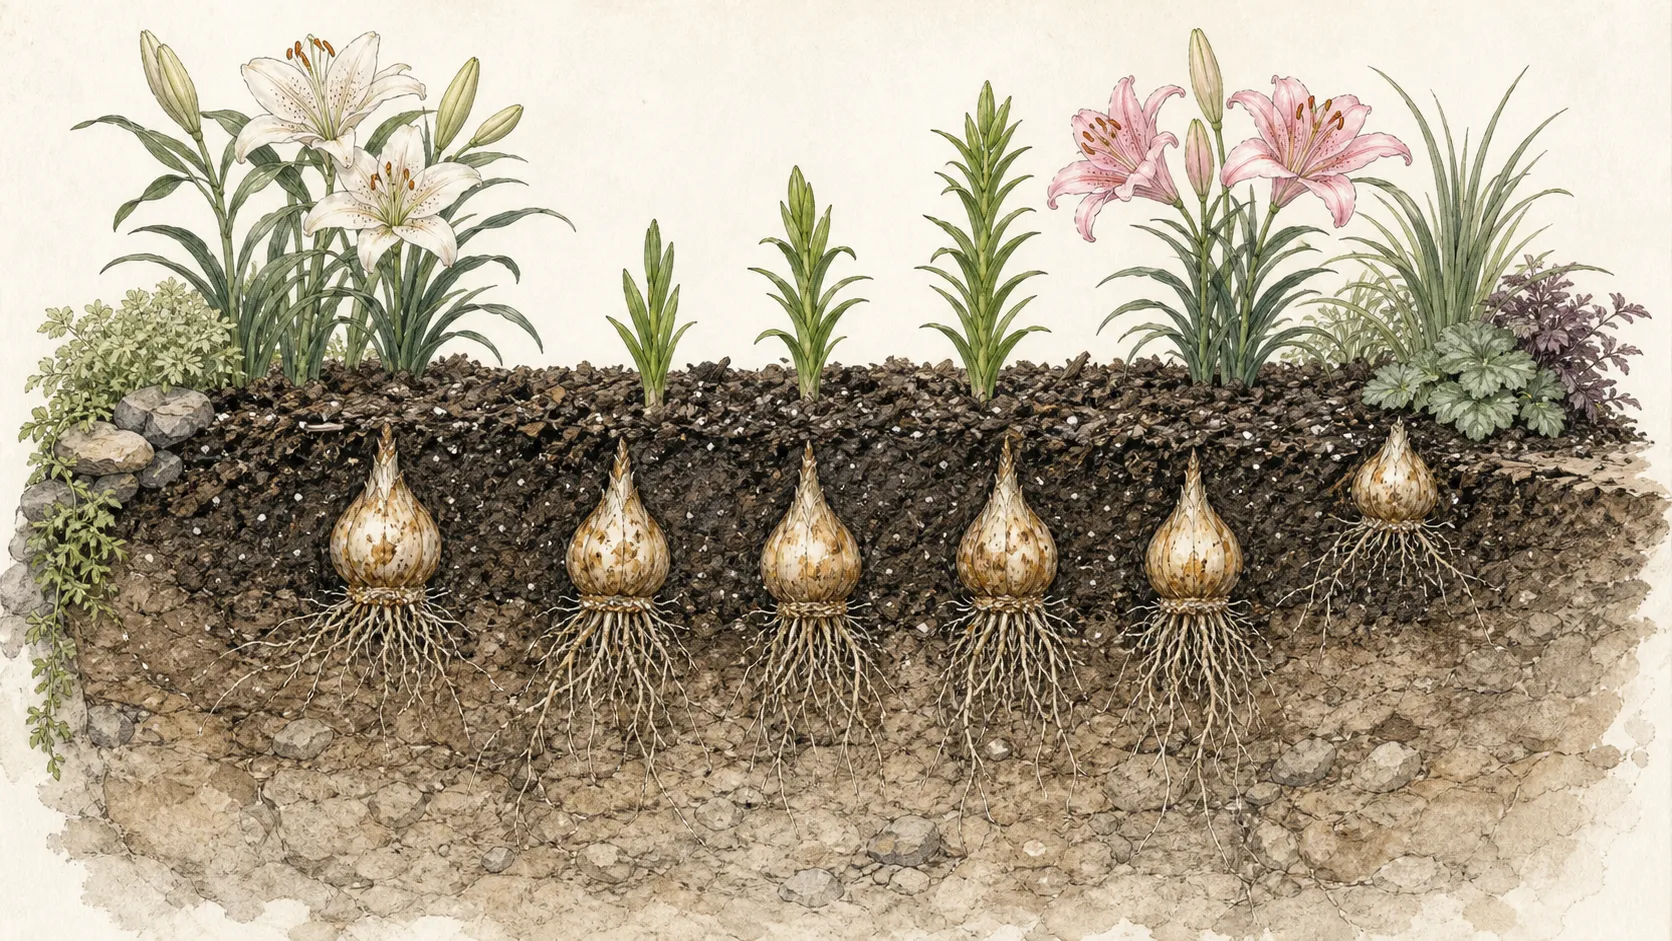
Measure from the finished soil surface to the relevant point specified by the source—often the bulb top or the amount of cover—not from an unverified hole bottom. Bulb size varies, so a single fixed hole depth can place small and large bulbs differently. Write the chosen convention on the bed map and apply it consistently within one cultivar group.
Keep documented exceptions outside a generic deep-planting rule. Some species and special lily groups are planted shallower than common Asiatic, Oriental, or trumpet hybrids. If the label names such a lily, use its direct guidance. An unidentified hybrid with conflicting instructions should be clarified with the supplier before planting, not averaged between unrelated numbers.
Account for lilies that form stem roots above the bulb. Deeper planting of common hybrids can provide room for those roots and stabilize tall stems, which helps explain why lily guidance may use substantial soil cover. The basal plate still needs drainage and the crown cannot be placed below an impermeable layer. Depth supports a known growth habit; it cannot rescue a site that stays saturated in winter.
Mark and settle the planting
Backfill with compatible crumbly site soil, working it around roots and between scales without compacting the bulb. Keep stones and concentrated fertilizer away from the basal plate. Restore the bed surface so rainfall drains across the group. A depression over each bulb collects winter water, while a hard mound can shed needed establishment moisture.
Water after planting when soil is dry enough to need settling, then allow full drainage. Autumn rainfall may provide all later moisture in some climates; other regions require establishment water. Let actual root-zone moisture set the watering interval. Persistent wetness calls for drainage correction, not repeated fungicide use or more mulch.
Label the exact cultivar, group, depth convention, planting date, and bulb positions. Stakes and labels should not become cat-accessible pollen supports near future flowers or trip hazards in a path. A map protects dormant bulbs from later digging and helps distinguish poor return caused by one group, one depth, or one wet section of the bed.
Keep cut-flower plans inside the cat-safety gate. Pollen can fall from anthers onto fur, tables, floors, and clothing, and vase water remains hazardous. Removing anthers for stain control does not make the flower safe because all Lilium parts are implicated. In a cat household, leave the flowers outside inaccessible to cats or choose a different plant for both garden and vase.
Plan the first season and aftercare
Apply a light mulch after planting while keeping the future stem emergence points clear. In spring, watch for shoots before working the bed. Slugs, lily beetles where present, and mechanical damage can affect new growth; identify the cause before treatment. Use regional integrated-pest guidance and follow every product label.
Stake tall stems early with a soft tie below flower clusters, leaving room for thickening and wind movement. After bloom, remove spent flowers if seed is not wanted, but retain all green leaves and stems. They continue rebuilding the bulb. Cut them only after they yellow and begin to die naturally.
Watch for yellow mosaic, distorted growth, botrytis spotting, and basal decline. North Carolina Extension notes that aphids can vector lily mosaic virus and that bulb rot follows wet, poorly drained soil. Isolate suspicious plants, obtain a diagnosis, and remove confirmed virus-infected stock under local guidance. Keep diseased material and tools away from healthy lilies.
Review the colony after the first winter and again after flowering. Failed emergence in one low section points toward drainage or rot; uniformly weak stems may reflect shade, depth, or depleted bulbs; healthy leaves without flowers may follow late planting or early foliage removal. Use the map to compare like cultivars. Dig only when the evidence identifies a depth, crowding, or disease problem worth disturbing the bulbs.
Keep the cat-exclusion plan active through cleanup. Collect fallen anthers, petals, leaves, and cut stems promptly, bag them where cats cannot investigate, and wash pollen from tools and hard surfaces. Check supports after rain because a fallen flower stalk spreads pollen beyond the bed boundary. If a neighbor's cat regularly enters the site, replace the lilies with a safer ornamental before the next flowering cycle exposes the animal again.
Steps
- Level
- moderate
- Time
- 45–90 minutes per group
- Tools
- trowel or bulb spade, measuring stick, labels
- Materials
- healthy named lily bulbs, compatible soil amendment only if a soil test supports it
- 1Identify and site
Confirm true Lilium, horticultural group, cultivar, hardiness, light, soil reaction, mature height, and cat exposure before purchasing. Choose a non-lily where cats can reach any plant part, fallen pollen, cut flowers, or vase water.
- 2Inspect bulbs
Open bulbs promptly and retain firm scales, sound basal plates, and healthy roots. Keep them cool, shaded, breathable, and only slightly moist during a short delay; reject spreading rot or a failed basal plate before it enters the bed.
- 3Lay out groups
Test drainage across the whole group, check summer light and soil pH, and prepare a broad compatible root zone or raised bed. Keep isolated amended sumps, saturated mulch, and incompatible high-water companions out of the lily planting.
- 4Prepare the full root zone
Lay out loose groups at cultivar spacing, reserving support and access for tall stems. Put basal plates and roots down, tips up, and install future stake positions beside bulbs without piercing them.
- 5Plant at documented depth
Use the named planting direction and record whether depth means soil cover or a multiple of bulb height. Keep the dedicated RHS basal-rooting and stem-rooting depths, NC's 8-inch regional profile, and any cultivar exception within their stated scopes.
- 6Water and label
Backfill gently with compatible soil, restore a draining surface, water dry soil once to settle it, and label cultivar, group, depth convention, and location. Recheck after rain for sinking, ponding, or exposed scales.
- 7Preserve foliage
Mulch lightly, support tall stems early, retain green post-bloom foliage until natural yellowing, and monitor for rot, mosaic, botrytis, and vectoring aphids. Diagnose problems before treatment and keep cat safety active through flowers, pollen, cutting, and cleanup.
Related reading
Sources
- Lilies for pots and borders. Royal Horticultural Society. Source record · Accessed 2026-08-30.
- How to grow lilies. Royal Horticultural Society. Source record · Accessed 2026-08-30.
- How to grow bulbs. Royal Horticultural Society. Source record · Accessed 2026-08-30.
- Lily - Lilium. North Carolina Extension Gardener Plant Toolbox. Source record · Accessed 2026-08-30.
- Lovely Lilies and Curious Cats: A Dangerous Combination. U.S. Food and Drug Administration. Source record · Accessed 2026-08-30.
- Which Lilies Are Toxic to Pets?. ASPCA Animal Poison Control. Source record · Accessed 2026-08-30.