Grow · autumn lily clump division
Divide Crowded Lily Bulbs After Autumn Foliage Dies Back
Lift a crowded true-lily clump after dieback, separate healthy bulbs from small offsets, and replant at a measured depth while the soil remains workable.
Published Last updated
In this guide
- Wait for dieback and a usable planting window
- Confirm crowding before dividing the whole group
- Prepare the destination and check cat access
- Lift beneath the bulbs and separate complete units
- Sort flowering-size bulbs, small offsets and suspect material
- Measure soil cover and give the bulbs room
- Replant promptly and manage an unavoidable delay
- Check the replanted group through winter and spring
- Steps
Wait for dieback and a usable planting window
Divide a crowded clump of true lilies after its leaves and stems have died back, while the soil still allows careful lifting and immediate replanting. Ease apart the individual bulbs, keep their living scales and roots intact, and give the smaller bulbs their own growing space. A flourishing group with room to expand can stay where it is. This is a selective renovation for established, locally hardy Asiatic and Oriental garden hybrids, whose congested stems or reduced flowering justify disturbance.
For a late-October job, check the plants and the ground before setting out the fork. Nebraska Extension includes mid-September through October in its fall planting window; Iowa State favors early fall, while Maryland describes late fall for lily planting. These regional calendars overlap imperfectly. They support autumn work under suitable local conditions, not a universal October deadline. A bed already frozen or saturated closes the elective digging window, even if another gardener is still planting nearby.
Leave substantially green foliage attached until it finishes naturally. It continues supporting the bulb after flowering, and a fading flower head alone says little about readiness to lift. Mark the stems now if surrounding plants will soon conceal them. When wet soil smears on the fork, postpone until it crumbles more readily. If winter is arriving before the clump is ready, retain the established roots and plan a locally appropriate spring move, protecting the young shoots then.
Confirm crowding before dividing the whole group
Compare this summer's stems with an earlier photograph. Several increasingly close stems, more small shoots around the original position, and declining flower production can make division worthwhile. The RHS Lily Group advises lifting very congested colonies when performance drops, and otherwise values established groups. A calendar reminder to assess lilies every few years is useful; an automatic order to split every bulb on that anniversary can undo a good display.
A sparse group with weak flowers needs a different investigation. Did a shrub canopy grow over it? Were flower buds eaten, or green stems cut for a vase close to the ground? Did yellowing begin unusually early in a wet patch? Record these observations before removing the remaining stems. Dividing a few already isolated bulbs cannot create more summer light or explain missing buds. It can also make a sick colony harder to trace once its pieces are scattered around the garden.
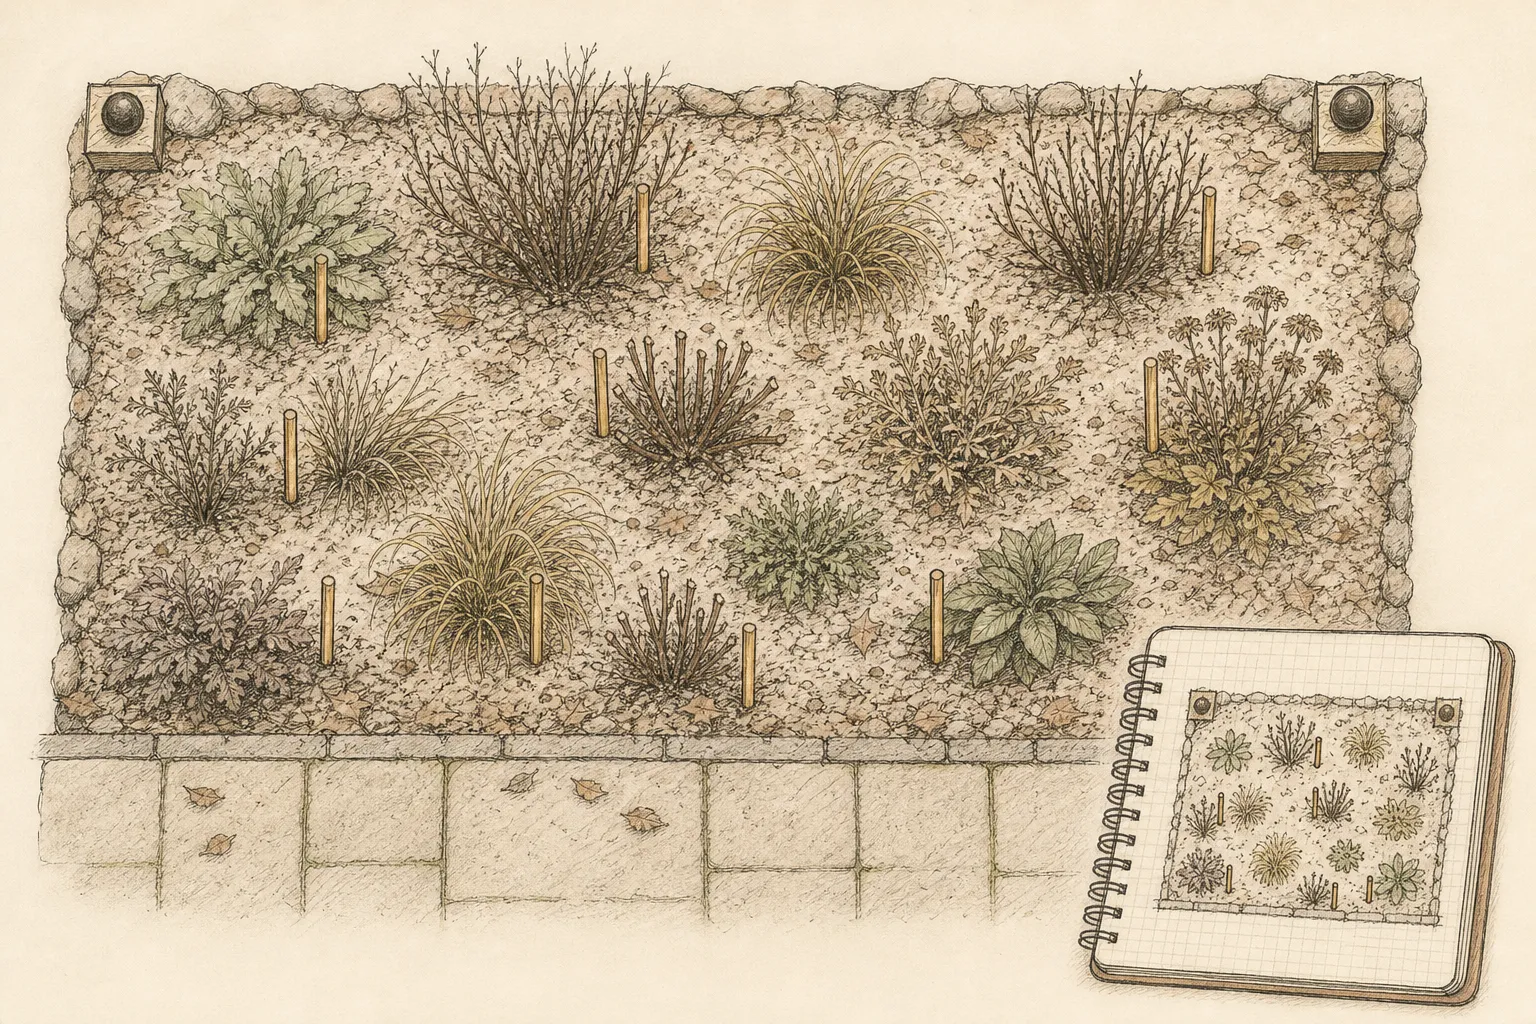
Use one clump as the unit of work. Put its name and original location on both receiving trays before lifting. Where several cultivars intermingle, add a simple sketch linking old stem positions to known flower colors. An unidentified bulb's cream or pinkish scales are insufficient evidence of its flower color. If the identity is uncertain, keep that material together under a location label and confirm it at bloom; this prevents an accidental mixed batch being distributed under a cultivar name.
Prepare the destination and check cat access
Choose a bed with drainage through the bulb's rooting depth and summer light appropriate to the group. Asiatic and Oriental hybrids generally need a sunny position; inspect photographs taken while trees were in leaf, because October's open canopy can be misleading. Oriental lilies have a stronger preference for acidic soil. Keep a known successful cultivar in comparable soil unless there is a clear reason to change it.
Open the receiving area before lifting. If the old group stood beside vigorous perennial roots, allow clear planting spaces beyond those crowns. A wet hollow needs a different position or a broadly improved, raised bed. The RHS Lily Group specifically warns that a hole containing grit in otherwise unimproved clay can collect water. Treat the entire rooting area as the drainage problem. Finding a puddle at the bottom of the new hole is a reason to leave the old clump in place that day.
Settle the pet decision before multiplying the planting. FDA and ASPCA warn that Lilium can cause severe kidney injury in cats; all plant parts are implicated, with very small exposures potentially serious. Exposed bulbs and cleanup material therefore need secure handling too. Where cats can reach the planting, choose a different ornamental instead of expanding the lily colony. If exposure is suspected, contact a veterinarian immediately and provide the plant name or a photograph. Waiting for symptoms can lose valuable treatment time.
Lift beneath the bulbs and separate complete units
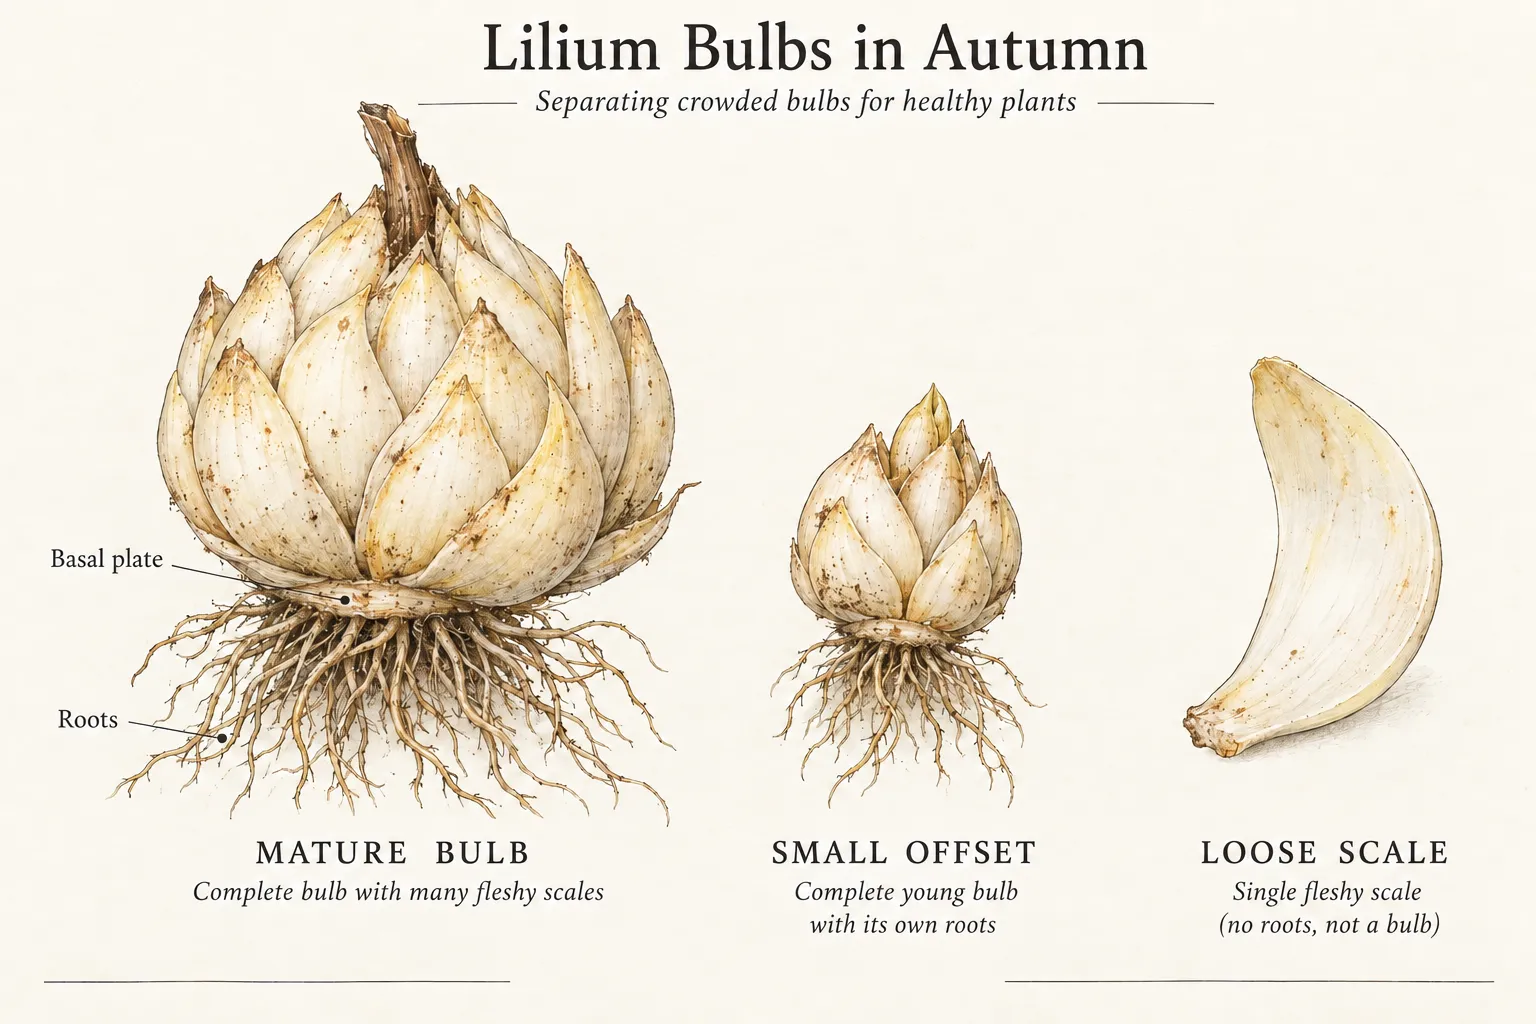
A lily bulb consists of overlapping fleshy scales attached to a basal plate. It lacks the enclosing papery tunic familiar on a daffodil. Roots emerge below, and an old stem may remain above; some lilies also carry small bulblets on the underground stem. This anatomy calls for a gentler approach than chopping through a daylily crown. Keep calla rhizomes and Hemerocallis roots outside this procedure: their common names conceal different structures and different seasonal treatment.
Start the fork beyond the outermost stems and work inward only as the clump's extent becomes visible. Loosen soil around the group, then work below the bulbs and lift with support beneath the root mass. Pulling the stalk is a poor way to judge where its bulb ends. If the lifted mass resists, expose the remaining attachment from the side before applying more force. There is no reliable fixed digging radius for a colony whose offsets have spread beyond the original planting hole.
Brush or crumble away enough loose soil to see the individual bulbs and untangle roots with your fingers. Separate bulbs where they already divide naturally, supporting each basal plate. Keep a tightly joined pair together if forcing it apart would tear through living tissue. Cut dead stems just above the bulbs once they are exposed, watching for attached bulblets. Lay accepted bulbs on the shaded tray and cover roots with a lightly damp cloth while opening the next planting position.
A complete small bulb has its own cluster of scales and a base; a single loose scale is one storage leaf. Reserve detached scales for a separate scaling project if you want to propagate them. They are not miniature flowering bulbs ready to fill a gap next summer. The division task succeeds by preserving usable bulbs, so there is little value in stripping sound outer scales to make every specimen look clean or symmetrical.
Sort flowering-size bulbs, small offsets and suspect material
Place the largest firm bulbs together for the main border group. Keep smaller complete offsets in a separately marked nursery position or pot them for growing on. Iowa State notes that large divisions may flower the following summer, while small bulbs can take two or three years; very small bulblets may take longer. Size is a planning clue, not a bloom guarantee. A tray of twelve pieces can represent only a few near-term flowering plants.
For example, suppose a lifted clump yields four substantial bulbs and seven small offsets. One practical arrangement is to return three large bulbs as one group, place the fourth in another suitable location, and keep the seven youngsters under their own label. Count the two classes separately in your notes. If the nursery group produces leaves next year, that can be normal progress; comparing it with the mature group's flower count would give a misleading verdict on the division.
Reject soft, collapsing bulbs and material with rotted brown tissue at the base. Keep them off the clean tray. RHS disease guidance distinguishes bulb rot from leaf spotting and from virus-associated streaking or distortion. These observations identify suspects, not a laboratory diagnosis. If the parent had distorted, streaked leaves or abnormal flowers during summer, seek local diagnostic advice before replanting or sharing any offsets, even when their scales now look sound. Confirmed virus-affected plants need removal; division preserves the infection along with the cultivar.
Small attached bulblets need protection from being lost among the larger bulbs. Iowa State describes potting these individually about an inch deep. Use a free-draining mix and a pot with room below for roots, then label it as nursery stock. Keep a separate tally of these tiny plants. Their care and flowering timetable belong to a growing-on project, whereas the substantial bulbs can return directly to the prepared border.
Measure soil cover and give the bulbs room
For the ordinary garden hybrids covered here, Nebraska Extension gives a particularly clear depth convention: place large bulbs with 4–6 inches of soil above their tops, and smaller bulbs with 2–4 inches above. Its suggested spacing is 8–12 inches between bulbs. Use the bulb's actual size and named cultivar guidance to refine that choice. The very small nursery bulblets described above are a separate size class, with shallower potting directions.
Measure from the finished soil surface to the top of the bulb, then allow additional hole depth for its body and roots. As a worked example, a bulb 2 inches tall set beneath 4 inches of soil needs its base about 6 inches below finished grade, with space for roots below that. Chicago Botanic Garden's rule of soil cover twice the bulb's width gives the same 4-inch cover for a 2-inch-wide bulb. Height and width happen to match in this example; measure both on an irregular bulb.
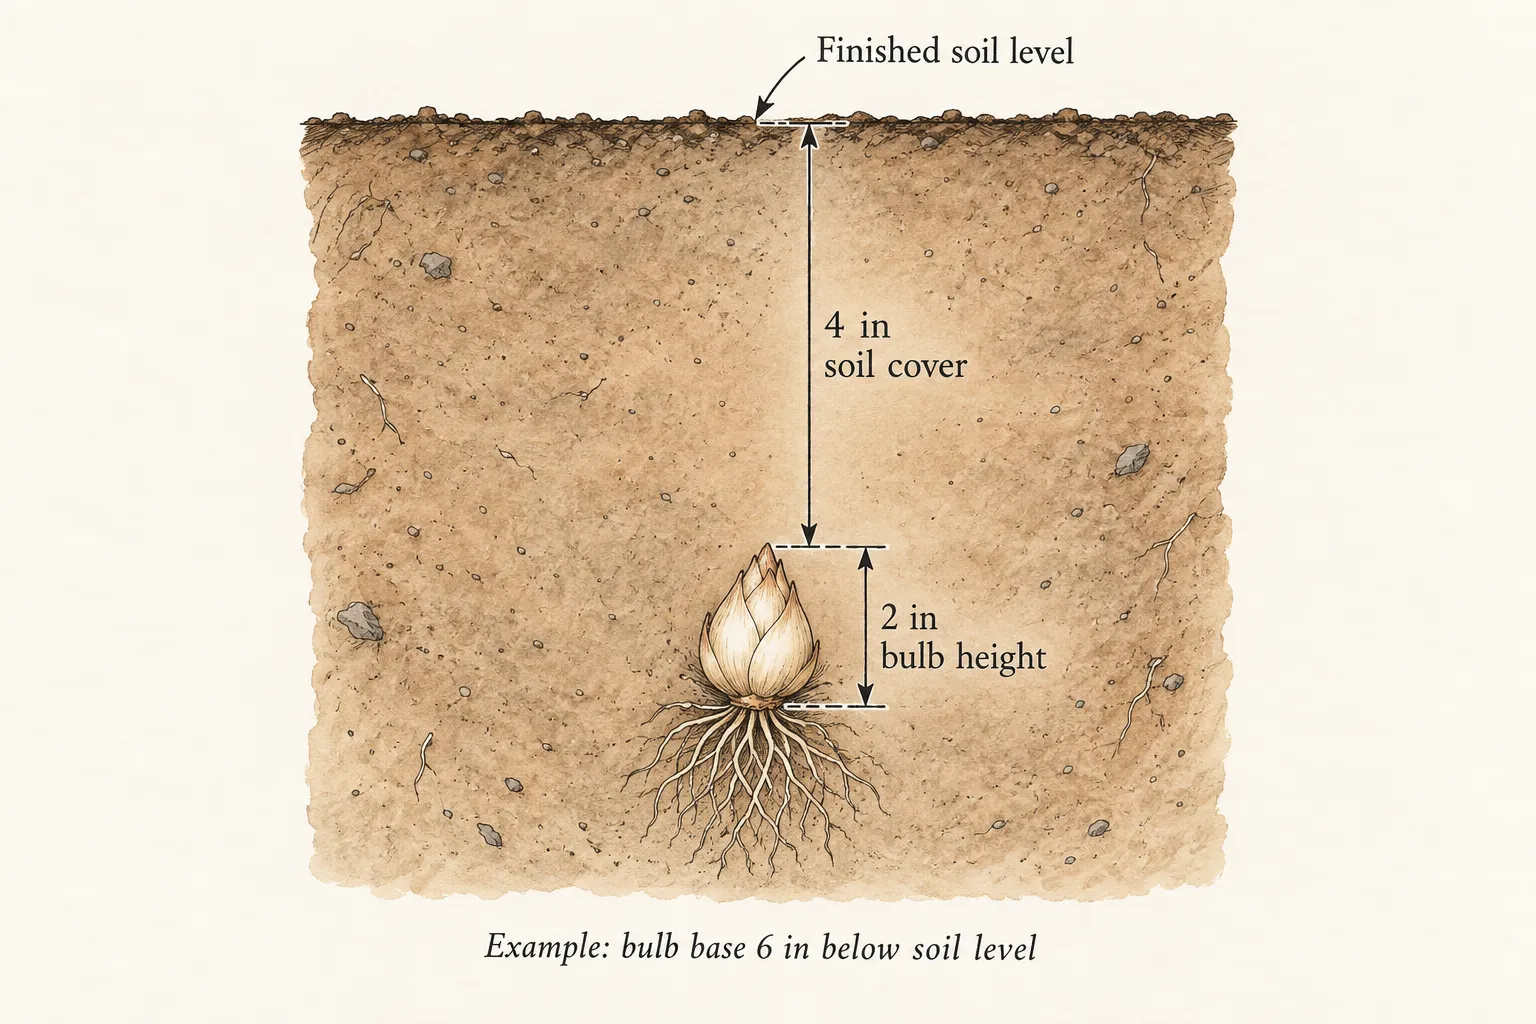
Published lily instructions use several depth rules. Iowa State's propagation guide uses three times bulb diameter and lists larger bulbs at 6–8 inches deep, while the RHS distinguishes rooting types. Those numbers should retain their original measurement conventions. The top-of-bulb convention above makes this operation repeatable. Specialist species such as shallow-planted Lilium candidum need their own instructions; keep them out of a mixed batch being set at the common hybrid depth.
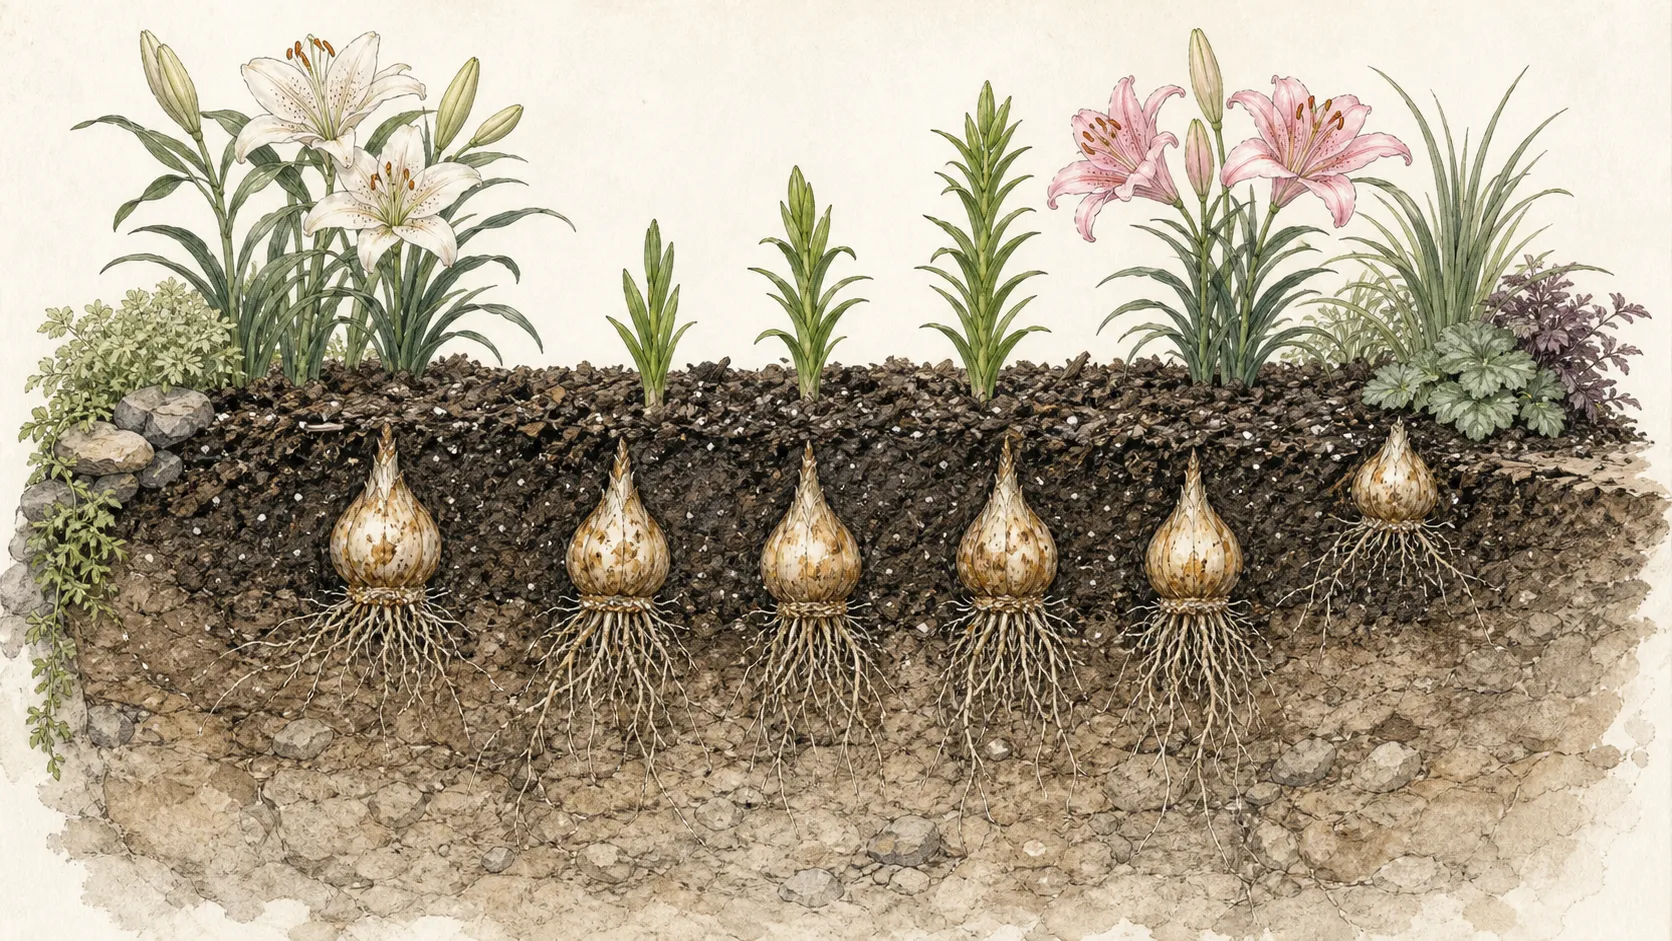
Set the basal plate down and scale tips up, spreading retained roots into the available space. Return crumbly soil around the bulb and firm gently enough to remove large voids. Keep the final surface level with the surrounding bed so it sheds excess rain normally. Install any necessary support beside the bulb position while it is visible. Place the cultivar marker just outside the group and draw the positions on the bed map before they disappear under soil.
Replant promptly and manage an unavoidable delay
Plan a same-session transfer from old bed to new bed. Drying lily bulbs for days on a bench is inappropriate for this task. Their exposed scales and retained roots need protection while they are out of the ground. Work through one labeled group at a time, especially on a breezy day. A tray left in the sun while another border is redesigned can turn a simple division into a storage problem.
If an interruption prevents immediate planting, Iowa State allows a short hold in a plastic bag with lightly moistened potting mix or sphagnum peat, kept cool in a garage or refrigerator. The packing should cushion the bulbs and preserve moisture, with no standing water. Keep the bag labeled and inaccessible to pets. Inspect it before replanting and remove any newly soft or deteriorating material. This is a contingency for a brief delay, not the intended winter destination for hardy border lilies.
A longer delay caused by unsuitable ground calls for potting. Use drainage holes, an appropriate free-draining mix and enough depth for roots; keep the potted bulbs cool and protected from freezing while they establish. The RHS Lily Group recommends a cool, frost-free place for bulbs arriving in the colder months. Resume the outdoor plan when local planting conditions permit. If the colony is still safely in the ground when that problem becomes apparent, postponing the lift is simpler than creating an indoor holding collection.
Check the replanted group through winter and spring
Water the newly filled planting area to settle soil around the roots, then judge subsequent watering by moisture at the occupied depth and recent rain. An autumn bed can remain wet long after its surface looks dry. Persistent standing water above the bulbs calls for attention to drainage; repeated watering will compound that condition. Keep the nursery pots just moist and freely draining, checking them separately from the bed because their small soil volume behaves differently.
Match winter protection to local practice. Iowa State recommends several inches of straw or pine needles for fall-planted lilies, particularly late plantings, to delay soil freezing and extend root growth. In milder gardens, the RHS describes hardy border lilies as needing little special winter care. These are regional choices. Preserve the labels and watch the mulched positions as spring approaches; heavy material remaining over emerging shoots needs easing away carefully before it conceals or bends them.
At emergence, compare like-sized bulbs within the same cultivar group. Record the positions that produce stems, then keep hoes and new stakes clear of them. Retain green leaves after flowering and give the small nursery stock time to build size. If one wet corner repeatedly fails while the rest returns, investigate that corner's soil before planting replacements. If stems emerge with distortion or unusual streaking, photograph the symptoms and seek diagnosis before the next round of division or plant sharing.
Steps
- Level
- moderate
- Time
- About one to two hours for a small clump and prepared receiving bed; follow-up through the next growing season
- Tools
- Garden fork and hand trowel, Clean pruners, Ruler and a straight stick, Two labeled trays and a damp cloth, Watering can and permanent plant labels
- Materials
- An established, locally hardy Asiatic or Oriental lily clump, Prepared, freely draining planting space, Free-draining potting mix and deep pots for small bulblets, if needed
- 1Make a clump record before removing stems
Take the cultivar label, summer photograph and a sketch to the bed. Mark the outside stems and identify the exact receiving positions. Record whether reduced bloom coincided with congestion, extra shade, missing buds or early yellowing. Proceed with division only when the foliage has died back and the prepared soil permits gentle work.
- 2Lay out a clean sorting area
Place two labeled trays in shade, with the damp cloth and planting tools beside them. Designate one tray for substantial bulbs and one for small offsets. Reserve a separate container for rejected material. Finish opening the receiving bed before starting to lift so the exposed bulbs spend the shortest practical time above ground.
- 3Raise and separate the colony
Loosen around the outer stems, slide the fork below the bulb mass and support it as it rises. Expose the bulbs by hand, ease natural divisions apart and preserve their basal roots. Trim dead stems above the bulbs, collecting small bulblets separately. Keep a resistant joined pair intact and leave sound scales attached to the bulb.
- 4Assign each size class to a destination
Count large bulbs and offsets separately. Put firm, substantial bulbs into the main planting layout and reserve small stock for a marked nursery space or suitable pots. Remove rotten material from the work area. Hold back offspring of a plant with suspicious summer symptoms until its condition has been assessed; a tidy bulb alone cannot establish health.
- 5Measure, backfill and label
Place a straight stick across finished bed level and use the ruler to measure soil cover above each bulb. Apply the stated common-hybrid depth range to the appropriate size class, with space beneath for roots. Backfill, settle with water and label the actual planted positions. Write the cover depth and size class on the map for a useful spring comparison.
- 6Set the follow-up for each planting
Check the bed after its first substantial rain and the nursery pots as their mix begins to dry. Apply locally appropriate winter protection, then return before spring shoots become hidden beneath it. Note emergence by position and flowering by bulb size. Keep the offsets identified through their growing-on seasons so slow maturation is distinguishable from a failed planting.
Related reading
Sources
- How to grow lilies. Royal Horticultural Society. Source record · Accessed 2026-10-10.
- How to Propagate Garden Lilies. Iowa State University Extension and Outreach. Source record · Accessed 2026-10-10.
- Growing Lilies in Iowa. Iowa State University Extension and Outreach. Source record · Accessed 2026-10-10.
- Lilies Bring Summer Color to your Garden. Nebraska Extension in Lancaster County. Source record · Accessed 2026-10-10.
- Lilies. Chicago Botanic Garden. Source record · Accessed 2026-10-10.
- Bulbs. University of Maryland Extension. Source record · Accessed 2026-10-10.
- Increasing your stock. RHS Lily Group. Source record · Accessed 2026-10-10.
- What do lilies need?. RHS Lily Group. Source record · Accessed 2026-10-10.
- Lily diseases: Symptoms, Causes & Control. Royal Horticultural Society. Source record · Accessed 2026-10-10.
- Lovely Lilies and Curious Cats: A Dangerous Combination. U.S. Food and Drug Administration. Source record · Accessed 2026-10-10.
- Which Lilies Are Toxic to Pets?. ASPCA Animal Poison Control. Source record · Accessed 2026-10-10.