Grow · winter sun shade site mapping
Map Winter Sun and Shade for Next Year's Planting
Use bare-canopy winter light, fixed observation times, and a simple site map to learn where next year's plantings will receive usable direct sun, lingering shade, glare, and seasonal misdirection.
Published Last updated
In this guide
- Winter is the cleanest season to read the garden's structure
- Start with a base map and fixed observation points
- Record direct sun hours and shadow edges through one clear day
- Separate winter opportunity from all-season plant reality
- Add reflected light, wind, and snow cover to the same map
- Turn the winter map into next year's planting zones
- Recheck near leaf-out and solstice before buying the long-term plants
- Steps
Winter is the cleanest season to read the garden's structure
Winter mapping works because the garden finally stops hiding its skeleton. Deciduous trees stand as trunks and branches instead of green umbrellas, herbaceous borders contract to outlines, and the line between open sky and shade becomes physically traceable rather than guessed from summer memory. That stripped-back condition is valuable for site analysis. It reveals where long shadows actually land, which walls throw light back into beds, and which parts of the garden are bright only because the overhead canopy has not yet returned. A gardener who maps this moment carefully gains information that is hard to reconstruct once spring foliage and flowering distractions arrive.
The trick is to treat winter light as evidence, not as the whole answer. University of Georgia's site-analysis guidance is useful here because it asks the gardener to record the site before drawing the design. NC State makes the same point in broader landscape terms when it stresses assessing both winter and summer sun angles. The value of winter mapping is not that it tells you every future condition. The value is that it gives you the clearest first layer of structure: where trunks stand, where shadows stretch, and where the property's permanent forms begin to shape next year's planting possibilities.
That first layer is especially useful in ornamental gardens because many plant choices depend on the difference between fleeting brightness and dependable direct sun. Early bulbs, woodland ephemerals, and some spring displays can take advantage of leafless-season light, while shrubs and long-season perennials must also survive the denser canopy that follows. If you wait until everything has flushed out, you lose the chance to see the winter opportunity. If you stop with winter alone, you risk planting the long-season garden for a light level it will not keep.
Start with a base map and fixed observation points
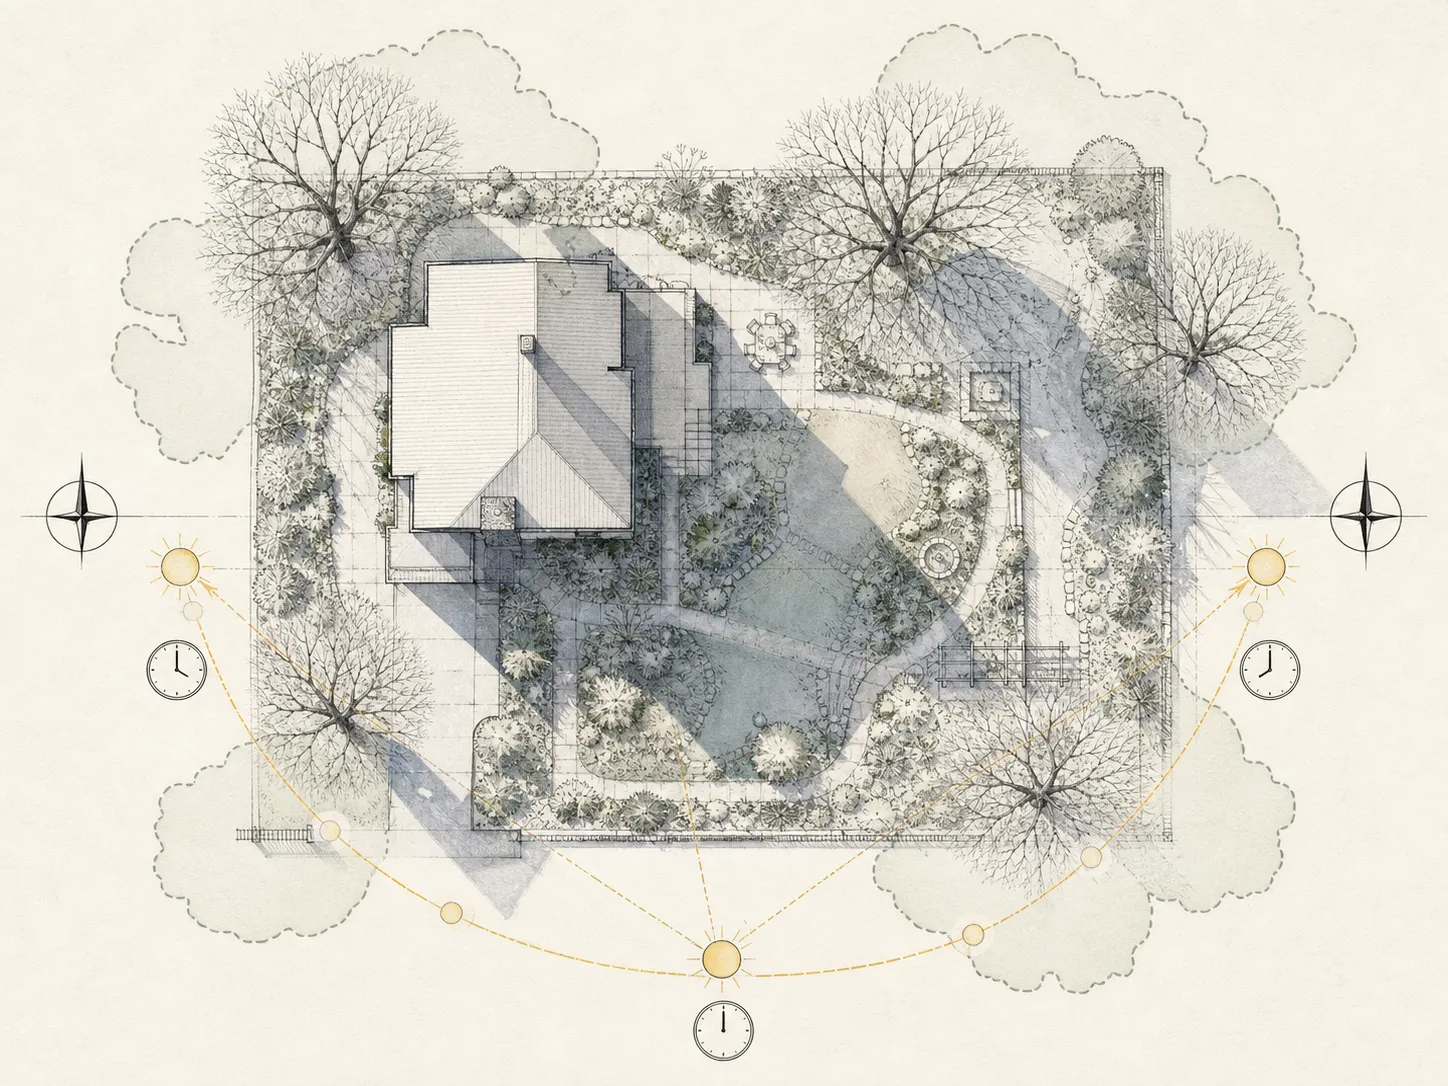
A winter sun map does not need surveying equipment, but it does need repeatability. Start with a simple plan of the house, paths, fences, existing trees, and the beds you are considering for next year. Then choose fixed viewpoints or checkpoints that you can revisit through the day. The University of Georgia source recommends pulling the recorded site information together on or over a base map so the design fits the real place rather than a mental shortcut. That advice matters because winter shadows move fast and memory edits them. Once you have a paper or digital base, the garden becomes something you can compare instead of something you keep reimagining.
Mark north. Mark the tree trunks, not just the canopy edges you remember from leaf season. Mark walls, sheds, and evergreen masses because they cast or reflect light differently from a deciduous frame. If a bed sits near a pale wall, broad paved walk, or open drive, note that too. Light in gardens is not only the beam from the sun. Reflected brightness from paving and masonry can increase leaf temperature or bleach the visual experience of a bed even when the counted direct sun hours stay moderate. A good base map preserves those secondary effects so they are not mistaken for full-sun exposure later.
Use the same observation points more than once in the season if possible. One bright day after snowfall can exaggerate glare, while a cloudy week can understate how much direct sun a bed usually receives. Repetition keeps the winter map honest. It also lets you compare late December with the weeks approaching leaf-out, when the same trunks are still bare but the light angle has already changed. Those repeated visits are brief once the base map exists. The time-consuming part is not standing outside. It is deciding to look consistently enough that the later planting plan is anchored in something better than intuition.
Record direct sun hours and shadow edges through one clear day
Direct sun should be counted, not merely felt. Georgia's site-analysis guide uses simple category thresholds that remain useful here: full sun generally means at least six to eight hours of direct sun, partial sun or shade roughly four to six, and shade less than four. Those are planning categories, not promises that every minute of brightness is equal. Winter light is often low-angle, brief, and strongly directional. A bed can look luminous at noon while still receiving too little direct duration to satisfy a summer-flowering perennial or small shrub. Recording the hours matters more than admiring the atmosphere.
On a clear day, mark where the shadow line falls in morning, midday, and afternoon. If the site is complex, add one more check near the end of the daylight window when the winter sun runs low and reveals which beds are truly open to the sky. It is not necessary to trace every branch shadow perfectly. What matters is the bed-scale truth: which areas stay open longest, which are shaded by a house wall until midday, and which receive only a narrow patch of moving sun. Those boundaries are often sharper than people expect, especially in small gardens where a single trunk shifts the category of an entire bed.
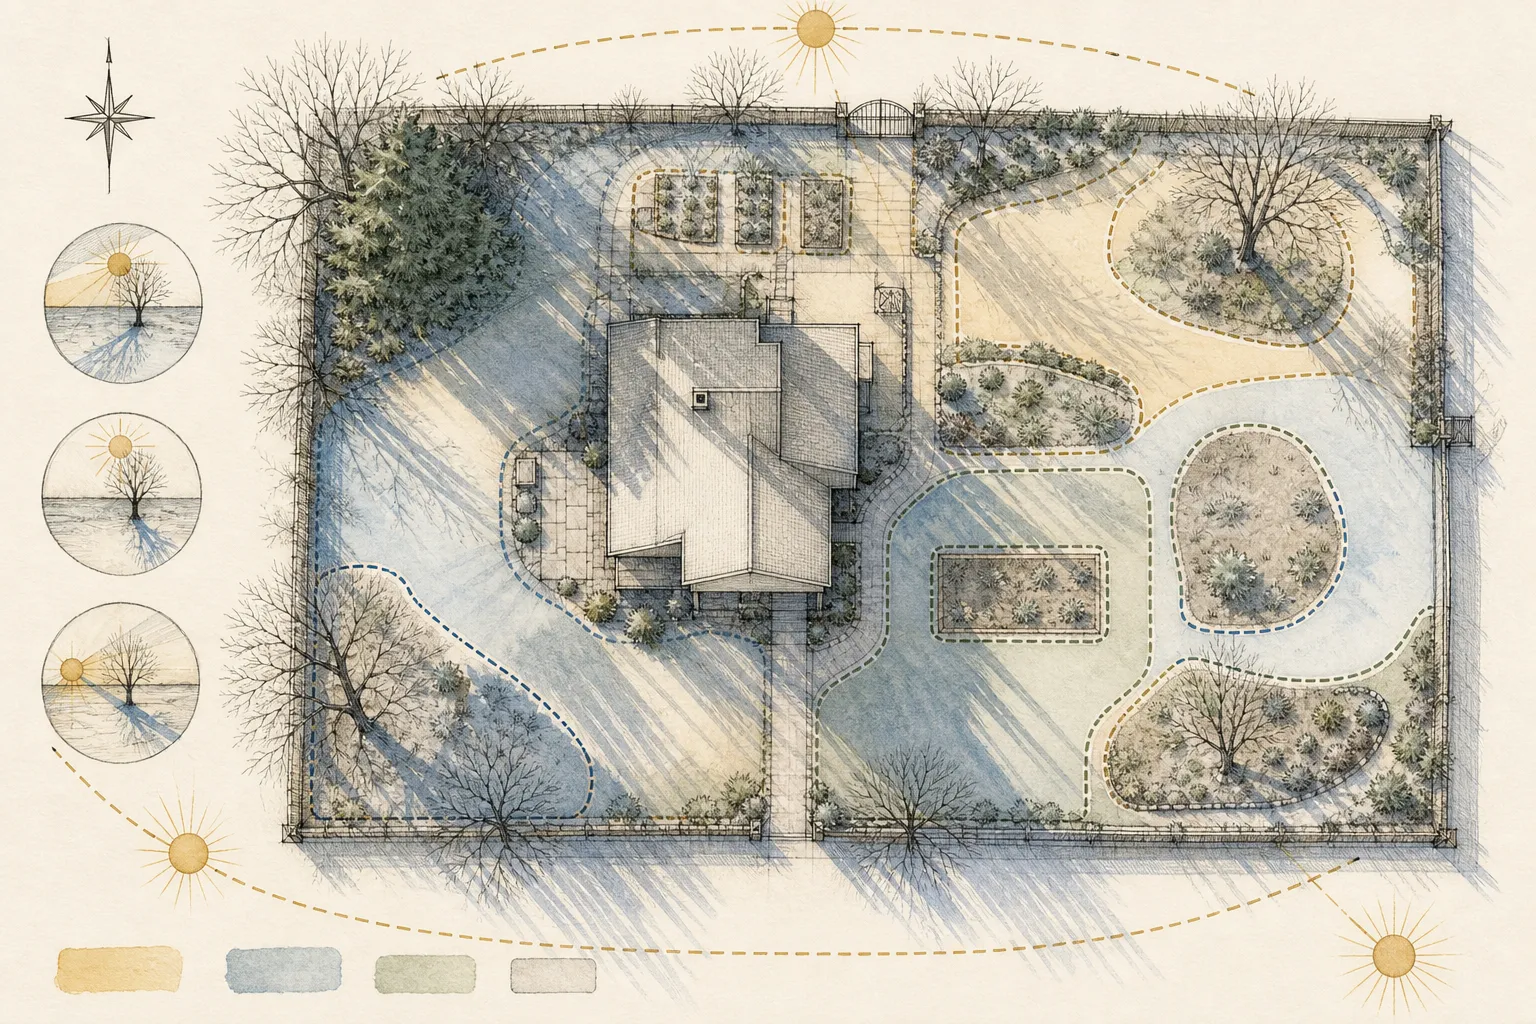
Write those boundaries into the base map immediately. A tracing layer or digital overlay works well because you can keep the permanent plan beneath it. Label the observation date and sky condition. Penn State's perennial-garden guidance and RHS planning advice both reinforce the same practical design habit: observe before you plant. In the winter-light context, that means giving each shadow line a date and a condition so you know later whether the map came from a clear dry day, a bright snow cover, or a season when the neighboring hedge had not yet been cut. Good plant placement depends on that context.
Separate winter opportunity from all-season plant reality
The most common mistake in winter light mapping is treating a seasonal opportunity as an annual guarantee. A border that receives beautiful leafless-season sun may still become high shade by late spring once canopy density returns. That can be ideal for snowdrops, crocus, early narcissus, hellebores, or woodland perennials that do much of their work before overhead closure. It is not automatically suitable for every sun-loving shrub or long-bloom perennial you hope to plant there next year. The winter map identifies opportunities, but the planting plan still has to distinguish between brief early light and sustained seasonal exposure.
This is why the comparison with leaf-out matters so much. NC State explicitly tells the designer to assess winter and summer sun angles, not just one season. Use your winter map to predict where canopy return will matter most, then revisit the bed as buds expand and again when leaves are mature. If a bed moves from six bright winter hours to deep dappled shade by late May, you have not discovered contradictory facts. You have discovered the actual seasonal rhythm of that place, which is far more useful than a single blunt label such as sunny or shady.
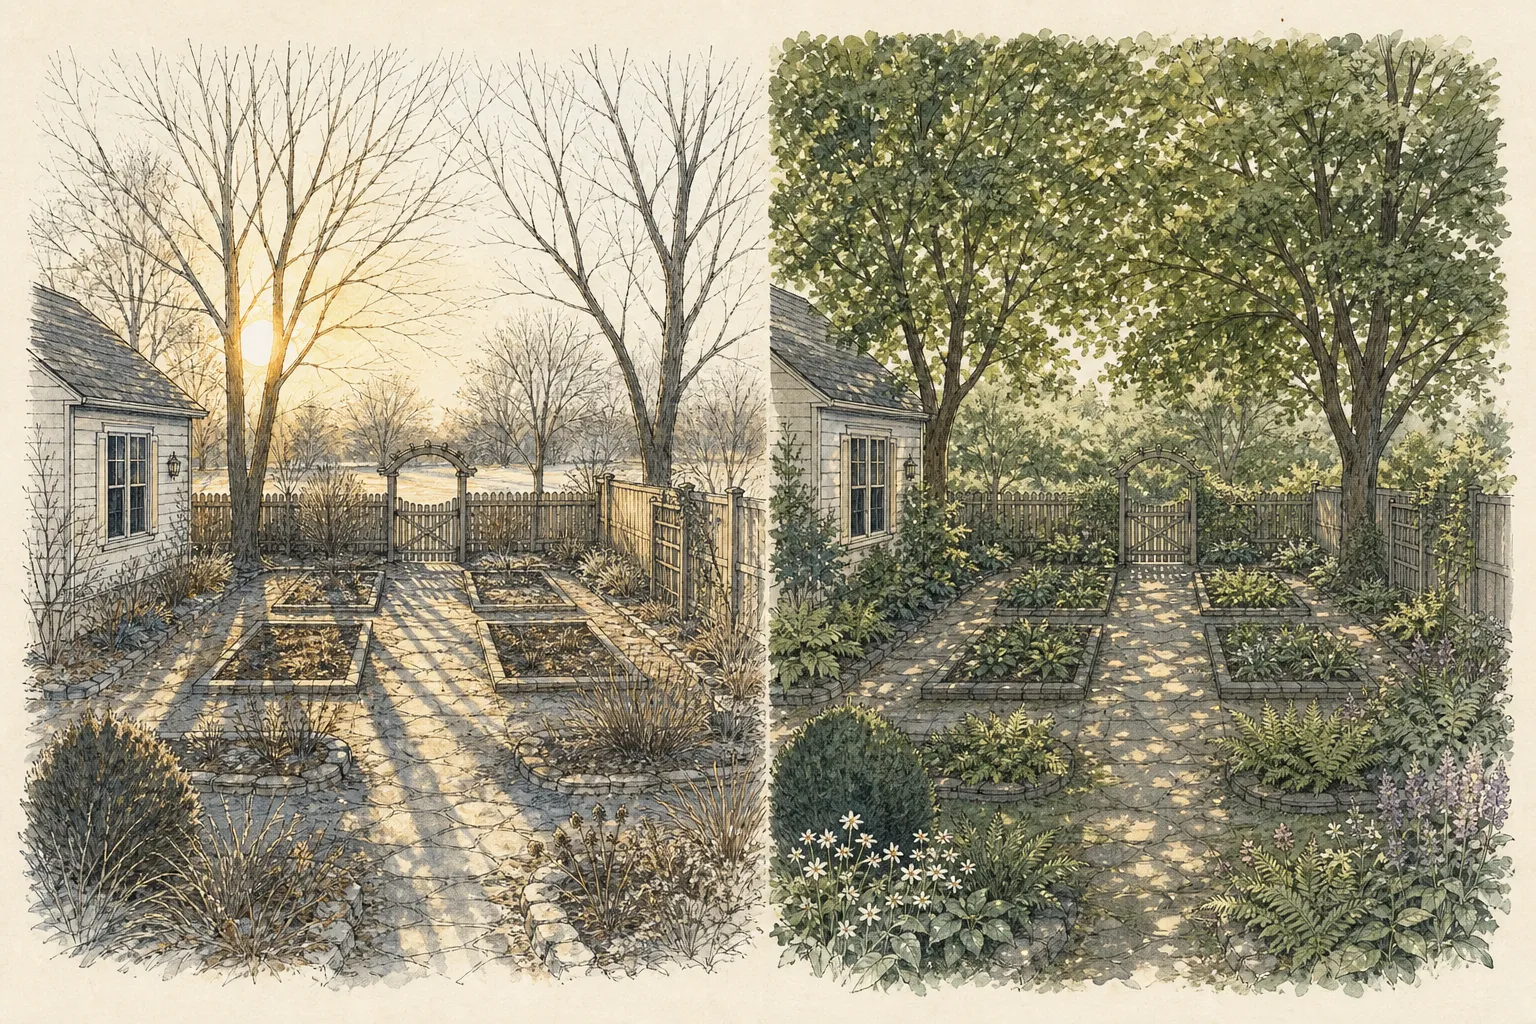
Make your notes specific to plant duration. Beds for spring ephemerals, bulb displays, or short early-season compositions can legitimately be designed around the leafless window. Beds for woody anchors, summer perennials, and structural foliage need the map that continues past leaf-out. Putting both on the same base plan prevents one of the most expensive ornamental mistakes: choosing permanent plants for light that only exists while the branches are bare.
Add reflected light, wind, and snow cover to the same map
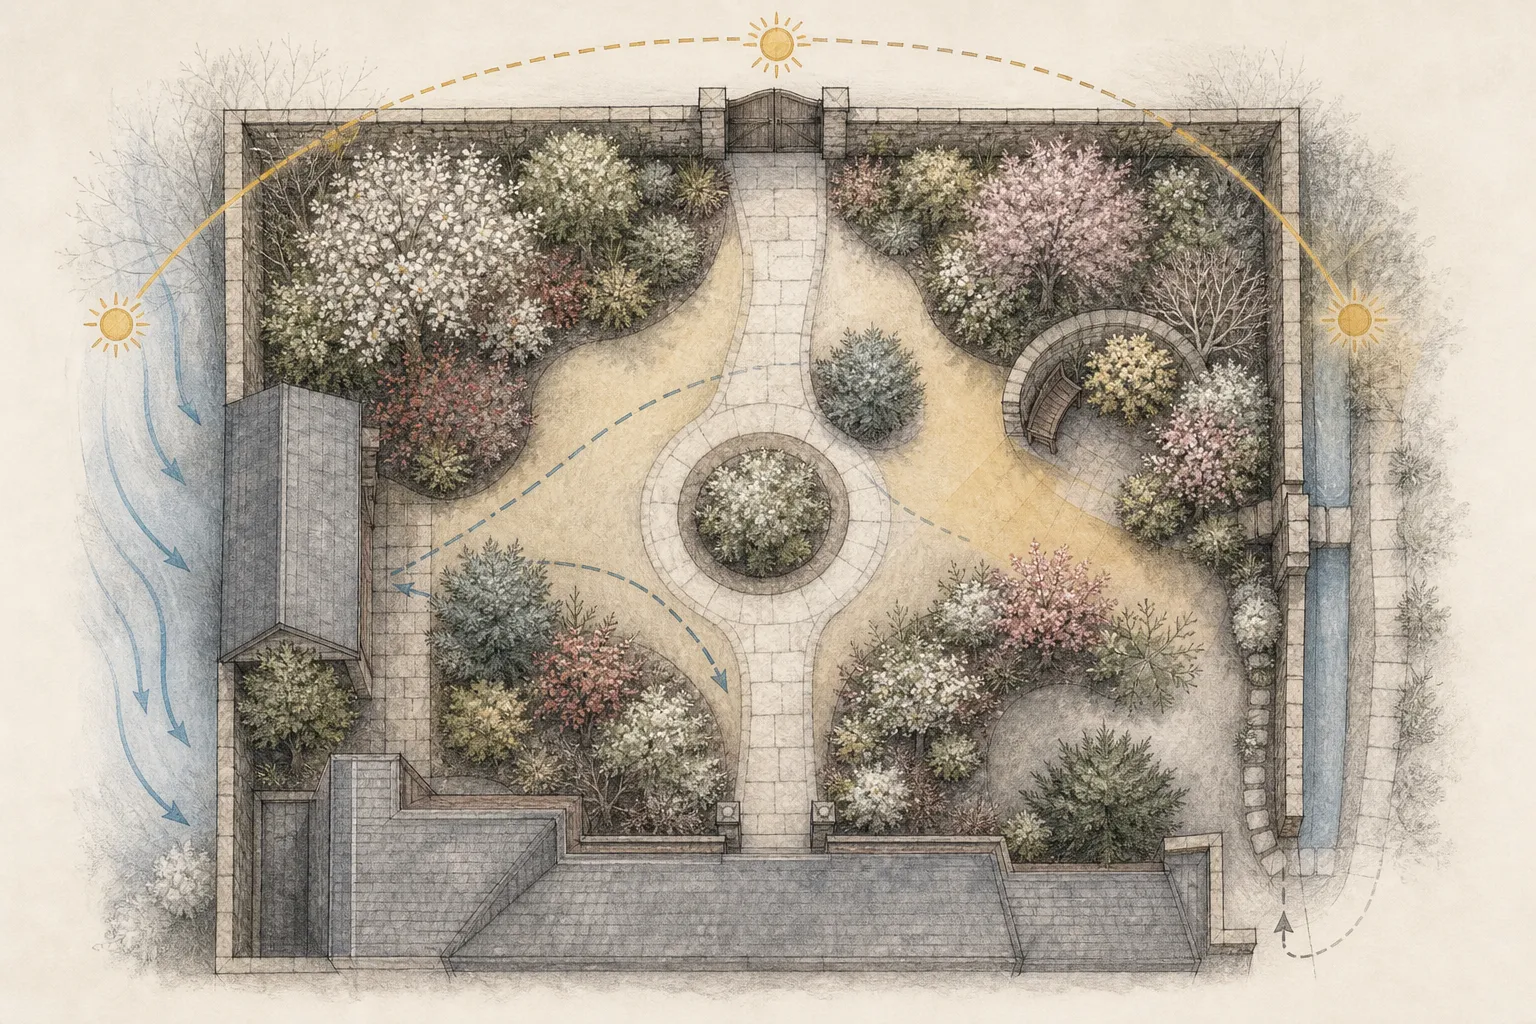
Sun and shade alone are still incomplete. Winter snow can bounce light into a north-facing wall bed. Pale paving can brighten the lower canopy of a shrub. A fence can cut wind on one side of a border while channeling it along another. RHS garden-planning advice and the Georgia microclimate notes both support folding these local modifiers into the design stage rather than waiting to discover them after planting. In winter, those modifiers are often easier to see because the bed surface is open and the branch structure is readable from above and through the planting.
Mark the places where snow lingers because that persistence changes not only soil temperature but also brightness. Mark where a house or outbuilding creates a still pocket that may protect early growth or, conversely, where a gap funnels wind through a corridor. If a bed lies beside a drive or broad front walk, note the reflective surface as part of the winter-light story. A plant that dislikes intense sun on frozen days may not care that the sky exposure is only moderate if the hardscape is amplifying the effect from below.
These additions also help you avoid treating all shade as identical. Cold open shade under bare branches is different from dry wall shade. Bright reflected shade at an entry is different from the soft high shade inside a tree group. Winter site analysis becomes genuinely useful when it stops reducing the property to only sunny and shady. The map should begin to describe how the bed actually behaves, because plants respond to those behaviors more than to the vocabulary we use about them.
Turn the winter map into next year's planting zones
Once the observations are recorded, convert them into decisions. Draw the beds that truly hold open winter sun and ask whether that matters for the kinds of plants you plan to use. Some zones will be ideal for early bulbs or for winter-interest structure that benefits from brightness without needing summer exposure. Others will be transitional zones where partial sun in the shoulder seasons becomes partial or full shade later. Those are often the most interesting planting spaces because they reward careful layering rather than one-note sun or shade formulas.
Do not assume every bed must receive a final categorical label. Some beds deserve a note such as spring-bright, summer-shaded or winter shade with reflected morning light. Those phrases are clumsy as garden poetry but excellent as planting instructions. They keep you from forcing the map into a false simplicity. A design that respects seasonal nuance usually looks more settled after the first year because it was planted for the real sequence of conditions rather than for a single photograph or one afternoon impression.
Carry the same map into discussions of access, snow storage, roof runoff, and mature size. The light pattern is one part of siting, not the entire siting process. A bed with lovely winter morning sun may still be wrong for a permanent shrub if the snowplow buries it or if a future tree root zone makes digging impossible. The best planting plans are layered maps. Winter sun and shade are simply one of the clearest layers you can draw before the next year's work begins.
Recheck near leaf-out and solstice before buying the long-term plants
Winter mapping should lead to more observation, not less. Revisit the same checkpoints as deciduous trees leaf out and again when the sun is higher in the growing season. The goal is not to create a perfect annual simulation but to verify the major transitions that matter to plant choice. Beds that looked open in December may still receive generous direct light in April yet lose it almost completely by June. Others remain brighter than expected because the canopy is higher or thinner than memory suggested. Those confirmations protect the plant list from being built on one season alone.
This follow-up also lets you separate permanent and temporary planting decisions. If you are installing bulbs, spring containers, or a short-lived annual layer, the winter map may already be enough. If you are choosing shrubs, small trees, or a long-term perennial composition, wait until the seasonal checks are complete. A delayed purchase is cheaper than a permanent mismatch. Winter site analysis gives you a head start, not permission to skip the rest of the evidence.
By the time next year's planting begins, the map should contain more than shadows. It should hold a record of direct sun, reflected brightness, canopy return, microclimate, and the practical borders of each bed. That is how a winter walk becomes a design tool. It turns one of the quietest seasons in the garden into the season that prevents a great many expensive corrections later on.
Steps
- Level
- easy
- Time
- One clear-day mapping session plus two seasonal rechecks
- Tools
- Base map or graph paper sketch, Compass or phone compass, Pencil or tracing layer, Camera or phone for timed photographs, Clock or phone timer
- Materials
- Observation notes for winter, leaf-out, and early summer, Flags or markers for future bed edges if needed
- 1Draw the fixed site first
Map the house, paths, fences, evergreen masses, and every deciduous trunk before tracking light. Mark north and outline any planned future beds. The winter map becomes far more useful when shadows can be read against permanent structure rather than against a loose mental picture of the garden.
- 2Pick repeatable observation times
Choose several points on a clear day such as morning, midday, and late afternoon, then stand in the same places each time. Take photographs and note the date and sky condition. Repetition matters more than precision because it keeps the map anchored to evidence instead of memory.
- 3Trace direct sun and deep shade by bed
Record where the shadow edge falls across each future planting area and count the hours of direct sun rather than only the overall brightness. Use those notes to sort beds that hold open winter light from beds that merely catch a brief moving patch.
- 4Mark reflected light and shelter
Add pale walls, paving, wind funnels, calm pockets, and persistent snow that increases brightness. These modifiers often matter as much as sky exposure, especially for winter-sensitive shrubs and entry beds where hard surfaces intensify the light pattern.
- 5Compare the map at leaf-out
Return as deciduous trees break leaf and note which winter-bright beds become filtered shade or deep shade. Keep the winter layer and the leafed-canopy layer together so spring-only opportunities do not get confused with year-round sun.
- 6Assign plants by seasonal duration
Use the winter-only bright zones for plants that truly benefit from the leafless window, and reserve long-season sun plants for beds that keep sufficient direct light after canopy return. The map should guide duration as much as intensity.
- 7Buy the long-term plants only after the recheck
Delay permanent shrub and perennial purchases until the winter map has been tested against leaf-out or early-summer conditions. A quick seasonal recheck is cheaper and more reliable than redesigning a planted bed built on one winter impression.
Related reading
Sources
- Drawing a Landscape Plan: Site Analysis. University of Georgia Extension. Source record · Accessed 2026-08-19.
- Landscape Design. NC State Extension Publications. Source record · Accessed 2026-08-19.
- Creating your garden plan. Royal Horticultural Society. Source record · Accessed 2026-08-19.
- Starting a New Perennial Garden. Penn State Extension. Source record · Accessed 2026-08-19.