Grow · first frost pocket mapping
Map First-Frost Pockets Before Protecting Tender Ornamentals
Map the low spots that cool first, compare them with plant vulnerability, and prepare the right move or cover before an autumn frost warning.
Published Last updated
In this guide
- Start with the low point you can see
- Separate frost from a regional freeze
- Draw cold-air routes before placing plants
- Place observations where plants actually stand
- Make the map from repeated differences
- Set protection tiers by exposure and vulnerability
- Treat containers as a separate root-zone risk
- Stage cover, shelter, and access before evening
- Read the night without overprotecting the garden
- Review the map after the event
- Steps
Start with the low point you can see
Use a first-frost map to decide where protection is worth staging: mark low spots and blocked drainage, measure the air where a plant actually stands on several suitable nights, then compare those readings with plant vulnerability. A hollow that repeatedly cools first receives a tender pot's move or a supported cloth; a hardy shrub on a higher, ventilated terrace may need no cover. The map turns one regional forecast into several site-specific actions.
September 17 is a useful planning date in a temperate Northern Hemisphere garden because cool nights may arrive before any official warning. The calendar does not promise frost. Local climate, altitude, coast, slope, soil moisture, nearby structures, and the season's plant growth all change the result. This guide is for ornamental beds and containers before autumn cold, not a substitute for a local forecast or the plant's own hardiness guidance.
Begin with an inventory, not a shopping list. Write down tender annuals, tender perennials, recently planted specimens, late soft growth, open flowers, and containers that still matter to the season's display. Add one or two established hardy shrubs as reference plants. Their survival does not prove a nearby tender plant is safe, but it gives the map a visible control point. Record the bed, slope position, pot size, and current condition beside every name.
Separate frost from a regional freeze
Frost is a surface event; a freeze describes air at or below 32°F, and the two can occur without matching one another. The National Weather Service explains that frost can form when the air reading is around 33–36°F under suitable moisture and light wind, while a freeze can damage unprotected seasonal plants when temperatures remain at or below 32°F. A hard freeze at 28°F or lower for several hours is a much broader threat. Use these categories to set urgency, not as a universal damage chart for every ornamental.
The thermometer in a weather app is not the temperature at every leaf. On calm, clear nights, the National Weather Service notes that air close to the surface can be up to 10°F colder than the usual observation level four to five feet above ground. That difference explains why one pot near the soil may blacken while a hanging basket or a plant on a raised terrace remains untouched. It also explains why a forecast just above freezing can still deserve a local check.
A first-frost plan therefore has two clocks. The regional forecast tells you when to start paying attention, while your garden map tells you where attention must be concentrated. Do not call a night safe because the front step stayed above freezing, and do not cover every bed because one shallow hollow received frost. Separate the weather event from the site response so the work remains proportional.
Draw cold-air routes before placing plants
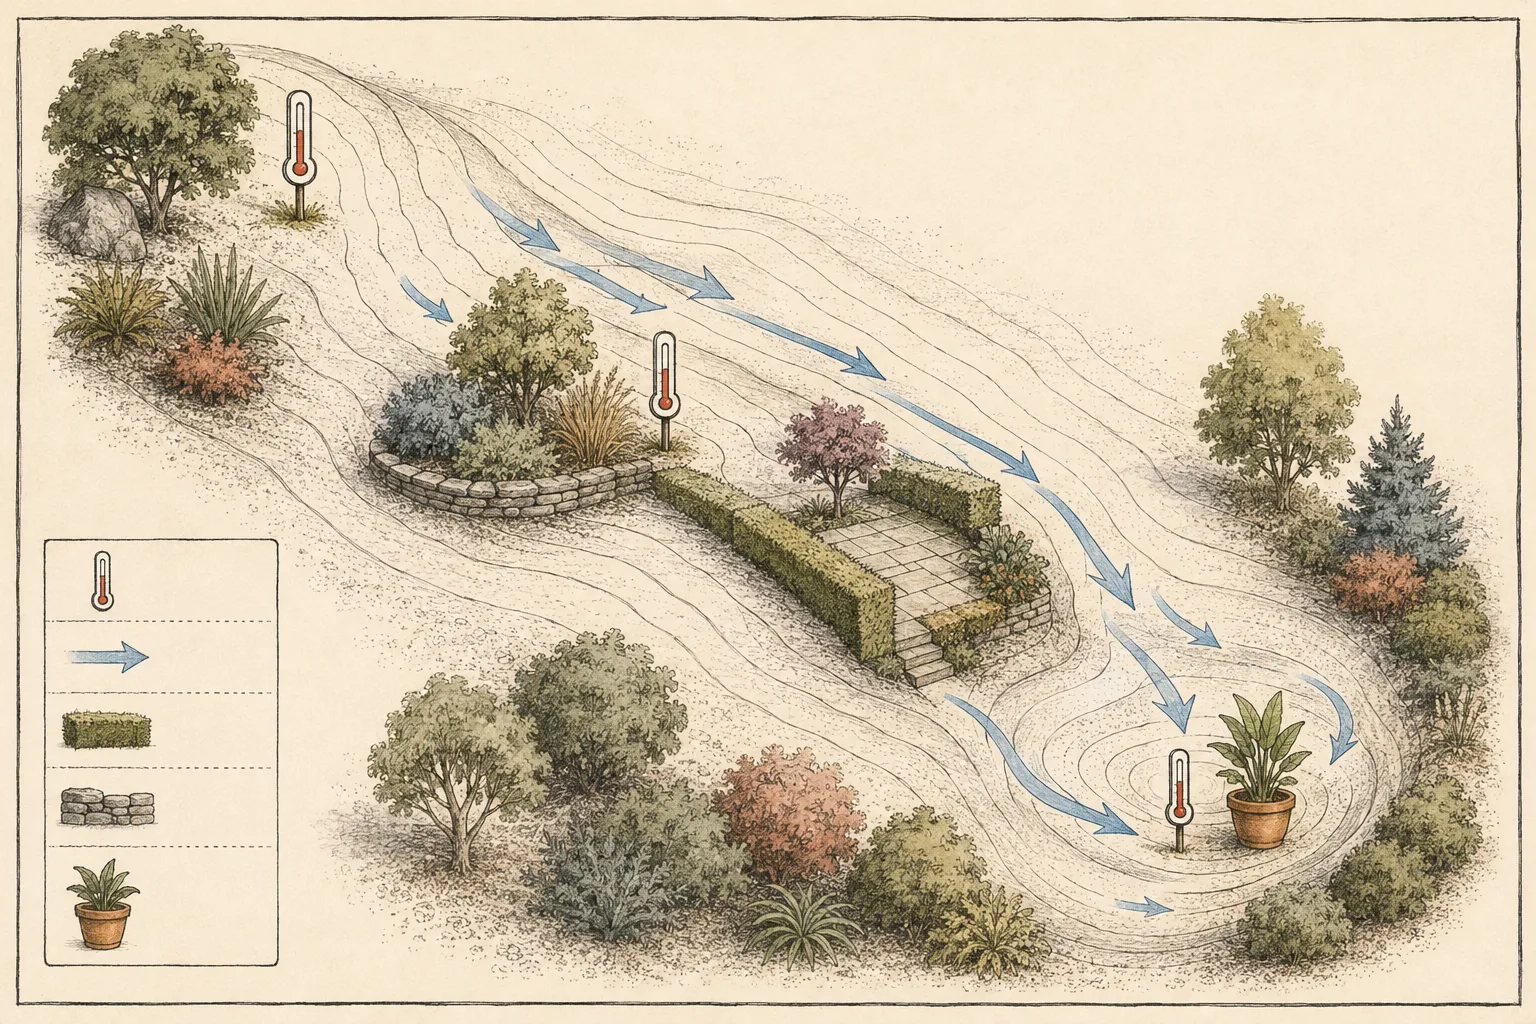
Walk the property from the highest visible point to the lowest. Mark a shallow dip, the bottom of a slope, a recessed courtyard, a stair landing, or a lawn edge where cold air could collect. The University of Minnesota Extension describes low spots as frost pockets and notes that forest edges and hedges can dam cold drainage. A small garden may not have a dramatic valley, yet a few inches of elevation beside a wall or step can separate two different overnight experiences.
Add the features that interrupt the route. A dense hedge, solid fence, retaining wall, tall evergreen, or building can block the downhill path of cold air; an open slope may let it move onward. These features do not create one guaranteed temperature. They tell you where to compare readings, because the whole bed cannot be assumed uniform. Draw arrows for likely flow, then circle the places where an arrow ends or pools.
Mark hard surfaces and sheltered corners as context, not as automatic safe zones. Masonry, paving, a south-facing wall, a roof overhang, and a garage entrance may change exposure, wind, or stored warmth, but the effect depends on the night and the plant's position. Use the sketch to choose observation points. Resist moving plants during this first walk; a false sense of safety is harder to correct than an empty space on a map.
Place observations where plants actually stand
Use two or three matching minimum-maximum thermometers if the garden has more than one level. Put one at a higher reference point, one in the transition zone, and one beside the plant or pot most likely to be damaged. Shield each instrument from direct sun and rain according to its instructions, but do not hide it inside a warm shed or under a dense canopy that the plant does not share. The comparison matters only when the positions represent real exposure.
Keep a simple placement record. Photograph each sensor from a fixed direction, draw its symbol on the site sketch, and note whether it sits near bare soil, mulch, grass, stone, a wall, a hedge, or a container. Place the sensor at the height relevant to the tissue you are trying to protect, and keep that height consistent between nights. A ground-level reading and a canopy-level reading answer different questions; neither should be silently substituted for the other.
Read the instruments at the same time, preferably just before dawn when the night's lowest value is most useful, and write down cloud, wind, recent rain, and soil moisture. Two calm clear nights are more useful than a single dramatic reading; three nights reveal whether a low point is persistent or whether one night's wind or cloud changed the pattern. If the instruments disagree in a way that follows the device, not the location, check the instruments before changing the planting plan.
Make the map from repeated differences
Transfer the readings to the sketch with the date and weather beside each point. You do not need a precise contour survey. You need a repeatable picture of where the garden cools first, where it tracks the higher reference, and where a structure changes the pattern. Shade the lowest repeated area with a cool color, mark the transition with a broken line, and leave the higher reference open. Add the plants to the map only after the temperature pattern is visible.
Use the National Weather Service ranges as weather context, not a promise of plant survival: patchy frost can occur in the upper 30s, areas of frost are more likely in the 33–37°F range, and 32°F or below is a freeze category. The page also warns that sky cover, wind, moisture, soil temperature, nearby water, and vegetation change the result. Your garden record adds the missing local layer. It does not turn a broad threshold into a species-specific safe temperature.
Give each mapped area a practical name that will still make sense in the dark: upper terrace, middle step, hedge shadow, or lower hollow. Then draw a short route from each vulnerable plant to its intended response area. If the same pot must be carried across a slippery slope, its protection plan is not finished. A useful map includes access, cover storage, a place to set containers down, and the person or time needed to act before nightfall.
Set protection tiers by exposure and vulnerability
Rank the plants before ranking the temperature readings. A tender plant with fresh soft growth, open flowers, or a thinly rooted container deserves attention sooner than an established hardy shrub at the same point on the map. Utah State University Extension notes that frost damage is more likely on tender plants and on growth produced late in the season; it also identifies flowers, shoots, buds, and leaves as tissues that may blacken or distort. Record the part of each plant that matters, not just its name.
Use three responses. Leave means a well-established hardy plant stays in place and is checked after the event. Cover means an in-ground tender plant receives breathable fabric held above the canopy with a secure edge. Move means a container or small portable specimen leaves the lowest pocket for a protected, stable position. Monitor is useful for a plant near the boundary when the forecast is uncertain and the map has not yet produced a repeated difference. One clear response prevents frantic, mixed instructions at dusk.
Avoid late nitrogen feeding as a rescue strategy. The Utah State guidance warns that nitrogen-rich fertilizer late in the season can stimulate soft, sappy growth that is especially vulnerable to cold damage. Do not try to make a plant stronger on the eve of frost with an unplanned feed. Water according to the root zone, correct a known drought problem earlier in the season, and use the map to place physical protection where it has a credible job.
Treat containers as a separate root-zone risk
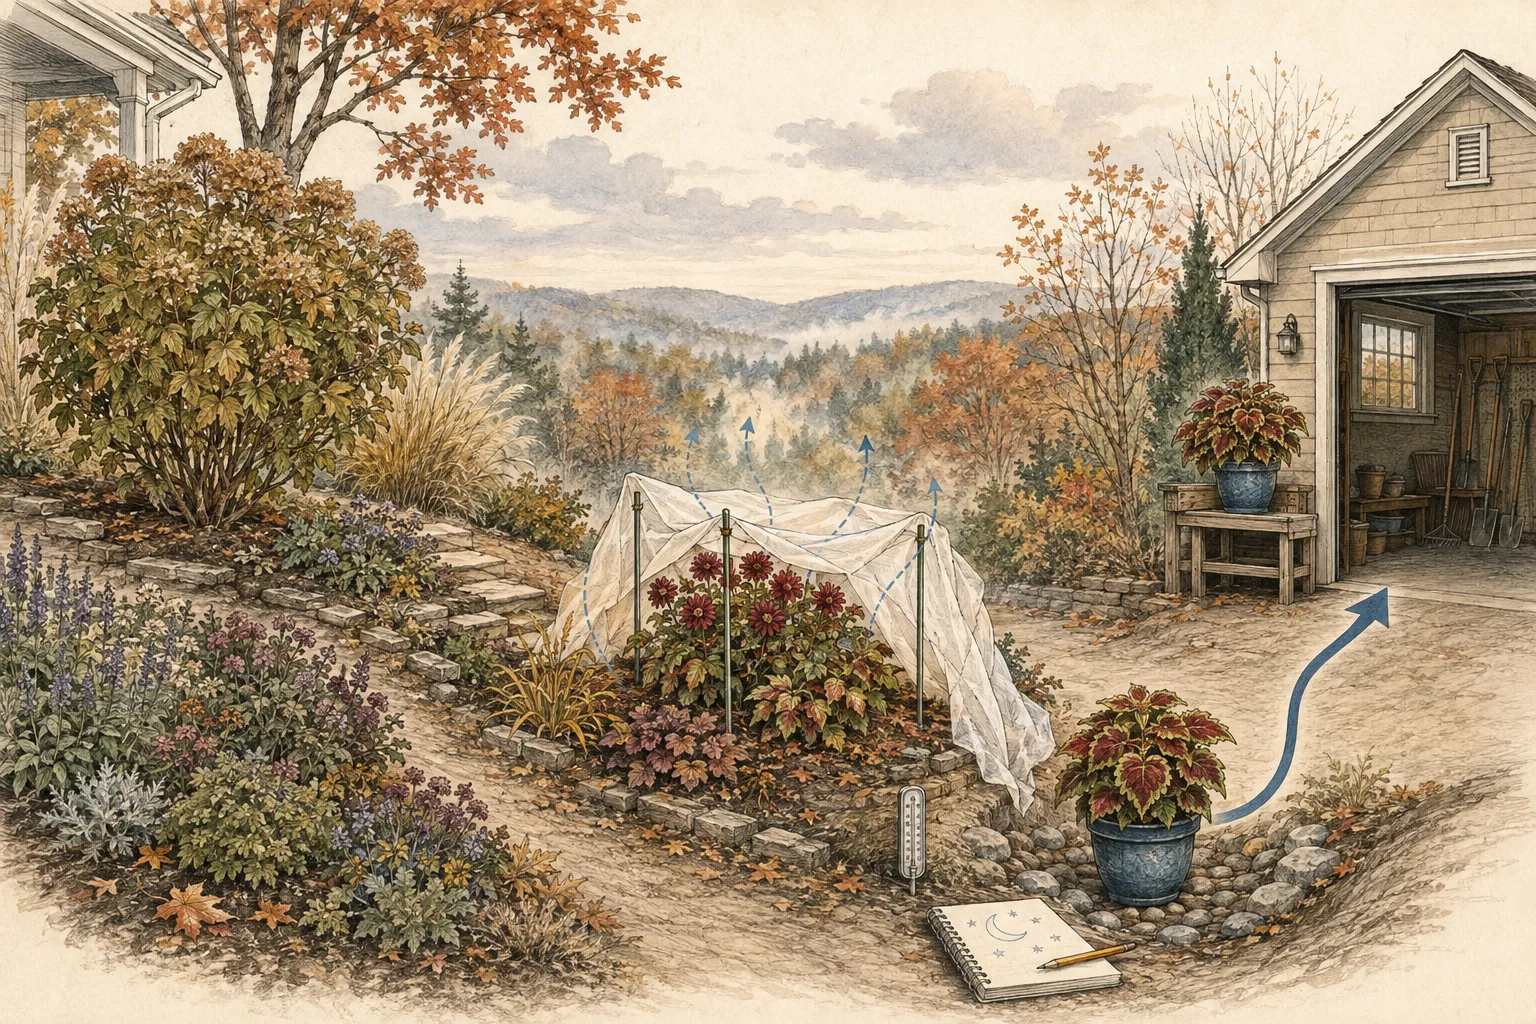
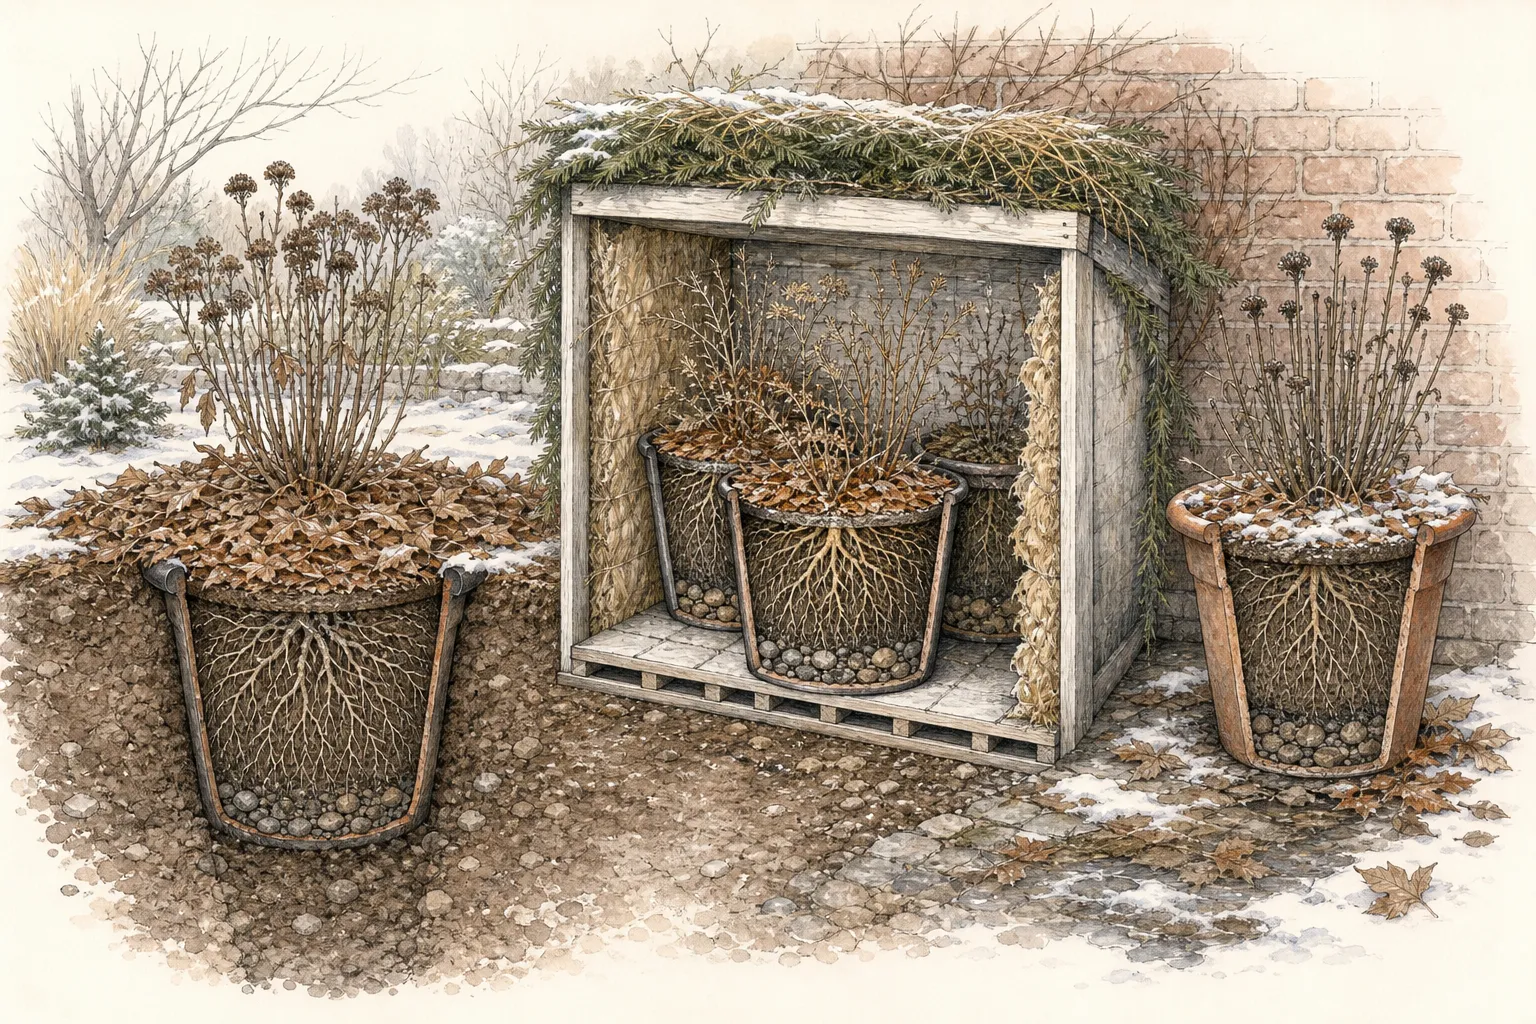
A container can occupy a warm-looking terrace and still expose its roots on every side. Illinois Extension explains that overwintering depends on preventing the soil mass from freezing and maintaining suitable moisture, and that a protected location reduces the risk. A plant's in-ground hardiness is not a guarantee for the same plant in a small pot. Put container position and pot size on the frost map instead of treating the container as a small patch of ground.
Map where pots can go before the warning arrives. A low garden hollow may be the coldest air pocket, while a deck may be windy and more exposed than its height suggests. A garage, shed, cold frame, or sheltered covered area may work only if it matches the plant's light, temperature, and ventilation needs. Illinois Extension emphasizes the protection of the soil mass; moving a pot into a dark, warm room without checking the plant's requirements simply trades one problem for another.
Group portable pots only when they can still be inspected and moved safely. Place them on the ground or a stable tray, keep them off unstable edges, keep drainage open, and do not let a cachepot hold cold water around the root ball. A cart route drawn on the map is part of protection. If the route crosses a narrow path or a step, move the pot while there is light and before the forecast becomes an emergency.
Stage cover, shelter, and access before evening
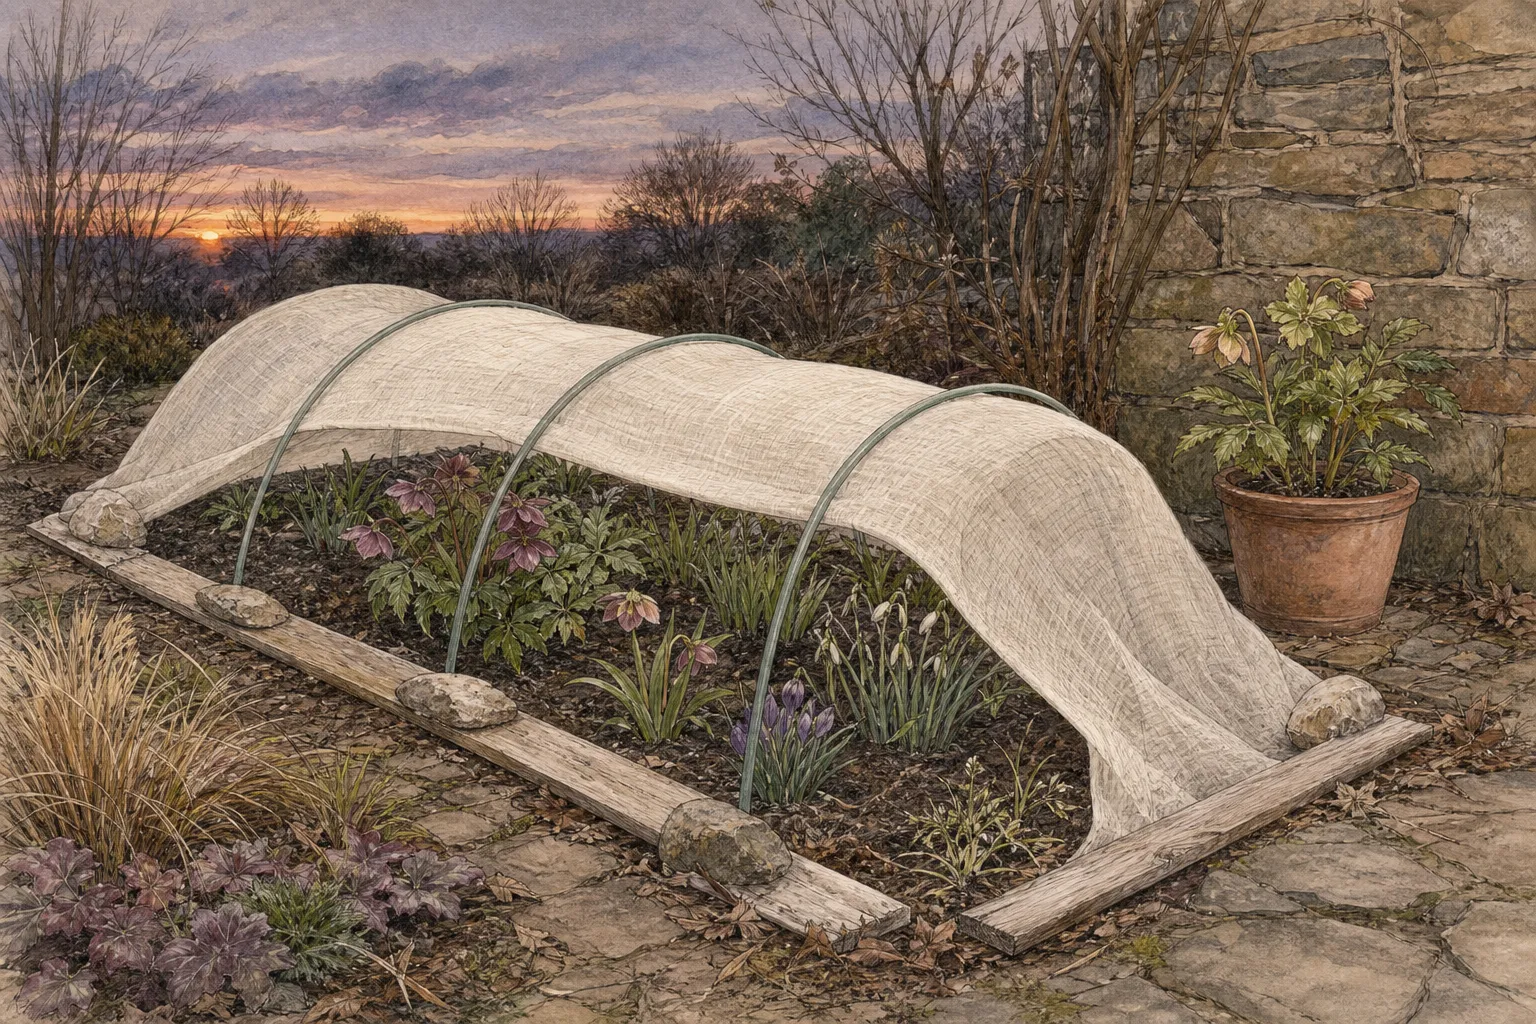
Buy or cut fabric to the map, not to an imagined average plant. A cover must reach the ground around the plant so the protected space can hold warmth, and it must be large enough to avoid pulling against stems. Utah State University Extension describes floating row cover as a frost blanket that can protect individual plants, groups, or rows; its grade determines the amount of insulation, and the fabric still allows air, water, and light through. For an ornamental bed, use material and support appropriate to the plant and local supplier guidance.
Hold the fabric above tender foliage when wind or abrasion is likely. Hoops, a small cage, or stable stakes create air space and keep the cover from crushing flowers and leaves. Utah State guidance reports that different cover grades can raise the air temperature beneath them by about 2–10°F, so preserve that number's scope: it describes the fabric grade and conditions, not a guarantee for every garden. Secure edges with bricks or staples, then check that the cover cannot snag a path or drain.
Stage the response in daylight. Put the correct cover beside the mapped plant, label it if several fabrics look alike, and clear leaves or tools from the route. Move containers before the coldest part of the night. At first light, inspect the local weather and plant condition; remove or vent protection when conditions become warm or humid enough to create a different problem. The map shortens the work because it tells you which plants are first, not because it eliminates judgment.
Read the night without overprotecting the garden
When a frost warning is issued, compare it with the map's three zones. A forecast near freezing with clear skies and light wind may justify covering the lower hollow before the higher terrace. A windy arrival of cold air can behave differently from a calm radiational frost, so do not assume the previous pattern will be exact. The National Weather Service and the University of Minnesota Extension both describe weather conditions and local topography as important parts of frost risk; use the current forecast to reopen the decision.
Do not cover plants simply because they are green. Hardy, established plants may need observation, while a small tender plant or a flowering specimen may justify the labor. A dense, wet cover left on a plant for days is not the same action as a breathable cover used for a forecast night. Keep the edge secure, preserve air space, and follow the material's local instructions for removal and ventilation. Protection works only when its limits are respected.
Do not improvise active irrigation in a small ornamental bed unless a qualified local system and guidance support it. Water, wind, coverage, and equipment failure can change the outcome, and a casual hose left running can create ice, flooding, or a false sense of safety. This map is designed for passive decisions: choose a better position, move the container, cover the plant, or accept the seasonal end of a tender display.
Review the map after the event
Wait before cutting blackened foliage. Utah State University Extension advises pruning frost-damaged growth when no more frost is expected and delaying the cut when the weather remains unsettled. A damaged leaf can look finished while a stem or side bud remains viable. Photograph each plant from the same direction, note whether the damage is on exposed tissue or throughout the canopy, and leave a temporary mark on the map before editing the record from memory.
Compare the damage with the measured pattern. If only the lowest pocket was affected, the map has found a useful priority. If plants on the high ground were damaged too, review wind, forecast accuracy, cover failure, plant condition, and the possibility of a broader freeze. If a sheltered corner stayed warm, record the specific shelter and its limits; a warm wall beside one pot does not make the whole courtyard safe. The goal is a better next decision, not a universal rule.
At the end of the season, keep the map with the plant inventory. Mark which plants were left, covered, moved, or lost, and note the first date that each response became necessary. Next autumn, place the sensors in the same points before buying fabric or moving pots. Over time, a small garden's most valuable frost information is not an average date from elsewhere; it is a short, honest record of where its own air, soil, containers, and plants diverge.
Steps
- Level
- moderate
- Time
- Two evenings for the first map, then about fifteen minutes before a forecast frost
- Tools
- Simple site sketch or printed garden plan, Two or three matching minimum-maximum thermometers, Small stakes and weatherproof labels, Pencil, clipboard, and headlamp, Plant tags or a current ornamental inventory
- Materials
- Breathable frost fabric sized for the tender canopy, Low hoops, stakes, or a cage to hold fabric above foliage, Bricks or landscape staples for securing cover edges, A stable tray or cart for moving container plants, Weatherproof notebook or phone field record
- 1List vulnerable plants and their locations
Record tender, newly planted, flowering, actively growing, or containerized ornamentals before the weather turns cold. Note each plant's hardiness guidance, current growth, pot size, and exact bed or terrace position; leave established hardy plants on the list as control points, and never assume that every green plant needs protection.
- 2Sketch contours and cold-air routes
Draw the high ground, slope, hollow, steps, walls, hedges, dense borders, paved surfaces, and nearby buildings. Add arrows downhill for likely cold-air movement, then mark places where a hedge, forest edge, wall, or level low area could slow or redirect it.
- 3Place matching thermometers safely
Set matching instruments at a higher reference point, a transition point, and the lowest plant-relevant point. Keep each sensor shaded from direct sun and away from a wall, exhaust, lamp, or warm paving. Photograph the positions and use the same placement on every observation night.
- 4Record two or three suitable nights
Choose calm, clear nights with no rain if possible, read the instruments before dawn, and record cloud, wind, soil moisture, nearby cover, and the lowest reading at every point. Repeat before treating one unusual night as a permanent microclimate.
- 5Turn differences into protection zones
Shade the map's repeated low pocket, transition band, and higher reference area. Compare the pattern with the plants' vulnerability and container exposure. Give each plant one response: leave, cover, move, or monitor. Base the decision on repeated site differences and current plant condition, not on the regional forecast alone.
- 6Stage the chosen response before evening
Pre-fit breathable fabric over hoops or a cage, label the correct cover, clear a route for carts, and place a stable landing area for pots. Move containers before the coldest part of the night, secure covers without crushing foliage, and keep plastic from resting directly on leaves.
- 7Review damage and update the map
After a frost, wait for settled weather before pruning damaged growth. Compare symptoms with the map, photograph the same plants, and record whether the low point, a wind-exposed edge, or a warm shelter behaved as expected. Revise the next protection priority from evidence.
Related reading
Sources
- OAX Freeze and Frost Dates. National Weather Service, NOAA. Source record · Accessed 2026-09-03.
- Escaping spring frost in the Upper Midwest. University of Minnesota Extension. Source record · Accessed 2026-09-03.
- Frost Damage. Utah State University Extension. Source record · Accessed 2026-09-03.
- Overwintering Plants in Containers. University of Illinois Extension. Source record · Accessed 2026-09-03.