Grow · lily of the valley pip forcing
Force Lily-of-the-Valley Pips Indoors
Start with prepared lily-of-the-valley pips, pot them densely in a free-draining medium, keep them cool, moist, and bright, and move them to display only after flower growth is underway.
Published Last updated
In this guide
- Start with prepared pips and a forcing goal
- Pack the pot densely in a free-draining medium
- Water through once, then keep the mix evenly moist
- Keep first growth cool, bright, and indirect
- Move to display when the bells are extending
- Read leaf-only pots, weak bloom, and rot correctly
- Finish the forcing cycle without guessing about reuse
- Steps
Start with prepared pips and a forcing goal
Lily-of-the-valley forcing begins by separating a pip from material that is ready to flower indoors. Clemson and Georgia define a pip as a bud or shoot on a rhizome, but the word itself does not confirm that cold conditioning is complete. Buy pips explicitly sold as prepared or pre-chilled for forcing and keep the supplier's treatment and timing directions. Wisconsin lists a 14- to 15-week cold period for Convallaria; unprepared garden divisions need that conditioning before the warm forcing phase.
For the most reliable indoor result, Virginia Cooperative Extension recommends buying commercially prepared lily-of-the-valley pips from a florist or garden center and planting as many as possible in one pot to secure an abundant display. The finished container is meant to read as a dense winter bouquet. One or two sound pips in a roomy container may flower, but they will not create the same massed effect. Density changes the display's fullness while leaving each pip's flowering capacity unchanged.
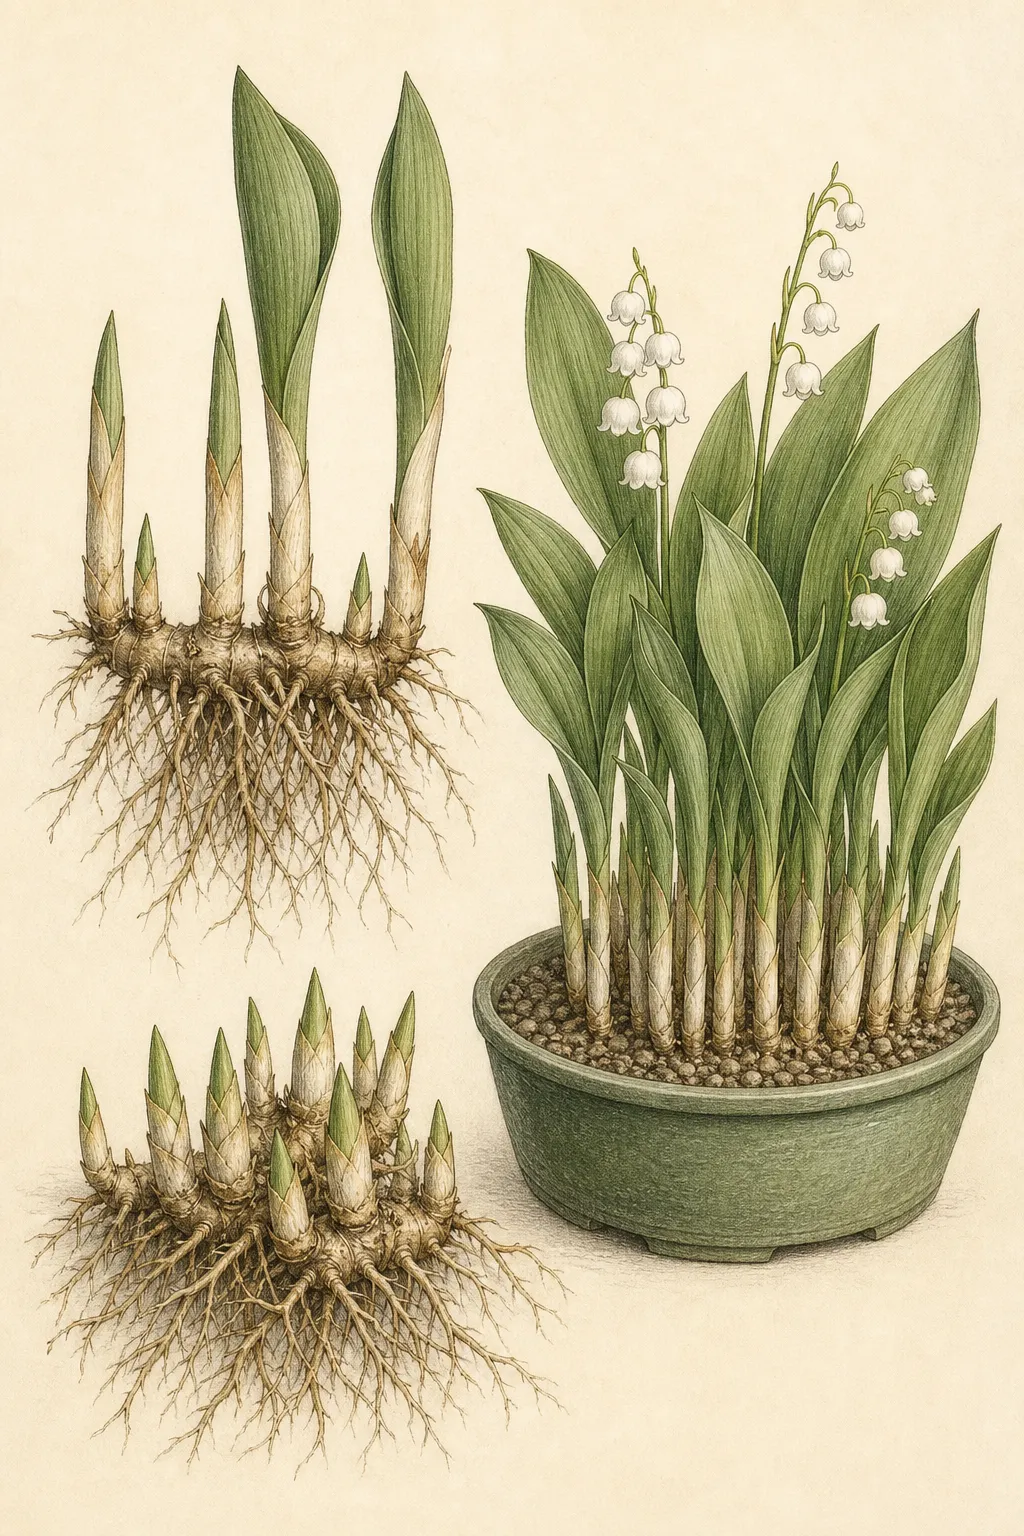
Use garden divisions only when you can supply the missing preparation. Georgia notes that lily-of-the-valley is best divided in fall after the foliage has fully developed and begun to yellow. That identifies an appropriate division stage, but it does not replace the cold requirement or turn every bud into forcing-grade material. For a dependable holiday or midwinter pot, prepared pips deserve preference. An experiment with a garden clump needs a documented cold phase and room for uneven results.
Set the forcing goal and schedule before potting. Iowa State gives a general two- to four-week bloom window after properly chilled spring bulbs leave cold treatment, while cultivar and supplier preparation can shift it. Unprepared Convallaria adds its 14- to 15-week cold period first. A brief fragrant display, gift plant, or pot intended for later outdoor recovery also calls for different density, finishing position, and aftercare.
Pack the pot densely in a free-draining medium
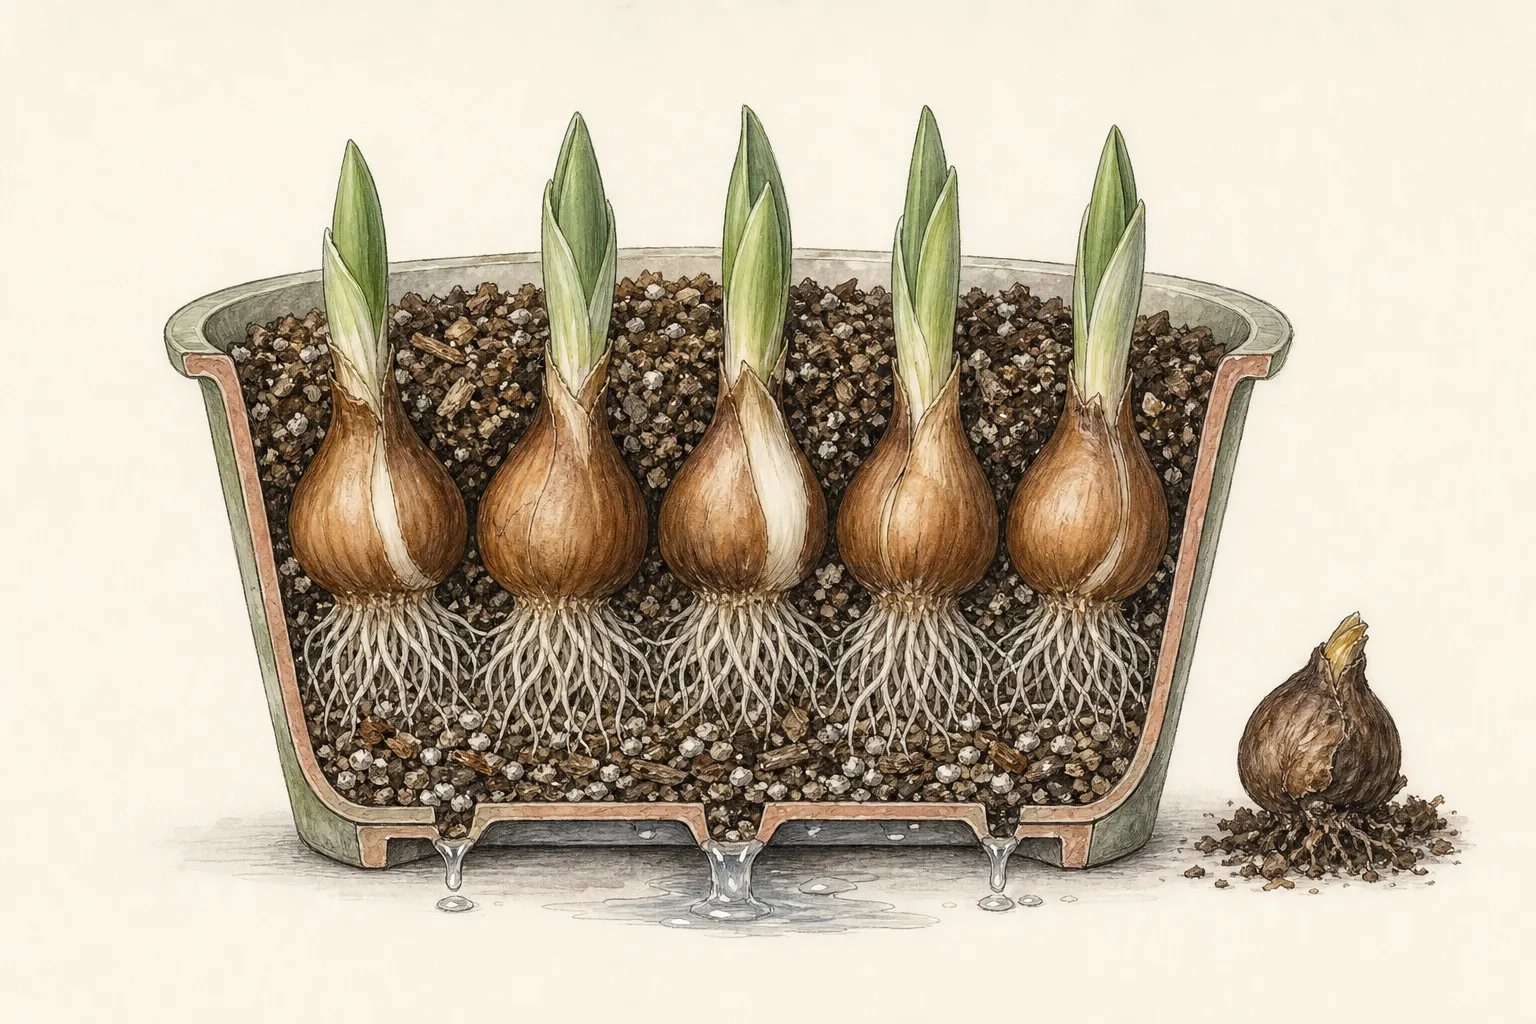
Clemson specifies a potting medium with good drainage. That requirement protects the forcing pot from a common winter mistake: treating the pips as if they want a sealed wet bowl simply because bloom is desired quickly. Good drainage matters from the first watering onward because the roots and rhizomes need moisture without stagnant water at the bud base.
Choose a broad pot that gathers many pips into one shallow display. Virginia's recommendation to plant as many as possible in a pot is the forcing clue. A dense planting creates the visual abundance associated with lily-of-the-valley indoors and makes the container easier to manage as one moisture system, with little empty rim drying around isolated pips.
Follow the prepared-pip supplier's indoor planting depth. Seat the roots and rhizome firmly enough to make contact with the medium without crushing the bud, and keep the growing point from disappearing beneath a deep wet layer. Georgia's one-inch Convallaria value belongs to its outdoor planting table, so it is not a universal forcing-pot measurement. Close spacing and open drainage matter more than a perfectly level decorative surface.
Label the pot immediately. If several forcing containers or other winter bulbs are in the same area, lily-of-the-valley can be forgotten until growth is already underway. A label with cultivar or source, preparation status, potting date, and intended display window turns the forcing project into a managed sequence.
Water through once, then keep the mix evenly moist
After potting, water thoroughly enough that the medium settles around the rhizomes and excess can drain away. This first watering is structural. It removes large air gaps, confirms that drainage is open, and creates the baseline for all later moisture checks. A newly potted mass of pips should not sit half dry because the gardener feared winter rot before the roots had even been connected to the medium.
From there, Clemson gives the central maintenance rule: keep the pips indoors in a moist, cool environment and water as needed when the soil begins to dry. Keep the root zone from cycling between saturation and complete dryness. Continuous waterlogging does not speed bloom. Even moisture comes from repeated checks and complete drainage, not repeated flooding.
The dense planting makes this easier to misread from above. A closely packed pot can look busy and humid on the surface while the root zone is already drying, or it can stay cool and damp below while the top begins to crust lightly. Use pot weight and the feel of the medium just below the surface where accessible. One small daily sip is less useful than a real watering when the pot needs it and complete drainage afterward.
Remove decorative sleeves or empty shallow cachepots after watering so runoff cannot collect beneath the rhizomes. The first watering exposes storage flaws before bloom shoots appear. Water management is one of the few forcing variables fully under the gardener's control, and complete drainage keeps it predictable.
Keep first growth cool, bright, and indirect
Clemson's forcing note places the pips indoors in a cool environment with indirect sunlight, and that instruction is central to keeping the growth compact and usable. Start the pot where light is clear and bright but not harsh, with a cool temperature that supports steady growth. Let the rhizomes establish the bloom sequence before the pot becomes room decor.
This is one place where lily-of-the-valley differs helpfully from some other forced bulbs. Virginia notes that these pips tolerate more heat than other commonly forced bulbs. That should not be misread as a license to park the pot beside a radiator from day one. It means you have slightly more flexibility later at display time. Early development still benefits from the cooler, calmer setup Clemson describes.
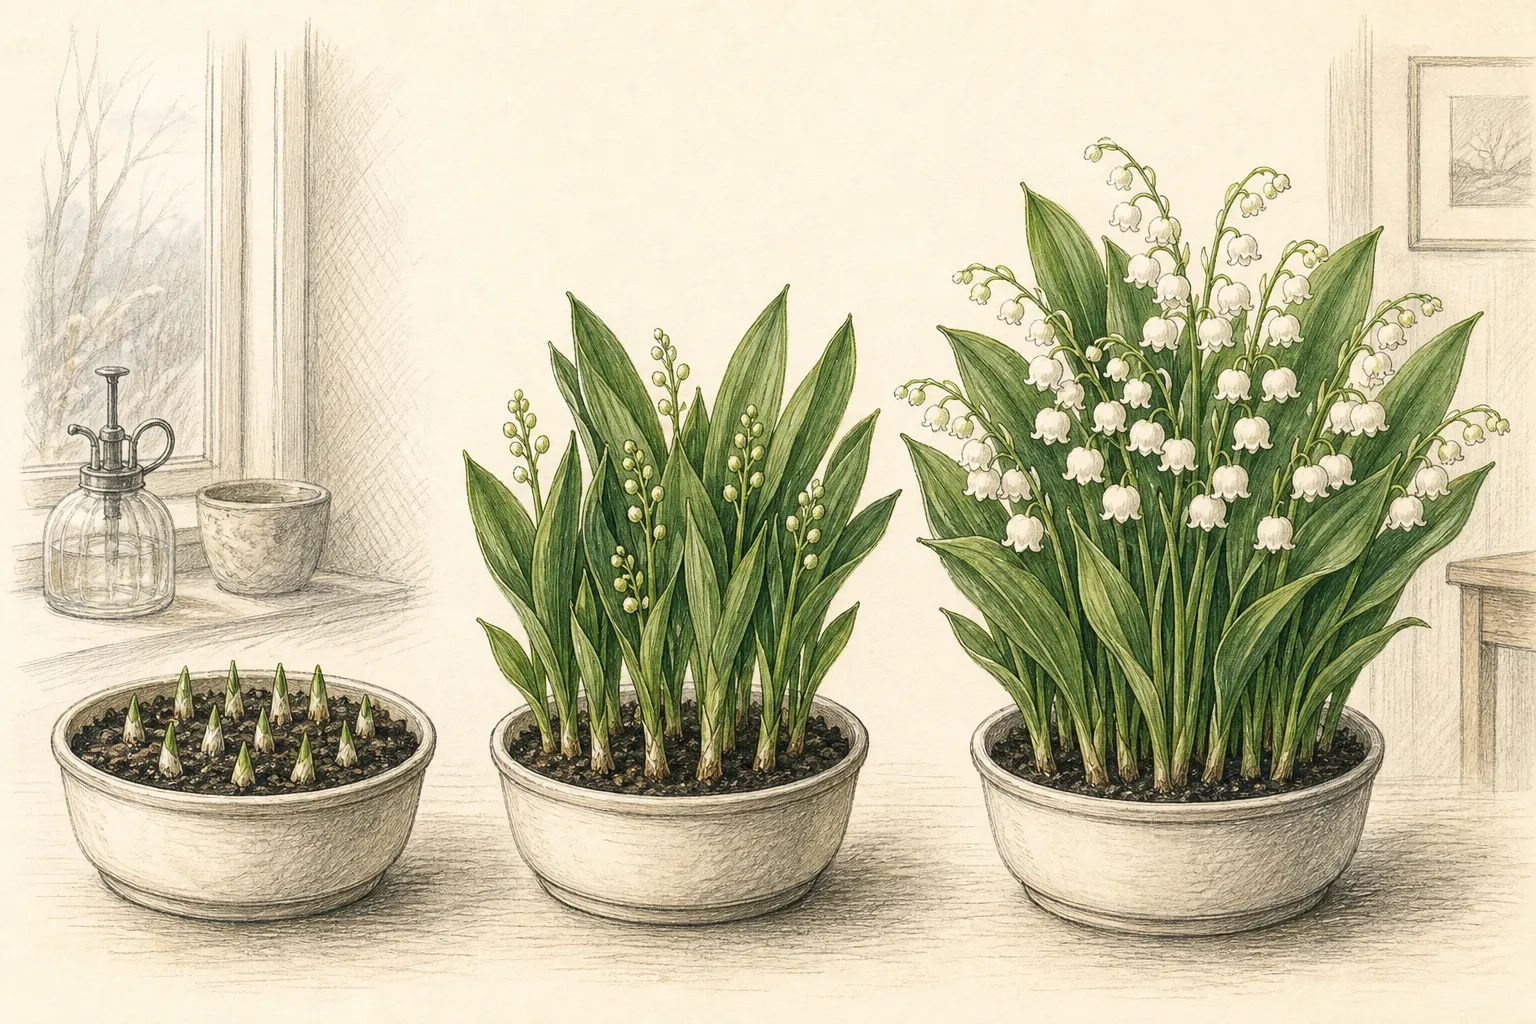
Indirect light also helps you maintain moisture consistency. In a harsh sun pocket, a dense shallow pot can swing from cool and damp to unexpectedly dry at the rim in a single bright winter day. In a dim room, you may get weak stretched foliage before the flowers can present properly. A bright indirect place is the balance point where the pips can move forward without being hurried or starved.
Keep the station stable enough that you can interpret the plant. If the pot rotates between a bright cold porch, a dim kitchen, and a warm table every day, the forcing sequence becomes impossible to read. Good forcing is progressive, not theatrical. One measured environment is worth more than several attractive but conflicting ones.
Move to display when the bells are extending
The container can finish in the living space without beginning there. Let active growth and flower development become visible before moving it from the controlled forcing station. A cooler position generally slows development and preserves the display longer; the move is a presentation choice after growth is established, not the start of forcing.
Use the Virginia heat-tolerance note carefully here. Lily-of-the-valley can tolerate indoor warmth better than many forced bulbs, which makes it a friendly gift or tabletop plant. Even so, direct heater blasts, hot afternoon glass, and complete dryness will still shorten the display. Bring it in when the bells are forming and the pot already looks committed to bloom, not when you are trying to force a weak barely rooted group to perform.
Think about fragrance as part of display placement. A dense lily-of-the-valley pot can be intensely scented in a small room. That is often the attraction, but it also means the best display spot may be one where the fragrance can be enjoyed without becoming oppressive. An entry table, sideboard, or cool bedroom window may serve better than a warm dining centerpiece surrounded by food and candles.
Check drainage again after the move. A pot that was easy to water over a sink becomes easier to neglect or overfill once it is on polished furniture. Display is part of the forcing system only when the plant can still be watered and drained properly there.
Read leaf-only pots, weak bloom, and rot correctly
A pot that grows leaves but offers little bloom is telling you something about the starting material, not necessarily about one missed watering. Prepared pips are selected because they are meant to flower. Garden divisions or weak sections may simply not have the same forcing strength. This is why Virginia's prepared-pip advice is so important. The forcing result is embedded in the material choice before the pot ever comes indoors.
Sparse planting creates a sparse-looking display, but it cannot explain why an individual pip produced leaves without flowers. For leaf-only growth, first check whether the material was sold for forcing and whether its cold requirement was completed. Clemson's cool indirect-light instruction and the drainage requirement still stand, yet neither can add flower buds that were absent from the starting material. More pips improve abundance; an unprepared pip remains unprepared.
Rot is different from weak performance. Soft rhizomes, sour smell, collapsing shoots, or a pot that never really lightens between waterings point to moisture failure, not insufficient forcing vigor. In that case the gardener should stop trying to nurse the pot with more water or more warmth. Correct drainage, isolate a failing pot from other indoor plants if necessary, and accept that a badly rotted forcing batch is not rescued by optimism.
Leave the pot intact during active display. Destructive inspection serves curiosity more often than it helps the plant. Observe above-ground cues, keep notes, and let the next forcing attempt benefit from what you learned without sacrificing the current one.
Finish the forcing cycle without guessing about reuse
After flowering, decide whether the pot was a one-season forcing display or a plant source you intend to re-establish outdoors. When indoor bloom was the whole purpose, discarding depleted forcing material may be the cleanest finish. An ephemeral winter display is a valid use; success does not require converting every pot into a long-term container project.
If you want to keep the material, shift the question from forcing to garden culture. Georgia's guide describes lily-of-the-valley as a rhizomatous ground cover for shady, moist locations. Allow the pot to complete its cycle, then move it toward suitable outdoor planting conditions. Indefinite indoor holding leaves a tired plant in the wrong environment.
Keep the aftercare proportional. Water enough to prevent collapse while the pot finishes. The current forcing used stored reserves; rebuilding them requires a separate growing period under garden conditions. Another indoor forcing in the same season interrupts that recovery and weakens both rooting and bloom.
Record what you used, how densely the pot was planted, how long it took to move from potting to first bloom, and whether the display length justified the method. That small forcing record is more useful next winter than any memory of how lovely the bells looked on one cold morning.
Steps
- Level
- easy
- Time
- One potting session, then about two to four weeks to bloom after completed cold conditioning; add 14 to 15 weeks when pips are not confirmed pre-chilled
- Tools
- Shallow pot with drainage, Watering can, Plant label
- Materials
- Prepared lily-of-the-valley pips, Free-draining potting medium, Cool bright indoor forcing spot
- 1Choose prepared forcing pips
Choose pips explicitly sold as prepared or pre-chilled for forcing and keep the supplier's schedule. If the treatment is not confirmed, plan a 14- to 15-week cold period before warm forcing. Garden divisions need sound buds and the same cold prerequisite, and their bloom may be less uniform. During home chilling, label the start date, keep the medium moist but not wet, and store the pot away from ripening fruit because ethylene can impair flower development.
- 2Use a broad draining pot
Select a container that allows many pips to be planted closely together and that drains freely after watering. The forcing effect depends on density and on a medium that stays evenly moist without becoming stagnant at the bud base.
- 3Seat the pips firmly
Set the pips at the depth specified for the prepared material, with roots and rhizomes in firm contact and buds clear of a deep wet layer. Keep the one-inch Georgia value with outdoor planting only. Label source, preparation status, potting date, and intended display window.
- 4Water through once
Water thoroughly after potting so the medium settles around the rhizomes, then let the excess drain. Remove trapped runoff and use the pot's drained weight and subsurface feel as the moisture baseline for later checks.
- 5Begin in cool indirect light
Keep the pot in a cool bright place with indirect sunlight while growth begins. Maintain even moisture by watering when the soil starts to dry and draining completely. Extra warmth and continuous saturation weaken the forcing environment.
- 6Move to display after bloom growth starts
Once the shoots and flower development are clearly underway, shift the pot to its display position. Enjoy the fragrance in a cool room and keep the shallow pot clear of runoff and heater outlets.
- 7Close the cycle deliberately
After bloom, either treat the pot as a finished forcing display or move the material toward outdoor shade-and-moisture culture. Keep notes on density, timing, bloom quality, and scent strength so the next winter pot starts from real experience.
Related reading
Sources
- This Month in Your Garden – December 2024. Clemson Home & Garden Information Center. Source record · Accessed 2026-08-30.
- Flowering Bulbs for Georgia Gardens. University of Georgia Cooperative Extension. Source record · Accessed 2026-08-30.
- November Tips: Perennials, Annuals and Bulbs. Virginia Cooperative Extension. Source record · Accessed 2026-08-30.
- Forcing Bulbs. University of Wisconsin–Madison Extension. Source record · Accessed 2026-08-30.
- How to Force Spring-Flowering Bulbs Indoors. Iowa State University Extension and Outreach. Source record · Accessed 2026-08-30.
- Lily of the Valley Poisoning. MedlinePlus, U.S. National Library of Medicine. Source record · Accessed 2026-08-30.
- Toxic and Non-toxic Plants: Lily of the Valley. ASPCA Animal Poison Control Center. Source record · Accessed 2026-08-30.