Grow · ornamental seed cold moist stratification
Cold-Stratify Ornamental Seeds in a Refrigerator
Use species-specific evidence, clean moist medium, measured refrigerator temperature, complete labels, regular inspection, and a planned sowing stage to cold-stratify ornamental seed.
Published Last updated
In this guide
- Verify the exact dormancy treatment
- Keep treatment order separate from time in the refrigerator
- Check seed source and condition
- Prepare moisture without saturation
- Measure the refrigerator zone
- Inspect through the treatment
- Move into the documented sowing stage
- Evaluate germination and refine the protocol
- Steps
Verify the exact dormancy treatment
Use refrigerator stratification only after a species-level source calls for a cold, moist treatment. Begin with the botanical name and, when available, the population, cultivar, collection location, harvest year, and supplier lot. A common name is not enough because related ornamentals can require different temperatures, durations, or treatment sequences. If the packet offers no dormancy information, find a university, botanic-garden, government nursery, or seed-bank protocol for that exact taxon before wetting the seed. Cold alone is not interchangeable with cold-moist stratification. Some seed germinates without pretreatment; some needs scarification, a warm-moist phase before chilling, several alternating phases, or outdoor temperature fluctuation. Iowa State University Extension describes both cold treatment and combined hard-coat plus embryo-dormancy treatments. A U.S. Forest Service research review also distinguishes long stratification, stratification re-dry, and multiple warm-cold cycles used for particular tree and shrub seeds.
Published refrigerator ranges illustrate why the taxon matters. Illinois Extension gives 33–40°F (about 1–4°C) and a typical one-to-three-month span for its general home method. Iowa State gives 32–40°F (0–4°C) and three to four months for most species in its perennial guidance. New Hampshire's Extension fact sheet describes a wider 34–50°F cool-treatment category lasting one to six months or more. These ranges are equipment checks within their source scopes, not permission to average a universal treatment.
Resolve conflicts before starting. Prefer a protocol tied to the exact species and seed origin over a general article, then retain the supplier direction as a lot-specific qualifier. If one authority calls for warm-then-cold and another calls for cold only, the methods are not close enough to average. Keep the seed dry under its documented storage conditions while you ask the supplier, a native-plant nursery, seed bank, or local Extension service which population the directions cover.
Keep treatment order separate from time in the refrigerator
Proceed only after the identified seed lot has a suitable treatment sequence. A requirement for a warm phase or a hard-coat treatment cannot be replaced by adding refrigerator weeks. During the prescribed cold phase, inspect moisture and germination separately. A seed beginning to germinate needs the protocol's next step, not automatic completion of every planned storage day.
Check seed source and condition
Read the entire packet before opening it. Record the accepted botanical name, lot or collection number, harvest or packed-for year, source, stated germination percentage, prior treatment, and any coating or hazard statement. Keep the original packet with the record. Seed collected from a garden also needs a defensible identity and collection date; a label copied from a nearby plant does not prove which parent supplied an open-pollinated seed.
Inspect the dry lot under good light. Separate obvious plant debris and discard seed that is crushed, leaking, extensively moldy, or occupied by insects. Do not use floating as a universal viability test, because seed density and buoyancy differ among taxa. A small germination or cut test can answer a viability question only when an appropriate protocol exists, and a failed untreated test does not prove dead seed when dormancy has not been relieved.
Decide how much of the lot to risk. For an abundant commercial packet with a well-supported method, one labeled treatment batch may be reasonable. Divide scarce, old, wild-collected, or experimentally treated seed into smaller lots so one moisture or temperature error does not consume everything. Each division needs its own count and label; otherwise a successful result cannot be assigned to a treatment.
Confirm that the eventual seedlings have a legal and suitable destination before beginning. Protected collections, imported seed, patented material, and locally restricted plants can carry rules beyond germination. The refrigerator does not neutralize invasive potential. If identity or permission remains uncertain, hold the dry lot securely and resolve that question before creating living plants that cannot responsibly be planted or shared.
Prepare moisture without saturation
Use the medium named by the selected protocol. Iowa State describes a moist 50:50 sand-and-peat mixture, while Illinois lists a moistened paper towel, sand, peat, or vermiculite. The New Hampshire fact sheet describes moist sand or peat and damp paper towels for dormant seed. Medium choice affects visibility, aeration, and later root handling, so it belongs in the treatment record rather than being swapped midway without notation. Moisten the medium evenly, then remove free water. A paper towel should be fully damp but should not release a stream when lifted by a corner. Granular medium should hold uniform moisture without leaving liquid in the bottom of the bag. That same Extension source explains the underlying constraint: germinating seed needs water and oxygen, while water-saturated media can inhibit respiration. A shiny pool, dripping bag, or seed packed in a paste is a setup failure.
Spread seeds in one visible layer or distribute them loosely through the measured medium. Dense clumps hide mold and make emerging radicles difficult to remove. Match the container to the source method: Illinois uses a closed container or sealed bag, Iowa notes that some lidded containers need air holes, and New Hampshire describes damp towels wrapped in plastic. Copy one supported configuration and leave incompatible details out.
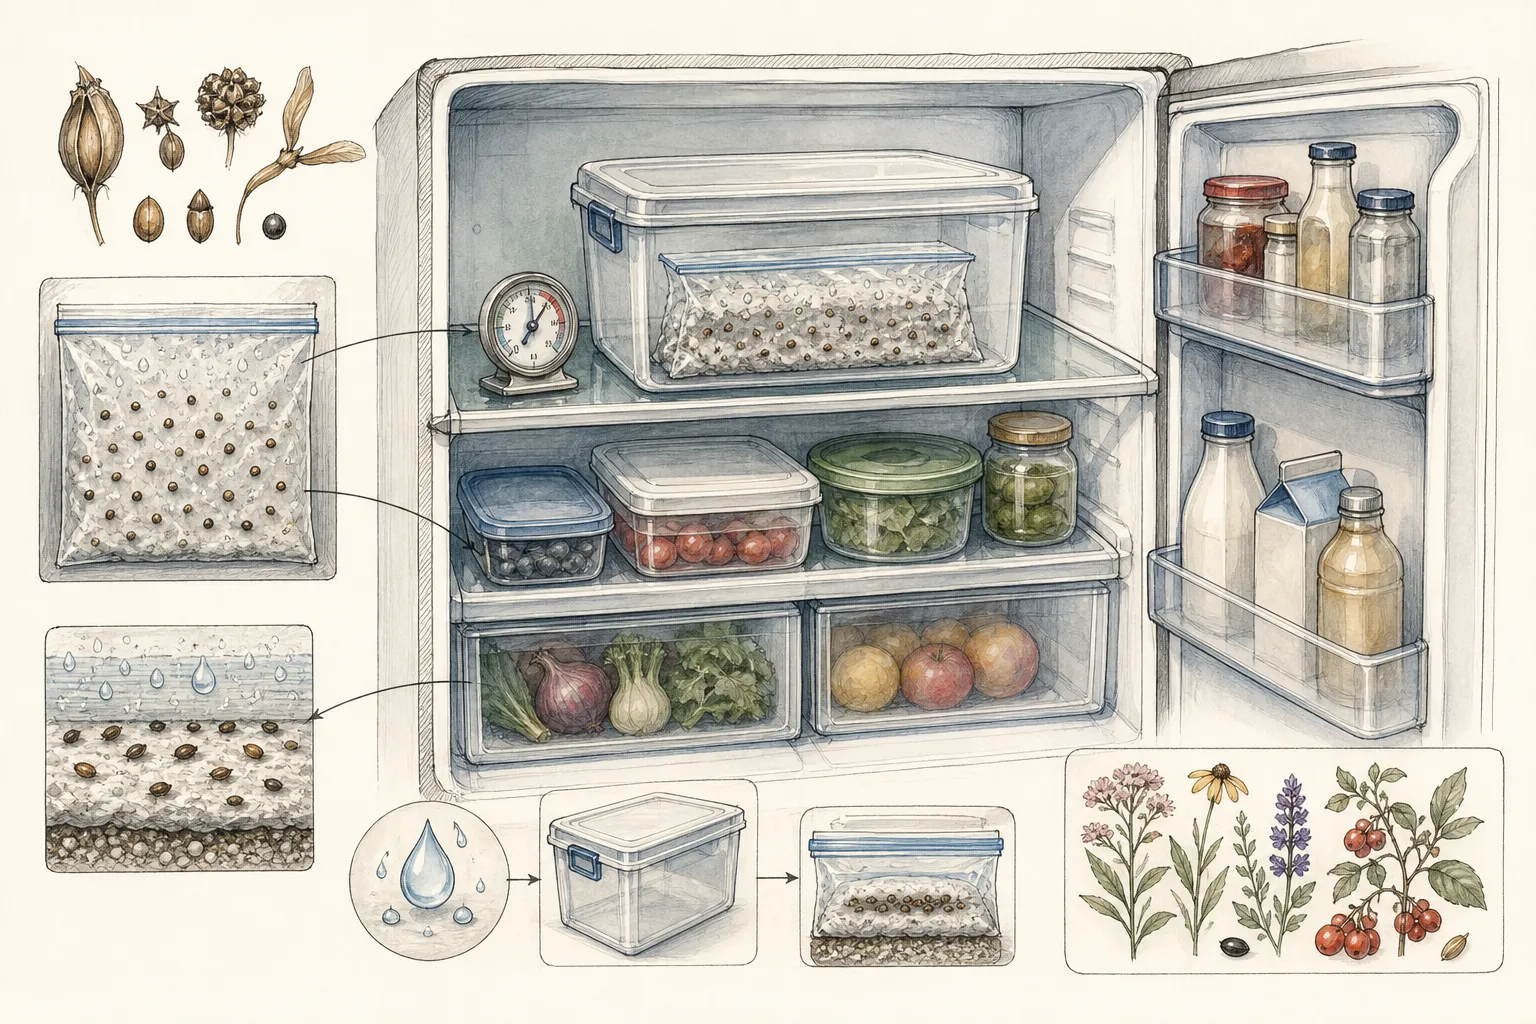
Write the taxon, lot, treatment sequence, start date, target temperature, earliest completion date, and next inspection on a moisture-resistant label. Put one label inside when its material will remain legible and repeat the same information outside. Enclose the primary container in a clean, rigid secondary box so a leak, torn bag, or displaced label remains contained and unmistakable in a household refrigerator.
Measure the refrigerator zone
Measure the intended shelf before adding seed. Place a refrigerator thermometer beside a container of similar size and read it at several times over at least twenty-four hours. A shelf that repeatedly leaves the documented range is unsuitable even if the appliance dial carries the expected number. Door shelves and positions touching a cold back wall often experience larger changes than a central shelf.
When the selected protocol specifies the Illinois range of 33–40°F, choose a shelf that stays above freezing and below the stated maximum. Do not treat 32°F on another general source as a reason to let an unverified lot freeze. Ice formation is a separate treatment variable outside this refrigerator method unless the exact protocol requires it. Move the test container and repeat the temperature check if readings approach either limit.
Schedule from the measured start, not from the day the packet was opened. Count the documented number of days or weeks, mark the earliest removal date, and prepare sowing space before that date. Record a power outage, an accidental freeze, a warm relocation, or a dried medium as a deviation. Extending the calendar cannot prove that a severe deviation was harmless.
Keep the secondary box visible and reachable without moving food over an open seed container. A dedicated propagation refrigerator is preferable for numerous lots. In a shared appliance, use sealed, clearly identified primary containers inside the secondary box and handle them on a separate washable work surface. If the packet carries a treatment or hazard warning that conflicts with household storage, do not place that lot in a food refrigerator.
Inspect through the treatment
Set a regular inspection interval that lets the bag remain closed most of the time; a weekly check is a practical household schedule, not a biological requirement. Look through the container first for condensation pattern, standing water, dry edges, mold, swelling, split coats, and emerging roots. Compare the observation with the previous dated note before opening anything. Drying calls for a small measured correction, not a complete soaking. Add only enough clean water to restore the original damp condition, then note the amount and likely cause. Free water calls for draining and a review of medium quantity, container position, and temperature. Repeated wet-dry cycles mean the container system is unstable and should be corrected before the remaining duration is trusted.
A small isolated patch of mold and widespread seed collapse are different findings. Remove clearly decayed material with a clean tool when it can be separated, but do not improvise bleach, fungicide, peroxide, or hot-water treatments. Those interventions can alter germination and need their own species-specific protocol. Widespread odor, slime, or recurring mold indicates that the batch is too wet, contaminated, or already deteriorating; isolate it and seek taxon-specific advice before exposing other lots.
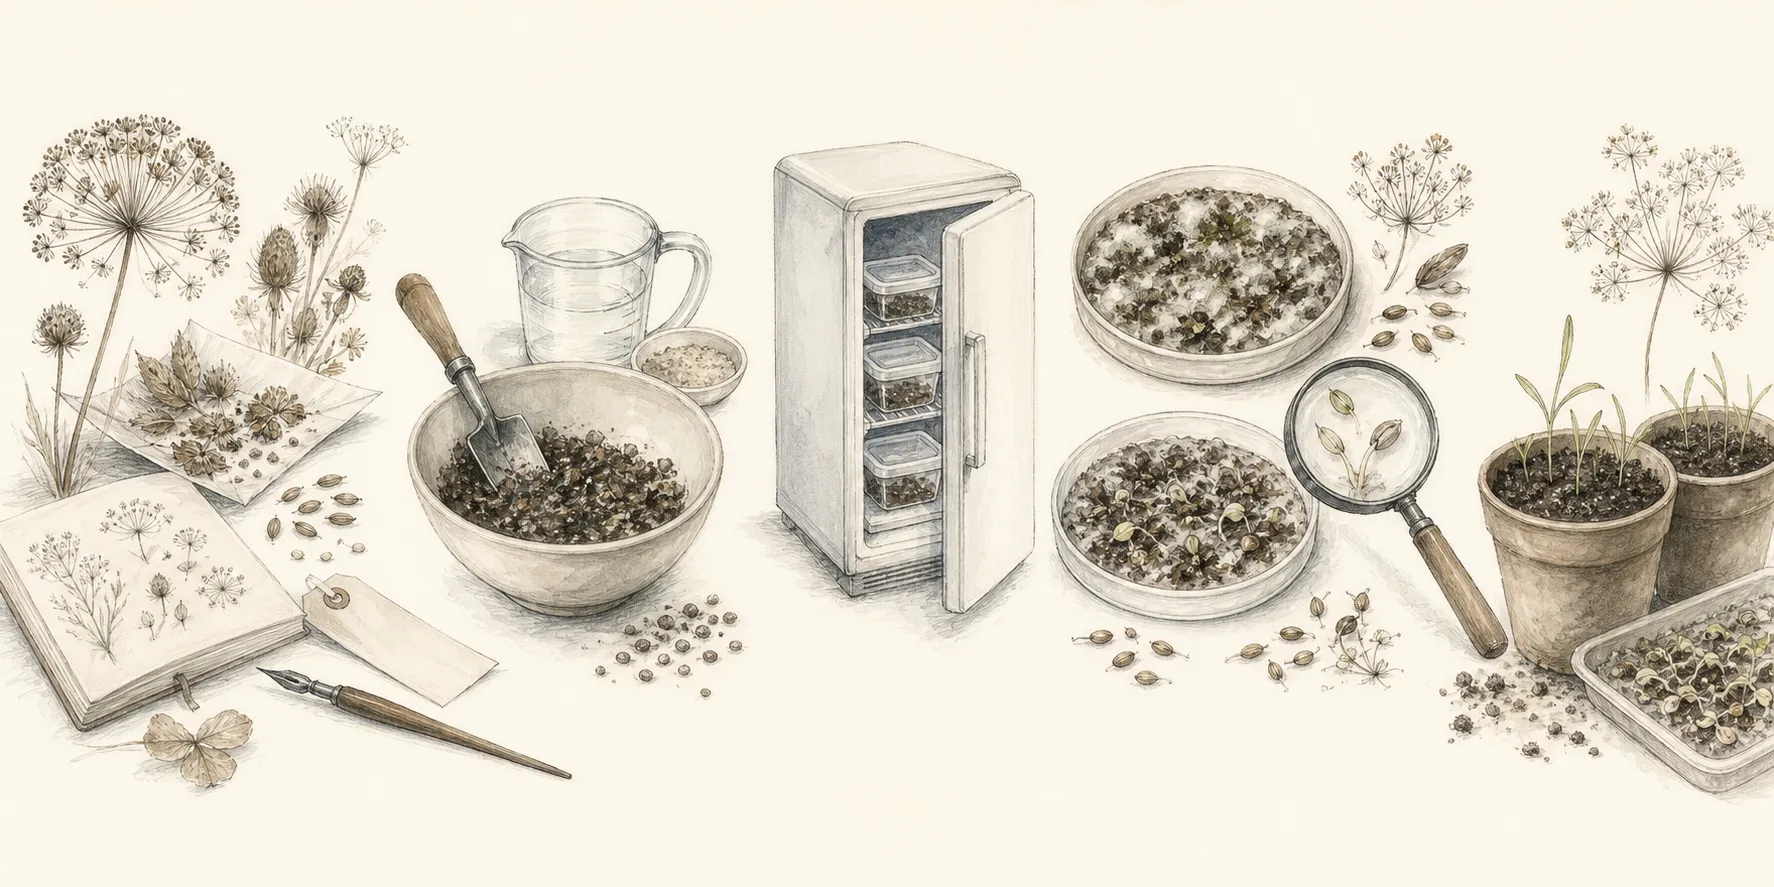
Check for germination at every inspection. Illinois Extension advises planting sprouted seeds. Move each germinated seed to its prepared pot as soon as it can be handled safely, before the growing root becomes entangled in paper or neighboring seed. Record early removals without resetting the treatment clock for unsprouted seeds still within their documented window.
Move into the documented sowing stage
Prepare the exit stage before the cold window closes. Set out clean pots or flats, drainage trays, fresh sowing mix, labels, and the light and temperature conditions required after stratification. A completed cold period followed by two days in an unopened warming bag can undo careful handling by allowing roots to grow through the towel or by accelerating decay. Separate seed from the medium gently. Tease apart granular material over a tray and unfold paper while keeping tension off the root. If a radicle has entered a paper fiber, cut a small piece around it and sow the attached fragment with the root undisturbed. Keep treated lots separate from untreated controls and write both cold-completion and sowing dates on each pot.
Use the species-specific sowing depth and light requirement. The New Hampshire source notes that light promotes some seeds and inhibits others, while emerged seedlings require bright light. Surface-sown seed should make the prescribed contact with the medium without being buried during watering. Covered seed needs the documented depth, not a generic multiple borrowed from a different taxon.
Shift from sealed-storage moisture to aerated germination conditions. Keep the sowing medium evenly moist, provide drainage and air movement, and remove a humidity cover when the protocol or emergence stage requires it. Saturated mix can limit oxygen and favor damping-off; a dry surface can kill a newly emerged radicle. Let the potting mix and seedling stage determine water as the refrigerator bag's closed humidity ends.
Evaluate germination and refine the protocol
Count emergence by lot and treatment from the first seedling through the protocol's stated germination window. Record normal seedlings, abnormal seedlings, decayed seeds, and seed that remains firm but ungerminated. Germination percentage is the number of normal seedlings divided by the number sown, multiplied by 100. Report the denominator; eight seedlings from ten seeds carries different weight from eight seedlings out of eighty.
Poor emergence does not identify one cause. A seed can remain dormant because the cold period was wrong, yet the same result can follow low viability, excessive water, insufficient oxygen, incorrect sowing depth, unsuitable light, or the wrong post-cold temperature. Use the temperature log, moisture observations, mold pattern, and any comparison batch to narrow the explanation. Do not add another cold cycle simply because the pot is quiet.
A second warm or cold phase belongs only to a protocol that calls for one. Some taxa germinate over a long interval or after alternating seasons, so intact seed may deserve continued care. Others should be evaluated after a defined window. Keep pots labeled and undisturbed while following the selected source; repeatedly excavating seed destroys the very evidence needed to judge viability.
Move healthy seedlings into the next stage before roots crowd. Supply strong light, thin or pot on at the taxon-appropriate stage, and harden plants before outdoor planting when indoor conditions differ sharply from the garden. File the final temperature range, actual duration, moisture corrections, first emergence date, and percentage with the original lot. That record can improve the next attempt without turning one household batch into a universal recipe for the species.
Steps
- Level
- moderate
- Time
- 30 minutes to prepare, plus periodic checks over the species-specific cold period
- Tools
- Clean bowl and spoon, Refrigerator thermometer, Waterproof labels, Clean sealed bag or container, Secondary storage box
- Materials
- Correctly identified ornamental seed, Clean stratification medium specified by the protocol, Clean water, Prepared sowing mix and pots for the exit stage
- 1Verify the protocol
Match the botanical name and seed origin to a direct protocol. Write its treatment sequence, target temperature, duration, moisture state, container method, and post-cold sowing conditions. Stop if sources disagree about cold-only versus warm-then-cold treatment; resolve the seed population and method before adding water.
- 2Inspect and divide seed
Record the packet, lot, year, count, prior storage, and any coating statement. Remove crushed, leaking, extensively moldy, or insect-damaged seed. Split a scarce or uncertain lot into labeled batches, reserving untreated seed only when its storage and later comparison are appropriate.
- 3Moisten clean medium
Use the paper, sand mixture, vermiculite, or other medium named by the protocol. Wet it uniformly, drain away free water, and spread seed so every piece can be inspected. A dripping towel, pool in the bag, or dense paste signals excess water and inadequate aeration.
- 4Label twice
Place a moisture-resistant label with taxon, lot, method, start date, target range, earliest finish, and next check inside when legibility permits. Repeat it outside and put the primary container in a clearly identified rigid secondary box.
- 5Place in a measured zone
Verify the shelf with a thermometer for at least twenty-four hours. Place the box only where readings remain inside the species protocol and above freezing unless freezing is explicitly required. Record the measured start and prepare a log for outages, moves, and temperature excursions.
- 6Inspect on schedule
At each planned check, look through the container before opening. Note dry edges, free water, mold, odor, swelling, split coats, and radicles. Restore only the original damp state, isolate recurring decay, and keep clean tools and labels with the correct lot.
- 7Sow transitions promptly
Prepare pots, mix, light, and temperature before the cold window ends. Transfer any germinated seed immediately without pulling its radicle, and sow completed unsprouted seed at the taxon's documented depth. Mark treatment completion and sowing dates on every pot.
- 8Audit the result
Count normal seedlings against the number sown through the documented emergence window. Compare the outcome with temperature and moisture deviations before changing the treatment. Continue a second cycle only when the protocol requires it, and carry the lot identity into thinning, potting on, hardening, and planting.
Related reading
Sources
- How to Grow Perennials from Seed. Iowa State University Extension and Outreach. Source record · Accessed 2026-08-30.
- Starting Plants From Seed [fact sheet]. University of New Hampshire Extension. Source record · Accessed 2026-08-30.
- Seed stratification: What seeds require cold treatment. University of Illinois Extension. Source record · Accessed 2026-08-30.
- Advanced techniques to prepare seed to sow. U.S. Forest Service Research and Development. Source record · Accessed 2026-08-30.