Grow · bearded iris autumn cleanup
Clean Up Bearded Iris After a Hard Frost and Reveal Rhizome Trouble
Sort healthy, spent, spotted, and water-soaked bearded iris foliage, then remove the right material after a hard frost and inspect the rhizomes below.
Published Last updated
In this guide
Wait for the right stopping point, not an arbitrary date
For a bearded iris bed with an iris-borer history, the cleanest autumn stopping point is after a hard frost has ended active growth and female moths are no longer laying eggs. University of Minnesota Extension specifically places cleanup after a hard frost because iris borer eggs overwinter on old iris leaves, stems, and nearby debris. Remove that material and you remove many eggs before they hatch into the next spring's fans. The date varies with climate and year; the condition of the bed matters more than an October square on the calendar.
A light frost that merely singes a few tips is not the same event. If most leaves remain green, upright, and firm, they are still functioning. Extension advice for iris and daylily care recommends doing the minimum when live green leaves must be trimmed because those leaves are still building stored energy for the next season. Take loose dead tissue now; leave a green fan unsheared to a decorative height merely because neighboring perennials have collapsed.
The recommendation also changes outside the iris-borer range. Iris borer is principally an eastern North American problem, so a gardener in another region should not turn a regional pest cycle into a universal reason for fall cutting. Dead bearded iris foliage can still be removed in late fall or early spring to reduce leaf-spot carryover, as Iowa State advises, but urgency and timing should follow local pest guidance. Ask a regional Extension or equivalent service whether iris borer occurs locally before claiming that every brown leaf holds eggs.
Choose a dry work period after frost-killed leaves have lost their wet limpness. Dry foliage is easier to distinguish from water-soaked damage, easier to gather while keeping soil across fans, and less likely to carry mud onto cutting blades. Photograph the bed before work if recurring decline has been difficult to explain. The picture preserves which fans browned first, which remained green, and where a wet pocket or crowded edge coincides with trouble. Cleanup should reveal evidence, not erase it before you have looked.
Sort the fan before reaching for the shears
Begin with four categories: sound green foliage, naturally senescent foliage, spotted foliage, and leaves whose damage runs toward the rhizome. Healthy leaves are firm, sword-shaped, and evenly green apart from minor weathered tips. Leave them unless they interfere with removing a diseased leaf. Naturally spent leaves are tan or straw-colored, dry, and often collapse from the outside of the fan inward. They can be gathered and removed once they release easily or after frost finishes them.
Leaf spot looks more organized than ordinary tip browning. Iris leaf spot commonly produces tan lesions with paler centers; tiny dark fruiting bodies may be visible within the spots. Several lesions can merge and kill a larger section of blade. One brown tip is insufficient for diagnosis, because drought, physical injury, frost, and normal senescence can all brown tissue. Mark the fan and remove affected dead foliage; then plan a spring inspection of new leaves while treating sanitation as risk reduction, not a cure.
Iris borer clues demand a closer path toward the base. University of Minnesota describes pinprick feeding, water-soaked streaks, and tan or dying tissue as larvae tunnel down leaves toward the rhizome. Later damage can include ragged tissue and frass near the base. Yet the same source cautions that fungal leaf spot, bacterial soft rot, iris scorch, and other damage can resemble borer injury. A streak is a reason to inspect, not permission to identify an insect until its tunnel, larva, or characteristic damage is found.
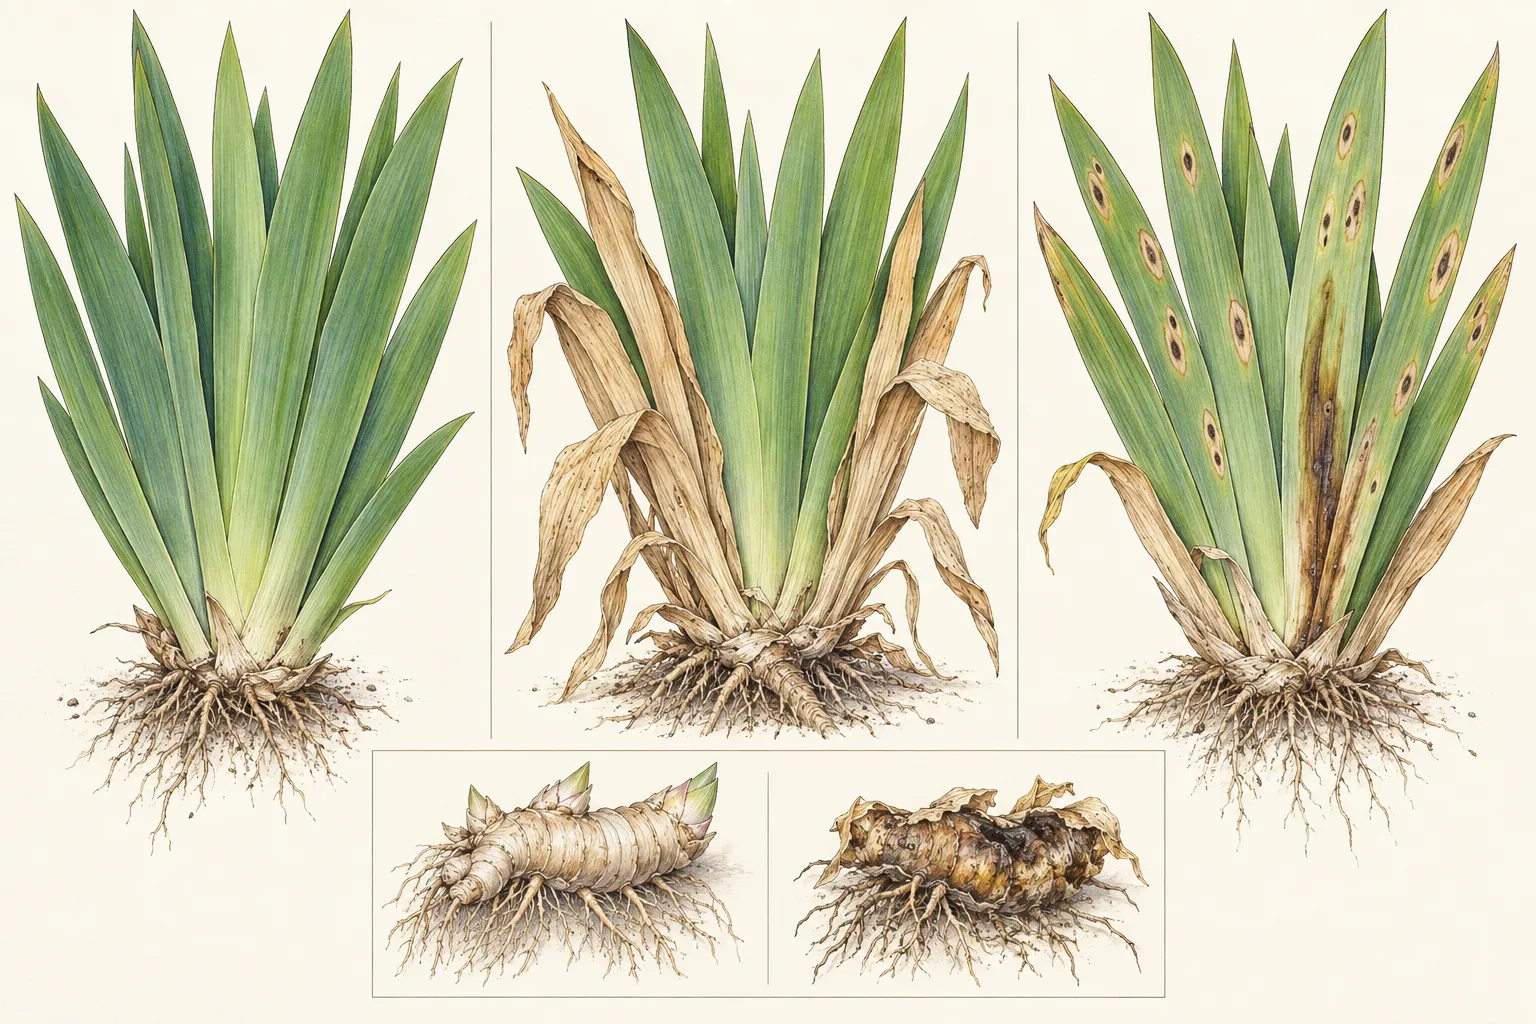
Separate each questionable fan with a small marker before cutting anything. Trace the damaged leaf to its own base; hedge shears sweeping across several fans would destroy that evidence. Press the exposed rhizome gently with a gloved finger and smell only from a safe distance: a sound rhizome is firm, while soft, slimy, collapsing, or foul-smelling tissue is consistent with rot and needs intervention beyond cosmetic trimming. Keep a clean fan and a questionable fan physically distinct so the diagnosis remains clear of mixed debris and tools.
Remove dead foliage and protect the fan
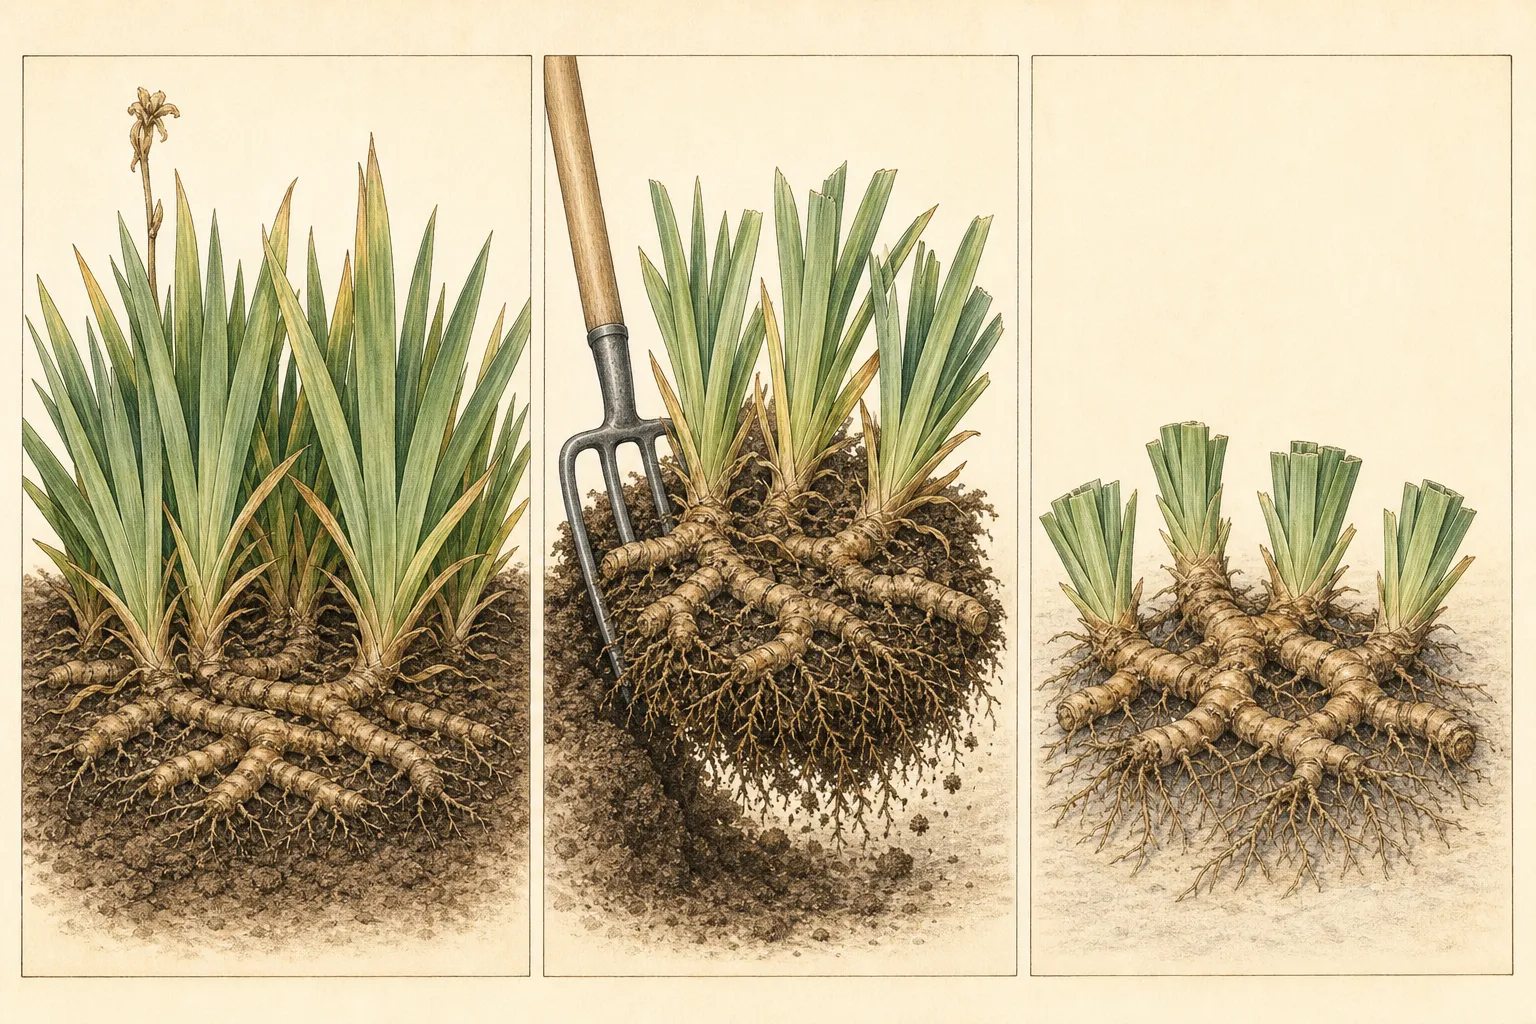
Put on gloves and begin with material that is already detached. Lift dry leaves and stems from around the rhizome one piece at a time. Lift gently; hard raking across shallow rhizomes or pulling a bundle until the fan rocks risks injury. Bearded iris rhizomes sit at or near the soil surface; a forceful tug can loosen roots, tear the fan from its rhizome, or hide damage under displaced soil. A hand cultivator is rarely needed inside the clump and can puncture the tissue you are trying to protect.
For dead leaves that remain attached, hold the blade upright and cut it with clean, sharp bypass pruners or sturdy scissors just above the firm fan base. Keep lower leaf stubs short enough to prevent a dense wet thatch, while every cut stays above the rhizome and green growing point. There is no horticultural prize for making every fan the same height. The final outline should follow tissue condition: a fully dormant fan may be short, while a partly green fan may remain taller and irregular.
Remove old flower stalks separately if they were not taken after bloom. Follow a stalk down to its origin and cut it while keeping leverage off the rhizome. Then work outward from the clump, collecting neighboring iris leaves, stem fragments, and dense debris that could carry borer eggs. Minnesota Extension includes nearby plant debris in its fall sanitation advice. The rest of the mixed border can remain standing; concentrate on the iris crown zone and material that lay against the fans.
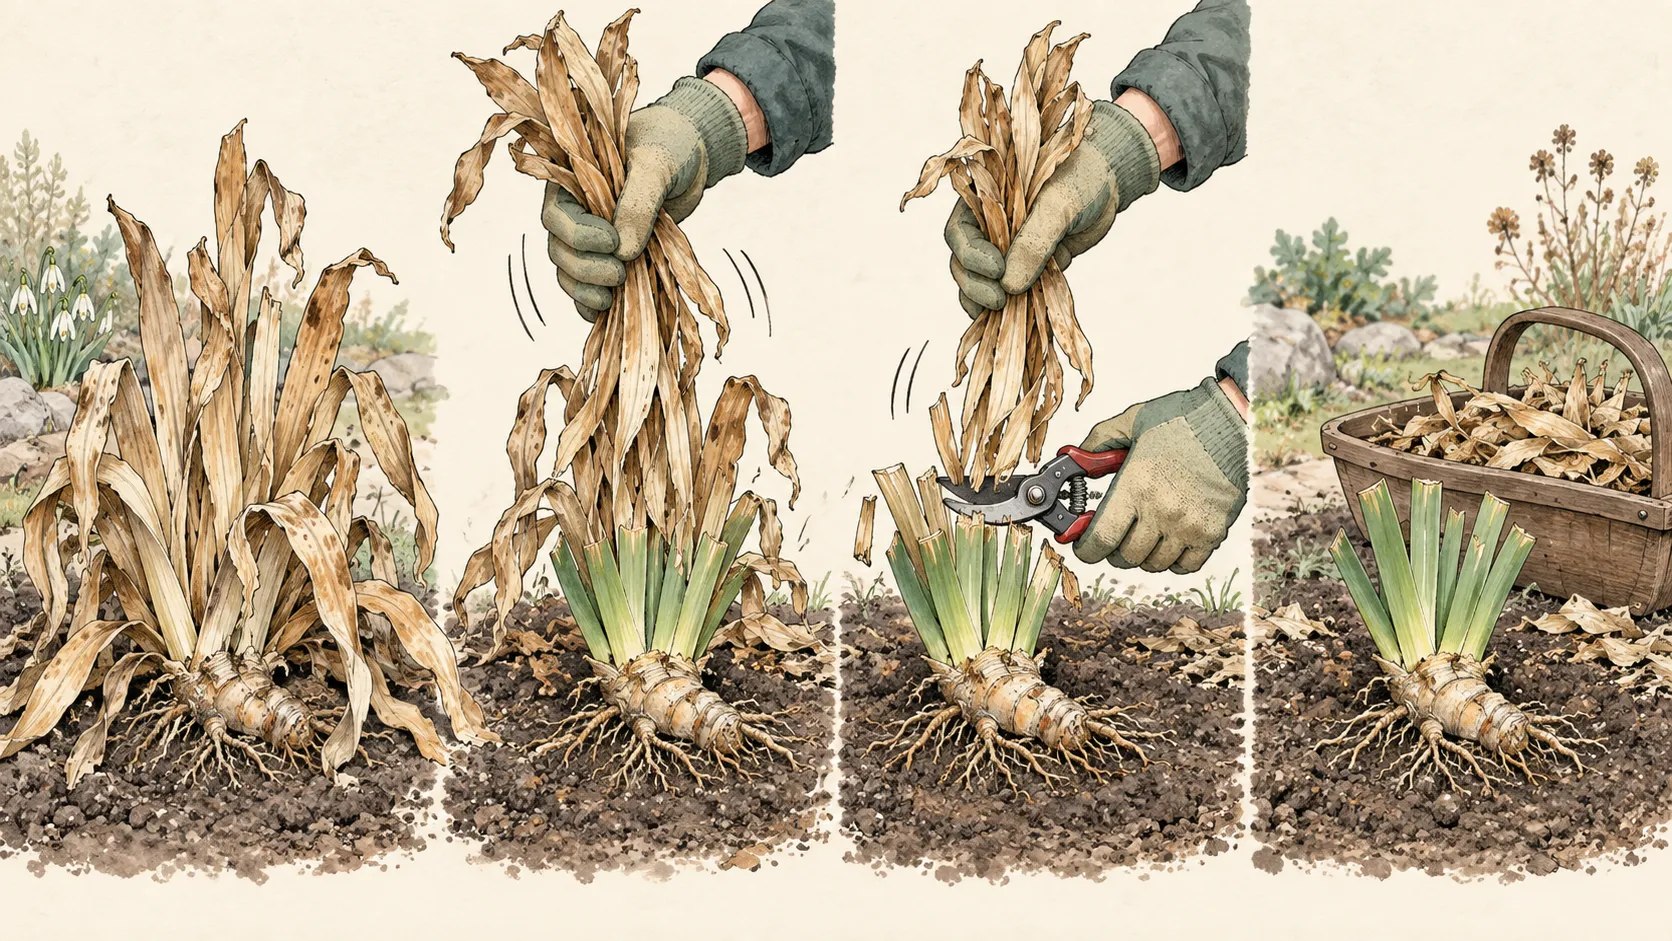
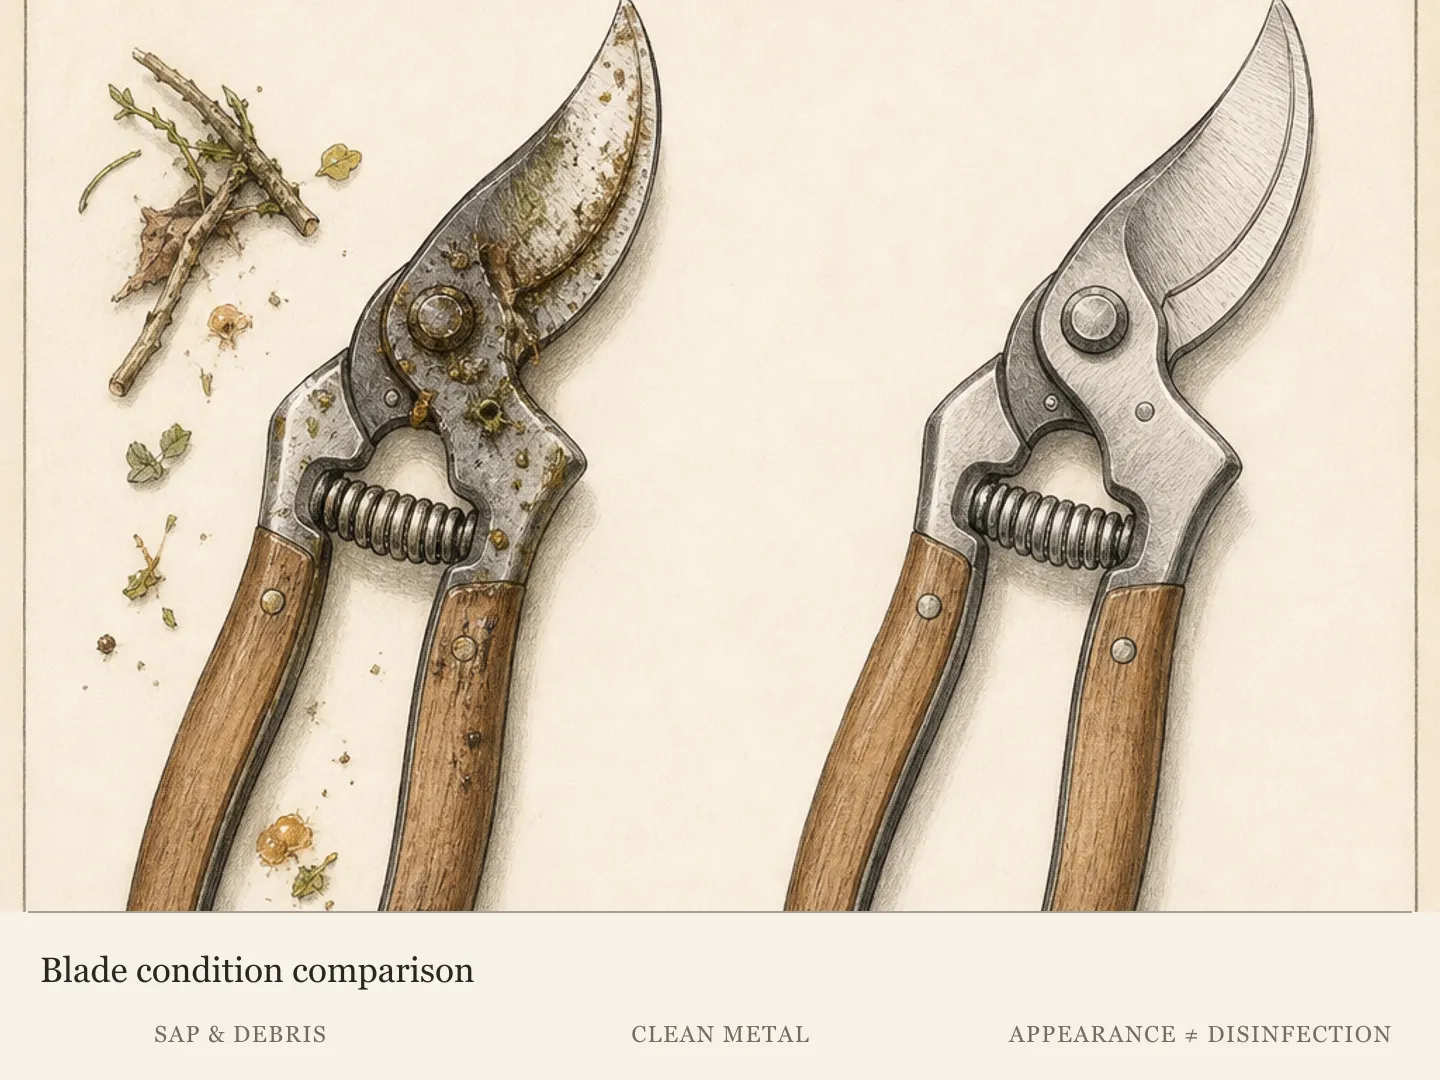
Stop if cutting reveals wet tissue, a hollowed leaf base, sawdust-like frass, or a soft rhizome. Place suspect debris in a separate container and inspect that clump before continuing. Finishing the whole bed with the same tool can spread sap and contaminated material while destroying the location record. Clean soil from blades between suspect plants and follow current disinfectant guidance for the tool and pathogen risk. A sharp tool makes a deliberate cut; disinfecting a dull blade does not prevent tearing.
Inspect the rhizome and the soil line you have uncovered
Cleanup is useful because it exposes architecture that summer leaves concealed. A bearded iris rhizome should remain shallow, with its upper surface visible or only lightly covered according to local conditions. Penn State warns that planting too deeply is a common mistake. Brush loose debris away by hand and check whether mulch, soil wash, or repeated top-dressing has buried the rhizome. Correct only loose excess material now; leave a stable clump in place during cold wet weather.
Follow every marked streak to its rhizome. Look for a tunnel, chewed tissue, an actual larva, or soft rot associated with injury. Iris borer larvae are large and pinkish at maturity, but they may already have left the rhizome to pupate by autumn. Absence of a larva does not make a tunnel sound. Conversely, a firm rhizome under a spotted leaf should not be discarded merely because the foliage looked poor. Keep diagnosis tied to the tissue you can see and to the seasonal life cycle.
A soft, smelly, or extensively rotted rhizome should not remain hidden in the clump. Penn State recommends discarding diseased and insect-damaged rhizomes for disposal outside the compost. If only one portion is affected and regional guidance supports salvage, lift and treat the plant at the proper time with cleaned tools; use only a documented treatment; remembered bleach strengths and improvised surgery are unreliable. For a valuable cultivar, submit images or a sample through a local diagnostic service before performing a treatment that may damage healthy tissue.
Read the soil at the same time. Persistent wetness around a shallow rhizome, mulch packed over its crown, or irrigation striking the fan can favor soft tissue and confuse future diagnosis. Remove lodged debris and restore the intended surface while keeping fresh compost off the rhizome. Fertilizer is not a remedy for weak autumn foliage. Nitrogen cannot repair a tunneled or rotting storage organ, and late lush growth may be poorly timed for the climate. The useful autumn correction is exposure, drainage, and an evidence-based plan.
Dispose of debris according to what it may carry
Keep clean, dry senescent leaves separate from material taken from a bed with confirmed or suspected borer, leaf spot, or soft rot. Minnesota advises removing and destroying old iris foliage and nearby debris where borer eggs may overwinter. Penn State says diseased and insect-damaged rhizomes should not go into compost. Follow local waste and burning rules; burning is illegal or unsafe in many settings, and a home compost pile may not reach conditions that reliably neutralize every pest or pathogen.
Bag suspect foliage for the disposal stream recommended by the local authority, or use a municipal system that accepts diseased plant material under controlled processing. Remove a filled bag promptly and choose a route away from healthy iris plantings. Clean the trug, gloves, and tool handles after the job. Soil stuck to equipment is part of the transfer route, so scraping blades while standing over another clump defeats the separation maintained during cutting.
Healthy leaf material can be managed under local compost guidance, but certainty matters. A leaf from a borer-prone bed may carry eggs too small to notice. If the regional recommendation is to destroy all old iris leaves after hard frost, follow that direction even when some leaves look clean. The brown leaf is not dangerous to people; the concern is whether the management route returns viable eggs or infected tissue to the garden.
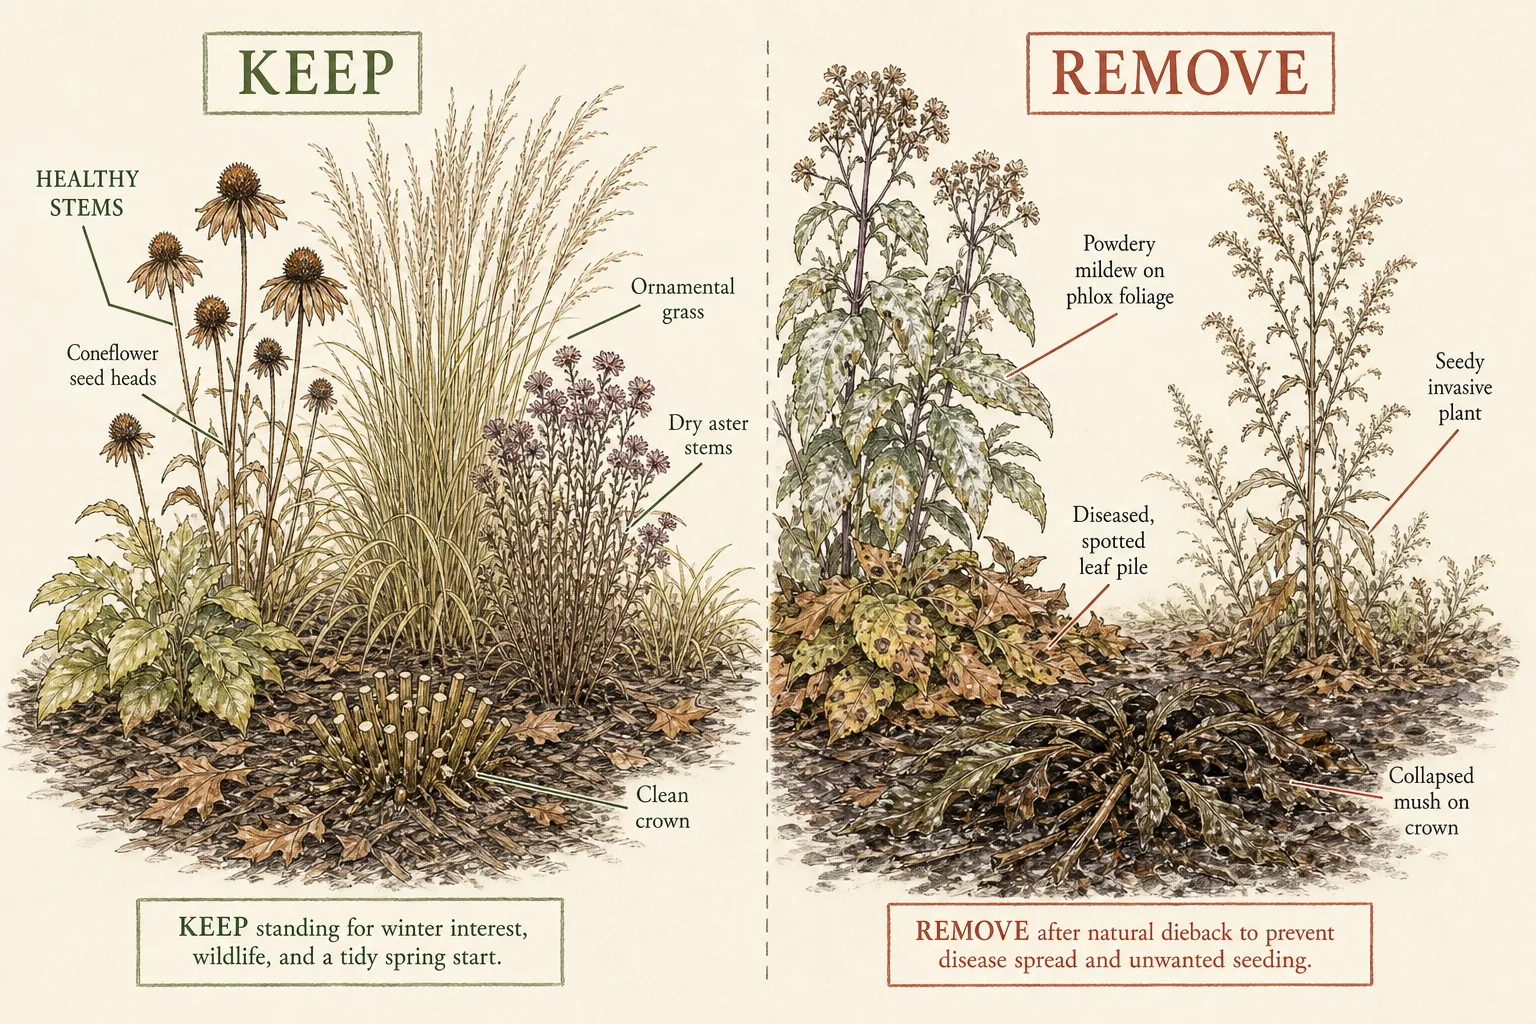
Leave useful structure elsewhere in the perennial border when it is healthy. Iowa State notes that standing stems and leaves can provide winter interest, crown protection, food, or shelter, while recommending fall removal for plants with disease or insect problems. Iris sanitation can therefore be selective. Clearing the defined iris crown zone does not require vacuuming every seed head and hollow stem from the garden. This boundary keeps a pest-specific task from becoming indiscriminate habitat removal.
Record what spring must confirm
End with a simple bed map. Number each suspicious fan and record leaf symptoms, rhizome firmness, odor, visible tunnels, drainage, and what was removed. Add a photograph taken from the same fixed point as the pre-cleanup image. The map turns next spring's inspection into a direct comparison. It also prevents a clean-looking autumn bed from creating false confidence about a problem that develops only as new leaves expand.
In regions with iris borer, begin watching as new fans emerge. Minnesota notes that larvae enter leaves when growth is young and recommends looking for chewing damage and water-soaked streaks in spring. The correct treatment window for any pesticide is tied to egg hatch and small leaf growth, not to autumn cleanup. Use a product only if it is currently labeled for the pest, site, and plant, and follow local integrated-pest-management advice; sanitation does not justify a routine spray.
Check drainage again after snowmelt or seasonal rain. A clump that remains wet while neighboring soil drains may need a site correction or division at the appropriate season. If fans are crowded, bloom has declined, or dead centers have formed, schedule division for its proper season and leave it out of frost cleanup. The site's guide on dividing bearded iris covers the late-summer operation; this article's job is to reveal and record the need, not combine two stressful tasks.
The successful result is not the shortest possible fan. It is a bed where dead and suspect debris no longer shelters a known pest cycle, shallow rhizomes remain visible and firm, living foliage was not removed merely for neatness, and every unresolved symptom has a spring checkpoint. Autumn sanitation reduces risk; it does not prove that borers, leaf spot, or rot are absent. That measured distinction keeps a useful cleanup from becoming a damaging annual haircut.
Steps
- Level
- easy
- Time
- About 30 to 60 minutes for a small established clump, plus spring follow-up
- Tools
- Clean sharp bypass pruners or sturdy scissors, Gloves, Two collection containers, Plant labels or flags, Camera or phone for the bed record
- Materials
- Waste bags approved for local plant-debris disposal, Tool-cleaning supplies appropriate to the identified risk, Notebook or bed map
- 1Confirm frost and regional pest context
Wait until a hard frost has ended active growth and, where iris borer occurs, moth egg-laying. Confirm the pest's local range with a regional authority. If leaves remain mostly green after a light frost, remove only loose dead material and postpone full cleanup.
- 2Classify every fan before cutting
Separate firm green leaves, dry senescent leaves, discrete tan-spotted leaves, and water-soaked or ragged damage running toward the base. Flag questionable fans. Check exposed rhizomes for firmness, odor, tunnels, frass, wet soil, or buried crowns before evidence is removed.
- 3Gather loose debris by hand
Lift detached leaves and old stem fragments while keeping the rake away from shallow rhizomes. Work from clean fans toward suspect ones. Keep the crown zone clear while preserving healthy winter structure elsewhere. Stop if a tug moves the whole fan or exposes wet damaged tissue.
- 4Cut only attached dead tissue
Hold each dead blade upright and cut it just above the firm fan base with sharp clean shears. Remove old flower stalks while keeping leverage off the rhizome. Leave functioning green blades, even if the outline is irregular, and keep tools out of the growing point.
- 5Inspect and separate suspect material
Trace marked streaks and spots to their bases. Isolate leaves, rhizomes, and soil associated with tunnels, frass, soft collapse, slime, or odor. Seek local diagnostic advice for uncertain plants. Clean tools between suspect clumps and route confirmed diseased or insect-damaged rhizomes outside the compost.
- 6Expose rhizomes and map spring checks
Brush away lodged debris and loose material covering the shallow rhizome while leaving roots undisturbed. Record each suspect fan, symptom, disposal route, and drainage issue on a bed map. Photograph the cleaned bed, then schedule spring inspection as new leaves expand.
Plants in this guide
Related reading
Sources
- Iris borers. University of Minnesota Extension. Source record · Accessed 2026-09-22.
- How do you care for bearded irises after they are done blooming?. Iowa State University Extension and Outreach. Source record · Accessed 2026-09-22.
- Should I cut back all my perennials this fall?. Iowa State University Extension and Outreach. Source record · Accessed 2026-09-22.
- Dividing Irises. Penn State Extension. Source record · Accessed 2026-09-22.