Grow · care newly bought thanksgiving cactus buds
Care for a Newly Bought Thanksgiving Cactus in Bud
Bring a budded Thanksgiving cactus home, check its nursery pot and drainage, choose a steady indoor position, and respond sensibly if unopened buds fall.
Published Last updated
In this guide
- Settle the budded plant before changing its care
- Choose the plant for the display you want
- Protect the journey and unwrap indoors
- Keep the nursery pot and expose the drainage route
- Choose one bright position with a stable temperature
- Make the first watering depend on the pot you received
- Separate arrival bud loss from a continuing problem
- Leave induction, feeding and reshaping for their proper stage
- Steps
Settle the budded plant before changing its care
Bring a newly bought Thanksgiving cactus into a bright, sheltered indoor position, keep its nursery pot freely draining, and maintain regular moisture while its buds develop. A plant already carrying buds has passed the stage for autumn flower-bud induction. The cooler, drier treatments described for that earlier stage are the wrong starting point for a November purchase covered in buds.
First check what came home with the plant: a plastic sleeve, decorative foil, a saucer or a closed outer pot can hide the drainage arrangement. Then choose a place where the plant can remain through its display. The Royal Horticultural Society recommends 18–20°C (about 64–68°F) once flower buds appear and during flowering. Treat that as a useful indoor target, with attention to conditions beside the plant. A thermostat across the room may measure a different temperature.
Some unopened buds may still fall after purchase. LSU AgCenter specifically describes this as common when holiday cacti come home and cautions that little can be done about that initial loss. Good settling-in care addresses the conditions you can control; it cannot undo the journey or guarantee that every bud opens. The useful test is whether the remaining plant has suitable light, moisture and drainage, not whether its saucer stays completely free of fallen buds.
Choose the plant for the display you want
Shop for a plant with plenty of unopened buds if you want to watch the display develop at home. RHS recommends this over a plant already in full flower because more of the display remains ahead. A few open flowers can help you choose a color, while the buds provide the coming display. Flower color and the number of open flowers alone tell you little about the moisture inside the pot.
Inspect the shop position as well as the plant. A cold entrance, draughty doorway or exposed outdoor display is a poor place for budded stock; RHS specifically flags cold and draughts when buying. Choose another plant if the only attractive specimen has been sitting in those conditions. Ask for protection for the trip home and plan the purchase so that a tender flowering plant can go directly indoors.
Thanksgiving cactus is Schlumbergera truncata. Its flattened stem segments have pointed, tooth-like projections along their edges; Christmas cactus, S. × buckleyi, has rounder segment margins. Shop labels may use Christmas cactus for both, and hybrid cultivars can have intermediate features. These flat green structures are stems, and buds arise at their ends. Keep the label, but use the actual plant and its visible stage to guide arrival care. This advice concerns budded Schlumbergera sold for autumn and winter display, not a spring-flowering Easter cactus.
A heavily budded plant is a reasonable purchase, but it is not a promise of a flower on every tip. Decide whether you want a plant already showing color or one whose display is mostly ahead. Neither choice gives an exact opening date for a holiday meal. Buy the stage you can enjoy now; attempts to accelerate the display with extra warmth or water can compromise the steady conditions it needs.
Protect the journey and unwrap indoors
Have the retailer protect the plant before you take it outside in cold weather. RHS links low temperatures during the journey with subsequent bud loss. The wrapping should cover the arching growth as well as the pot, with room for projecting buds. Carry the pot from underneath so its weight is supported by the container, and keep shopping bags from pressing against the stems. A loose protective sleeve is transport packaging, not a handle.
Take it straight home and into the intended room. A sheltered shop-to-home journey is different from leaving the pot in a cold vehicle while completing other errands. An unheated porch also has a different job from the warm indoor flowering position. If the journey cannot be protected from cold, postponing collection is more useful than planning a rescue treatment afterward.
Unwrap where there is space for the stems to spread. Ease packaging away from the plant; cut a tight sleeve open if pulling it over the arching tips would catch the buds. Keep the nursery pot intact. Record anything already damaged or detached before adjusting the position or watering, so later observations have a starting point. A few buds lying in the wrapping cannot tell you whether the cause was cold, dryness, handling or some earlier change at the retailer.
Keep the nursery pot and expose the drainage route
A newly purchased plant usually belongs in its existing nursery pot during this first display. RHS says newly bought Christmas cacti can generally stay in their original pot for a couple of years, with routine repotting timed to renewed growth in spring. A small-looking pot beneath broad arching stems is therefore not, by itself, a reason to disturb the roots as soon as the plant arrives.
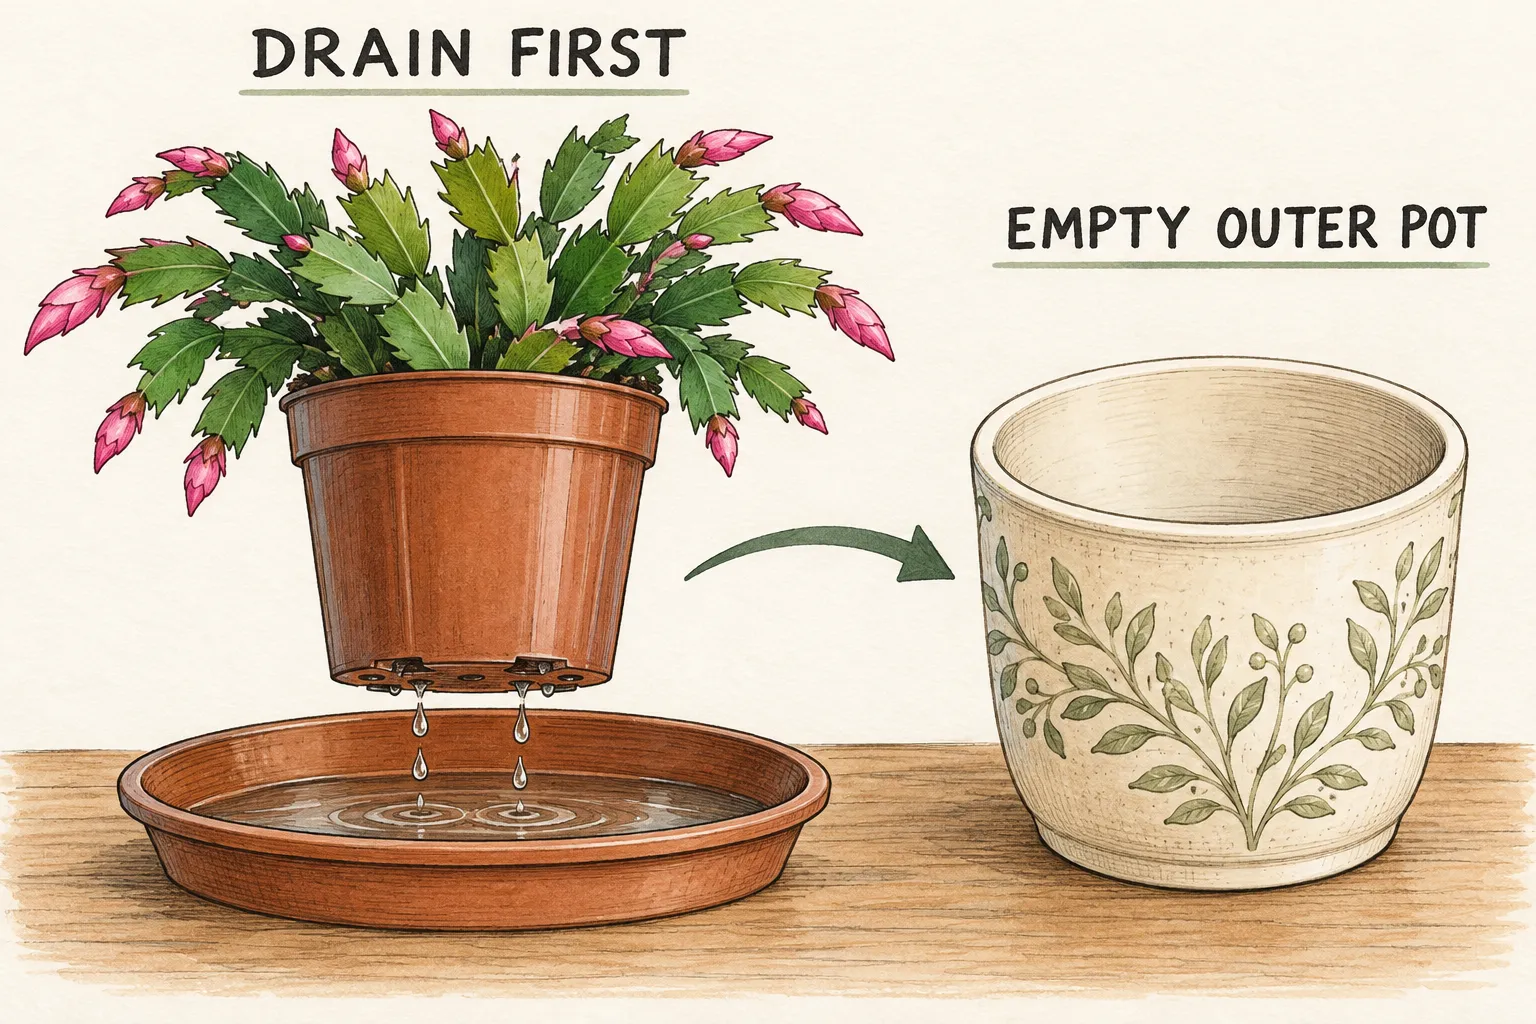
Lift the nursery pot out of its decorative covering while supporting the container. Find the holes underneath and look inside the outer pot. Empty any retained water. If foil seals the bottom, remove the foil for watering and drainage; an attractive cover has to leave you a practical way to inspect and empty the container. A cachepot can stay part of the display, provided you can lift the nursery pot out and return it after excess water has drained.
Water that has passed through drainage holes still needs somewhere to go. Returning a dripping pot immediately to a closed cover can leave the base standing in the collected water. Let it finish draining separately, empty the saucer or outer pot, then put it back. This is a handling sequence, not a reason to bare-root the cactus. The nursery pot remains around the root ball throughout.
If the supplied container has no drainage holes, or the medium remains saturated and the plant is deteriorating, ordinary display care may be insufficient. Ask the seller about the container and the plant's condition before transferring it blindly into a larger pot. A routine upgrade and an investigation of a failing root environment are different decisions. For a sound purchase, an accessible draining nursery pot inside a decorative cover solves the presentation problem with much less disturbance.
Choose one bright position with a stable temperature
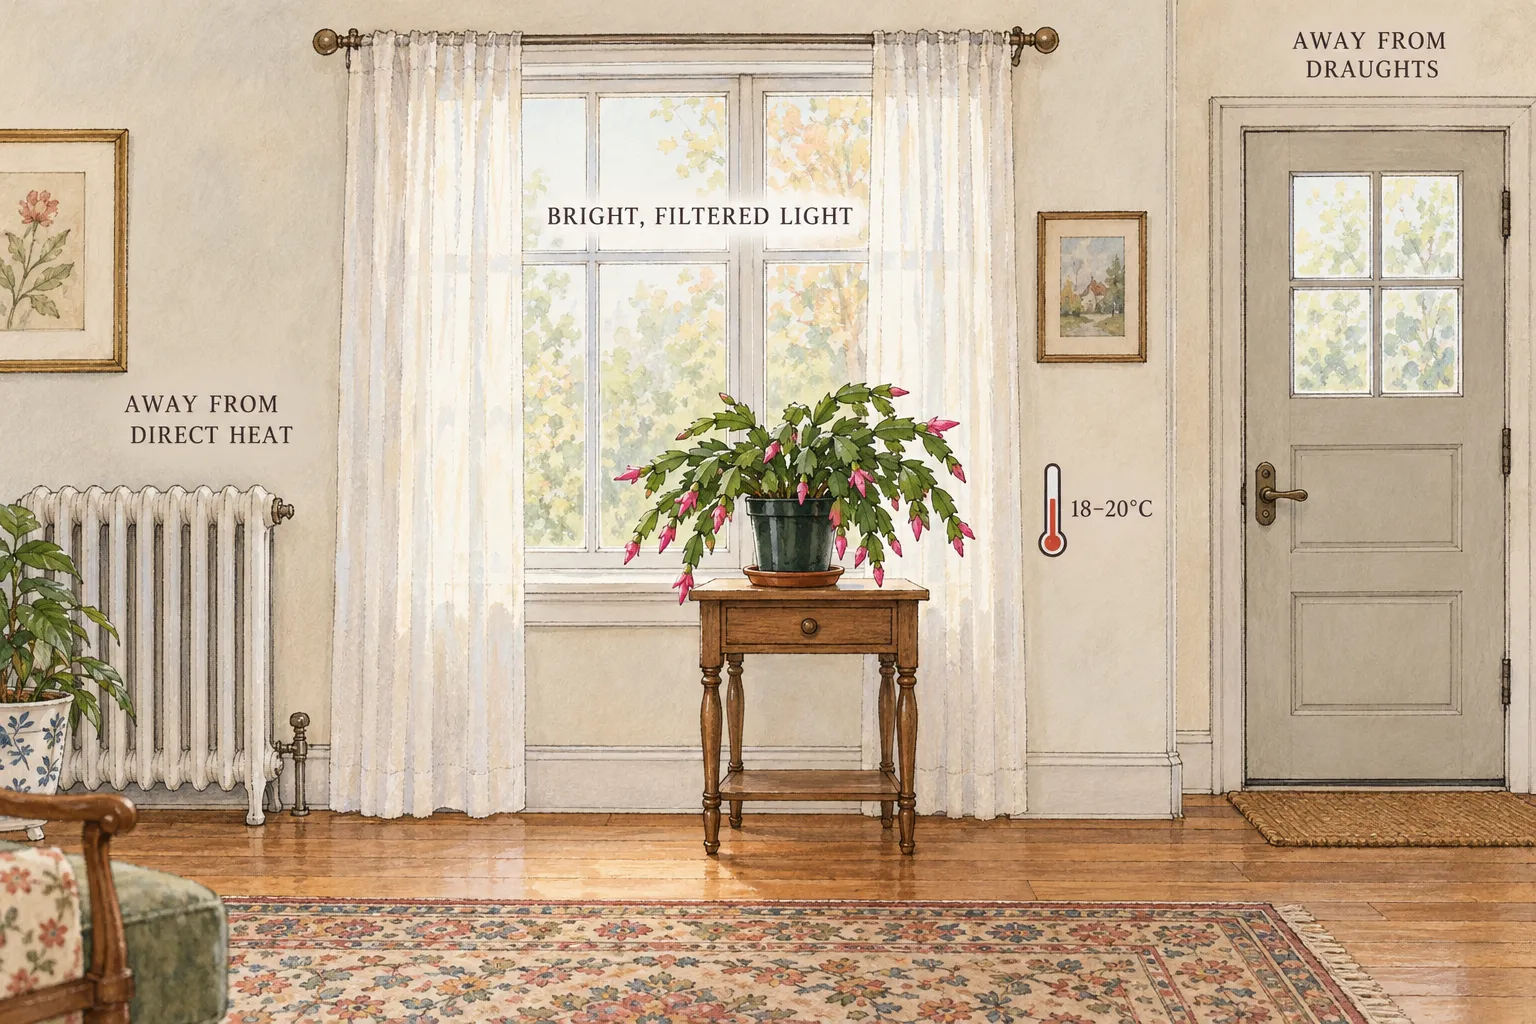
RHS recommends indirect or filtered light, with an east-facing windowsill often suitable. A bright place near the window can work when the sill itself is narrow, cold or directly above a heat source. Look at the space the arching plant actually occupies: the pot may fit comfortably while the outer stems touch glass or hang into rising hot air. Give those tips clear space.
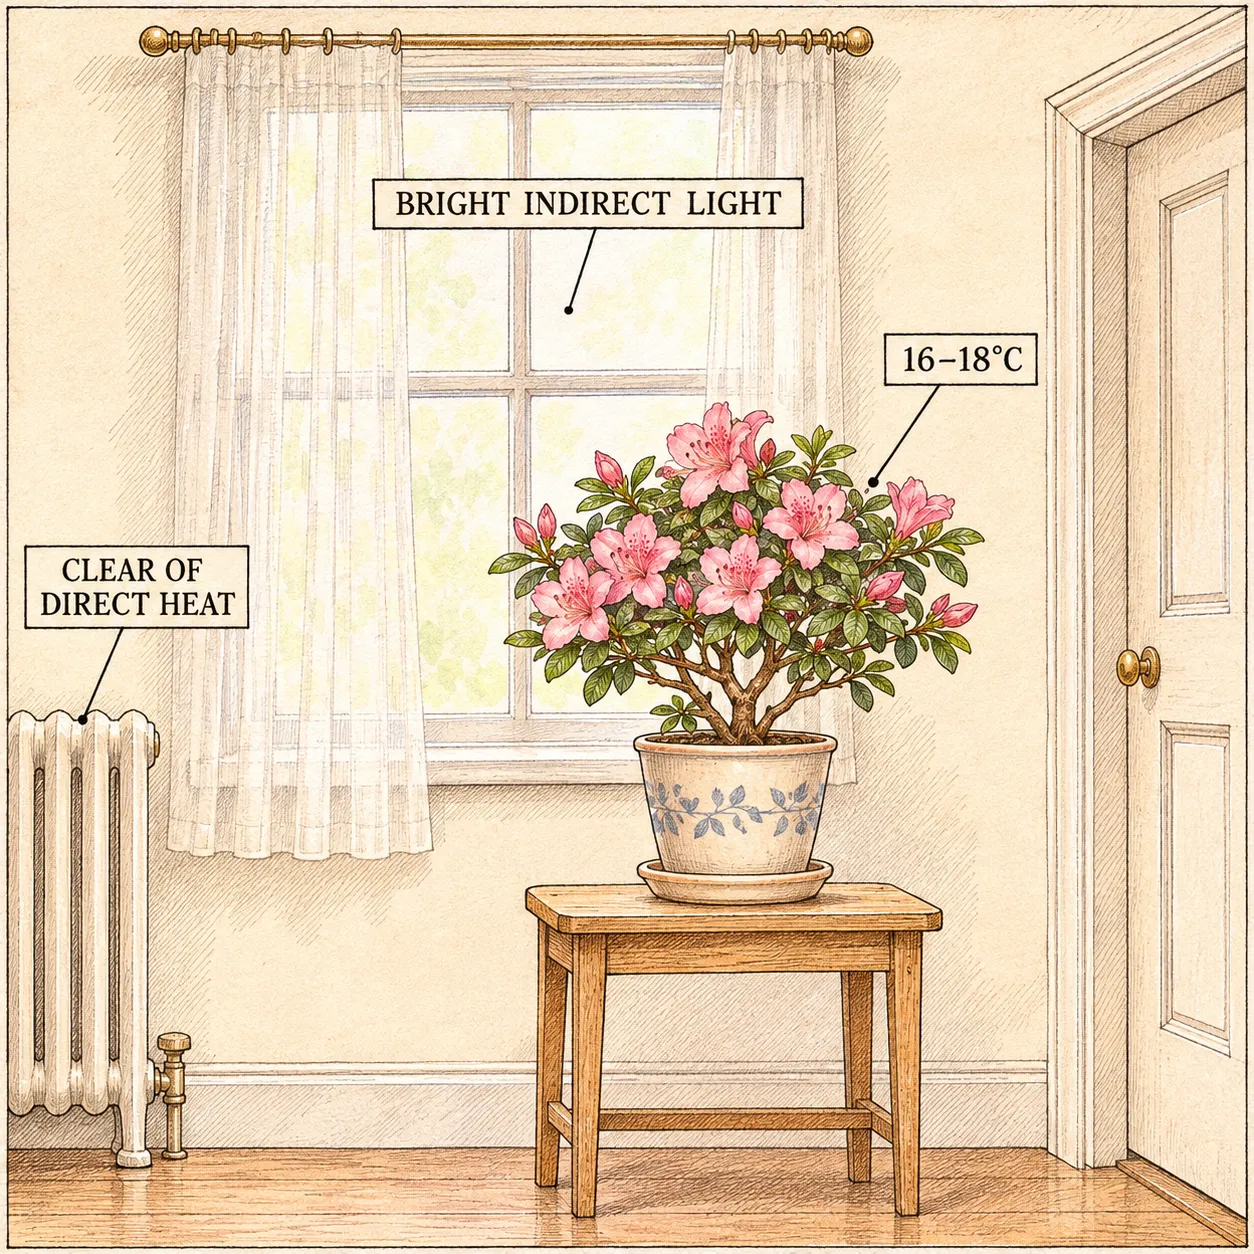
The room illustration shows an example, not a required distance from a window, radiator or door. Its useful relationships are filtered daylight, a stable surface, and separation from direct heat and incoming cold air. A nearby thermometer can help you judge the flowering target of 18–20°C (about 64–68°F). If the spot becomes very hot in sunshine or markedly colder at night, choose a more even location.
Published advice on sunlight differs with setting. LSU recommends a bright, sunny window, while RHS favors filtered light and warns against strong sun and high temperatures. For a newly arrived plant whose previous growing conditions are uncertain, bright filtered light is the cautious common starting point. This is not a recommendation for a dim interior shelf. Check that a curtain softens the light while still admitting useful daylight.
Once settled, keep relocation to a minimum. Chicago Botanic Garden specifically advises minimizing movement after buds form. Choose a place you can water and inspect easily, so the cactus need not travel between a windowsill, dining table and dark hallway for display. A necessary brief lift to empty its outer pot is part of care; the aim is to stop repeatedly changing its growing environment. If the first position proves unsuitable, correct it deliberately and let the plant remain in the better spot.
Make the first watering depend on the pot you received
Arrival is not an automatic watering date. Touch the growing medium and check whether the pot is already moist, dry at the surface or visibly saturated. A plant watered just before sale may need no immediate addition. A dry one needs attention even if its buds still look attractive. Assess the medium inside the nursery pot, not moisture on decorative moss or the outside of a ceramic cover.
During bud development, aim for an evenly moist root environment with free drainage. Let the surface begin to dry enough to prompt a check, but keep the whole root ball from drying out. When water is needed, apply it to the growing medium and allow excess to leave through the holes. Finish by emptying the saucer or cover. This combines regular moisture with an exit for surplus water; keeping the base immersed is a different condition.
The interval will depend on that particular pot, medium and indoor position. Check it regularly through flowering and use its condition to decide when to water again. A fixed weekly appointment can miss a small pot drying in a warm room or repeatedly soak one that is still wet. Compare the pot's weight before and after a normal watering if that helps you learn how this container feels, while continuing to check the medium itself.
Shrivelled stems are a reason to investigate, not proof that the plant is thirsty. RHS lists root deterioration from excessive or insufficient watering, heat and direct sun among possible causes. Dry medium and a dry root ball call for a different response from wet medium around a struggling plant. If the pot is already wet, adding water because the stems look limp can compound the problem. Check drainage, temperature and exposure together before changing the watering routine.
Separate arrival bud loss from a continuing problem
Pick up fallen buds so that you can see whether more are dropping, and examine the remaining stems and growing medium. Firm green stems with a draining, appropriately moist pot present a different situation from softening growth above persistently wet medium. The fallen buds themselves rarely identify a single cause. Sudden environmental changes and moisture problems are among the possibilities, but a diagnosis needs the condition of the whole plant.
RHS identifies fluctuating temperatures and overwatering among reasons for bud drop. Check the location at the times it changes: when heating runs, when the door opens frequently, or after the window area cools at night. Correct a clear problem such as water standing around the pot or a position beside direct heat. Resist making several speculative adjustments at once; otherwise it becomes harder to judge whether the new arrangement is suitable.
If the stems remain sound and the conditions are suitable, continue the settled routine while watching the remaining buds. LSU's warning about common arrival losses matters here: more watering, more warmth or immediate repotting cannot be assumed to retrieve those lost buds. A shrinking display can be disappointing even when the surviving plant remains worth keeping.
Seek further advice from the seller or a local horticultural service if whole stems begin collapsing, the medium stays wet despite an open drainage route, or deterioration continues after an obvious environmental problem is corrected. Take photographs of the plant, pot and growing medium and explain the journey and watering history. Those observations are more useful than presenting bud drop alone as evidence of a particular disease. This is the point for a closer diagnosis, not an automatic fungicide or fertilizer application.
Leave induction, feeding and reshaping for their proper stage
A budded November purchase needs care for its existing display. RHS distinguishes the cooler autumn period used to encourage bud formation from the warmer position and regular watering resumed once buds appear. There is no need to begin moving this already-budded plant into a cupboard every evening. That would add handling and changes of position to a task that calls for steadiness.
Likewise, reserve the cooler, reduced-water rest described in annual care schedules for its appropriate stage. RHS ends the autumn rest when buds appear and resumes regular watering. Its feeding schedule is also tied to spring and summer growth, from April through September. A new bottle of feed is not a necessary part of unpacking a budded autumn purchase, and a falling bud is not enough evidence of a nutrient deficiency.
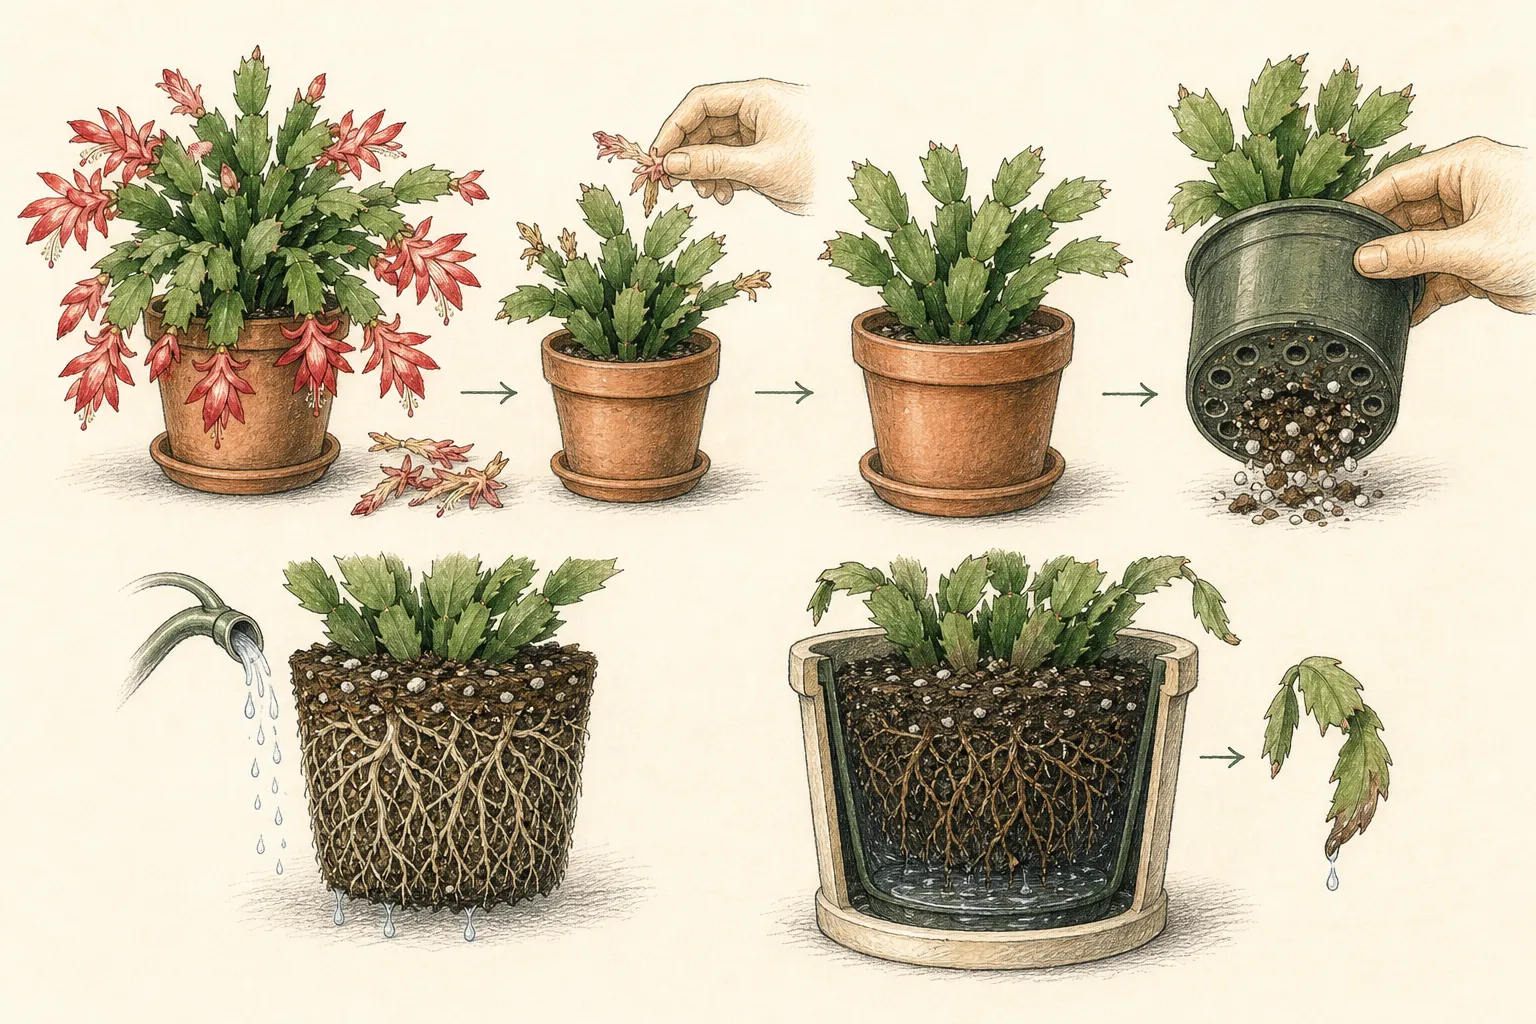
Leave healthy terminal segments attached during the display; removing them also removes their buds. Branching and reshaping belong to the later growth cycle. After the last flowers fade, the task changes to postbloom care, followed eventually by spring growth and future bud formation. Keep the plant's label and note which indoor position worked, then use the separate holiday-cactus after-bloom guide for that next stage. The end of this first display is a handoff to another season of care.
Steps
- Level
- easy
- Time
- 20 minutes to unpack and place; moisture checks through flowering
- Tools
- Small watering can, Room thermometer, if the window position fluctuates, Scissors for tight packaging
- Materials
- Budded Thanksgiving cactus in its nursery pot, Protective transport wrapping, Saucer or removable decorative outer pot
- 1Inspect before bringing it outside
Choose a sound plant with unopened buds remaining and check that its shop position is sheltered from cold draughts. Keep its label and ask for wrapping that protects the projecting tips. Arrange the journey before buying so the plant can go directly into a suitable room at home, with its pot supported and its branches free from other bags.
- 2Unwrap and establish the starting condition
Place the wrapped pot on a stable surface indoors. Ease away loose wrapping or cut a tight sleeve open where it cannot catch the buds. Note existing fallen buds and obvious damage, then check the medium inside the nursery pot. Leave the plant rooted in that container while you inspect its cover and the underside of the pot.
- 3Make drainage accessible
Lift the nursery container clear of its decorative outer pot, look for drainage holes, and empty collected water. Remove any bottom-sealing foil during watering. Set up a place where excess water can drain before the nursery pot returns to its dry cover. If drainage is absent or the plant is deteriorating in saturated medium, seek advice about that condition before routine display care.
- 4Set the flowering position
Choose bright filtered daylight and a steady surface clear of direct heater output and cold doorway draughts. Check that the arching tips have space around them. Use the RHS flowering target of 18–20°C (about 64–68°F) to assess the actual plant position. Make any necessary initial correction, then keep the display there with easy access for moisture checks and draining.
- 5Water only when the medium calls for it
If the supplied medium is already moist, leave it to be checked again. When the surface is becoming dry, water the medium and let surplus drain through the pot, keeping the root ball from drying completely. Empty the receiving saucer or cover afterward. Use repeated checks to learn this pot's needs instead of assigning every new plant the same watering interval.
- 6Respond to observations through flowering
Remove detached buds and look at the remaining stems, medium and surroundings. Correct identifiable wetness or temperature problems, then observe the remaining buds under settled conditions. Keep records or photographs if deterioration continues and ask the seller for help with a declining plant. Continue flowering-stage care until the display finishes; then move into the separate postbloom routine for an established holiday cactus.
Related reading
Sources
- All About Holiday Cacti. Iowa State University Extension and Outreach. Source record · Accessed 2026-10-30.
- How to grow Christmas cactus. Royal Horticultural Society. Source record · Accessed 2026-10-30.
- The Christmas Cactus. LSU AgCenter. Source record · Accessed 2026-10-30.
- Christmas Cactus Care. Chicago Botanic Garden. Source record · Accessed 2026-10-30.