Grow · care flowering kalanchoe indoors winter
Care for Flowering Kalanchoe Indoors in Winter
Care for a flowering florist kalanchoe through winter with bright light, drying intervals and free drainage, then distinguish post-flowering care from new bud induction.
Published Last updated
In this guide
- Keep the flowering succulent bright and freely draining
- Identify the plant and the flowers still to come
- Choose a bright window with moderate temperatures
- Check the growing mix before reaching for water
- Water outside the decorative cover and empty the runoff
- Groom the display and keep feeding tied to growth
- Make the change after flowering deliberately
- Use long nights only when you are inducing new buds
- Investigate decline before changing the whole routine
- Steps
Keep the flowering succulent bright and freely draining
Place a flowering kalanchoe in a bright indoor position, let its potting mix dry between waterings, and empty the water that drains into its outer container. Keep the room moderately warm and the leaves clear of cold glass. A plant bought with flowers and visible buds has already formed that display. It needs light and sensible watering now; the long dark nights used to induce future buds belong to a later stage.
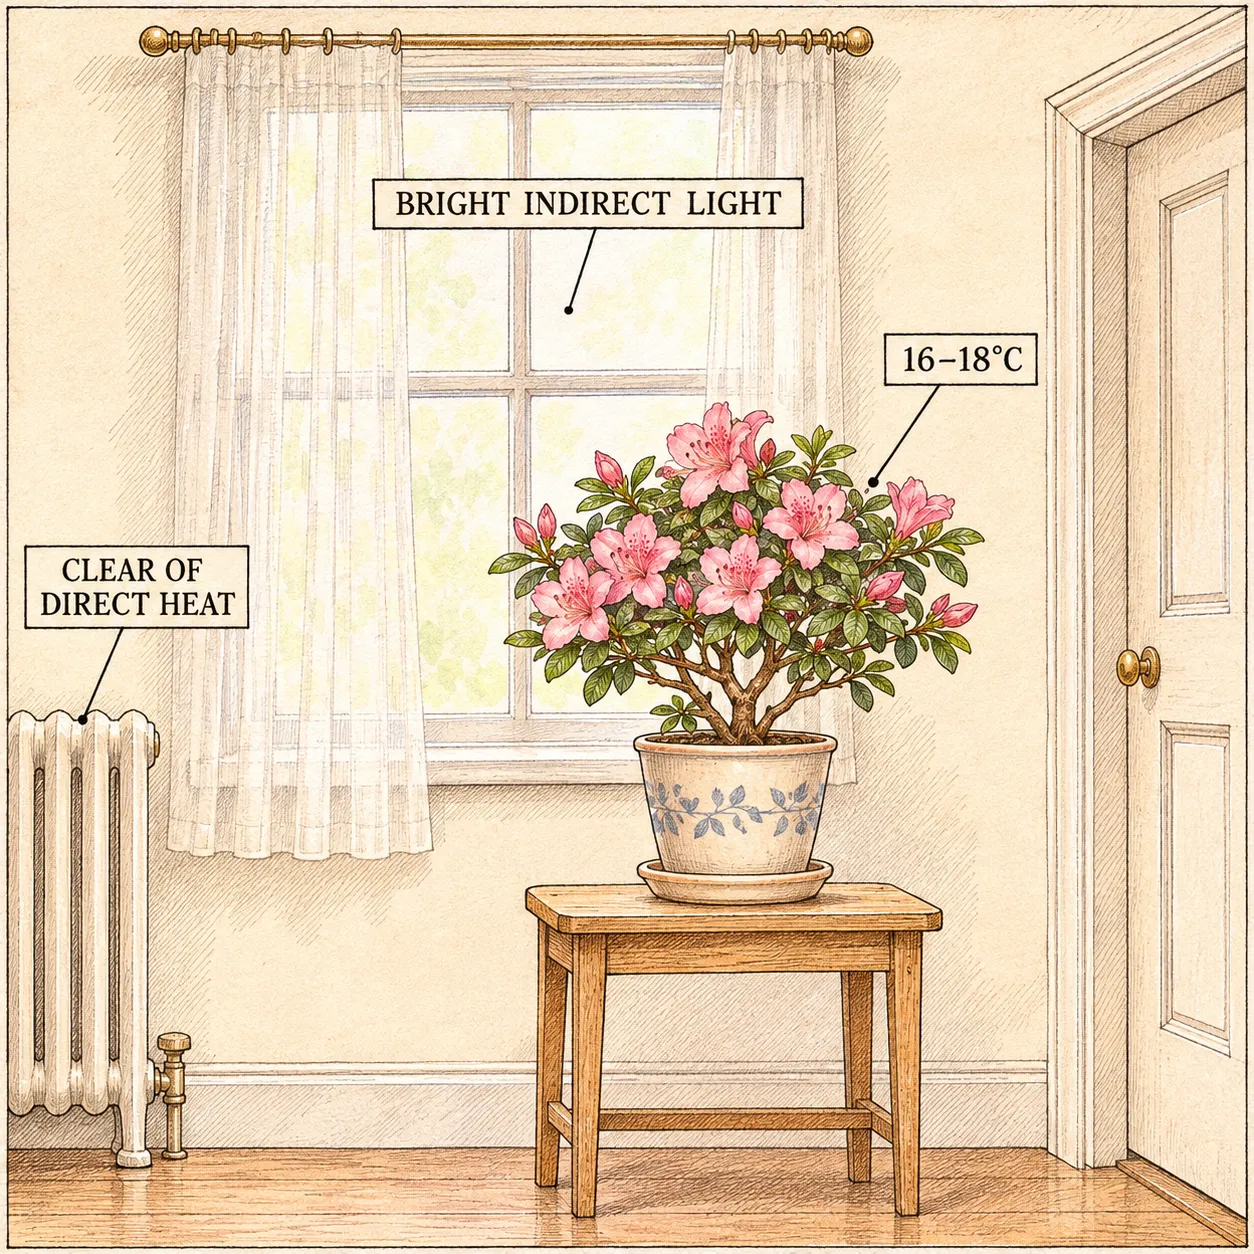
Late November often brings these compact flowering pots into temperate homes as gifts or seasonal colour. Their succulent leaves make their moisture needs different from those of a florist azalea standing beside them. Give each plant its own assessment. A shared weekly watering day can leave the kalanchoe wet while the azalea is becoming dry. The attractive ceramic cover is another source of confusion: check the actual growing pot inside it.
This care applies to florist kalanchoe, Kalanchoe blossfeldiana, including its single- and double-flowered forms. It is indoor winter care for a frost-tender plant, not an outdoor hardiness prescription for every member of the genus. An already flowering purchase and an older, flowerless plant are both worth keeping, but they have different immediate jobs. Establish which one you have before deciding whether light at night matters.
Identify the plant and the flowers still to come
Look for thick, fleshy, glossy green leaves with rounded scallops along their edges, generally arranged in opposite pairs. Branched flower stalks carry clusters above the foliage. A typical single flower has four small spreading lobes; double cultivars have many petals and can resemble miniature roses. The crowded flower head is a collection of individual flowers, so part of it may be open while another part remains in bud.
Use that mixture of stages when choosing or grooming a plant. Firm unopened buds are part of the coming display. Open flowers with good colour are already doing their job. Brown, shrivelled flowers have finished. A few fading flowers among healthy buds can be ordinary ageing. Compare the leaves, stems and growing medium as well as the flower head before changing care. Keep the cultivar label if one is supplied.
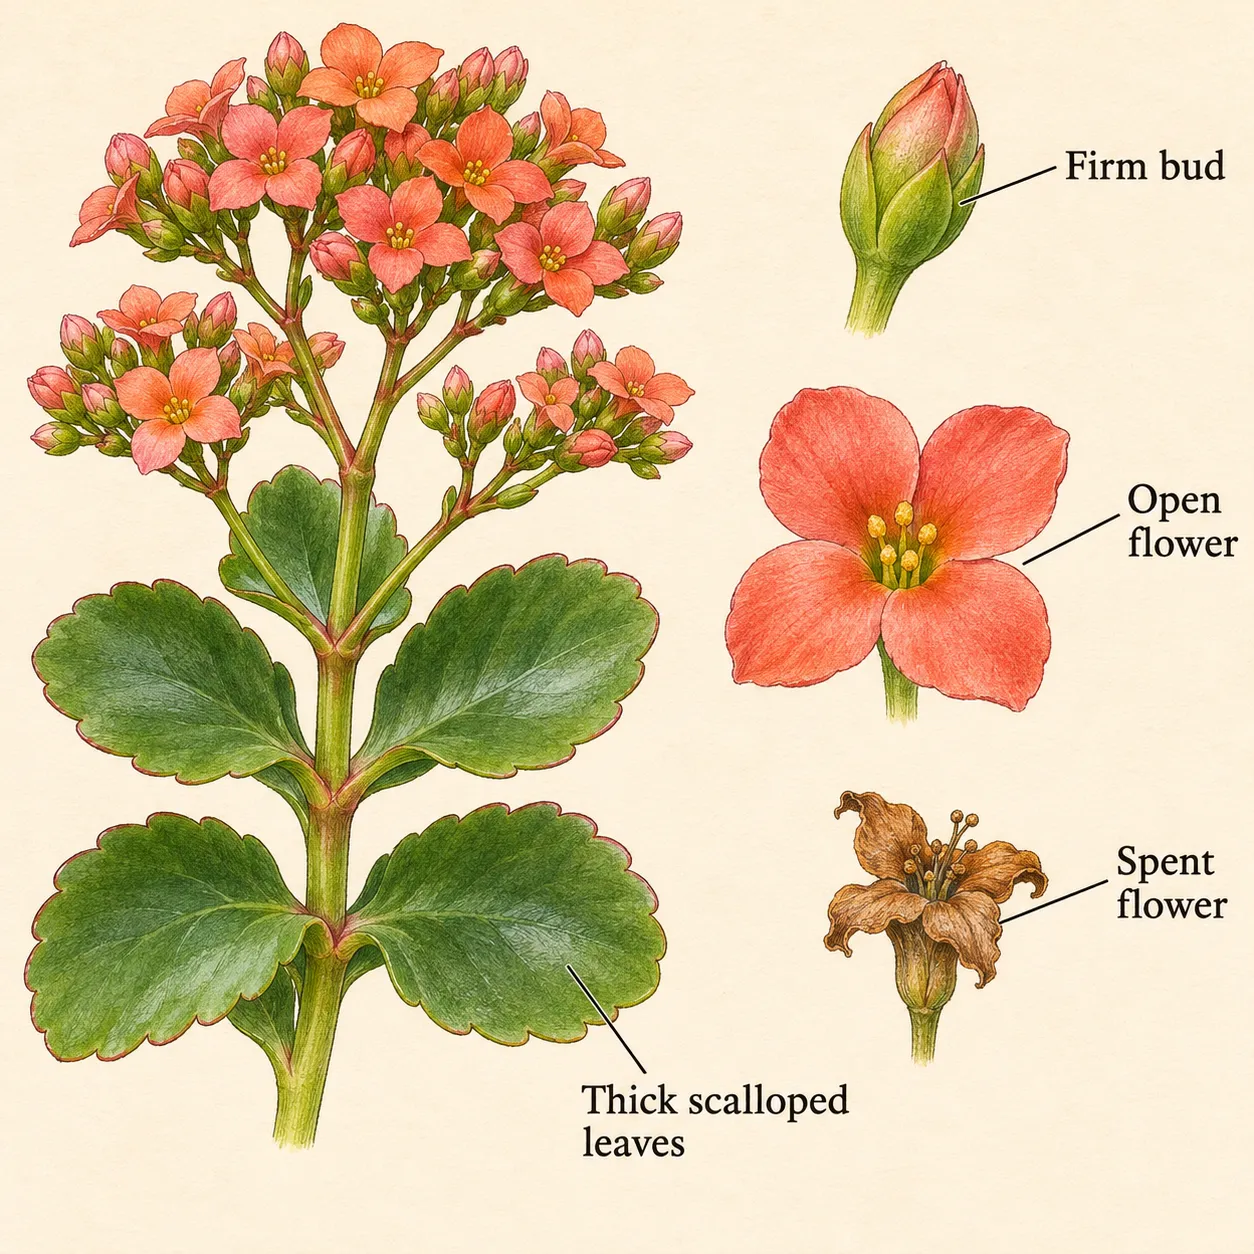
The leaves also help separate florist kalanchoe from other succulents sold under the same genus name. A fuzzy-leaved plant or a plant grown mainly for plantlets along its leaf margins needs identification on its own terms. A label bearing only the word succulent leaves that question open. For the familiar flowering pot, retain its compact branching framework and healthy leaves through the display; they support the plant after the current flowers have gone.
Choose a bright window with moderate temperatures
Use bright indirect light or gentle winter sun, with protection from prolonged harsh sun through glass. North Carolina State recommends bright indirect light and warns of scorching with prolonged direct exposure, while Clemson describes full sun and good bright indoor light. Those statements need the window and season attached to them. A dim room centre fails the light requirement, but a suddenly exposed hot window can also be unsuitable for a nursery-grown plant.
A bright east-facing window is a useful place to assess first. A south-facing window can offer valuable winter light if the plant is set back from intense sun and cold panes. New York Botanical Garden suggests a position a foot or two from a south-facing window; that distance is a starting arrangement, not a light measurement for every building. Look at nearby roofs, trees and curtains, and make sure the actual plant receives the available daylight.
For a straightforward indoor arrangement, aim near 60°F at night and 70°F by day, approximately 16°C and 21°C. NC State uses those temperatures, and they sit within the wider flowering-care ranges given by Iowa State and Clemson. Cooler conditions within suitable ranges can prolong flower life. There is little value in chasing the lowest published temperature in an unheated porch whose overnight minimum is unknown. Keep the plant frost free and use a thermometer beside it.
Give the fleshy canopy a stable base. The leaves and branching flower heads can make a small nursery pot top-heavy, a point noted by Illinois Extension. Choose a level shelf wide enough for the container and its outer cover. Keep the foliage away from a radiator plume, closing curtains and frequently opened doors. A sheltered bright position that can be watered safely is more useful than a narrow sill where the plant is repeatedly knocked or pressed against glazing.
Check the growing mix before reaching for water
Feel the exposed mix inside the nursery pot, then lift the pot if it is manageable. Moisture use changes its weight, and learning that difference helps distinguish a genuinely drying root ball from a dry-looking surface over wet compost. Iowa State advises drying between waterings while stopping short of wilt. NYBG uses dryness in the top few inches as its cue. In a shallow gift pot, assess the available root-ball depth gently; a fixed probing depth may reach the bottom.
The practical objective is an interval in which the medium loses moisture, followed by a proper watering when needed. A cool, weakly lit position may use water slowly. A small pot in a warmer bright room may dry sooner. Write down the first watering and the next actual drying point if the plant is unfamiliar. That gives a useful comparison for this container, while still leaving the next application dependent on what the mix feels like.
Keep the thick leaves reasonably firm. Their water storage does not make deliberate shrivelling a useful routine. If the medium is dry and the plant is beginning to lose firmness, attend to its water supply. If the medium remains wet and leaves or stems soften, adding water may worsen a root problem. Leaf appearance alone cannot distinguish these situations. Read it alongside the pot's moisture, drainage and recent care history.
Misting is unnecessary for this plant in an ordinary home. NYBG specifically notes its suitability for dry northeastern US winter rooms, and Illinois recommends relatively low humidity. Put the effort into root-zone moisture and an open position around the foliage. A sealed decorative enclosure changes those conditions and makes flower debris harder to clear. Keep the flower clusters and lower leaf junctions accessible so that deterioration is visible early.
Water outside the decorative cover and empty the runoff
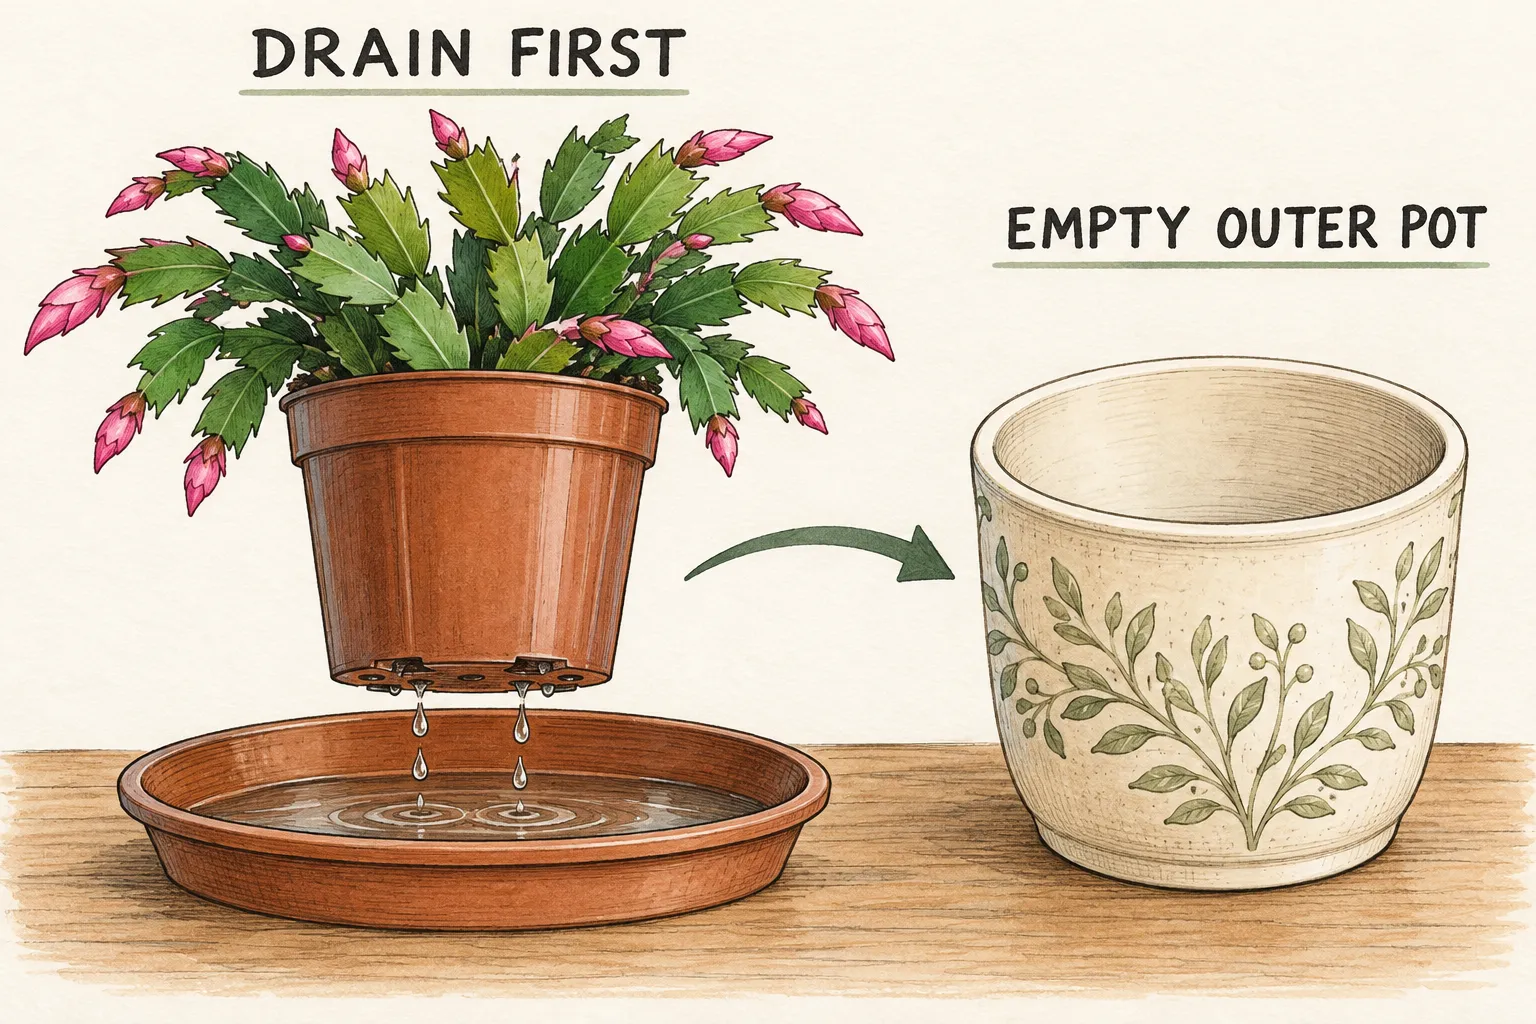
Lift the nursery pot out of a watertight cachepot or sleeve before watering. Confirm that the growing container has drainage holes. Apply water to the medium and let it pass through, then let the pot drain before returning it to the display. This separates the watering action from the hidden reservoir that often forms beneath a gift plant. Iowa State specifically warns about containers standing in sleeves full of water.
Check the catch dish after draining and pour away the surplus. NYBG gives a 15-minute check for its runoff dish; use that as a practical reminder to revisit the pot, including any slow drips. The root ball should then be able to use its retained moisture between applications. Water trapped in an opaque cover can escape notice for days, so lift the inner pot and look inside each time you water.
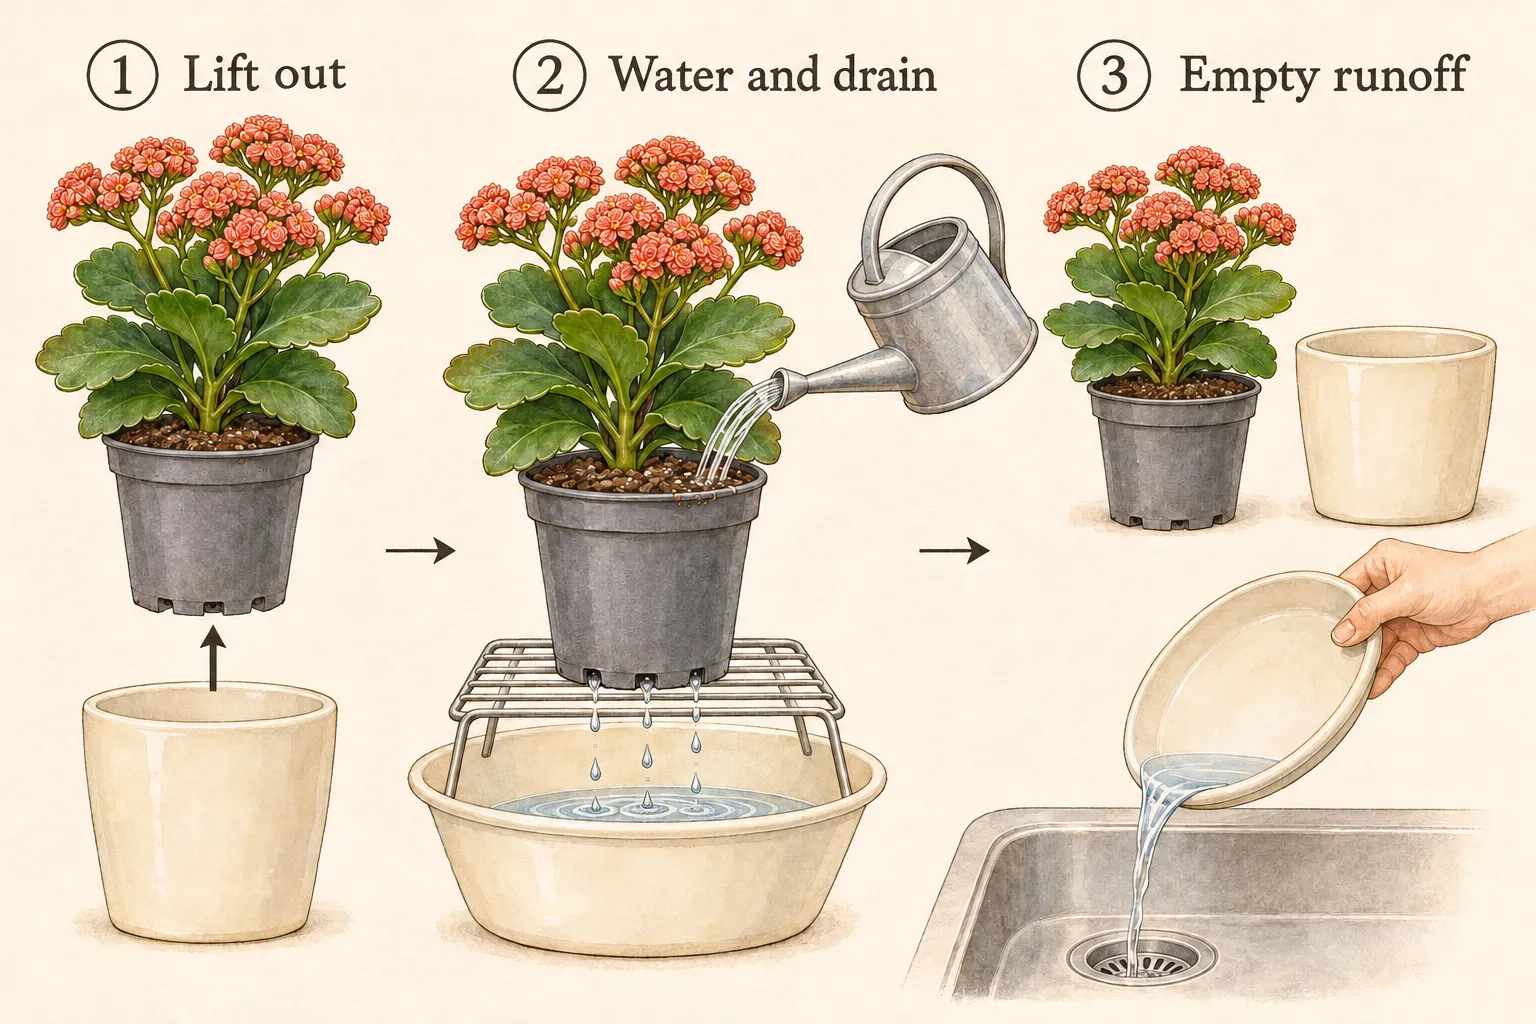
Keep an intact, draining nursery pot during the flowering display. An outer pot with no hole can serve as a removable cover, provided the inner pot is emptied and drained separately. A plant rooted directly into an undrained vessel needs a suitable draining container; decorative gravel at the bottom cannot create an outlet. When correcting that arrangement, preserve the existing root ball and planting level as far as possible and use a porous succulent potting mix.
Groom the display and keep feeding tied to growth
Remove faded flowers carefully while preserving adjacent firm buds. Once a whole cluster is finished, trace its stalk to the leafy growth beneath and remove the spent flowering portion with clean scissors. The aim is to clear exhausted material and expose the remaining plant. Cutting off an entire mixed cluster while some flowers are still opening sacrifices part of the current display. Leave sound leaves and growing shoots in place.
Deadheading keeps the plant tidy, but it cannot replace the light signal needed to initiate a later crop of flowers. This matters when the last purchased flowers finish: an immediate second flush is not an assured result of removing the old stalks. A healthy green plant can be retained while it grows and, at the appropriate stage, receives a deliberate long-night treatment. Judge that retained plant by sound growth as well as the presence of flowers.
Clemson recommends a houseplant fertilizer once a month while the plant is actively growing. Follow the product's container-plant dilution instructions, and reserve feeding for a plant with functioning roots and suitable growing conditions. Flowers on a newly bought plant are not evidence of a fertilizer shortage. Other institutions use different seasonal schedules; keep one coherent routine. A wet, declining plant needs its moisture and root condition assessed before extra feed is considered.
Make the change after flowering deliberately
After the display ends, remove old flower stems and shorten overly tall growth as needed to restore a manageable shape. NYBG describes a brief rest of about 30 days with reduced water and no fertilizer after flowering. Keep enough light for the leafy plant and continue checking the medium. Reduced water means applications follow slower use; it does not mean storing a leafy kalanchoe dry in darkness for a month.
Plan ordinary repotting for spring after flowering, as NYBG recommends. Use a container one size larger when the plant needs the space, with a drainage hole and a well-aerated mix suitable for succulents. Keep the plant's previous soil line visible as you settle it. Clemson also places the move to a slightly larger pot after flowering. Neither schedule makes a larger pot the first requirement for a newly purchased winter display.
If keeping the plant through another growing season appeals, a bright indoor position can remain its home. Summer outdoor use requires gradual adjustment to brighter conditions and protection from frost when it returns indoors. Save that decision for suitable weather. In late November, the useful next choice is whether to maintain the green plant through its post-flowering interval or, for an older plant ready to form buds, establish a consistent light-and-dark schedule.
Use long nights only when you are inducing new buds
For a retained, flowerless plant ready for another cycle, Iowa State describes six weeks of 14-hour nights. During that induction period it gives daytime temperatures of 65–70°F, about 18–21°C, and nights of 60–65°F, about 16–18°C. Give bright light in the day and uninterrupted darkness at night. A room with lamps switched on through the evening may defeat the intended treatment even when outdoor November nights are long. NYBG describes shorter induction schedules. Use the full six-week routine consistently when following the Iowa State method; check for visible buds before ending it.
One workable household schedule is darkness from 6 pm to 8 am, with bright light during the remaining daytime interval. That timetable is an example of the 14-hour requirement, not a special clock-time preference of the plant. Use a suitable dark room or move the plant into a ventilated dark space, then return it to daylight each morning. Choose a method that preserves moderate temperature and can be repeated consistently for the full induction period.
Clemson says day length stops being crucial once buds are large enough to be visible above the leaves. That is why a flowering purchase can stay in its normal bright display position even if the room has evening lighting. For a plant undergoing induction, watch for those visible buds before ending the routine. Keep daily light, drainage and moderate temperatures in place as the flowers develop; completing the dark interval is only one part of their care.
Six weeks is the bud-induction interval, not a promise of open flowers six weeks after starting. Clemson gives approximately 12 weeks from early-October long nights to January flowering in its example. A late-November start therefore offers no dependable Christmas deadline. Cultivar, prior growth and room conditions affect the result. Keep a dated note of the start and first visible buds, and assess the actual plant before restarting a treatment simply because a holiday has arrived.
Investigate decline before changing the whole routine
Persistent wetness, soft stem bases or deteriorating roots need prompt attention to drainage and plant condition. Clemson and NC State both link excessive watering with root or stem rot. Conversely, a dry, light pot with loss of leaf firmness points toward checking water supply. These observations guide the next inspection; they are not a laboratory identification of a disease. Separate a deteriorating plant from the display and seek local horticultural help if the cause remains unclear.
Inspect leaf junctions and stems for pests when the plant arrives and during watering. Mealybugs, aphids and scale are among the problems described by Clemson. Isolate a suspect plant while identifying the cause, and base treatment on current advice appropriate to the organism and indoor use. Kalanchoe powdery mildew can also be less obvious than a heavy white coating: Clemson describes mottling and fine webbing. Keep air moving around the foliage and get uncertain markings identified.
Keep kalanchoe and fallen plant material beyond the reach of pets and children. NC State identifies ingestion toxicity for this species, and ASPCA lists Kalanchoe as toxic to dogs and cats. If a pet may have eaten it, contact a veterinarian promptly. Choose the accessible watering and display position with that restriction in mind, and collect flower trimmings as you work. A bright, stable location is only suitable if the household can use it safely.
Steps
- Level
- easy
- Time
- About 15 minutes to arrange the plant, followed by moisture checks and flower care
- Tools
- Small watering can, Clean scissors, Room thermometer
- Materials
- Bright indoor position, Draining nursery pot and removable catch dish, Succulent potting mix only if a container correction is necessary
- 1Check identity, growth stage and access
Confirm a florist Kalanchoe blossfeldiana with thick scalloped leaves and clustered single or double flowers. Note firm unopened buds and any finished clusters. Lift the growing pot out of its cover, inspect the drainage holes and check for standing water. Choose a stable location beyond the reach of children and pets, with enough working space to remove the pot for watering.
- 2Set the bright winter position
Place the plant in bright indirect light or gentle winter sun, keeping leaves clear of cold glazing and intense heat. Check temperature beside the pot; about 60°F at night and 70°F by day is a useful indoor arrangement. Watch how sunlight reaches the actual canopy through curtains and neighbouring buildings. Keep an already flowering plant on display care.
- 3Water according to the root ball
Feel the mix and compare pot weight before adding water. Allow drying between applications while keeping the plant short of wilting. When needed, remove the inner pot, water the medium thoroughly and let it drain. Empty the catch dish and check again for later runoff. Return the pot to its cover only after drainage, then reassess moisture before the next application.
- 4Clear finished flowers and inspect the plant
Remove faded flowers while retaining firm buds and healthy leafy growth. Trim a completed flower stalk when its cluster has finished. Examine leaf junctions, lower stems and the mix during grooming. Keep a persistently wet or softening plant separate for assessment. Feed only as appropriate to active growth and the chosen product, not as a response to every faded bloom.
- 5Choose the next stage after the display
Give a retained plant a brief post-flowering interval with reduced water and no feed, then continue suitable growing care. Plan ordinary repotting for spring after flowering. If a healthy flowerless plant is ready for bud induction, provide 14-hour dark nights for about six weeks with bright days and appropriate temperatures. Stop controlled nights when buds are visible above the foliage; allow additional time for flowers to open.
Related reading
Sources
- Kalanchoe. Clemson Cooperative Extension. Source record · Accessed 2026-11-12.
- How do I care for Kalanchoe?. Iowa State University Extension and Outreach. Source record · Accessed 2026-11-12.
- Kalanchoe (Kalanchoe blossfeldiana) cultivars: Houseplant Care. New York Botanical Garden. Source record · Accessed 2026-11-12.
- Kalanchoe blossfeldiana. North Carolina State University Extension. Source record · Accessed 2026-11-12.
- A nontraditional holiday plant: Kalanchoe. University of Illinois Extension. Source record · Accessed 2026-11-12.
- Kalanchoe. ASPCA. Source record · Accessed 2026-11-12.